Hi all
Got a good one for your today to further master your Photoshop skill set.
Today we’ll be taking a look at how to become a master operator with the Clone Stamp Tool.
The Clone Stamp Tool is an extremely important tool and if you can’t use it then you are missing out on a huge area of Photoshop.
With knowledge of how to use the Clone Stamp Tool you can improve your images 10 fold.
A lot of times when you are taking photos there will be elements within those photos that you have no power to avoid while in the middle of a shoot.
So this is why the Clone Stamp Tool is really excellent, because you will be able to get rid of them post shoot.
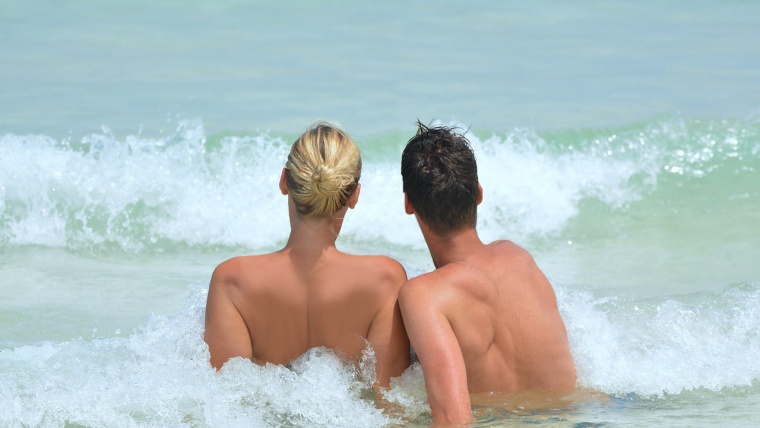
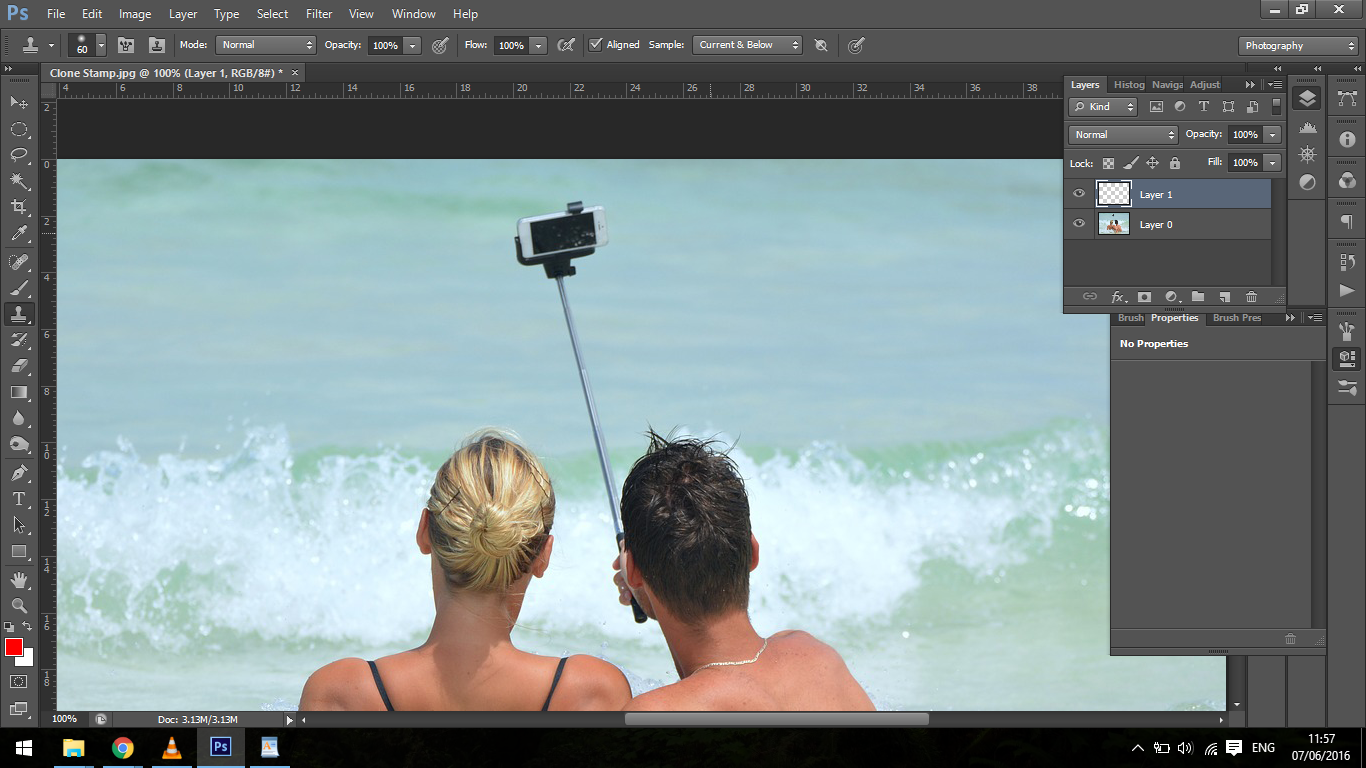
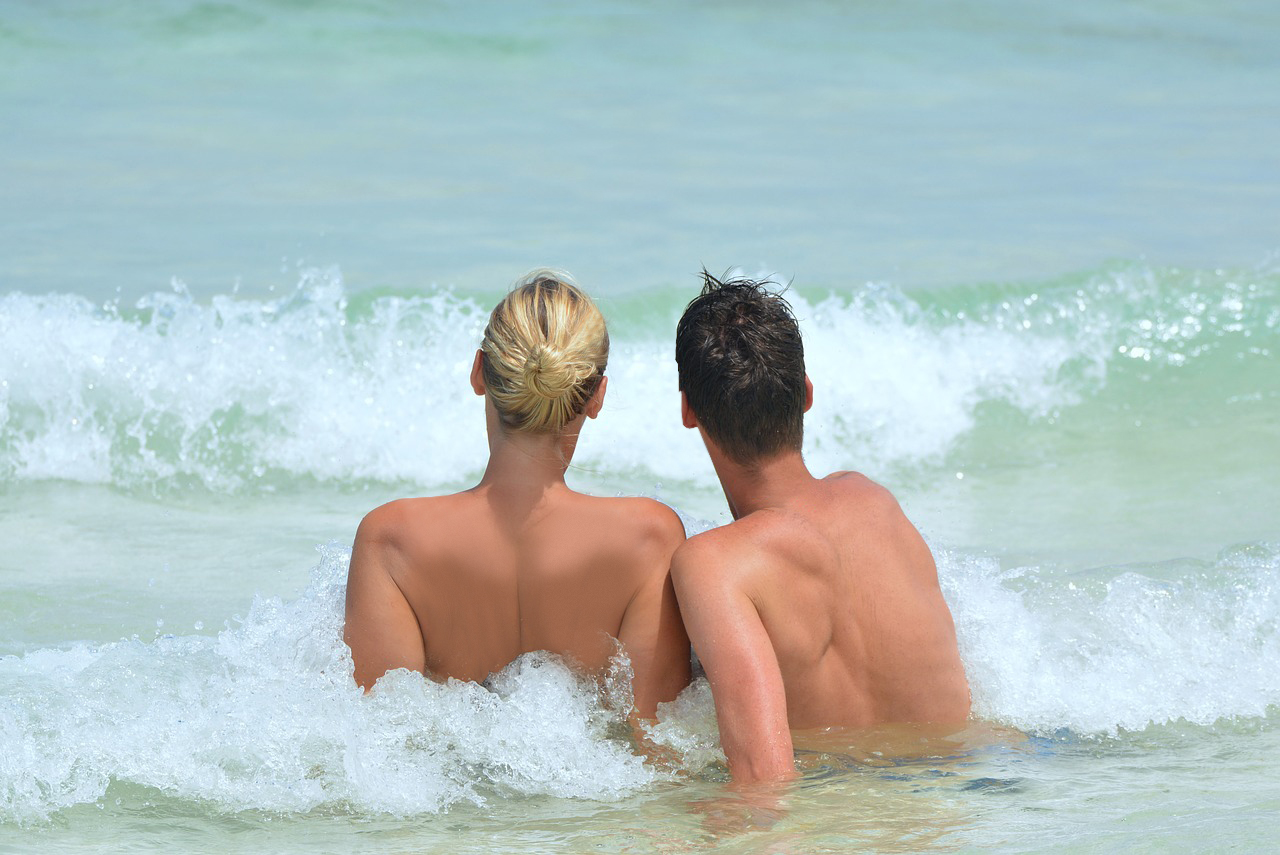
If you look at our image for today, it is of a couple on a beach which is a pretty cool lifestyle scene.

My issue with this image is there is a good few distractions that we could get rid of to make this image a whole lot more natural looking.
When you come to do a clone stamp session the first thing you should do while assessing the image it to list out the things with in the image that you could get rid of.
Looking at my image I can imediatly see the camera, hairpins, necklace.. so look out for things like this that you could get rid off.
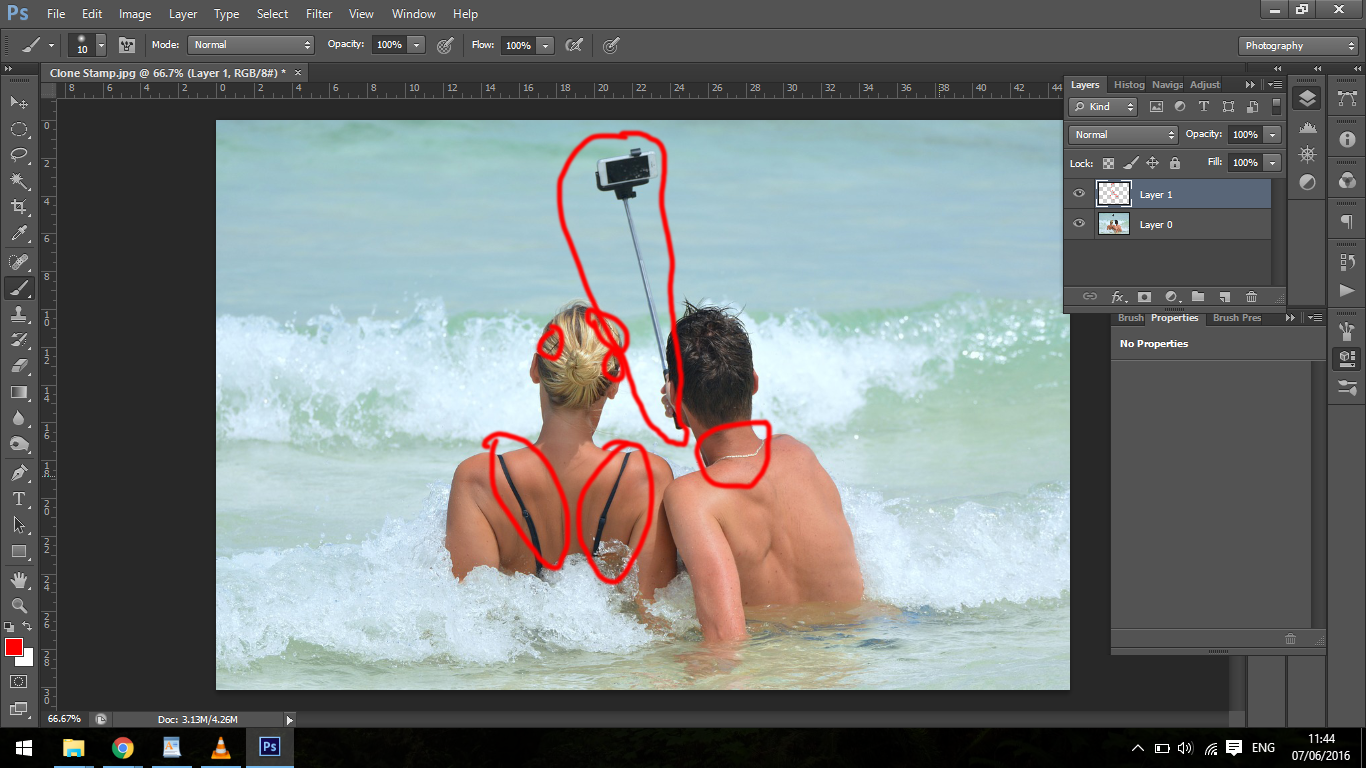
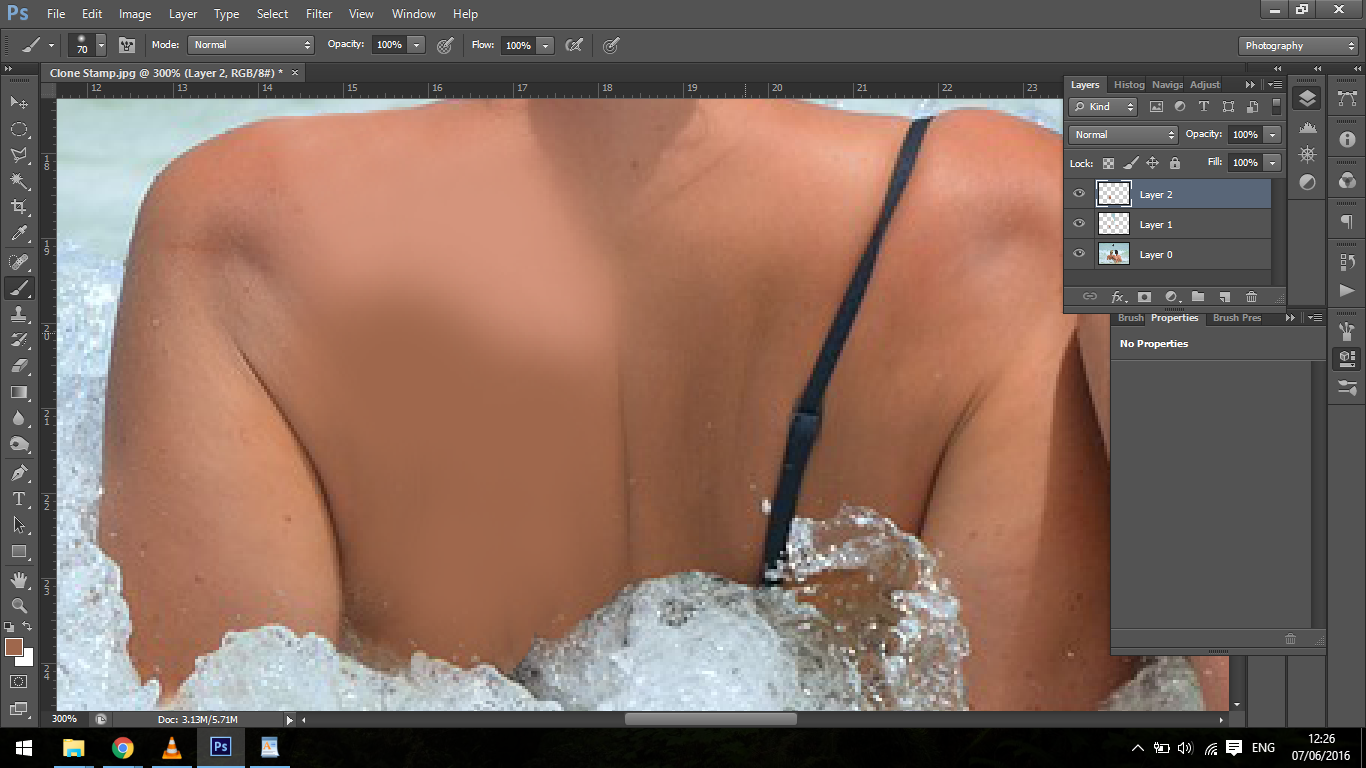
You can see in my below image the areas that I have chosen to clone over.
Key in (S) on your keyboard which is the shortcut on
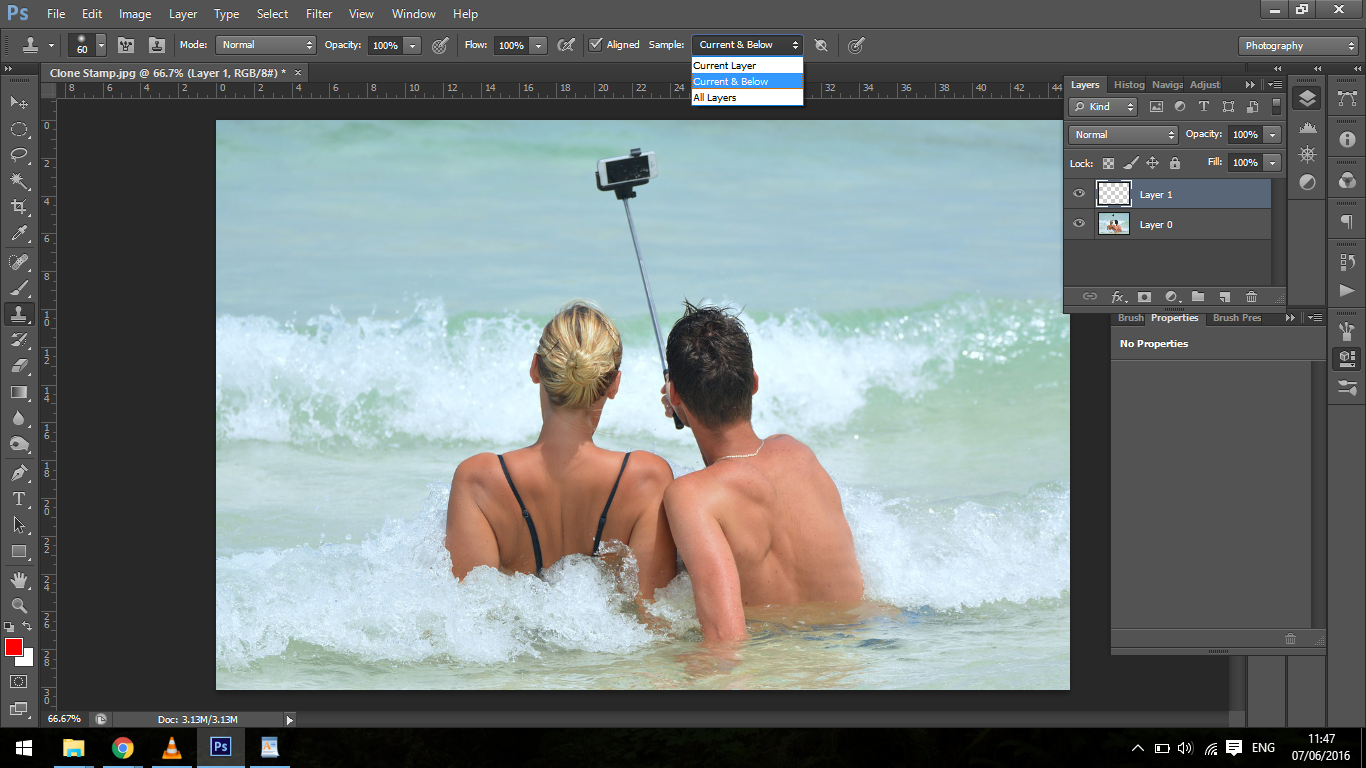
Now when I use my clone stamp I have the following settings.
Current and below – This means that I can use new layer and clone into it with out having to edit over my original layer.
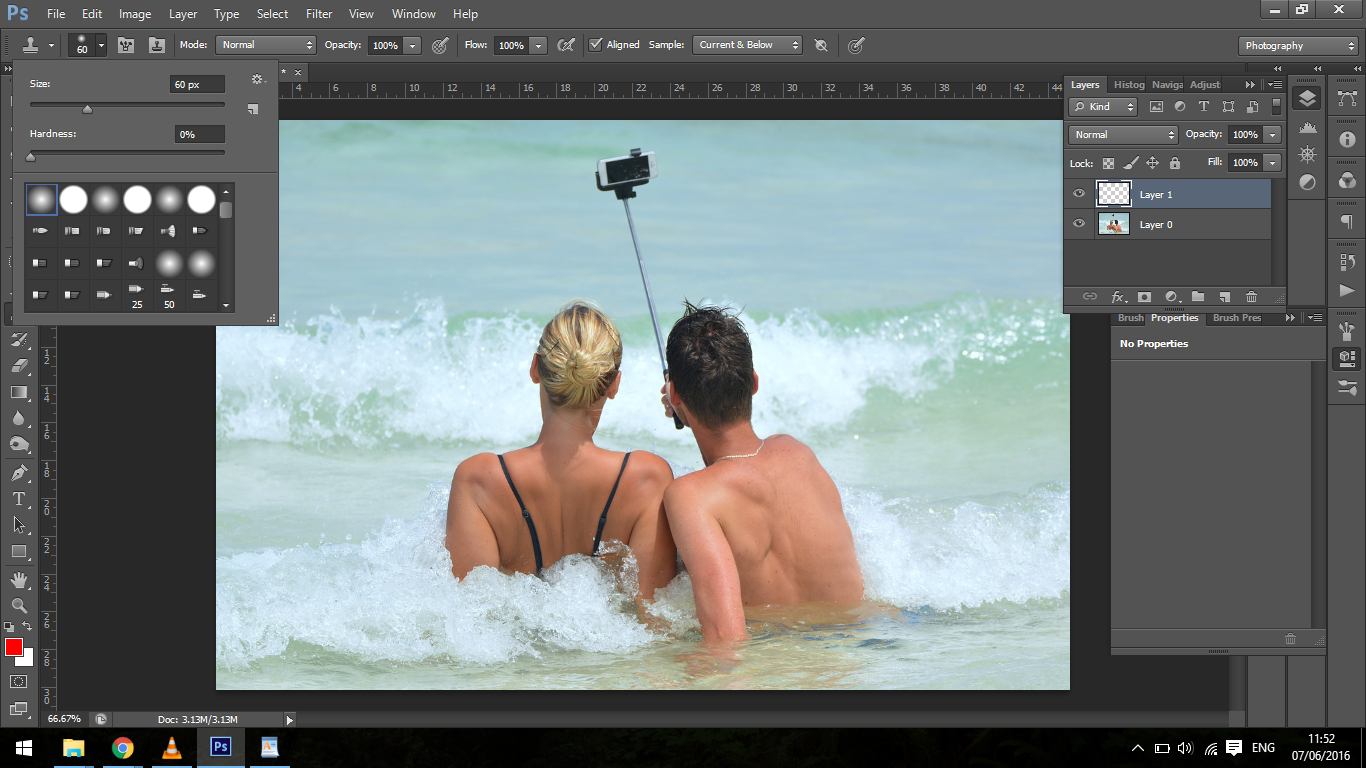
I have my flow to 100
My opacity is usually to 100 too, sometimes I drop it down a little and I use a soft edged brush so that there will be some feathering around the edges.
Right lets get into it, I’m going to be now taking each element that I choose to clone over and talk you through how I do these myself.
The Camera and Stick.
First I’ll zoom in and take care of the top part first just to about the top of the head, this bit will be easy and we should be able to be pretty free with it.
Hold down Alt just beside the area you want to clone and click on it, you will have now sampled that area and will be able to paint that part of the image over the area you wish to get rid of.
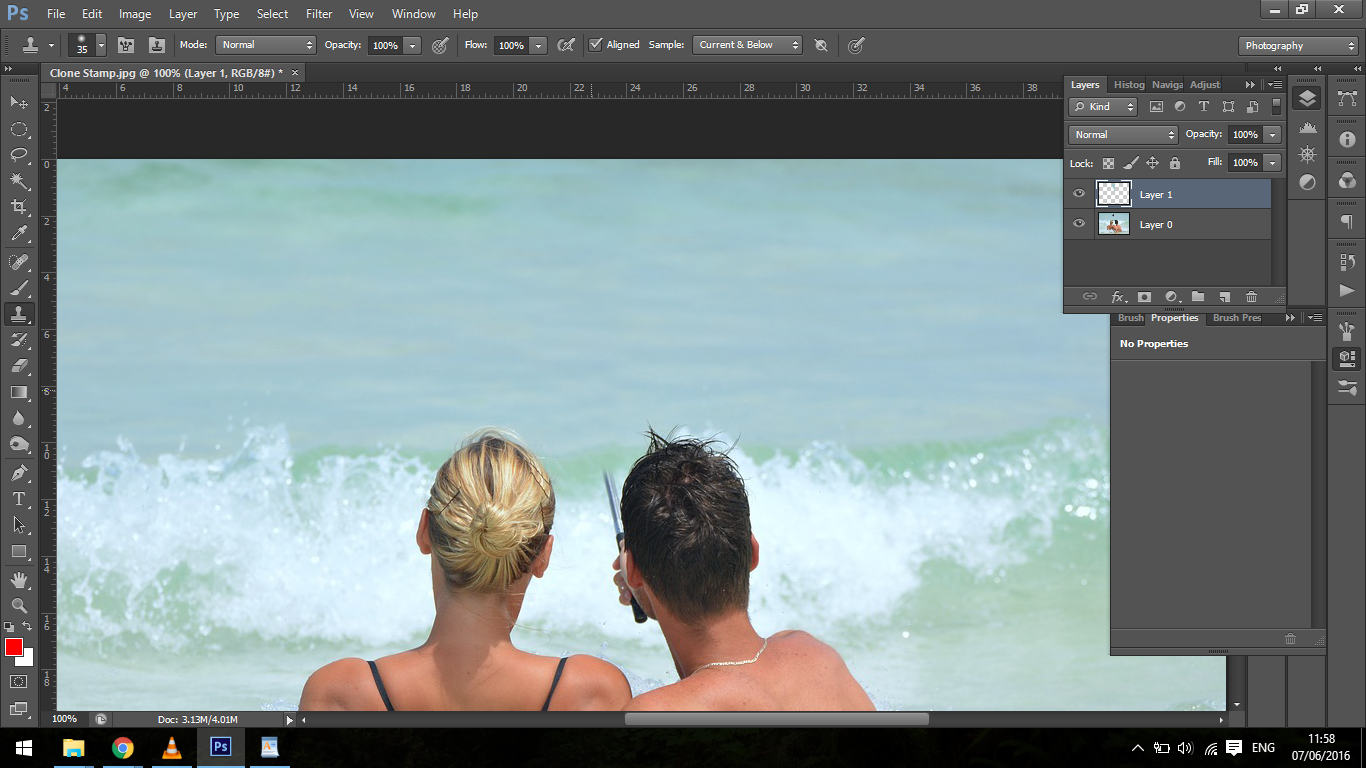

While painting you can use the bracket keys to decrease of enlarge the size of your brush.
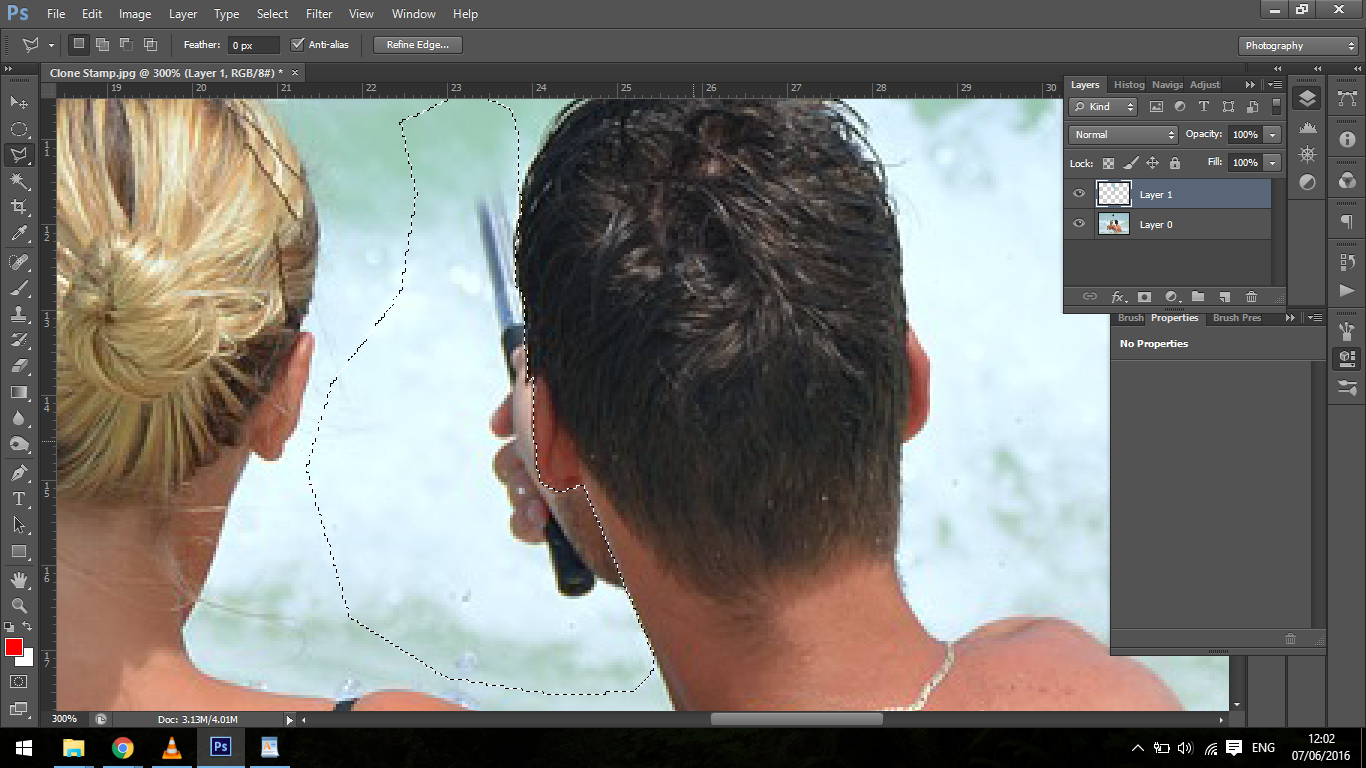
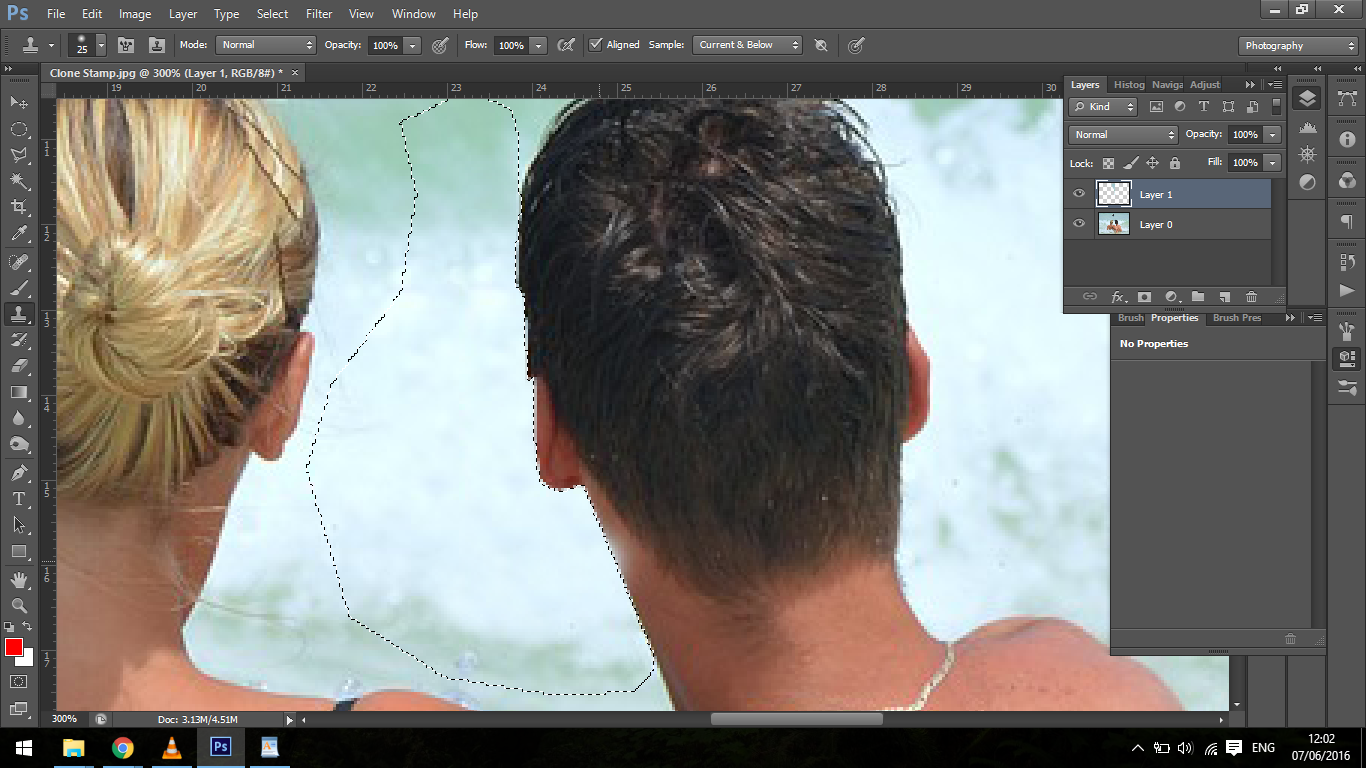
For the area around the head we will have to delve a little deeper, you will have to zoom in and use your polygonal tool.
Make the selection around that area keeping in mind the shape of the face.
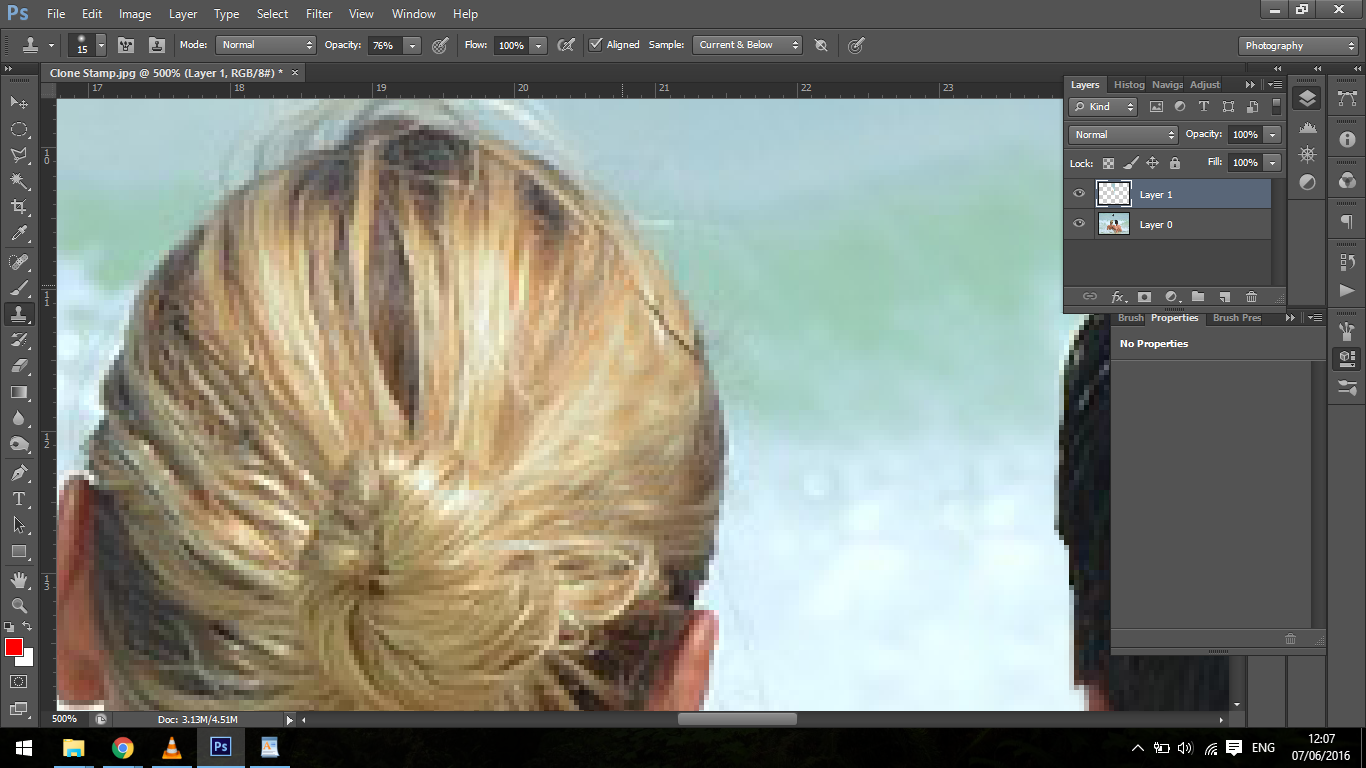
Next up is the hair pins.
I will zoom right in to the hair for this one, and it’s in this situation were I will drop my opacity slightly, I do this to blend the hair in a little better.
So I sample as close to the hair pins as I can and try to match the flow.
The Necklace is next.
You will have to do this similar to the side of the face, once again we will use the Polygonal Tool.
Make your selection like so.
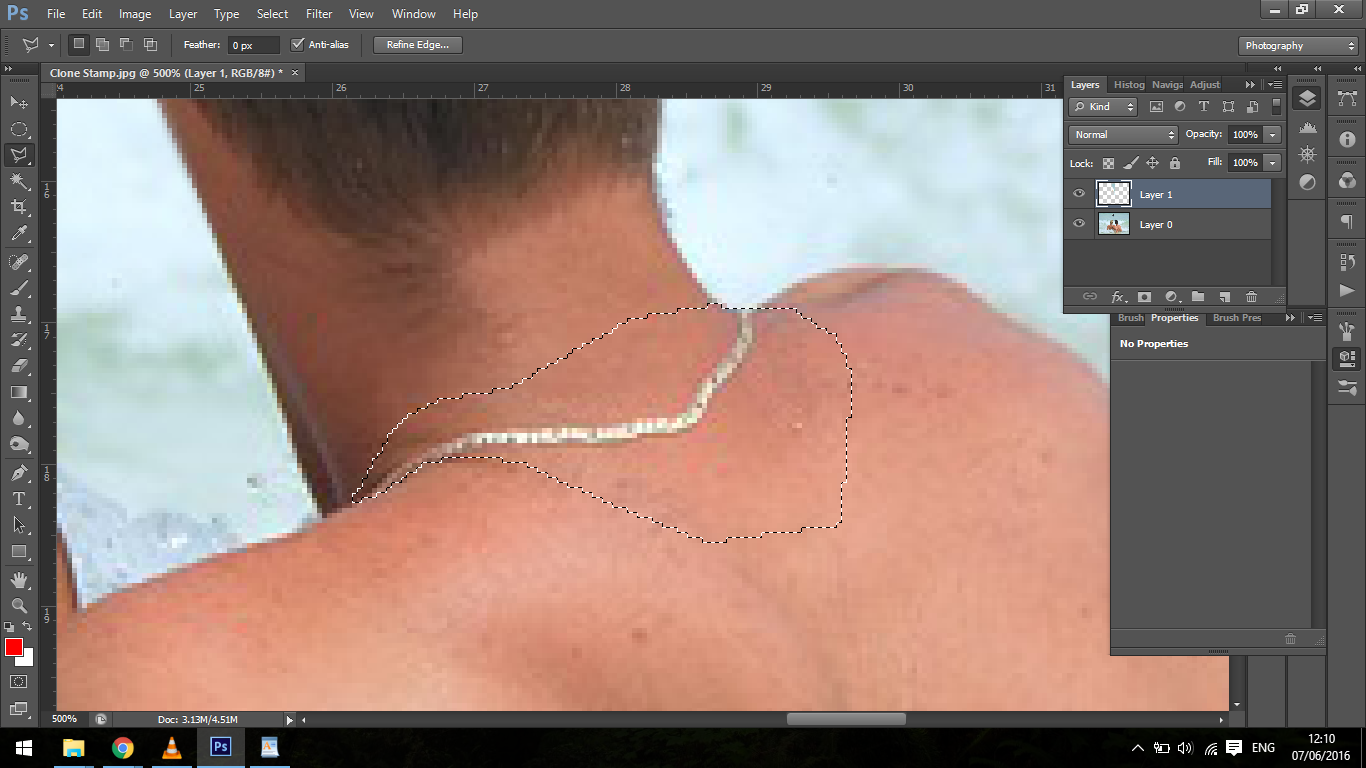
With this one you will have to clone just above the necklace to match the skin tone, my opacity is dropped that way when I click I can blend the skin tones in better.
When the opacity is lowered it will let you build on the layers.
So now you have had a little sample in doing the necklace and the skin it’s time to take care of the largest part of the skin on the ladies back.
This will be done much in the same way as I did the side of the face and removing the necklace.
When you make your selection you have to be aware of how the ladies back would look like if she was not wearing the straps.
So if you look ate my selection you will notice I have formed what I think the back would look like.
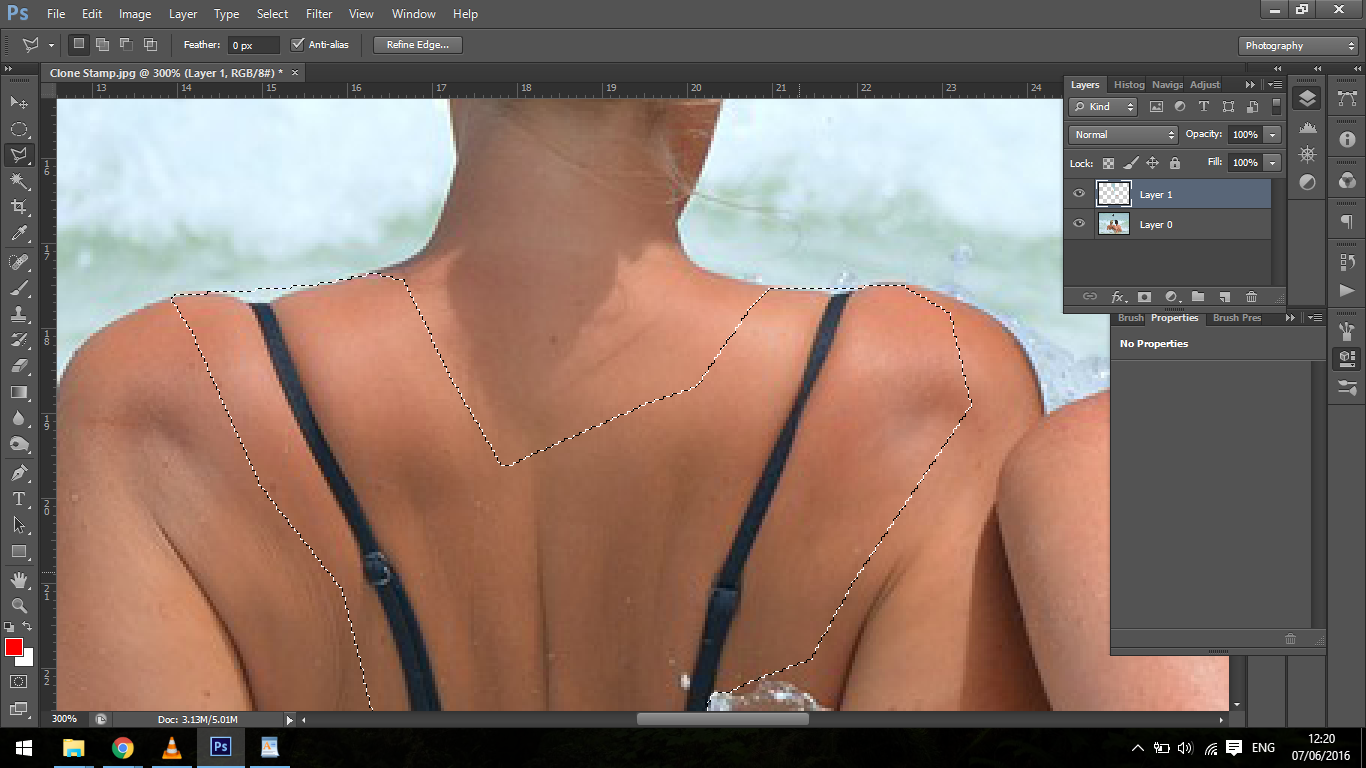
Then in the same manners as previous we start to apply the flesh, with a lowered opacity to build on the layers.
Sometimes you will not have enough sample area to clone over so you will have to use a little trick to help knowledge level.
Taking your standard brush tool, using Alt in the same way as the clone tool, you can sample the colour of the flesh and paint the back on.
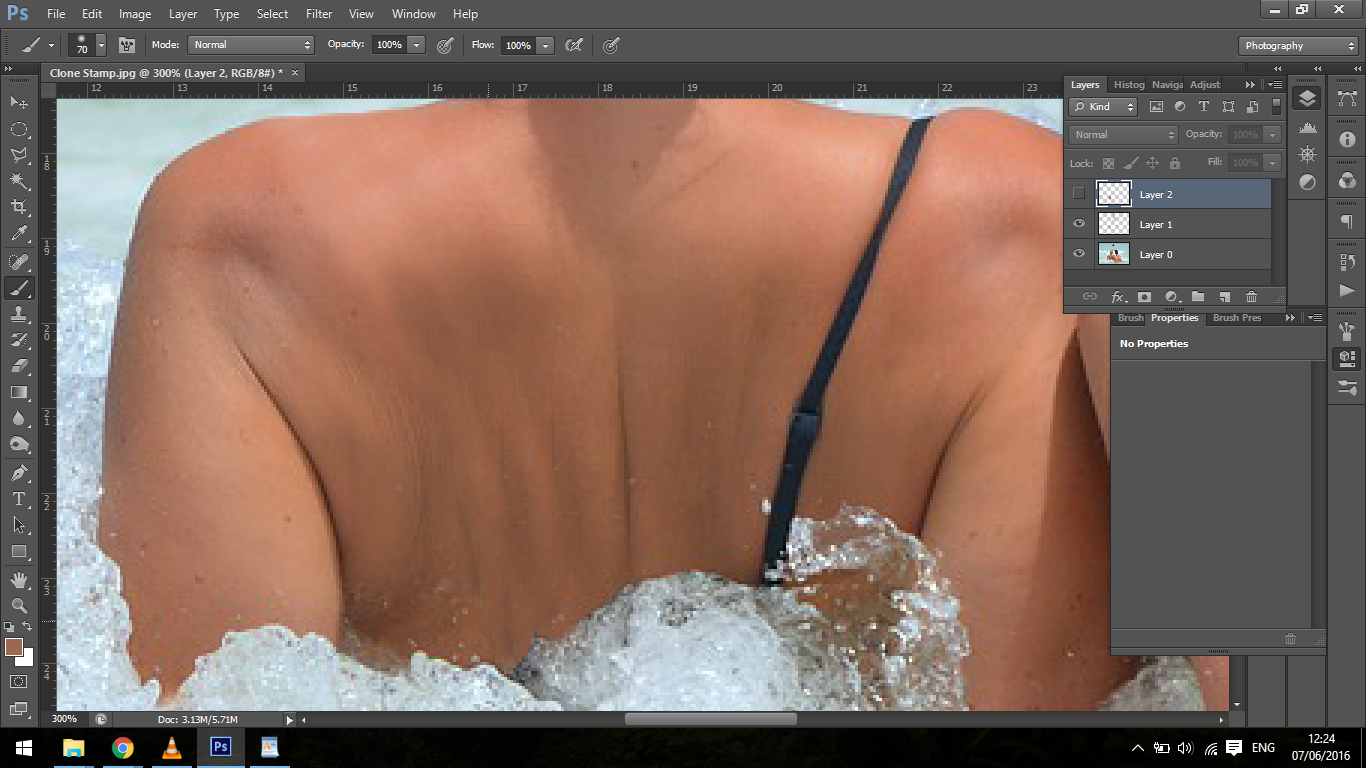
Once you have created a somewhat realistic back go to Filter – Noise – Add Noise

This will add in Photoshop Textures to you image and make it look realistic, you can then use this to sample off of, or like in this case make a copy of the layer and flip it to save on time, then I clone in a separate layer below that.
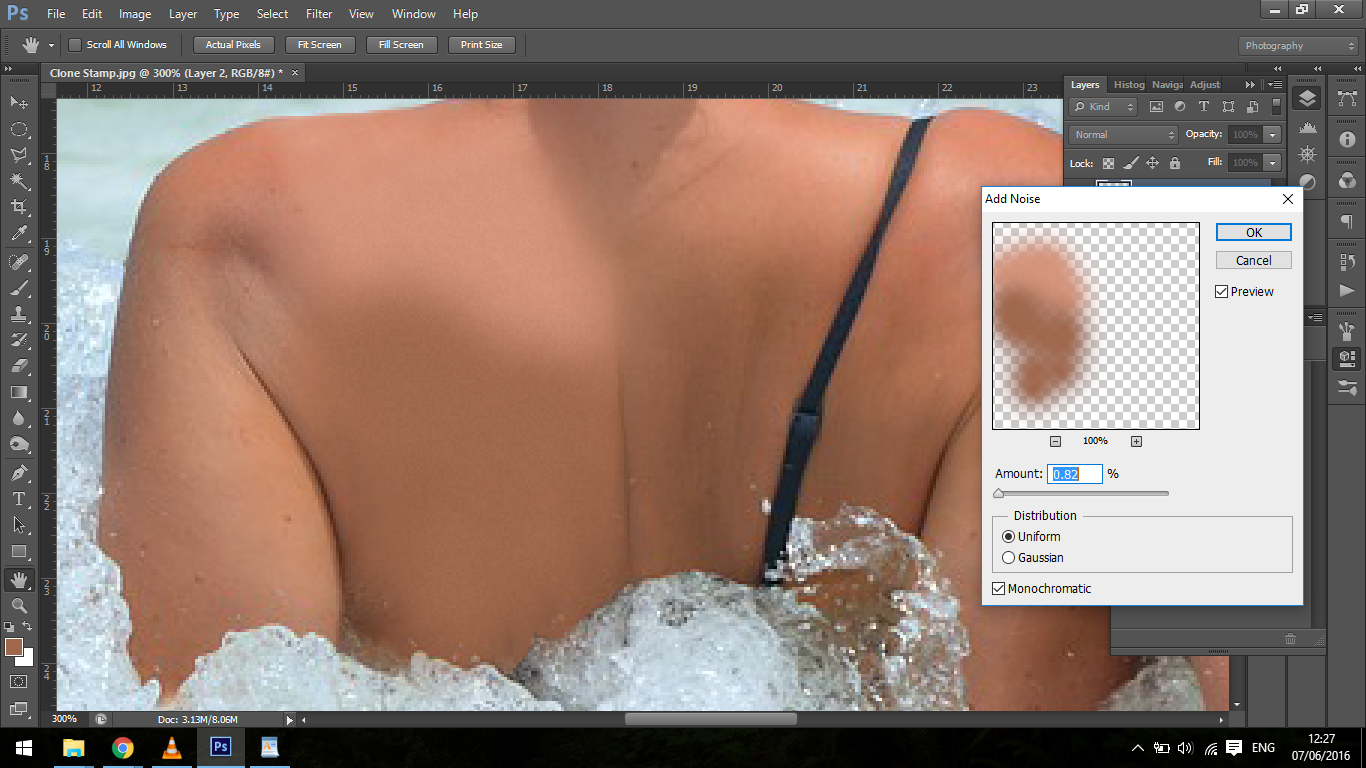
So that’s just an extra little trick thrown in there for you.
And that’s pretty much how I use my Clone Stamp Tool.
Using a combination of the clone tool, making selections and the paint brush trick you should end up with something like my newly edited image below.
How to add textures to your images in photoshop?


Please verify your software version before proceeding.
 I’ve verified my software version


 Facebook
 Google +
Comments (0)
There are no comments yet.