Tag: lighting

5 Portrait Photography Mistakes You Should Avoid

It’s true, creativity has no limits. What may look like an unforgivable mistake to one artist may be a relieving source of inspiration for another. Regardless of this fact, certain mistakes are simply worth avoiding. Photography genres have unique rules that deserve to be kept in mind during photo shoots. Landscape photography, for instance, demands a type of lighting that may not appeal to portrait photographers.

In portrait photography, unflattering lighting, uncomfortable poses, and tension all contribute to inauthentic photographs. It’s important to know how to deal with models, what not to do during the editing process, and how to approach different lighting situations. In addition to doing all of these things yourself, you can learn from the mistakes of others to boost your learning process.

In this article, you’ll not only familiarize yourself with 5 common portrait photography mistakes but learn from them. Each mistake is accompanied by a helpful solution so that the next time you bump into a creative problem, you’ll know exactly what to do.

Avoiding Conversations with Your Model

Taking photos of someone you barely know can be a tense activity, especially if you’re introverted. It’s easy to forget that the model is probably as uncomfortable as you are. Avoiding proper discussions will not only result in unnecessary awkwardness but give you a massive creative block.

Solution: If possible, have a short meeting with your client before a shoot. Once they get to know both your love for photography and the creative ideas you have in mind, they’ll feel more comfortable in your presence. In turn, you’ll get to know them. Don’t be afraid of asking questions, requesting feedback, and giving them creative space. They may have an idea that will come in handy during your shoot, so remember to stay open-minded.

conversations with coffee

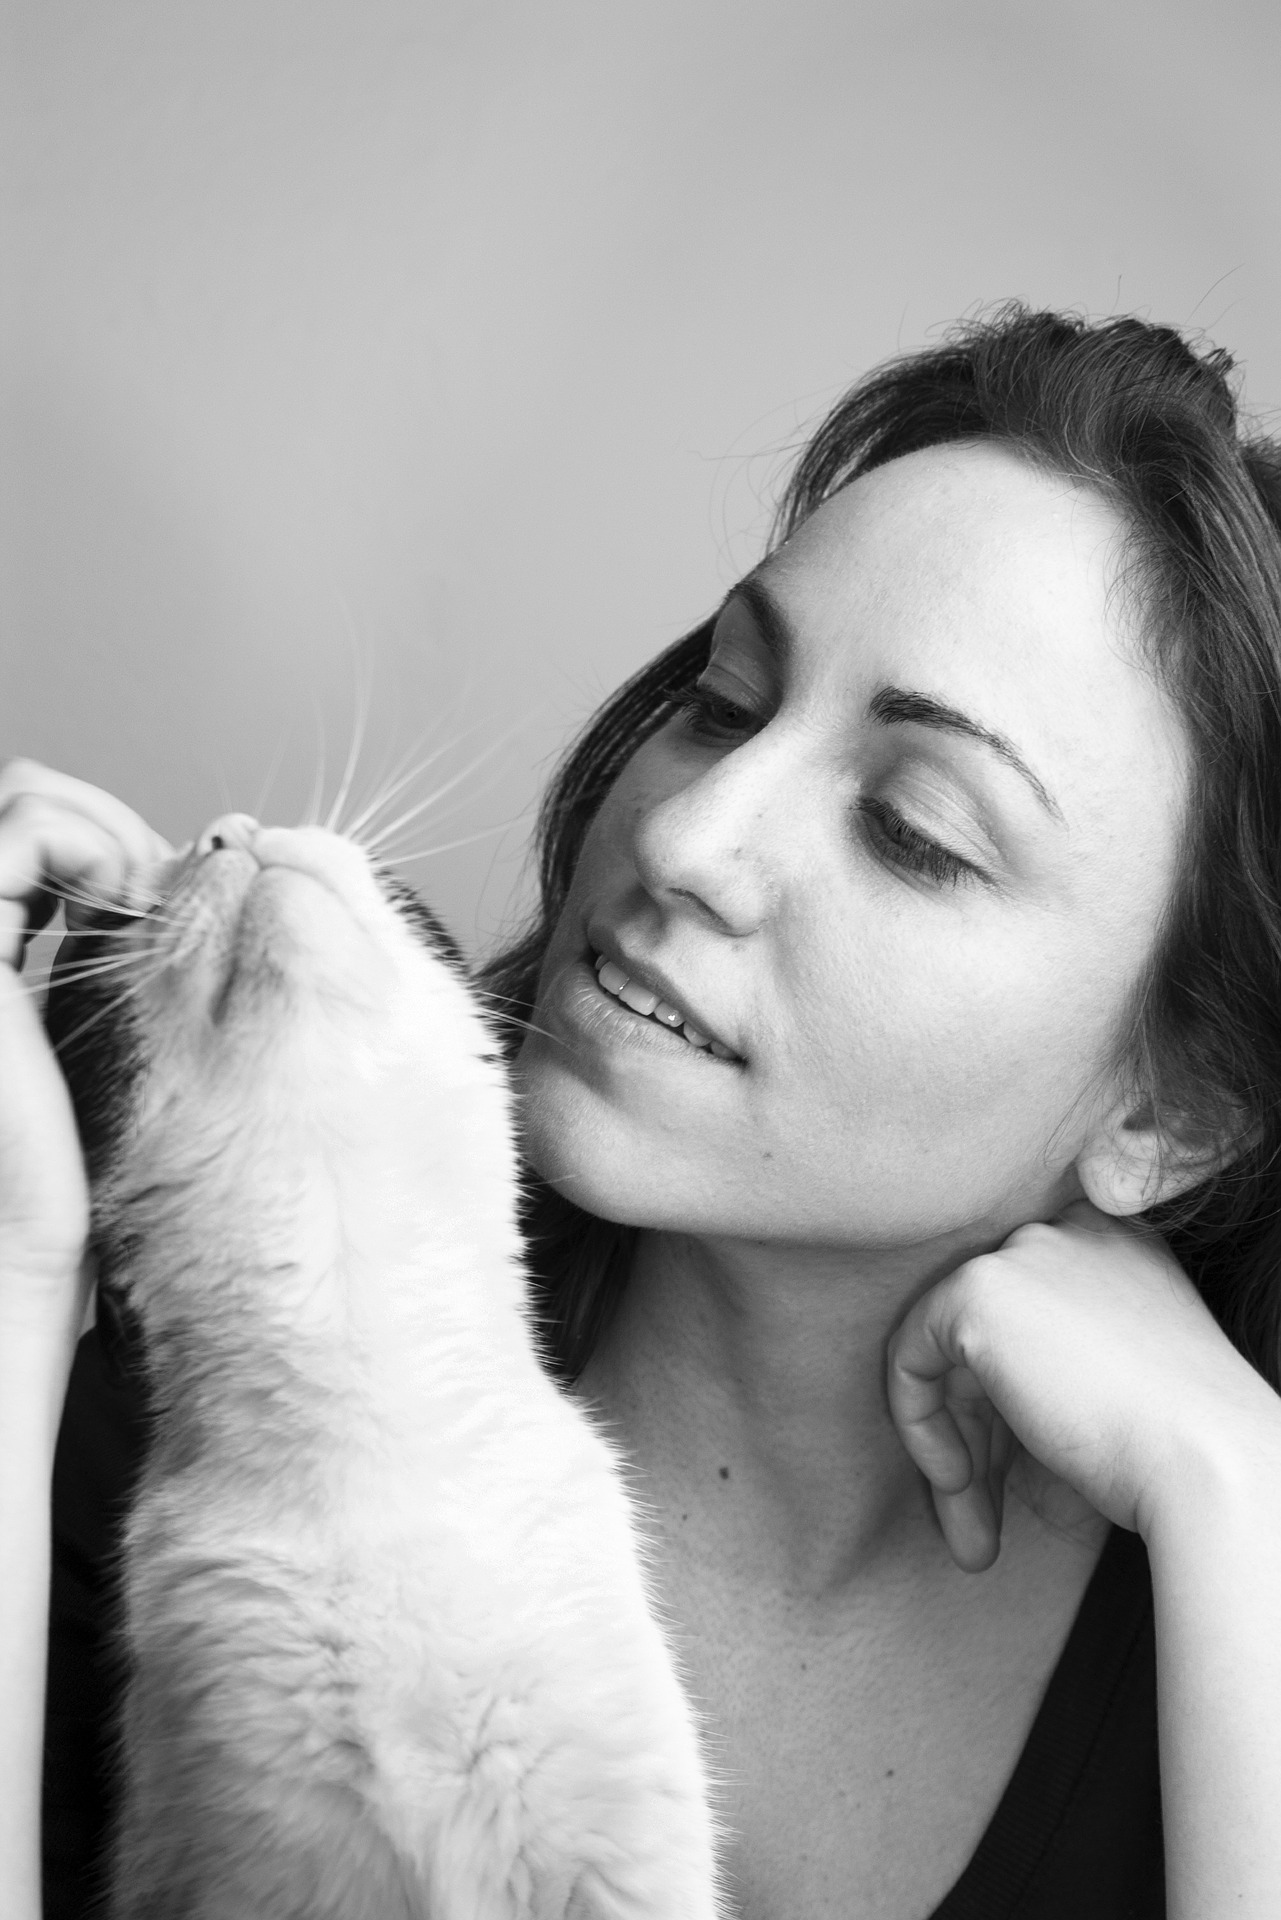
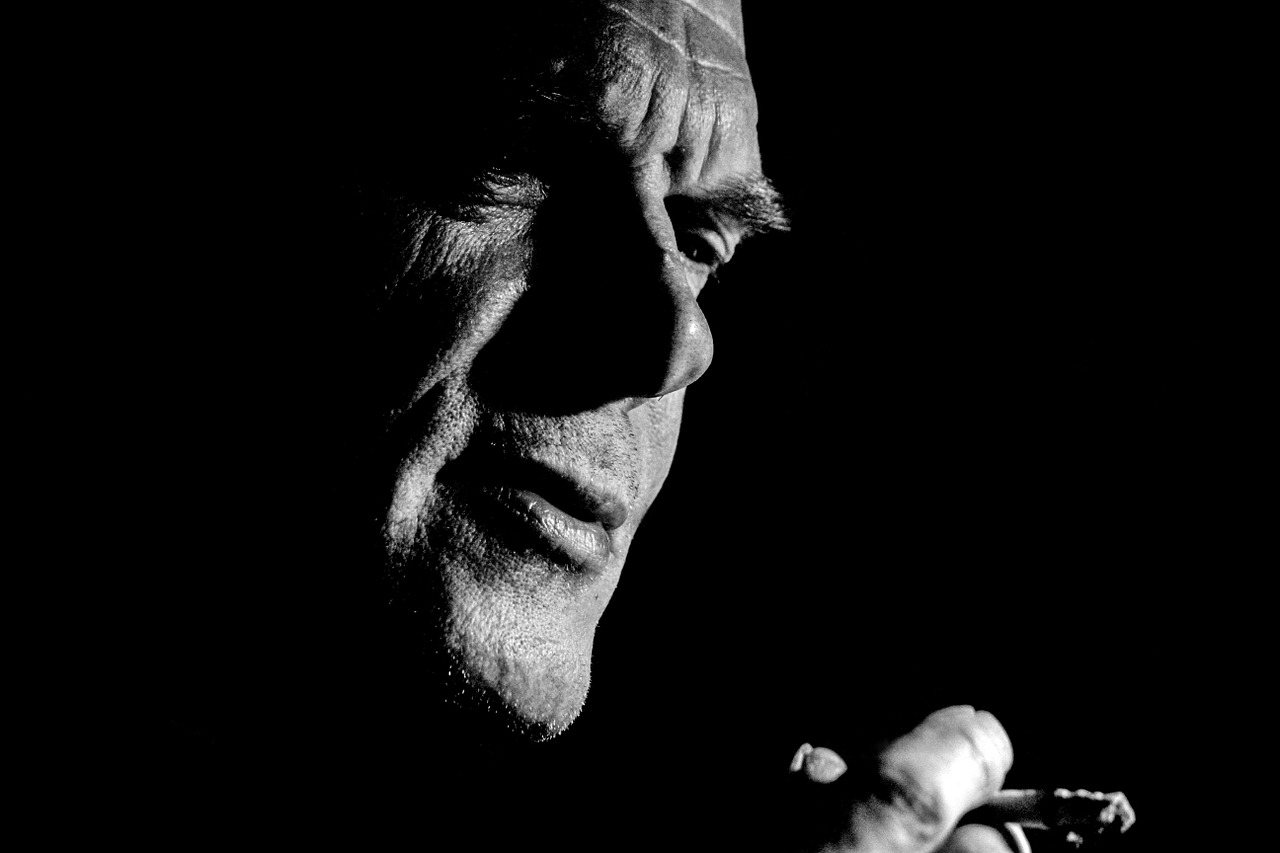
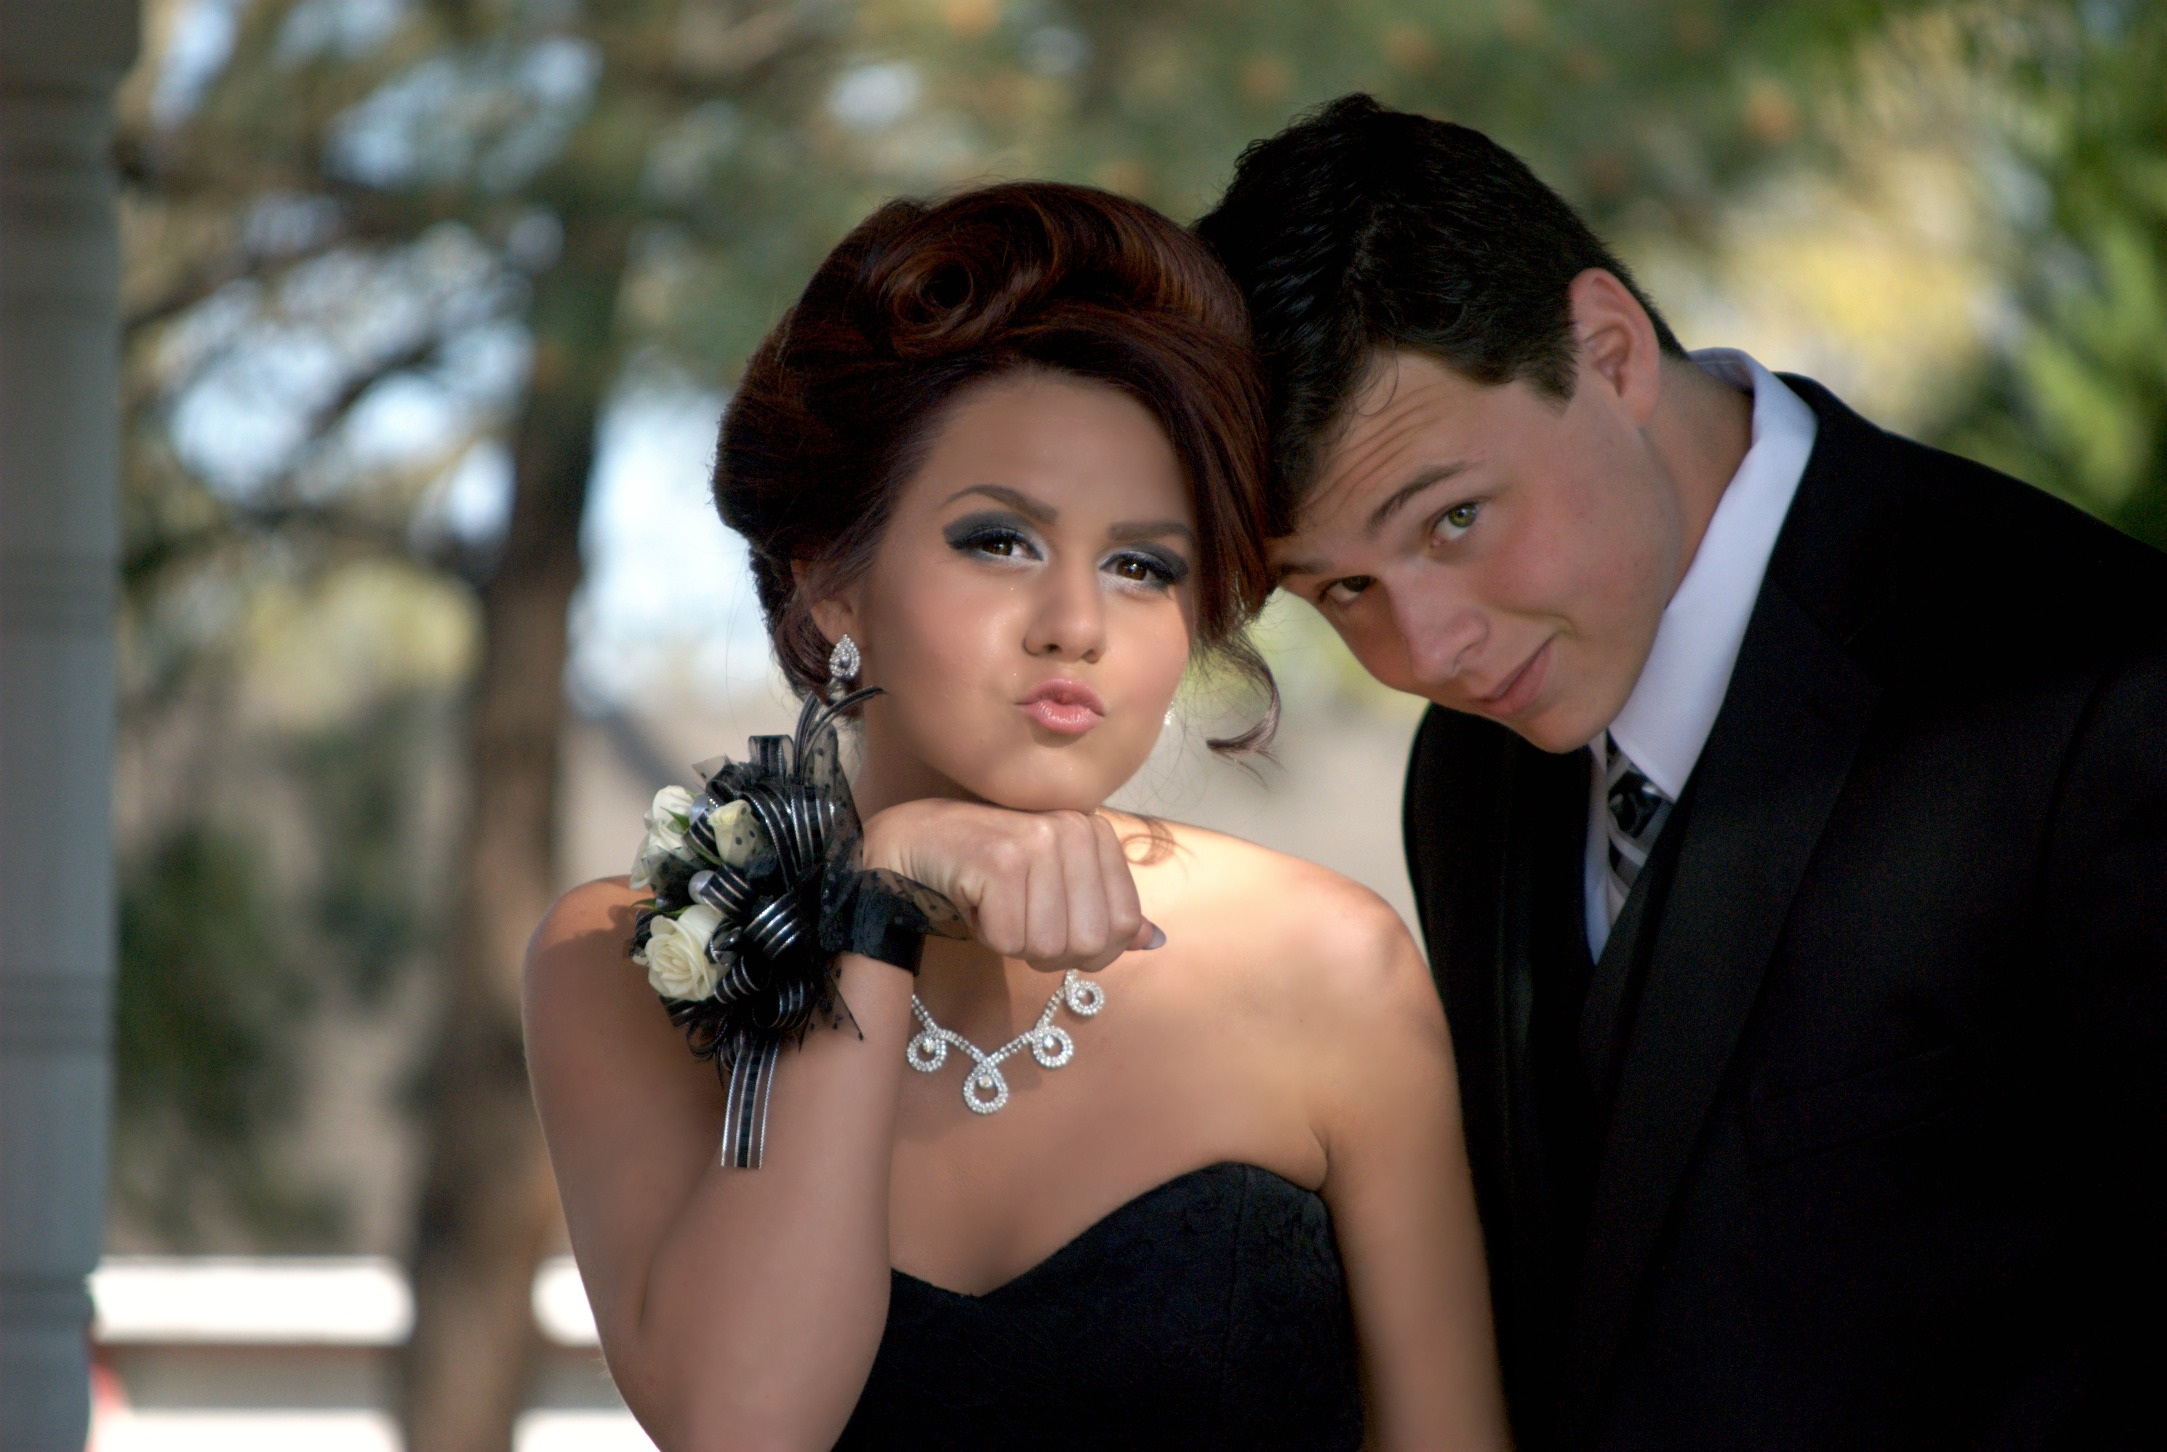
Solely Depending on Poses

Posing guides are undeniably helpful, but they can get in the way. Not every individual will feel comfortable with certain poses. Your client may even end up feeling bad about poses you really like.

Solution: Don’t ditch your posing guide. Instead, give your model lots of room to be spontaneous from time to time. If they enjoy talking, have conversations with them as you take photos. Give them compliments and proper feedback. This will help you catch authentic moments. The photo below is a great example of this.

girl smiling

Beating Yourself up in Front of Your Client

…or in any other situation. Of course, self-deprecation is sometimes humorous and pleasant. When it comes to photo shoots, however, bringing yourself down will bring your others down, too. You’ll end the shoot feeling exhausted and unenthusiastic. If you don’t believe in your creative skills, no one will.

Solution: Embrace the inevitability of mistakes. If something goes wrong, don’t immediately blame yourself. Instead of discouraging both yourself and your client, find a solution. Once your client notices the confidence you have in your problem-solving abilities, they’ll feel safe in your presence.

girl taking a picture

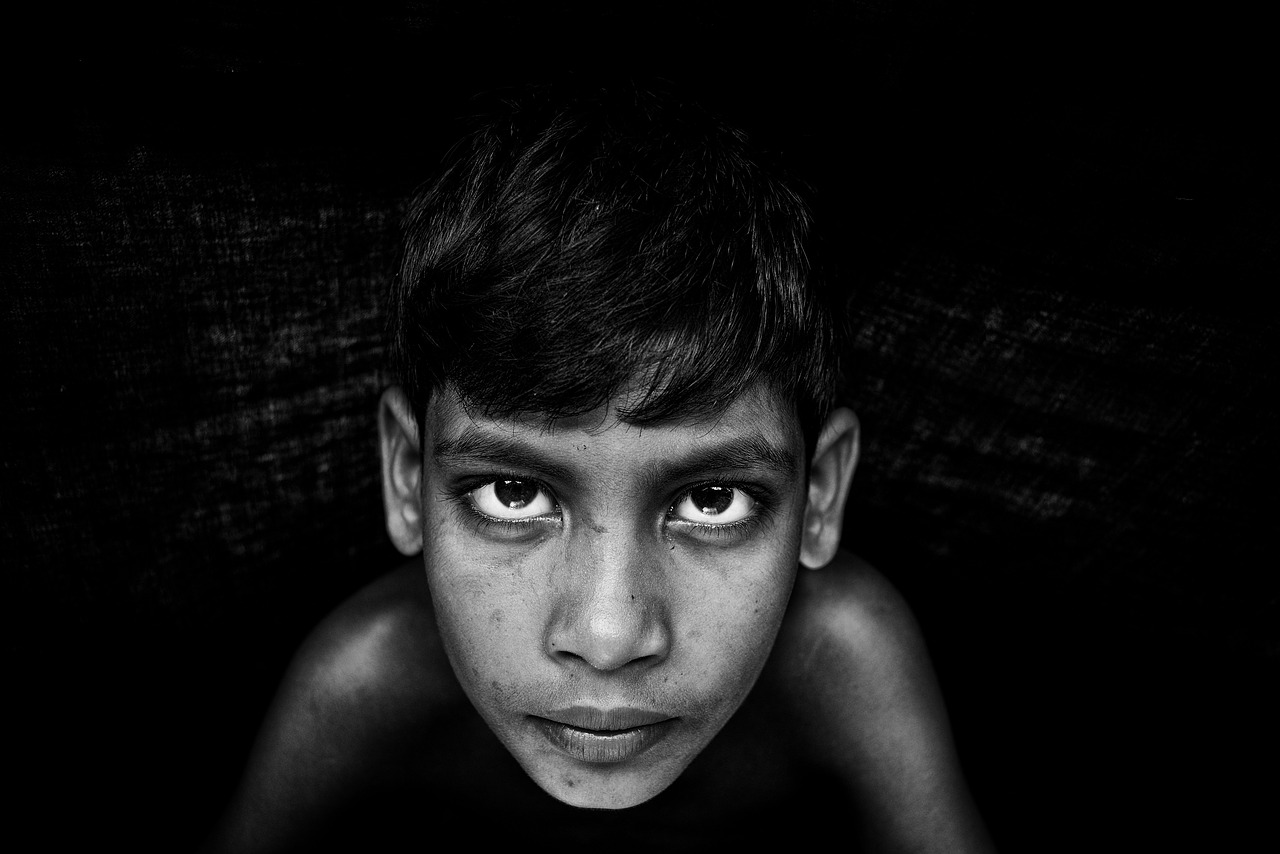
Not Focusing on the Eyes

Experimentation is cool. It proves that you don’t limit your creative mind. Many clients, however, want a combination of simple and creative photos of themselves. Images that focus on their clothes, hair, or surroundings won’t satisfy them completely.

Solution: Manually focus on the eyes when you take simple portraits. This may take some practice, especially if you’re used to autofocus, but keep trying and you’ll get the perfect results in no time.

portrait

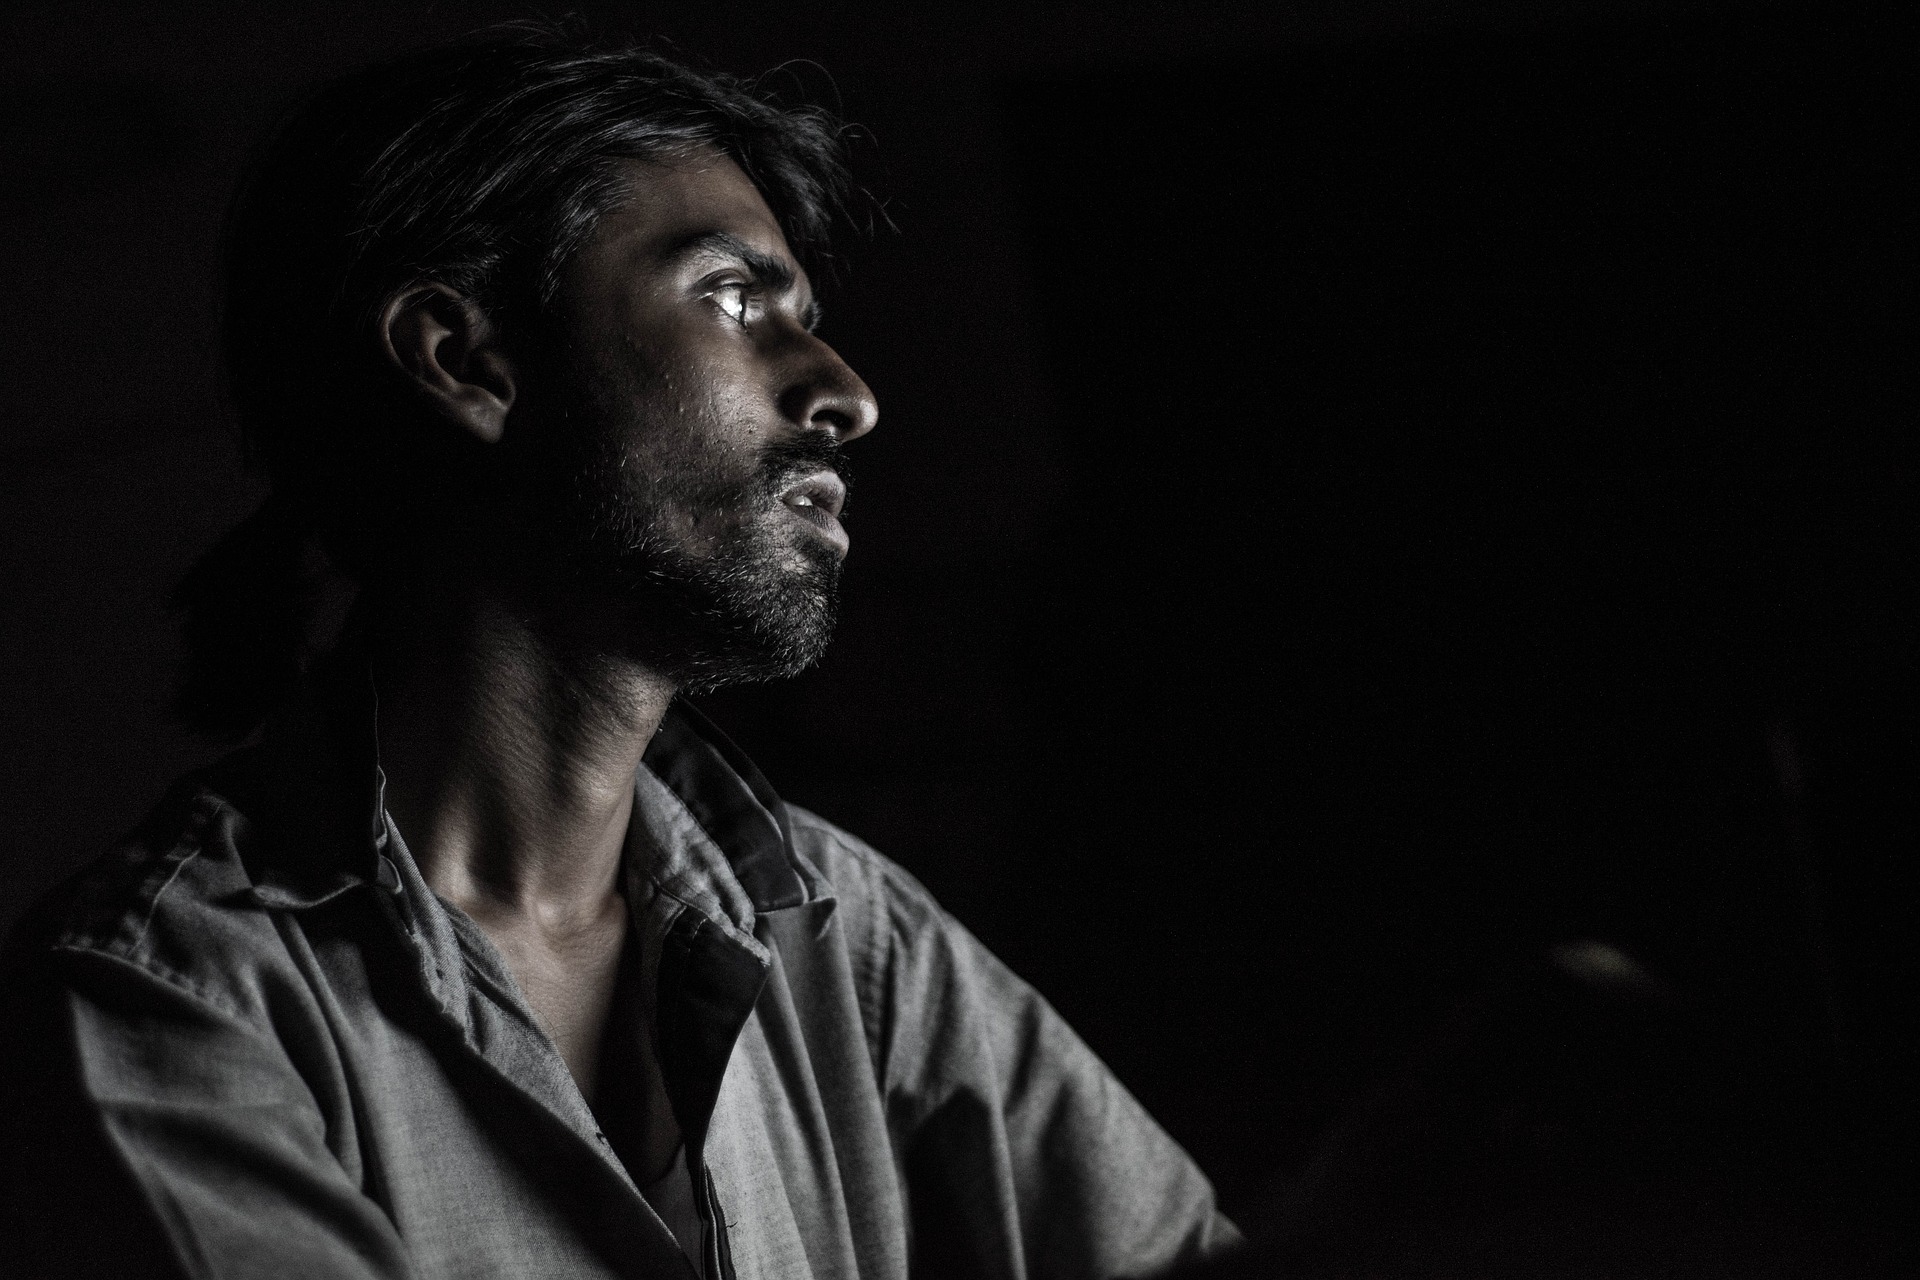
Shooting in Locations with Abnormal Lighting

Light is a photographer’s best friend

, but too much of it can lead to the creation of unappealing portraits. Harsh, flat, or distracting light is something portrait photographers don’t use on a daily basis. Unique lighting situations require unique approaches. If used incorrectly, they’ll highlight the wrong features and overshadow flattering elements.

Solution: Before a shoot, find the best locations where lighting won’t be a problem. For instance, a park filled with shaded areas will give you lots of room to take well-lit photos on sunny days. An open field will give you lots of lighting opportunities on gloomy days. Unless you want to create experimental portraits or experiment with portrait actions, avoid locations with lots of different lights.

girl looking through records

It’s true, creativity has no limits. It’s also true that learning from other photographers’ mistakes will benefit you greatly. Absorb this knowledge, learn from your own mistakes, and keep taking wonderful photographs of others.

SaveSave

A day in the life of a photogenic kitten

I own a sassy little Scottish Fold called Mimi whose rambunctious personality gives me unique photo-taking opportunities every day. Though I mostly focus on portraiture, taking photos of animals gives me a chance to broaden my creative horizons and familiarize myself with mind-opening, genre-specific techniques. With this in mind, I decided to focus on an average day with my cat and find interesting creative doors as the day progressed. Here are the results.

//

//

While some cats are nocturnal animals, others enjoy sleeping at the same time as their owners. Mimi is a combination of both, switching from a peaceful nighttime cat to a wild creature lurking in the dark. The former is preferred by everyone not just because it gives the family an undisturbed night of sleep, but also because it makes Mimi fairly sleepy in the mornings – the ideal time to take cozy pet photos. A kitten experiencing the light of a new morning is exceedingly charming. This time of day is particularly useful for those who own wild kittens; photographing them early in the morning will help you avoid taking unsuccessful and blurry shots. Keeping the curtains drawn on a bright morning will also provide you with the best light: a mild yet clear environment for the best indoor pictures.

//

//

Mimi turns into a hyper creature as soon as she devours her breakfast. While this part of the day is a challenging one to capture, it’s worth diving into thanks to the often funny creative opportunities that arise. The light during this time is still mild, so worrying about lighting conditions isn’t a necessity. Taking into consideration the importance of capturing movement, the good lighting conditions are a huge plus. If the light isn’t favorable when your cat is in a playful mood, consider increasing your camera’s ISO number for less blurred results.

To make playtime more entertaining for both you and your cat, consider using distractions such as toys and snacks. These will catch your pet’s attention and serve as visually appealing foregrounds. Other objects which have the potential of becoming striking foregrounds are hair, blankets, and plants. Remember to reward your cat every few minutes so it feels encouraged and loved. Grumpy pets don’t make the best models, no matter how sweet they may look.

//

//

Exploring the apartment is something Mimi thoroughly enjoys, no matter how well she knows every room. Washing machines, doors, tables, and windows all fascinate her beyond measure. For unique and endearing images, follow your cat around and notice what interests them. Photograph them while they’re in their own bubble of curiosity. Exploration is the perfect time for spontaneity, and spontaneity is perfect for eye-catching and impressive shots.

//

//

Take advantage of your cat’s favorite hobby: napping. Mimi can sleep for hours on end, occasionally getting up and freezing mid-stretch. Since cats are so flexible, their sleeping and resting positions are often quite amusing. Mimi, for example, loves sleeping with her paws lined up neatly in front of her, just like The Sphinx of Giza. Photographing your cat’s unique quirks will give your photos more personality, so use your pet’s naptimes as an excuse to take awesome photos.

//

It really is all in the details. Focusing on parts of your cat – its paws, ears, eyes, and so on – will allow you to think more creatively due to the fact that it takes careful observation to find outstanding details. Instead of photographing your cat from a distance, find graceful parts that stand out to you. Making a collage out of those parts could be the start of an interesting project, for instance.

In just a day, you could acquire a plethora of sweet cat photographs. Imagine how wonderful your results would be if you photographed your pet more often if you started a project tracking its development and growth. Such projects, tough as they may sometimes be, are fantastic methods of improvement. Whatever you decide to do after reading this article, remember to reward your cat, be present while shooting (even if you’re focused), avoid stress, and most importantly, enjoy this wonderfully pleasant time together. The experience will leave you feeling warm and the photos will be the beginning of something wonderful.
Good luck!

//

Posing Models Part 4: Facial Posing Tips for Stunning Portraits

The face is important in photography, whether you’re looking for a beautiful close-up portrait, or just the right expression for a full-body fashion shot. The only thing that will consistently land you professional shots is practice. This is especially true when it comes to photographing the human face, but a little basic knowledge can help anyone improve the quality of their pictures.

When it comes to facial posing, light and shadow become very important. The shape of the face is largely going to be determined by how the shadows fall in the final photograph. Too much light will blend the features, while too little can obscure them in shadows. You have to work the angle of the face with the lighting to get it right, all while getting the model to convey the right emotion. It sounds complicated, but some simple tricks will have you well on your way to better pictures in no time!

Decide What Kind of Lighting to Use

You should have some idea of what you want to convey with your photograph, along with some good lights for studio portraits. Are you taking a professional portrait, fashion photograph, or moody art piece? The overall mood will be determined by the model’s expression and your lighting choices. You should use the lighting to work with the basic shape of the models face as well.

For instance, a wider face can by narrowed by shadowing the side of the face angled towards the camera:

shadowing faces

The reverse is true as well. A narrow face can be widened by lighting the side of the face angled towards the camera:

lighting faces

Research different lighting methods and techniques before you begin the shoot, and make notes of what to experiment with based on what kind of shot you’re going for.

Make Sure Your Model Knows the Basics

Take a minute to see what your model knows about moving her own face in the shoot. While looking through your camera, ask her to shift her angle and expression slowly. Pay attention to the following, and work with her until she is comfortable with these basics:

  • How far she can turn her head before her nose breaks the line of her cheek in profile;
  • To follow her nose with her eyes so that the whites are not showing too much;
  • To angle her chin out and slightly down for a well-defined jawline, but to do so without looking strained;
  • To express the appropriate emotion with her eyes;
  • To keep the lips slightly parted to create a relaxed jawline—especially true for fashion;
  • More than anything, make sure your model is comfortable!

posing faces

Once you’ve spent a few minutes ascertaining how well your model understands the basics of getting a good close-up, coach them as you see fit. Instruct them to turn their head by degrees until you see an angle that works for them, ask them to hold it. Tell them why it works. Continue to do this throughout the shoot and you’ll see increasingly better photographs as you progress.

A Handy Trick to Avoid Dead Eyes

Sometimes a picture still falls flat, even though the model had the perfect expression! How does that happen? Something goes wrong with the eyes. Even if the feeling reaches them, without enough light they will simply look dead. There a simple trick that will help you correct this: make sure the angle of the camera and the face work together with the angle of the lighting, allowing you to capture a reflection of a foreground light in the eye of your subject. This will add a little sparkle to an otherwise dark eye, enhancing the feeling behind any type of mood.

facial posing tips

Experiment, Experiment, Experiment

It bears repeating: the only way to learn to take truly stunning close-ups is to practice. That’s how you’ll learn when to use butterfly lighting, or go for a standard loop lighting. Butterfly lighting is created by placing the main light source above and slightly behind the subject, resulting in a butterfly-shaped shadowing effect on the face. Loop lighting requires the light to be eye level, angled at 30 to 45 degrees from the camera depending on the subject. The only way to learn what kind of lighting will work for what kind of face, and what style of shot, is through experimentation.

Next time your friend needs a new professional photograph, why not bust out a light and your camera? With the above tips, and little experimenting, you’ll probably be able to make them look gorgeous! But first, check out the other tips in our posing series. They are full of advice that will help you make your friends and family look better than runway ready! The practice will have you well on your way to landing perfect studio shots with ease.

How to Photograph Drinks in Studio

The food and beverage industry is always looking for good photographers to capture the essence of their brand through amazing product photos. Do you have what it takes to capture impactful image of drinks? Can you capture those little droplets of water as they condense on the edge of the glass?

As it turns out, you don’t have to. Many beverage photographers use a spray of glycerin mixed with water to create the effect of condensation on the outside of the glass. Throw in a few fake ice cubes, and you’ve got yourself a pretty picture. Okay, so it takes a little more than that! Here’s some advice to get you started.

Typical Lighting Rules Do Not Apply

Normally, you would light your subject from the front. This allows your camera to capture the light that’s bouncing off the subject. The combination of glass, ice, and liquid can create a strange glowing effect when you use the traditional methods.

drinks photo 1

Instead, when shooting drinks, your primary lighting should come from the back of the shot. The light should pass through the liquid. This will prevent the glow effect while perfectly illuminating the contents of the glass. Obviously, you’re still going to need additional lighting. You’ll end up with dark image otherwise.

You don’t want to completely neglect illuminating the foreground. If you want a stronger light, use a strobe with a softbox. For a softer light, use two strobes in the background and place a reflector at the front. Use your strobes in combination with the natural lighting of the room.

It’s Time for the Snoot

A snoot is a simple piece of equipment that you can place over the strobe to make strong directional light. You can make one out of a thick, dark piece of fabric. Simply drape it over the strobe in the background so that it frames the bulb and directs a strong beam of light through the drink.

Since you’ll be using two lights, and possibly a reflector, be sure to watch for double shadows. You can prevent this when you’re using a light in the foreground by ensuring the backlight is brighter.

Don’t Be Afraid to Play Around with Settings and Lighting

You’re probably going to be making a lot of little adjustments to the lighting angle and intensity throughout the shoot. This will help you capture different moods and angles. If you want to save yourself some time, use a tripod for your camera. That way, you don’t have to reframe the shot every time you tweak the lighting.

drinks photo 2


A handy way to balance out the shot, especially when you’re lighting from the front and the back, is to adjust each one individually. Get your initial shot set up, then turn off your foreground light. Snap a couple of test shots, play with your camera settings so they pick up the background light just right. Then switch to the foreground and use test shots to make sure the light is falling properly. Turn your background back on and you’re ready to go.

Timing is Everything

Working with drinks can be more difficult than working with food, especially if you decide to work with real ice or condensation. Okay, so not everyone uses glycerin! It is a good trick, especially since there are some complications to shooting with real condensation. You will only have a small window of time to snap pictures before the condensation begins to drip. While this may work for your shot, most photographers prefer the rounded beads of liquid on the glass.

drinks photo 3

If you’re using real ice, but you don’t want condensation formed on the glass, then you should wait to put ice in the beverage until right before you’re ready. Fake ice in a room temperature beverage would be better. That way, you can take shots from multiple angles without worrying about condensation.

Don’t Forget About Mood

Like any promotional photography, you want to capture what the company wishes to convey. You’ll need to play around with form and composition to create different moods. For instance, lighting an image from the back without a strong foreground light will create a dark and moody composition. Colorful liquid splashing out of the glass against a white background would look cheerful and fun. Remember the aim of the shoot when you’re setting up your props and your lighting. Take the images above and below this paragraph into consideration. They feature similar subjects, but a change in scene and lighting renders a completely different mood.

drinks photo 4

One Last Thing

The last bit of advice for photographing drinks may seem simple, but it’s very important:

Don’t touch the glass.

No one wants to get that perfect shot only to find that they left a big smudge on their subject. Try using gloves, especially if you have to move the drink around during the shoot. No matter what, remember to have fun! Drink photos are usually bright and happy, so why not have a good time while you’re taking them?

Black and White Lighting – How to Light a Black and White Portrait

Lighting is essential to photography, and this is especially true for taking black and white photographs. Depending on what kind of lighting you’re using, you can capture a flat image or silhouette, a dark image with textured portions of the foreground showing through the shadows, or a crisp image in which you get a clear portrait of the subject with all of the rich texture and dimensionality.

You need to know what style you’re going for before you determine what kind of natural or artificial lighting you’ll need. You should also take the subject of the photograph into consideration as different types of lighting work better on different subjects. Portraits will be our subject today, so let’s take a look at different lighting techniques for this type of black and white photograph.

Portraits and Lighting

When working with black and white portraiture, if you’re outdoors, overcast lighting actually works really well. While this will produce a pale image in color, in black and white it creates nice contrasts between the lights and shadows. You’ll also pick up the grayscales that add depth and rich texture to the image.

If you’re indoors, you’ll need to play around with main lights and fill lights until you create a rich tonality. Find a balance between the highlights, shadows, and mid-tones by playing around with the positioning and number of lights that you use. It can help to set your camera to preview the shot in black and white even though you will take the shot in color and convert it later using a computer program.

Strong directional lighting will create harsh shadows that may not look good in a black and white portrait, which is why overcast outdoor lighting works better than bright sunlight. Remember this when you’re playing with the lighting in your studio. Try using a strong backlight with soft foreground lighting to create strong contrasts without losing the mid tones that add depth and texture.

black-white-portrait-2

On the other hand, you may enjoy the look of harsh shadows created by hard, directional lighting in a black and white image. As shown in the above photograph, it can create some interesting contrasts. The only real rule is to discover your style, then set up your lights to reflect it.

General Rules to Follow, Bend, or Break

As with any form of art, it’s better to understand why something works than it is to follow a set of rules with the blind hope that you’ll get the shot you want.

With black and white photography, the name of the game is contrast. You want deep blacks and ultra-whites to stand out against each other within the image. At the same time, however, you don’t want to create such a stark contrast that you end up with a flat image – or maybe you do.

Black and white portraits, specifically, bring in another element to style. A black and white photograph is all about capturing mood and emotion with the image. When you are deciding what style of lighting to use, keep in mind what mood you wish to convey. Also, the eyes of the person are one of the most important parts of the image as the expression of your subject will also affect the mood of the shot.

black-white-portrait-3a

So, if you’re shooting indoors—whether your subject is a person or a still-life object—think about what you want the final image to look like before you set up the lights. If you are going for something two-dimensional, use hard lights in the background. You can choose to fill in the foreground with some soft lighting if you want to create a little more texture, but you don’t have to if a silhouette or flat image is what you’re going for.

Shaping Light

If you want something more three-dimensional and with all the detail, you may not need a hard light in the background. However, you will need to play around with more soft lights off to the sides and in the foreground. This will bring out more of the grayscale, creating a richer texture without losing the contrast. This creates a dark background wherein only the softly lit portions of your subject shine through.

Lastly, if you want a more even image that doesn’t focus as much on contrast, and captures all the detail of the shot, use a combination of hard backlighting and soft foreground lights. You’ll want to create a little deeper shadowing than a color image would require keeping the photo from falling flat but try not to create a harsh shadow unless you are going for a particular style.

Have fun playing around with lighting to see what kind of shots you get, and remember that bending the rules can sometimes result in a truly unique picture.

Faking Golden Hour: How to Create Believable Sunset Lighting Indoors

Golden hour, whether it’s early morning or evening, can be a photographer’s best friend. The natural, golden lighting of the setting sun creates an ethereal effect that can really make an image pop.

What do you do if you need that ethereal effect, but you don’t have the option of lugging everything outside at just the right time to capture the shot? The following tips and techniques will help you set up your studio to capture believable sunset lighting effects from the comfort of the great indoors.

Use Flash Lighting Sources and Gels

You can use an array of varying strength flashes and gels to effectively render sunset lighting inside. This technique works well if you’re shooting an image that is meant to look as though it was taken indoors with sunset lighting coming through a window.

sunset-lighting-1

To start with, set up a strong flash in the background of the image. You can cover the light with a gold gel, or use a combination of yellow and orange placed side-by-side over the light source. This will provide a strong directional glow in the background of the image that looks like the setting sun as it crests over the horizon. Place the flash outside the window or directly in front of it, if possible, using the glass to further refract the light.

Next, you should set up a weaker flash in the foreground – try using an for this one. Place a gold, yellow, or orange gel over the flash. Use light diffusion to create a soft glow by aiming it away from the foreground, casting the light on a gold reflector or reflective wall. The other option is to aim it at the foreground while using a softbox which will create a more directional light. Be careful with this as you can accidentally make it look as though the sun is shining from two different directions.

Fill in the Shadows

You may need to use additional SB600 or other speedlight, and reflectors to fill in the shadows and create just the right glow. You’ll need to experiment with your space and your camera to get the type of sunset effects you’re looking for.

sunset-lighting-2

If you don’t want to use a window to create the effect of having the setting sun in the background of the shot, then angle your backlight so that it is not causing such direct illumination. Instead of a flash, you can also use bare-bulb lighting for this. Either way, remember that the lighting will create deeper shadows when it is placed further away from the foreground.

You should also remember that sunset lighting often creates unique directional shadowing. You will need to play with your light positioning and reflectors to create proper shadowing in the image.

The Right Camera Settings

You’ll need to control the exposure of the image by playing with the shutter speed, ISO, and aperture settings on your camera. You can try out different combinations to create different effects. Let’s take a look at two basic ways to create a different type of sunset image using these settings.

Crisp Images with a Sunset Glow

If you want the entire image to appear crisp and in focus, try the following settings: Use a low shutter speed and a tripod. The low speed will help you capture more light, and the tripod will keep the image from appearing blurry.

sunset-lighting-3

Next, you’ll want to use a high aperture setting. This will produce a lower-level of light, but this should be balanced by the shutter speed. The aperture setting, when combined with the right lighting, will ensure that the image appears crisp instead of soft and nuanced.

The last thing to do is play with your camera’s ISO settings. High-quality equipment can use ISO setting above 400, but low-quality equipment may produce a grainy effect at higher settings. Low ISO lets in less light, high ISO lets in more. Use the ISO to better balance the lighting captured by the camera’s shutter speed and aperture settings.

Soft Images with an Ethereal Background

If you want the light in your image to appear more glowing, with only the foreground appearing in crisp focus, then try out the exact opposite of the above. Set a higher shutter speed with a lower aperture setting, then use the ISO to create just the right balance of lighting.

sunset-lighting-4

Recreate the Effects of Nature

If you want to take an indoor sunset shot that looks like it was taken outdoors, you’ll need to play around with some additional equipment. You can place vellums with holes in front of lights to create cloud shadowing or use a softbox cover with a hole in the center over your foreground light to create the glowing directional light of the setting sun.

While these tips and tricks will help you to get started, experimentation is the only real way to get things set up just right. Have fun working it out in your studio, and please feel free to share any tips you discover along the way!

Soft Light and Shadows: How to Effectively Shape Lighting in Studio

The core fundamental behind any great photo is the interplay between light and shadow. When you get it just right, the two will work together to create an image that emphasizes the foreground without completely losing the background.

This is especially true when the subject of your photograph is a person because, as any artist knows, the shape of a face is determined by the interplay of light and shadow. Sketch artists know that a big part of their craft is understanding how to use shadowing to give depth to an image.

The same is true for photographers, and the way you shape light in the studio will determine whether your image is more two-dimensional or three-dimensional. Working with soft lights in a studio allows the photographer to capture the right balance between light and shadow to create an image that is not harsh while also appropriately emphasizing the foreground of the shot.

soft-light-1

Methods for Shaping Soft Light in Studio

There are multiple ways to shape soft lighting, and they will produce different styles. A common tactic is to use a softbox. Place the softbox over your light source, then aim it directly at the subject of the photograph.

This will effectively illuminate the foreground of the image, but it can also create deep shadows that one would normally associate with a harder light while also losing clarity in the background. Deep shadows give more form to an image, whereas soft lighting should result in a less-defined form. So, what can you do if you’re looking for a softer image that has less of a contrast between light and shadow?

Think about the physical properties of light. Light travels as waves and particles and shadows are composed of particles that rush in to fill an area where there is an absence of light. So, anywhere that light does not travel, you will end up with a harsh shadow.

soft-light-2

Different Angles of Light Produce Different Shadowing

This is why hard lighting uses a narrow-angle and soft lighting uses a wide angle. A narrow-angle for lighting focuses on the subject, creating a deep shadow that has the little gradient between the shadow and illumination. The wider the angle of the light source, the higher the gradient. This produces a soft effect, blending shadow and illumination in such a way that the foreground is emphasized without creating harsh shadows.

With this in mind, the question becomes how to create soft lighting without getting hard shadows from the direct light source. The answer is simple, and it may go against everything you’ve learned as a photographer so far.

To start with, instead of aiming the light source at the subject, you’ll be aiming it at the walls. That’s right, the walls.

soft-light-3

How to Position the Lights to Create Diffusion

The point of diffusion is to cause the light to bounce around, refracting off of the walls, floor, and ceiling to effectively fill the entire area with an even light. It helps if the area you’re working in is bright white as light refracts more evenly off of a white surface.

You can use a photo cube, paint a section of your studio in an ultra-white hue, or even use large sections of Styrofoam to put together your own little studio box. No matter what size space you’re using, aim the lights at the walls of the area.

Move your lights around until you strike a nice, even illumination. As the light is evenly filling the area, you will end up with smoother shadowing that doesn’t stand out as starkly in the image.

soft-light-4

You’ll also notice that the light itself takes on a different hue. Instead of having a foreground image with a high white-balance where the directional lighting is focused, the subject appears softer with a better balance of coloring. This actually gives a more accurate portrayal of the subject, especially if it is a person, as hard shadows can change the shape of the image.

Position the Model

When you use directional lighting with a softbox, the position of your subject has more of an effect on the image. Too close to the background and you end up with hard shadows behind the model, too close to the foreground and you’ll wash out the subject. You’ll also end up needing to use additional lighting techniques in the background to counteract some of the shadowing effects.

With diffusional soft lighting, positioning is still important, but you won’t have to play around with as many secondary light sources to eliminate noise from the shadows.

If you’re feeling experimental, take off your softbox and give this method a try. Take the same photograph with directional soft light and diffusional soft light to really get an idea of the difference between the two methods. Let us know how your experimentation works out in the studio!

Silver Linings – 5 Rainy Day Photography Projects

Rainy days may put a damper on outdoor photography shoots but for those who decide to ditch a day out with their camera in favour of a day in there’s plenty of creative fun you can have indoors. From building a stock photography library to rediscovering forgotten photographs in Lightroom there are many ways to make the most of wet days. The limitations of working indoors and in poor lighting conditions offer an opportunity for inventive and original shots.

All you need is a camera and a bit of imagination to turn a light shower into a storm of creativity.

Stock photography

If you often find yourself searching for generic images when working on projects, only to be hindered by copyright laws, rainy days are great excuses to build up a library of stock images. The easiest kind of images to get will be everyday objects that could be used in multiple contexts. Hands on keyboards, photos of computer screens where you can see the pixels, and shots of colourful things like pencils and post-its are all great ideas that can have a range of uses.

Rainy Day Photography Projects

Rainy Day Photography Projects

A tripod is a useful thing to have for rainy day photography as if you don’t have a spare body you can set up your shots and then use the timer feature, or an infrared shutter control, and shoot your own hands.

Food photography

When you’re locked indoors, with nowhere to go, and a cupboard full of food there’s only one thing to do – photograph it (and then eat it). Whether you’ve got a project in mind or just want to experiment make yourself a snack or meal and find the most flattering way to frame it. If it’s a rainy day natural light probably won’t be your friend so get out the spotlight (or whatever lighting you have to hand) and have a go at setting something and frying something up.

Rainy Day Photography Projects

One spotlight will usually suffice for food photography whatever you’re shooting. Bounce the light off a wall or ceiling to cast a bright but diffuse light on the subject. A prime lens will help to create a narrow depth of field and also offer better shutter speeds in darker lighting conditions.

Experiment with lighting

If you’re struggling to get sufficient light for your shots embrace the darkness and experiment with extra lighting. There are plenty of ways you can improve the situation with budget lighting ideas, or with things you already have around your home. If you don’t have a spotlight try using any source of light that can illuminate your compositions. Ceiling lights and standing lamps won’t make a huge difference, though every little helps, but brighter work lights are a more effective solution and fairly inexpensive to buy. Typical household light bulbs will cast a yellow glow but this can be improved in Lightroom by adjusting the colour temperature slider.

Rainy Day Photography Projects

Even if these experiments don’t yield great results exercises like this can be great for learning what works and what doesn’t, and save you time on a future shoot.

Rediscover your home

It might not seem like the most obvious place for photographic inspiration but rainy days can be a great way to rediscover your home through the eye of a lens, and develop a photographer’s eye around the house. Whether it’s a small detail or a wider shot of a room try experimenting with lighting and subject matter to capture what’s special about where you live.

Rainy Day Photography

Your subject could be something as simple as a bookcase or an interesting piece of furniture. Or it could be a room in your house that has a strong character. If you’re shooting a room imagines you’re taking shots intended to help sell it – this will put you in the mindset of trying it make it look as attractive as possible and as an added bonus encourage you to do your household chores, like dusting bookshelves for example.

When photographing rooms keep in mind the field of view, and if you have multiple lenses or a telephoto lens with a wide range try taking images at different focal lengths to see how it affects your compositions.

Revisit old photographs

Finally, if the rain is too oppressive and you just want to curl up under a blanket with a laptop on your lap it’s a great time to boot up Lightroom and rediscover old photographs you’ve taken. Looking over old photos with new eyes may reveal shots that deserve a second chance, and help you to see how your eye has developed over the years. If you’ve built up a large collection of images before adopting Lightroom it’s also a good excuse to see how older images could be brought back to life with its range of filters and brushes.

Rainy Day Photography Projects

It can also be fun to see what can be done with some of your earliest digital photos, in my case those taken with a Fuji @xia ix-100 in 2002 – the results might not be amazing but it will make you grateful for modern camera technology.

Rainy Day Photography

Next time it rains doesn’t despair, just use it as an excuse to get creative with your camera. Even if you live in a small and uninspiring apartment like this Sleeklens writer when you’re looking at things through a lens you can often find some interesting surprises.

High Energy Photoshoots: Pets and Children

Everyone loves pets, and everyone loves children. Photographers can get some wonderful pictures of children and pets, but it is often difficult to get the right circumstances where the pets and children behave the way you want them to for the photoshoot. They have a lot of energy, short attention spans, and it can push you to your limits to get the photo, but it isn’t impossible if you just have some patience and a few tricks up your sleeve. Here are some good tips for you to get the best photos of pets and children.

Understand the Challenges

There are going to be several challenges when you photograph children and pets. Understanding these challenges will ensure you get the photos you want.

photographing-children-pets-1

First, respond to the personality of your model. That’s not only for a child, but the pet as well. You can do this with an individual child, or with a group of children. Let them be children, and let them act naturally for the photo. The best photos of children are they ones where you can really see what they’re like, when you really capture their personality. Same with pets.

Second, you are going to be dealing with fast moving subjects and that means you need to be very quick on your feet.

Lastly, it can be hard for the kids to stay in one spot when you want to take advantage of certain light. Natural lighting is really what you want to go for when photographing children and pets playing.

photographing-children-pets-1-b

Have Fun

When you are photographing children or pets for portraits, have fun with it. Understand that they are not going to act how you want them to act. They are going to act how they want to act, so you need to take advantage of that. If the child, or children, have a lot of energy and want to run around and play, then take them outside and get photos of them climbing trees, playing in leaves, running around a field. All of this can make for wonderful, and relaxed, photos that a family will cherish for many years to come.

photographing-children-pets-2

With pets, you can follow the same mentality. If you are photographing cats, then let them play. Give them some cat nip, work to make them interact with each other using toys and strings. With dog photography, it is much easier as the dog is very eager to please. They will want to do the things you want them to do. Have them sit and stay and capture the picture. You can throw a ball outside, or into water, and get those pictures that show the dog having the time of its life.

Don’t Expect Boredom

What I mean by this is that you should not expect that the children are just going to stand around, or the dogs and cats won’t just sit there and not move. Well, maybe the cats won’t move. You should expect a lot of energy and you should expect that the children and pets don’t want to be bored. In that regard, because of the high energy, make sure you capture everything with a fast shutter speed. Make sure there is a lot of light around you as well. Natural light will be the best for pictures, so being outside is a good option if you want to get the best photos of your pets and children models. If you have to take pictures in the studio, then make sure that you have plenty of light to work with.

photographing-children-pets-4

Think Outside the Box

When you are getting the photos, especially of pets, then think outside the box. Don’t just have the dogs sit and pose, have them take a bath and shake. Have them photographed soaking wet, or running after a ball, or playing with their favorite toy. With cats, have them play with string instead of just lay on the ground, or have them interact with other cats. If they are just laying around, then make a sudden noise to get their attention and have them look directly at the camera. There are so many options for creating some really great and interesting photos of pets.

photographing-children-pets-5

We love our pets and we love our children and some see their pets as their children. Help preserve the memories of your dearest ones through amazing photoshoots that capture the high energy and unique personalities of the models.

Tips To Photograph A Splashing Wine Glass

There is something beautiful about getting a picture of something frozen in time. Whether it is a glass shattering, or a dog sneezing, it is a glimpse of something that happens too fast for us to really see. It gives us a new perspective on the world.

One of the most common, and most interesting, freeze frames to get is a splashing wine glass. We have all had a wine glass splash its liquid on us, or on our new carpet, but how many of us have actually seen that moment frozen in time? How many of us have wanted to capture that?

It may seem like it is a very complicated thing to do, getting that photo without a blur, but it is actually relatively easy for you to capture that brief moment in time. Here’s how.

splashing-wine-glass-1

What You Need

First, you are going to need some very good equipment to pull this off. A simple point and shoot camera is not going to capture this moment in time clearly, so you are going to need a good DSLR to get the clear photo that you want. In addition, you will need some excellent accessories to get a great photo of that wine splashing out of the glass.

  • The Nikon D800 is an excellent bet, using a 70-200mm lens.
  • A strobe, or any light modifier, is very important. Using a strobe with a seven-inch cone reflector and a soft box attached will ensure that you get enough light when the moment happens.
  • PocketWizard Mini TT1 + AC3 Zone Controller for Nikon (Canon versions are available too) attached to the camera’s hotshoe to trigger the flash.
  • A receiver plugged into the strobe light to receive wireless signal from the Mini TT1.
  • A wirelesss shutter release to allow you to take pictures from any position in the room.

splashing-wine-glass-2

Your Background

For your background, black is usually the best bet because it can create the best contrast for you with the photo. It will also help everything stand out a lot more. You can also place a blue gel over your strobe light, and use another strobe with a blue gel to get a bit of a blue tint on your black background.

All of these things together will create a great balance to your spilling wine glass photo, while at the same time giving you a sharp picture that will capture every drop of water, and every bit of splash across the screen.

splashing-wine-glass-3

Affordable Alternatives

Obviously, we can’t all afford to pay the amount of money needed to get the super sharp picture of the wine glass spilling. There are plenty of great budget lighting alternatives. You can use an LP180 Speedlight instead of a more expensive strobe, and other triggers. You can also just use a cheap light stand with an umbrella on it to get the light you need.

How to Get the Picture

Now that you have the equipment itself, how are you going to get that picture? You can’t just throw a glass and hope you get the picture. Things need to be planned out and be shot perfectly to get that shot that you need. Luckily, there are some very easy steps to remember to get that perfect photo.

  1. You will need to line the glass up to one side to allow the splash and the glass itself to line up within the frame perfectly.
  2. On a table, make sure you mark where the glass should be because you don’t want to lose that spot or have to keep trying over and over to get that spot right.
  3. Toss the glass up and down, side-to-side, and get some pictures with you holding the top of the glass so you can get a clear image of the stem itself. This is important for later.
  4. Make sure you take some photos of the top of the glass as well, with you holding the stem. Again, this will be important for later.

splashing-wine-glass-4

Photoshop it All

Once you have your pictures, you open the RAW files in Photoshop as separate documents.

  1. Choose all the pictures that are the clearest.
  2. Copy each image you choose into the same Photoshop file that you have.
  3. Select an image of the wine glass stem that does not show your hand it in and you will move this to a layer where your hand is on the stem.
  4. Move the stem over to where it needs to be, click the layer mask and erase the part you don’t need.

Getting that perfect wine glass photo, with splashing liquid, is not as difficult as you would imagine. By following these tips, you can get that excellent picture, and you will impress others with your skill in making two photos look seamlessly like one. Just make sure that you get a lot of pictures to work with, so you have plenty of options for your finished picture.

10 Great Softbox Lighting Techniques and Effects

A softbox is one of the most versatile tools at your disposal as a photographer. It can give you the light you need for your photos, while preventing harsh angles, deep shadows and more. It will ensure that everything in your photos is balanced. There are many options for what you can do with a softbox; all it takes is knowing some great techniques to get the right amount of light for your picture.

Here are 10 fantastic lighting effects that you can achieve with just one softbox at your disposal.

Getting the Jewel Light

A great jewelry shot is all about the lighting. To get a wonderful picture that reflects the beauty of the jewelry, all you need is one softbox, the jewelry itself, along with a shiny surface and some white poster board. Place the piece of jewelry on the surface, with the poster board off to the side at an angle. Place the softbox to the side as well. Once everything is shining and reflecting, take the picture.

softbox-lighting-effects-1

Window Softboxing

Take translucent silk and have it in front of the softbox. About five feet in front of that silk, opposite the softbox, have the model sit facing the light. This will give the light a feel of coming in through a window, and it can make for some very unique photos.

Light the Subject and Background

If you want to give equal light on the person you are photographing and the background itself, this is quite easy to do with a softbox. Just have the subject stand at an angle to you facing the light. The softbox should only be about one foot from the subject, and at nearly a 90-degree angle from them.

softbox-lighting-effects-2

Highlighting Beauty

A softbox is a great way to highlight a model’s beauty. The simple and slight light can add to the features without making them harsh on the subject. All you need is one softbox with one reflector. The reflector should be down below to catch the light, and it will fill out the features of the face. Have a plain background behind the subject.

Use it as a Rim Light

When you are doing a profile picture, you can have a front profile and you can have a back profile. With the one softbox, just place it at an angle behind or in front of the person you are getting a photo of to create that rim light and to provide a slight light on the subject.

softbox-lighting-effects-3

Movie Poster Light

Using a softbox, have it lower than the person you are photographing and off at an angle from them, about 45 degrees. The person looks down at the light as you get the picture. This will highlight their features, provide some deep shadows, and darken their back area.

Softbox as a Background

To get an amazing silhouette all you need to do is have the model stand in front of the light source itself, about one foot in front. Then take a picture of the model with the light behind them so you get clean, crisp silhouettes.

softbox-lighting-effects-4

Softbox Bouncing

In order to increase the light you have with only one softbox at your disposal, you can bounce the light off a white wall. Have the model stand in front of the camera, with the softbox next to you pointing towards a wall. This will provide a great deal of extra light as it reflects off the surface to give a lot of definition on the model, especially on the side facing the white wall.

An Element of Design

If you are taking a picture of an object, have the softbox off to one side facing towards a reflector on the other side with the object in the middle. Set your camera up between the softbox and the reflector (a foam core reflector works) and back about five feet. You will get some great light from this, especially with reflective products like bottles or glasses.

softbox-lighting-effects-5

A Group of People

If you only have one light and you want to get a group of people evenly lit, it may seem very difficult but, really, it’s not. All you need to do is have everyone stand in a line and turn the light source horizontal. At this point, you move the softbox down the line, taking one photo of each individual person as they’re lit perfectly. In post-production, you can put it all together and you will have an evenly lit photo of a group of people. It is actually multiple photos together, but with the editing it will look like it was taken with everyone all at once.

These tips will help you get the most out of your softbox, without having to buy another one, or any other form of light source. Great for photographers on a budget or just starting out.

Lighting and Posing Tips for Beautiful Wedding Photos

One of the most highly stressful photography jobs out there is the wedding photographer. You have to capture a person’s happiest day, and you only get one shot at it. If things don’t go well, there is no do-over. Making sure you get the lighting and posing right is crucial, but don’t despair or begin to worry, we have the tips you need right here to make the great pictures possible.

Create the Portrait

wedding-photography-tips-2

Sure, shooting the wedding details is super important and can make for some great photos, but the most important part of the wedding is the portrait. This is what is going to hang on the wall of the couple in their home. It is vital you capture the right image, and there are a few steps to getting the image that you want with the couple:

1. Posing is extremely important when it comes to the portrait. You want it to be fun, but also to show the couple in love. Make it a bit edgy, and even make it a bit sexy. Have fun with it. This is a happy day for them, so show it in the pose.

2. Before you take a picture, you make sure you got your exposure right. You don’t want to find out your exposure was off after 20 minutes of taking pictures.

3. Don’t be afraid to compose the scene. You may think it is better to have things natural, but composing the scene takes out the variables and the risk factors and allows you to create something truly memorable. Have fun with it.

4. Never, ever forget about your lighting. You want the lighting to be right, so make sure you have some portable lights and that you play with the lighting around you. Failure to do this can make a great looking photo look horrible.

5. In post-production, don’t be afraid to lighten things up just a bit as well.

What about Posing?

wedding-photography-tips-3

So, posing is one of the most important parts of any wedding portrait. What should you consider when you do this? There are a few factors that can really make your image pop. The biggest factor is the background. You don’t want it to be too busy, but you don’t want it to be too bland either. You want your background to incorporate itself into your photo. Use it to your advantage, don’t ignore it.

You should also pay attention to your curves. These are your C-curves and S-curves, and they will help to accentuate the bodies of your subjects, and it will help bring more of an interest to your photo. Never ignore these because they can be your best friend when it comes to getting an amazing photo.

The lighting once again is crucial. You can use natural light, or artificial light, but make it work to your advantage. Don’t leave things to chance. You make the light flatter the people you are taking, not take away from them. The importance of lighting cannot be understated, so make sure you get the lighting just right.

If you are shooting with artificial light, do it when things are dark because you can have more control with your studio lights than with the fluorescent lights above you. It is all about controlling the lights and making them work for you. Don’t be afraid about being a bit creative with the lighting as well.

wedding-photography-tips-4

Keys to Success

If you want to make the most of the posing and the lighting, and the wedding in general, then you need to keep these things in mind:

1. Be professional because that is incredibly important in a wedding setting.

2. Always be consistent with your subjects and what you want from them.

3. Educate your subjects on what you want so they know what you are doing as well.

4. If they’re camera shy, try a few things to make them comfortable. Take your time and provide lots of direction.

5. Look for inspiration around you.

6. Never be afraid to get ideas from your subjects. It is their day after all, so why not listen to them and find out what they might like out of the pictures. You won’t be sorry you did.

If you are going to be at a wedding, don’t be nervous, don’t be uptight. Have fun because if you do that the subjects around you are going to have fun. When you are taking portraits of the happy couple, work with them and have fun with them. Sometimes the best photos are the ones that happen spur of the moment, without planning, and sometimes you need to plan things out a bit more than you would have thought. The important thing is to be flexible and to adjust to the circumstances around you. You never know, you may get a portrait that gets you more business. The main thing is the couple’s happiness, and if you follow these tips, they will be very happy with the work you provide.

Lighting for Still Life Photography Tips

As a photographer, you know how important lighting is to any photo. It is incredibly important to ensuring that the image you get it crisp, sharp and truly stands out. It can take a bit of work to get it right, but when it works it usually always comes down to lighting.

There are several things to consider when you are using lighting for still life, to the backdrop, to the lights used, to how everything interacts. Just like a rug that ties the room together, the lighting needs to tie everything in the picture together.

Back in Black

When you are shooting black objects on black backdrops, it can be hard to know how to make them stand out from each other. This is where lighting comes in. A great tip is to use a silver panel to reflect the light and fill the image with that light but in a softer tone. You don’t want things so bright they wash everything out. A softbox is great for this type of lighting situation, so don’t be afraid to use one.

still-life-2

An important part of this is creating a sheen off the objects to give them definition off of the black background. That will help make the picture really stand out, and it will make the black on black juxtaposition something people immediately notice.

Think about the Shape

With still life, the shape of the object is one of the most important aspects of it. There are several ways to bring out a shape. One way is to have a clear rim of light that brings the shape out in the photo. This is especially true for shiny objects that are against a dark background.

still-life-3

A great tip is to cut out a piece of black paper in the shape of the object. You then place that under the object. This gives just a tiny bit of extra black around the object and it also helps to create a wonderful graduated lighting effect.

One thing to remember as well is the hotspot. This is the distance of the light. If you have a hotspot too far off the surface, you will get the object that has even lighting on it. If you move it closer to the surface, you get a strong hotspot, which creates more condensed light and sharper shadows.

Use the Lens Hood

We often use the lens hood for its intended purpose, blocking out the light to create more even tones of our subject matter. The great thing about the lens hood, or shade, is that it can be used in other ways as well. You block the amount of light from a flash going into the lens to create really clean images, especially of black objects on black backgrounds. It is a neat little trick that can really go a long way in making your images stand out.

Multi-Position

When you are using lighting, try using multi-position setups. This means that you have lights not just from one angle, but from many angles. You want light from the front, the sides and even above. This can create some really fantastic shadow art for your photo, but it can also give you a very clean look to your images. With the use of diffusers, you will prevent the subject from being washed out. Using a gold diffuser will also give your photos a nice hue that is calming and reminiscent of sunlight, something we all love.

still-life-4

Another tip is to use a room with a window. In this regard, you can have a couple of lamps set up but you also have the natural light coming in from the window. This will then give you a cool look to your photos where you combine the artificial and the natural to great effect.

The Best Still Life Backdrop

Lastly, you want to make sure you get the right backdrop. With still life you typically want a blank backdrop rather than a natural one that will be busy and cause your objects to blend in. Keep your backdrop nice and simple and you will have greater control over how the lighting impacts your subject.

still-life-5

That is all there is to creating great still life images with the proper lighting. Take some time, stage things right and you will have some excellent looks to your images that will really make things stand out and look awesome. Never be afraid to experiment with your images and your lighting to achieve some stellar results out of something as simple as still life.

Using a Mini Softbox for Awesome Outdoor Portraits

Shooting portraits in a studio can be great, but outdoor portaiture with natural light is just better. The problem is that when you try and take photos outside, the light doesn’t always cooperate, and you need to take matters into your own hands. This is where something like a mini softbox can really help you out when you need it.

A softbox is just a small light, used primarily in studios, but which can be adapted for use outside. The mini variety tends to be best in this regard since it is easy to transport around.

When you can control the lighting of the outdoors with a mini softbox, you can drastically change how your photos look. Subjects can really stand out, while also getting the natural setting around them. It is the best of both worlds. You have the studio and the outdoors, together in perfect harmony.

outdoor-portrait-2

The Advantages

So, why use a mini softbox for this? Why not use some other type of lighting? Why not use umbrella lights? There are several reasons why a mini softbox is just best for this situation.

The biggest advantage is the fact that these boxes are small and highly portable. You don’t need to haul your studio around, you just need to take a small box with you and you will get all the light you need. You can also use a light shaping tool to get the lighting that you want in your portraits outside. You can add definition through the use of shadows, or remove shadows to create a clean and elegant look on the subject.

outdoor-portrait-3

Why Not Regular Softboxes?

You may be asking why you can’t just use a regular-sized softbox, the type you use in the studio. After all, it is not like they are huge or anything. Well, you get all the features of the regular softbox, in a mini softbox, but without the extra space. So, there is no reason to add extra work for yourself in lugging around a large softbox.

How to Do It

Now that you know you should use a mini softbox, how do you go about using it?  It is actually very easy to use. The main thing to remember is that as you move the subject around for the photos, you may have to change the lighting depending on cloud cover, the position of the sun and more. This will allow you to get the right light for your subject with the softbox.

Don’t be afraid to try out multiple locations for your shoot as well. The light is going to be different everywhere and you may find a great spot for your photos just by random. Most mini softboxes run on batteries since you won’t be located near an outlet. Make sure that you always have batteries on hand so you don’t lose your lighting opportunities with the softbox.

outdoor-portrait-4

Use the Attachments

When you are taking your mini softbox out, make sure you use your attachments to get the most out of the mini softbox. There are many attachments that will be useful to you depending on the lighting conditions outside, and the needs you have as a photographer. These attachments, like diffusers, can be carried around easily by you and often come as part of the mini softbox. These diffusers will create many lighting effects for you, from creating very soft light to compliment the sunlight, or sharper and more focused light to create the shadows that you want.

One of the best types of diffusers to keep in mind is the gold-banded diffuser. This diffuser attaches with Velcro to the softbox itself and creates really beautiful and warm images in the outdoors. It can work great if you want a natural look on the subject but don’t want to add too much light. It is also very effective at creating the golden hour light, where the sun is setting.

outdoor-portrait-5

As a photographer, you want to get the most out of your photos, your light, and your subjects. You can leave everything to chance and allow Mother Nature to dictate the lighting, but what if it is a cloudy day and you want golden light on the subject? If that is the case, then you need to take matters into your own hands and get a mini softbox. It is highly portable. It is easy to use, and it will ensure that you get the most out of your pictures.

For incredible portraits, you should always take things one extra step. Mother Nature can be great for her lighting, but there is nothing wrong with a bit of a helping hand from technology. The mini softbox can do that for you.

Umbrellas vs. Softboxes: Key Differences

Today we discus Softboxes vs Umbrellas. When you see a professional photographer setting up for a photo shoot, you probably see some weird looking lights. You may see some lights that look like they have an umbrella attached, and you may see some that look like big boxes of light. These are umbrellas and softboxes and they are vital parts of any photographer’s studio.

Studio lighting is very important and it comes down to the lighting. The question you have to ask yourself is whether or not you want softboxes or umbrellas for your lighting. They both have benefits and disadvantages, and it all depends on what exactly your needs are. Both are highly beneficial to your studio, so getting one or the other is going to improve things no matter what.

Why Choose Umbrellas?

umbrellas-softboxes-1

Let’s dive into umbrellas first.

An umbrella looks exactly like an umbrella, except it is often white or opaque, and it helps spread the light around. The umbrella is highly versatile and one of the biggest benefits of it is that it will create extra light when you need it, but also create more dimness and darkness when you need that as well. You can choose translucent umbrellas because they are easier to close on a subject, or back away from a subject to create unique looks and lighting moods for your photography. You can choose reflective umbrellas though, to create a more uniform amount of light in the studio.

One of the biggest advantages to using umbrellas is the fact that they are excellent for macro photography. When you force light onto a subject in a macro setting, with light at different angles, you can get many different effects that can aid the picture you are taking. It can define the features of a subject, even if that subject is very small. It can also create a gentle light over the subject, allowing you to literally show it in a new light with your photography. Regardless of how you use the umbrella light, you are going to get some real advantages from it when you are taking macro photos.

umbrellas-softboxes-2

Why Choose Softboxes?

One of the biggest advantages of something like a softbox is the fact that they are very easy to use. They can be used by nearly anyone and may be the best option if you are new to studio photography and want to learn more about lighting before you upgrade to something like an umbrella light.

Softboxes are great because they can allow you to change the direction of the light on the subject by moving the softbox around the studio. This will let you play with lighting angles, shadows and more. When using a softbox, always take test shots first to make sure you get the right lighting from the softbox when you are shooting the subject.

One advantage of the softbox is also the fact that you can take it and move it directly in front of the subject, without washing the subject out, if you want to create a softer light on the subject. If a softbox is at a distance, it can result in a strong amount of contrast on the subject, or the subject being in harsh light. That being said, if you are finding the subject’s lighting is very flat, you can move the softbox around to a different angle in order to give more definition on the subject through the use of the shadows.

umbrellas-softboxes-3

Which One?

So, which one should you choose? Which one should you decide is best for you when you are starting up your new studio? It can be hard to choose but really it all comes down to your personal taste and what you need the lighting for. Are you shooting portraits? Product photography? Macro?

If you want to do lighting with more definition and you are looking to challenge yourself a bit more, then you should consider umbrella lights. They do tend to be more expensive and there is a learning curve but it is by no means too difficult to use an umbrella light. If you want something a bit simpler, and you aren’t worried about how defined a subject is, or you’re not doing macro photography, then a softbox is going to be the best option for you.

umbrellas-softboxes-4

Play around with both options and see which one is going to work best for you. Test things out. You may find you like the softbox, or you may find you prefer the umbrella.

Whichever you prefer, make the lights work to your advantage, and know how to use them so that your pictures stand out with proper lighting, excellent definition and striking shadows that make people see your subject in an entirely new light. That is the power that comes from something as simple as studio lights and the filter that is in front of them.

Lightbulb Moments – Bright Ideas for Budget Photography Lighting

Lighting is such a critical element of great photography that many opportunities can be missed if you don’t have the budget for a proper lighting setup, or just happen to be in a dark place at the right time. With a little bit of imagination and creativity though you can make those darker moments shine and sometimes create new and unexpected effects.

Below are a few tips on how to make the most of the light available to you and use your imagination to create new light without having to break the bank or go over your budget.

Search for the Sun

The first thing you can do if you’re struggling to light a scene properly is make the most of the natural light around you – remember the sun’s always shining somewhere, it’s just the clouds that get in the way. Open every curtain, every blind, every door, and move closer to any available windows if you’re not getting the shutter speeds you want.

Sleeklens - Lightbulb Moments_013_mini

If you have time to plan your shoot, for example if you’re taking portraits, think about quiet and well-lit public places where you can capture your subject. Locations like universities out of term time are great because they tend to have loads of buildings with lots of big windows and large open spaces. For more information on shooting in natural light check out Damon’s beginner’s guide.

If the light is too strong, or not in the right place, consider using a reflector to create a more diffuse glow and move the light. Reflectors can be purchased quite cheaply anyway, but a simple home-made solution is to cover a large sheet of cardboard in tin foil. Aluminium foil has a shiny side and dull side which can be used to create different levels of diffusion, and can also be crumpled to change the quality of the reflected light.

Low-cost Spotlights

Over the years I’ve had varied success searching for a cheap alternative to a proper spotlight. Any torch that comes close to the brightness of a low-end spotlight is likely to cost just as much if not more than one, and the batteries will run out quickly. The best thing I’ve found is a basic clip-on lamp that plugs into the mains, combined with a regular lightbulb and lampshade.

Sleeklens - Lightbulb Moments_001_mini

For less than £10 the adapted work lamp works a treat, offering a good level of light – it can easily light up a room – and flexibility in terms of positioning. The lightbulbs can be switched to provide a better colour temperature, and it can be easily raised up by clipping it onto a tripod (or any convenient high place like a curtain rail). The setup below cost me just £8.50 in total (not including the tripod) and is something I’ll be using a lot.

Sleeklens - Lightbulb Moments_008_mini

Another option is to use any bright light or lamp to hand. Turning on a ceiling light generally doesn’t help because the light isn’t being directed anywhere, but table lamps and especially bendy desklamps can make great impromptu spotlights.

Fun with Flashguns

Although approaching the same price as a proper spotlight a cheap third-party flashgun can make a great portable solution which can work great as a basic flashgun or a way to fine-tune the lighting in a scene. For less than £30 you can pick up a cheap flash gun, which although not as advanced as the more expensive models gets the job done in terms of generating light.

Sleeklens - Lightbulb Moments_011_mini

You can also have great fun creating different lighting effects with flashguns, by adjusting their brightness but also by adding different coloured gels (as I will describe below). I once had to turn a dull meeting room into something that looked a bit more romantic, so added a red gel to my flashgun to turn the wall behind the subject a nice shade of pink.

Gel Power

If you want to add some colour to a scene, or set a particular mood, combining gels with your budget lights can create some interesting effects. Making the gels is simple and cheap. All you need is a few strips of cardboard from something like a cereal box, some transparent materials, and a stapler.

Sleeklens - Lightbulb Moments_010_mini

While trying things out for this article I went to my local stationers and picked up a packet of colourful document wallets for £1 and was able to create a Red, Yellow, Blue, and Green, gel for my flashgun. I had enough material left over to make one for my desk lamp as well and also experimented with a rainbow-coloured pencil case.

Sleeklens - Lightbulb Moments_012_mini

With a little bit of outside-the-box thinking there are plenty of ways you can improve the lighting of your setups for little or no money, depending on the materials you have lying around your home. From simply being more aware of your surroundings to being inspired by the lighting department at your local hardware store, you just need to get creative to make your budget go further. Why not trying creating your own lighting solution and see what bright ideas you can come up with? For more inspiration for cheap lighting see Julian Rad’s guide to making a DIY light tent for under $5.

Photo Master Class: Finding the light

A beautiful atmospheric glow; a sense of depth and dimension; a reduced color contrast that flatters a subject’s natural beauty…Artists have long sought to capture the magic that nature provides in the golden hour. It’s what can set a photograph apart and make it truly special.

What is the golden hour?

Simply put, it is that time of day (whether exactly an hour more or less, depends on the season and how far away from the equator you are) in which the sun has just crossed the horizon at sunrise or will soon pass over the horizon at sunset. At these hours, the sun’s angle creates an indirect light, traveling at a greater depth of atmosphere which makes it appear soft. Shadows are longer, so interesting dimension is created. There is a concentration of the warmer yellow/red wavelengths as the blue ones are more scattered, creating a beautiful glow and background color that flatters people’s skin tones and makes landscapes pop. In short, it is the preferred natural lighting for photography and the one I use almost exclusively to create meaningful and beautiful images.

image

When finding the light, it’s always best to be prepared ahead of time. Go out location scouting around the time of day you want to shoot. It’s best to do this, so you can get a better idea of where the sun will sit in the sky during the golden hour. If you are shooting in an urban location, remember the light and the direction of your light source. Whether you are next to a building or out under some trees, you always want to direct your subject towards the light. Not only will you create some beautiful catchlights, you will have beautiful fallen light in all the right places on your subject. The creative possibilities are endless and definitely not limited to just portrait photography. It’s a wonderful time to explore landscapes too. For stunning effects use a wide aperture and make sure you don’t overexpose your photos.

image

Rim lighting

This involves a thin line of light outlining your subject. In this case…the little girl in this photo was enhanced using rim lighting while the background is darkened. This illuminates and pops your subject. When using a light source such as the sun, you must be at a low angle at either mid-morning or late afternoon. This allows the light to evenly distribute the light around the hair. Place your subject right in front of the sun or just a little off center. The sun must be in the same direction as your dark background.

image


image

Sun Flare

This is beautiful and there’s really no wrong way of doing it. When the sun hits your lens it produces different effects. These effects are really cool techniques that are really easy to achieve without any special processing. It’s important to remember to use a narrow aperture, which means bigger number settings. Starting out in AV or A mode while setting your aperture to f22 and your ISO around 100-200. Your camera will choose a proper shutter speed for you.   Just remember. This is a good start. If you aren’t happy with your results, switch over to M mode, dial in your same settings then slightly increase or decrease your shutter speed depending on the look you are going for.

image

Silhouette photography

This is one of the best times of the evening to create those gorgeous photos. When your subject becomes the shadow, throwing all textures aside…you are left with an outline of what you are shooting. When a person is your subject, remember to angle them to accentuate their shape rather than shooting them head-on. Remember to have your light source in front of you. It doesn’t necessarily need to be behind the subject, just the best angles to outline your subject properly. In the photo below, I chose a few different subjects with a prop. I set my camera in M mode and dialed my aperture to around f8. I wanted the US flag to be lit enough so people could see it

I hope you enjoyed this article and this helped you to find the light! Photography is all about creating art and having fun doing it!

The Lighting Technique That Always Sells

It seems these days that photographers are always looking for the next, new and interesting way to set up their studio lights. While I respect the experimentation, it adds an awful lot of confusion. Just exactly, how should you be setting up your lights for a typical family portrait session?

There is one lighting method that I fall back on for nearly every session. Look at any artificially-lit family portrait, corporate headshot or school portrait and you’ll see the same lighting technique every time.

Why? Because it sells. Every time.

How?

Let’s talk about natural light for a moment. If you could plan to shoot outside at a perfect time of day, what time of day is it? Sunrise or sunset, naturally. The angle of the sun to your subject is about 45 degrees, and it’s simply perfect. Rembrandt caught on to this in the 1600s and started lighting subjects the same way in their portraits. Hence, this lighting style is called Rembrandt Lighting. Rembrandt studied light and how it affected faces and determined that the most flattering light for people is this 45-degree angle of light, just like the sun would provide, at the perfect time of day.

Here, a sample of Rembrandt’s work:

maxresdefault

Observe, particularly, the shadows. A lot of photographers mistake flat light for good light, but this isn’t the case. Flat light always works, but it’s always boring. The shadows are extremely important – the shadows give the depth and detail to a face.

All we are going to do is emulate that in your studio.

The other note I want to make is that, in all of the diagrams below, the main source of light is a strobe with an umbrella. You can also use a softbox, but in terms of emulating the sun, an umbrella does a slightly better job. Think about how the two devices work.

A softbox allows you to shoot through several layers of fabric, and direct the light exactly where you want it to go. However, an umbrella takes hard light from an uncovered strobe and shoots it in several directions at once – which is much more like the sun.

This can be done with one light, and up to three.

One Light

Take a look at the diagram below.

lighting-diagram-OneLight

This is a simple, one light setup. The light is set at a 45-degree angle to the subject, who is turned very slightly towards the light. On the opposite side, you’ll see a white reflector. The reflector is necessary because, while it leaves the shadows on the sides of the face, it fills them in a little bit so that the details are not lost.

The result of this lighting setup is shown in the image below.

DSC_5126-WEB

Two Lights

Take a look at the diagram below.

lighting-diagram-TwoLights

This is a basic two-light setup. Again, the primary light is left exactly where it was in the first diagram. I have even left the reflector opposite to the primary strobe. The best place for this second light is as a kicker light, behind the subject. This adds separation of the subject from the background.

This light setup results in this:

ABVMA-HoDesiree

As you can see, around her head and some on her shoulders, there is a light that sets her off from the background.

Three Lights

The natural instinct with three lights would be to remove the reflector, and replace it with your third strobe, as shown below:

lighting-diagram-ThreeLights1

However, I would actually suggest you turn the third light into an additional kicker to add some drama. Further, I can eliminate the use of the reflector, simply by adjusting the light more to the front of the subject. The angle is still 45 degrees on the subject.

lighting-diagram-ThreeLights2

Here is the result:

DSC_4598-EditWEB

Using that 45-degree angle is the real trick to photography that sells. Keep in mind, you don’t want to eliminate shadows entirely – just fill them enough, so you can see the details.

Shadows are what give your face character, and what looks most natural. Families are always more likely to purchase images where the people they love, actually look like the people they love.

All diagrams in this image provided by LightingDiagrams.com