Tag: softbox

DIY: Softbox in Twelve Easy Steps

One of the neat things about photography is that you don’t need a lot in order to take photos; a camera, memory cards and you can start taking photos. However, as you advance in your field, you will discover that at certain conditions you need more gear than just the mentioned above: external flash, reflectors, diffusers, lenses and the list goes on and on. Some of these accessories are a must if you want to advance, others are really helpful and cheap, and so they are worth having. But what if you can’t afford the equipment? Or the retail company doesn’t deliver to where you are? What if you just want to get a feel for the equipment to see if you will use it before you spend your money? My favorite solution is to make one myself, and today I will show you how to make your very own softbox.

What is a softbox?

A softbox is a lighting equipment which provides soft and diffused light. It is a box-like, conic or pyramid-like structure that can be attached to a light source so that it will cover it. The softbox’s inner side is light reflecting except for the portion in front of the light source, that is light diffusing.

You will need:

Aluminum foil

Baking paper

Black Bristol board (or other black thick paper)

Glue or double sided tape

Scissors

Utility knife

Ruler

Pencil

Light source (lamp or flash)
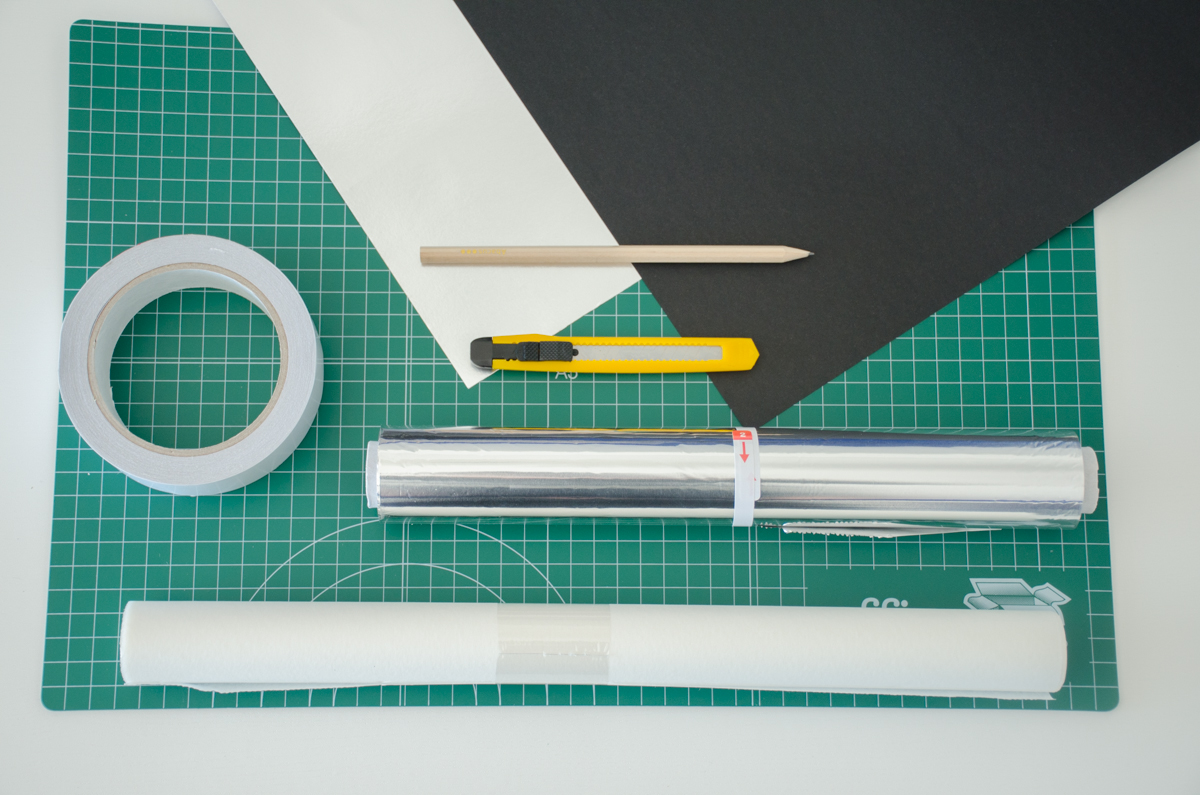
DIY softbox

Step one:

Take the measurements of your Bristol board and draw a grid of three vertical lines and three horizontal lines, creating four equal columns and four equal rows.
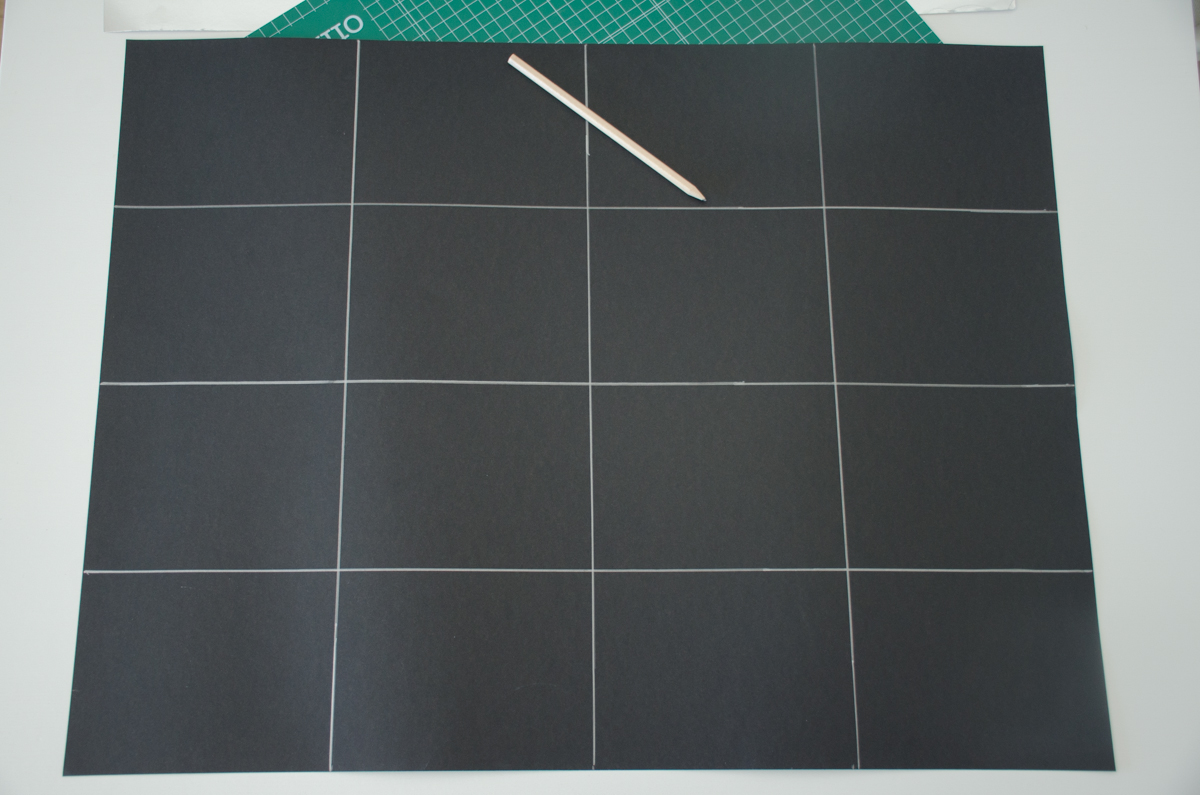
DIY softbox

Step two:

Flip the Bristol board over. Place strips of double sided cello tape (adhesive tape) on the unmarked side of the Bristol board so that extensive part of its surface is covered
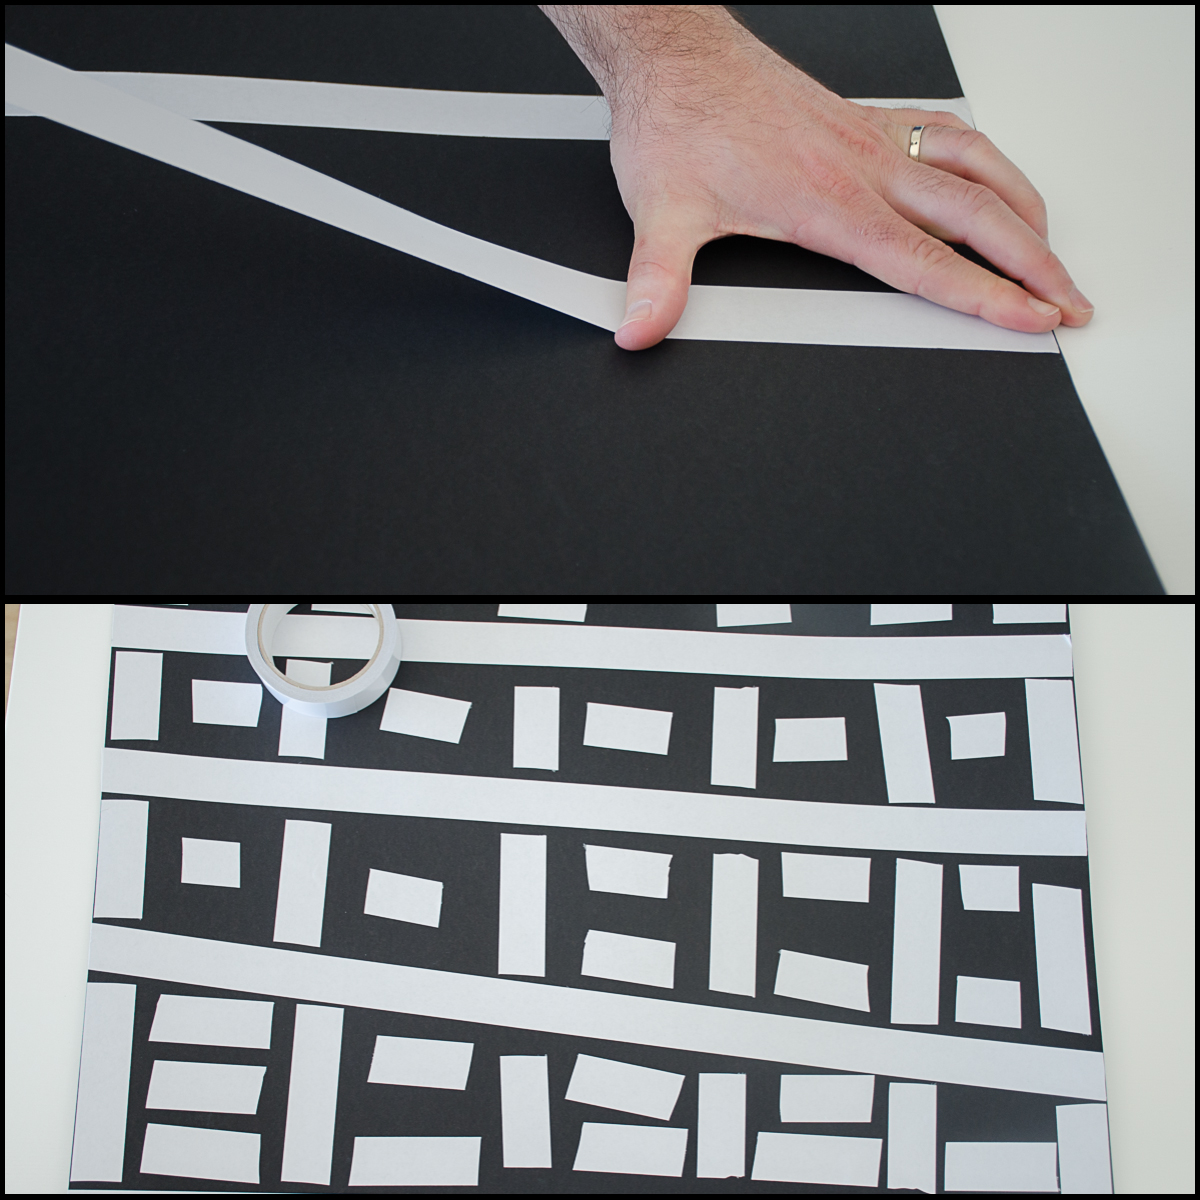
DIY softbox

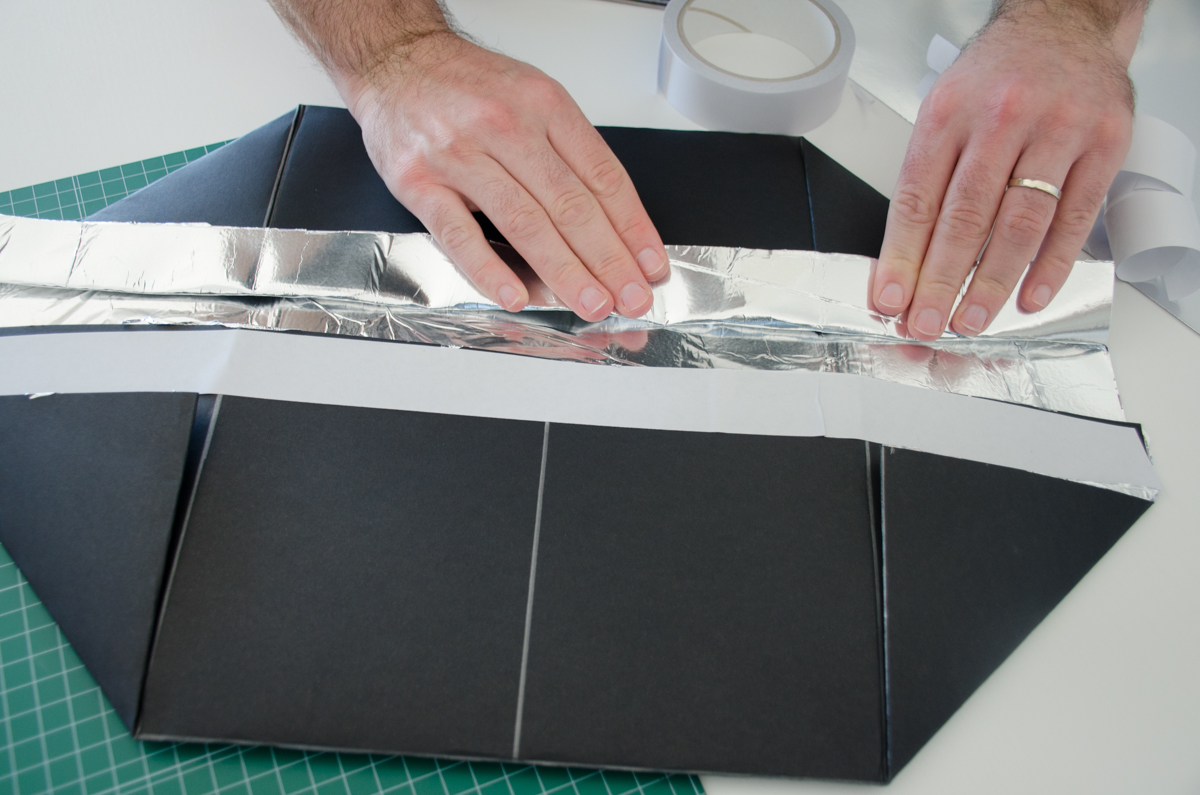
Step three:

Expose the second sticky side of the tape and attach aluminum foil to the Bristol board, cover as much as you can
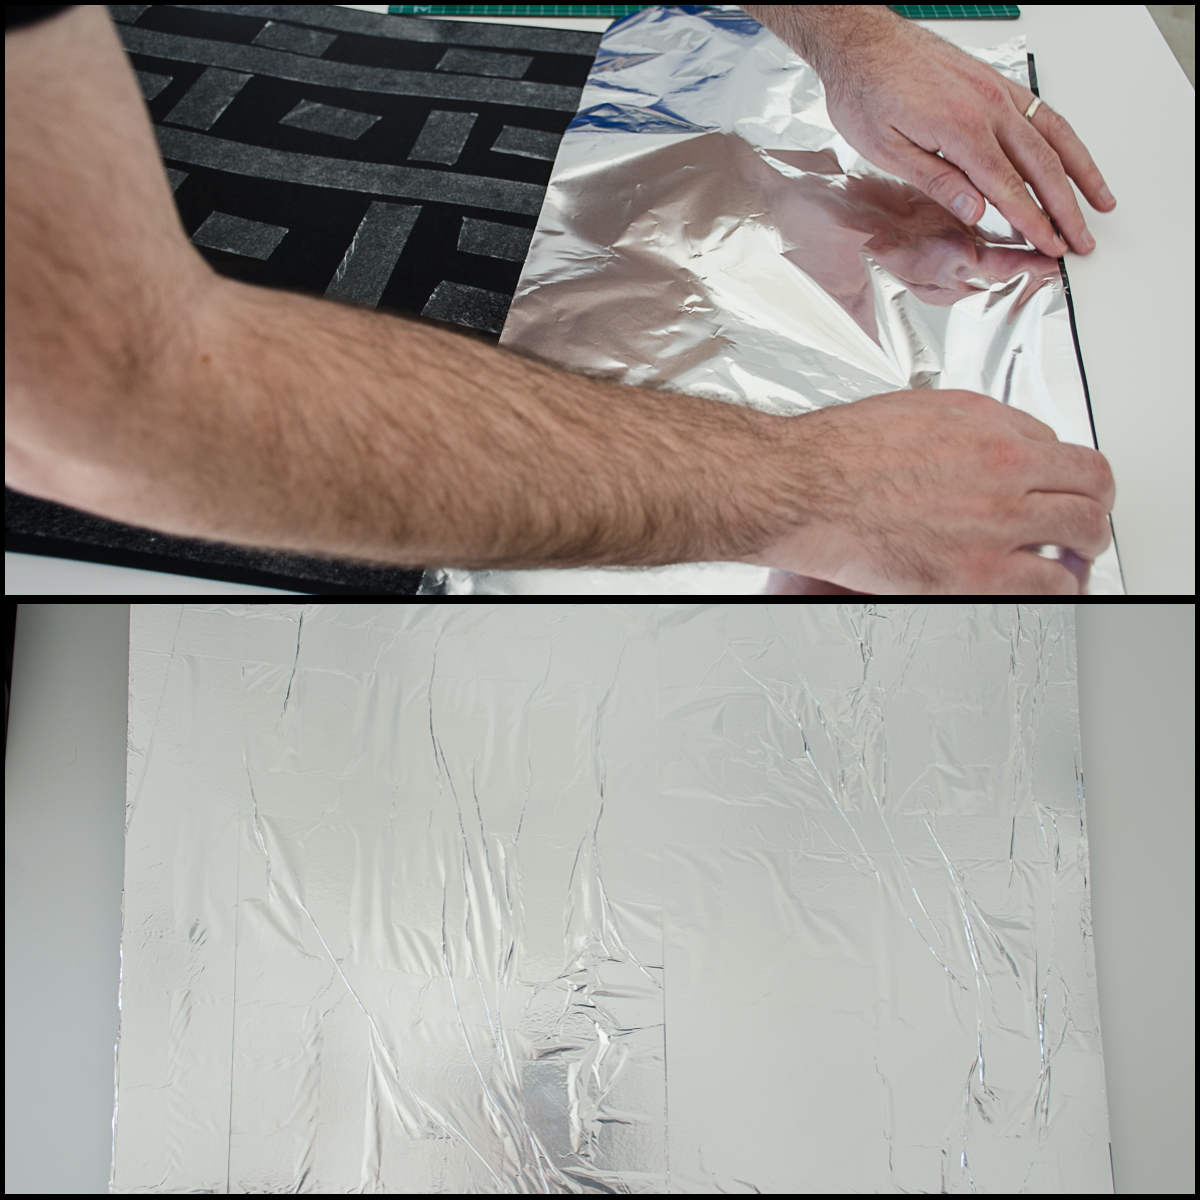
DIY softbox

Step four:

Fold the Bristol board along the top and bottom vertical lines, creating two creases along the board. Unfold and repeat this action, this time on the top and bottom horizontal lines. Keep the board folded.
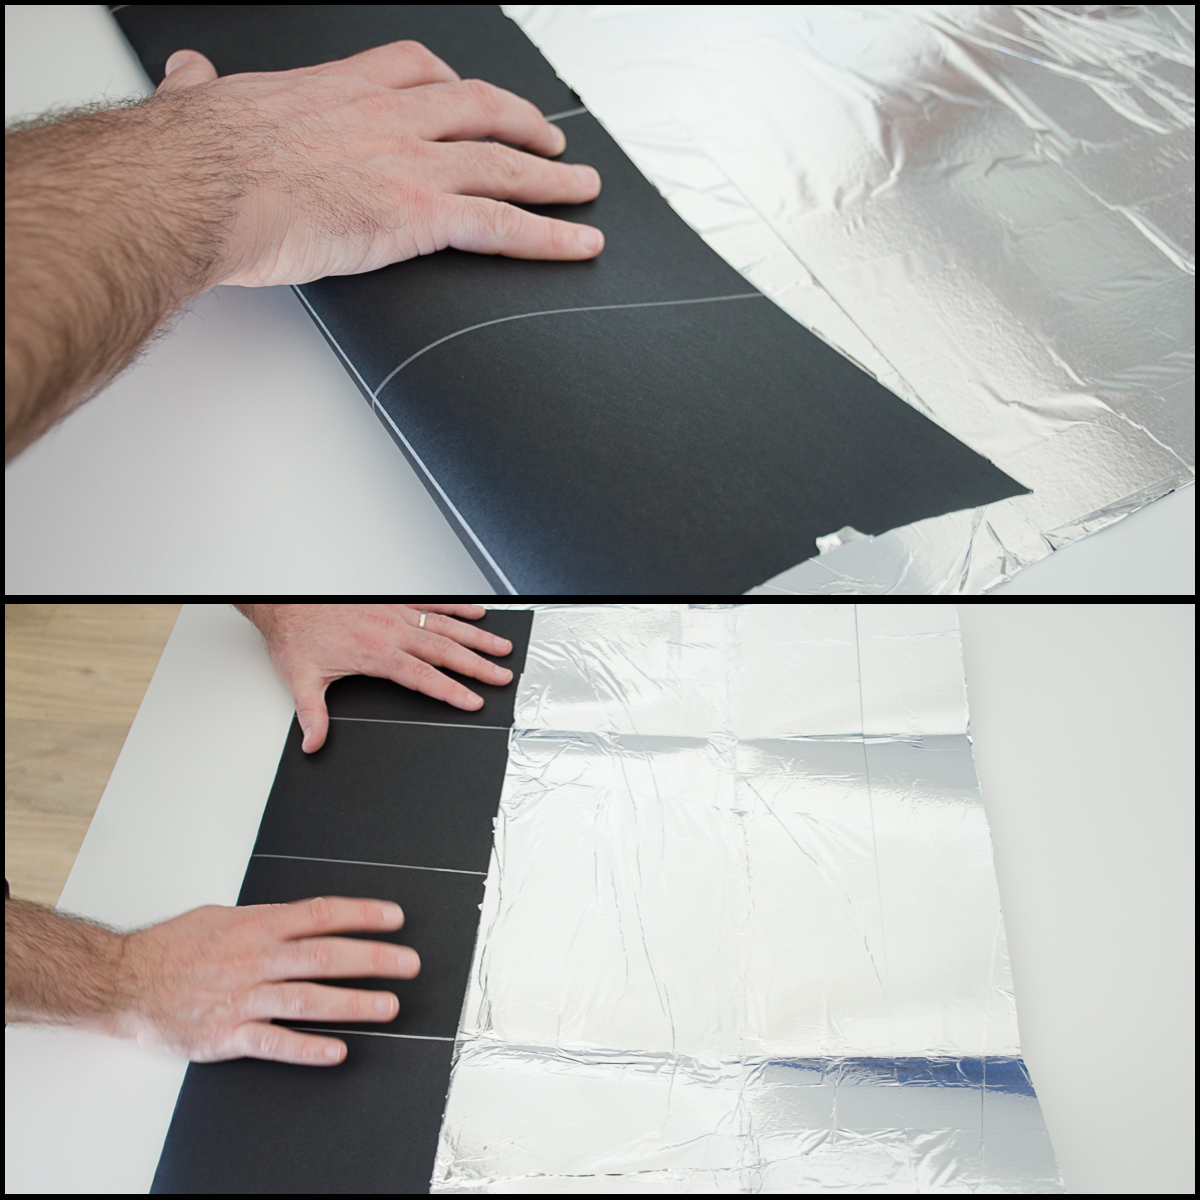
DIY softbox

Step five:

Fold the corners of the board towards the grid line closest to the corner, creating an octagon.
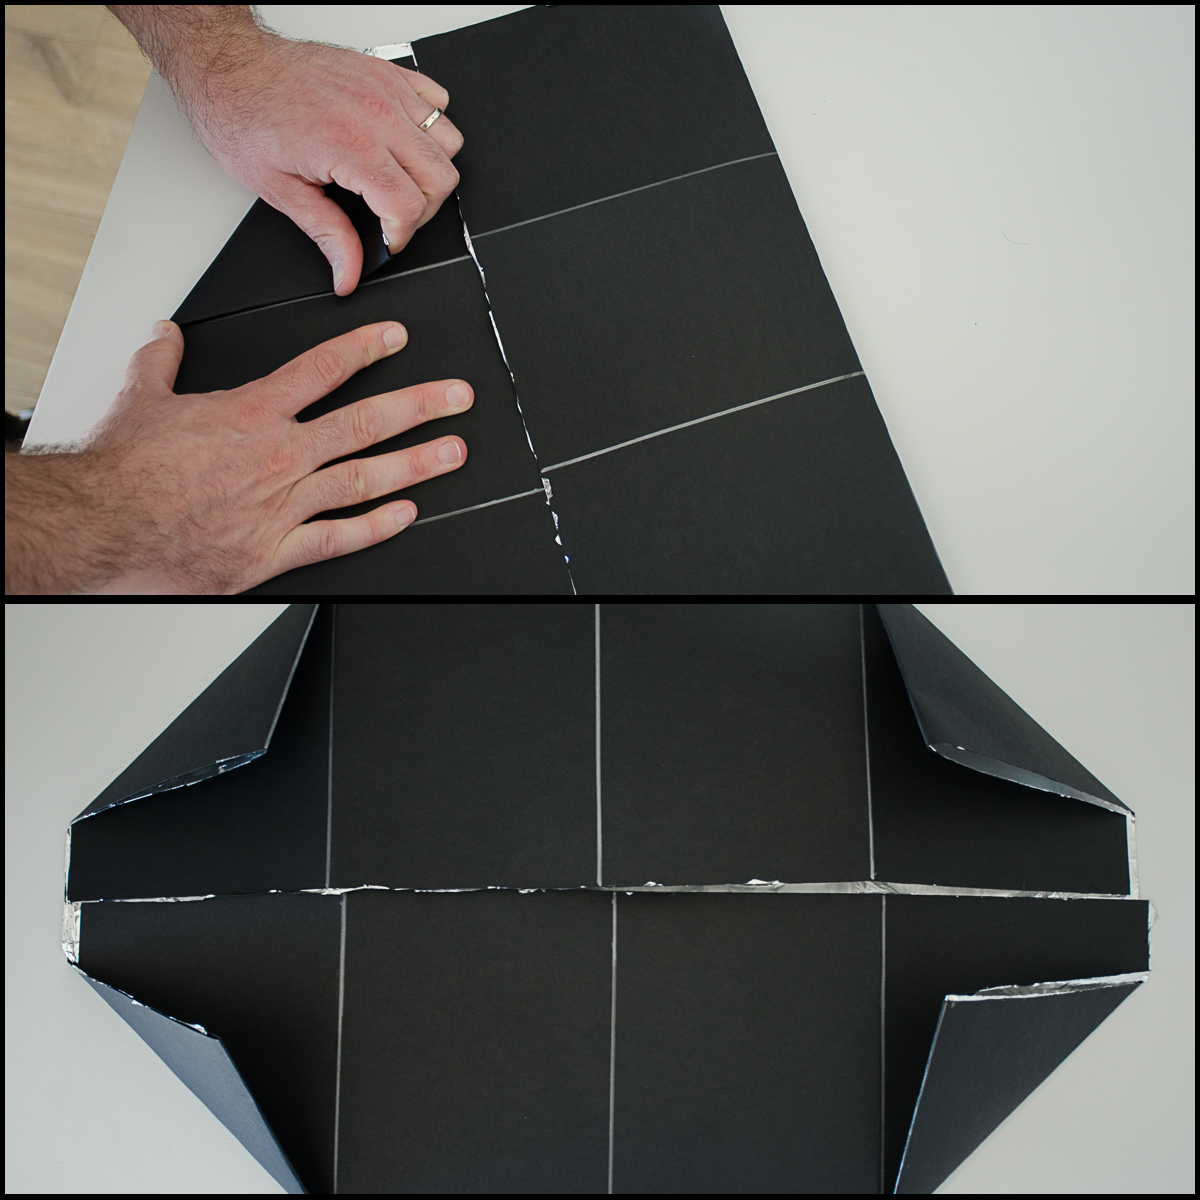
DIY softbox

Step six:

Place strips of double sided cello tape on the folded corners to attach them to the board.
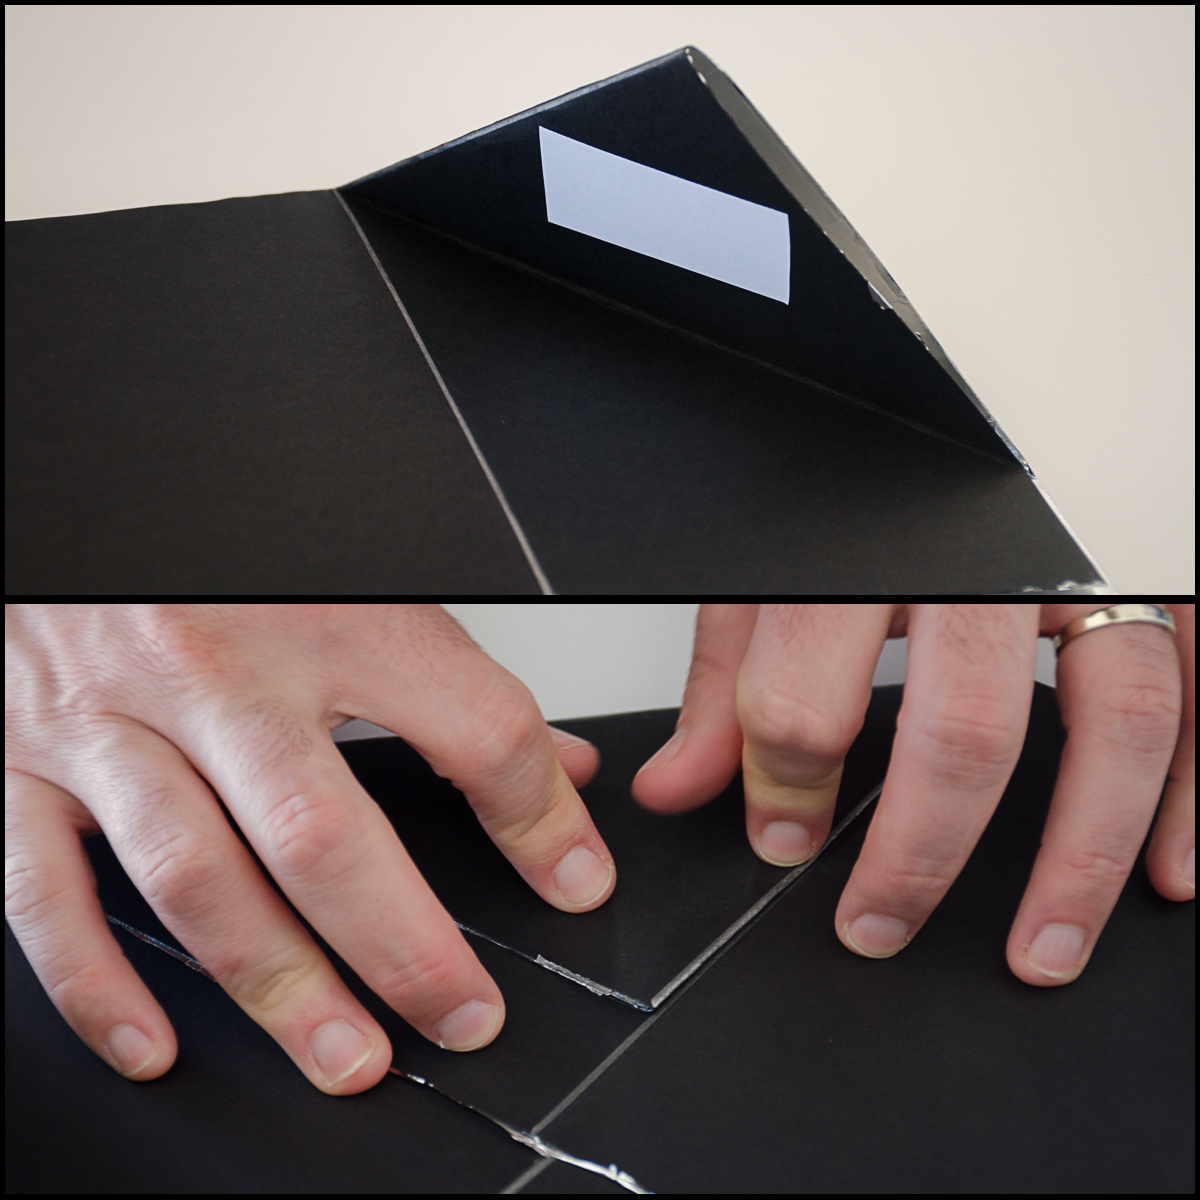
DIY softbox

Do the same along the edges of the board and fold them backward, over the corners, creating lips.
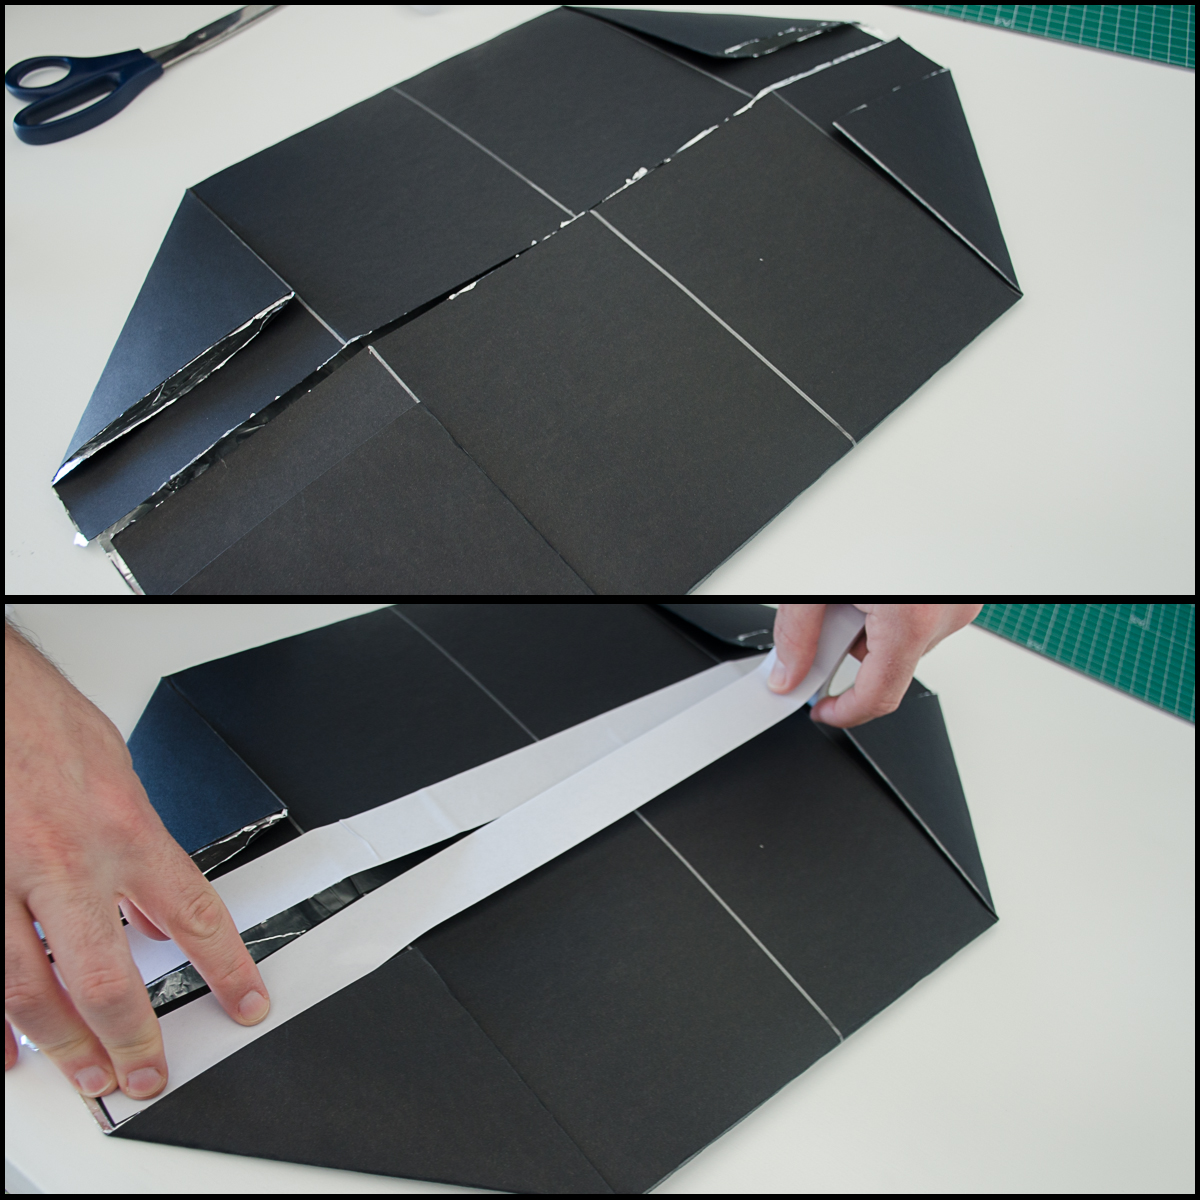
DIY softbox


DIY softbox

Step seven:

Hold the each lip between your finger and your thumb and start pulling the away from each other. You will see that by doing so, the sides of the board will rise upwards to form a box.
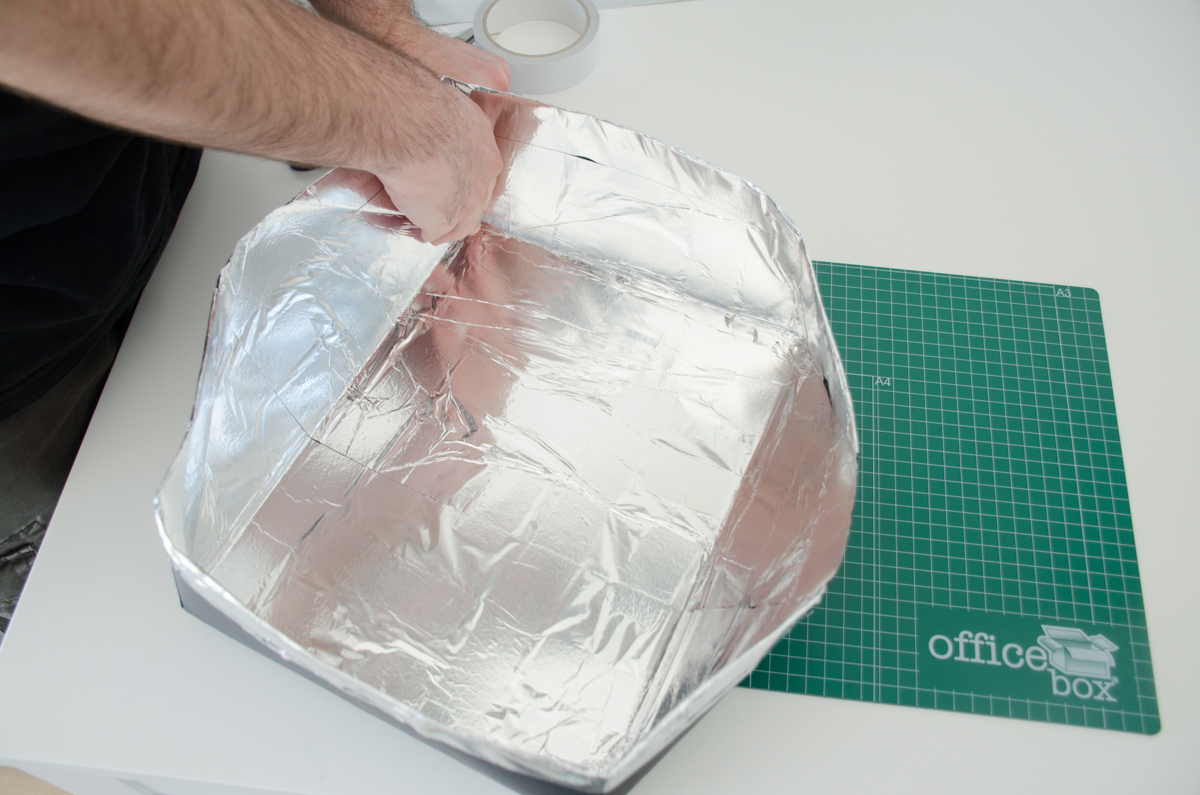
DIY softbox

Step eight:

Strengthen the structure of the box by going over the corners, pressing on them lightly
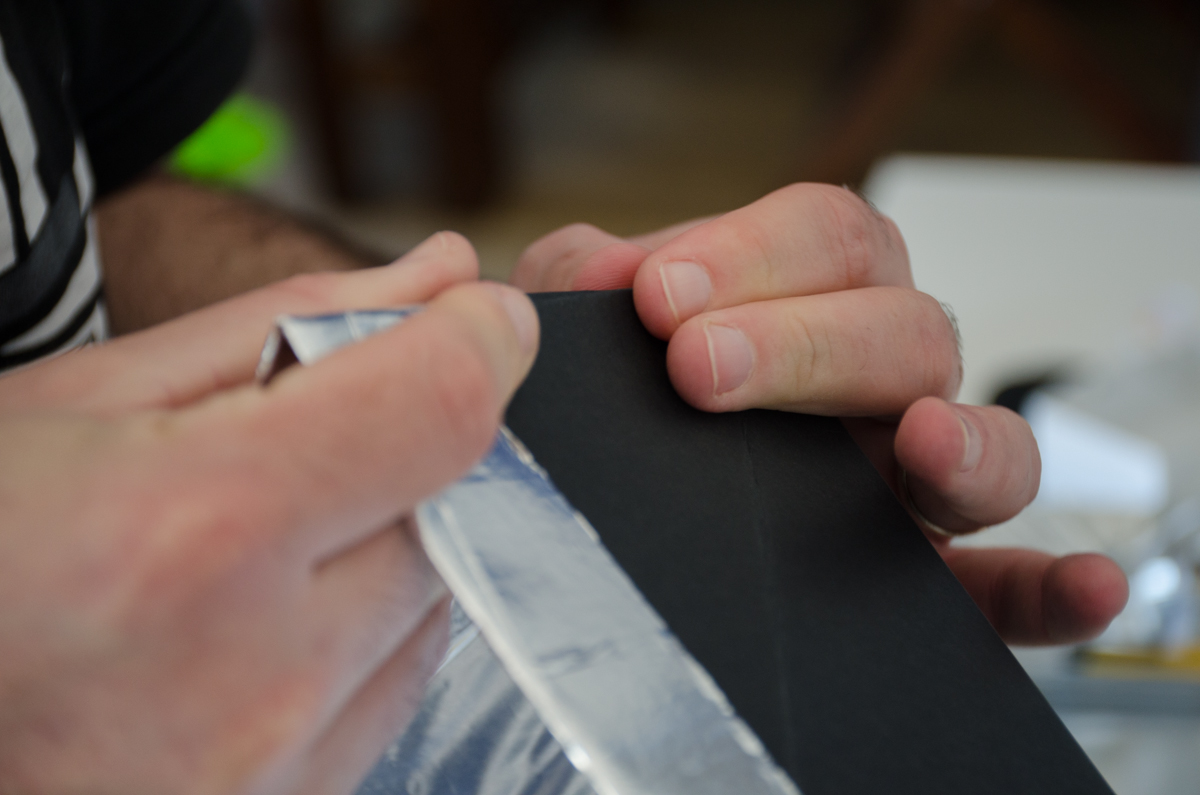
DIY softbox

Step nine:

Take your light source (in this case I used a flash) and draw its outline around the center of the base of the box, this will be the hatch through which you will insert your light source.
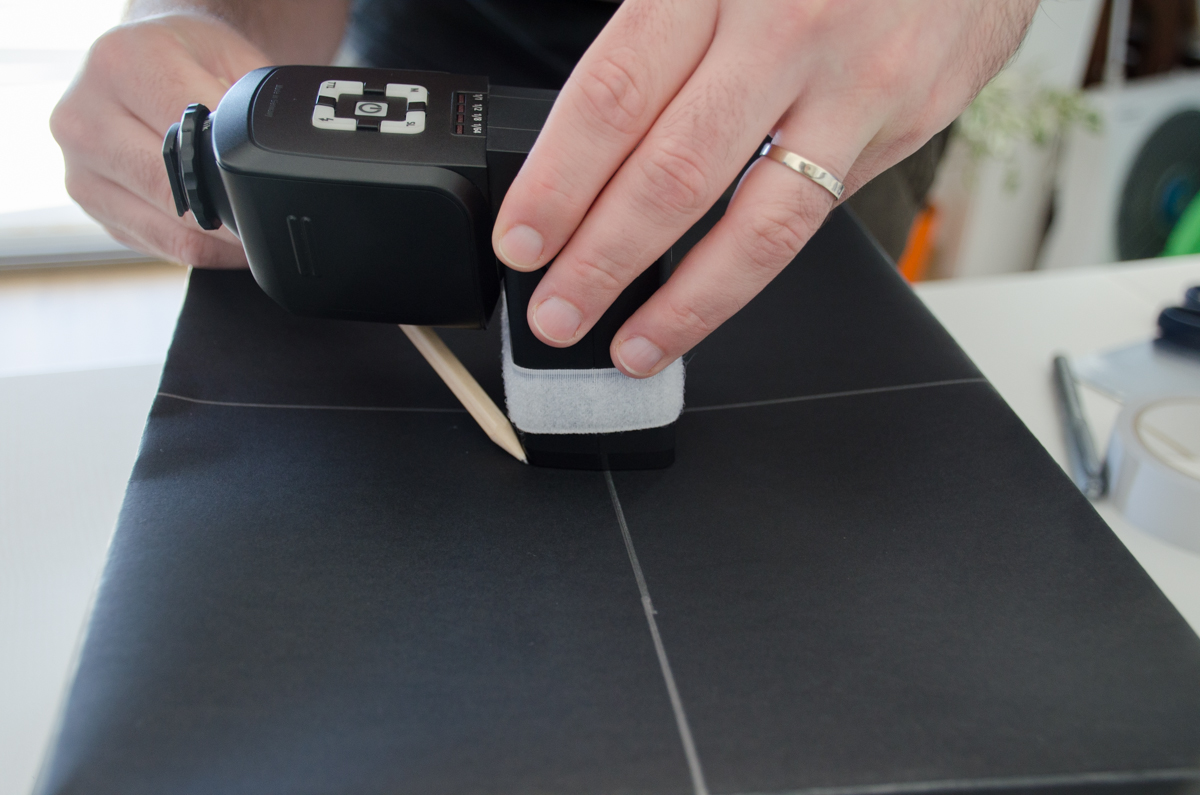
DIY softbox

Step ten:

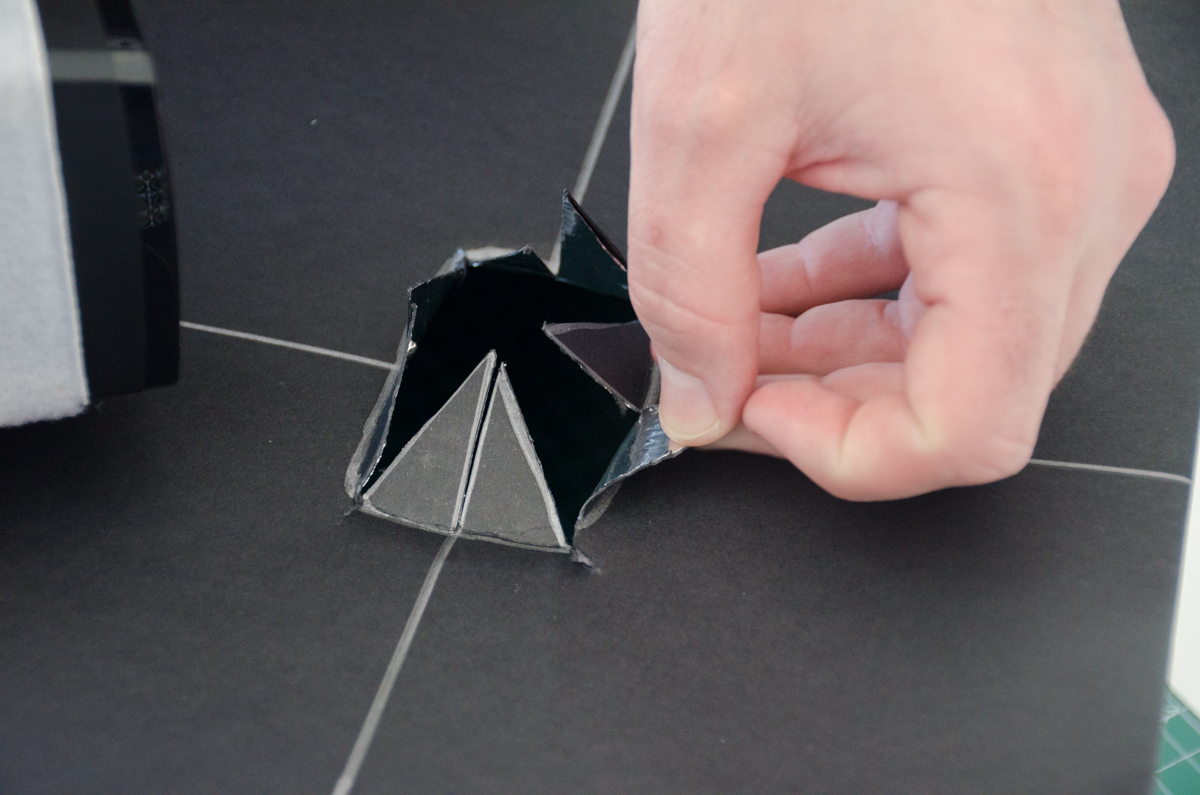
Divide the area of the hatch into eight sections and cut with a utility knife along the lines of the sections, then fold the flaps outwards.
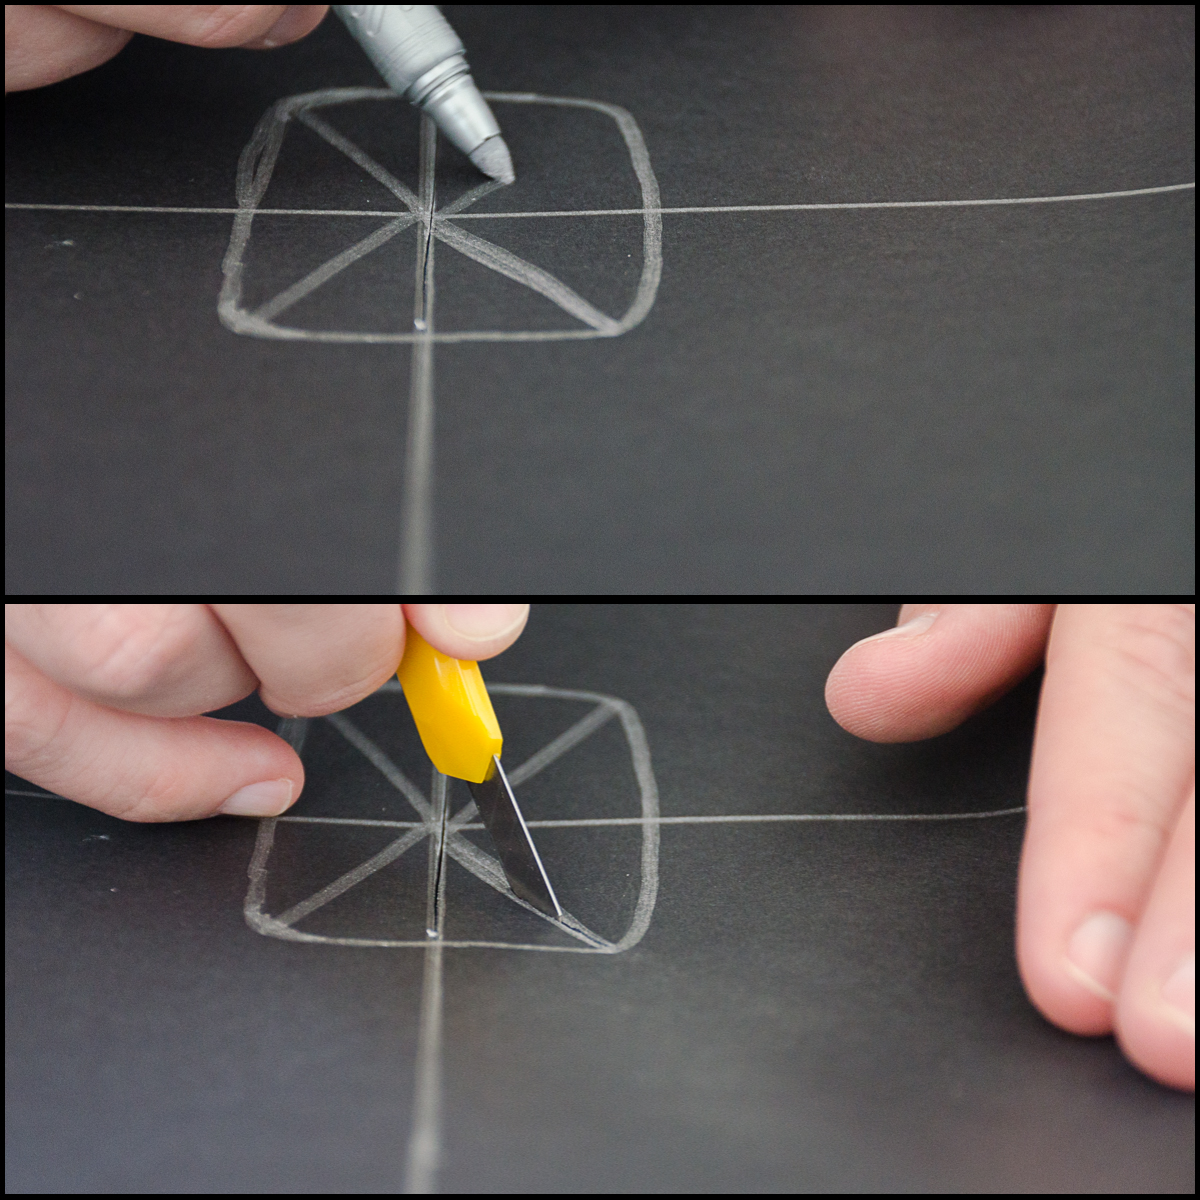
DIY softbox


DIY softbox


Step eleven:

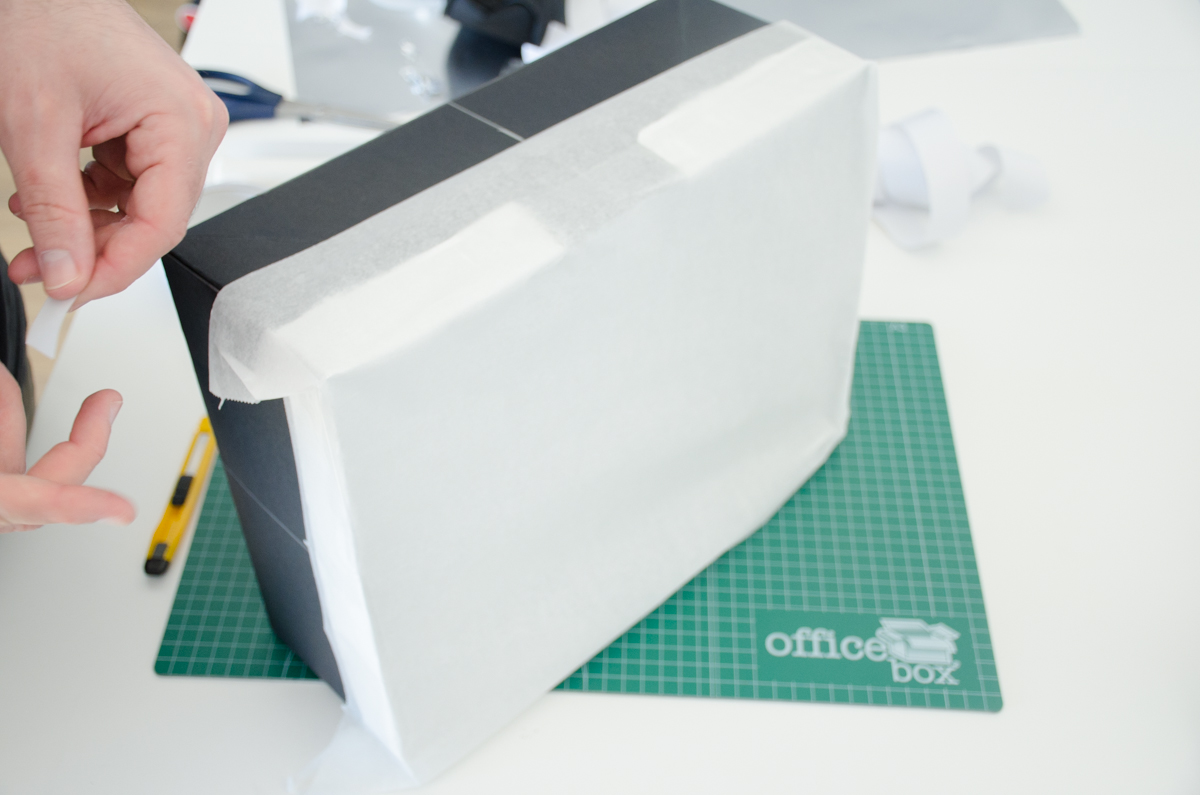
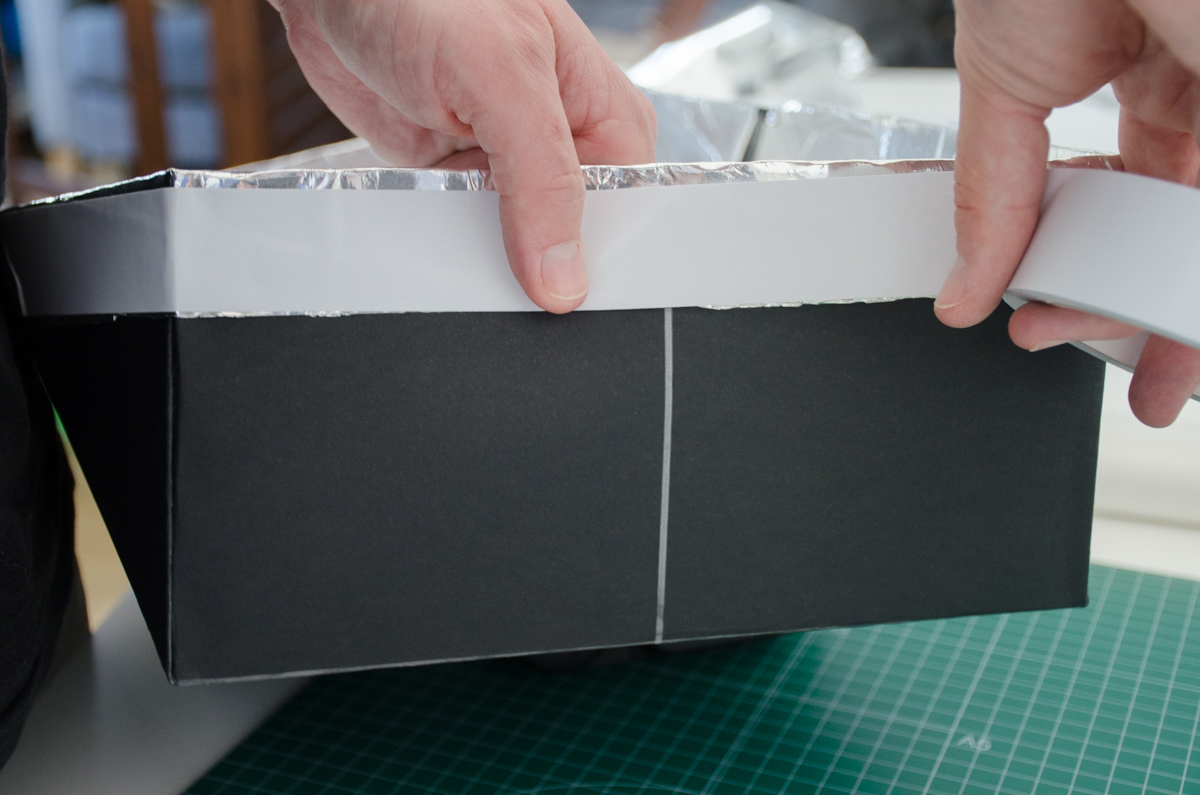
Take a sheet of baking paper (or other thin paper) and put it over the open side of the box, attaching it with any kind of adhesive (if you want to make the box foldable you can use Velcro  instead of glue or tape).
DIY softbox


DIY softbox

Step twelve:

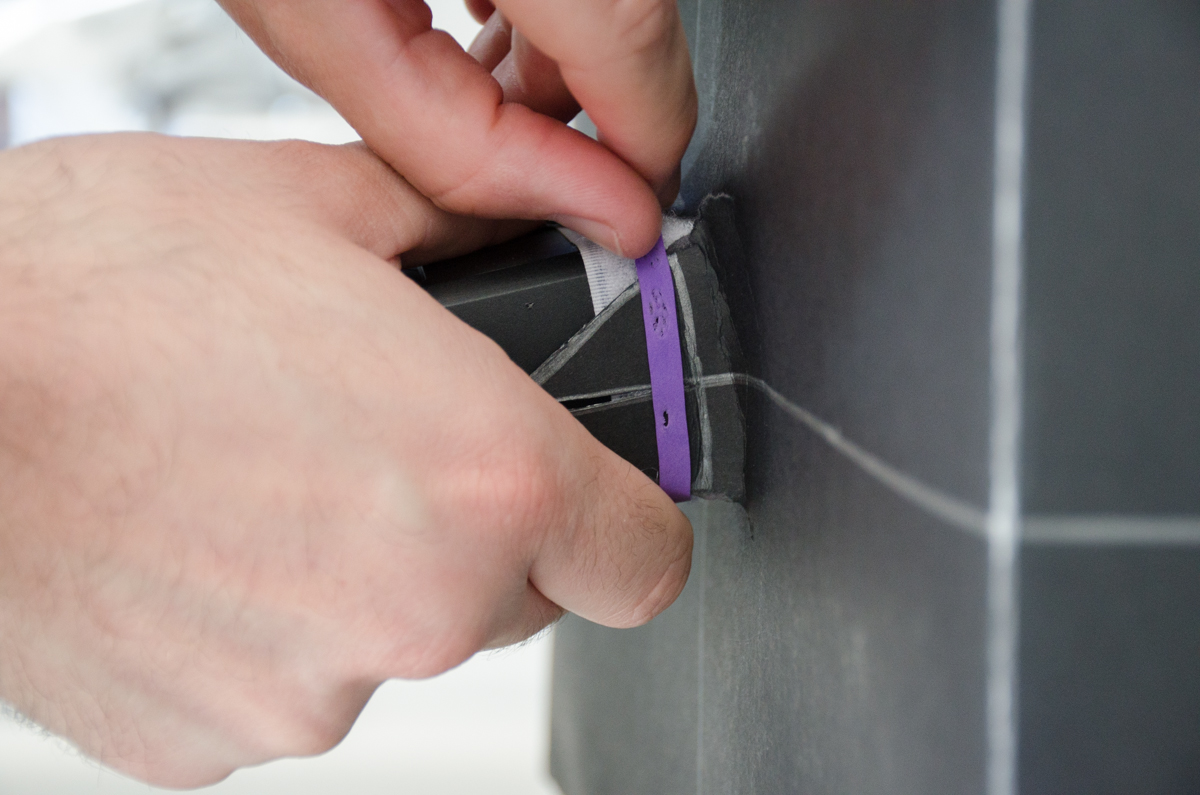
Fit your light source through the hatch with the Hatch’s flaps overlapping the light source. Tighten the grip of the softbox on the light source with a rubber band.
DIY softbox

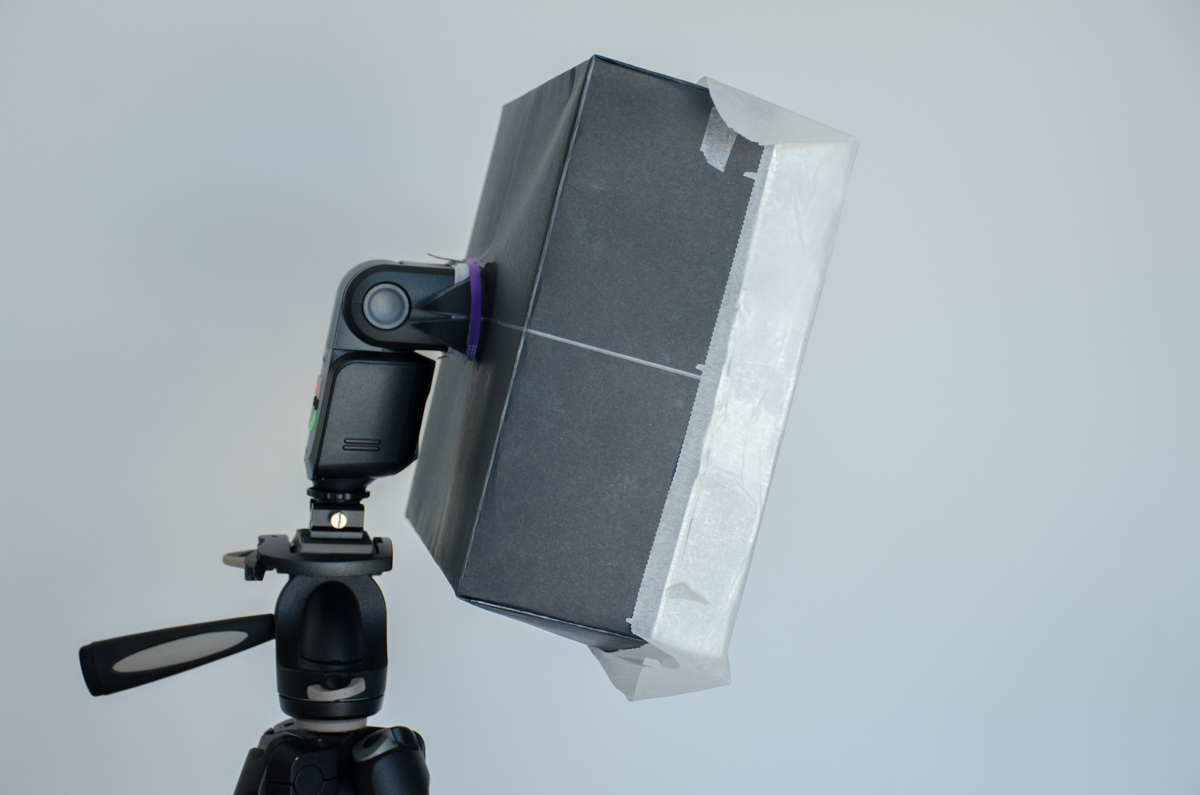
And there you have it! You very own, homemade softbox!
DIY softbox

I hope you find this article helpful, if you have any ideas and remarks for improvement, or if you would like me to make more DIY articles please let me know, have a happy shooting!!!

10 Great Softbox Lighting Techniques and Effects

A softbox is one of the most versatile tools at your disposal as a photographer. It can give you the light you need for your photos, while preventing harsh angles, deep shadows and more. It will ensure that everything in your photos is balanced. There are many options for what you can do with a softbox; all it takes is knowing some great techniques to get the right amount of light for your picture.

Here are 10 fantastic lighting effects that you can achieve with just one softbox at your disposal.

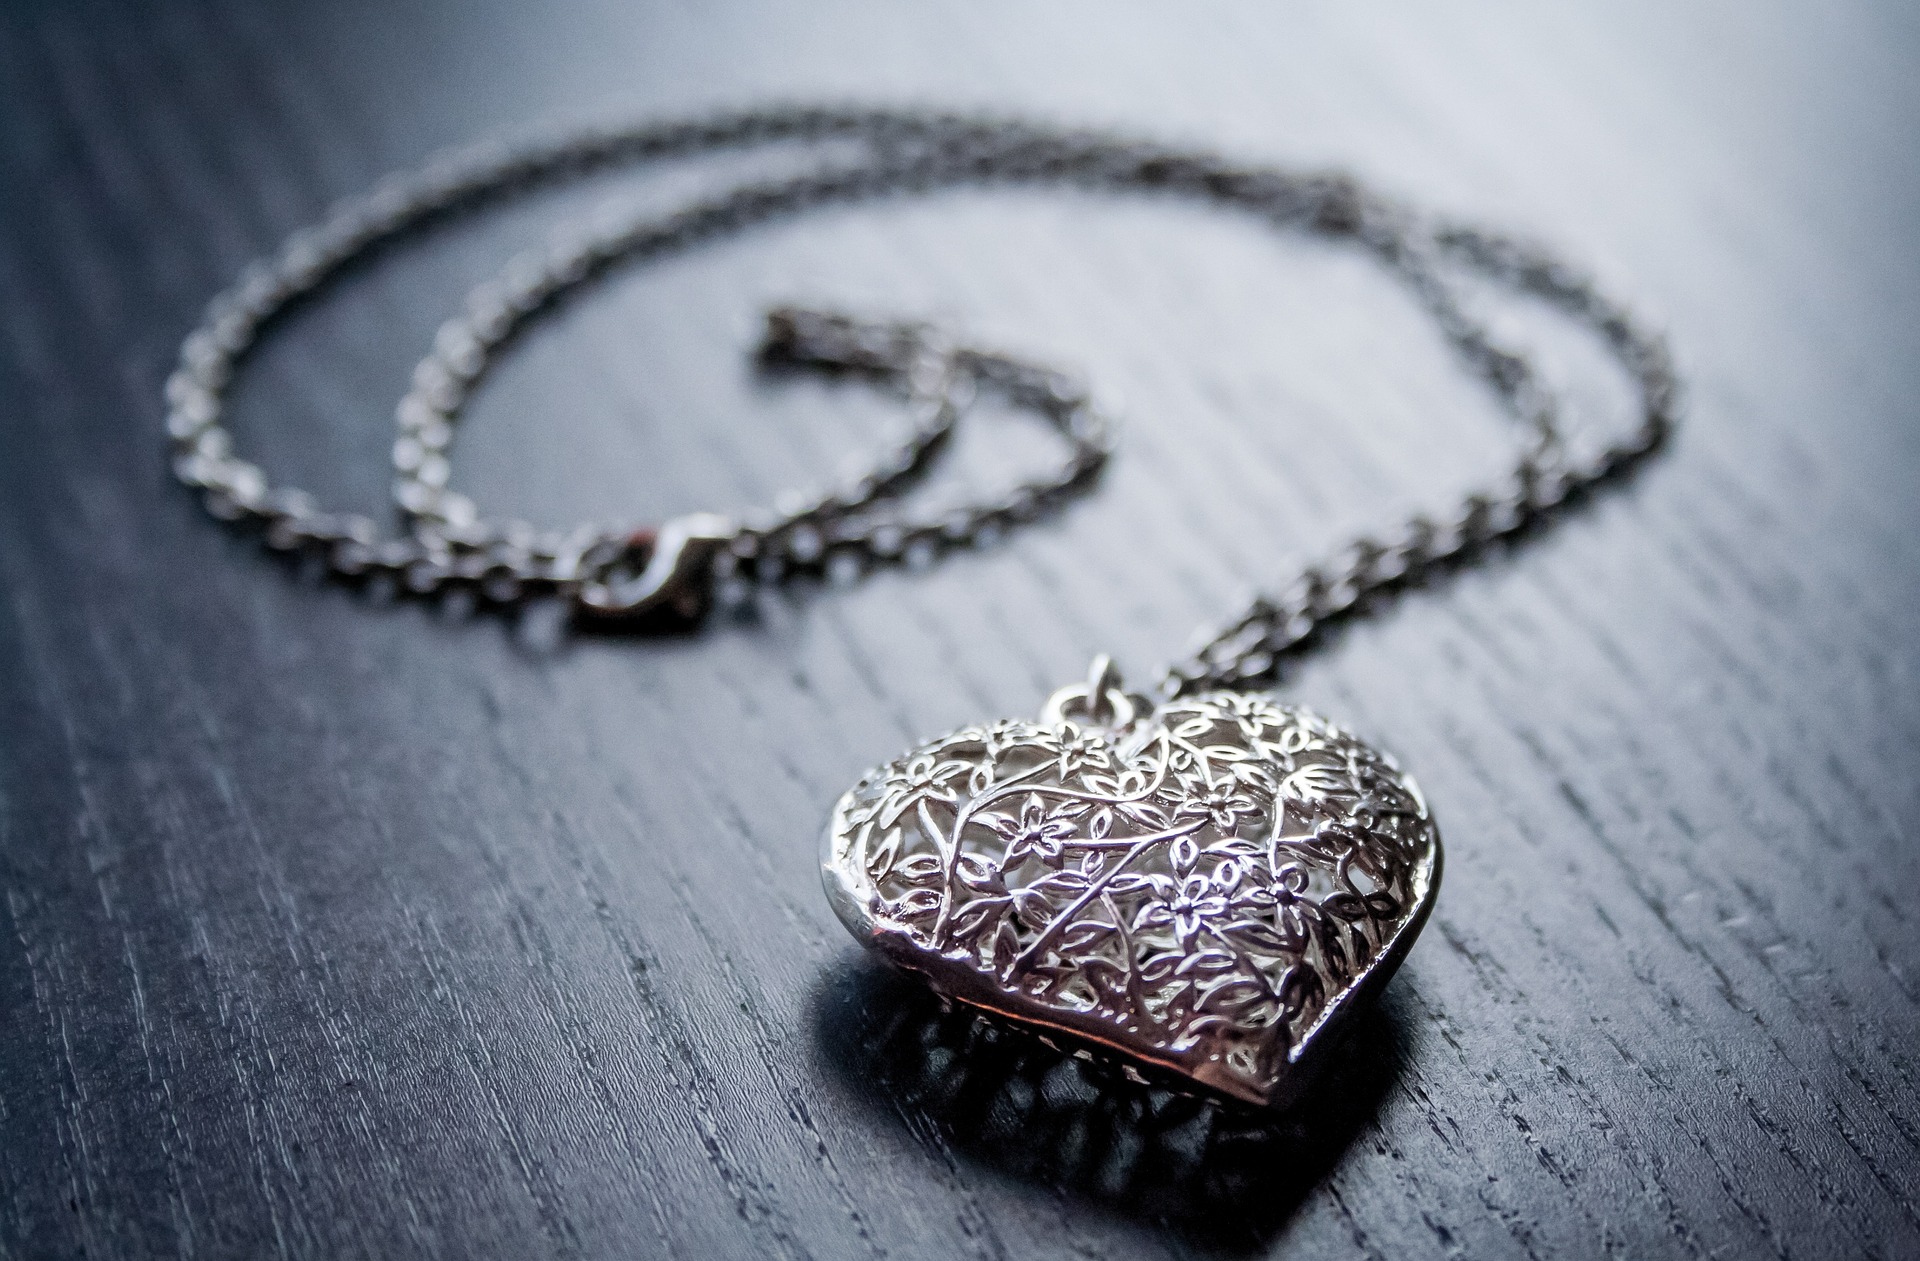
Getting the Jewel Light

A great jewelry shot is all about the lighting. To get a wonderful picture that reflects the beauty of the jewelry, all you need is one softbox, the jewelry itself, along with a shiny surface and some white poster board. Place the piece of jewelry on the surface, with the poster board off to the side at an angle. Place the softbox to the side as well. Once everything is shining and reflecting, take the picture.

softbox-lighting-effects-1

Window Softboxing

Take translucent silk and have it in front of the softbox. About five feet in front of that silk, opposite the softbox, have the model sit facing the light. This will give the light a feel of coming in through a window, and it can make for some very unique photos.

Light the Subject and Background

If you want to give equal light on the person you are photographing and the background itself, this is quite easy to do with a softbox. Just have the subject stand at an angle to you facing the light. The softbox should only be about one foot from the subject, and at nearly a 90-degree angle from them.

softbox-lighting-effects-2

Highlighting Beauty

A softbox is a great way to highlight a model’s beauty. The simple and slight light can add to the features without making them harsh on the subject. All you need is one softbox with one reflector. The reflector should be down below to catch the light, and it will fill out the features of the face. Have a plain background behind the subject.

Use it as a Rim Light

When you are doing a profile picture, you can have a front profile and you can have a back profile. With the one softbox, just place it at an angle behind or in front of the person you are getting a photo of to create that rim light and to provide a slight light on the subject.

softbox-lighting-effects-3

Movie Poster Light

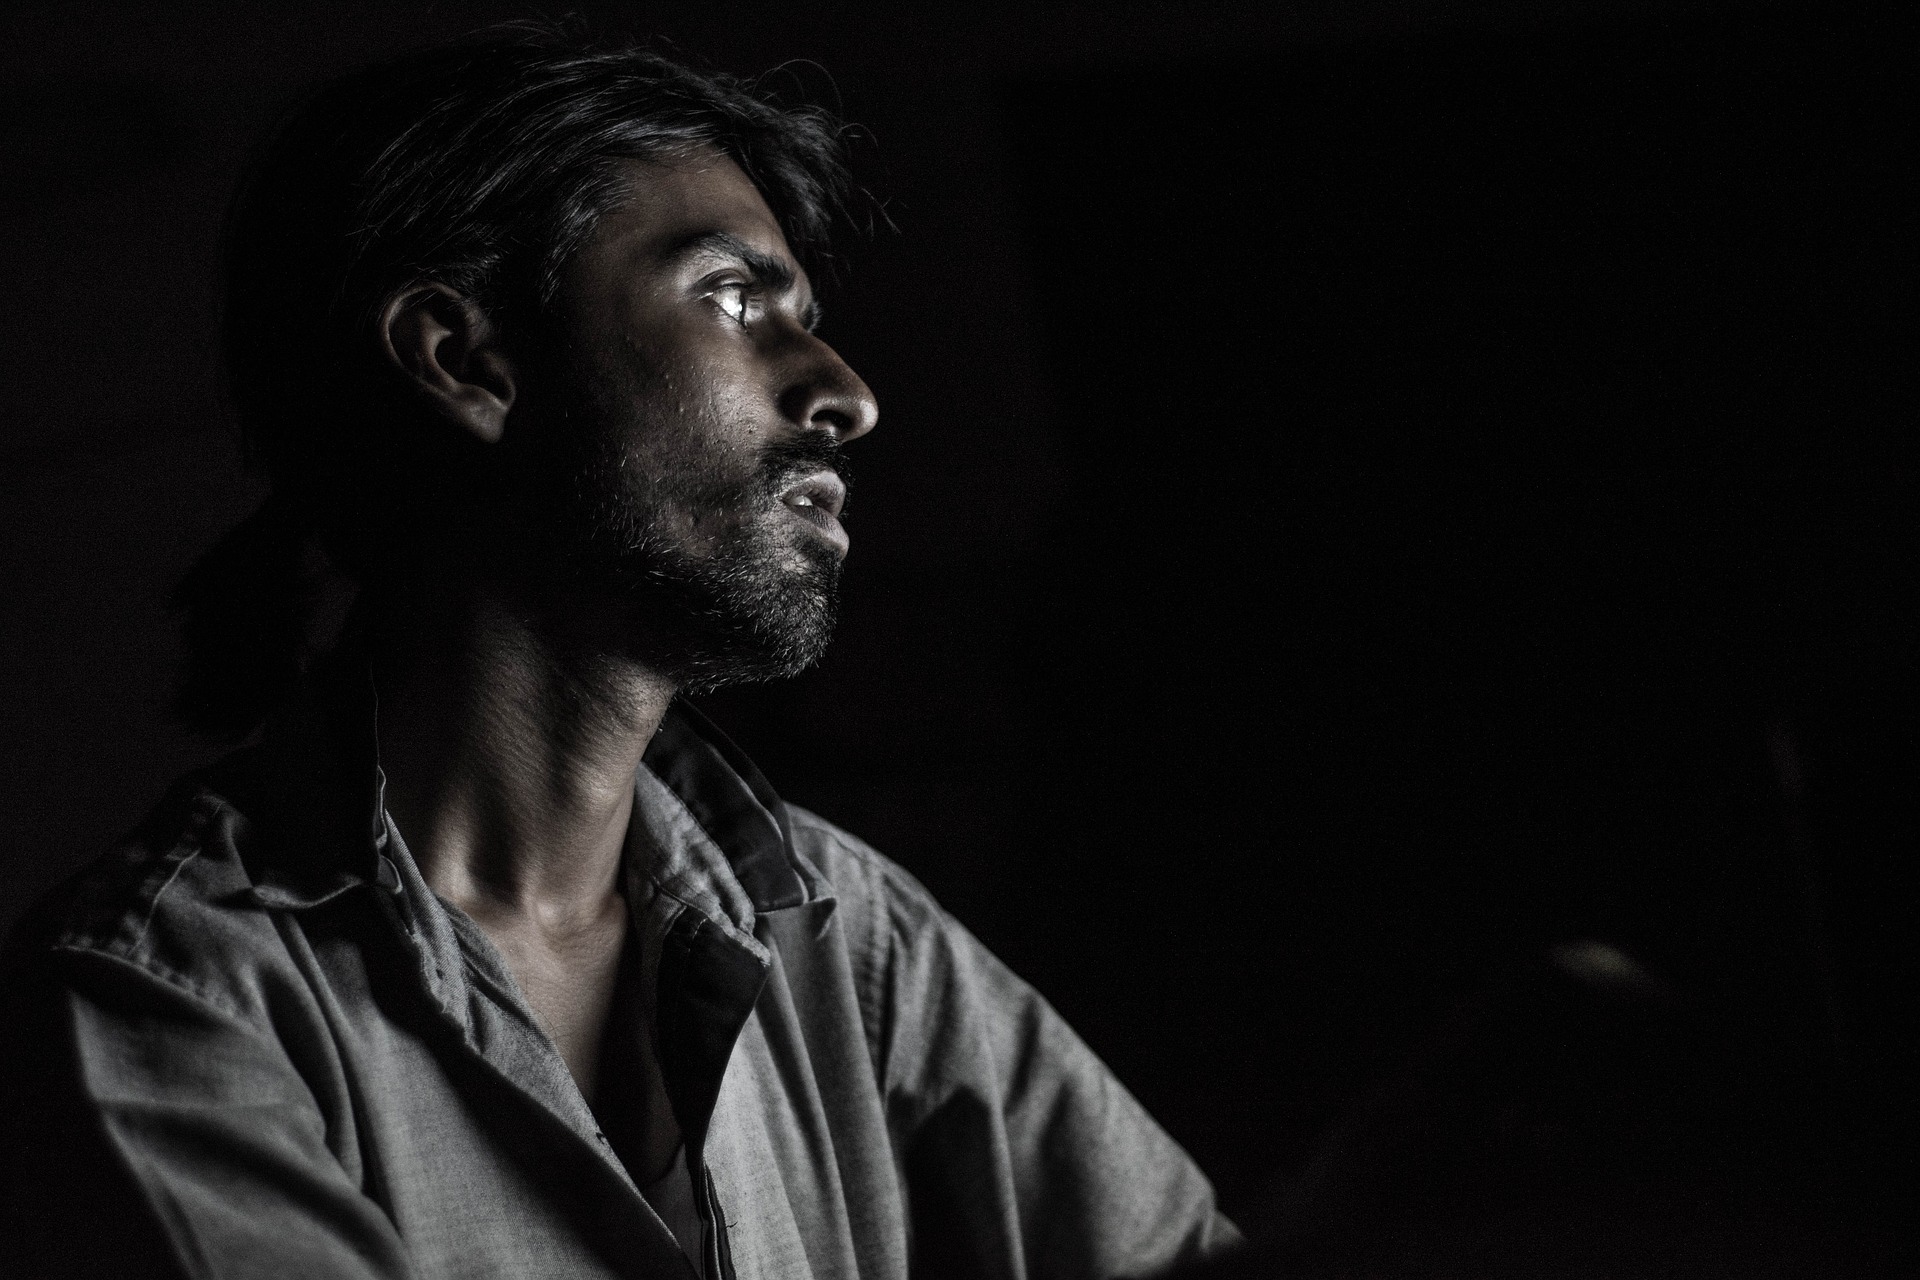
Using a softbox, have it lower than the person you are photographing and off at an angle from them, about 45 degrees. The person looks down at the light as you get the picture. This will highlight their features, provide some deep shadows, and darken their back area.

Softbox as a Background

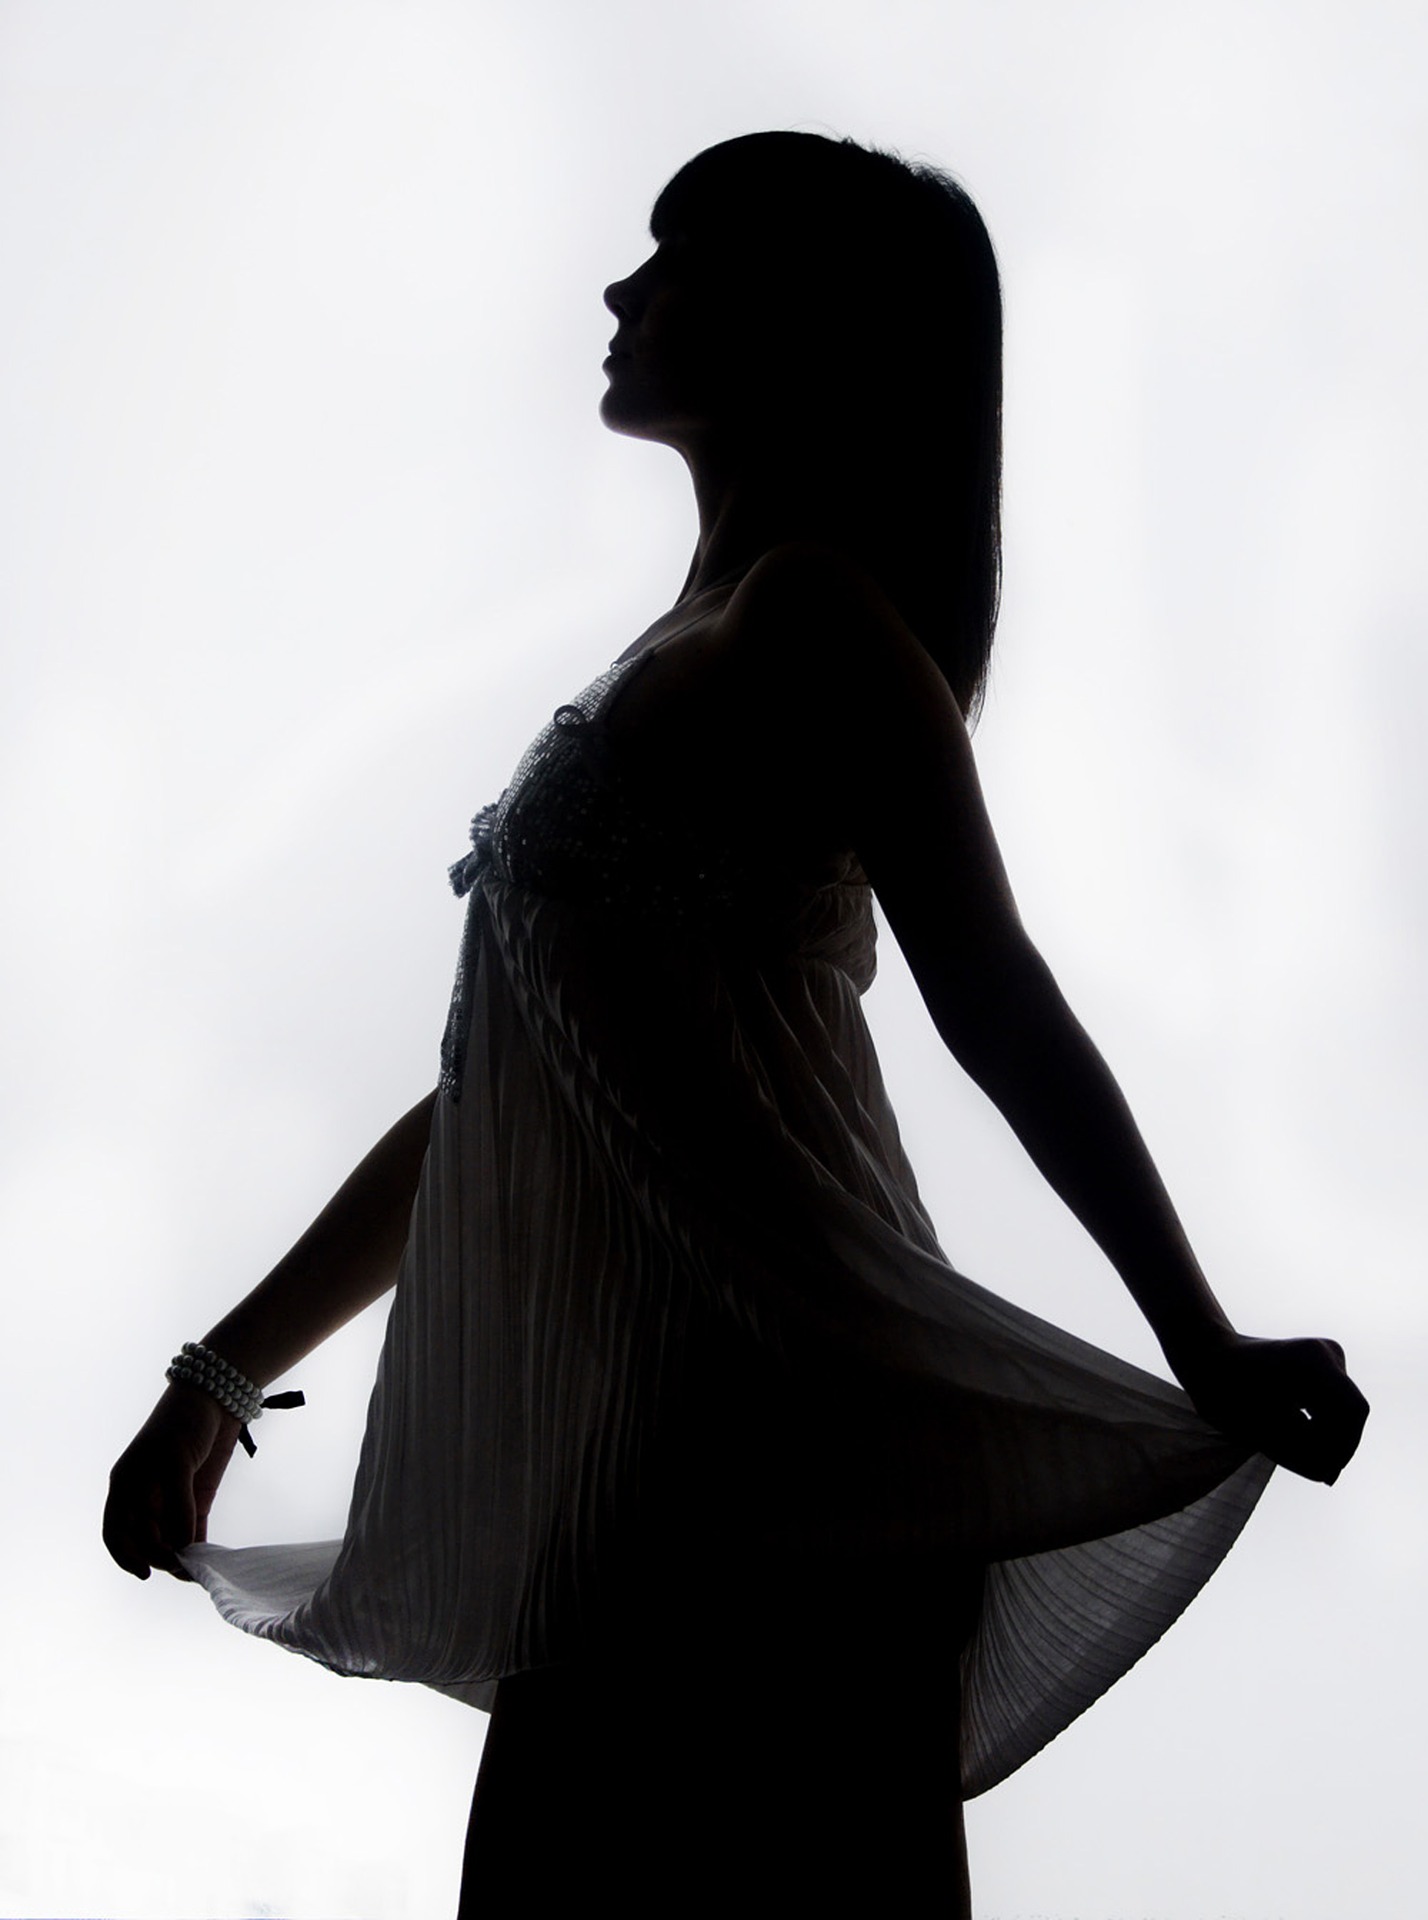
To get an amazing silhouette all you need to do is have the model stand in front of the light source itself, about one foot in front. Then take a picture of the model with the light behind them so you get clean, crisp silhouettes.

softbox-lighting-effects-4

Softbox Bouncing

In order to increase the light you have with only one softbox at your disposal, you can bounce the light off a white wall. Have the model stand in front of the camera, with the softbox next to you pointing towards a wall. This will provide a great deal of extra light as it reflects off the surface to give a lot of definition on the model, especially on the side facing the white wall.

An Element of Design

If you are taking a picture of an object, have the softbox off to one side facing towards a reflector on the other side with the object in the middle. Set your camera up between the softbox and the reflector (a foam core reflector works) and back about five feet. You will get some great light from this, especially with reflective products like bottles or glasses.

softbox-lighting-effects-5

A Group of People

If you only have one light and you want to get a group of people evenly lit, it may seem very difficult but, really, it’s not. All you need to do is have everyone stand in a line and turn the light source horizontal. At this point, you move the softbox down the line, taking one photo of each individual person as they’re lit perfectly. In post-production, you can put it all together and you will have an evenly lit photo of a group of people. It is actually multiple photos together, but with the editing it will look like it was taken with everyone all at once.

These tips will help you get the most out of your softbox, without having to buy another one, or any other form of light source. Great for photographers on a budget or just starting out.

Umbrellas vs. Softboxes: Key Differences

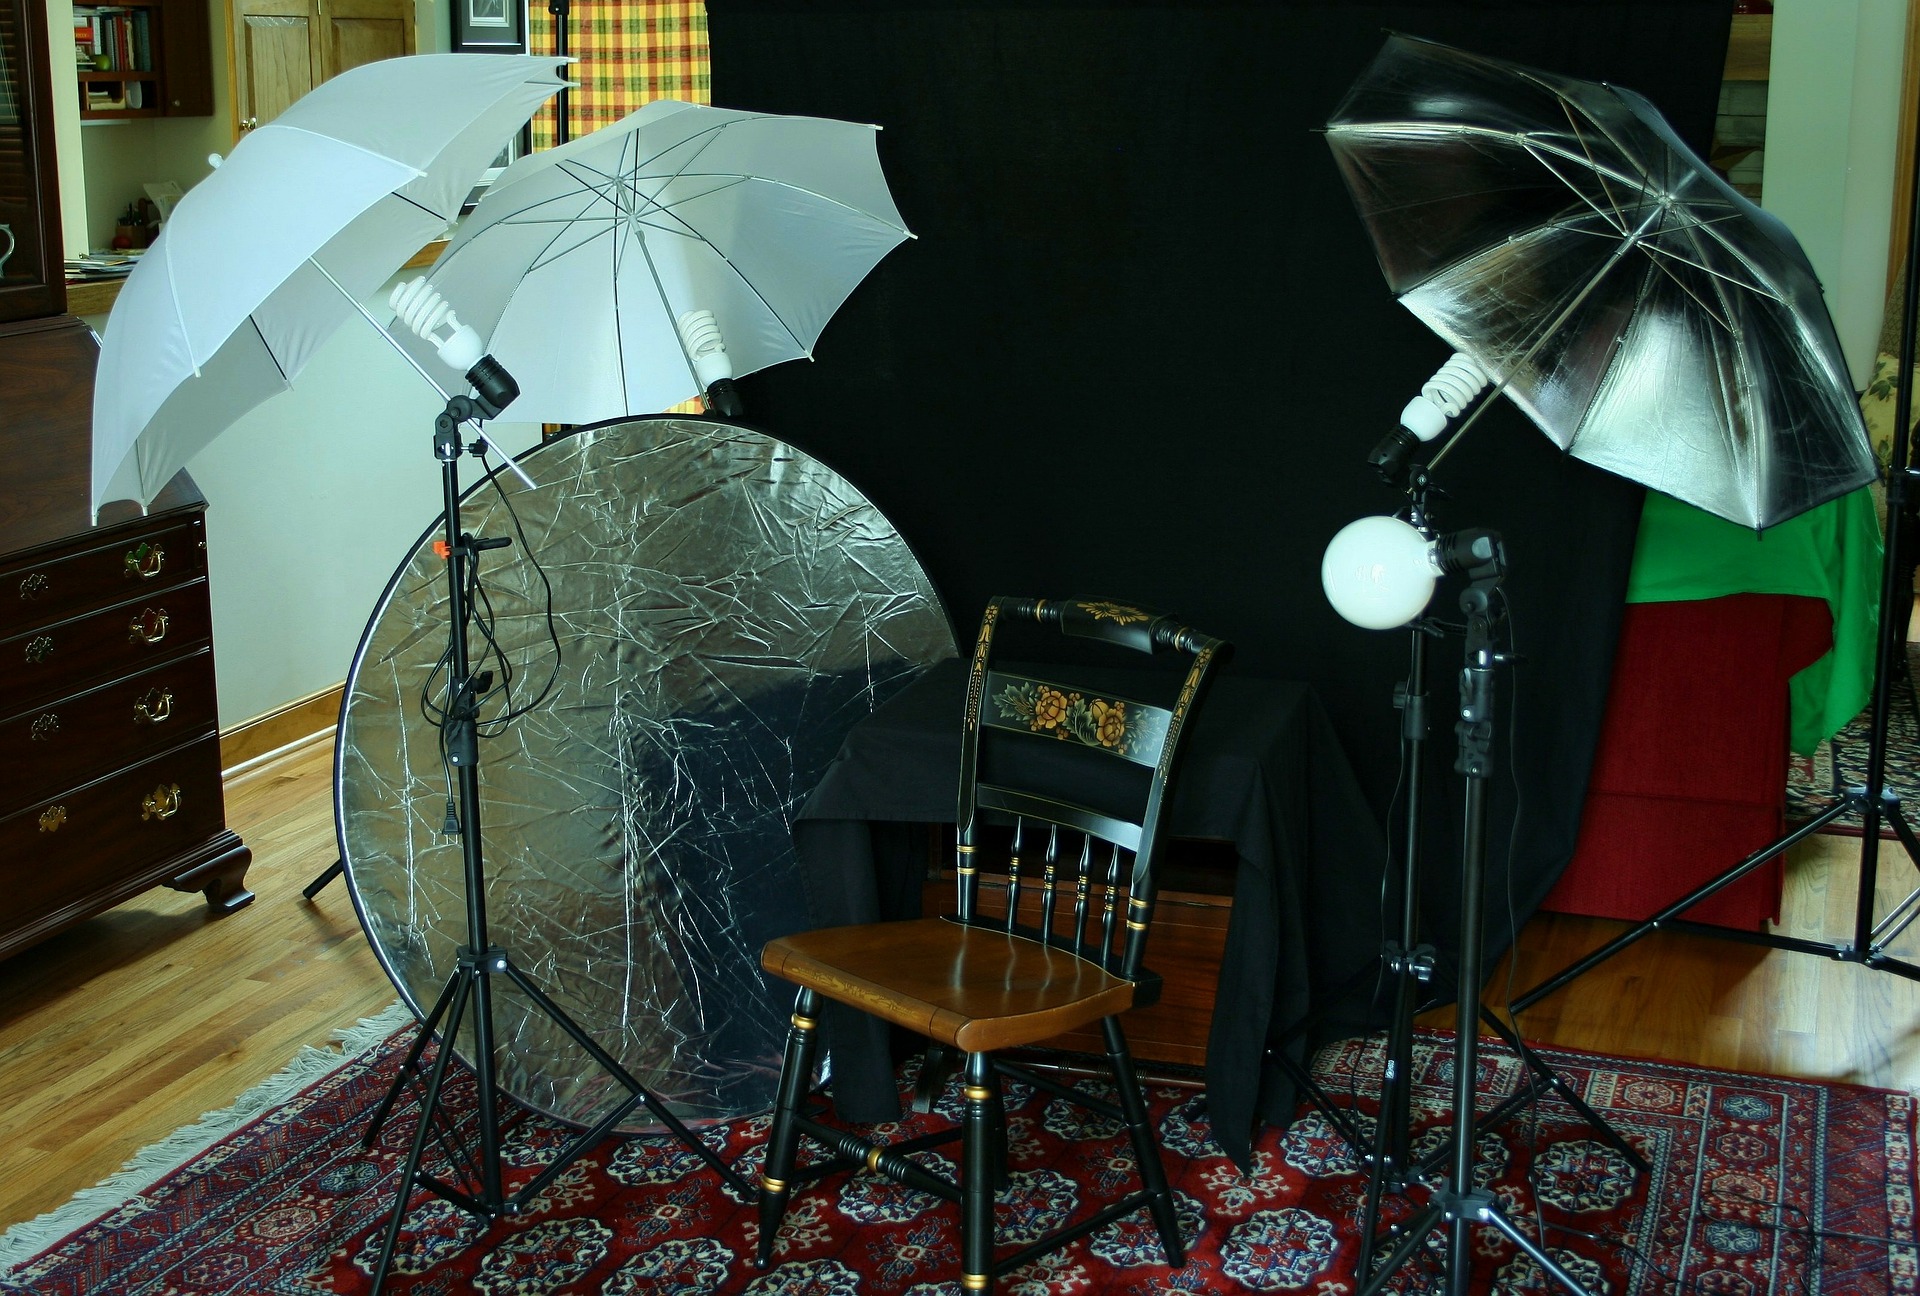
Today we discus Softboxes vs Umbrellas. When you see a professional photographer setting up for a photo shoot, you probably see some weird looking lights. You may see some lights that look like they have an umbrella attached, and you may see some that look like big boxes of light. These are umbrellas and softboxes and they are vital parts of any photographer’s studio.

Studio lighting is very important and it comes down to the lighting. The question you have to ask yourself is whether or not you want softboxes or umbrellas for your lighting. They both have benefits and disadvantages, and it all depends on what exactly your needs are. Both are highly beneficial to your studio, so getting one or the other is going to improve things no matter what.

Why Choose Umbrellas?

umbrellas-softboxes-1

Let’s dive into umbrellas first.

An umbrella looks exactly like an umbrella, except it is often white or opaque, and it helps spread the light around. The umbrella is highly versatile and one of the biggest benefits of it is that it will create extra light when you need it, but also create more dimness and darkness when you need that as well. You can choose translucent umbrellas because they are easier to close on a subject, or back away from a subject to create unique looks and lighting moods for your photography. You can choose reflective umbrellas though, to create a more uniform amount of light in the studio.

One of the biggest advantages to using umbrellas is the fact that they are excellent for macro photography. When you force light onto a subject in a macro setting, with light at different angles, you can get many different effects that can aid the picture you are taking. It can define the features of a subject, even if that subject is very small. It can also create a gentle light over the subject, allowing you to literally show it in a new light with your photography. Regardless of how you use the umbrella light, you are going to get some real advantages from it when you are taking macro photos.

umbrellas-softboxes-2

Why Choose Softboxes?

One of the biggest advantages of something like a softbox is the fact that they are very easy to use. They can be used by nearly anyone and may be the best option if you are new to studio photography and want to learn more about lighting before you upgrade to something like an umbrella light.

Softboxes are great because they can allow you to change the direction of the light on the subject by moving the softbox around the studio. This will let you play with lighting angles, shadows and more. When using a softbox, always take test shots first to make sure you get the right lighting from the softbox when you are shooting the subject.

One advantage of the softbox is also the fact that you can take it and move it directly in front of the subject, without washing the subject out, if you want to create a softer light on the subject. If a softbox is at a distance, it can result in a strong amount of contrast on the subject, or the subject being in harsh light. That being said, if you are finding the subject’s lighting is very flat, you can move the softbox around to a different angle in order to give more definition on the subject through the use of the shadows.

umbrellas-softboxes-3

Which One?

So, which one should you choose? Which one should you decide is best for you when you are starting up your new studio? It can be hard to choose but really it all comes down to your personal taste and what you need the lighting for. Are you shooting portraits? Product photography? Macro?

If you want to do lighting with more definition and you are looking to challenge yourself a bit more, then you should consider umbrella lights. They do tend to be more expensive and there is a learning curve but it is by no means too difficult to use an umbrella light. If you want something a bit simpler, and you aren’t worried about how defined a subject is, or you’re not doing macro photography, then a softbox is going to be the best option for you.

umbrellas-softboxes-4

Play around with both options and see which one is going to work best for you. Test things out. You may find you like the softbox, or you may find you prefer the umbrella.

Whichever you prefer, make the lights work to your advantage, and know how to use them so that your pictures stand out with proper lighting, excellent definition and striking shadows that make people see your subject in an entirely new light. That is the power that comes from something as simple as studio lights and the filter that is in front of them.