DIY: Softbox in Twelve Easy Stepswww.sleeklens.com
One of the neat things about photography is that you don’t need a lot in order to take photos; a camera, memory cards and you can start taking photos. However, as you advance in your field, you will discover that at certain conditions you need more gear than just the mentioned above: external flash, reflectors, diffusers, lenses and the list goes on and on. Some of these accessories are a must if you want to advance, others are really helpful and cheap, and so they are worth having. But what if you can’t afford the equipment? Or the retail company doesn’t deliver to where you are? What if you just want to get a feel for the equipment to see if you will use it before you spend your money? My favorite solution is to make one myself, and today I will show you how to make your very own softbox.
What is a softbox?
A softbox is a lighting equipment which provides soft and diffused light. It is a box-like, conic or pyramid-like structure that can be attached to a light source so that it will cover it. The softbox’s inner side is light reflecting except for the portion in front of the light source, that is light diffusing.
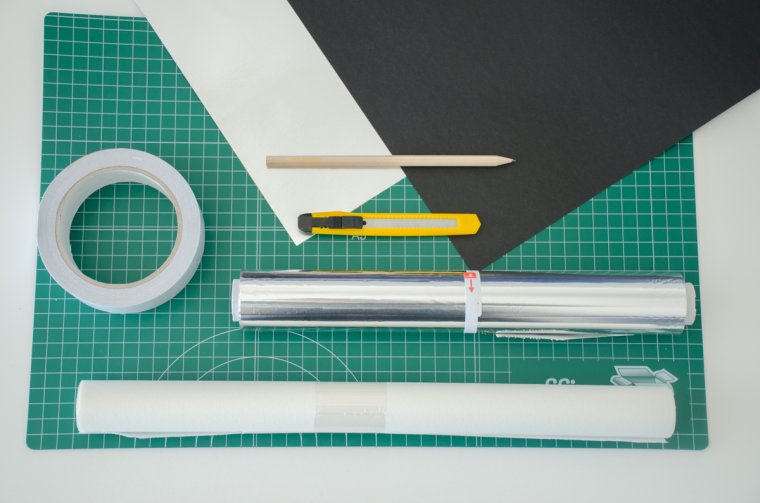
You will need:
Aluminum foil
Baking paper
Black Bristol board (or other black thick paper)
Glue or double sided tape
Scissors
Utility knife
Ruler
Pencil
Light source (lamp or flash)
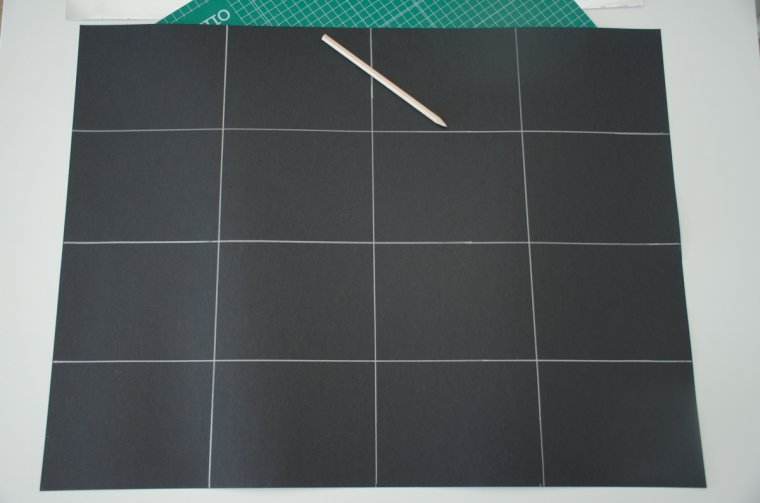
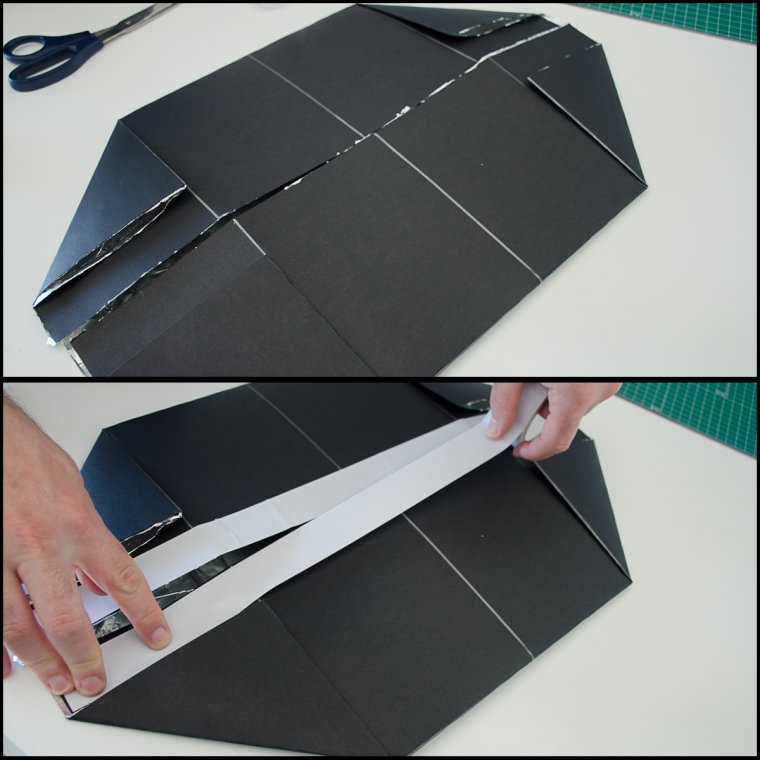
Step one:
Take the measurements of your Bristol board and draw a grid of three vertical lines and three horizontal lines, creating four equal columns and four equal rows.
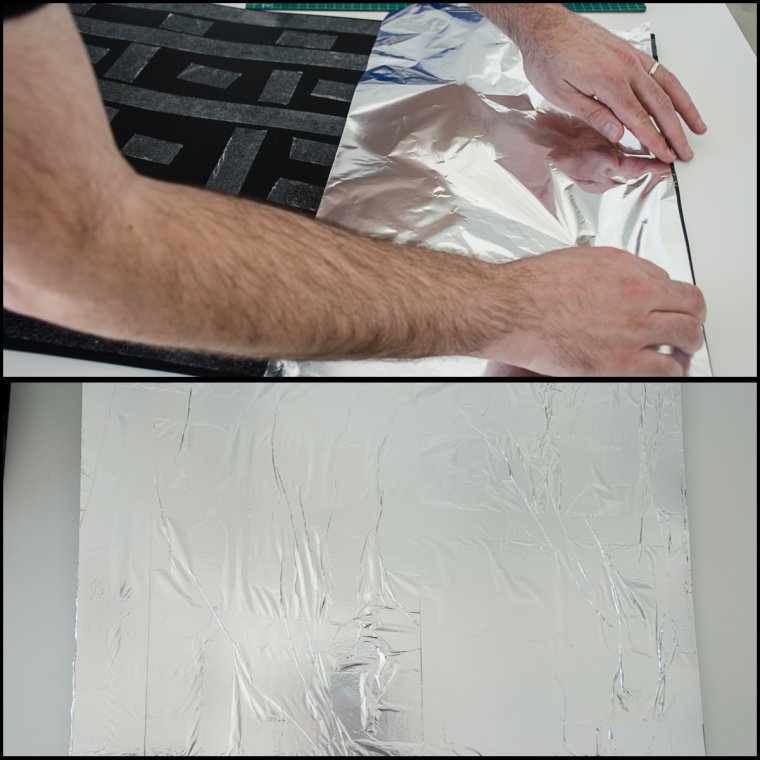
Step two:
Flip the Bristol board over. Place strips of double sided cello tape (adhesive tape) on the unmarked side of the Bristol board so that extensive part of its surface is covered
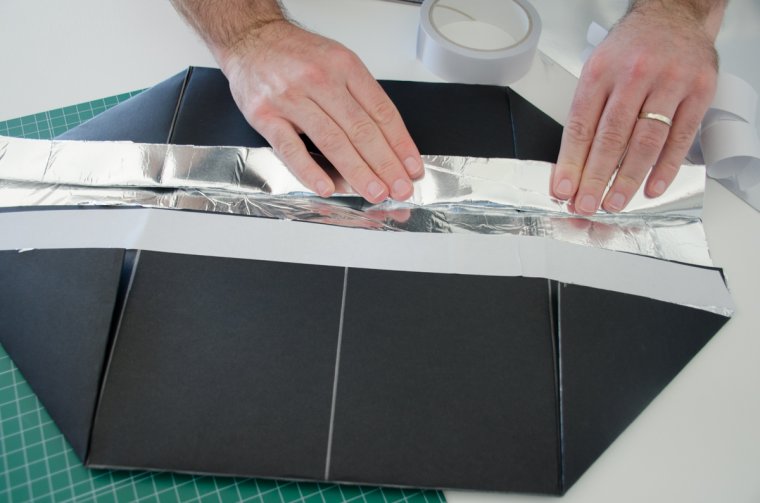
Step three:
Expose the second sticky side of the tape and attach aluminum foil to the Bristol board, cover as much as you can
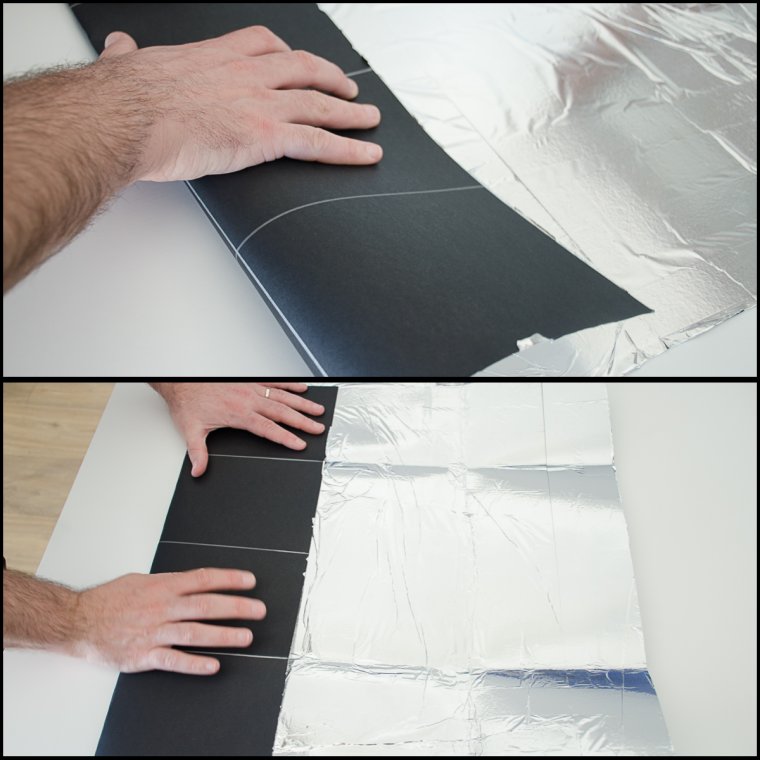
Step four:
Fold the Bristol board along the top and bottom vertical lines, creating two creases along the board. Unfold and repeat this action, this time on the top and bottom horizontal lines. Keep the board folded.
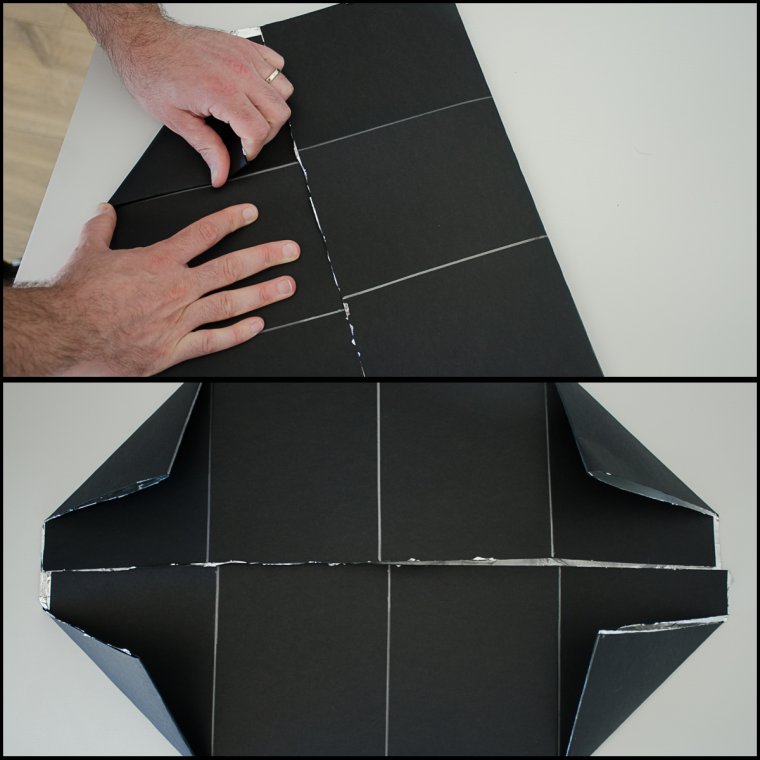
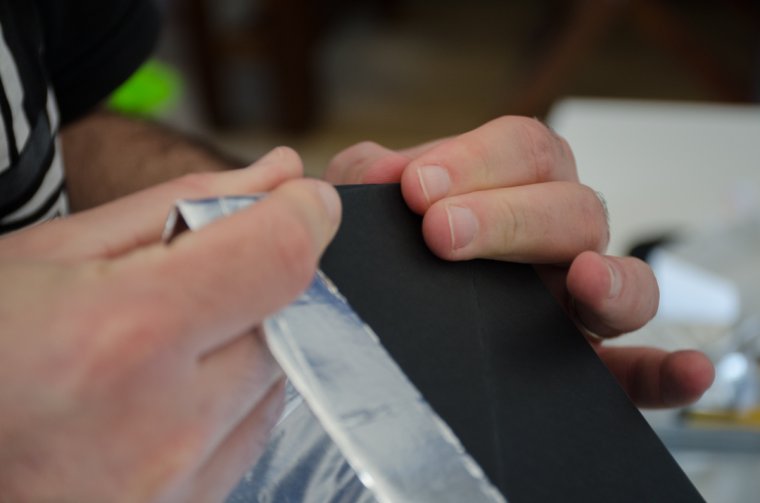
Step five:
Fold the corners of the board towards the grid line closest to the corner, creating an octagon.
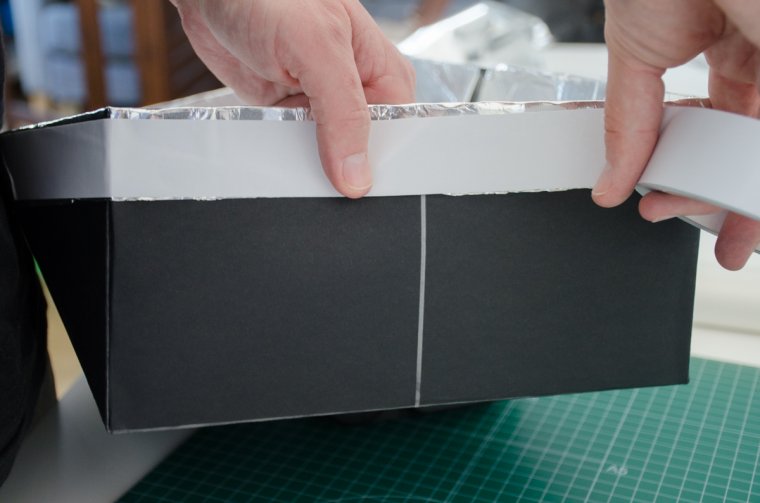
Step six:
Place strips of double sided cello tape on the folded corners to attach them to the board.
Do the same along the edges of the board and fold them backward, over the corners, creating lips.
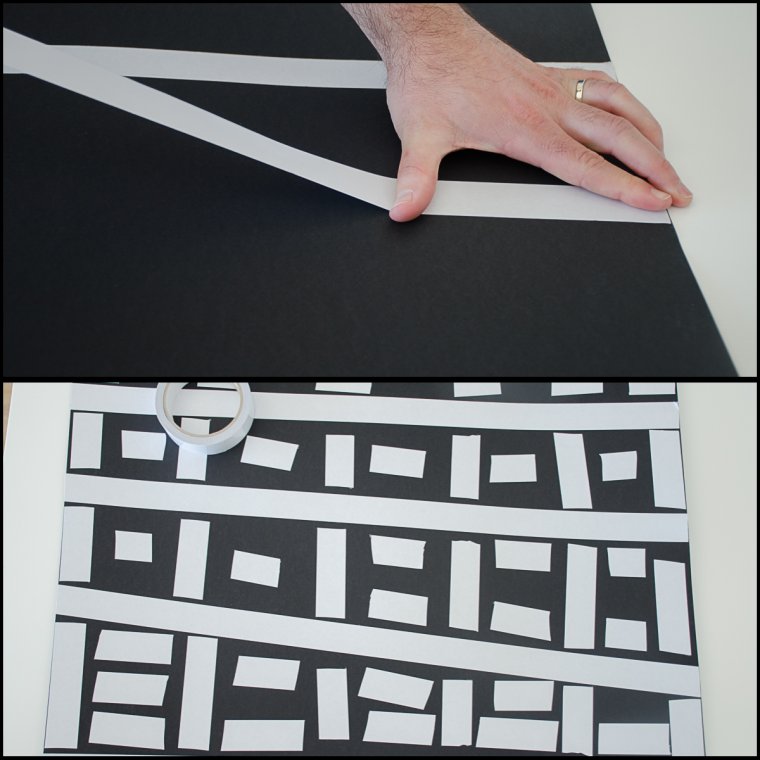
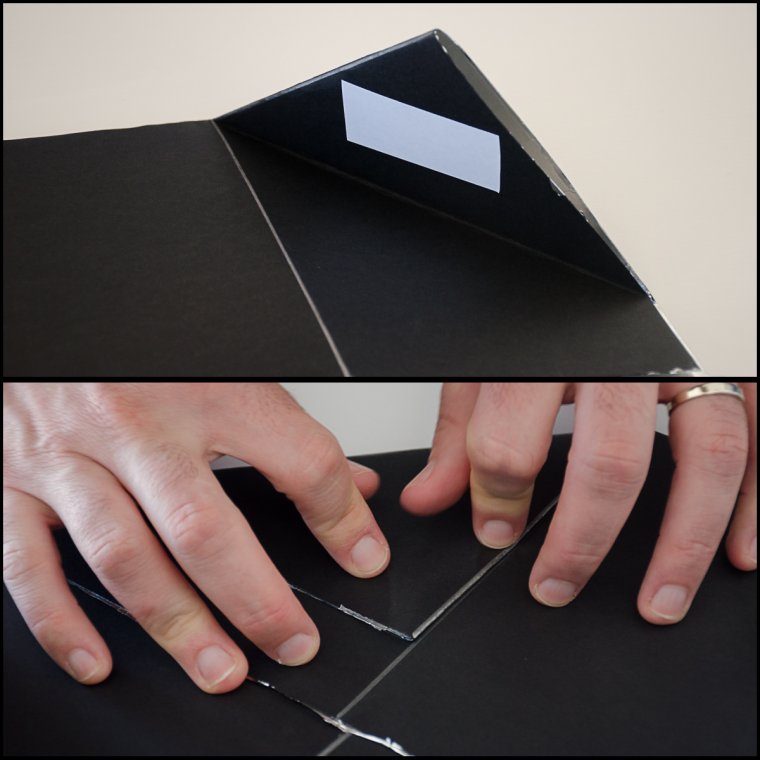
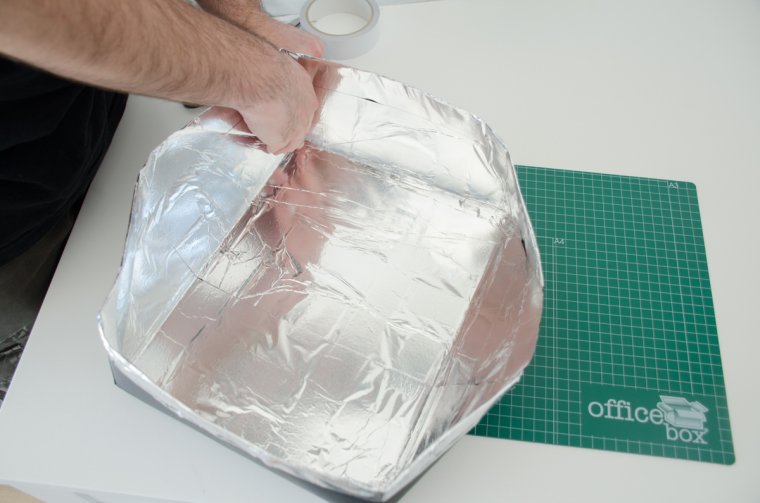
Step seven:
Hold the each lip between your finger and your thumb and start pulling the away from each other. You will see that by doing so, the sides of the board will rise upwards to form a box.
Step eight:
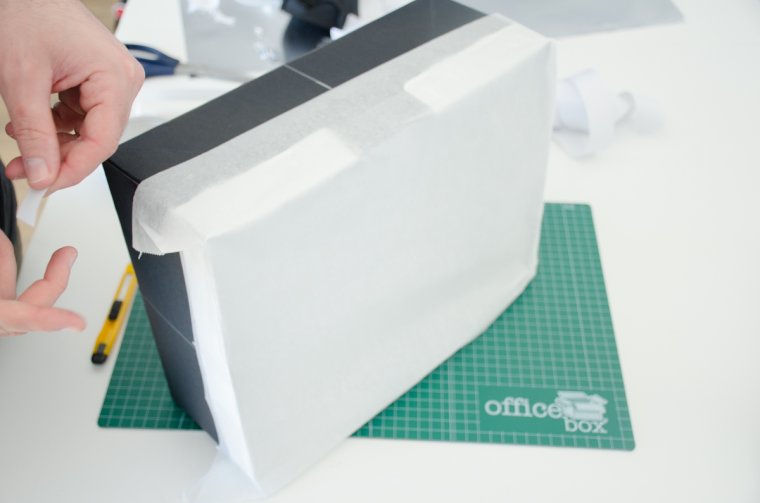
Strengthen the structure of the box by going over the corners, pressing on them lightly
Step nine:
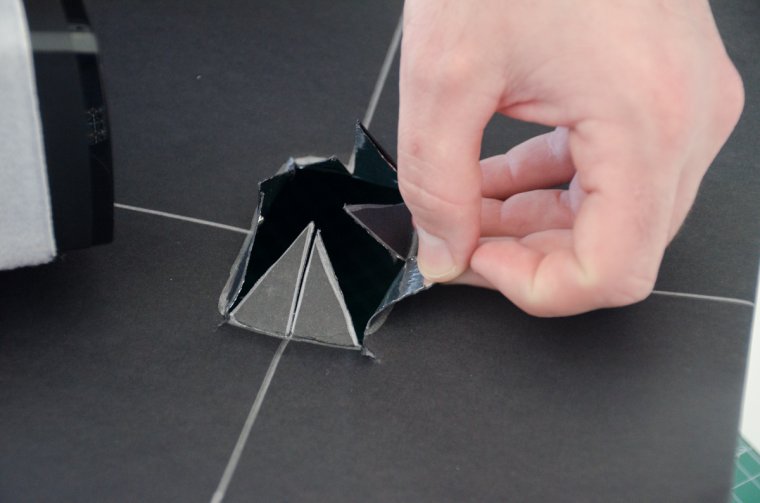
Take your light source (in this case I used a flash) and draw its outline around the center of the base of the box, this will be the hatch through which you will insert your light source.
Step ten:
Divide the area of the hatch into eight sections and cut with a utility knife along the lines of the sections, then fold the flaps outwards.
Step eleven:
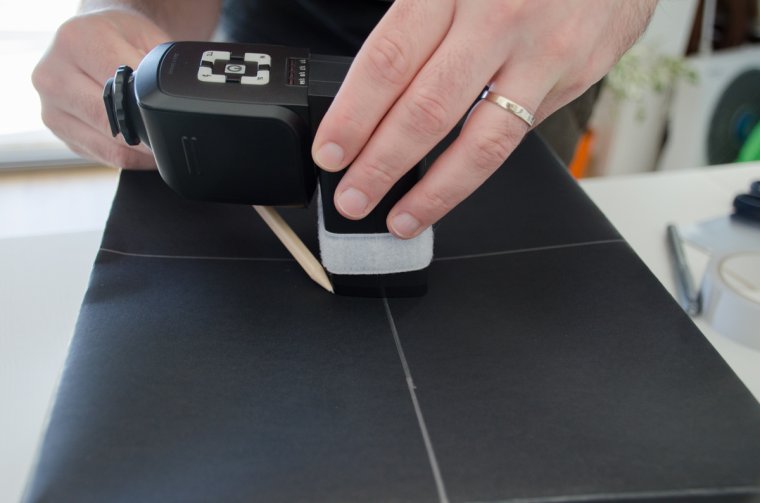
Take a sheet of baking paper (or other thin paper) and put it over the open side of the box, attaching it with any kind of adhesive (if you want to make the box foldable you can use Velcro instead of glue or tape).
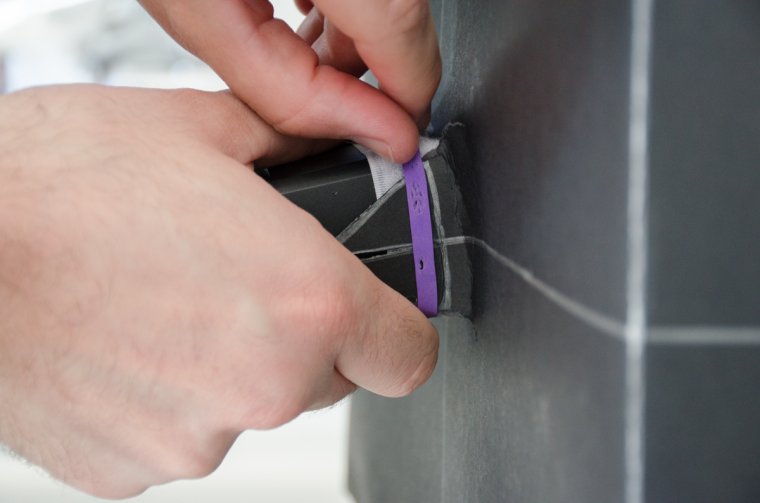
Step twelve:
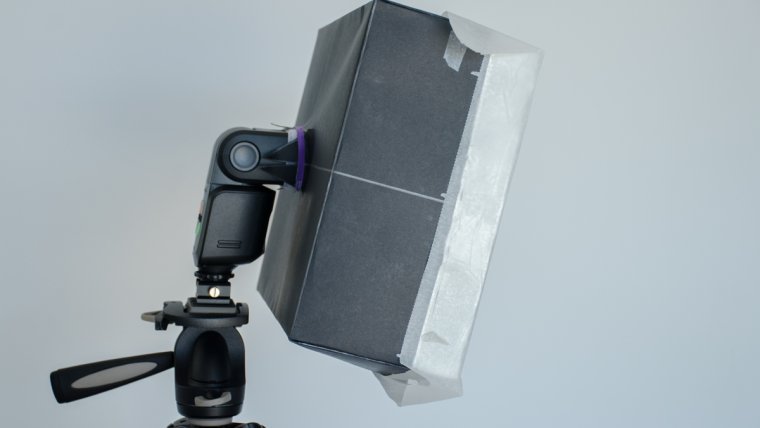
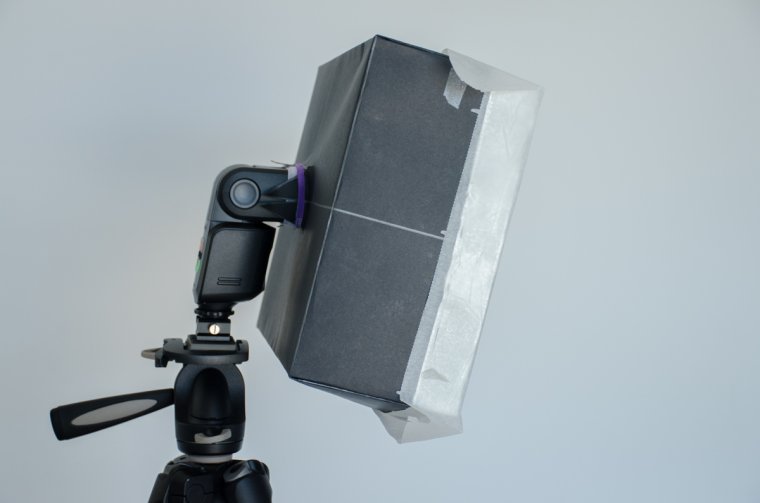
Fit your light source through the hatch with the Hatch’s flaps overlapping the light source. Tighten the grip of the softbox on the light source with a rubber band.
And there you have it! You very own, homemade softbox!
I hope you find this article helpful, if you have any ideas and remarks for improvement, or if you would like me to make more DIY articles please let me know, have a happy shooting!!!
I am a biologist and a self-taught photographer based in Barcelona (Catalonia). Buddhist philosophy has a strong influence on me: I have a deep appreciation to life and I give a huge value to the little things that makes our days happier. I became a passionate about photography when I got my first camera and I understood that photography allows me to express my way of approaching life. I love learning so I am always willing to trying new things. These days I am shooting mostly nature and portraits.


 Facebook
 Google +
Comments (0)
There are no comments yet.