Tag: portrait photography

PS Tools Used to Make Portraits Stand Out

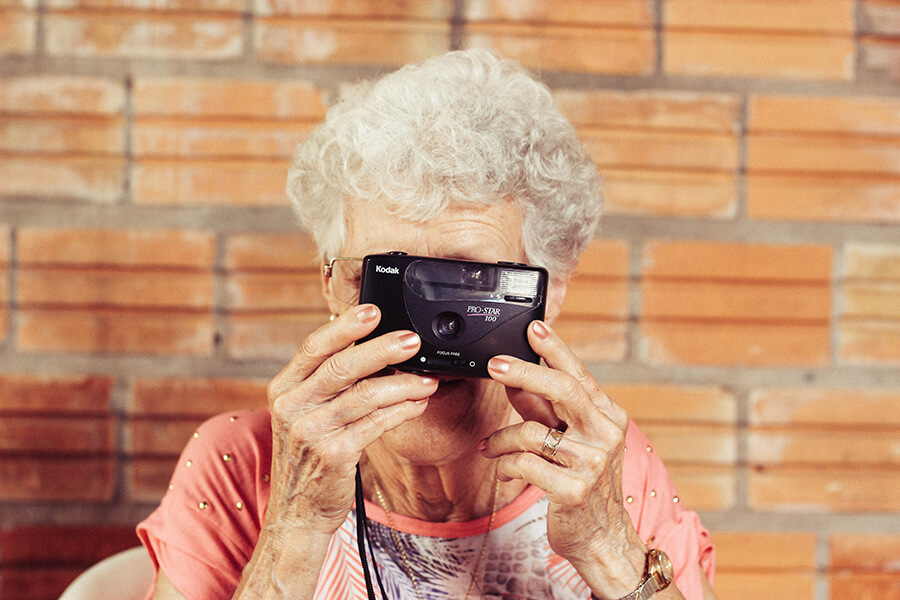
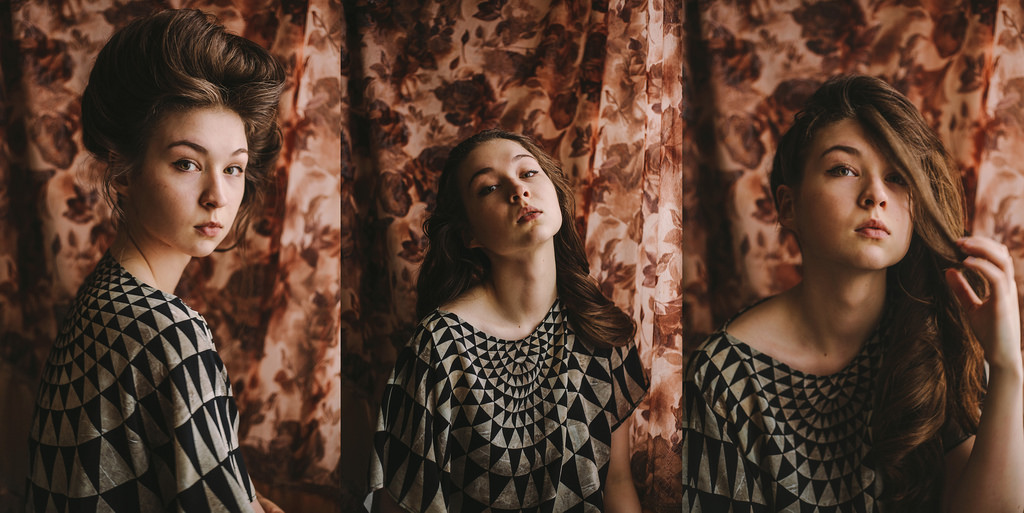
Simple portraits are beautiful and worthy of being shared online, but sometimes, they can look a bit boring.

However, that doesn’t mean you need to delete every portrait that looks too dull. Knowing how to enhance simple photos will:

  • Make you a better retoucher
  • Inspire you to find beauty even in the most insignificant places
  • Encourage you to get better at mastering simple themes and compositions

Before you’re even tempted to delete that rich collection of simple portraits, try to enhance them using these incredible Photoshop tools.
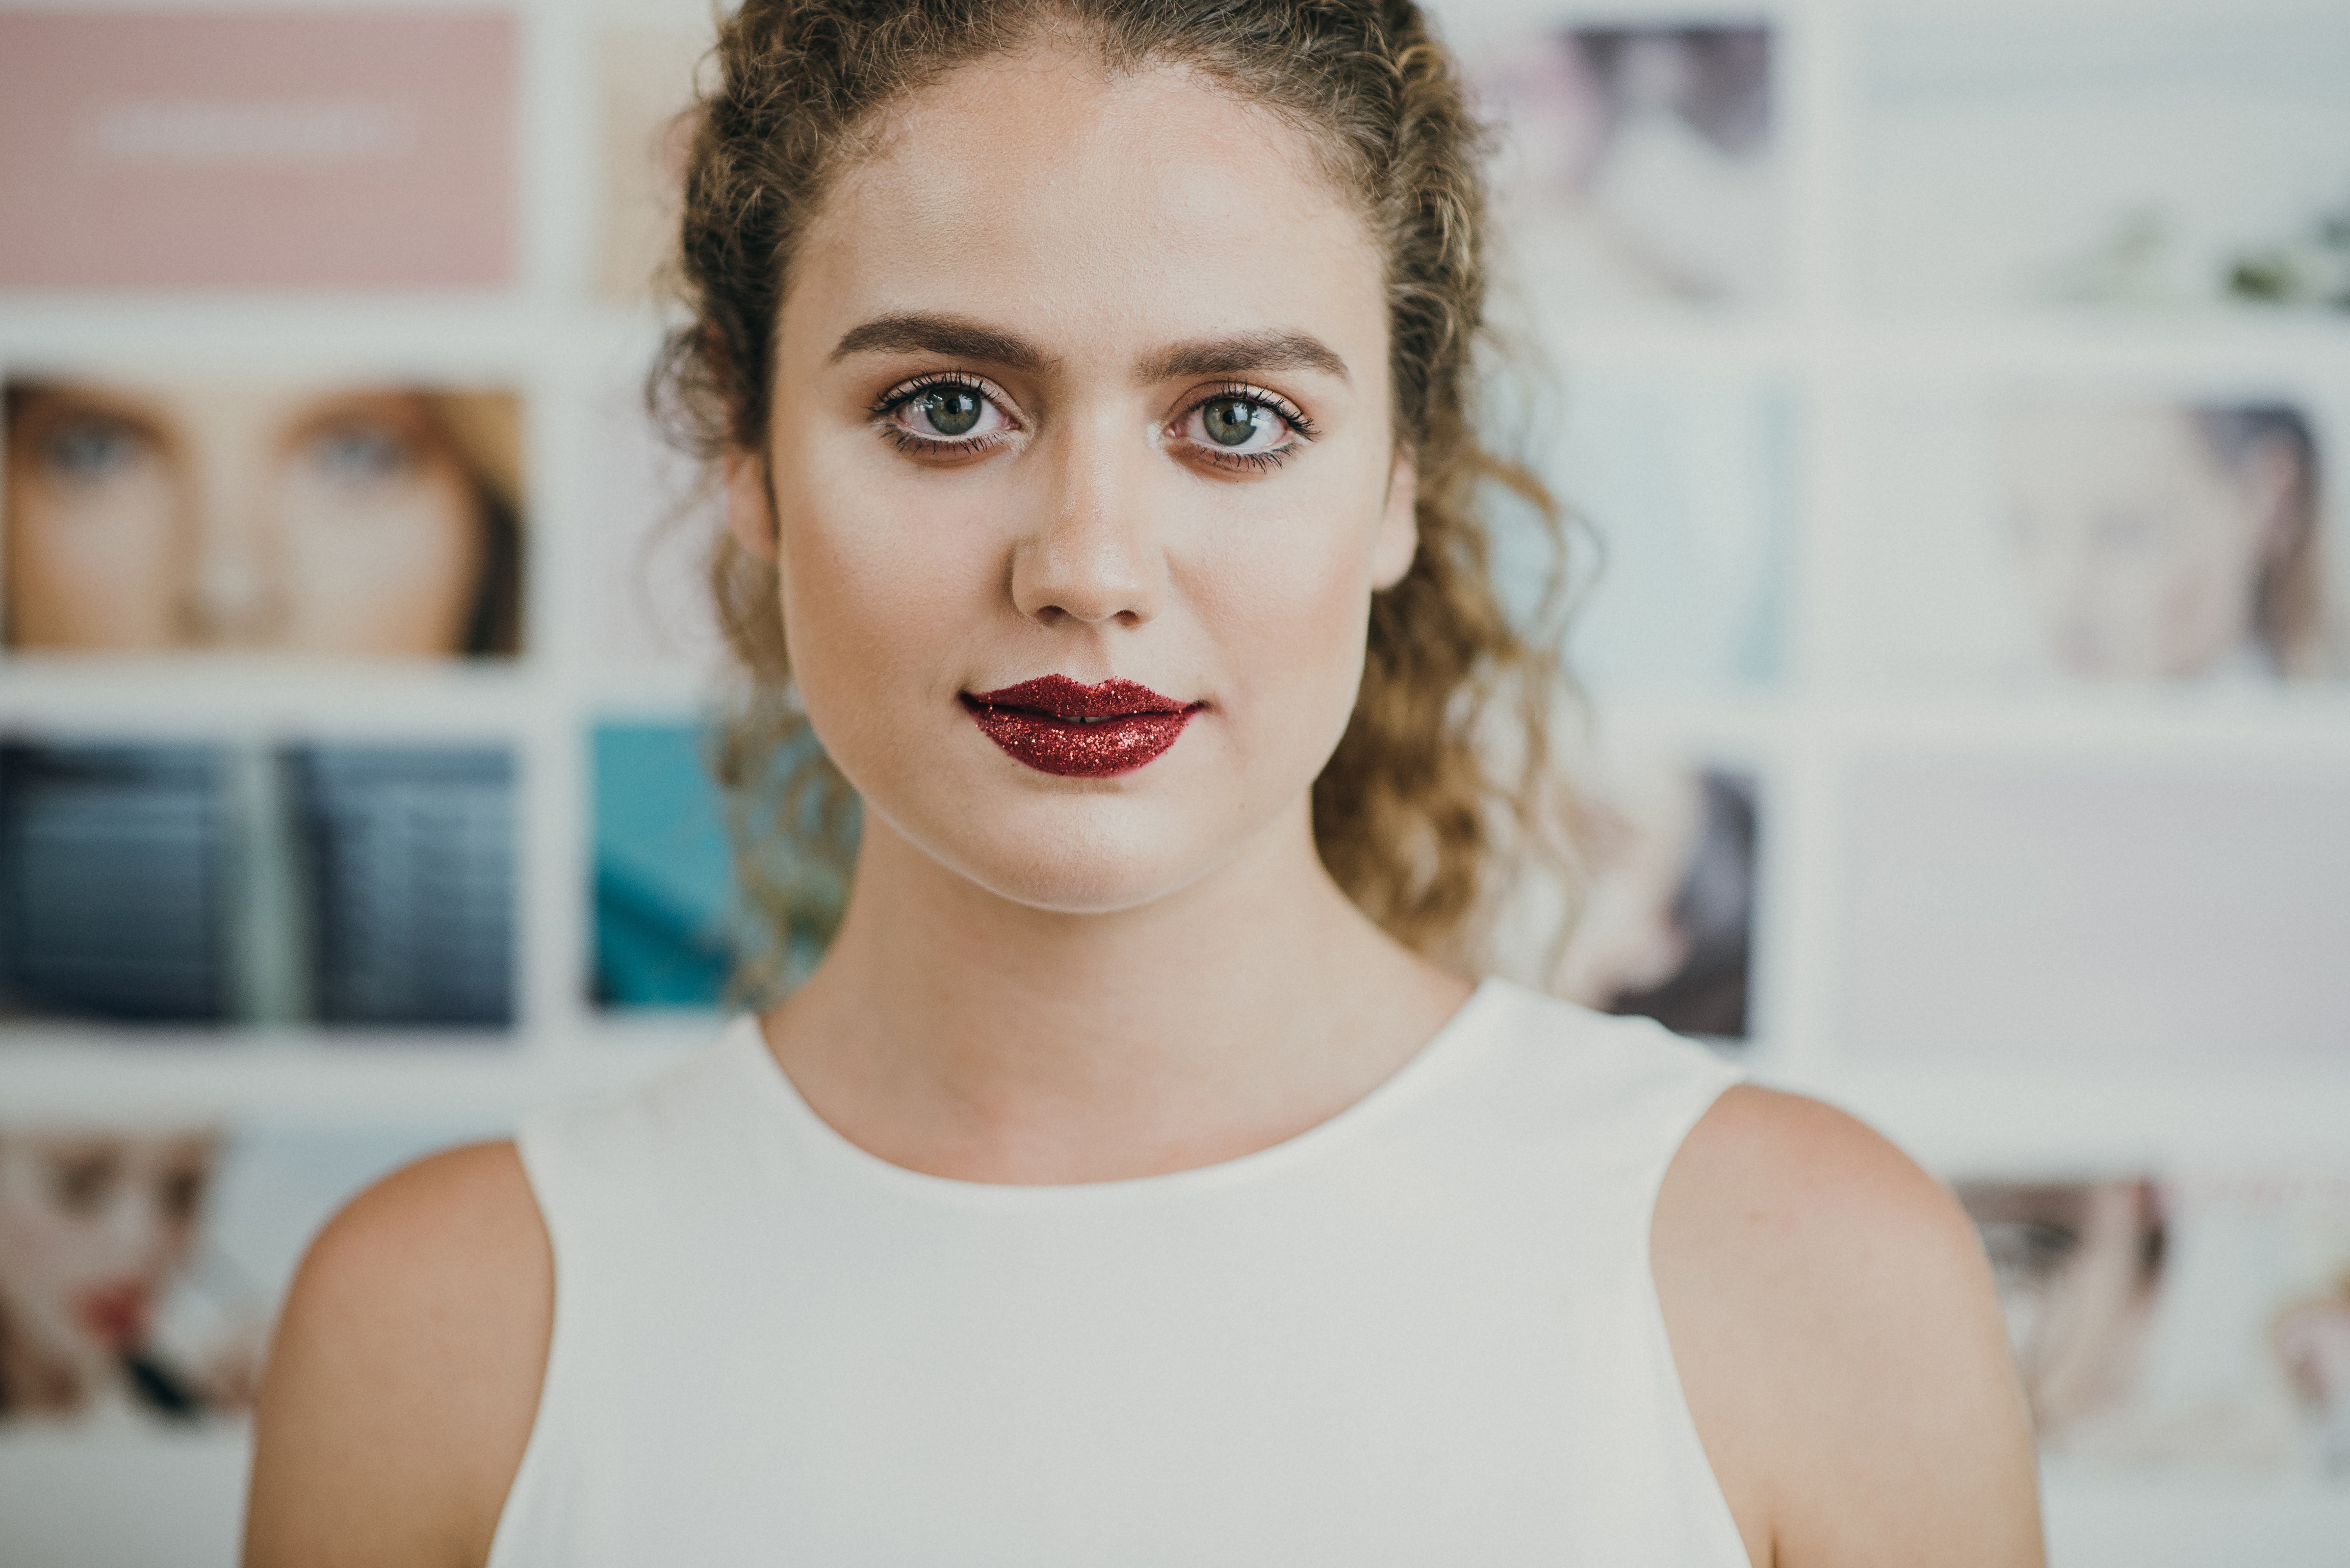
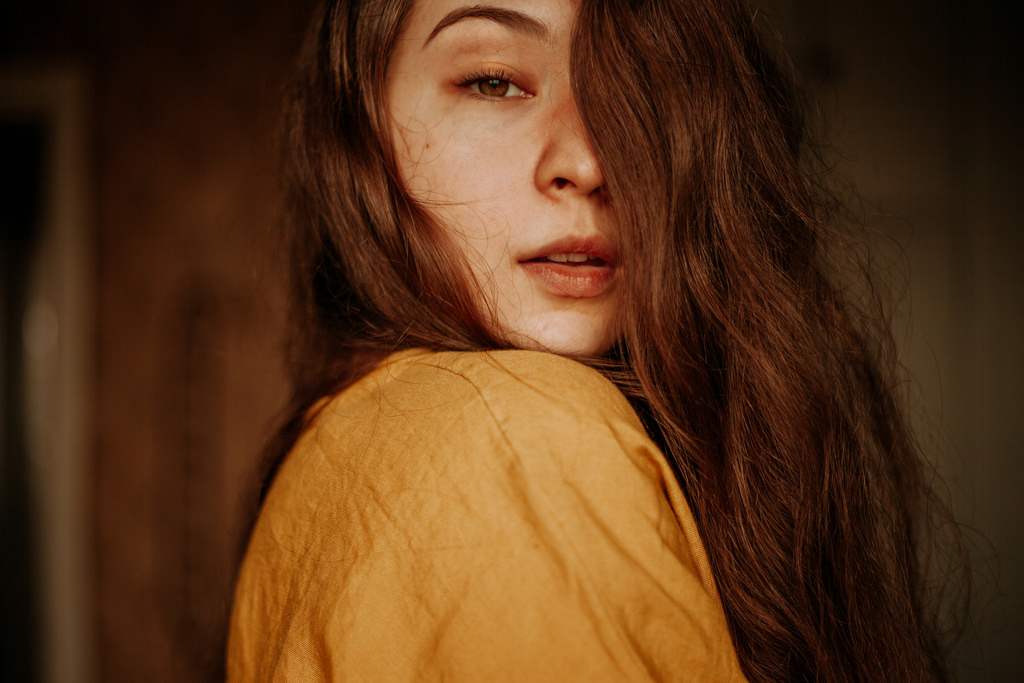
Patch Tool

photoshop patch tools
If you look closely, you’ll notice that a few of the model’s blemishes and neck wrinkles are gone. Even though the patch tool might seem like an insignificant part of Photoshop, it will make your editing workflow easier.

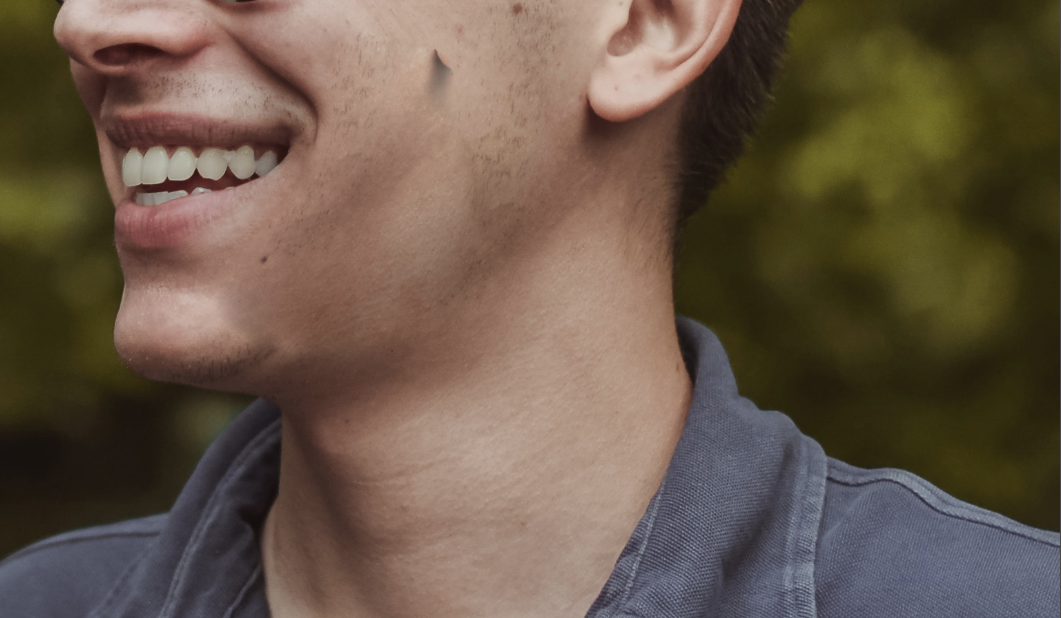
This handy tool will patch up any blemishes on your model’s face. You can also use it to get rid of wrinkles, stray hairs, and facial hair. Simply draw over the area you’d like to fix and drag it to a clean patch of skin. I recommend dragging your selection horizontally, as this will create a more natural look.

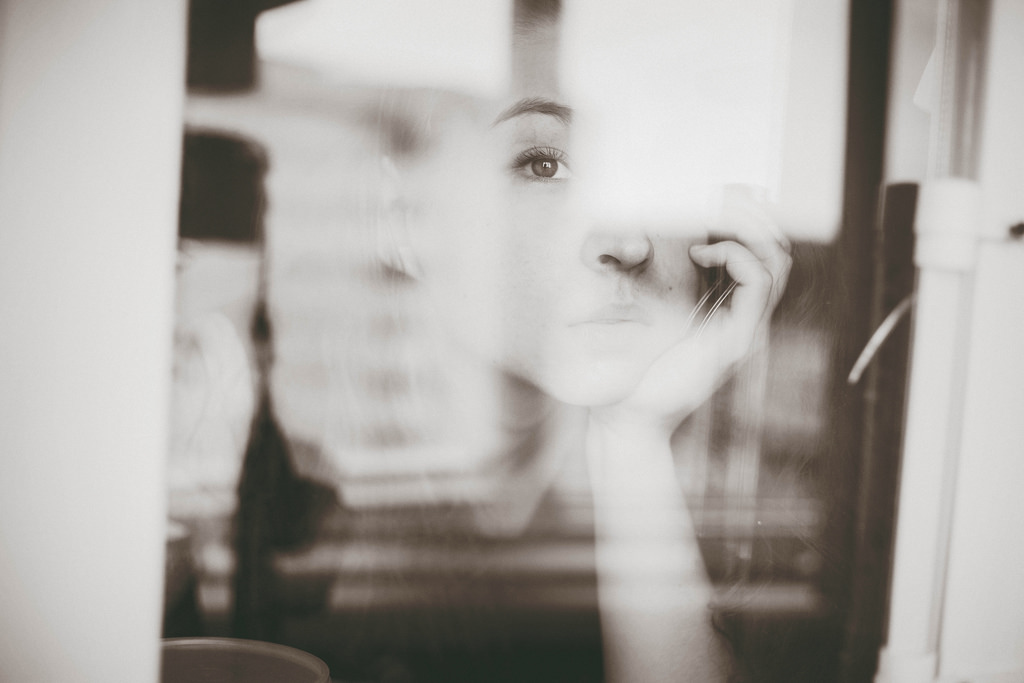
I don’t recommend using this tool to fix large areas on your model’s skin. Dragging a very large selection away from its source will result in blurred, unflattering-looking skin like this:
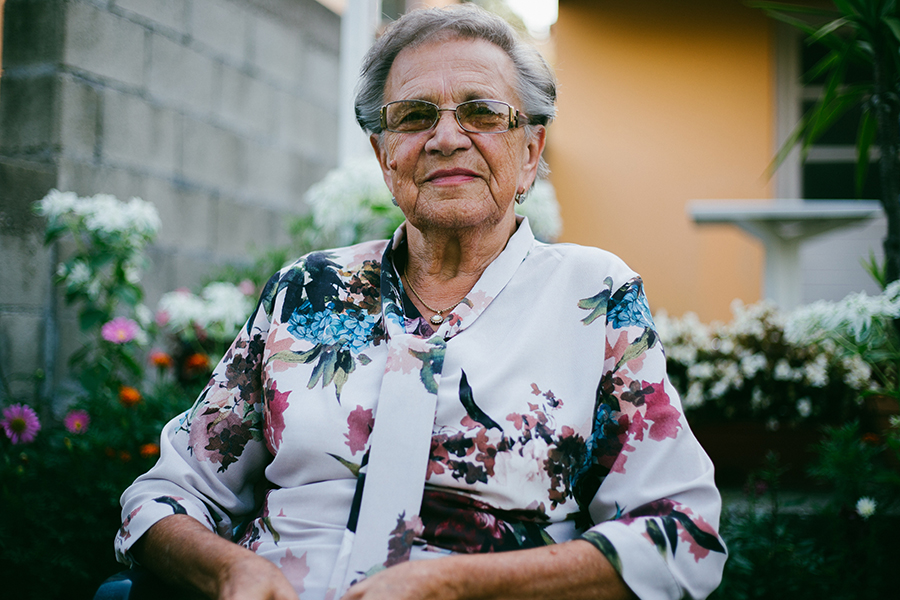
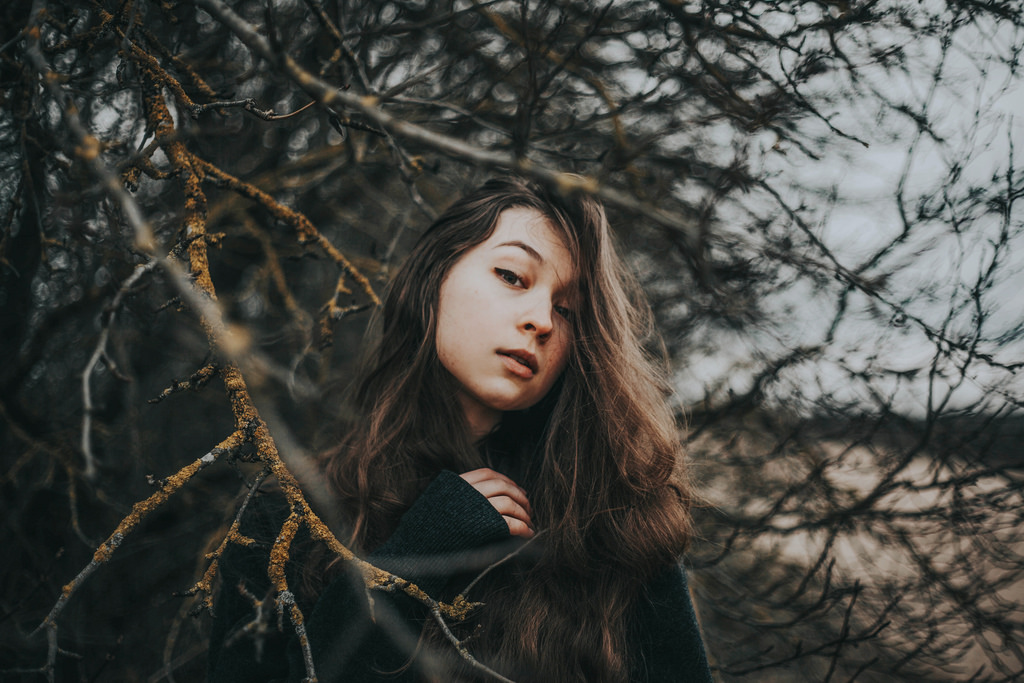
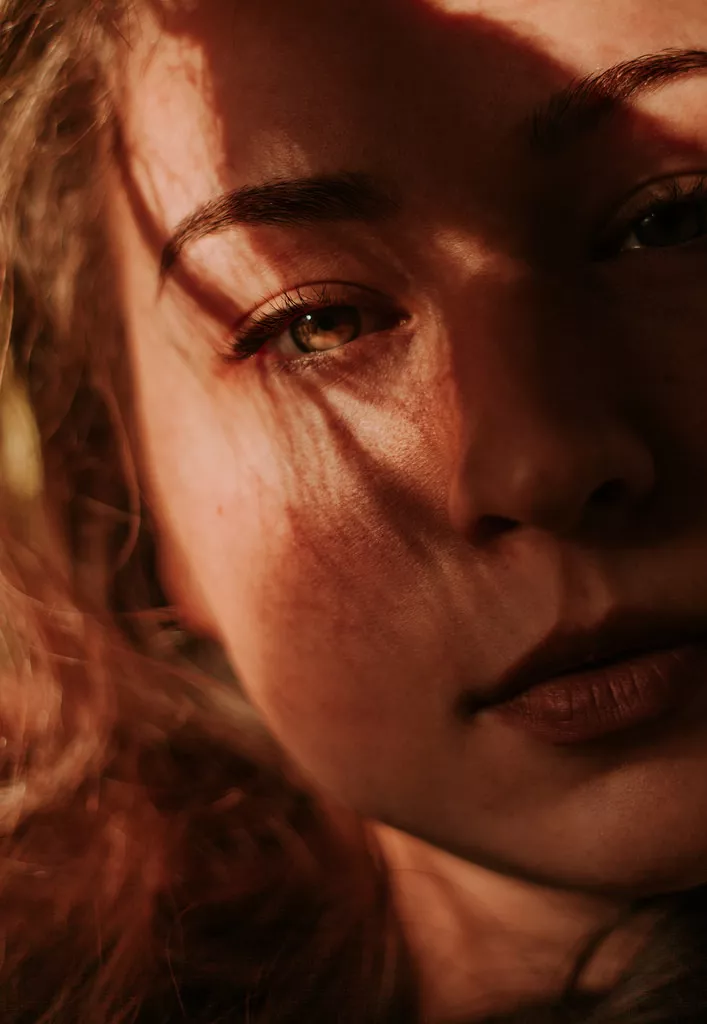
photoshop patch tools

Gradient Map

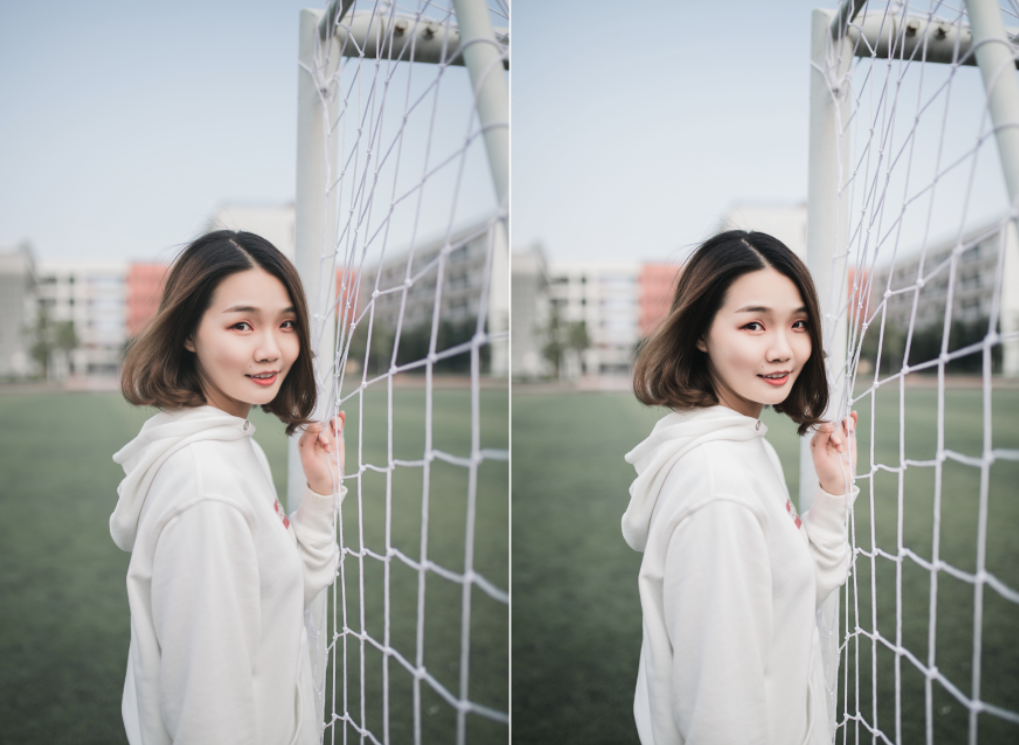
If your portraits are lacking in contrast, you don’t necessarily have to use Curves or Levels. Gradient Map, a tool that’s often overlooked, will make your portraits stand out within seconds.

ps tools gradiant map

Before you create a new layer, press D on your keyboard. This will set your colors to black and white.


photoshop tools set colors
You can also find Gradient Map in Image > Adjustments.

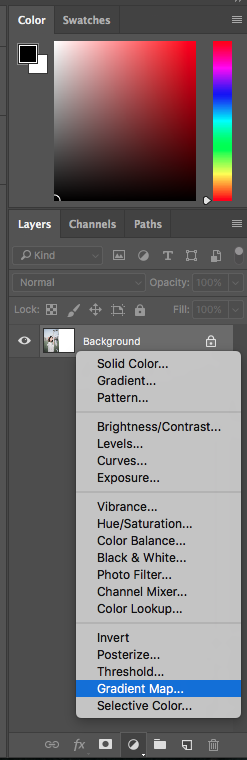
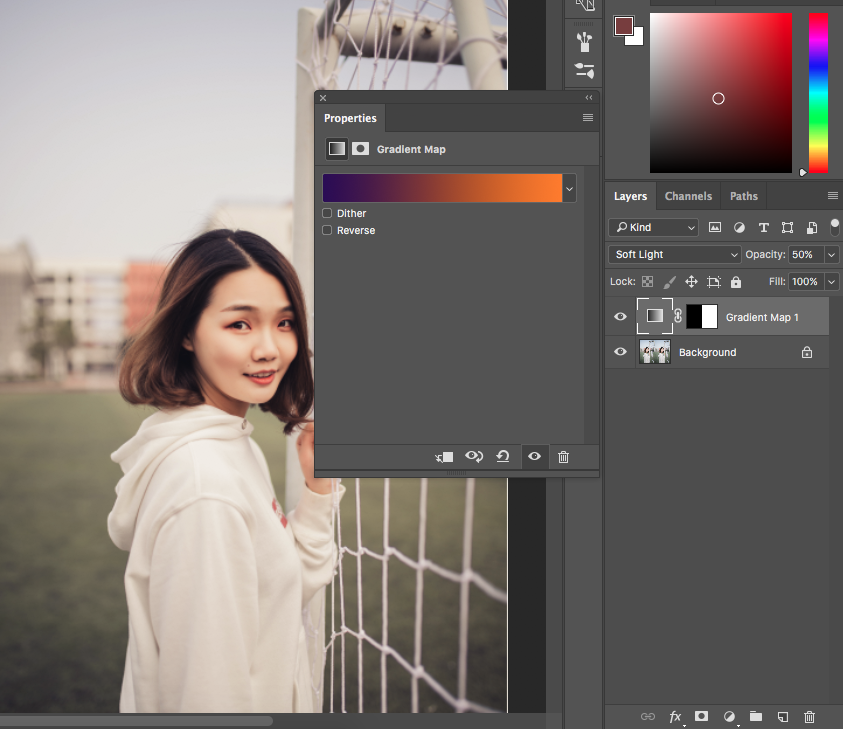
When you select Gradient Map, a small window will pop up. Make sure Dither and Reverse are unticked and click Okay. Then, change your layer mode to Soft Light and lower your layer’s opacity until the results don’t look too dramatic. Even though Gradient Map can look images look intense, you can use it to add a bit of contrast to your images without wasting a lot of time.

If you want to give your photos a more nostalgic feel, change your colors to something other than black and white.
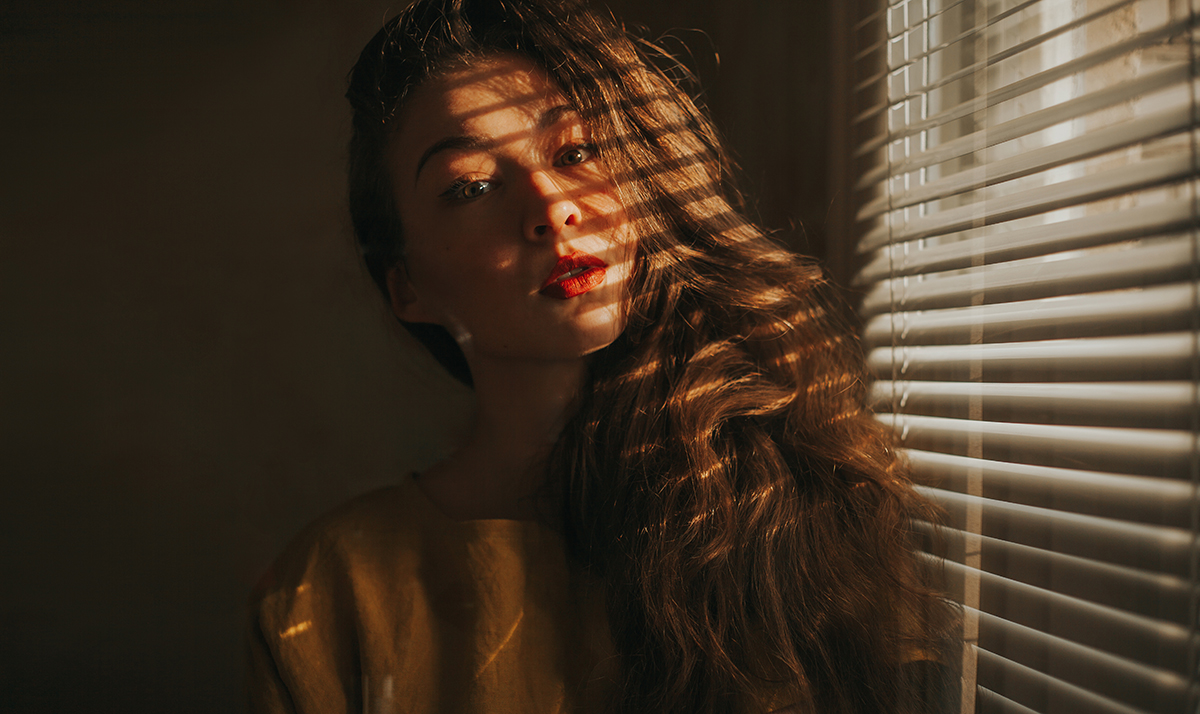
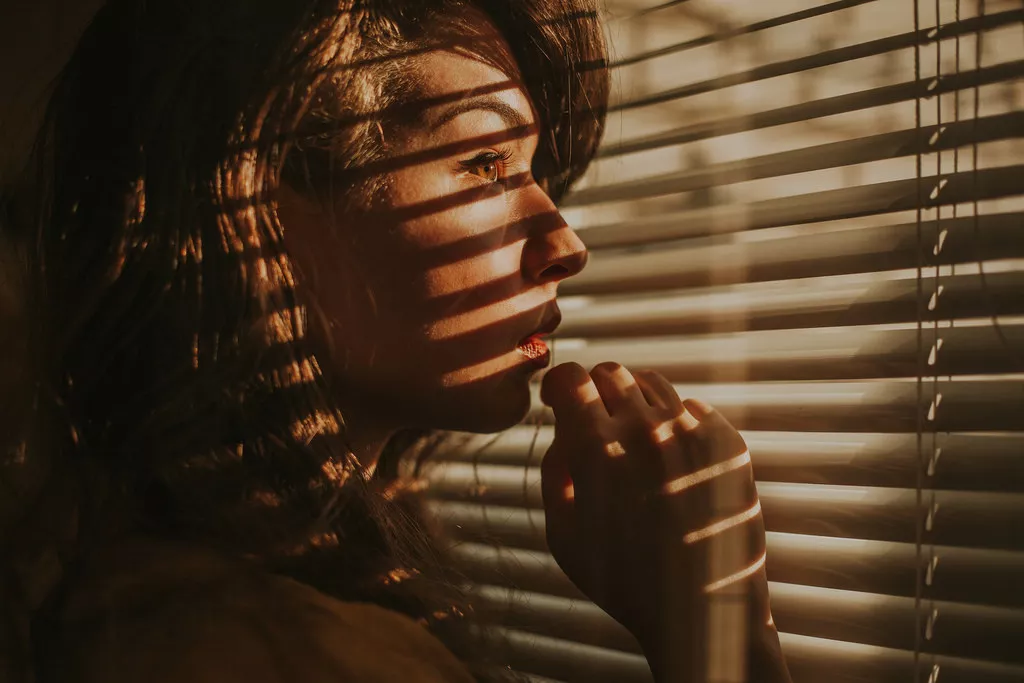
PS tools dither and reverse
You can either manually change your colors or choose from a few styles in the Gradient Map window. For this photo, I used a variety of tones to add both contrast and warmth to the image.

Screen Mode

Screen mode is a layer mode that’s often used to create double exposures. It can also be used to add reflections and textures to photos of all kinds.

ps tools double exposure
The extra image, combined with the aforementioned Gradient Map tool, resulted in a portrait with lots of textures and vibrant colors.

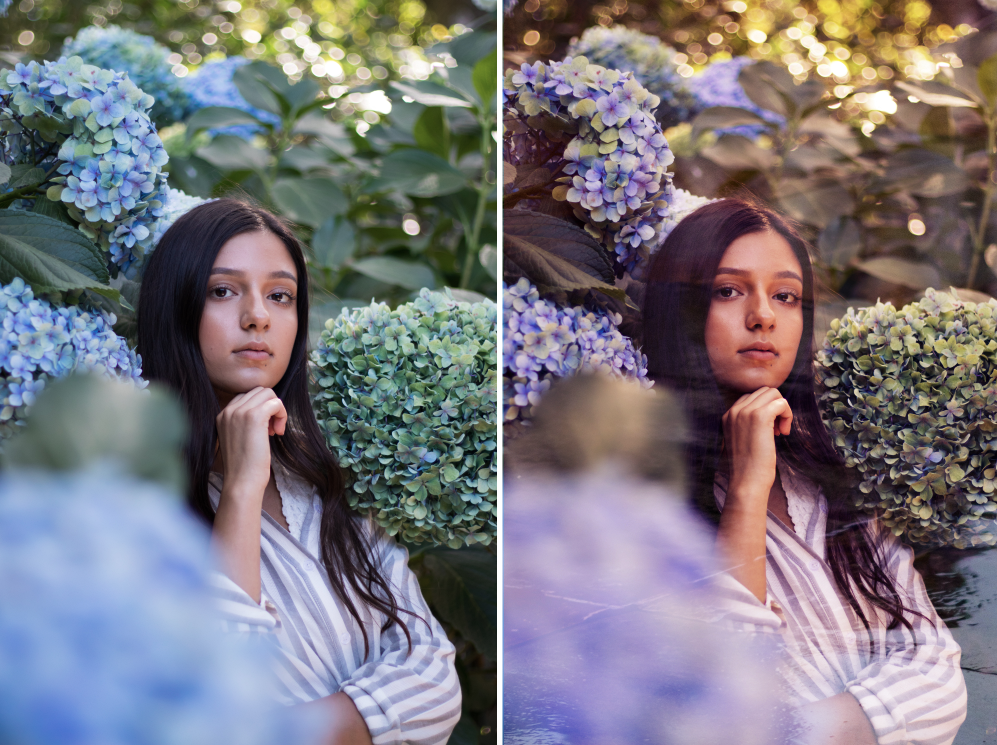
For this to work, you need to have a variety of stock photos. You can either take them yourself or download them from a website like Pixabay or Unsplash. Use photos that have a lot of light and space, but also remain open to using photos with unusual compositions.

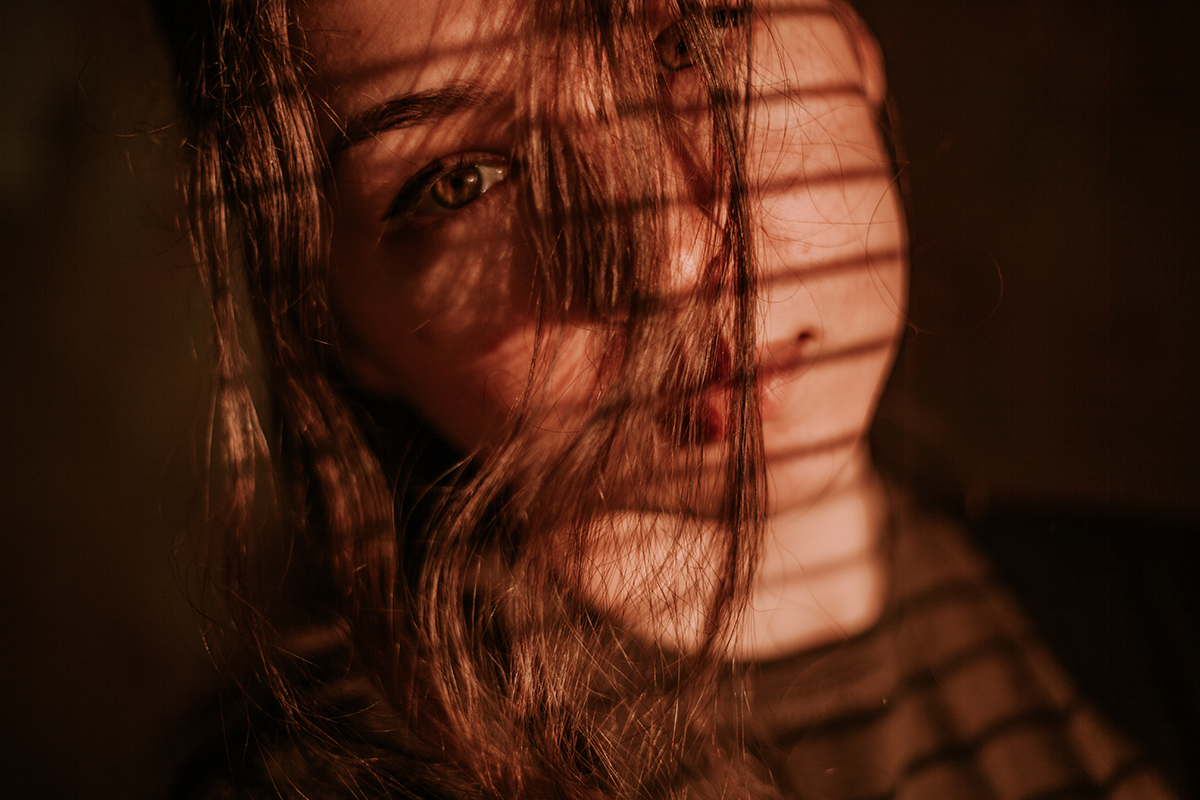
Place your stock photo over your portrait and change your stock photo’s layer mode to Screen. This will immediately brighten your entire image. If the effect is too dramatic, use the Curves or Levels tools to edit the stock photo only.

If you’re not satisfied with the results, use another image or add multiple photos to your portrait. There’s no limit to how much you can do when it comes to these “double exposures.”

ps tools

Using these simple Photoshop tools, you’ll be able to enhance even the simplest of portraits. And the next time you’re tempted to delete that precious photo, open it in Photoshop and give it a chance to show its true potential.


6 Tips to Create Stunning an Old Person Photography

Old people have something that younger people don’t: years of wisdom, a rich collection of stories, and a unique way of looking at life. This combination of treasures is perfect for curious and open-minded photographers.

If you enjoy taking photos of people, you’ll love photographing the elderly. This fulfilling sub-genre is all about traditions, genuine emotions, and precious family moments.

Photographing old people requires a variety of skills including communication, creativity, and empathy. The tips below will help you strengthen them and take stunning photos of your subjects.

old person photography

Let Them Talk

As simple as this tip sounds, it will help you connect with your subject.

Oftentimes, people assume that they should stand still in front of the camera and not blink or breathe. Let them know that this isn’t the case by asking them questions and sharing your own stories. Comfortable discussions will make your time together more of a fun meeting than a formal photo shoot.

Some old people aren’t used to the poses and facial expressions that most teenagers have already mastered. Make it clear that you’re not looking for magazine-quality professionalism. Instead, gently give them instructions if necessary. Focus on letting them be themselves in your presence.

old people photography

One of the most important things you should do is ask them for feedback. Do they have any specific photo requests? Are there any photographs they like? By giving them options, you’ll let them know that you care about their voice and aren’t just there for the pictures.

Include Their Loved Ones in Your Photos

old people photography

Most people feel more comfortable in the presence of a friend or family member. If possible, photograph your subject with their partner, friend, child, or even pet. In addition to feeling supported, they’ll have more opportunities to forget that the camera is even there. Use these moments to take heartwarming candid photos.

Give Them Something to Have Fun With

old people photography

Your images don’t have to consist of sitting or standing photos only. Once you find out what your subject cares about the most, give them a chance to show off their skills in front of the camera. This could be cooking, knitting, playing with their pet, or even taking photos. Putting a spotlight on their strengths will make them feel very special, something that every client deserves to feel.

Use Natural Light

old people photography

Artificial light can be very uncomfortable to stare at. Instead of distracting your subject with unnatural light, photograph them during the day.

If you want to capture warmer tones, have a shoot during the golden hour (after sunrise or before sunset). If you want cooler tones, take photos after midday. For pleasant and even light, take photos in the shade on a bright day.

Don’t Be Afraid of Silliness

old people photography

Adolescence and childhood are usually related to fun and laughter, but they’re just as relevant in other age ranges. Even though many photos of old people are very serious and monochromatic, don’t be afraid of making yours look silly and vibrant. If your subject enjoys laughing and having fun, let them be their true selves in front of your camera!

Don’t Photograph Their Faces All the Time

old people photography

Unless you’re taking classic portraits, you don’t have to worry about facial expressions during your entire shoot.

When your subject’s back is turned, photograph them. When they’re holding something dear to them, don’t be afraid of zooming in. The more diverse your photos are, the easier it will be to capture your subject’s most precious memories, and the closer you’ll get to taking truly authentic portraits.

old people photography
Photographing people of all ages will have a significant impact on your portrait photography skills. The wisdom and stories of old people will not only help you diversify your portfolio but teach you important lessons that will make your life all the more enriching.

Are there any old people you’d love to photograph now? Let us know in the comments!

How to Take Gorgeous Portraits Using Window Blinds

I recently moved into an apartment with window blinds. I didn’t pay much attention to them until the golden hour when they cast gorgeous horizontal shadows on the table. Instantly inspired, my inner photographer forced me to take a few photos. The results pleasantly surprised me.

Though I’ve seen an abundance of window blind portraits online, I’ve never really thought of creating similar photos of my own. When the opportunity arrived, I was astounded by the plethora of creative possibilities a simple object could offer.

To take photos similar to the ones in this tutorial, all you need are window blinds, a camera, and bright sunlight. The golden hour and noon are the best times of day for photo shoots of this kind, in my opinion. I used a Canon 5D Mark II with a 50mm 1.8 lens.

Here are the many ways you can take photos using window blinds.

window blinds sunlight photo

Slightly Closed

Blinds that are slightly closed will give you enough light to photograph your subject’s entire face. To make this look more interesting, shoot using a wide angle lens. If, like me, you don’t have one, create a panorama instead.

The photo above was taken through a window, which added interesting textures to the image. When you shoot through a window, make sure you don’t stand directly in front of it. If you do, you and your camera will be a part of the image! (Sometimes this creates a really cool effect, though.)

window sunlight cool effects

Almost Completely Closed

Closing your window blinds almost completely will create very thin horizontal lines. These are great for moody, mysterious, and delicate portraits.

What I find most difficult about the lack of light is finding the right pose. Effects like this are perfect for highlighting certain features like eyes. However, this is easier to achieve with models as you can give them instructions. When you take self-portraits, use your phone to find the right light and then take a photo with your camera.

almost open window sunlight effect photo

Almost Fully Open

Blinds that are almost open will create thin horizontal shadows. This is my least favorite technique because it’s so similar to other kinds of shadows; for example, you can create the same effect with fences. Nonetheless, if the photo above appeals to you, it’s very likely that you’ll enjoy experimenting with this look.

window backlight portrait

Backlight

If your model stands in front of window blinds, your photos will acquire a pleasant, backlit atmosphere. This is great for creating textured silhouettes and casting shadows on hair.

window blinds light

Extra Tips

  • Due to the nature of window light, it’s important to work with angles to avoid unflattering looks. Before your photo shoot, experiment with poses. When I take self-portraits, I use my phone to get a preview of how certain angles and poses complement my face.
  • You don’t have to photograph your model’s face only. Include hands, hair, and clothes in your images. Window blind light looks amazing on anything and everything!
  • If you have trouble lighting your photos, underexpose them. Overexposure is difficult to fix in editing programs. It’s significantly easier to restore shadows than it is to fix unnaturally bright areas. (This is also why you must shoot in RAW mode whenever you can.)

window blinds

The photos above were taken in a small kitchen using window blinds, golden hour light, a window, and a camera with an affordable lens. The photo shoot itself was incredibly fun and didn’t take up much of my time.

Photography isn’t always about extravagant photo shoots and expensive equipment. Sometimes, it’s all about making the most of what you have. Use this knowledge to your advantage.

Don’t limit yourself to window blinds. Look for other objects that you could use to take breathtaking portraits.

Let us know what you come up with in the comments!

Interesting Blurred Foreground Ideas for Portrait Photographers

Sometimes, our photos end up looking dull and uninspiring. We know that something’s missing, but we’re not exactly sure what it is. Sometimes all you need to do is use blurred foregrounds to enhance your simple photos.

To put it simply, foregrounds are parts of an image that is closest to the camera. If you place an object in front of your camera and set your aperture to a small f-number, like f/2.0, you’ll get a blurry effect.

This effect is great for many reasons, some of which are:

  • Framing. If you cleverly frame your lens, you’ll end up with a unique composition regardless of what you’re photographing.
  • Adding a pop of color. Oftentimes, simple photos need an extra boost of color. Vibrant foregrounds can fix that.
  • Adding depth. A blurred foreground will add more depth and shape to detailed photos.

You can use professional equipment, DIY props, or random objects to frame your photos. In this article, I’ll focus on simple and accessible objects that will enhance every photo you take.

fence landscape photography

Gates and Fences

Fences have a constant pattern that’s ideal for creative photographs. A fence with a gap, like the one in the photo above, is fantastic for framing landscape photos and portraits.

model hand foreground

Hands

If you want to include human elements in your photos, partly cover your lens with a hand.

Stretching your own hand in front of the camera can create a melancholic atmosphere or a sense of yearning.

If you’re a portrait photographer, have your model hide parts of their face with their hand, like in the photo above. You can use this technique to shape their face, highlight specific features, or simply make your portraits look more interesting.

people foreground

People

Photographing through crowds of people is a popular technique used in street photography. Indirectly using people in your compositions will create a sense of familiarity.

In the photo above, the little girl is adding even more depth to the story. Even though she’s blurry, you can’t help but wonder if she’s just a stranger or if she’s related to the couple in the distance.

flowers foreground

Flowers and Plants

If you need to make your indoor photos look more exciting, use plants. Even if you don’t have a green thumb, chances are you own a plant or two. Flowers are perfect for enhancing simple portraits and still life shots. The more colorful they are, the better!

branches foreground

Branches

For fun outdoor shoots, use branches as foregrounds. Shooting through branches will create a contrast between your subject and the foreground. Curvy branches are great for creating striking compositions, while straight ones are perfect for photographers who want to experiment with leading lines.

window foreground

Windows

One of my favorite foreground styles is the combination of windows and reflections. When you shoot through a window, you’ll get beautiful blurred reflections that will add texture to your image.

Extra tip: when you photograph through a window, don’t stand directly in front of it unless you want to be visible in the shot. Shoot from the side to avoid camera reflections.

string lights foreground

String Lights

String lights, or fairy lights, are becoming increasingly popular thanks to the creativity of photographers like Brandon Woelfel. Hold them in front of your lens and they’ll create stunning bokeh. They can be stretched out to your subject, strategically framed around your composition, or simply held by you or your model. Each of these approaches will make your photos look soft and ethereal.

Whether you’re looking to take your compositions to the next level, brighten your photos, or become more detail-oriented, blurred foregrounds will help you improve your photographs. Remember to experiment as possible; even the simplest objects have the power to make your photos stand out.

What are your favorite foreground objects?

30-Minute Indoor Portrait Photo Shoot Ideas: A Photographer’s Guide

As portrait photographers, we often get caught up in perfection. Our desire to take unforgettable portraits leads to creative slumps. Because of this, we don’t take as many photos as we’d like to.

This doesn’t have to be the case anymore. Whenever I want to have a shoot just for the sake of enjoying photography, I invest 30 minutes of my time in a photo shoot. Mini photo shoots of this sort can:

  • Challenge your skills
  • Show you what you can do with very little
  • Make you more aware of the details

The point of this challenge is to entertain you, teach you valuable lessons about your own work, and lead you to impulsive discoveries that might take your work to the next level. Don’t let the time limit stress you out. Instead, treat it as a creative reward for your hard work.

Keep in mind that these photo shoots can be longer than half an hour. This is just how long it takes me to set everything up and take photos for my own pleasure.

indoor photo window blinds sunlight

Window Blinds on a Sunny Day

Window blinds and sunlight are perfect for detailed, textured portraits with a touch of mystery. If it’s very bright outside, use the warm daylight to create eye-catching portraits.

What I love the most about window blinds is that their shadows can be controlled. You can make them wide enough to cast shadows on your model’s face. You can also keep them barely open so that they light up only a part of your model’s face.

For an extra touch of creativity, shoot through a window. This will create beautiful textures that will overlap the shadows and enhance your composition.

indoor photo shoot close up
To take this self-portrait, all I needed to do was lie down, hold my hair up with one hand, and take the photo with another. It took me around 10 minutes to get this shot.

Close-ups and Shadows

This is another idea that’s perfect for sunny days. Get close to your model’s face and cast shadows using hair, hands, or textured objects. The closer you get, the harder it will be to figure out what those shadows are. Since taking close-ups of people isn’t always comfortable, try photographing yourself instead.

indoor photo shoot hair shadows

Right in Front of a Window

I love natural window light. Whether it’s gloomy, sunny, or dark outside, windows will always provide enough light for soft portraits. Have your model stand right in front of a window for a glowing look. For the best results, take these photos when it’s slightly overcast.

indoor photo shoot artificial backlight
The light source in the background is a simple lamp.

Artificial Backlight

A backlight is created when a subject stands right in front of a light source. This creates a halo around them and softens the entire image. If the weather outside isn’t ideal for portrait photography, use a lamp or a torch to take dreamy photos. If it’s sunny outside, have your model stand with their back to a window.

A backlight can make photos look flat. If your results end up looking dull, use a reflector to add more depth to your model’s face. Reflectors are fairly affordable nowadays, but you can also make your own using a sheet of white paper or foil.

indoor photo shoot DIY backdrop
The backdrop is a curtain that I taped to the wall.

DIY Backdrop

Backdrops are great for indoor studio photo shoots. If you don’t have professional ones around, use everyday items like curtains, bedsheets, or an intricately designed wall. If something has texture, it’s very likely that it will make your portraits stand out.

I hope these ideas inspire you to take a break from your work and experiment with something new. The more experiences you expose yourself to, the easier it will be to enjoy your photo shoots and take incredible portraits. 🙂

5 Portrait Photography Mistakes You Should Avoid

It’s true, creativity has no limits. What may look like an unforgivable mistake to one artist may be a relieving source of inspiration for another. Regardless of this fact, certain mistakes are simply worth avoiding. Photography genres have unique rules that deserve to be kept in mind during photo shoots. Landscape photography, for instance, demands a type of lighting that may not appeal to portrait photographers.

In portrait photography, unflattering lighting, uncomfortable poses, and tension all contribute to inauthentic photographs. It’s important to know how to deal with models, what not to do during the editing process, and how to approach different lighting situations. In addition to doing all of these things yourself, you can learn from the mistakes of others to boost your learning process.

In this article, you’ll not only familiarize yourself with 5 common portrait photography mistakes but learn from them. Each mistake is accompanied by a helpful solution so that the next time you bump into a creative problem, you’ll know exactly what to do.

Avoiding Conversations with Your Model

Taking photos of someone you barely know can be a tense activity, especially if you’re introverted. It’s easy to forget that the model is probably as uncomfortable as you are. Avoiding proper discussions will not only result in unnecessary awkwardness but give you a massive creative block.

Solution: If possible, have a short meeting with your client before a shoot. Once they get to know both your love for photography and the creative ideas you have in mind, they’ll feel more comfortable in your presence. In turn, you’ll get to know them. Don’t be afraid of asking questions, requesting feedback, and giving them creative space. They may have an idea that will come in handy during your shoot, so remember to stay open-minded.

conversations with coffee

Solely Depending on Poses

Posing guides are undeniably helpful, but they can get in the way. Not every individual will feel comfortable with certain poses. Your client may even end up feeling bad about poses you really like.

Solution: Don’t ditch your posing guide. Instead, give your model lots of room to be spontaneous from time to time. If they enjoy talking, have conversations with them as you take photos. Give them compliments and proper feedback. This will help you catch authentic moments. The photo below is a great example of this.

girl smiling

Beating Yourself up in Front of Your Client

…or in any other situation. Of course, self-deprecation is sometimes humorous and pleasant. When it comes to photo shoots, however, bringing yourself down will bring your others down, too. You’ll end the shoot feeling exhausted and unenthusiastic. If you don’t believe in your creative skills, no one will.

Solution: Embrace the inevitability of mistakes. If something goes wrong, don’t immediately blame yourself. Instead of discouraging both yourself and your client, find a solution. Once your client notices the confidence you have in your problem-solving abilities, they’ll feel safe in your presence.

girl taking a picture

Not Focusing on the Eyes

Experimentation is cool. It proves that you don’t limit your creative mind. Many clients, however, want a combination of simple and creative photos of themselves. Images that focus on their clothes, hair, or surroundings won’t satisfy them completely.

Solution: Manually focus on the eyes when you take simple portraits. This may take some practice, especially if you’re used to autofocus, but keep trying and you’ll get the perfect results in no time.

portrait

Shooting in Locations with Abnormal Lighting

Light is a photographer’s best friend

, but too much of it can lead to the creation of unappealing portraits. Harsh, flat, or distracting light is something portrait photographers don’t use on a daily basis. Unique lighting situations require unique approaches. If used incorrectly, they’ll highlight the wrong features and overshadow flattering elements.

Solution: Before a shoot, find the best locations where lighting won’t be a problem. For instance, a park filled with shaded areas will give you lots of room to take well-lit photos on sunny days. An open field will give you lots of lighting opportunities on gloomy days. Unless you want to create experimental portraits or experiment with portrait actions, avoid locations with lots of different lights.

girl looking through records

It’s true, creativity has no limits. It’s also true that learning from other photographers’ mistakes will benefit you greatly. Absorb this knowledge, learn from your own mistakes, and keep taking wonderful photographs of others.

SaveSave