Tag: blur

Interesting Blurred Foreground Ideas for Portrait Photographers

Sometimes, our photos end up looking dull and uninspiring. We know that something’s missing, but we’re not exactly sure what it is. Sometimes all you need to do is use blurred foregrounds to enhance your simple photos.

To put it simply, foregrounds are parts of an image that is closest to the camera. If you place an object in front of your camera and set your aperture to a small f-number, like f/2.0, you’ll get a blurry effect.

This effect is great for many reasons, some of which are:

  • Framing. If you cleverly frame your lens, you’ll end up with a unique composition regardless of what you’re photographing.
  • Adding a pop of color. Oftentimes, simple photos need an extra boost of color. Vibrant foregrounds can fix that.
  • Adding depth. A blurred foreground will add more depth and shape to detailed photos.

You can use professional equipment, DIY props, or random objects to frame your photos. In this article, I’ll focus on simple and accessible objects that will enhance every photo you take.

fence landscape photography

Gates and Fences

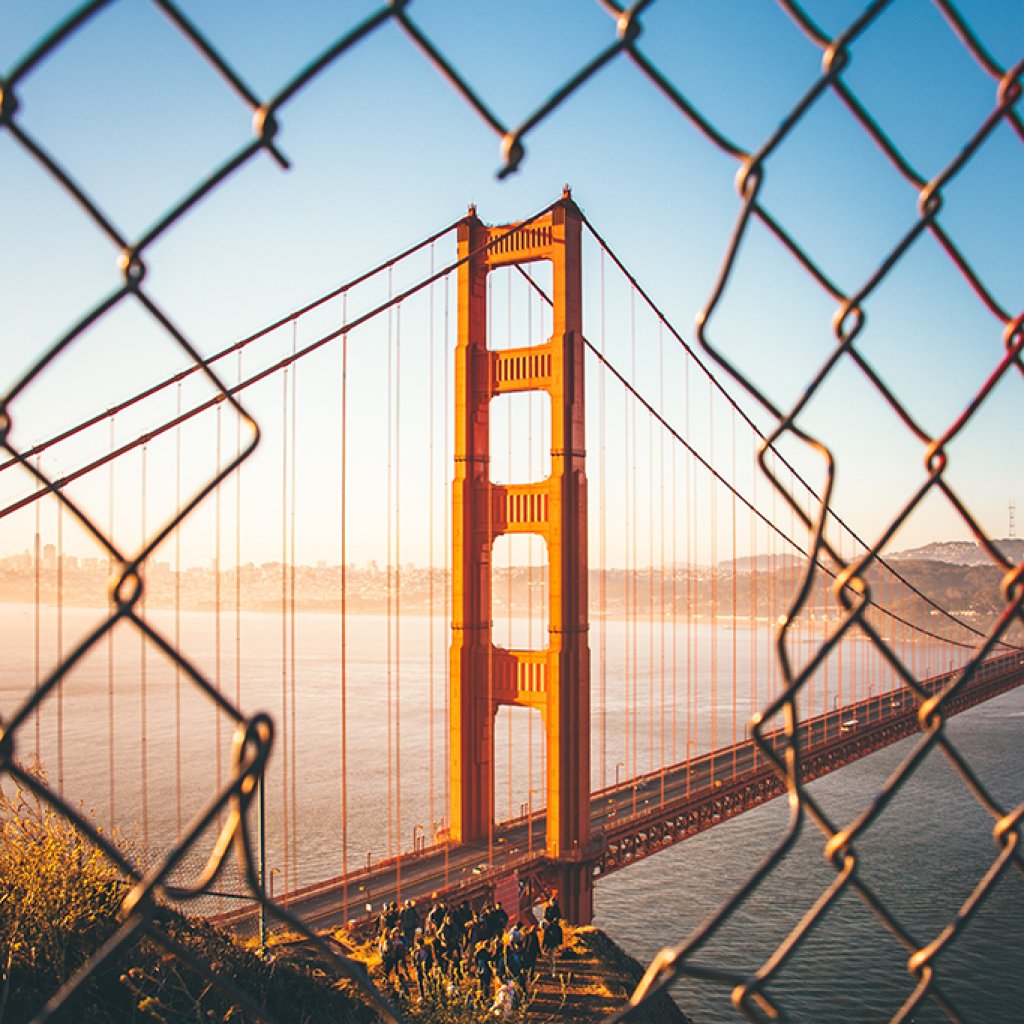
Fences have a constant pattern that’s ideal for creative photographs. A fence with a gap, like the one in the photo above, is fantastic for framing landscape photos and portraits.

model hand foreground

Hands

If you want to include human elements in your photos, partly cover your lens with a hand.

Stretching your own hand in front of the camera can create a melancholic atmosphere or a sense of yearning.

If you’re a portrait photographer, have your model hide parts of their face with their hand, like in the photo above. You can use this technique to shape their face, highlight specific features, or simply make your portraits look more interesting.

people foreground

People

Photographing through crowds of people is a popular technique used in street photography. Indirectly using people in your compositions will create a sense of familiarity.

In the photo above, the little girl is adding even more depth to the story. Even though she’s blurry, you can’t help but wonder if she’s just a stranger or if she’s related to the couple in the distance.

flowers foreground

Flowers and Plants

If you need to make your indoor photos look more exciting, use plants. Even if you don’t have a green thumb, chances are you own a plant or two. Flowers are perfect for enhancing simple portraits and still life shots. The more colorful they are, the better!

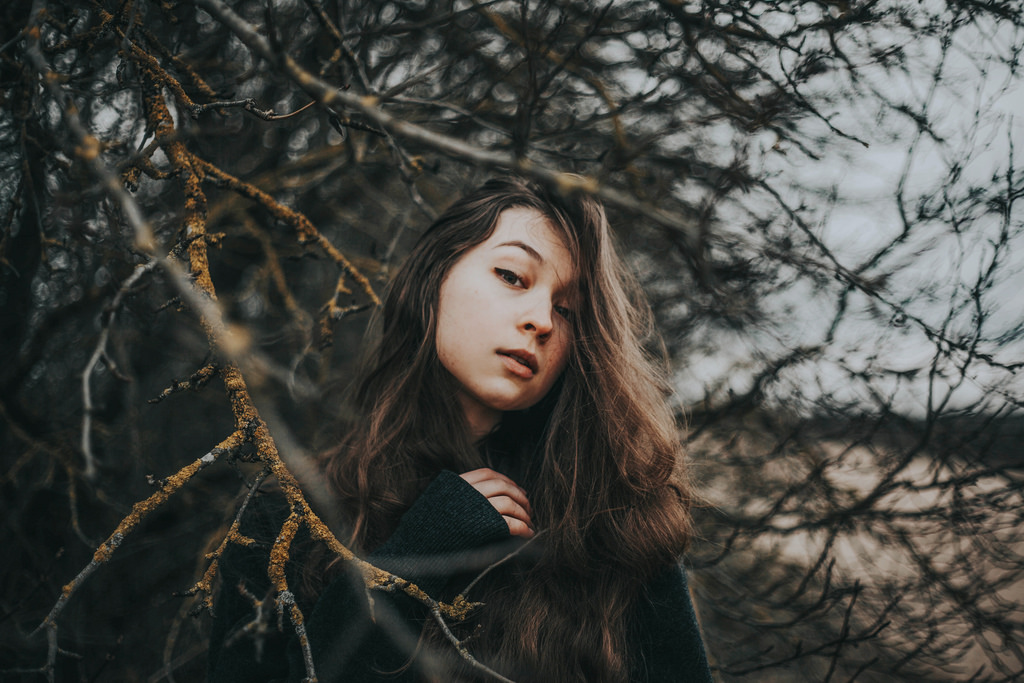
branches foreground

Branches

For fun outdoor shoots, use branches as foregrounds. Shooting through branches will create a contrast between your subject and the foreground. Curvy branches are great for creating striking compositions, while straight ones are perfect for photographers who want to experiment with leading lines.

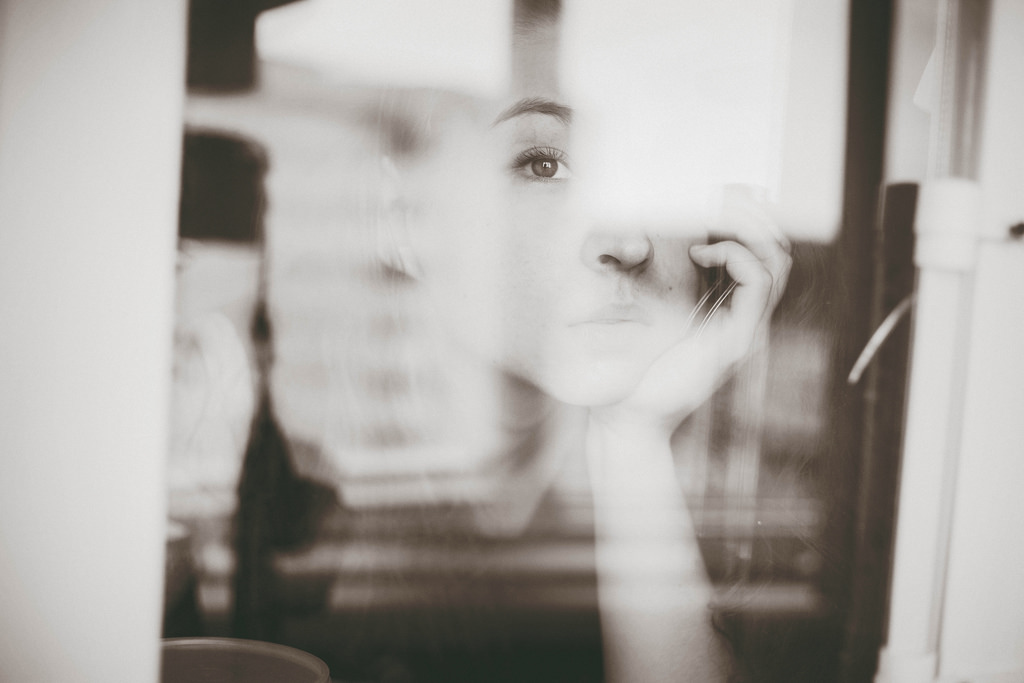
window foreground

Windows

One of my favorite foreground styles is the combination of windows and reflections. When you shoot through a window, you’ll get beautiful blurred reflections that will add texture to your image.

Extra tip: when you photograph through a window, don’t stand directly in front of it unless you want to be visible in the shot. Shoot from the side to avoid camera reflections.

string lights foreground

String Lights

String lights, or fairy lights, are becoming increasingly popular thanks to the creativity of photographers like Brandon Woelfel. Hold them in front of your lens and they’ll create stunning bokeh. They can be stretched out to your subject, strategically framed around your composition, or simply held by you or your model. Each of these approaches will make your photos look soft and ethereal.

Whether you’re looking to take your compositions to the next level, brighten your photos, or become more detail-oriented, blurred foregrounds will help you improve your photographs. Remember to experiment as possible; even the simplest objects have the power to make your photos stand out.

What are your favorite foreground objects?

How to Add Unique Effects With Lens Movement

When people think that they want to get really amazing and unique photos, they usually think they need the best equipment and the best software to get those photos. While that does help and it can help turn a basic picture into something dynamic, you can get the same amazing impact with proper lens movement. When you know how to move our lens to create unique pictures, you will be able to get photos that stand out and make a viewer look at things in a different way.

Follow these tips to create some truly stunning creative effects with intentional lens movement.

The Equipment

The first thing you need to do is get the right equipment to make these lens movement photos a success. You don’t need super-high end items for this to work, but having good equipment is always important. A good DSLR with a 24-70mm lens will work best. You should also have a good speedlight flash as well.

With your equipment, you should have a setting similar to a small aperture of f/13, with a shutter speed of about 1/6 of a second. It is very important that you use a slow shutter speed because you need that extra bit of time to adjust the lens to get that unique effects.

lens-movement-1

How to Do It

When you have your subject in front of you, you will need to do the following to get the right look with the picture.

First, you want to set your timing of the flash to rear curtain. This means that the flash will go off when the exposure is over, rather than at the beginning.

Second, you need to start zooming in after you have triggered the shutter. When you have it set for one-sixth of a second, you need to be very fast when you do this. Zoom in as quickly as you can to get that look on the picture. In addition, squeeze the shutter as you are starting to zoom in.

The Flash and Stash

Another really cool tip for creating unique effects with lens movement is to use the flash and slash technique. This technique can actually create some really energetic images that dramatize the movement but allow the subject to stay sharp in the photo. With this technique, there is motion in the background, so the subject has the feeling of movement through the still image.

lens-movement-2

With your camera, you will want to have the aperture set at f/22, with an ISO of 200 and an exposure of one-third of a second.

In order to use this technique, you need to do the following:

  1. Set your camera so that the flash will happen at the end of the exposure. This is done by setting it to the Rear Curtain Sync.
  2. You can have your ISO higher than 200, but it should be no higher than 800. A lower ISO is going to be better for creating that blur effect.
  3. As you take the picture, begin to move the camera in a rotating fashion to get the blur of the subject centered but everything moving around the subject in a blur.

Your subject generally should be still as you move the camera in a counter or clockwise fashion while you stand in one place in front of the subject. This is what creates the look of motion, and the flash firing at the end helps to give sharpness to the subject.

This technique is actually really great for shooting in a low-light situation with a long exposure, when the showing of activity is very important.

Panning

There are several other techniques you can use including panning while you take the picture. With panning, you are imitating the movement of the subject and this gives the image of a clear subject moving over a blurry background. You typically have the camera set at one-quarter of a second. If you want to have less blur, you could set it at 1/30 of a second.

lens-movement-3

Getting the right kind of movement can give your pictures a very surreal and wonderful look to them. Don’t be afraid to try things out to create the photo effect that you want.

Behind the Photoshop Filters Masterclass – Gaussian Blur

In this post, I want to start a short series of entries explaining what lies behind some of the post-processing filters that we use on a regular basis with programs like Photoshop or Lightroom. These articles might be a bit technical, but I’ve always found it interesting to know how things work, so I am pretty sure that there are other people out there that will feel the same.

I want to start by looking at a ‘softening’ filter, the Gaussian Blur. This is a filter that, as the name implies, blurs the image (or sections of it) and is often used to reduce the noise of specific regions or when using specific techniques such as frequency separation. But first, let’s see what a filter is in the first place.

Filters

There are many different types of filters, including the ones used for photography when attaching them to the lens to achieve a specific result. The ones I am focusing here are signal processing filters, meaning that they are applied to given ‘signal’. For the specific case of photography, by ‘signal’ we mean the image we are working with.

However, to better illustrate the basic functioning of signal processing filters, it makes sense to look at a simpler example. Images are two-dimensional (2D) in nature, so we will first see what a filter does to a one-dimensional (1D) signal.

The simpler signal one can imagine for this purpose is a sinusoidal signal. This is, for instance, the type of signal that is used to transmit electricity through power lines. The following image shows a sinusoidal image with a frequency of 1 Hz (Hz being an abbreviation for Hertz, meaning ‘cycles per second’).

figure_1

The frequency is a measure of how many times per second the signal repeats itself. Signal processing filters act upon the so-called frequency components of a given signal, which are the different signals superimposed upon each other, by ‘filtering out’ or eliminating a specific frequency component. Since our simple signal has only one frequency component (1 Hz), it does not make sense to apply any filter, since we will end up with no signal at all.

So let’s complicate our signal by adding another frequency component. This can be achieved in different ways. The following signal was obtained by simply adding a sinusoidal function with a frequency of 10 Hz. What you see now is a superimposition of two frequencies which is actually visible.

figure_2

The two components in the image above are analogue to the low- and high-frequency components of an image. While the fast changing signal, which completes 10 cycles in 1 second, could be related to an area of large changes (like a brick wall), the slow changing one, completing only 1 cycle in 1 second, could be related to soft clouds on a blue sky.

Now, if we apply a low-pass filter (low-pass meaning that we will let the low frequency components pass and will filter out the high frequency components), what we get in the end is the original signal, simply because we removed the added one. In the example mentioned above, this would be similar to getting rid of any detail on the brick wall while maintaining the soft details on the sky.

Image filters

Image filters work on a similar way but, since as mentioned above images are 2D signals, the filters need to be 2D as well. In a past article, I mentioned that images have, as well, low-frequency and high-frequency components. For this reason, we can also apply a low-pass and a high-pass filter. In this post, I will focus on the low-pass filter, which is the basis of all the blurring filters, being the Gaussian blur one of the most common ones.

The way filters are applied to images is based on a mathematical operation called convolution. Simply put, a convolution is a sequential multiplication of a small matrix (the filter) by a large matrix (the image). Notice that from a mathematical perspective, an image is simply a matrix, as it is the filter, and what the convolution does is multiply both matrices at every possible position, starting from, say, the top left corner and ending at the bottom right corner.

The name Gaussian comes from the function defined by the filter matrix. The following image shows the shape of a 1D Gaussian function.

figure_3

To illustrate how the convolution works, it is useful to imagine a ‘1D image’ which, for our purposes, will be a line with X values from 1 to 10 and a constant Y value of 1. The X values can be regarded as the pixels of our 1D camera and the Y values the amount of light of our image.

Now try to imagine the result of multiplying the Gaussian function by our image pixel by pixel. Since the maximum value of the Gaussian function is one, it is easy to see that, at the point of the image that coincides with this maximum, the final result will by 1×1 = 1. The rest of the surrounding pixels will acquire the value of the Gaussian curve. This is a simple case because our ‘image’ was formed of ones only.

What is important here is that the Gaussian function gives special importance to a given pixel while it decreases the information contained on the surrounding ones. The particularity of the convolution process is that this is carried out all over the image which, for our 1D case, would mean moving the filter from the position where the maximum peak matches the first pixel until the one where it matches the last one. What we are doing by this process is that, for any given pixel, a special kind of average value of the surrounding pixels is taken into account to obtain the final pixel.

This might sound a bit complicated, but put in different words, what the filter does is include information from the surrounding pixels for all the pixels in the image. And this is why the blurring effect works. What the image processing software (Photoshop, Lightroom, etc.) does is this mixture of information and how much information is going to be mixed is decided by the radius of the filter, a parameter that can usually be adjusted by the user.

The following image shows the effect of a Gaussian blur applied using a self-written code in a programming language called Python.

figure_4

This post might have not given any useful tip to get better images, but if you are interested in what happens when you click on specific functions of your preferred image processing software, I hope you found this interesting. If you have any question regarding the contents of this post, don’t hesitate to write me an email!

Photoshop Sharpness – Getting the most out of your camera

Today I want to address a problem that most of us face at some point during our lives (that sounds dramatic, but it is true, at least if you care about photography anyway!): how to get a perfectly sharp image.

There are a couple of great articles on the Sleeklens blog covering sharpening and noise reduction (two things that are deeply intertwined) in Lightroom, so for this entry I will focus on how to get the sharpest image right from your camera so that the post-processing is as simple as possible. And, for those situations where we had to deal with some blurriness anyway, I will briefly explain a nice technique for that in Photoshop as well.

Capturing the image

First of all, let’s define sharpness, for the purpose of this article, as the contrary to blurriness. This helps us focus on what we need to do to get a sharp image, which is the same as getting an image as free of blurriness as possible.

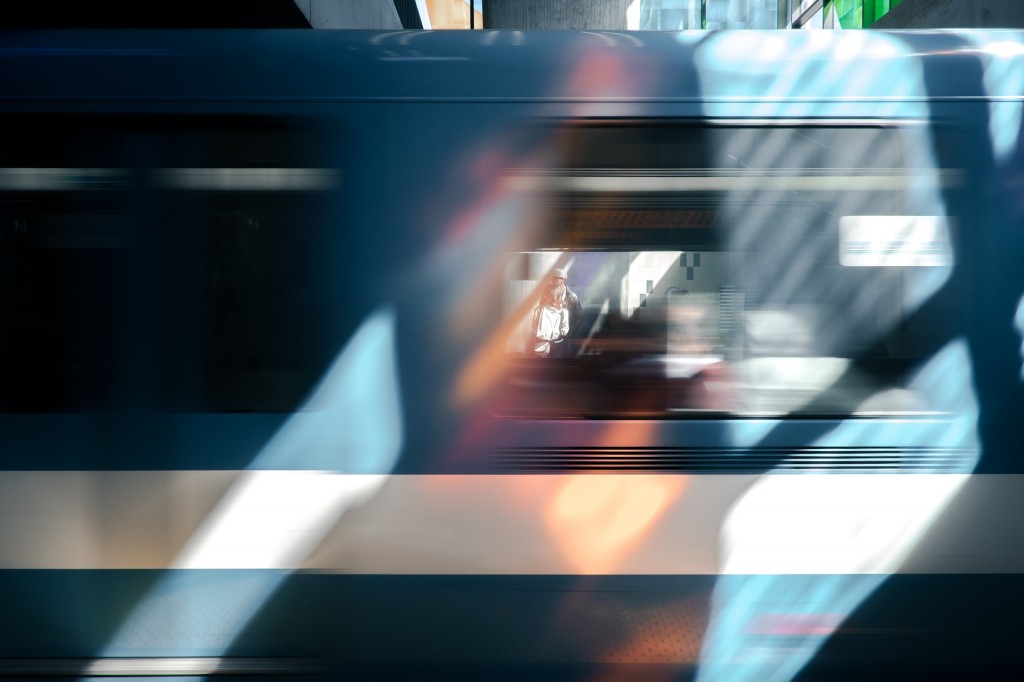
But where does blurriness come from? In photography, this can originate as an effect of moving the camera or a subject in motion while taking a photo (motion blur), or by more specific aspects related to the camera itself, the lens or filters being used (Gaussian blur). Then there is also the artificial blur that can be introduced with so-called low pass filters, but we are not concerned with that right now.
train-828597_1920

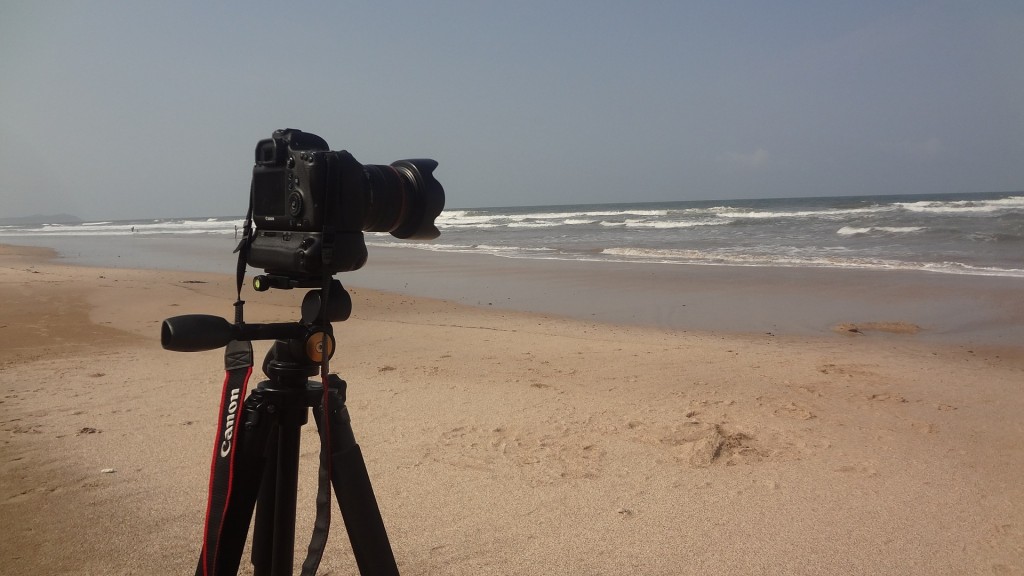
So let’s start with the easy one: motion blur. Unless you are trying to capture moving objects with long exposure photography or experimenting with your camera in different ways, motion blur is something you want to avoid. And there is only one way to do it: get a sturdy tripod and use it whenever you can. Many people only get their tripods out of their bags when they want to take photos under low light conditions, but I really recommend always using your tripod, unless you are after an action shot that happens too quick to set the tripod or if you don’t carry one at all.

That said, even with a very good tripod, a mild wind can shake your camera in a way you cannot perceive but still make your final image look blurry, so if there is any wind at all, try to put your body between the wind and your camera to block as much as you can. Sometimes this might prove harder than it seems, but most of the time this is as much as you can do.
camera-961942_1920

Finally, use the delay function of your camera to give some time for the tripod to stabilize after pressing the shutter button. Two seconds are usually enough, but the exact time will depend on the camera you use.

Now let’s move on to the hard part. Sometimes you might notice that even on a perfectly still day and after spending $500 on a tripod, after you take your photo, go back home and open your file on Photoshop or Lightroom, you realize that the image is blurry anyway! But before throwing away your tripod or getting a new camera, read on (even though it is true that better cameras produce sharper images, chances are that you have some things that you are able to improve in your workflow before thinking about that!).
camera-1125872_1920

One easy thing to try if you are taking long exposures is to turn off the image stabilization of your lens. That sounds counter-intuitive, but if you are using a tripod and taking relatively long exposures, the image stabilization system can actually try to compensate for some motion that is not there, finally producing a slightly blurred image. Image stabilization has helped to push the exposure time at which we definitely need a tripod a lot, but when using a tripod, it becomes unnecessary so taking it out of the way might be helpful sometimes.

The next one is related to the focal length you use. Building lenses is a delicate and difficult task. And building lenses that retain the same sharpness throughout the whole focal length range is almost impossible. It is for this reason that lenses have something called ‘sweet spot’. Simply put, when you take the aperture to the extremes (very small or very large f-numbers) your lens will produced less sharp images. Each lens is different, so the only way to find out the ideal range for your lens is to go out and take the same image only changing the f-number, but as a rule of thumb, staying three steps away from the limits should work quite well.
filter-87327_1920

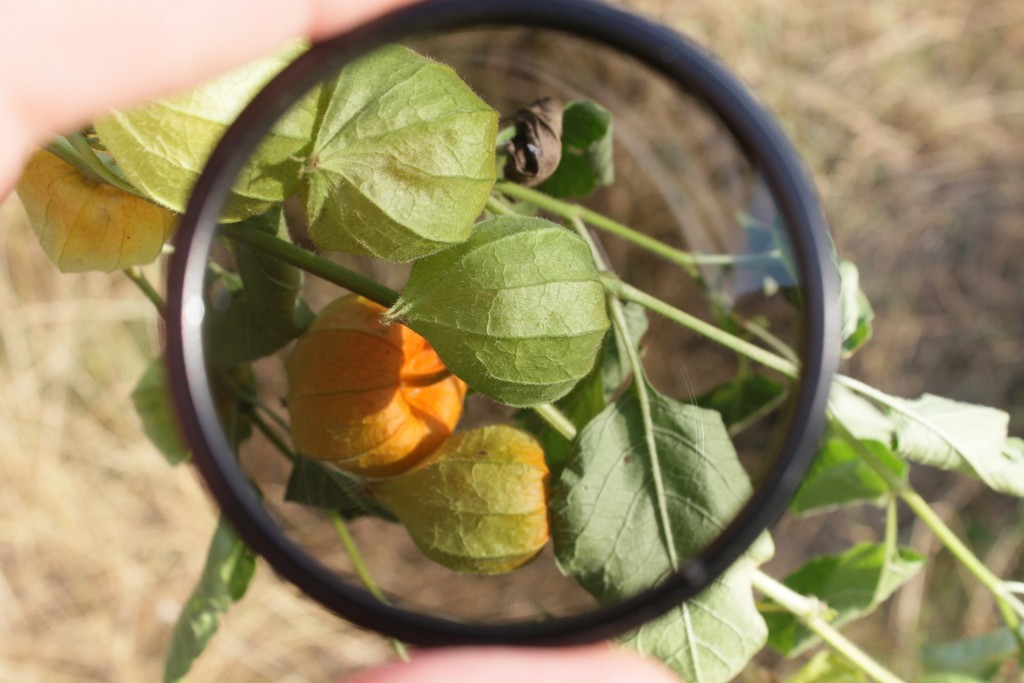
Finally, using certain types of filters will also affect the overall sharpness of your image. Probably the filters that have the worst effect are neutral density (ND) filters. These filters, used to capture long exposure images in daylight, can have very strong effects both in the sharpness of your image and in the white balance.

But what happens if you end up with a blurry image anyway? You might have needed to use an ND filter or you just did not realize your image was blurry until you got home. What can you do?

Frequency separation in Photoshop

Photoshop, as well as Lightroom, has a set of filters devoted to the sharpening of your images. They are simple to use but they also have a downside: when you want to remove the blurriness of an image, what the filters do is enhance the borders by applying a so-called high pass filter. The problem with high pass filters is that they tend to introduce noise, and this noise can sometimes damage parts of your image, especially those with low contrast such as the sky.

Take a look at this image, captured in the Cordillera Blanca in Peru:
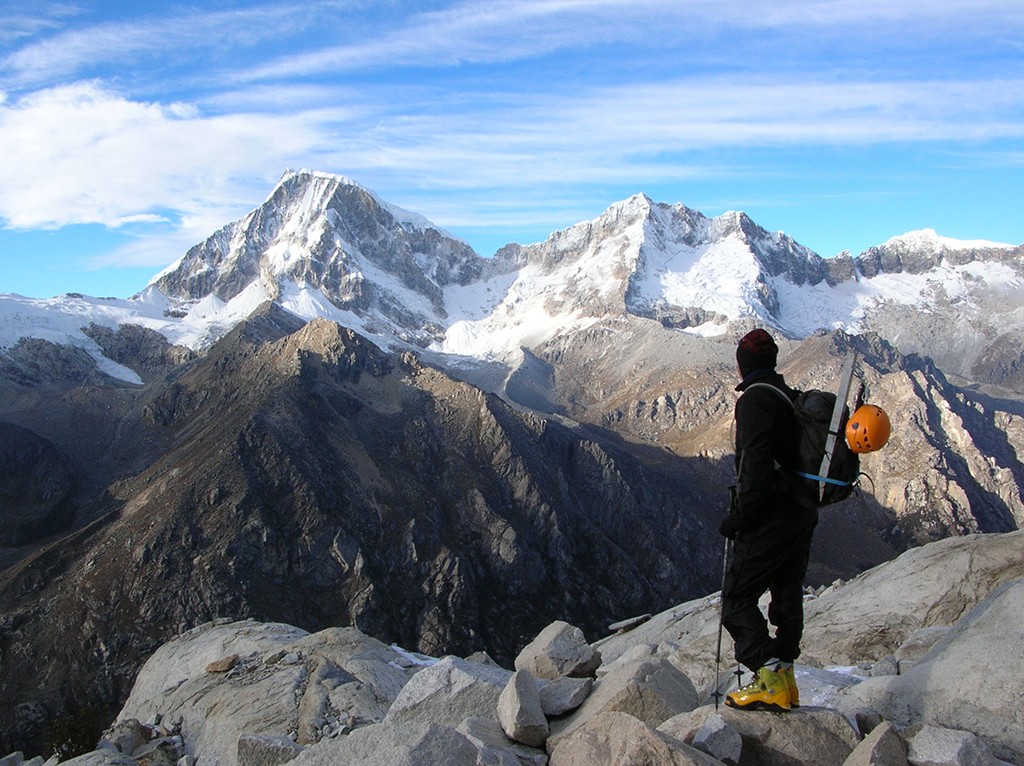
DSCN1995_withouthsharp DSCN1995_withsharp

The top image is the original file without any added effect while for the bottom one a simple sharpening filter was added (Filter -> Sharpen -> Smart Sharpen… in Photoshop). They both might look pretty similar, but if you look closely enough, the top one is a bit blurry, especially noticeable in the mountains. This has been improved in the bottom one, but the problem I mentioned before is there: the sky looks now rather noisy. This is easier to see if we zoom in to 100%:

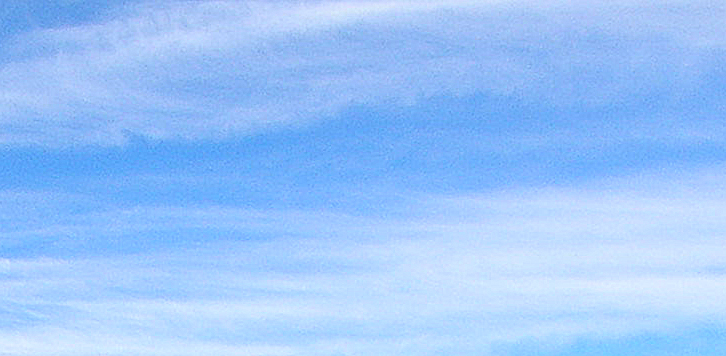
sky_withoutsharp

sky_withsharp

You can improve the situation by creating a layer mask in Photoshop and masking out the sharpening effect on the sky, but then it gets quite complicated when you try to select the horizon. Luckily enough, there is a nice technique called ‘frequency separation’ that comes to our rescue.

The term frequency separation comes from the fact that images, same as for instance music, are formed of many different components that have different frequencies. While in music high frequency refers to high pitch tones and low frequency to low pitch tones, in photography high frequency refers to regions where there are many changes in contrast within a small area while low frequency refers to regions with few changes over that same area. For instance, in our image, the sky is a low-frequency area (because for a given area there are not many changes in color) while the mountains are high-frequency areas.

So what we want to do is separate the low-frequency part of our image from the high-frequency part in order to be able to separately edit them. This way, we can increase the sharpness in the high-frequency part (mountains in this case) without affecting the low-frequency part (sky).

The first thing we do is duplicate our base layer twice. You can name these new layers however you want. I called them here ‘Low Frequency’ and ‘High Frequency’.
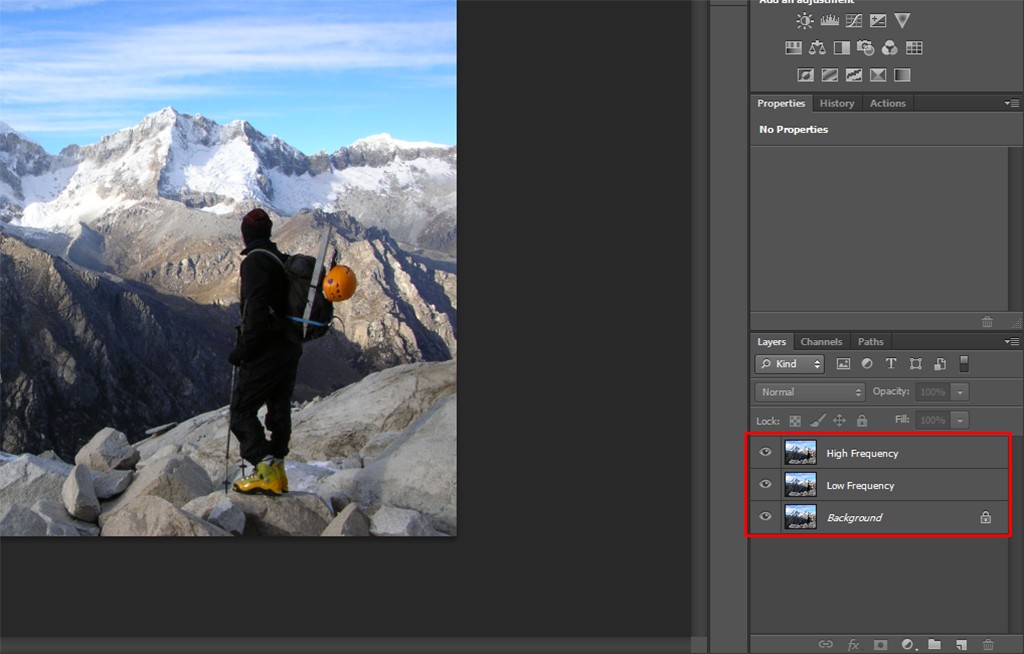
fsep1

The next thing to do is separate the frequencies. The low-frequency component is achieved by blurring the image until you see a uniform sky (or any other part of your image that you don’t want to get modified when applying the sharpening filter later on). The amount of blur will vary, but it usually is relatively large (around 10 pixels or more), so that the whole image looks blurry. For this you make the top layer (high frequency) invisible, select the middle layer (low frequency), go to Filter -> Blur -> Gaussian Blur… and apply the amount you feel happy with. In my case, I chose 50 pixels.
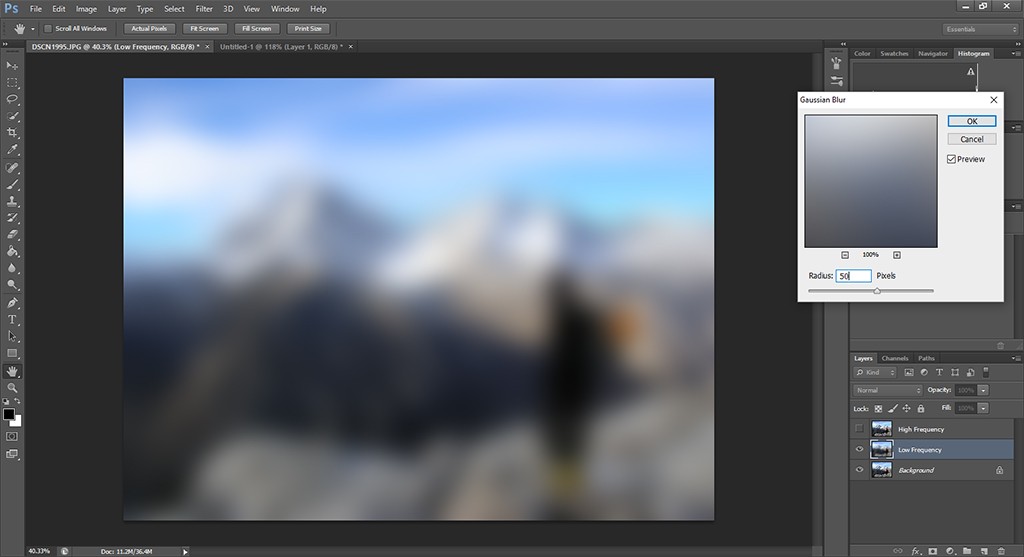
fsep2

For the high-frequency component, we make the top layer visible again, go to Image -> Apply Image… and select Subtract as the Blending method and apply it to the Low-Frequency layer (see the different parameters in the next figure).
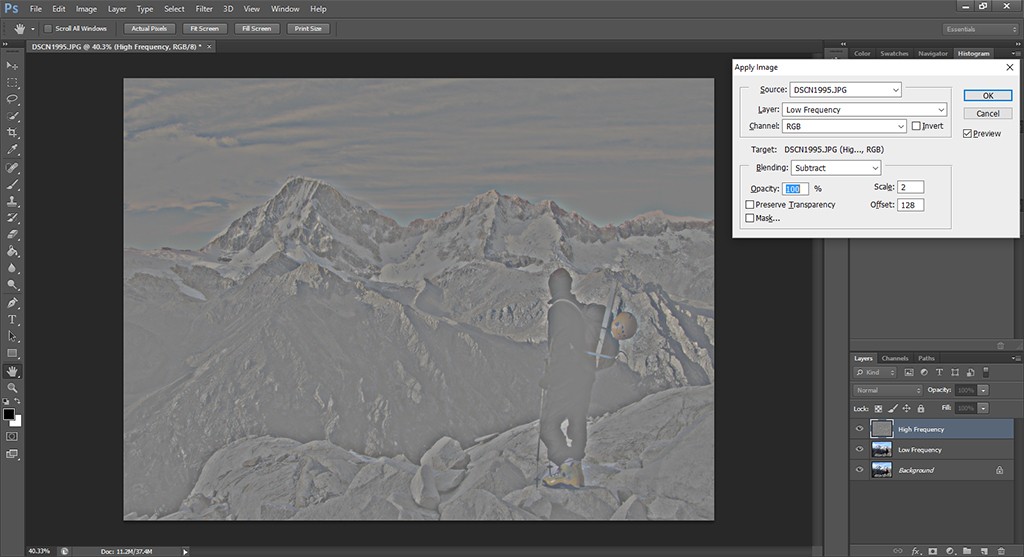
fsep3

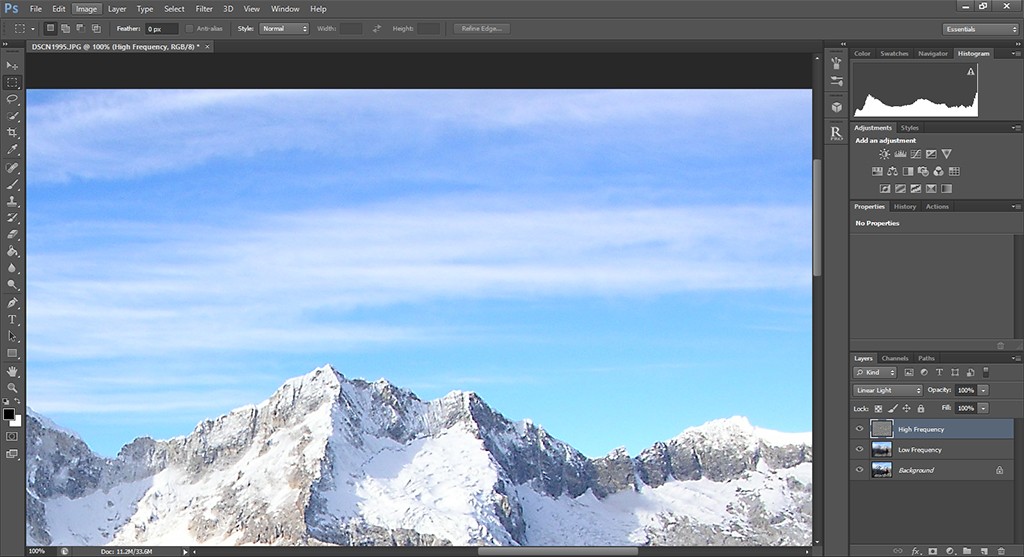
After you do this last step, the image will look like the one above. This is because you are looking at the difference between the two layers. To get a normal image again, just change ‘Normal’ to ‘Linear Light’ in the drop-down menu right above your layers and to the left of opacity.
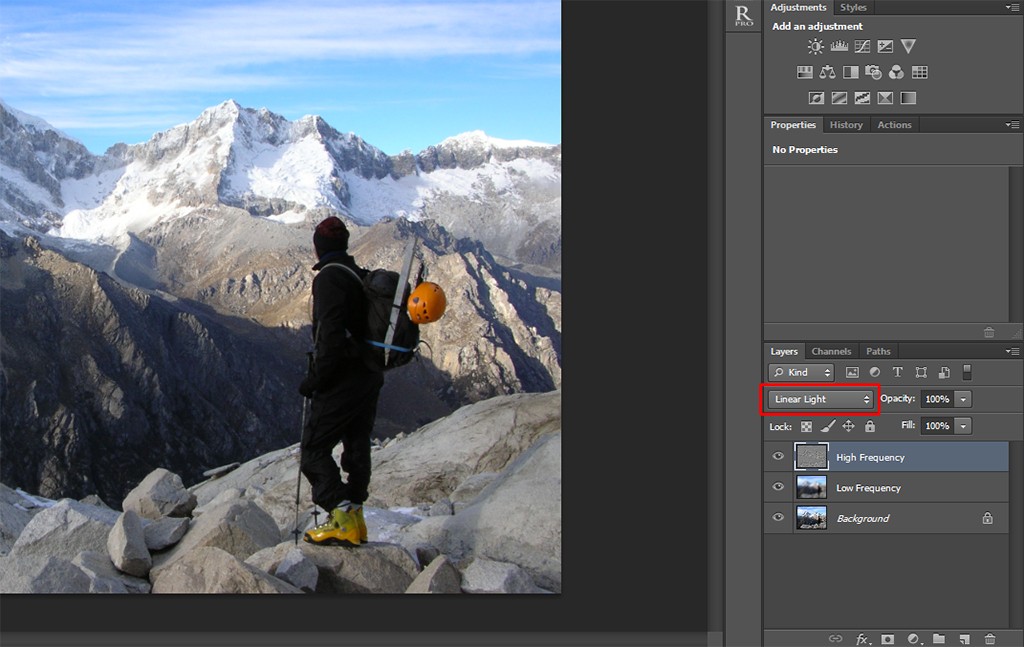
fsep4

We are now ready to apply the sharpening filter. For this, we select the top layer, go to Filter -> Sharpen -> Unsharp Mask… and we select the values according to what makes our image look the way we want.
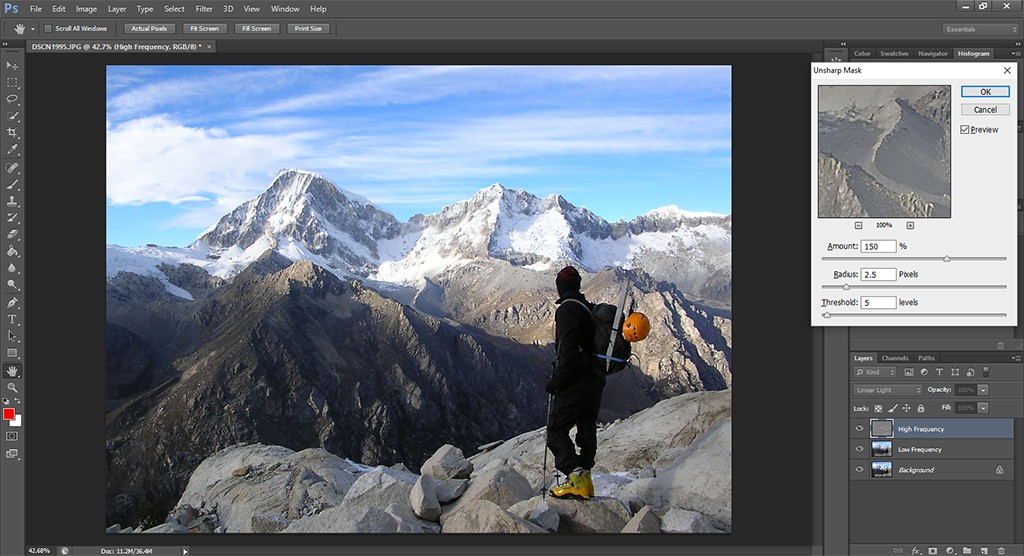
fsep5

Notice that we are able to select relatively large values for the Amount and the Radius and, as we will see in the next couple of images, the sky is unaffected by this.
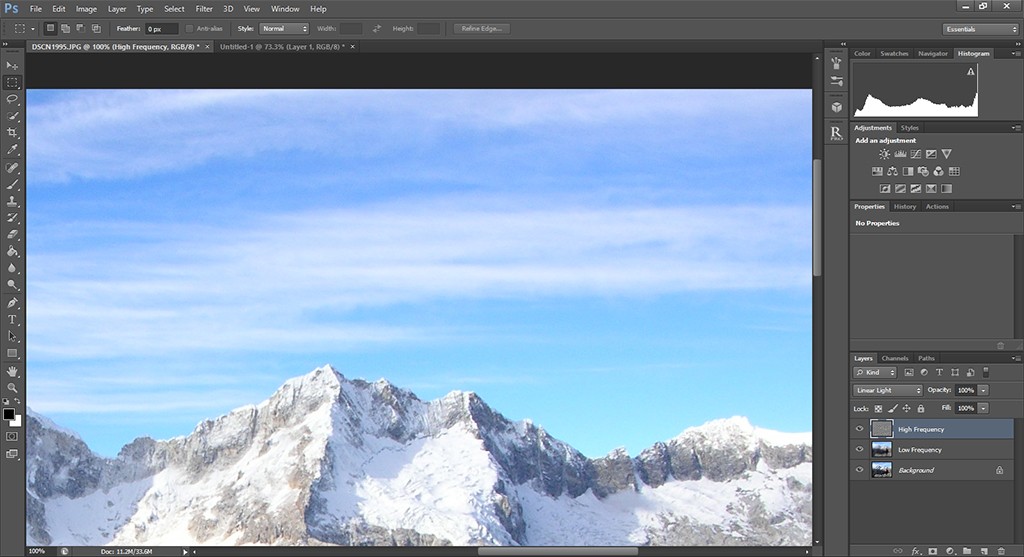
fsep_nosharp

fsep_sharp

The top image shows a 100% view of a part of the image before the sharpening and the bottom image shows the same area after the sharpening. Notice that the sharpening is visible in the mountains but not in the sky, thus avoiding the appearance of unwanted noise. The really neat thing about frequency separation is that we don’t need to worry about a very precise horizon selection, but with just a few steps, everything is automatically done.

I know this might sound a bit complicated at first (it was for me, at least!) but with practice you will work it out. So, as usual, have fun with it!
Here Is How To Blur Background In Lightroom

Sometimes you take a picture, but the end result is not as you expected, leaving too many objects in focus and diverting attention from the main subject of the photo.

In this tutorial, we will learn how to use the adjustment brush to blur the background of a picture and highlight the main subject reducing the depth of field, a common effect in close-up photographs. You can see the result in this before and after comparison below. Let’s begin!

Before and after

Step 1) Import or select an image from your library that has more than one object in focus so we can practice this effect. Go to develop mode and select adjustment brush from the panel on the right:

Selecting adjusment brush

Step 2) When we select the adjustment brush, the adjustment panel will appear right above the basic panel. In this panel, we can work with various adjustments in our picture, but these settings will apply only to the adjustment mask. Click “New” and let’s start a new mask.

Create new adjustment mask

Step 3) You’ll notice that the cursor changes to a different format (a circle with a cross in the middle, similar to photoshop). In order to view the areas that will define the mask, select the “Show selected mask overlay” In the right panel you can see some options regarding the adjustment brush aspect:

Adjustment Brush settings

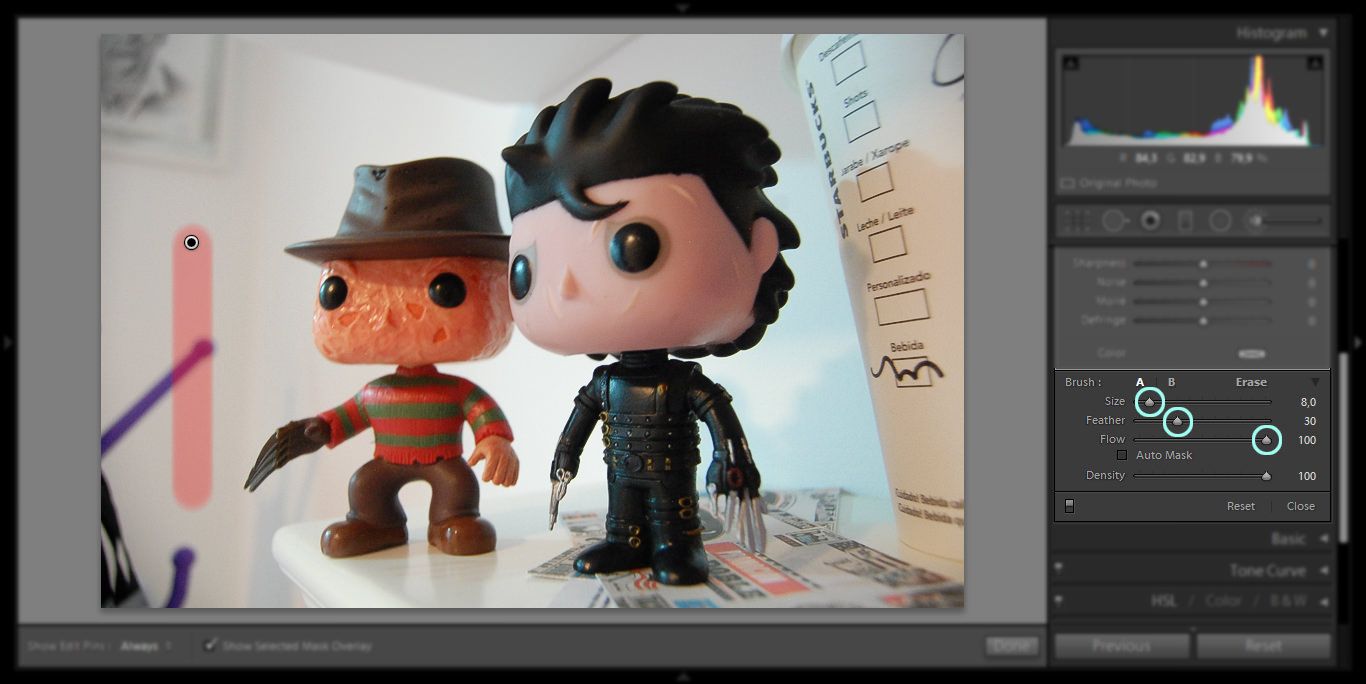
Size – This is the brush size to be used, the higher the value, the bigger the image area that will be covered by the adjustment mask.

Feather – This option defines the hardness or softness of the brush, as an example of the brushstroke in the picture.

Flow – Defines the intensity of the stroke, the lower the value, the lower the intensity of the mask.

Just tweaking some of these parameters, we can already see the difference of the brush stroke. Let’s say, if we increase the hardness of the brush and decrease the size of the stroke, we will get the following result:

Brush Hardness and Size

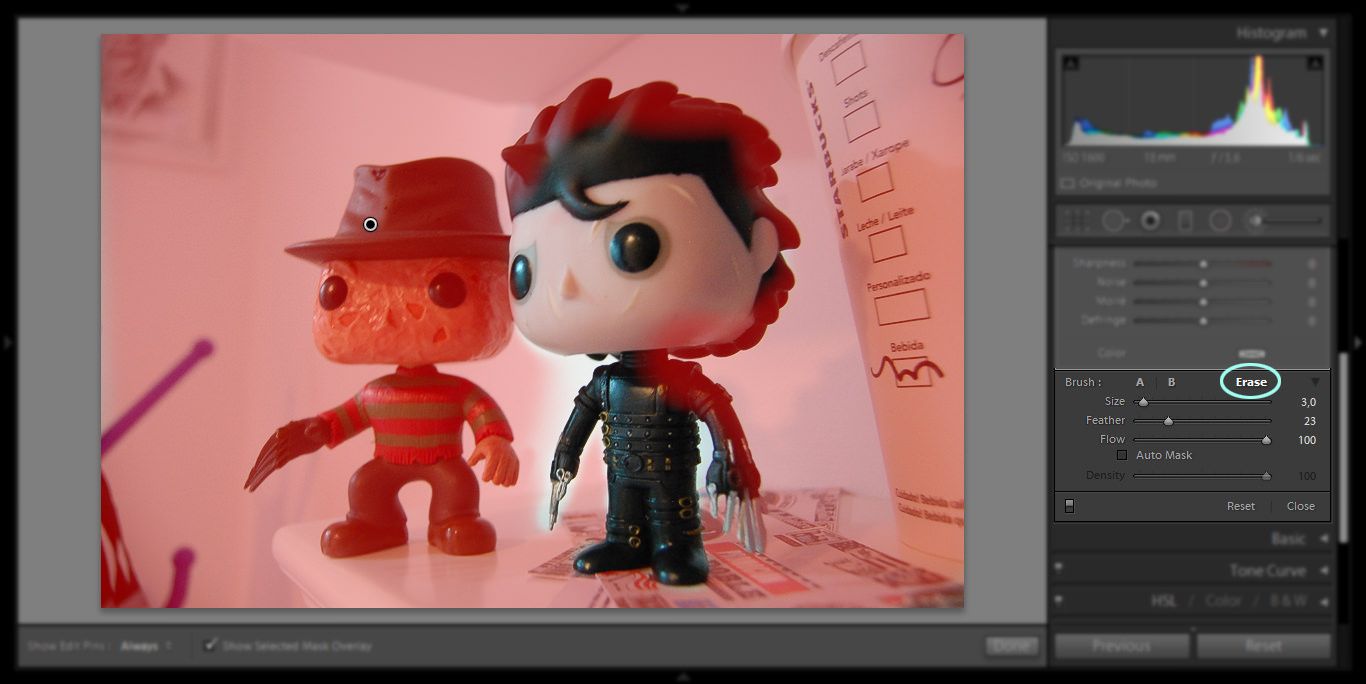
In case you cover an area of the image on which you do not want to apply the adjustment mask, you can trim and delete it by clicking on “erase”, so the brush can erase the mask off unwanted areas. You can notice that the right panel has the same adjustments for the normal brush, being able to control size, hardness and strength parameters.

Erase options

After a couple minutes with the adjustment brush, the final mask will be like this:

Final mask selection

(You can note some areas of my image are not trimmed perfectly, but I’ve made it like this because of the white background, which will end up not affecting the final effect)

Step 4) Now it is time to apply the blur effect, uncheck “show selected mask overlay”, so you can see the changes on the image as you change the parameters in the right panel. For the blur effect, we will move all the clarity and sharpness to the left, decreasing the contrast and highlight from the edges only in the areas selected by the mask. In the example image, I used the maximum values, but you can work with different values depending on the result you want or photo used.

Tweaking clarity and sharpness

Step 5) We can save this adjustment brush setting for future uses, this can be done by creating a preset. Click on the two small arrows located in the right panel and select “save current settings as new preset ..”.

Creating an adjustment preset

Rename the preset with the desired name and click “create”.

Create adjustment preset

Step 6) For the final result I want the picture edges to have a more pronounced effect, we can do this by creating another adjustment mask by clicking “new”

Create new adjustment mask

My second adjustment mask ended up like the image below. To finalize the editing, click “done”

Second Adjustment mask

The final result can be seen below. I’ve also removed some objects that were in the corner of the image with the “healing brush” using Photoshop. If you have any suggestions or doubts you can write a comment below or contact me directly. See you next time!

Final Result