
In this post, I want to start a short series of entries explaining what lies behind some of the post-processing filters that we use on a regular basis with programs like Photoshop or Lightroom. These articles might be a bit technical, but I’ve always found it interesting to know how things work, so I am pretty sure that there are other people out there that will feel the same.
I want to start by looking at a ‘softening’ filter, the Gaussian Blur. This is a filter that, as the name implies, blurs the image (or sections of it) and is often used to reduce the noise of specific regions or when using specific techniques such as frequency separation. But first, let’s see what a filter is in the first place.
There are many different types of filters, including the ones used for photography when attaching them to the lens to achieve a specific result. The ones I am focusing here are signal processing filters, meaning that they are applied to given ‘signal’. For the specific case of photography, by ‘signal’ we mean the image we are working with.
However, to better illustrate the basic functioning of signal processing filters, it makes sense to look at a simpler example. Images are two-dimensional (2D) in nature, so we will first see what a filter does to a one-dimensional (1D) signal.
The simpler signal one can imagine for this purpose is a sinusoidal signal. This is, for instance, the type of signal that is used to transmit electricity through power lines. The following image shows a sinusoidal image with a frequency of 1 Hz (Hz being an abbreviation for Hertz, meaning ‘cycles per second’).

The frequency is a measure of how many times per second the signal repeats itself. Signal processing filters act upon the so-called frequency components of a given signal, which are the different signals superimposed upon each other, by ‘filtering out’ or eliminating a specific frequency component. Since our simple signal has only one frequency component (1 Hz), it does not make sense to apply any filter, since we will end up with no signal at all.
So let’s complicate our signal by adding another frequency component. This can be achieved in different ways. The following signal was obtained by simply adding a sinusoidal function with a frequency of 10 Hz. What you see now is a superimposition of two frequencies which is actually visible.
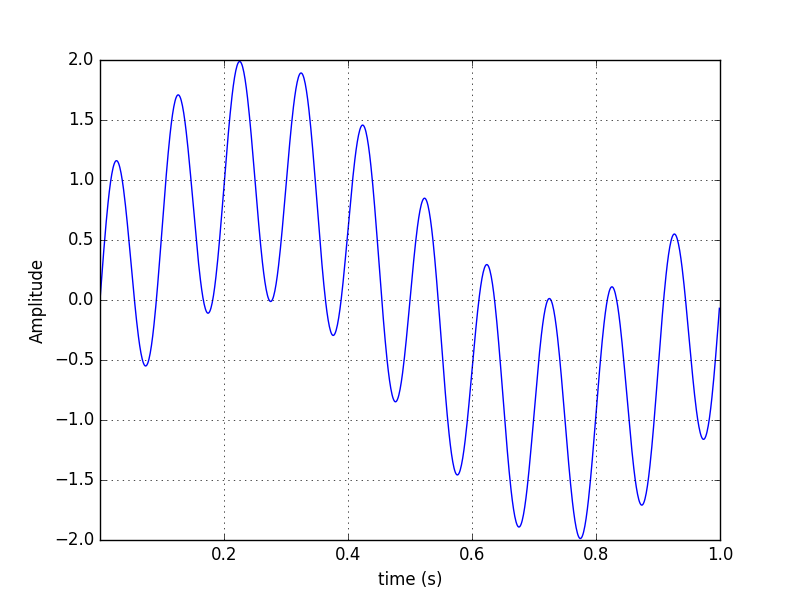
The two components in the image above are analogue to the low- and high-frequency components of an image. While the fast changing signal, which completes 10 cycles in 1 second, could be related to an area of large changes (like a brick wall), the slow changing one, completing only 1 cycle in 1 second, could be related to soft clouds on a blue sky.
Now, if we apply a low-pass filter (low-pass meaning that we will let the low frequency components pass and will filter out the high frequency components), what we get in the end is the original signal, simply because we removed the added one. In the example mentioned above, this would be similar to getting rid of any detail on the brick wall while maintaining the soft details on the sky.
Image filters work on a similar way but, since as mentioned above images are 2D signals, the filters need to be 2D as well. In a past article, I mentioned that images have, as well, low-frequency and high-frequency components. For this reason, we can also apply a low-pass and a high-pass filter. In this post, I will focus on the low-pass filter, which is the basis of all the blurring filters, being the Gaussian blur one of the most common ones.
The way filters are applied to images is based on a mathematical operation called convolution. Simply put, a convolution is a sequential multiplication of a small matrix (the filter) by a large matrix (the image). Notice that from a mathematical perspective, an image is simply a matrix, as it is the filter, and what the convolution does is multiply both matrices at every possible position, starting from, say, the top left corner and ending at the bottom right corner.
The name Gaussian comes from the function defined by the filter matrix. The following image shows the shape of a 1D Gaussian function.
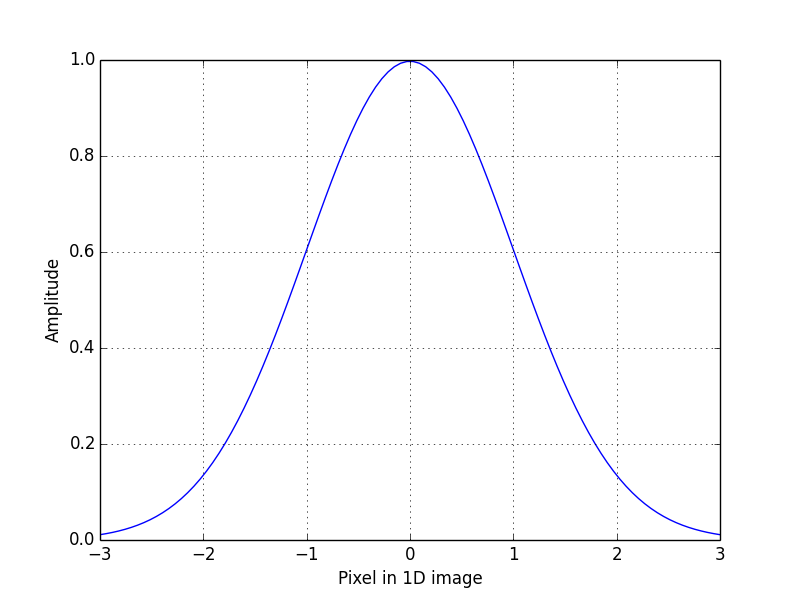
To illustrate how the convolution works, it is useful to imagine a ‘1D image’ which, for our purposes, will be a line with X values from 1 to 10 and a constant Y value of 1. The X values can be regarded as the pixels of our 1D camera and the Y values the amount of light of our image.
Now try to imagine the result of multiplying the Gaussian function by our image pixel by pixel. Since the maximum value of the Gaussian function is one, it is easy to see that, at the point of the image that coincides with this maximum, the final result will by 1×1 = 1. The rest of the surrounding pixels will acquire the value of the Gaussian curve. This is a simple case because our ‘image’ was formed of ones only.
What is important here is that the Gaussian function gives special importance to a given pixel while it decreases the information contained on the surrounding ones. The particularity of the convolution process is that this is carried out all over the image which, for our 1D case, would mean moving the filter from the position where the maximum peak matches the first pixel until the one where it matches the last one. What we are doing by this process is that, for any given pixel, a special kind of average value of the surrounding pixels is taken into account to obtain the final pixel.
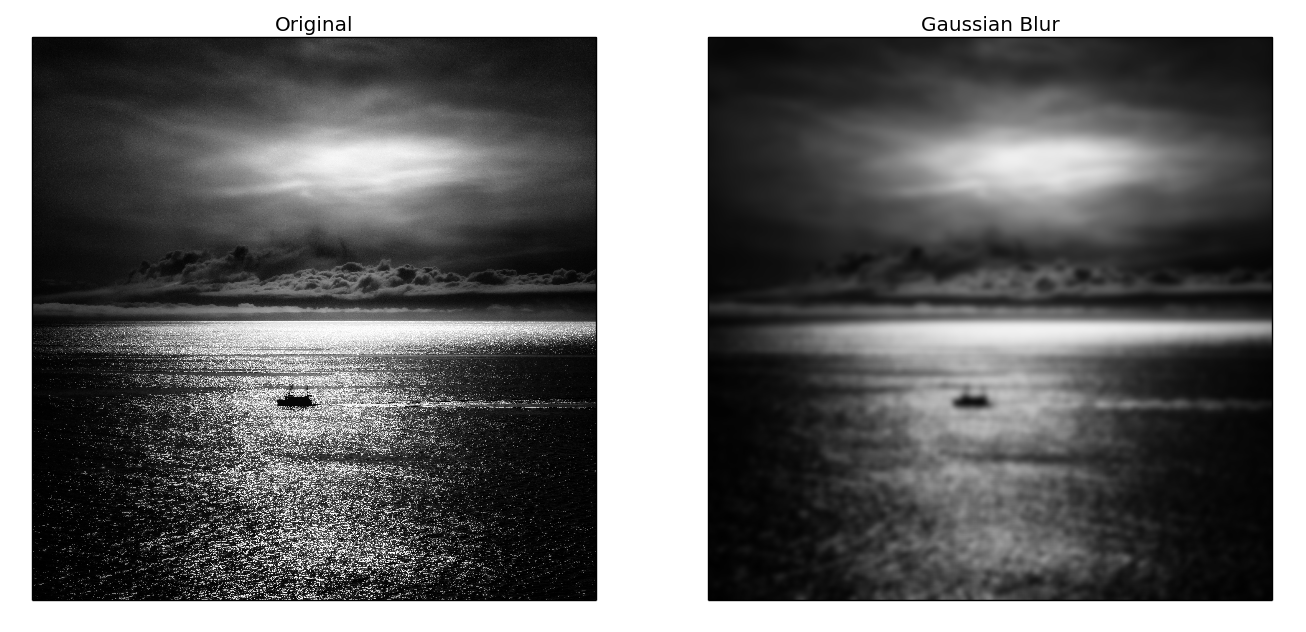
This might sound a bit complicated, but put in different words, what the filter does is include information from the surrounding pixels for all the pixels in the image. And this is why the blurring effect works. What the image processing software (Photoshop, Lightroom, etc.) does is this mixture of information and how much information is going to be mixed is decided by the radius of the filter, a parameter that can usually be adjusted by the user.
The following image shows the effect of a Gaussian blur applied using a self-written code in a programming language called Python.
This post might have not given any useful tip to get better images, but if you are interested in what happens when you click on specific functions of your preferred image processing software, I hope you found this interesting. If you have any question regarding the contents of this post, don’t hesitate to write me an email!


Please verify your software version before proceeding.
 I’ve verified my software version


 Facebook
 Google +
Comments (0)
There are no comments yet.