Tag: clarity

Lightroom Masterclass: What is Clarity?

Clarity is simply a part of contrast. Just like how contrast can sharpen your image, so can clarity. But what is it that makes it not contrast? When you adjust the contrast on an image, you’re adjusting the whole image. Clarity can be used to adjust specific parts of an image in Lightroom presets. However, you don’t get to choose those parts. Clarity takes the mid-tones of an image and enhances them, bringing sharpness to a photo and increasing the texture found there. It is great to use as a spot tool and can be the perfect way to enhance your images in Lightroom. To do this, we have to import the Lightroom preset.

Texture Enhancing

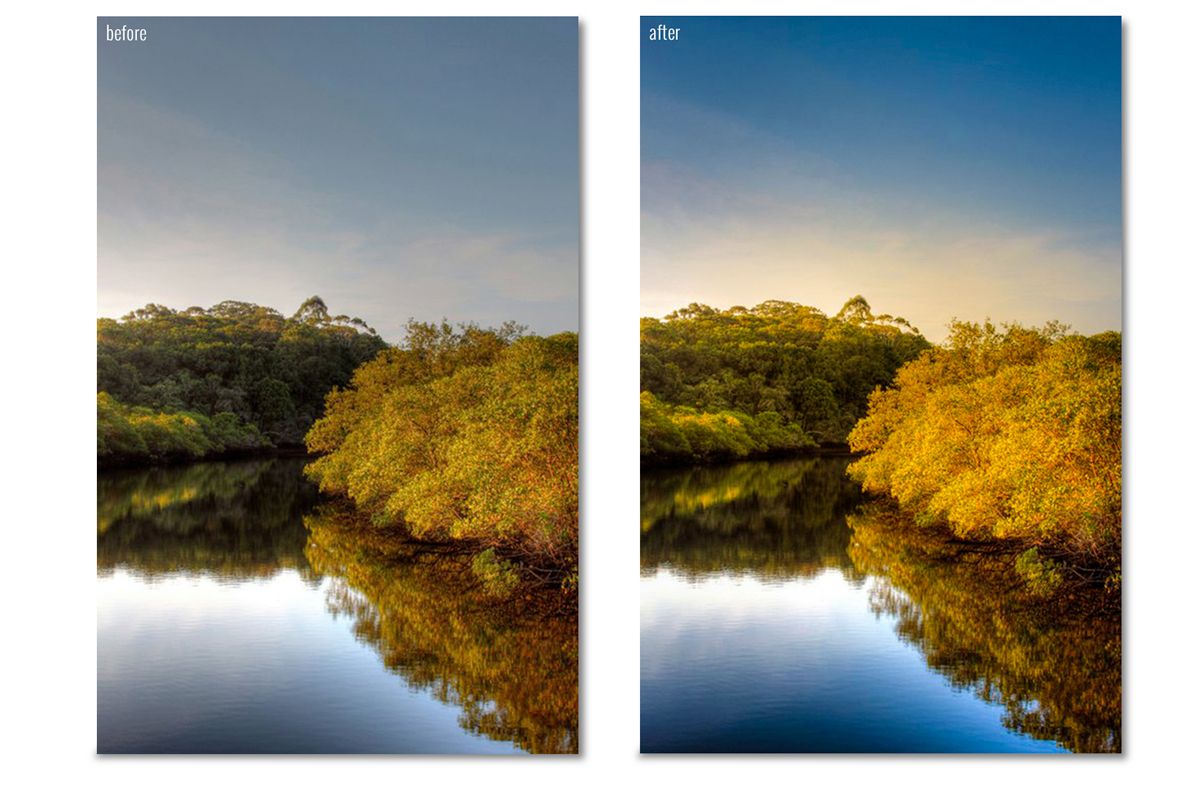
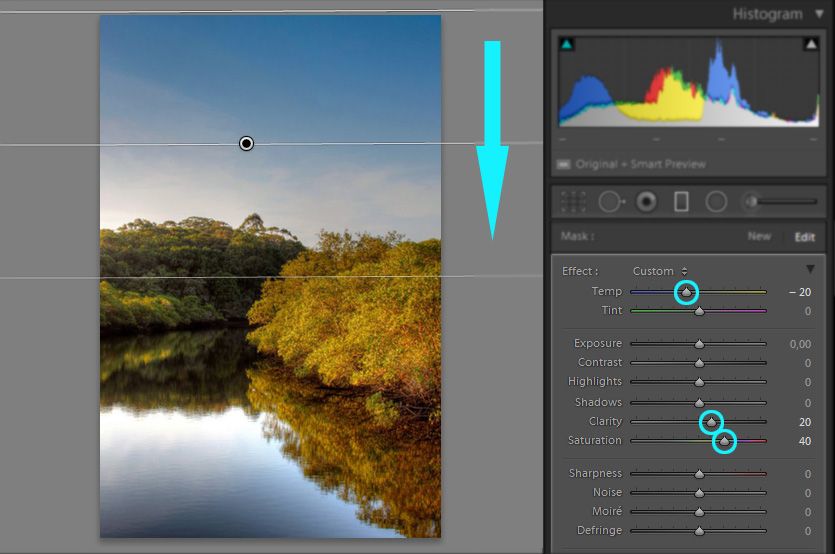
Clarity is most often used to enhance texture. Because it only brings out the mid-tones, it helps sharpen the image and show off the natural textures which is also important when doing panorama in Lightroom. Changing it is very simple. When in Development, you can increase or decrease the clarity of a whole picture. Under the Basics tab you’ll find a Clarity slider. (You’ll also see the Contrast slider that can be used with the in conjunction to further enhance images). Below is the image we’ll be working with.

lightroom clarity setting

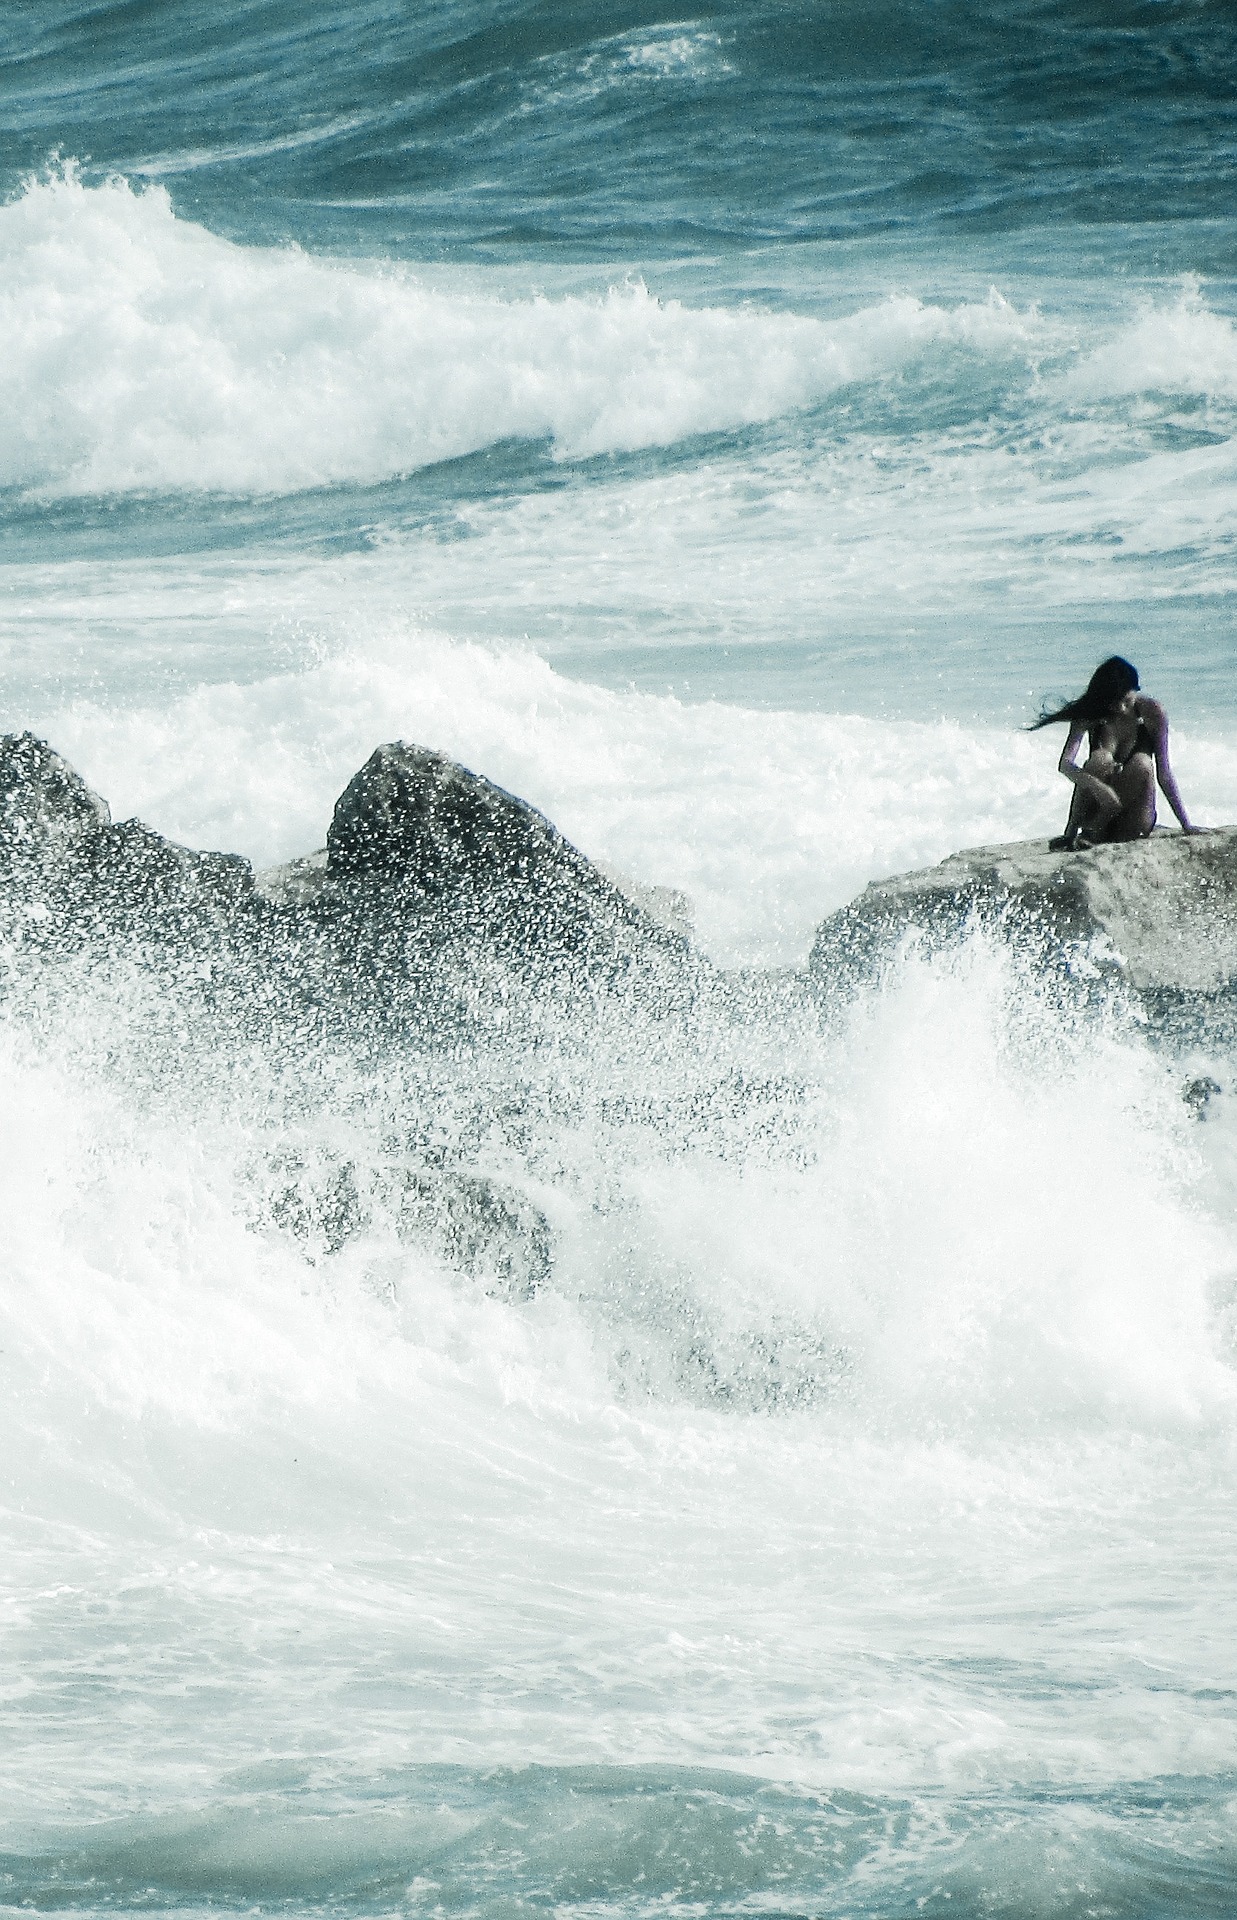
Next is the image with the slider all the way up (to the right). By bringing out the mid-tones, not only do the waves become sharper, but the texture of the rocks is featured more heavily.

sharpen image midtones

Notice how this also gives the image a bit of a grainy feel, but fully brings out the mid-tones. For a softer look, raise the slider just a bit to give it a more natural feel.

Soften Texture

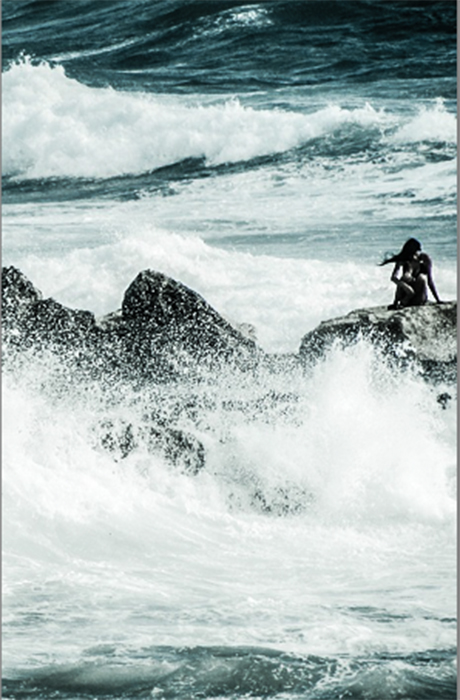
Increasing clarity isn’t the only way to edit an image. You can also lower the clarity of an image to make it appear softer and a little hazy. Here’s our example image taken to the other extreme, with the slider all the way down (to the left).

soften texture

You can see how, with the mid-tones toned down, the water and rocks become hazy and blurry. This can actually be used to your advantage if you’re a water photographer. Sometimes, having water with a hazy effect is just what you want. You can’t always photograph water with a steady camera at a low shutter speed. So, in Lightroom, you can simply photograph the water as needed and use the clarity slider to give it that motioned/hazy look.

Spot Enhancing

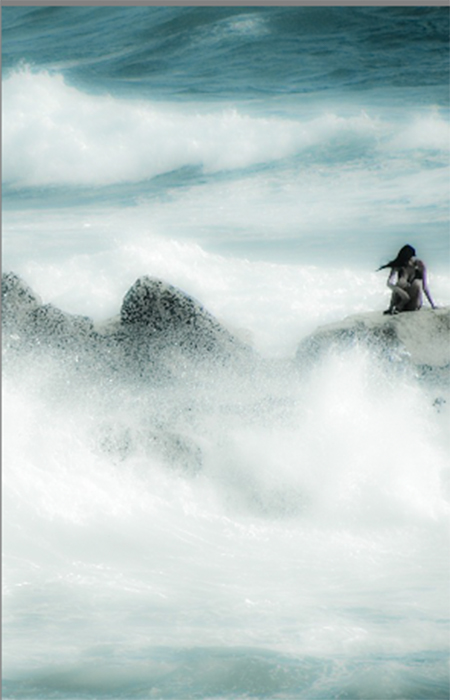
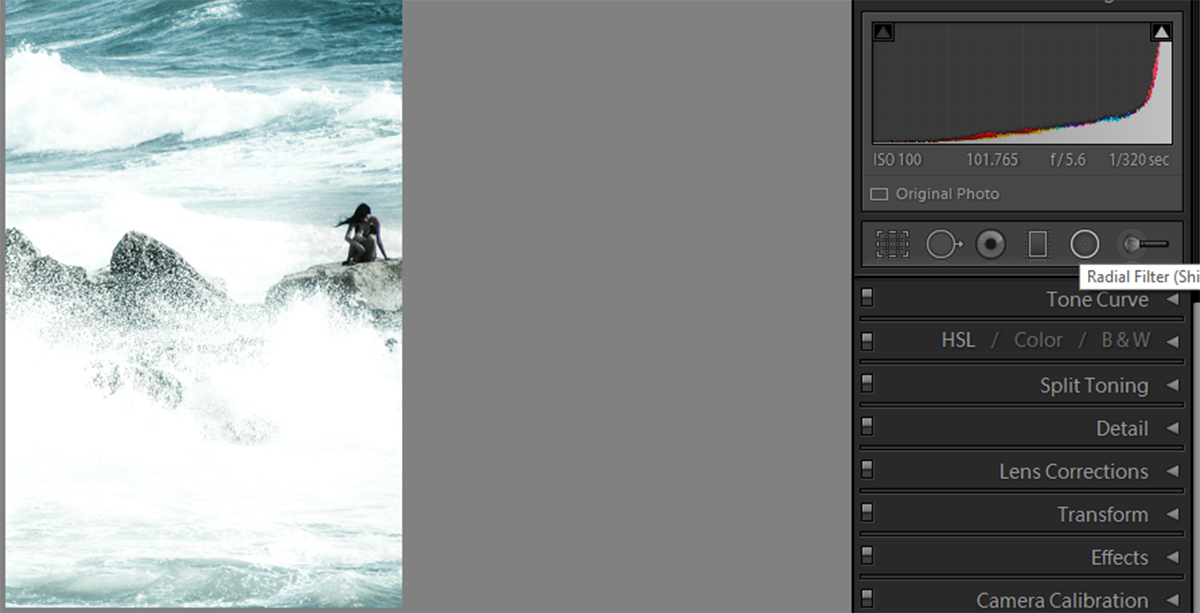
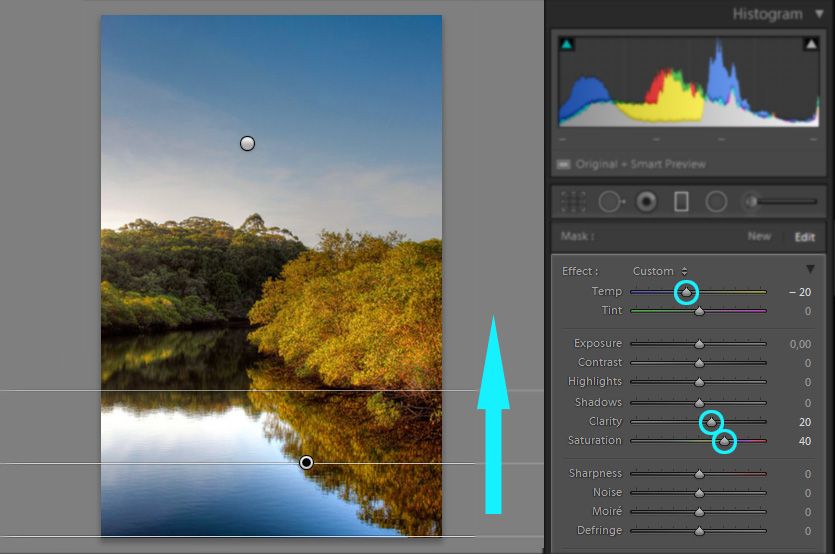
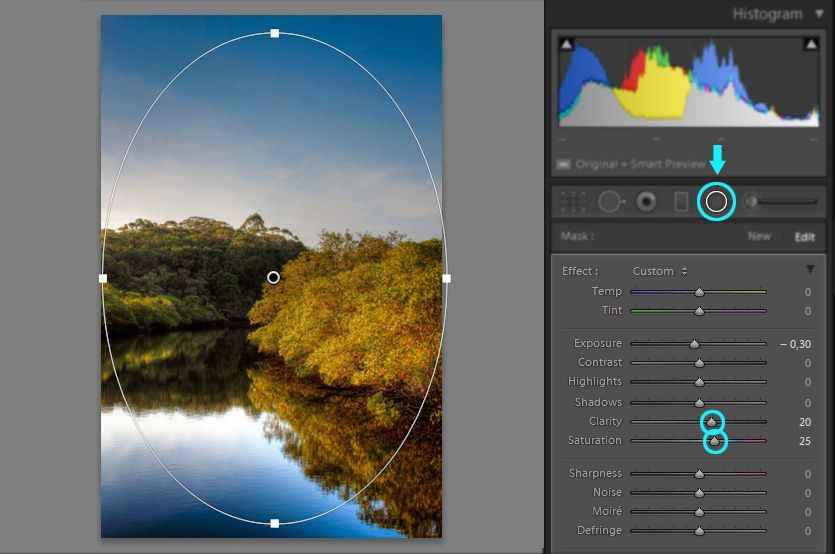
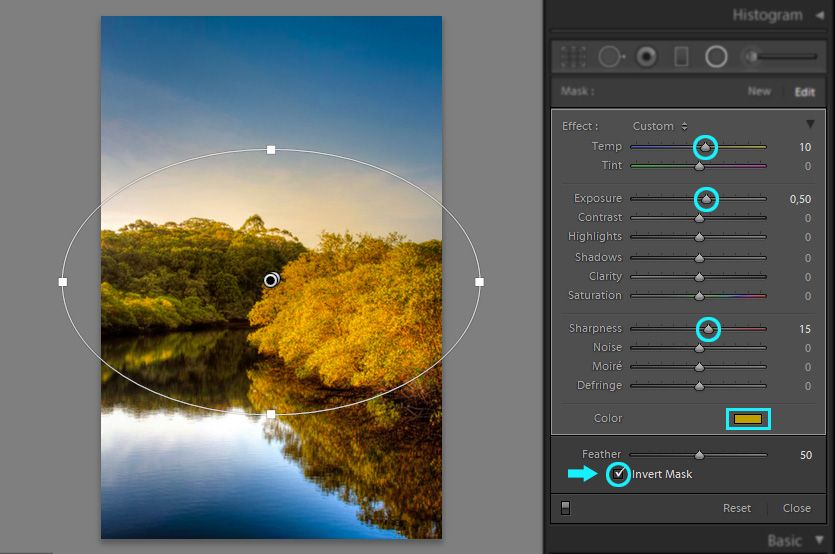
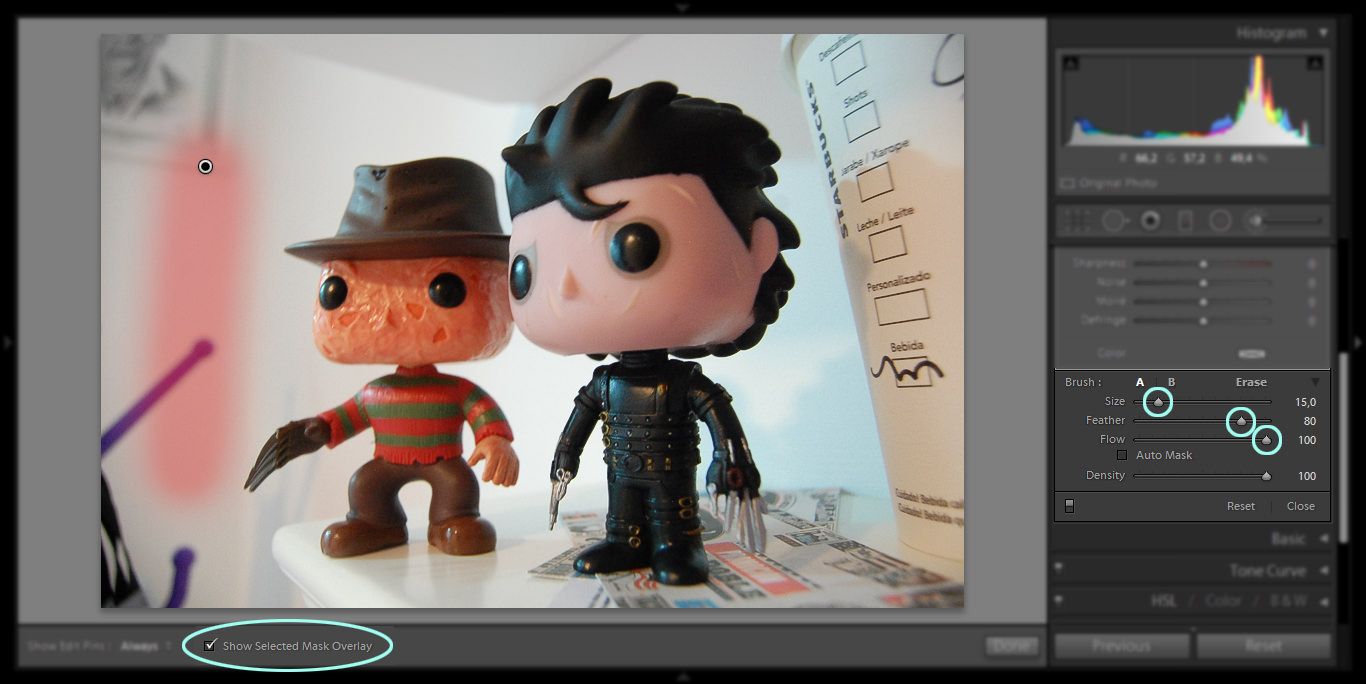
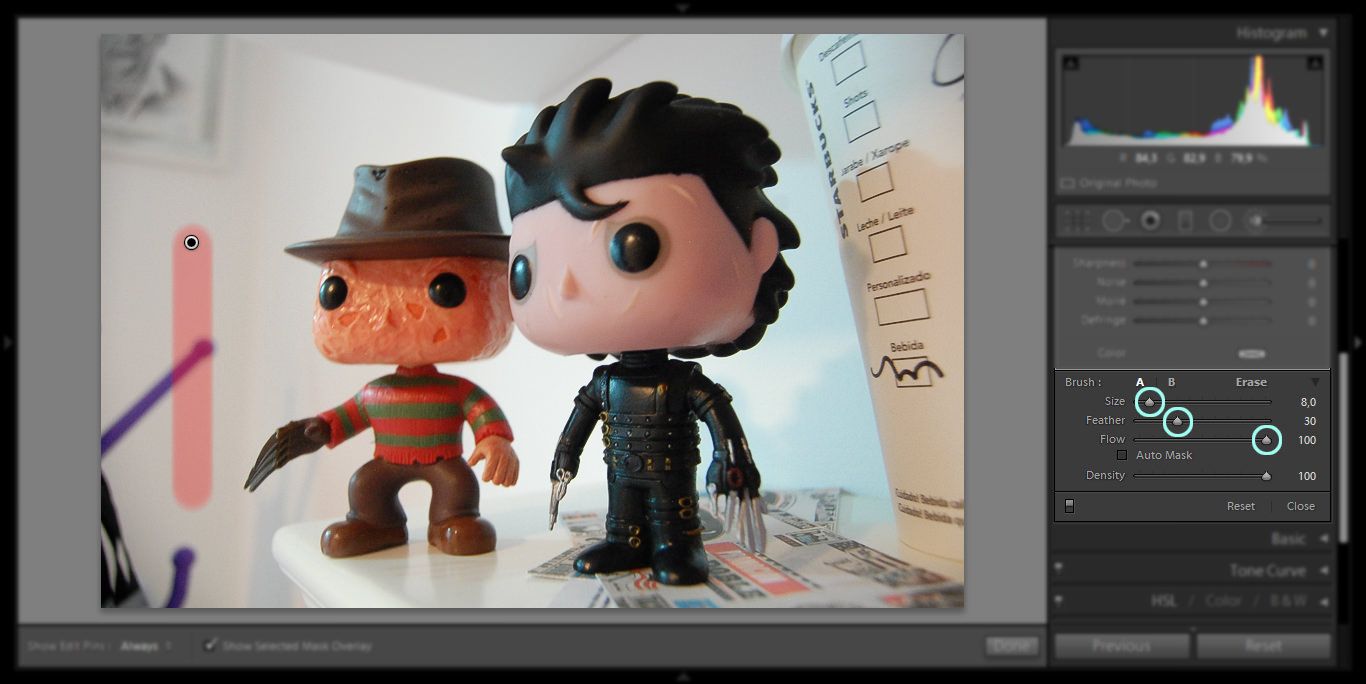
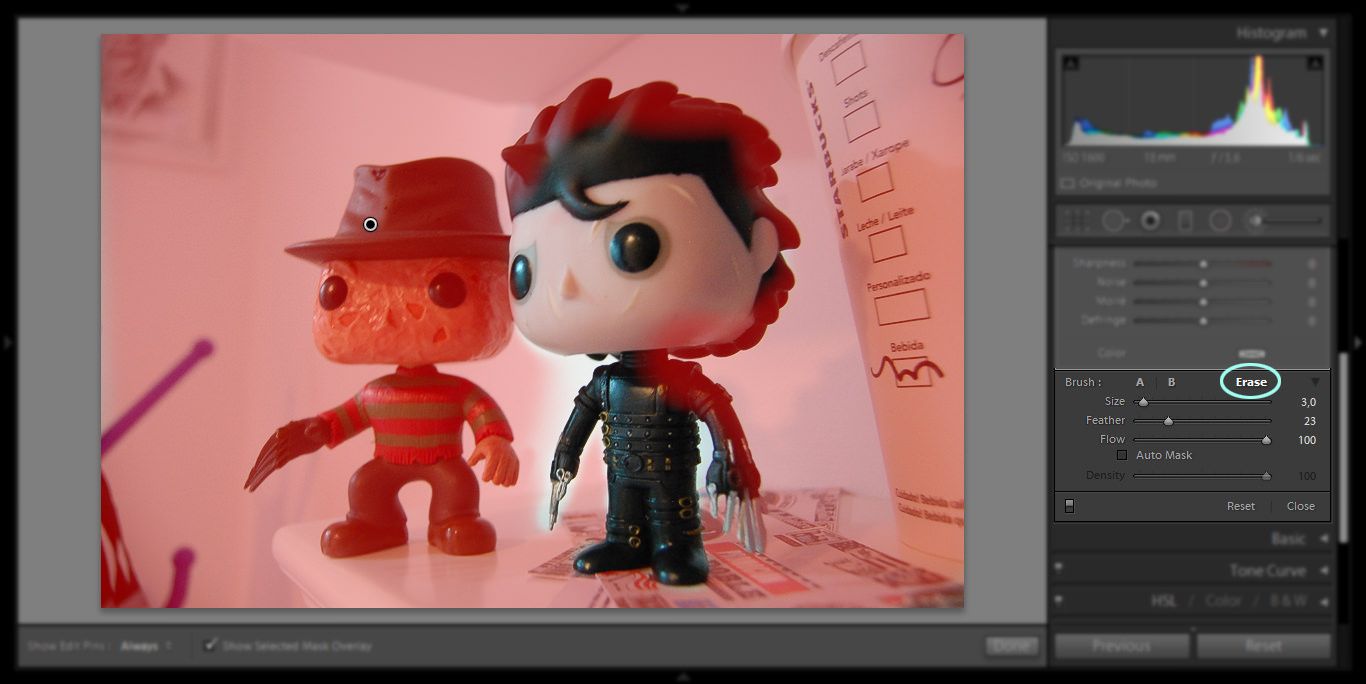
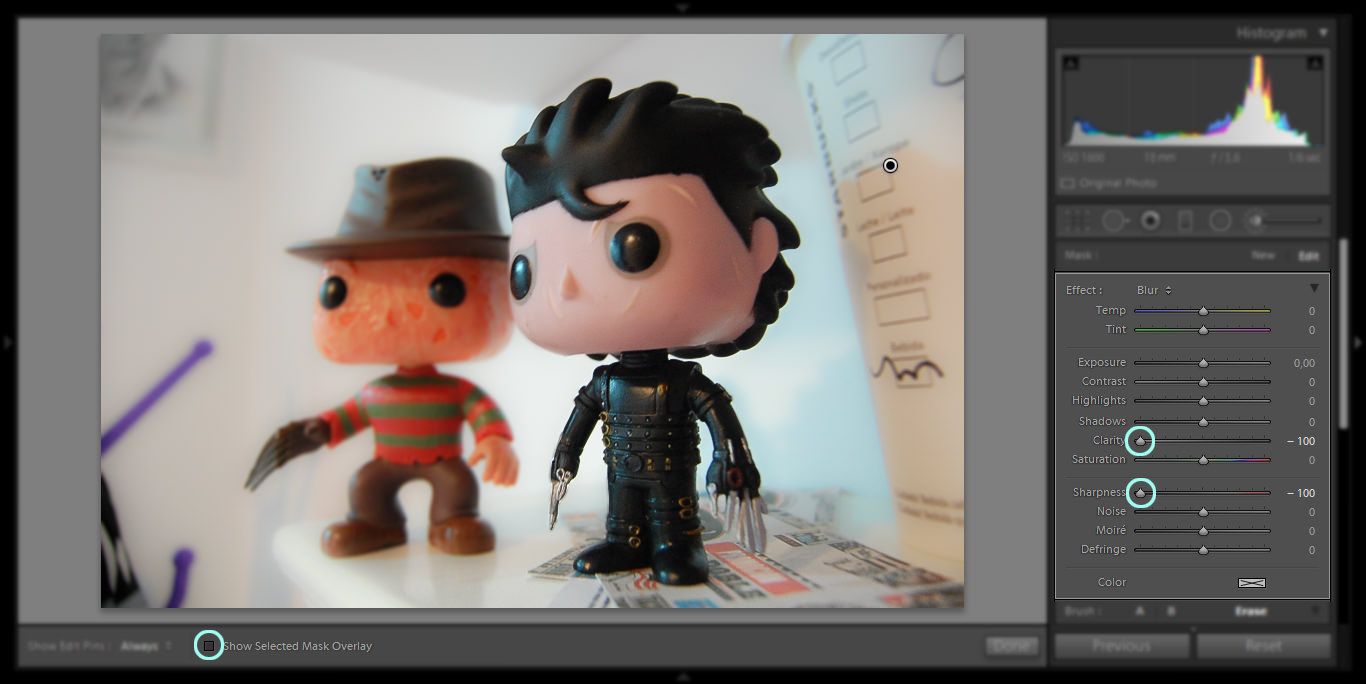
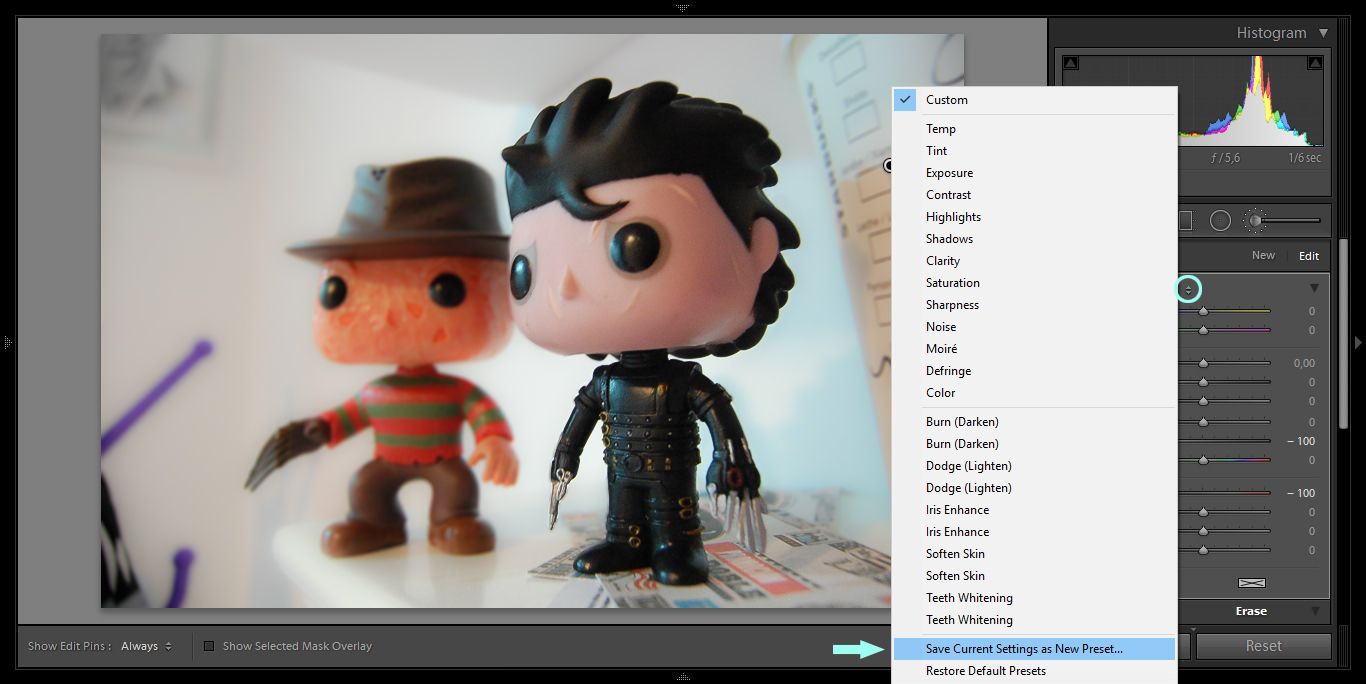
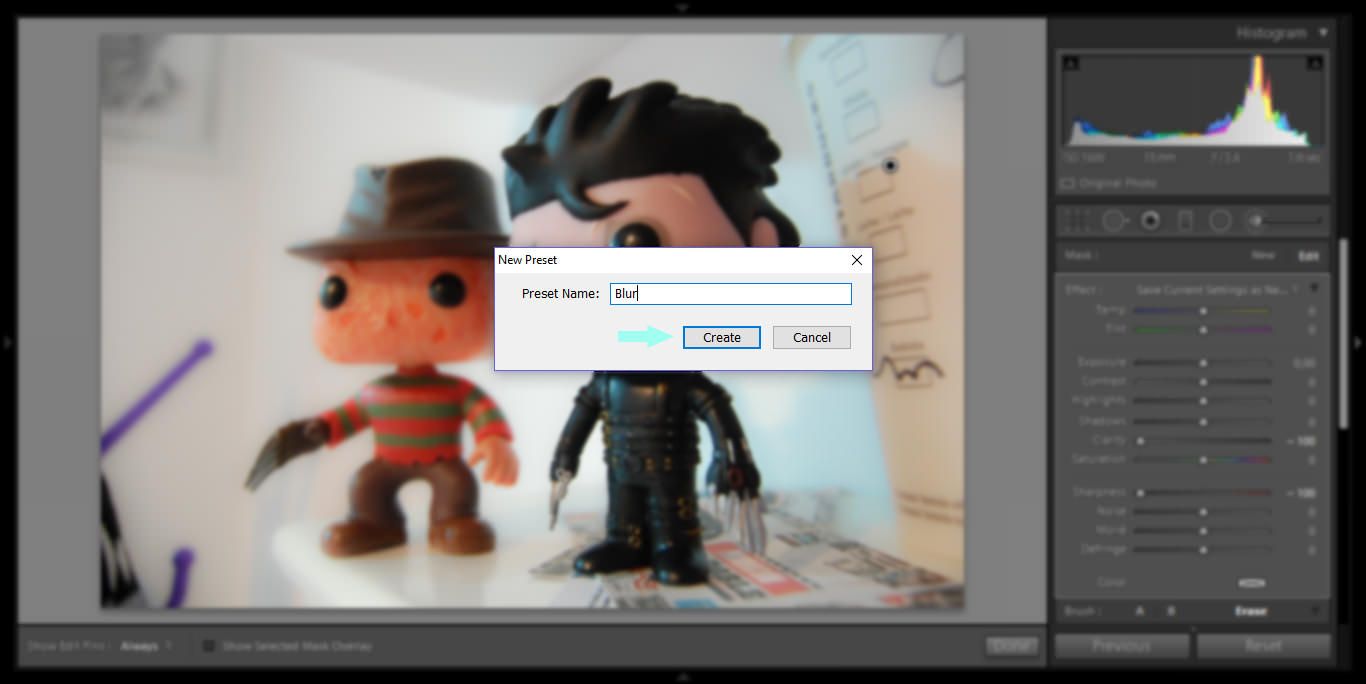
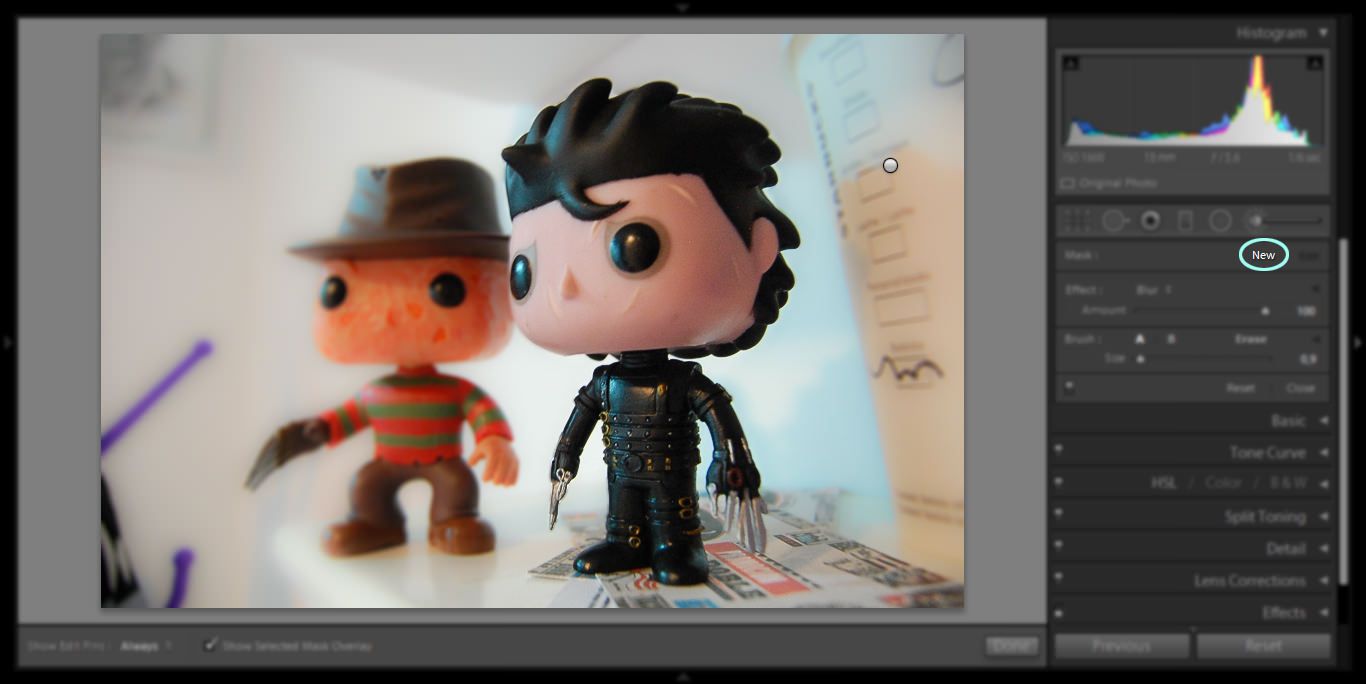
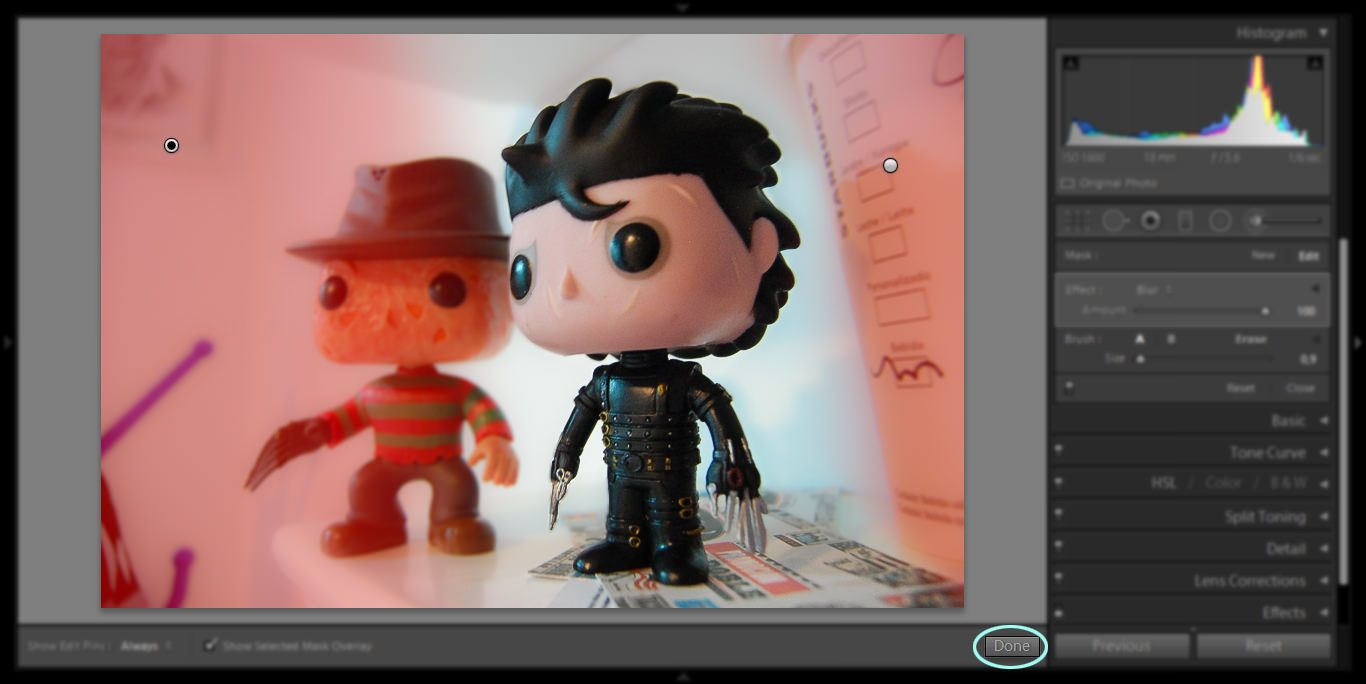
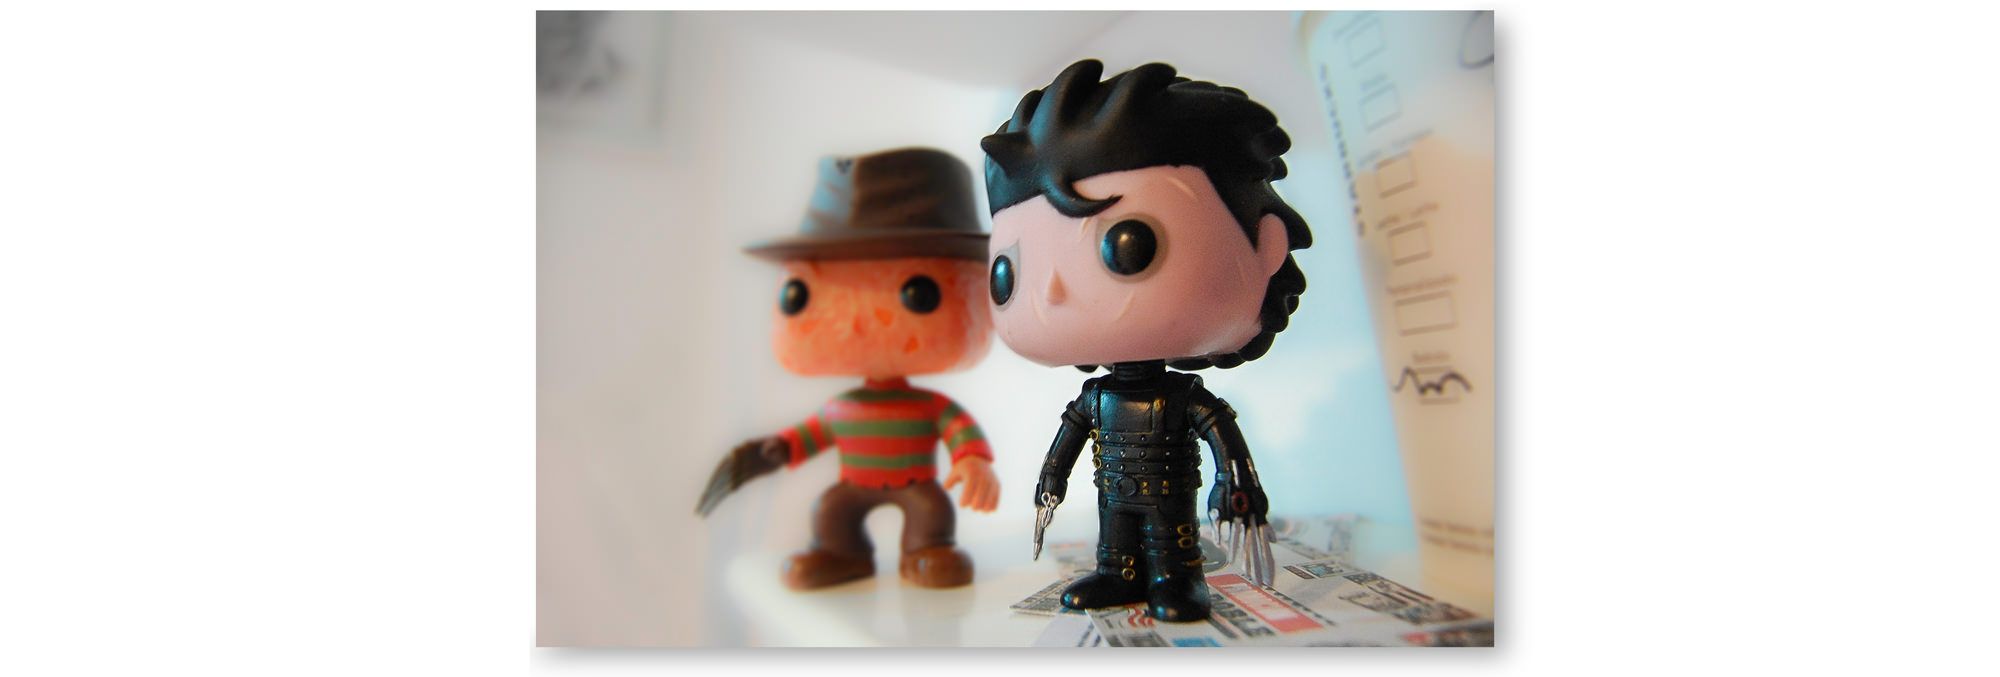
When adjusting clarity in Lightroom, you don’t have to fix the whole image. You can use the radial filter and adjustment brush to further enhance your image. Let’s look at the low clarity example one more time. That’s the effect we want for the water, we want to show off its hazy confusion. But the model in the picture doesn’t stand out enough for us. Now what do we do? We can use the radial filter to select the model, and then increase the clarity to enhance her mid-tones.

spot enhancing

When she becomes sharper and has more texture, she’ll draw the eye and all attention to her, the subject of the image.

Playing with Portraits

Clarity is a very important tool if you want to quickly touch-up a portrait photograph. Let’s look at how we can influence portraits by using this image as an example.

adjusting portrait clarity

This image already looks pretty stellar, but we can make it even more fantastic. Let’s start by softening texture. We can use the adjustment brush to single out the model’s skin, focusing particularly on the cheeks, where a bit of rough skin shows itself. Then, just as the low clarity softened the water, we can decrease the slider to soften the skin. Already the image looks a bit better.

softening portrait texture

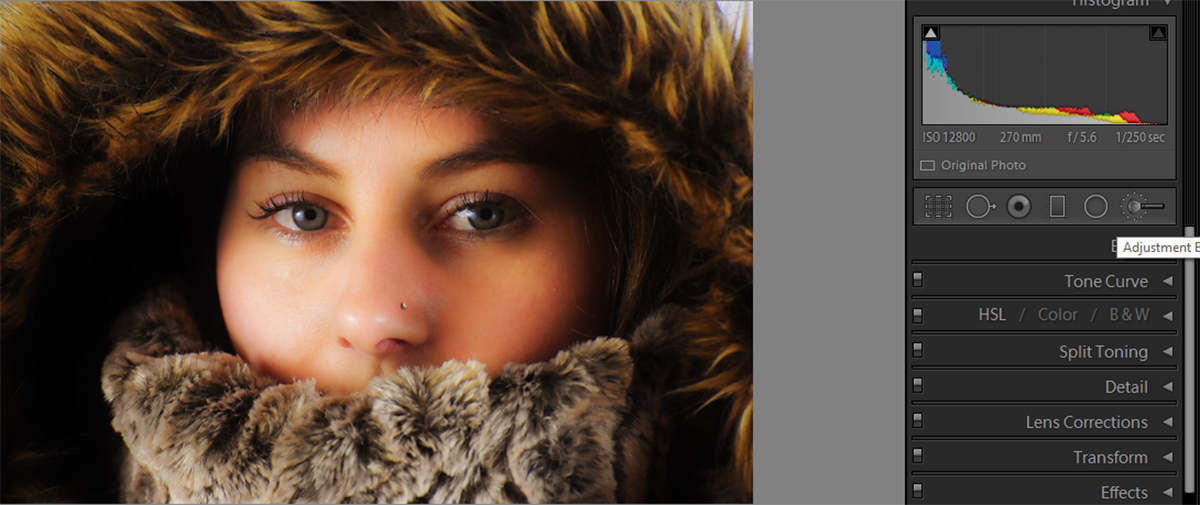
Next thing we’d want to do is increase the clarity around the eyes. Eyes draw the attention and the clearer they are, the more interested the viewer is in the image. Here’s the photograph with the eyes on high clarity to show off the difference. In reality, you might want to tone it down so it isn’t as bright and in-your-face.

high clarity eyes

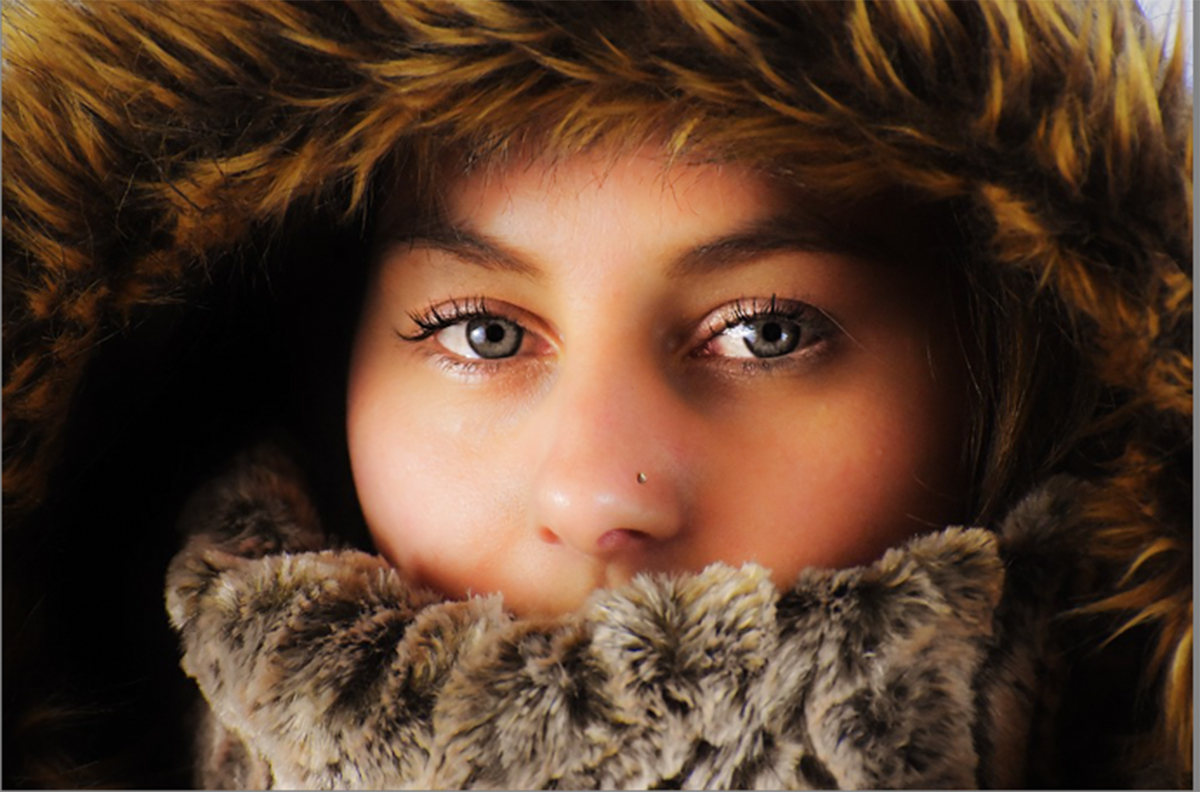
With just two simple steps we’ve turned a great photo into an amazing one. Clarity is one of the most useful, easy-to-use settings for images. It brings out the mid-tones in a picture and helps show off natural textures. Of course, lowering the setting can also help soften images. And using the radial filter or adjustment brush can help you merge the two extremes to create eye-popping, and catching, pictures.

How to Make Your Picture Standout using Lightroom

Vignetting

a picture is often used to enhance the subject of a composition, and Lightroom has an automatic feature to create vignetting in the effects panel. However, this software’s native effect only darkens the edges of the picture, making it look very artificial for my taste. So in this tutorial, you’ll learn an alternative way to make the same effect using specific adjustments in Lightroom, improving your picture and making it stand out just like the before and after below. Let´s go!

How to make your pictures standout using Lightroom

Step 1) Open Lightroom and Import and/or Open the selected image you want to tweak. Then, go to develop mode and select the graduated filter tool on the right tools panel, that way you’ll create a new mask in your image:

Create a graduated filter maskStep 2)

When you select this tool, you’ll notice the cursor will become a cross, click at the top edge of your image and drag to the middle of the image, maintaining a straight line. This way, you’ll create a mask on your image, and can tweak with the adjustments from the right panel, just as a usual image, but it will only apply to the area highlighted by the mask. You can tweak with the values according to your style of editing, but these are the values I’ve used for this example:

Create the first mask

Lowering the temperature of the image and increasing the saturation, I could enhance the colors of the sky, and by tweaking the clarity values, I was able to increase the edge’s contrast, enhancing the details of the sky.

Step 3)

Now you’re gonna do the same thing as the previous step, but this time clicking and dragging from the bottom edge to the middle of the image. You can make the adjustments in the right panel, but for this example, I’ve used the same values from the first mask.

Create the second mask

Step 4) In this next step you’re gonna make the edges of the picture darker than the middle, just like the default vignette effect, but better! Create a radial filter by clicking the tool on the right panel, you’ll notice the cursor will become a cross also (just like the graduated filter). To create this new mask, click at the center of the image and drag all the way to one of the edges, but this time it has a rounded shape. The values I’ve used are in the images below but, again, it will depend on the image you use and the style of editing you have.

Create a radial filter mask

In my case, I like to bring colors to the picture by increasing the saturation and tweak a little bit in the clarity dial to enhance the details of the shadows. To darken the edges of the image, like the default vignette, I´ve lowered the exposure dial a bit.

Step 5)

To finalize the effect, you’ll create another radial filter just like the previous one. Click on the center of the image and drag to the edges, but this time you’re going to invert the mask by checking the box “invert mask” at the bottom of the right panel:

Create a inverted mask

To emphasize the tone at the center of the image, I´ve increased the temperature just a little bit and added a warmer color to the mask, by clicking on the color box at the bottom of the panel and selecting a color similar to the ones at the center of the image. I´ve also adjusted the exposure and sharpness to enhance the details at the center of the image.

By now you should have ended with a totally different picture from the one you had at the beginning of this tutorial. Click “Done” and you can export the picture the way you do usually.

Final Result

In this tutorial, we learned how we could make our pictures stand out using two great tools from Lightroom, the graduated and radial filters. The final result was an image with enhanced colors and a smooth vignette effect with no dark edges. If you have any suggestions or doubts you can write a comment below or contact me directly. See you next time!

Here Is How To Blur Background In Lightroom

Sometimes you take a picture, but the end result is not as you expected, leaving too many objects in focus and diverting attention from the main subject of the photo.

In this tutorial, we will learn how to use the adjustment brush to blur the background of a picture and highlight the main subject reducing the depth of field, a common effect in close-up photographs. You can see the result in this before and after comparison below. Let’s begin!

Before and after

Step 1) Import or select an image from your library that has more than one object in focus so we can practice this effect. Go to develop mode and select adjustment brush from the panel on the right:

Selecting adjusment brush

Step 2) When we select the adjustment brush, the adjustment panel will appear right above the basic panel. In this panel, we can work with various adjustments in our picture, but these settings will apply only to the adjustment mask. Click “New” and let’s start a new mask.

Create new adjustment mask

Step 3) You’ll notice that the cursor changes to a different format (a circle with a cross in the middle, similar to photoshop). In order to view the areas that will define the mask, select the “Show selected mask overlay” In the right panel you can see some options regarding the adjustment brush aspect:

Adjustment Brush settings

Size – This is the brush size to be used, the higher the value, the bigger the image area that will be covered by the adjustment mask.

Feather – This option defines the hardness or softness of the brush, as an example of the brushstroke in the picture.

Flow – Defines the intensity of the stroke, the lower the value, the lower the intensity of the mask.

Just tweaking some of these parameters, we can already see the difference of the brush stroke. Let’s say, if we increase the hardness of the brush and decrease the size of the stroke, we will get the following result:

Brush Hardness and Size

In case you cover an area of the image on which you do not want to apply the adjustment mask, you can trim and delete it by clicking on “erase”, so the brush can erase the mask off unwanted areas. You can notice that the right panel has the same adjustments for the normal brush, being able to control size, hardness and strength parameters.

Erase options

After a couple minutes with the adjustment brush, the final mask will be like this:

Final mask selection

(You can note some areas of my image are not trimmed perfectly, but I’ve made it like this because of the white background, which will end up not affecting the final effect)

Step 4) Now it is time to apply the blur effect, uncheck “show selected mask overlay”, so you can see the changes on the image as you change the parameters in the right panel. For the blur effect, we will move all the clarity and sharpness to the left, decreasing the contrast and highlight from the edges only in the areas selected by the mask. In the example image, I used the maximum values, but you can work with different values depending on the result you want or photo used.

Tweaking clarity and sharpness

Step 5) We can save this adjustment brush setting for future uses, this can be done by creating a preset. Click on the two small arrows located in the right panel and select “save current settings as new preset ..”.

Creating an adjustment preset

Rename the preset with the desired name and click “create”.

Create adjustment preset

Step 6) For the final result I want the picture edges to have a more pronounced effect, we can do this by creating another adjustment mask by clicking “new”

Create new adjustment mask

My second adjustment mask ended up like the image below. To finalize the editing, click “done”

Second Adjustment mask

The final result can be seen below. I’ve also removed some objects that were in the corner of the image with the “healing brush” using Photoshop. If you have any suggestions or doubts you can write a comment below or contact me directly. See you next time!

Final Result