Tag: graduated filter

Graduated ND Filters: Still essential for Landscape Photography?

The question “Are Graduated ND Filters still essential for Landscape Photography?” is one that has been doing the rounds for the last number of years. And it will almost certainly continue to be debated within photographic circles for the next few years to come. With continuing camera sensor developments and progressions, allowing for better dynamic range capabilities, the question is certainly worth some consideration.  In this post, I want to explore this question and share my personal opinions on this much-debated topic.

Picture of camera with graduated nd filters in use

Historical importance of Graduated ND (Neutral Density) Filters

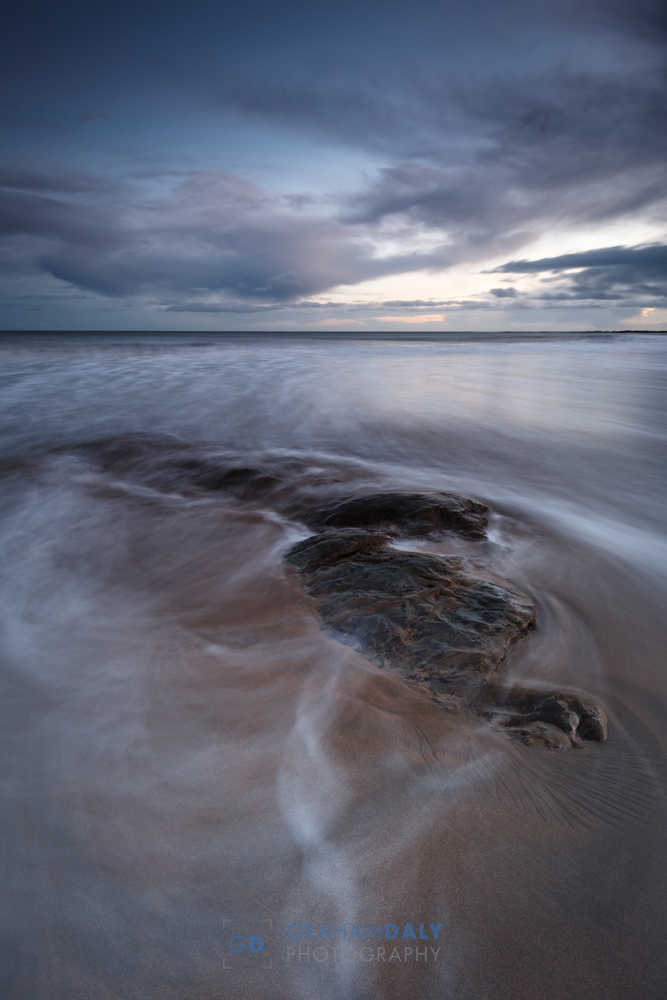
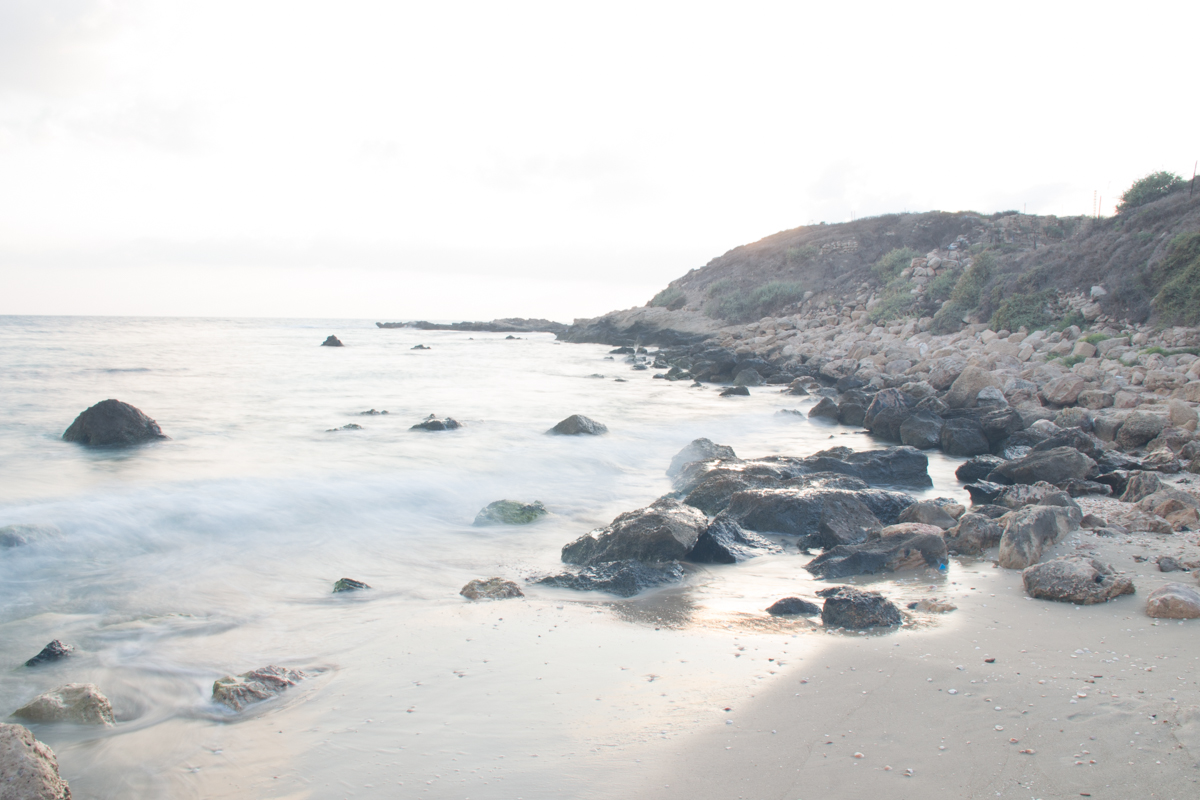
Before we consider their importance in today’s digital arena, let us first remember the reasons why Graduated Filters were important for the photographers who applied their trade during the analog days. Before the arrival of digital sensors and the “magic sliders” in Adobe Photoshop, photographers of yesteryear had to do a lot of their image adjustments at the time of capture. If a darkened moody sky was the desired result, film photographers would often use graduated filters to control the exposure levels for the sky portion within the scene. And because so many of the landscape photographers shot using black and white film, the graduated filters mostly had color casts.

The requirement for true neutral density in their graduated filters was not such a big deal at that time. The desire for neutral density graduated offerings would come to a later stage as more and more photographers shot with color film. And even more so when digital photography came into the picture.

Graduated ND Filters in the Digital Age

Where we are today with respect to digital photography is very different to that of the introduction of digital sensor technology. In the early days of digital photography, sensors had rather small pixel counts. Anyone remember those days where you would jump for joy at the sight of a 4-megapixel camera!

Dynamic range was a major issue for those brave souls who first adopted and started to shoot with digital cameras. Yes, they were the trendsetters and were smart enough to see where the future of photography was heading but they definitely had their share of shooting challenges to deal with. Compared to film, the early digital sensors had the very poor dynamic range and struggled to control the luminosity and contrast difference between the white and black points within the scene. This was actually one of the reasons why so many shooters delayed going digital for as long as they possibly could!

So, even in the early years of digital cameras, landscape togs were still very reliant on graduated filters for the purpose of helping them to control the dynamic range within the scene. Yes, they now had the magic sliders in Adobe Photoshop and later Adobe Lightroom and could adjust the highlights/shadows but the flexibility afforded by early digital file formats with respect to processing was a lot less than we shooters have today.

NiSi 4 Stop Medium Graduated ND Filter

Digital alternatives to Graduated ND Filters

The landscape of digital photography and digital sensors has most certainly changed a lot since their introduction. Technology has progressed to the point now where some full frame sensors are now able to capture up to 14 stops of dynamic range. With the improved dynamic range capabilities, our reliance on graduated ND filters is fast diminishing.

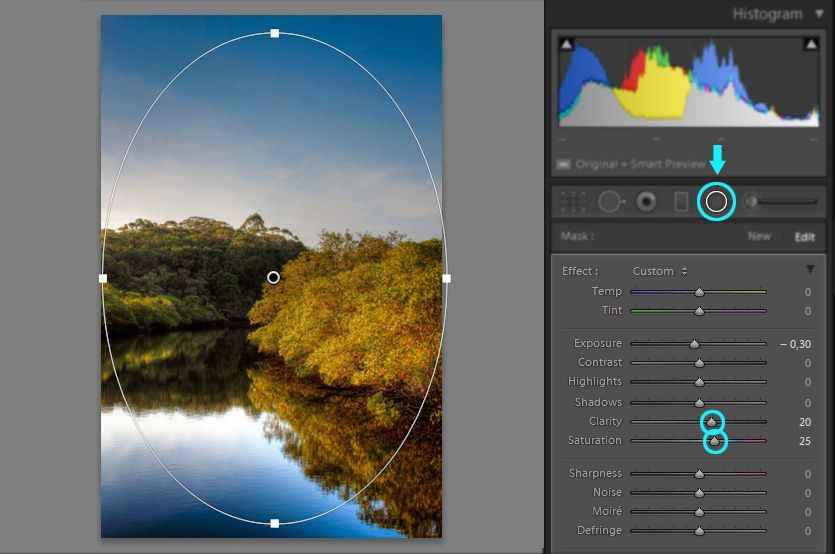
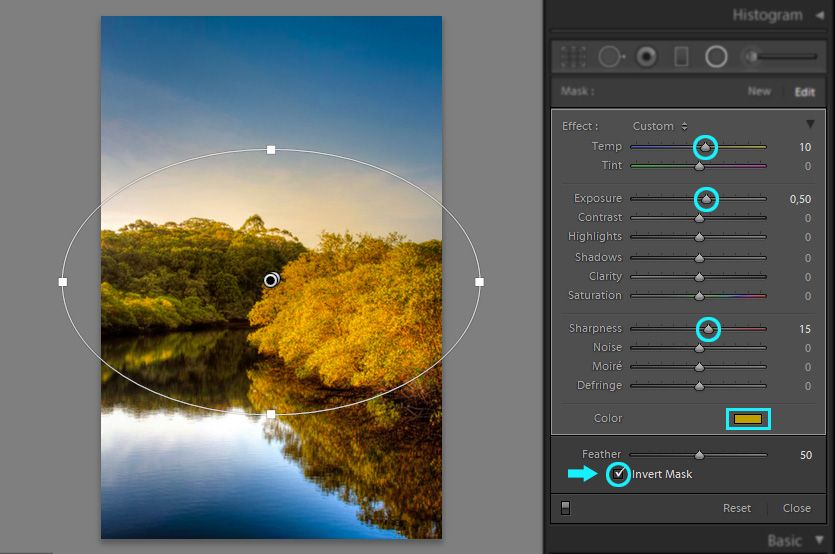
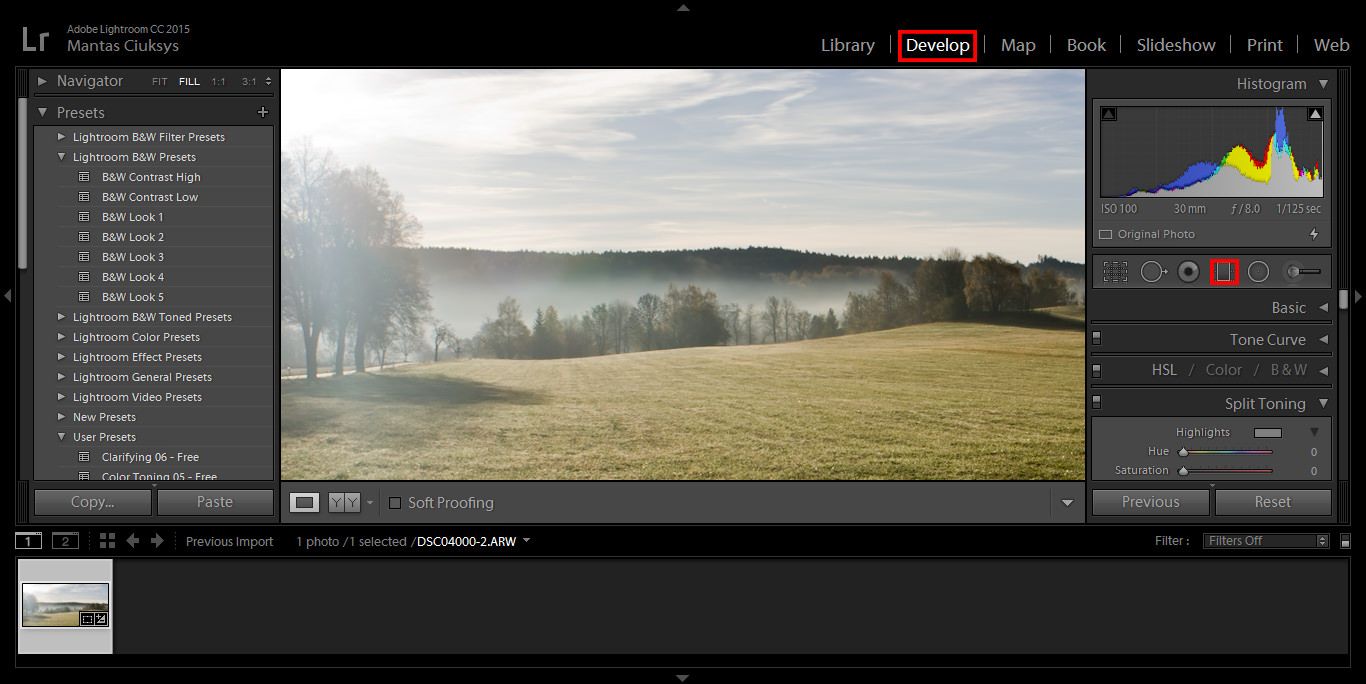
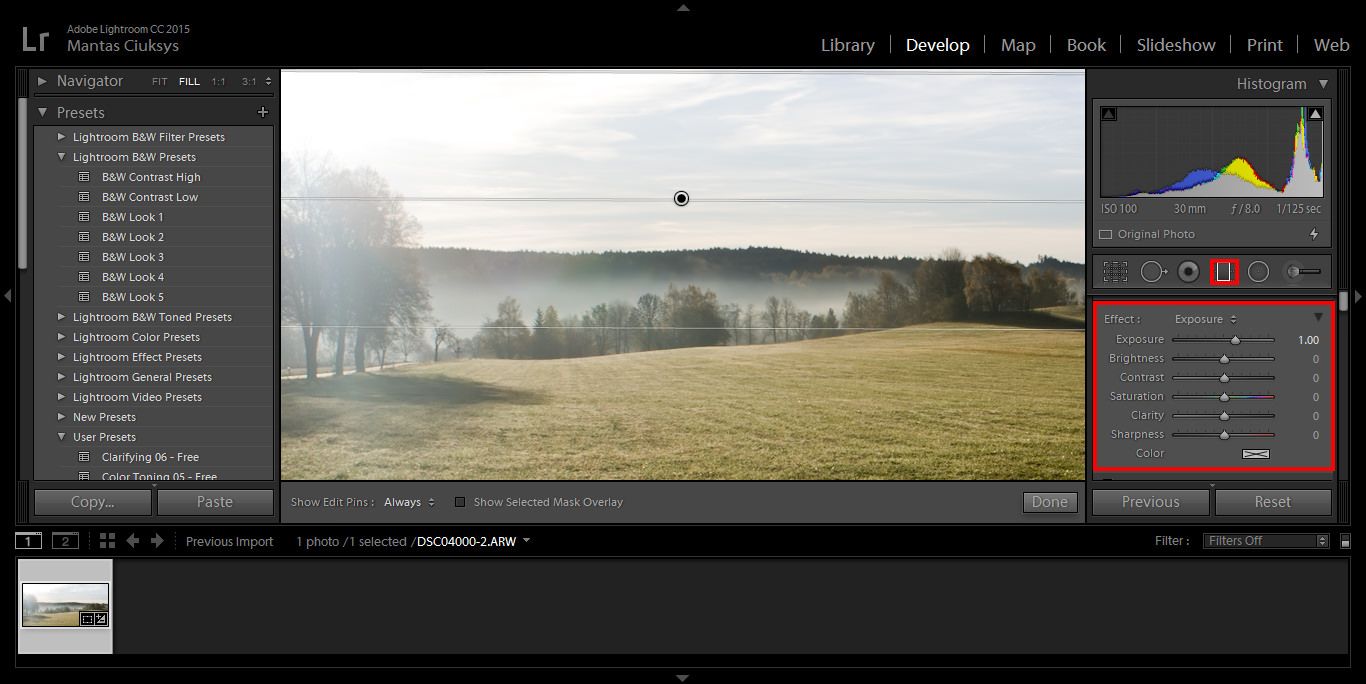
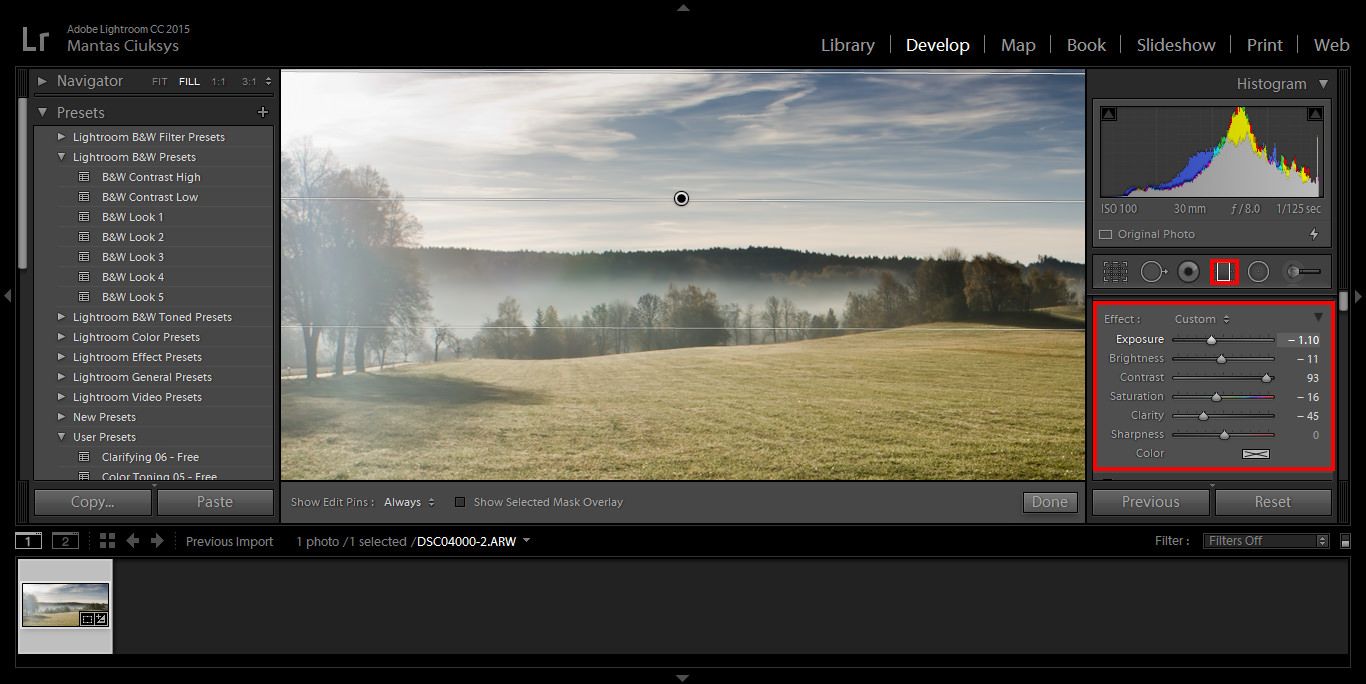
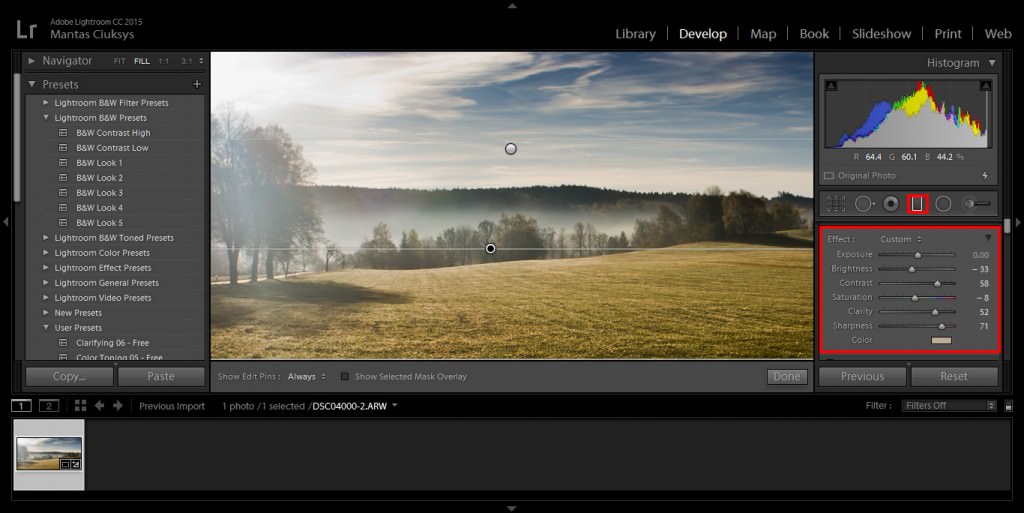
Not only are the digital sensors better equipped to handle dynamic range, there are now several means and methods available to landscape photographer to control, extend or even overcome any issues concerning dynamic range. We have in-camera features such as HDR (High Dynamic Range) and Exposure Bracketing. Then there are the advancements at the processing end where we now have access to powerful tools such as Luminosity Masks and various other less complex blend modes available within Adobe Photoshop.

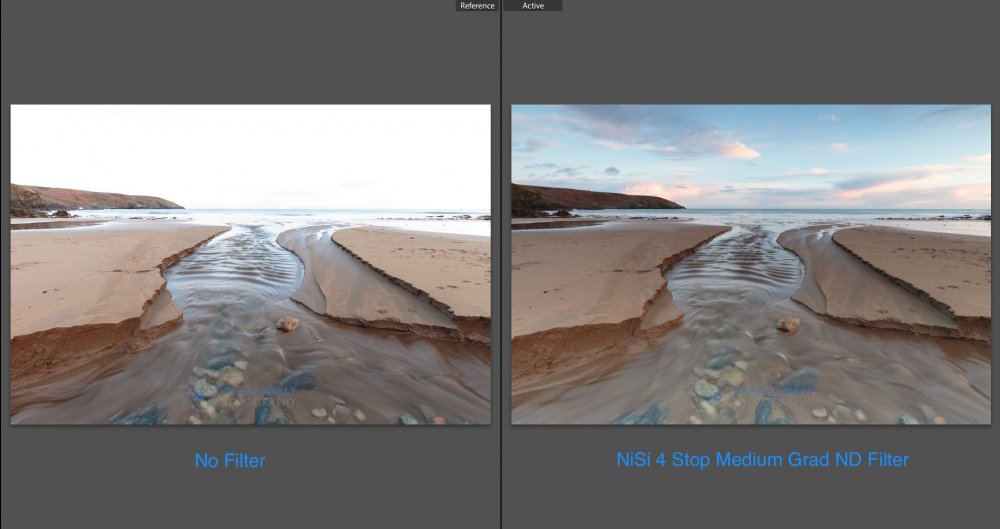
These days, landscape photographers can easily just take two separate exposures, one for the sky and one for the foreground, and then simply blend the layers together in Photoshop using a simple layer mask. In many ways, one could argue that graduated filters are no longer necessary when using today’s digital sensors.

Photo camparison with and without graduated nd filter

Graduated ND Filters versus Exposure Bracketing/Blending

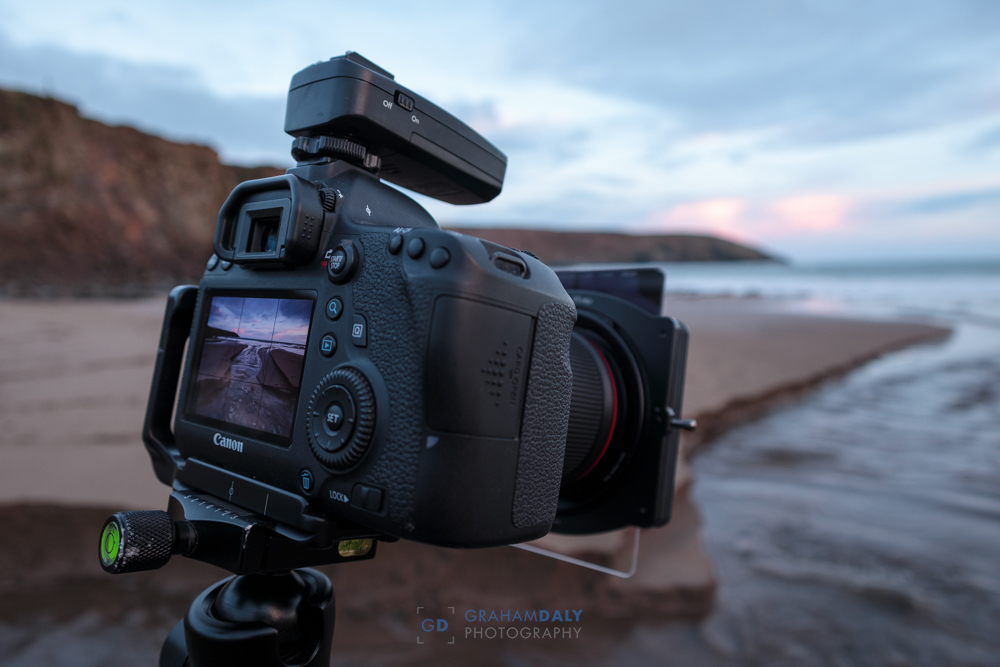
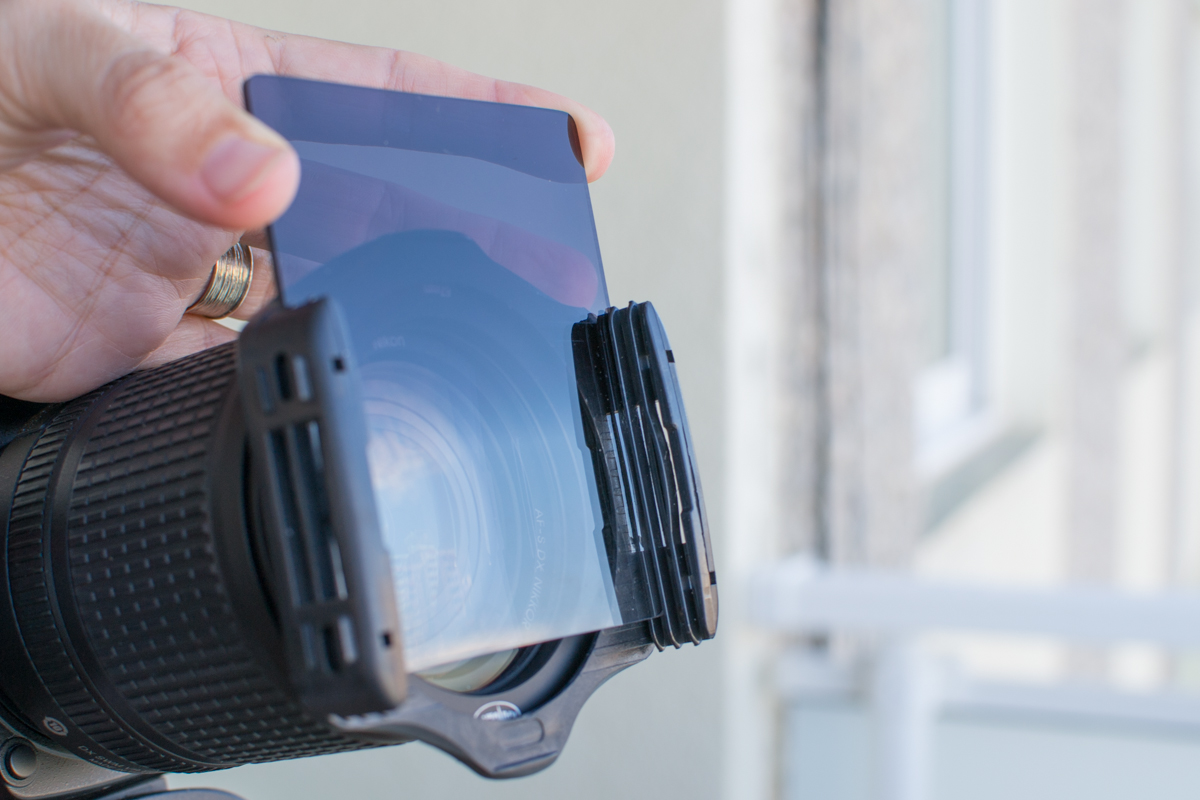
As mentioned above, the necessity for graduated ND filters is definitely no longer there. However, there are still shooters who prefer to control the dynamic range while out in the field via graduated filters. Quite often, these shooters would state that they prefer to spend more time out shooting and less time at home or at their studio processing. Hard to argue with that! I would most certainly include myself in this group. I too, prefer to use graduated filters while shooting so that I can capture the scene in a single RAW file when possible. Although I have the knowledge and skills to create masks and blend exposures together in Photoshop, I definitely prefer spending time behind the camera.

These days though, there are lot more photographers falling into the other group who prefer to do away with the use of graduated ND filters while shooting and opt to blend exposures together instead. Whether you fall into the former or latter group, there are certain pros and cons to consider and be aware of concerning the decision to use graduated filters or to go down the blended exposure route.

Will Graduated ND Filters serve you’re better than Exposure Blending?

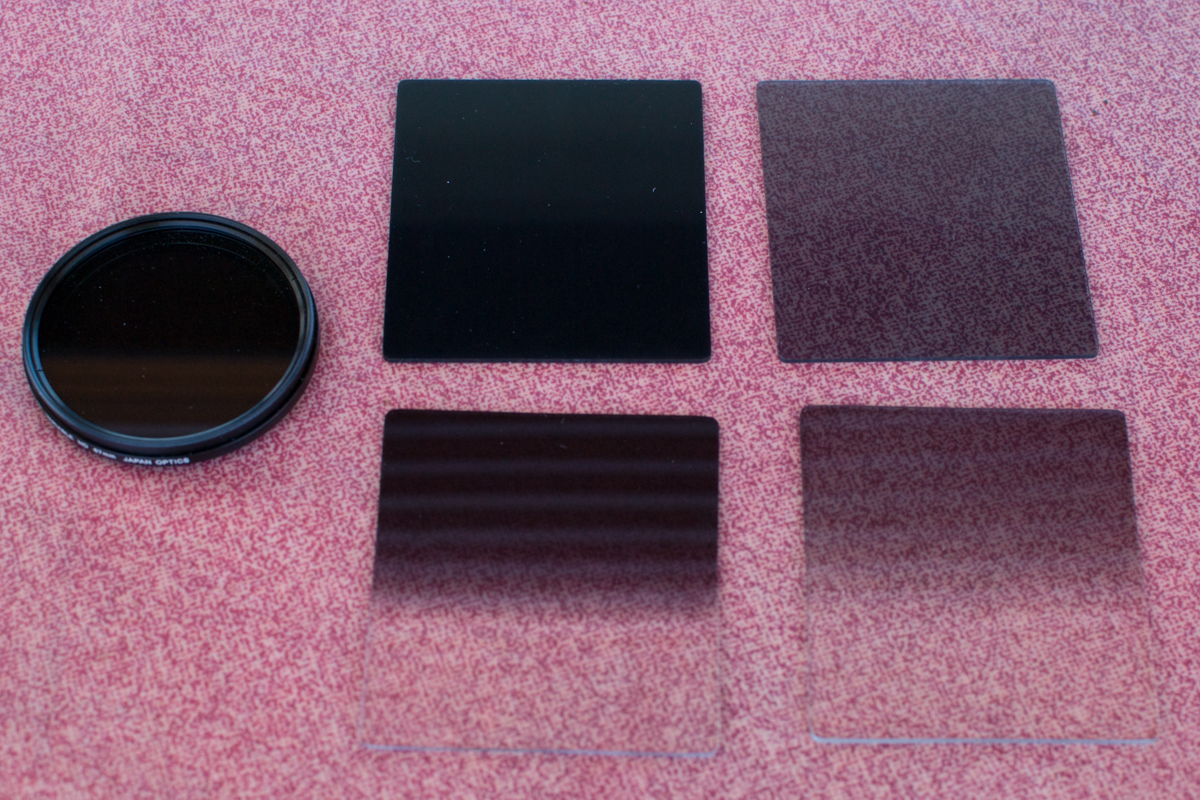
The biggest advantages of using graduated filters when shooting are as follows:

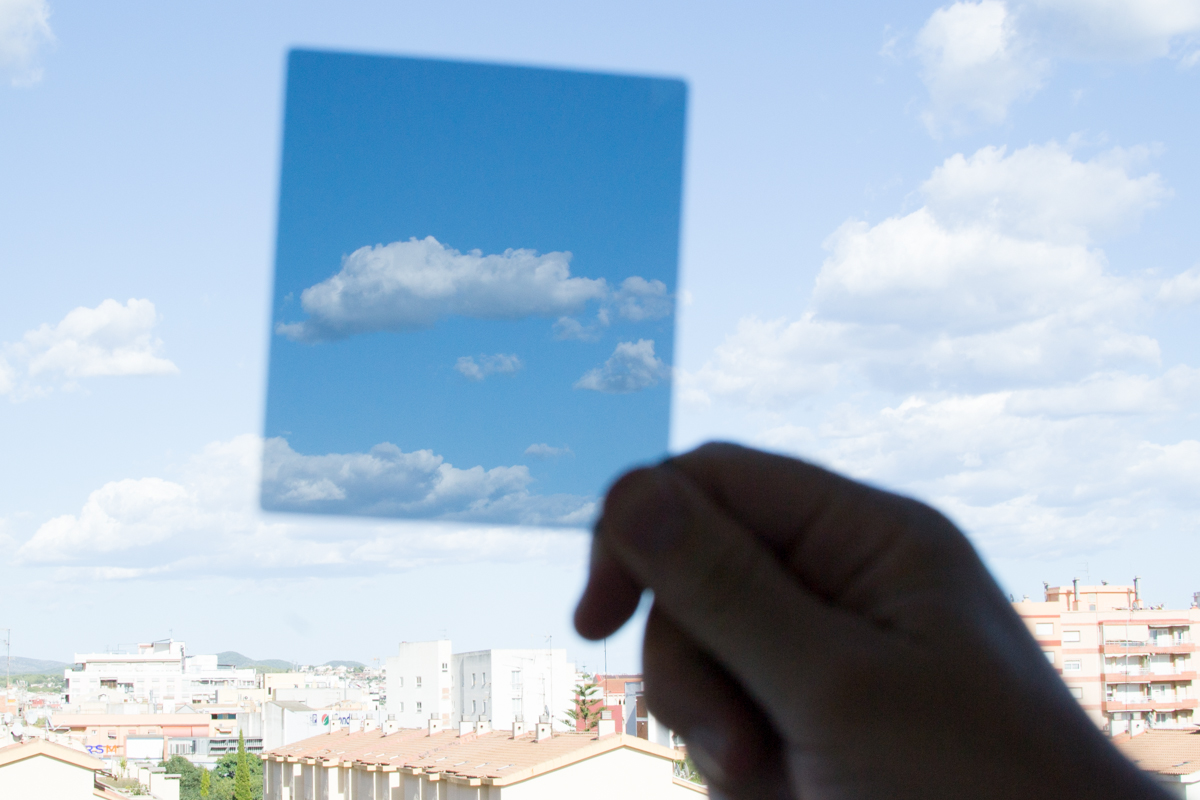
  • Ability to see/review the correctly exposed image in-camera
  • Requires less processing time and allows you to spend more time away from your processing software
  • Requires less processing knowledge/skills
  • Enables to capture a correct exposure in a single RAW/JPEG file – especially vital for the latter!

The biggest disadvantages of graduated filters:

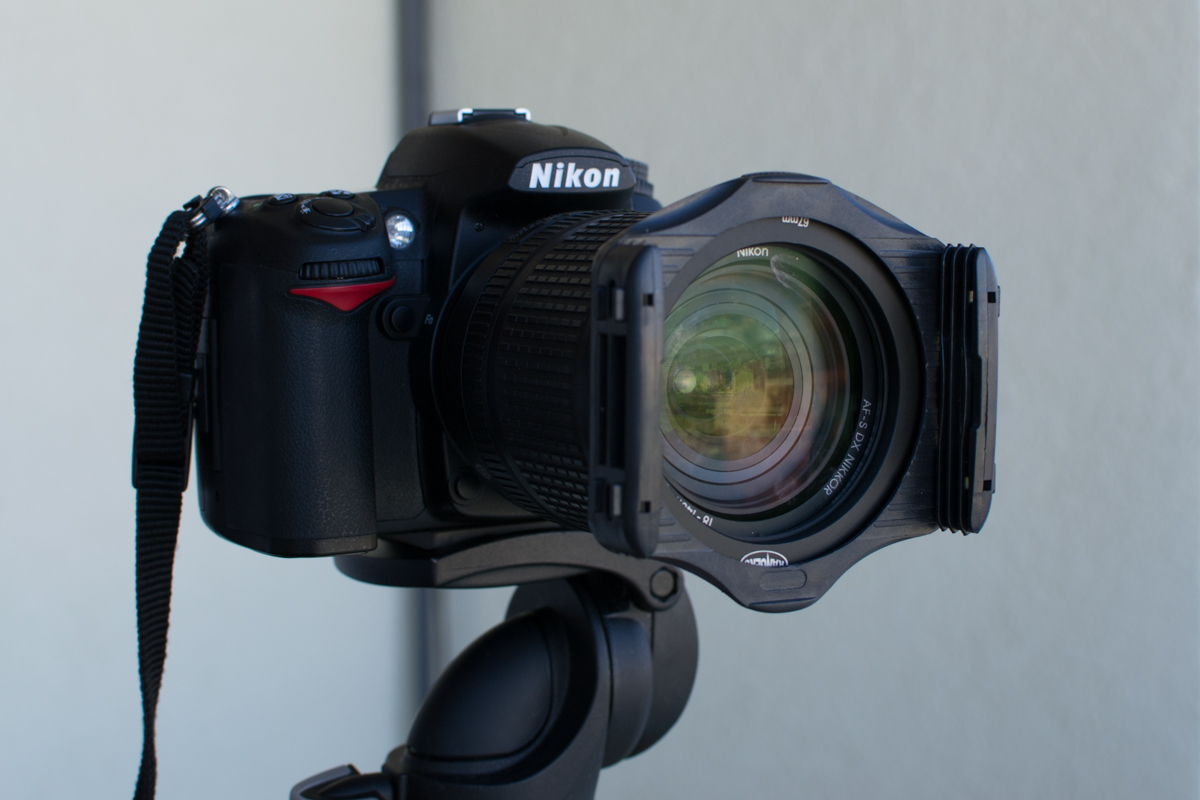
  • Requires a Filter System – costly investment
  • Takes more money out of your pocket
  • More gear to carry around with you
  • Can be a struggle to keep clean and free from raindrops/sea spray when shooting
  • They can get scratched or fall and break
  • When the dynamic range is very large, you will still have to take two exposures and perform a simple blend in Photoshop anyway

On the other hand, Exposure Blending methods have the following advantages:

  • No additional costs or investments
  • Less gear to carry around with you
  • Less time spent trying to control the dynamic range when shooting
  • Easier to keep lens clean and free from raindrops when shooting because you can keep your lens-hood attached

The disadvantages of Exposure Blending are:

  • Requires a greater knowledge and familiarity with blending techniques within Photoshop
  • Will require larger memory cards and storage as you will need to capture more exposures and store them
  • Will cause you to spend more time at the computer processing your images
  • Unable to review and visualize the image in a single file/in-camera
  • Increases the need to shoot in RAW – uncompressed files allow for greater latitude when blending/processing the images

Picture of camera with graduated nd filter in use

What does the future hold?

The future definitely looks interesting. How long before we have digital sensors that can handle dynamic range like our own optical system (our eyes)? Already we have been introduced to in-camera features such as seen within the Sony cameras and their “Digital Filter” app. This allows for simulation graduated neutral density filters. Also, the effects seen from colored graduated filters. In essence, the app splits the scene into three sections. Each section can have different exposure settings. They are then merged together in-camera by clicking the shutter. Obviously, this app is not going to provide the same level of image fidelity or blending control as Photoshop. But is this app from Sony a picture of things to come?

Conclusion – My thoughts

Personally, I would agree that graduated ND filters are definitely no longer essential for the modern landscape photographer. However, I think I will remain old-school for the foreseeable future. I have already made the investment with respect to my LEE and NiSi Filter systems. So it is only right that I extract every bit of value and return on that investment! Also, I just happen to like working more in-the-field and spending less time on my computer screen.

Seascape image by Graham Daly Photography

But that is just me. What are your thoughts? Are you ready to dispose of your graduated filters and become an exposure blending guru? Or will you stick with the graduated filter tradition for a little while longer?

SaveSave

Beginner’s guide to long exposure nature photography

Long exposure photography

is a technique that makes slow-moving elements (such as waves or the light trail of cars) appear in the photo mist like, blurry or elongated, while still, objects remain sharp and defined. The key factors for achieving this effect are low shutter speed and having the camera extremely stable. Using long exposure photography you can give a totally new dimension to your nature photos. I think you will love this technique and the photos you will achieve by using it. In today’s article, we will show you how.

Long exposure trails
This photo was taken at night using long exposure. The moving cars were too fast to be captured by the camera, but their bright lights were captured as light trails, giving a nice effect to the image.

#1. Use long exposure photography when you have moving elements in the frame

The effects achieved by long exposure are created because the moving object is captured by the camera many times during the time the shutter is open. We can achieve different effects depending on the amount of light the object is giving and its manner of movement, For example, a passing car at night is giving off light from its headlights and is moving relatively fast in a specific direction, so the effect we get is that we see the headlights as streaks of light outlining the path of the car the car drove through. On the other hand, waves, which do not give off the light, move back and forth on the shore and so they would make the water at the beach look like mist or a thick fog.

Long exposure_Clouds and water
In this photo, both the water and the sky were moving, but the buildings were static.

#2. To get a well-balanced image, add static elements in your composition

If everything in the frame is moving, you can end up producing photos with a dizzying effect. Unless you want this effect for creative purposes, I recommend you to include in the composition of the image at least one static element that will provide the viewers a point to rest their eyes. The contrast can also enhance the effect and make the image more balanced. A static object can be a rock, a tree, a house, a path… anything that does not move when you are pressing the shutter.

Long exposure_ Rocks and water
The combination of the static rocks and the buildings and the movement of the waves create a balance in this photo.

#3. You will need a tripod to avoid camera shake

As you will be shooting with low shutter speed, you will need to stabilize your camera somehow. One of the best option is to use a tripod. There are a lot of tripod models in the market. I recommend you to get a stable one which will fit your budget.

The tripod by itself won´t give you 100% stability. If you have a lens with image stabilization (also known as vibration reduction), it will be better than you turn it off when you have the camera on the tripod.  I know this last tip might seem contradictory, but these stabilization systems are meant for hand-holding situations and if you are using a tripod, they might cause shaking instead. Another tip is to avoid touching the camera or tripod while you take the photo. I recommend using the timer delay options of your camera to avoid the shaking due to the pressing of the shutter release. You can also use a remote control and avoid touching the camera altogether.

#4. Use filters to avoid overexposure

Nature photography many times takes place during daylight. If you want to take a long exposure photo, the first problem you will face is the overexposure. Sometimes even with the aperture closed as much as it can be and the ISO set to the lowest value, you might still have burnt photos. How to solve this problem? By using filters to reduce the light that gets into your camera.

Long exposure_ Overexposed

Long exposure_Beach sunset
The upper long exposure photo was taken without using any filter. As the sun was bright at that moment and the shutter speed was low, the image ended up being overexposed (burnt). The photo below was taken using an ND filter. As it stops light from coming into the sensor of the camera, the resulting photo is better exposed.

There are many different filters, but two types are especially interesting for long exposure photography: Neutral density (ND) and graduated filters. The first one is basically a uniform dark filter. There are different dark intensities. The more intense is the light in your frame, the darker your filter should be. The darkness of a filter is measured by the stops of light that they don´t get into your camera. The highest its stop number, the darker the filter is. Graduated filters are a variation of the ND filters. Their darkness is not uniform but increases progressively in a gradient.

Filters ND for long exposure
Filters can come in various shapes and types. Here you can see the left a circular ND filter, To the right at the top are 2 ND filters with 2 different stops (degree of light they can block) and in the bottom 2 graduated ND filters also with different stops.


ND filter example
The effect of ND filters is blocking light. As you can see in this overexposed photo., the area covered by the filter was corrected by it.

You can use one filter or stack several ones on top of the other. For example, you can use several rectangular filters in the filter holder or you can use one round filter on your lens and then add one or more rectangular filters using a filter holder.

Filter holder for long exposure
Rectangular filters are usually placed in a filter holder mounted on the lens.
How to place a filter for long exposure
The filter holders have slots into which the filters can be fitted easily.

Once in the field, I set the camera to the shutter speed I want in order to get the desired effect. Then I set the ISO to 100 and the Aperture that will give me the Depth of Field I want. I usually go with Apertures 8.0 or higher. To decide the filter or filters I need, I have to admit I do it by trial and error. I believe there is a formula, but when I am in the field, trying filters comes to me much more naturally. I start with the least dark filters and I progressively move to darker ones.

More than one filter long exposure
Filter holders have two or three slots that enable you to stack several filters on it.

#5. You might need to crop your image a little in order to delete the filters borders

When you use filters, and especially when you use several filters stacked, black halos or shadows it might appear in the corners of the photo. This is more evident if you are using a wide-angle lens or low numbers of mm. This can be solved easily. Just plan ahead and take a photo knowing that you will need to crop it afterward. I recommend you to how a look to Navanee Viswa´s tutorial to learn how to crop a photo using Lightroom.

Cubelles long exposure

Cropping long exposure
In the upper image, you can see black areas that are in fact the filter holder. The lower photo is the same one, after cropping it a little using Lightroom.

#6. You might need to deal with some color cast correction

Depending on the quality of your filters, they might add a color cast to your photo.

Color cast long exposure
This image has a purple tint due to the filter I used to take it. You can find better quality filters that don’t produce any color cast, but they are usually more expensive.

I am quite new to long exposure photography. When I decided to give it a try, I was not sure about spending a lot of money on my first filters. I got a filter kit that included a wide variety of filters in a really good price. Of course, they are not of the highest quality, but they still allowed me to experiment and discover that I do like this type of photography. As I use them quite a lot, I can think about investing in better ones in the future. For now, however, I stay with my cheap filters and I solve the color cast issue using Lightroom.

Long exposure edition
In the Develop module, look for the HSL/Color/B&W section and select Saturation.


Long exposure edition
Play around with the sliders of the colors that are giving you the color cast. In my case, I put down the purple and the magenta.


Long exposure edition
If you don’t like playing around with the sliders, there is another way you can correct the color cast. Press in the little icon marked with a blue rectangle.


Long exposure edition
This icon changed shape. This shape is also in your cursor.


Long exposure edition
Click in the area of the photo you want to correct and scroll down (because you want to decrease the color saturation. To increase it, you need to scroll up).


Cropping long exposure
Here you have the final corrected image!

If you prefer Photoshop, you can also use it to remove the color cast. Julian H explains how to do it in his article “How to remove color cast using Photoshop”.

#7. Keep your filters clean if you don’t want to spend a lot of time removing spots

Your filters might seem clean,but when you see the photo on your computer you might discover it is full of spots of dust or drops…

Dust in filter long exposure
That day I didn’t clean the filters and I ended up with a lot of ugly spots in my photos.

I remove them with Lightroom using the spot removal tool.

Long exposure edition
There are few dust spots that are quite visible in this photo.


Long exposure edition
But there is a way to see the dust spots even better! Select the Spot removal tool (blue square), click on “Heal” and in the lower part of the screen click on “Visualize Spots”. You will see your photo in black with white contours. The dust spots are the little round white spots. There are a lot in this photo!


Long exposure edition
With the Spot Removal Tool, select one dust spot. You will see that Lightroom selects an area from which it is copying the content. Repeat for each dust spot.

Believe me, if you have a lot of them, it can get really tedious. Look how crazy it can get!:

Long exposure edition

I have learn that it is better to keep a cleaning cloth with your filters and spend some time cleaning them before using (even when they seem quite clean). A minute of cleaning in the field could save you hours later (depending on how many photos you have) in front of the computer.

Long exposure cleaned from dust
Here the dust-free version of the photo.

#8.Take your time and enjoy nature

Long exposure photography is not fast photography. You need to set your tripod, choose filters (clean them), experiment different settings… I recommend you to take it as an opportunity to relax and enjoy nature. Sit down, bring something nice to eat and/or drink and have fun!

I hope you liked this article, please write me any questions or comments and have a happy shooting!


Local Correction Tools – Lightroom

Color correction is an art form that relies on your perception, experience, and interpretation of the image. We can do this correction if we have an installed Lightroom presets. The fundamental difference between Global & Local correction tools is simple:Global edits are the enhancements we make to the whole photograph.Global correction does apply the changes across all the pixels in the frame. Global editing shouldn’t be used to correct one part of an image, to the detriment of the remainder.Too often I’ve seen people adjust the white balance of an entire photo to try to achieve “perfect” skin tones. Not only is this quite difficult, it frequently makes the rest of the photo look strange. Good global edits are essential, but they don’t negate the need for local editing. Well-executed local edits are the difference between a nice photo and a great one.Whereas local correction tools apply the changes only based on the areas we choose to apply. Some of the Basic Lightroom tools and Photoshop’s Shadow/Highlight act locally and do not treat all pixels with the same brightness values as identical. Some of the Local correction tools in Lightroom  Presets are:
Crop tool(R)
Spot removal tool(Q)
Red eye removal tool
Graduated filter(M)
Radial filter(Shift+M)
Adjustment brush(K)

Local Correction Tools - Toolbar
Local Correction Tools – Toolbar

These tools are available only in develop module and are placed right below the histogram on the right side.

  • Crop tool ( R)
    Crop tool helps us to recompose the photograph that we have taken, to make it aesthetically better or to simply make it more pleasing to the eye. The kind of cropping we do, without a doubt, will vary from one photograph to another. Some might require minor corrections on the horizon while some others might require vertical alignments. Regardless, the crop tool provides the photographer with an opportunity to play around with the proportions, perspective, and the way a photograph looks ultimately. This tool plays a vital role in the post-processing of a photograph.

    Click the Develop tab at the top of your workspace. Locate and select the Crop & Straighten tool icon in the toolbar, which opens the options for the tool. Alternatively, press “R” on your keyboard to open the Crop & Straighten tool options. 

    The Crop & Straighten tools are often the first step many photographers use when editing photos in Lightroom. Use these options to crop a photo for Instagram, straighten crooked photos, or prepare photos for printing.

    Crop Tool features
    Crop Tool features
  • Spot Removal (Q)
    In the Develop module, select the Spot Removal tool from the tool strip, or press Q.

    The Spot Removal tool in Lightroom lets you repair a selected area of an image by sampling from a different area of the same image. It helps us remove dust speckles, insignificant or unnecessary elements from the photograph, remove skin blemishes, etc. On an advanced level, the spot removal might also help to us to remove certain elements from the photograph, like a person, overhead electrical wiring, etc. 
    The two spot removal techniques are Clone and Heal.

    Heal matches the texture, lighting, and shading of the sampled area to the selected area.
    Clone duplicates the sampled area of the image to the selected area.
  • Spot removal tool - features.
    Spot removal tool – features.
  • Red eye removal tool
    Red Eye will remove the red discoloration of a person or a pet’s eyes that can result from a camera flash going off. Unfortunately, there aren’t any shortcuts available for this particular Lightroom feature, but this is yet another vital tool when it comes to post-processing photographs. To remove a red eye from an eye on a photograph, you can use this tool to remove the red eye and to enhance the eye.
  • Spot removal tool.
    Red-Eye Removal Tool.
  • Graduated Filter Tool
    Graduated Filter Tool
  • Graduated filter (M)
    In the Develop module, select the Graduated Filter tool from the tool strip, or press M.
    The Lightroom Graduated Filter is a versatile tool for making local adjustments to your photos.This tool is a huge help for landscape photo retouch as it can be used to enhance the details from the foreground and the skies.
  • Radial Filter (Shift + M)
    The background or elements surrounding the primary object of your photograph can distract the viewer. To draw attention to the subject, you can create a vignette effect. The Radial Filter tool enables you to create multiple, off-center, vignetted areas to highlight specific portions of a photograph.

    In the Develop module, select the Radial Filter tool from the tool strip, or press “Shift + M”.
  • Radial Filter Tool
    Radial Filter Tool

    Adjustment Brush (K)

    The Adjustment Brush tool, literally, works like a brush. The changes or corrections get applied to those regions that you select or brush over. This is one the major advantages of this particular tool – make changes to specific areas or regions of the photograph. The Adjustment Brush tool lets you selectively apply Exposure, Clarity, Brightness, and other adjustments to photos by “painting” them onto the photo.

    In the Develop module, select the Adjustment Brush tool from the tool strip, or press K.

Adjustment Brush Tool

The adjustment brush tool combined with the graduated filter tool are a deadly combination. These two tools together have the power to create/produce magical outputs even out of the most simple photographs.

Lightroom is great for processing your photos and understanding how its tools work will help you use it more effectively. Use these features, play around with the tools and tell us about your experience in the comments below. 🙂 

How to Make Your Picture Standout using Lightroom

Vignetting

a picture is often used to enhance the subject of a composition, and Lightroom has an automatic feature to create vignetting in the effects panel. However, this software’s native effect only darkens the edges of the picture, making it look very artificial for my taste. So in this tutorial, you’ll learn an alternative way to make the same effect using specific adjustments in Lightroom, improving your picture and making it stand out just like the before and after below. Let´s go!

How to make your pictures standout using Lightroom

Step 1) Open Lightroom and Import and/or Open the selected image you want to tweak. Then, go to develop mode and select the graduated filter tool on the right tools panel, that way you’ll create a new mask in your image:

Create a graduated filter maskStep 2)

When you select this tool, you’ll notice the cursor will become a cross, click at the top edge of your image and drag to the middle of the image, maintaining a straight line. This way, you’ll create a mask on your image, and can tweak with the adjustments from the right panel, just as a usual image, but it will only apply to the area highlighted by the mask. You can tweak with the values according to your style of editing, but these are the values I’ve used for this example:

Create the first mask

Lowering the temperature of the image and increasing the saturation, I could enhance the colors of the sky, and by tweaking the clarity values, I was able to increase the edge’s contrast, enhancing the details of the sky.

Step 3)

Now you’re gonna do the same thing as the previous step, but this time clicking and dragging from the bottom edge to the middle of the image. You can make the adjustments in the right panel, but for this example, I’ve used the same values from the first mask.

Create the second mask

Step 4) In this next step you’re gonna make the edges of the picture darker than the middle, just like the default vignette effect, but better! Create a radial filter by clicking the tool on the right panel, you’ll notice the cursor will become a cross also (just like the graduated filter). To create this new mask, click at the center of the image and drag all the way to one of the edges, but this time it has a rounded shape. The values I’ve used are in the images below but, again, it will depend on the image you use and the style of editing you have.

Create a radial filter mask

In my case, I like to bring colors to the picture by increasing the saturation and tweak a little bit in the clarity dial to enhance the details of the shadows. To darken the edges of the image, like the default vignette, I´ve lowered the exposure dial a bit.

Step 5)

To finalize the effect, you’ll create another radial filter just like the previous one. Click on the center of the image and drag to the edges, but this time you’re going to invert the mask by checking the box “invert mask” at the bottom of the right panel:

Create a inverted mask

To emphasize the tone at the center of the image, I´ve increased the temperature just a little bit and added a warmer color to the mask, by clicking on the color box at the bottom of the panel and selecting a color similar to the ones at the center of the image. I´ve also adjusted the exposure and sharpness to enhance the details at the center of the image.

By now you should have ended with a totally different picture from the one you had at the beginning of this tutorial. Click “Done” and you can export the picture the way you do usually.

Final Result

In this tutorial, we learned how we could make our pictures stand out using two great tools from Lightroom, the graduated and radial filters. The final result was an image with enhanced colors and a smooth vignette effect with no dark edges. If you have any suggestions or doubts you can write a comment below or contact me directly. See you next time!

Creating your own preset in Lightroom

Working as a graphic designer I usually have to develop corporate identities, and an essential part of the branding process is to establish a visual style for the photography, illustration, and images used in the brochures and editorial design as well. Some important factors are subject in the photo, lighting, cropping style, colors, depth of field and so on.

Another important factor is the post-processing that must follow these visual style criteria. Thanks to the Lightroom Presets, today we’re able to do this with ease and speed, editing dozens of the picture at the same time by just clicking one button! You must be saying, how can I create a preset to use in my own branding visual style? Don´t worry, this is what we’ll learn in this tutorial, and is so simple that it can be done in 5 steps. Ready?

Before and after applying preset

Step 1) Open Lightroom and import all the images that you want to apply the visual style too. In my case, I’ll be using this 4 stock pictures (found on Google) that imply the subject of my branding visual styles, such as sea, aquatic sports and dynamism.

Import images into Lightroom

So we can create our preset, we must first adjust the settings of our picture according to our branding visual style. In this case, select your first picture and go to develop mode.

Entering Develop Mode in Lightroom

The first thing we must do is to eliminate all the colors of the original image, by going into the basic panel and clicking “Black & White”. This step will convert your image to black and white automatically, but you may tweak the dials according to your style of editing.

Turning Black & White in Lightroom

Step 2) Now, we’re gonna open the “split toning” panel on the right and work with the main colors of the branding visual style. In my example, I’m using the hue and saturation values I’ve found, using the eyedropper tool in Photoshop (image below).

Split Toning with Lightroom

Hue & Saturation values in Photoshop

What I did was, match these two values of hue and saturation and use it in the highlights and shadows dials of my image. I’ve used the lighter color for the highlights, and the darker color for the shadows, but feel free to explore the possibilities. I’ve also tweaked the balance value in order to achieve a better balance between the two colors.

Step 3) Next step, we’re gonna create a graduated filter mask. Click the graduated filter tool, on the right panel and drag from the bottom edge of the image all the way to the top edge. You can leave the values default, but we’re gonna change the mask color with the same values of the previous step.

Creating a graduated filter mask in Lightroom

For the bottom of the image, I’ve used the darker color. Now we’re gonna do the same thing, but this time drags from the top edge of the image to the bottom and selects the lighter color on the color mask box:

Creating a graduated filter mask in Lightroom

Step 4) This is the final aspect of the visual style we want for all of the images. Hit “Done” and let’s proceed to create the preset, in order to apply it to the other images. Still in develop mode, go to the top menu in “Develop > New Preset…”

Creating a new preset in Lightroom

In the window that opens, we can choose a name for our preset. In the example below, I’ve also created a folder to eventually save other presets for this same branding project. You can see that I’ve only checked the boxes of the adjustments used for the preset, like split toning, graduated filter and also treatment (black & white).  Click “Create” and our preset is now available in the Lightroom library.

Configuring a new preset in Lightroom

Saved preset in Ligthroom

Step 5) In order to apply this preset to your picture, select the picture you want to use, then go to quick develop on the right panel and click on “saved preset”. In the drop down menu, go all the way to the folder you’ve created (the Lightroom default folder for created presets is “User presets”), click on the name of the preset and you’ll notice that the picture will instantly change to the applied preset.

Applying the preset in Lightroom

Final Result

For this example, I’ve also created another preset with different toning and colors, and after I was satisfied with the result, I just clicked on “Develop> New preset…” and created another preset using a different name.

Creating a preset in Lightroom

You can also apply the presets in several pictures at the same time, by selecting them and applying the preset the same way as before.

Applying the preset in Lightroom

Final Result

The final result is an image with the visual style of your branding project, and now you can apply the logo and graphic elements as you like. The best part is that it’s possible to create as many preset as you need for your project! One thing I’m sure of, you’ll never suffer again by having to apply the same visual style in your pictures one-by-one.Finalvisual style with logo applied

If you have any suggestions or doubts you can write a comment below or contact me directly. See you next time!

How to Use the Graduated Filter Tool in Lightroom

Perhaps one of the greatest challenges of landscape photography is finding the perfect exposure, that will give you a well-lit landscape and a beautiful looking sky in one mesmerizing photo. Before digital went mainstream, the common tool was to use the graduated filter that would go in front of your lens, it is still widely used with digital technology as well. You also have the option to shoot with two exposures and stitch them together, but even if you ended up shooting only one image, you can still achieve a similar effect using the Graduated Filter tool in Lightroom.

In the example image, we see a landscape scene, showing green rolling hills and a mist covering an early morning valley. The image has potential, but the sky, unfortunately, looks overexposed and dull. The foreground could use some minor tweaking as well, to bring out the dark tones.  These are the two problems we will want to fix with the Graduated Filter tool.

What Lightroom Develop Module Tells Us

Begin by opening the image you want to be corrected in Lightroom and find the Develop module. In the develop module you will find the Graduated Filter tool – the fourth adjustment tool in the module. Alternatively, use the Keyboard shortcut “H” to access the tool.

lr develop

Once the tool is selected, hold the mouse and drag it down from the top of the image, towards the lower half. You want it to go comfortably over the land areas in your image for a more realistic final look. Naturally light scatters, it does not get cut off unless an object interferes with its path – we want the changes we make to the sky areas of the image to reflect that; therefore, we allow the adjustments to transition just a tiny bit into the foreground as well.

graduated filter

Fixing Common Mistakes

If the graduated filter you applied does not align with the horizon, rotate it by moving the mouse cursor towards the center of the filter. Once you are close enough, the mouse icon will change indicating you are able to rotate it. To prevent the graduated filter from misalignment in the first place, hold down the ‘Shift’ key when dragging it.

Once you have the graduated filter you will notice that it allows you to change a number of settings. They include: exposure, brightness, contrast, saturation, clarity, sharpness and add color. The changes you make to these settings will only affect the area covered by the Graduated filter.

filter settings

What do we Use the Graduated Filter Tool for?

Since we aim to darken the sky, we begin by lowering the exposure levels. Lowering the exposure will also lower the highlights for that area, if you have clouds in your image, you will want to regain some of their whiteness by raising the contrast ratio. Making these changes to the image will usually increase the saturation of the image – adjust it accordingly.

filter settings2

Further, if you aim to have a dramatic looking image, you can increase clarity of the Graduated Filter – it will increase the edge contrast ratio. Beware that increasing the clarity of the sky can reveal uneven color graduation, going from dark to light, if you are seeing that reduce the clarity. If you aim to have a smoother sky then decrease the clarity to achieve a softer look.

While you are applying changes to the Graduated Filter beware of the land areas of the image. Often, parts of those areas will become underexposed when lowering the filter setting. You will likely need to bring the shadows back slightly or move the graduated filter higher so that those areas are not affected.

Lightroom’s Graduated Filter tool is not only limited to for use on skies, feel free to experiment by adding it to any part of the image. For instance, the Graduated Filter can be further used in the example image to deepen the black tones in the foreground area.

graduated filter2

The same process as the one used on the sky applies. We drag the Graduated Filter across the areas we want to be corrected, once it is applied we change the settings for the filter. In the case of the example image, we increase the clarity, add sharpness for a crisp look,  lower the highlight by lowering the brightness, compensate for saturation and add warmth by adding just a little bit of a color cast to the gradient.

lightroom graduated filter