Tag: long exposure

Beginner’s guide to long exposure nature photography

Long exposure photography

is a technique that makes slow-moving elements (such as waves or the light trail of cars) appear in the photo mist like, blurry or elongated, while still, objects remain sharp and defined. The key factors for achieving this effect are low shutter speed and having the camera extremely stable. Using long exposure photography you can give a totally new dimension to your nature photos. I think you will love this technique and the photos you will achieve by using it. In today’s article, we will show you how.
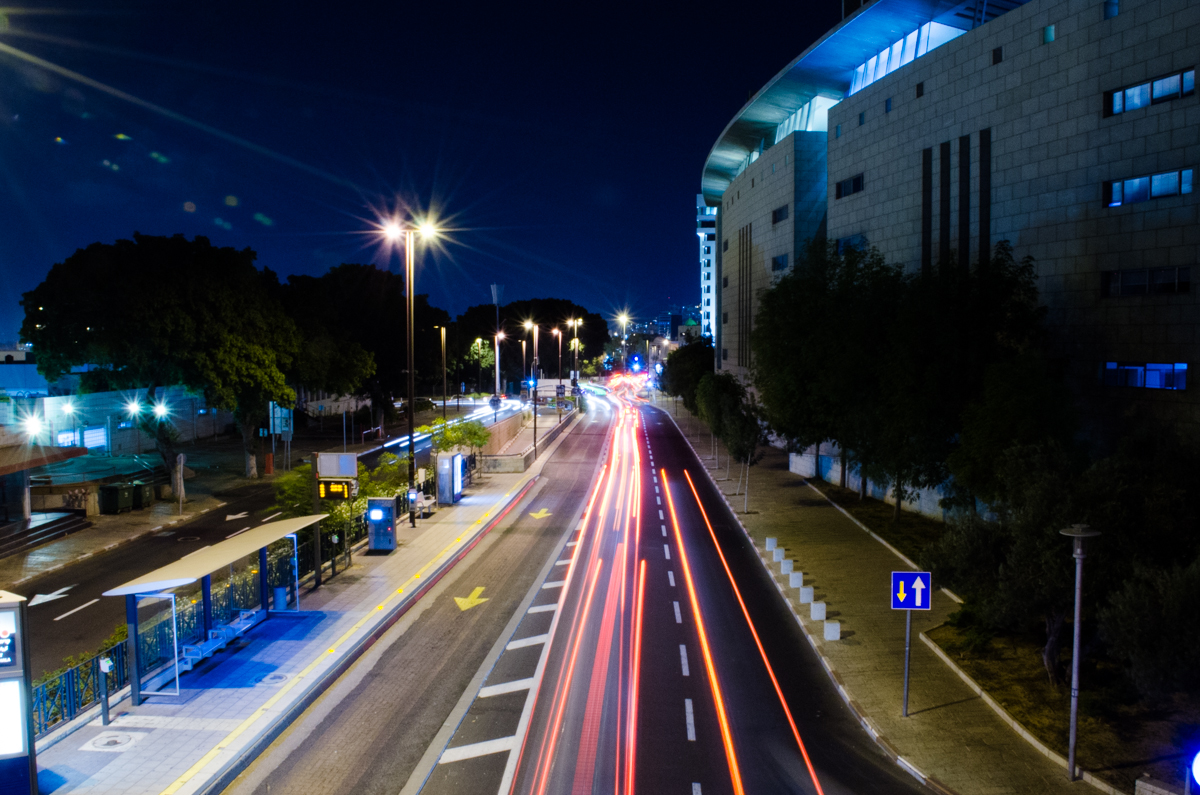
Long exposure trails
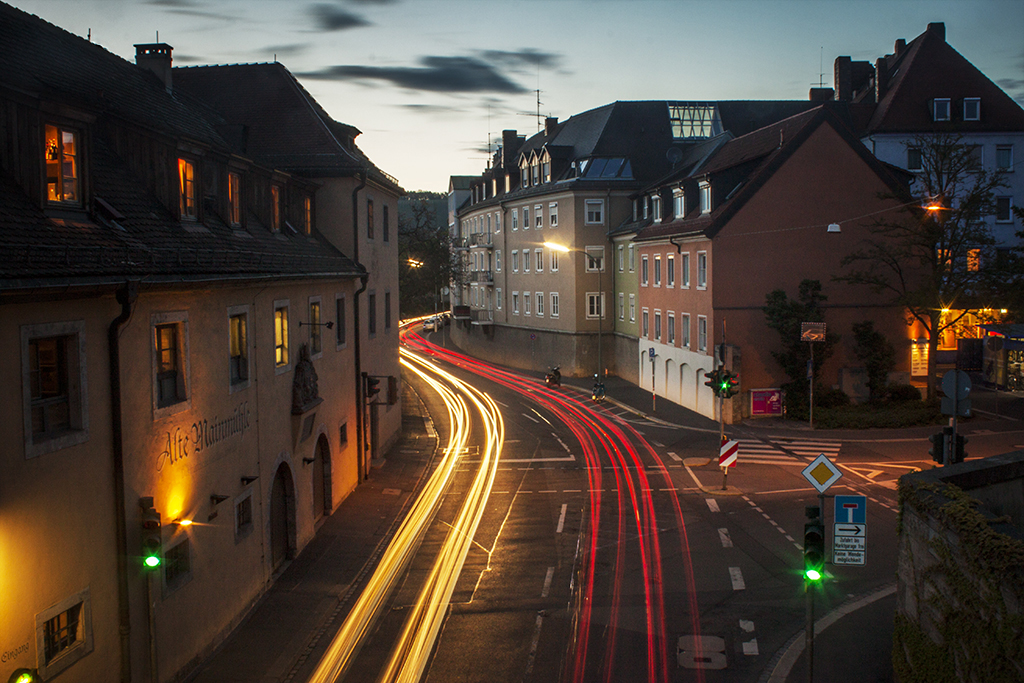
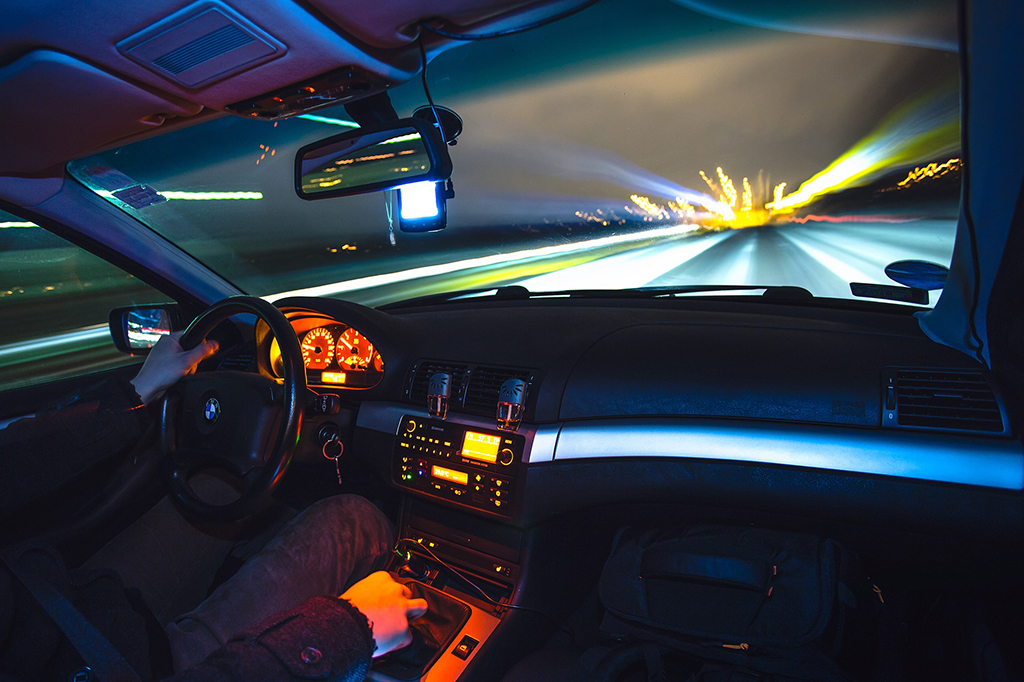
This photo was taken at night using long exposure. The moving cars were too fast to be captured by the camera, but their bright lights were captured as light trails, giving a nice effect to the image.

#1. Use long exposure photography when you have moving elements in the frame

The effects achieved by long exposure are created because the moving object is captured by the camera many times during the time the shutter is open. We can achieve different effects depending on the amount of light the object is giving and its manner of movement, For example, a passing car at night is giving off light from its headlights and is moving relatively fast in a specific direction, so the effect we get is that we see the headlights as streaks of light outlining the path of the car the car drove through. On the other hand, waves, which do not give off the light, move back and forth on the shore and so they would make the water at the beach look like mist or a thick fog.
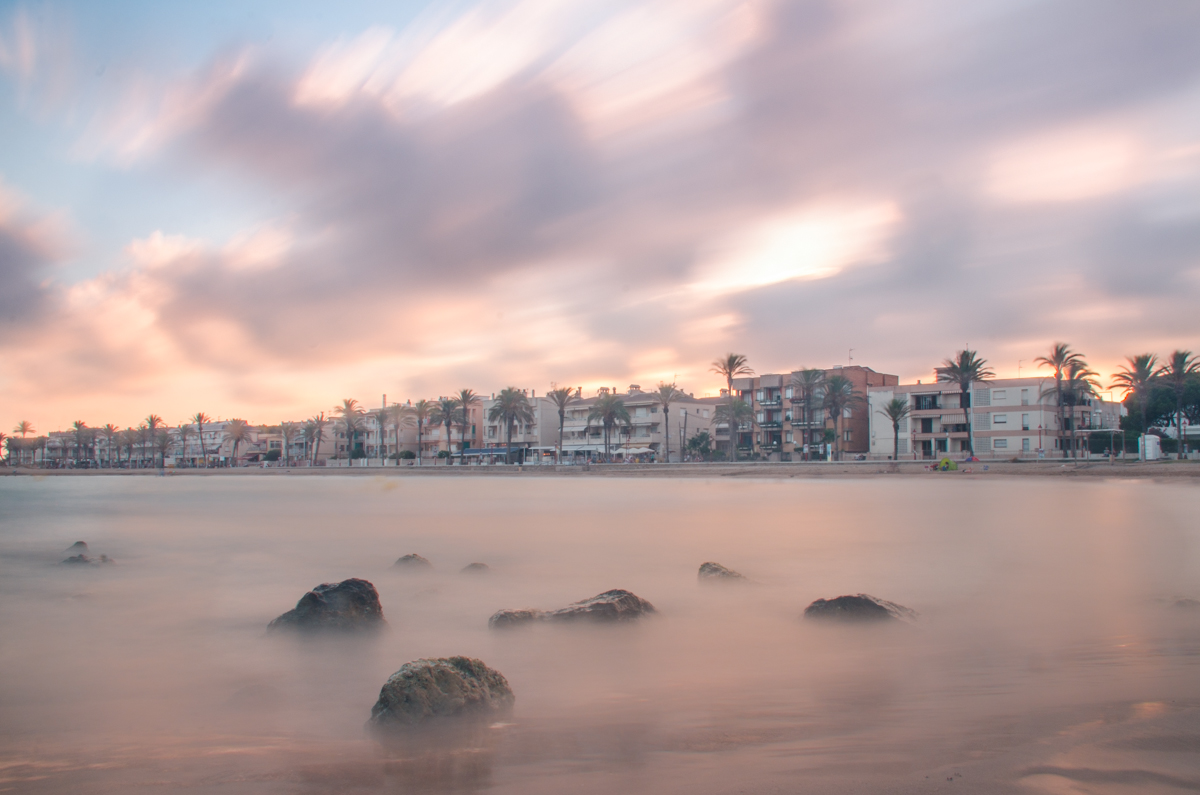
Long exposure_Clouds and water
In this photo, both the water and the sky were moving, but the buildings were static.

#2. To get a well-balanced image, add static elements in your composition

If everything in the frame is moving, you can end up producing photos with a dizzying effect. Unless you want this effect for creative purposes, I recommend you to include in the composition of the image at least one static element that will provide the viewers a point to rest their eyes. The contrast can also enhance the effect and make the image more balanced. A static object can be a rock, a tree, a house, a path… anything that does not move when you are pressing the shutter.
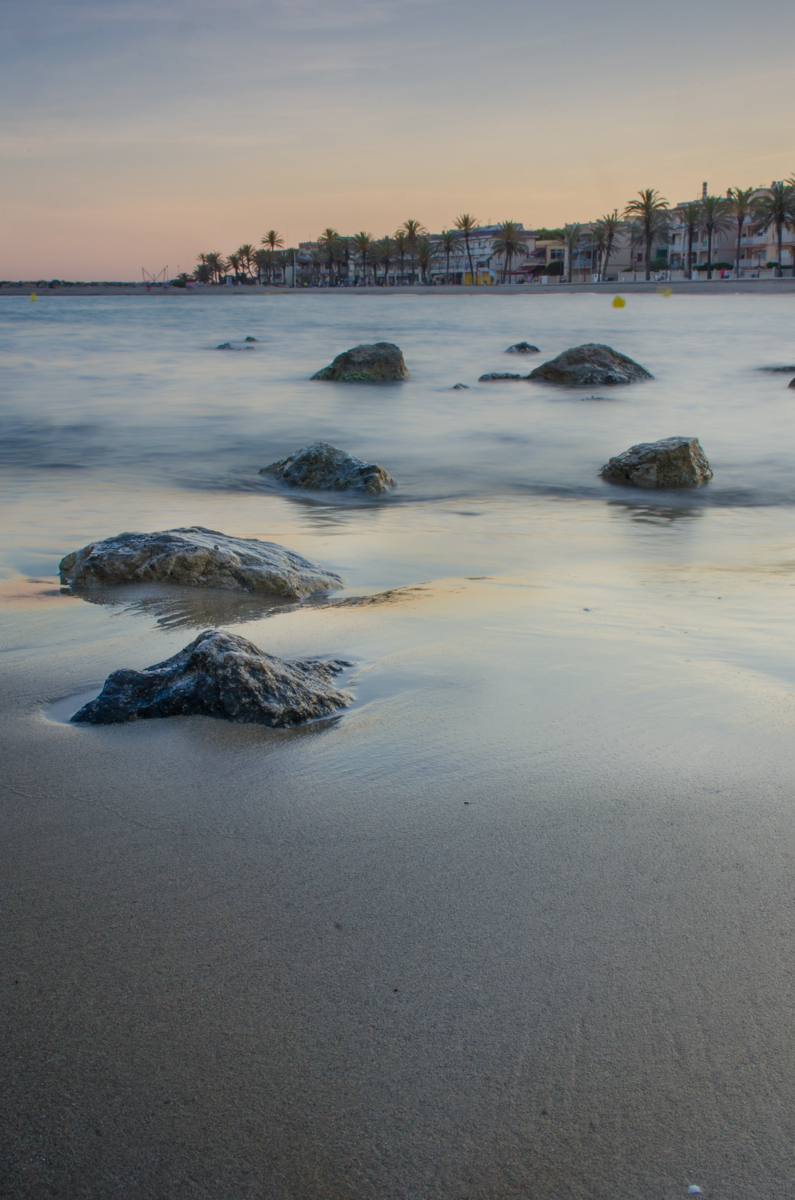
Long exposure_ Rocks and water
The combination of the static rocks and the buildings and the movement of the waves create a balance in this photo.

#3. You will need a tripod to avoid camera shake

As you will be shooting with low shutter speed, you will need to stabilize your camera somehow. One of the best option is to use a tripod. There are a lot of tripod models in the market. I recommend you to get a stable one which will fit your budget.

The tripod by itself won´t give you 100% stability. If you have a lens with image stabilization (also known as vibration reduction), it will be better than you turn it off when you have the camera on the tripod.  I know this last tip might seem contradictory, but these stabilization systems are meant for hand-holding situations and if you are using a tripod, they might cause shaking instead. Another tip is to avoid touching the camera or tripod while you take the photo. I recommend using the timer delay options of your camera to avoid the shaking due to the pressing of the shutter release. You can also use a remote control and avoid touching the camera altogether.

#4. Use filters to avoid overexposure

Nature photography many times takes place during daylight. If you want to take a long exposure photo, the first problem you will face is the overexposure. Sometimes even with the aperture closed as much as it can be and the ISO set to the lowest value, you might still have burnt photos. How to solve this problem? By using filters to reduce the light that gets into your camera.
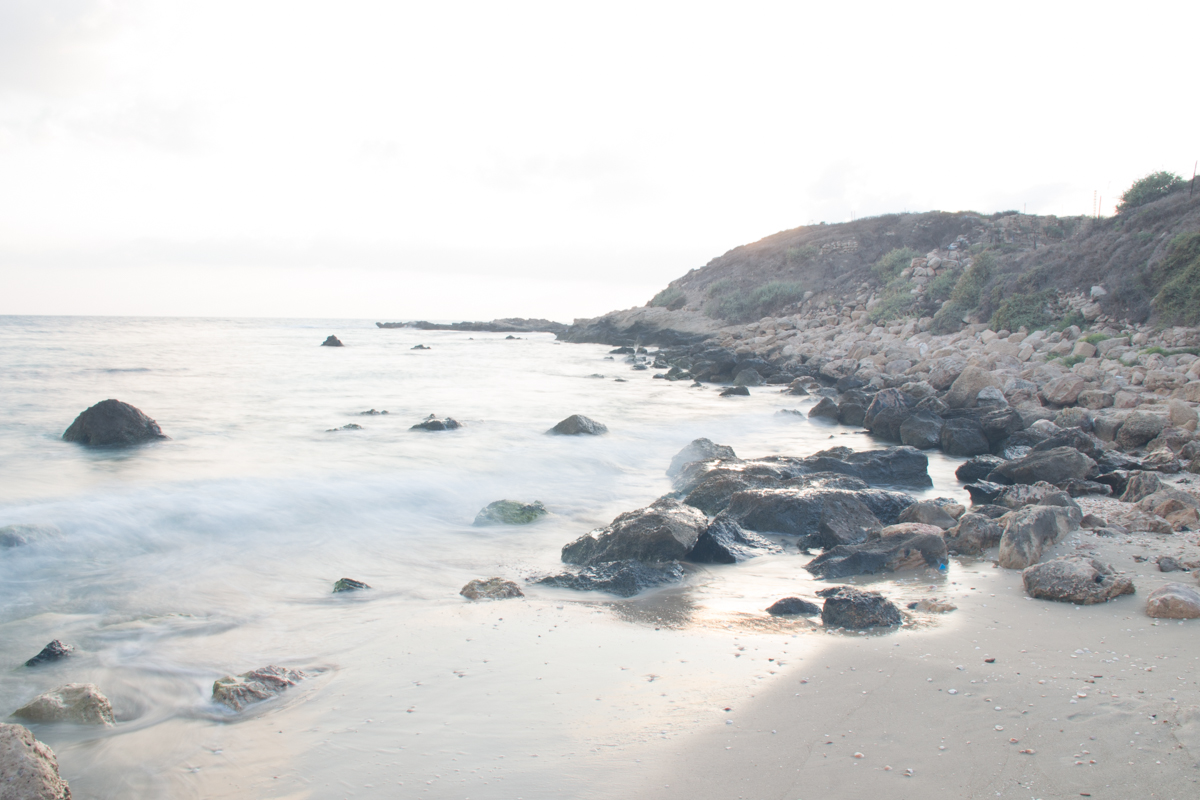
Long exposure_ Overexposed

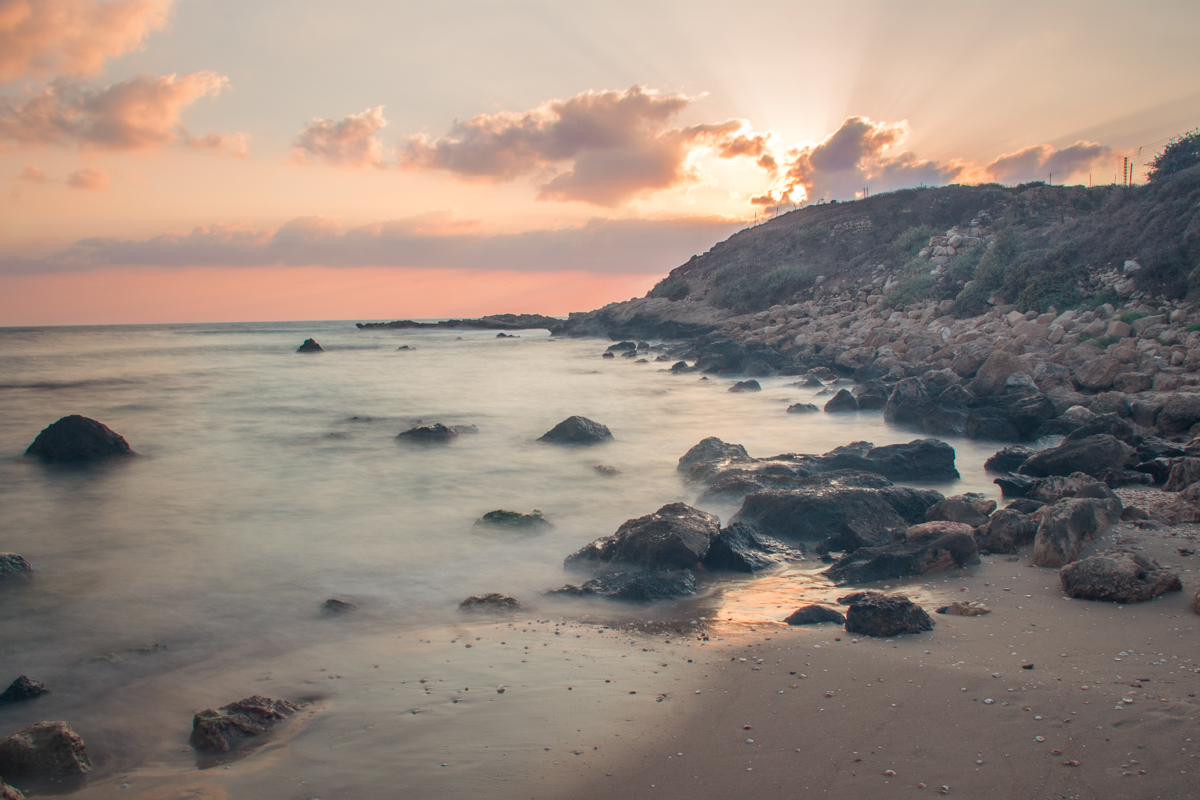
Long exposure_Beach sunset
The upper long exposure photo was taken without using any filter. As the sun was bright at that moment and the shutter speed was low, the image ended up being overexposed (burnt). The photo below was taken using an ND filter. As it stops light from coming into the sensor of the camera, the resulting photo is better exposed.

There are many different filters, but two types are especially interesting for long exposure photography: Neutral density (ND) and graduated filters. The first one is basically a uniform dark filter. There are different dark intensities. The more intense is the light in your frame, the darker your filter should be. The darkness of a filter is measured by the stops of light that they don´t get into your camera. The highest its stop number, the darker the filter is. Graduated filters are a variation of the ND filters. Their darkness is not uniform but increases progressively in a gradient.
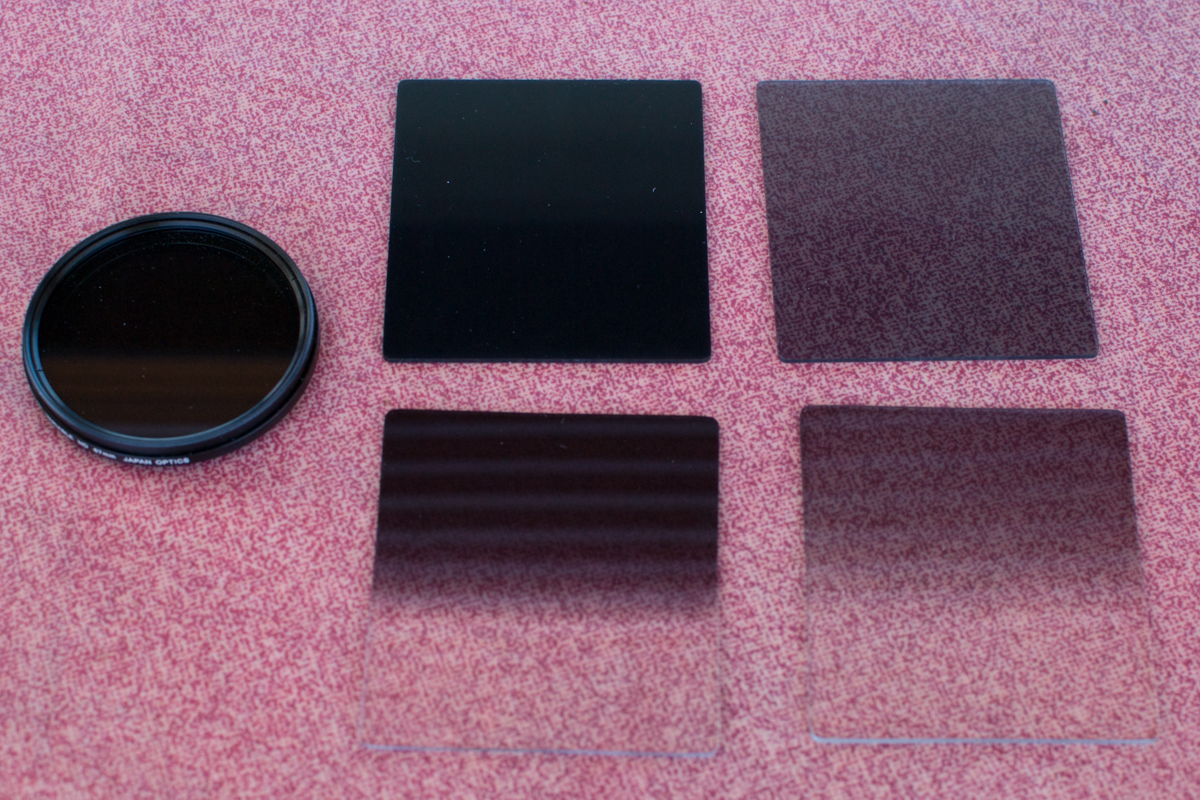
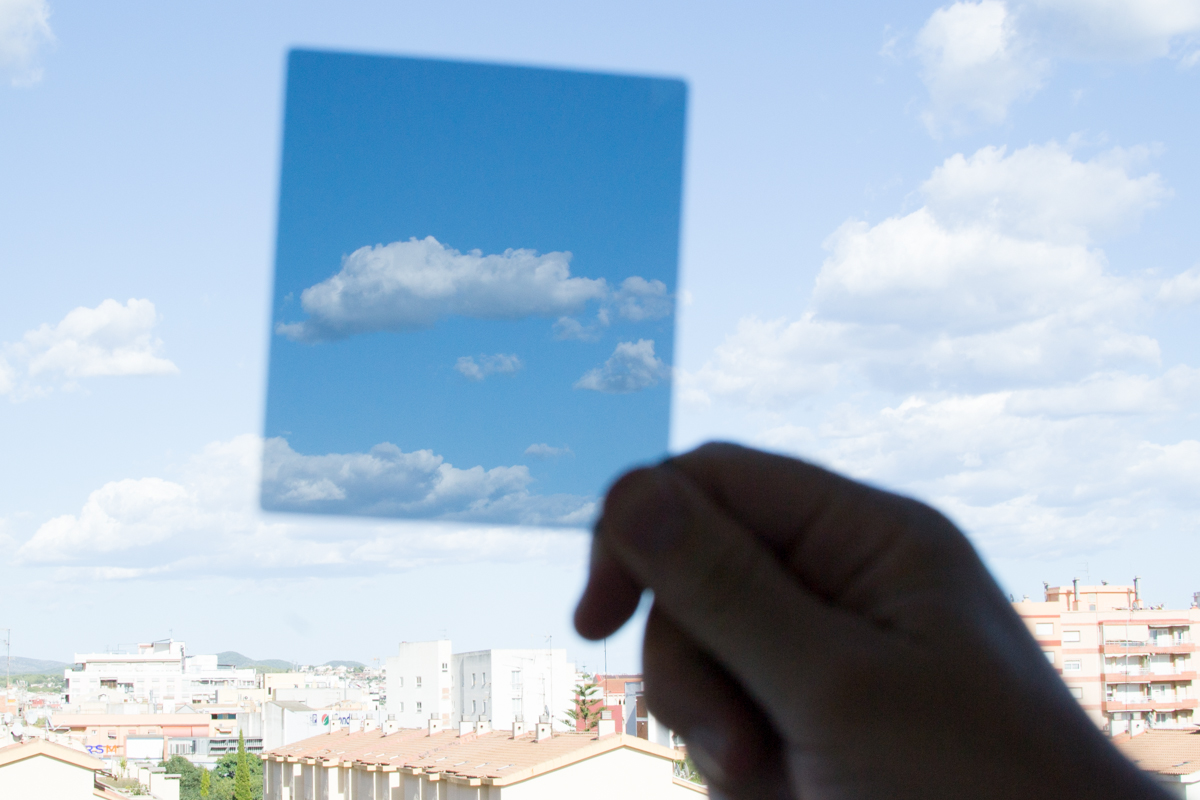
Filters ND for long exposure
Filters can come in various shapes and types. Here you can see the left a circular ND filter, To the right at the top are 2 ND filters with 2 different stops (degree of light they can block) and in the bottom 2 graduated ND filters also with different stops.


ND filter example
The effect of ND filters is blocking light. As you can see in this overexposed photo., the area covered by the filter was corrected by it.

You can use one filter or stack several ones on top of the other. For example, you can use several rectangular filters in the filter holder or you can use one round filter on your lens and then add one or more rectangular filters using a filter holder.
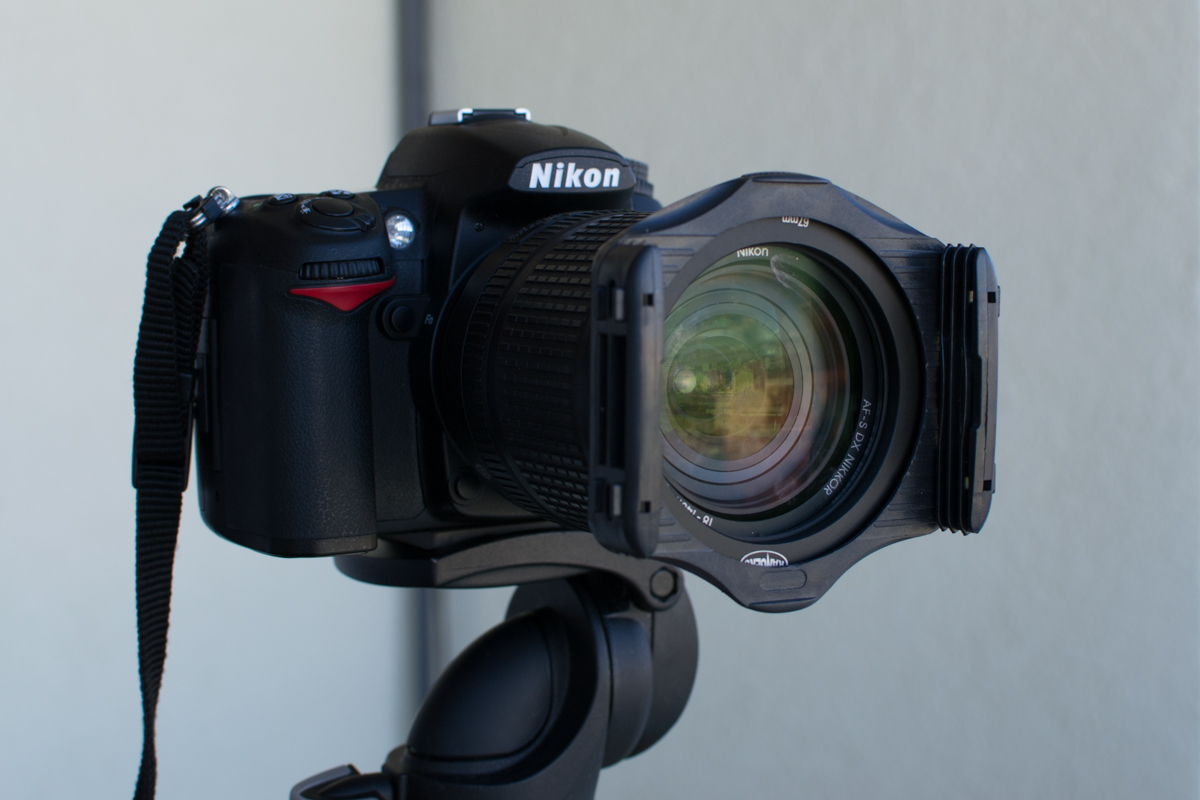
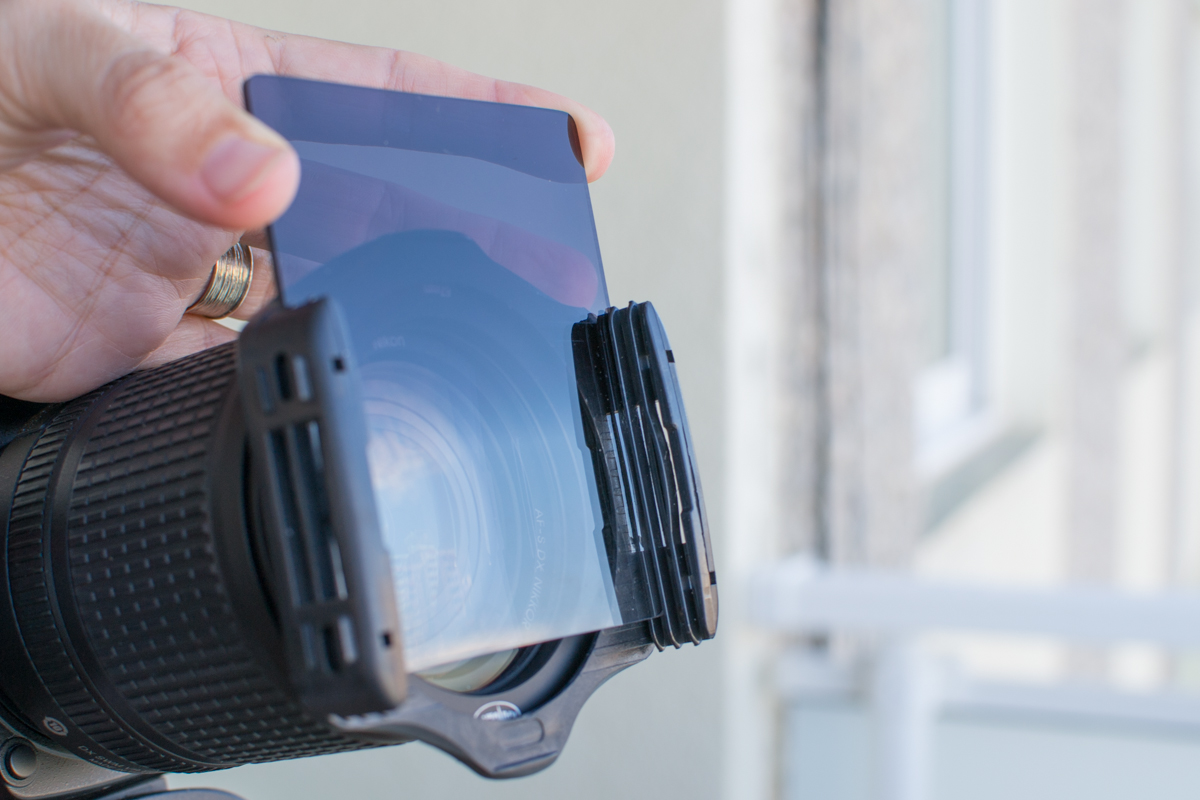
Filter holder for long exposure
Rectangular filters are usually placed in a filter holder mounted on the lens.
How to place a filter for long exposure
The filter holders have slots into which the filters can be fitted easily.

Once in the field, I set the camera to the shutter speed I want in order to get the desired effect. Then I set the ISO to 100 and the Aperture that will give me the Depth of Field I want. I usually go with Apertures 8.0 or higher. To decide the filter or filters I need, I have to admit I do it by trial and error. I believe there is a formula, but when I am in the field, trying filters comes to me much more naturally. I start with the least dark filters and I progressively move to darker ones.
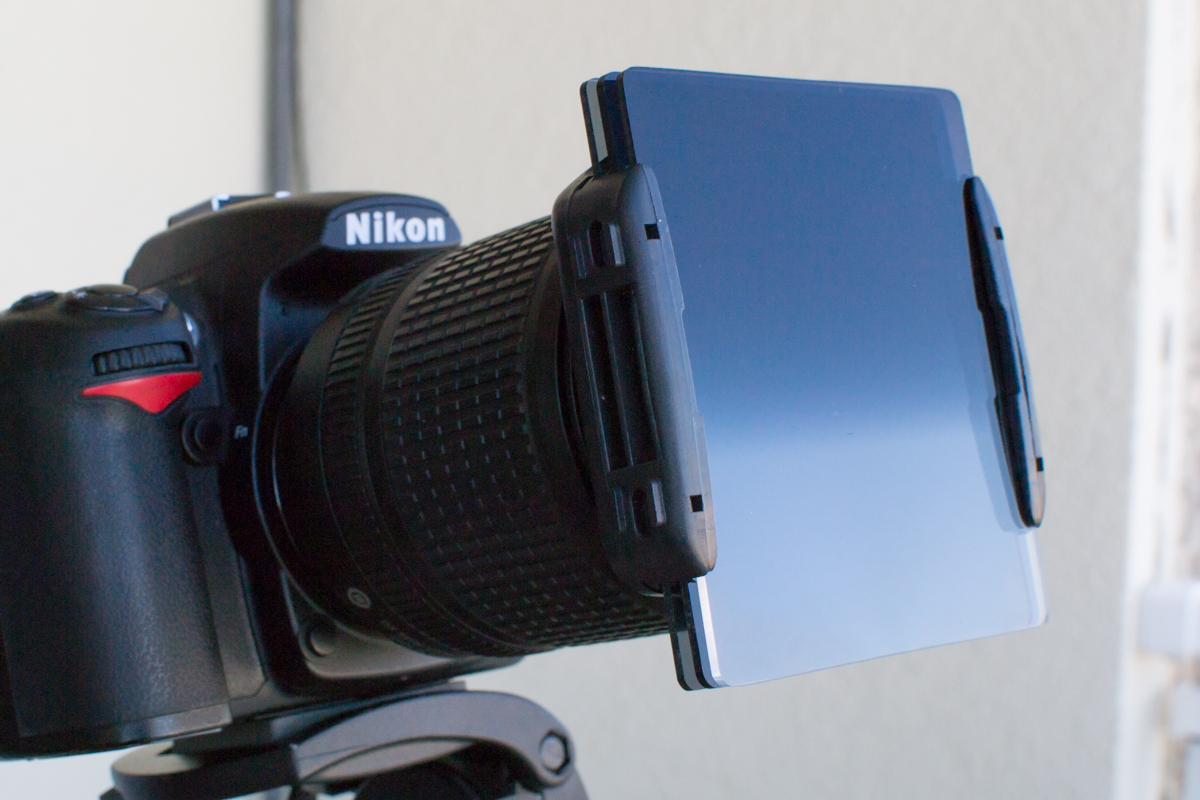
More than one filter long exposure
Filter holders have two or three slots that enable you to stack several filters on it.

#5. You might need to crop your image a little in order to delete the filters borders

When you use filters, and especially when you use several filters stacked, black halos or shadows it might appear in the corners of the photo. This is more evident if you are using a wide-angle lens or low numbers of mm. This can be solved easily. Just plan ahead and take a photo knowing that you will need to crop it afterward. I recommend you to how a look to Navanee Viswa´s tutorial to learn how to crop a photo using Lightroom.
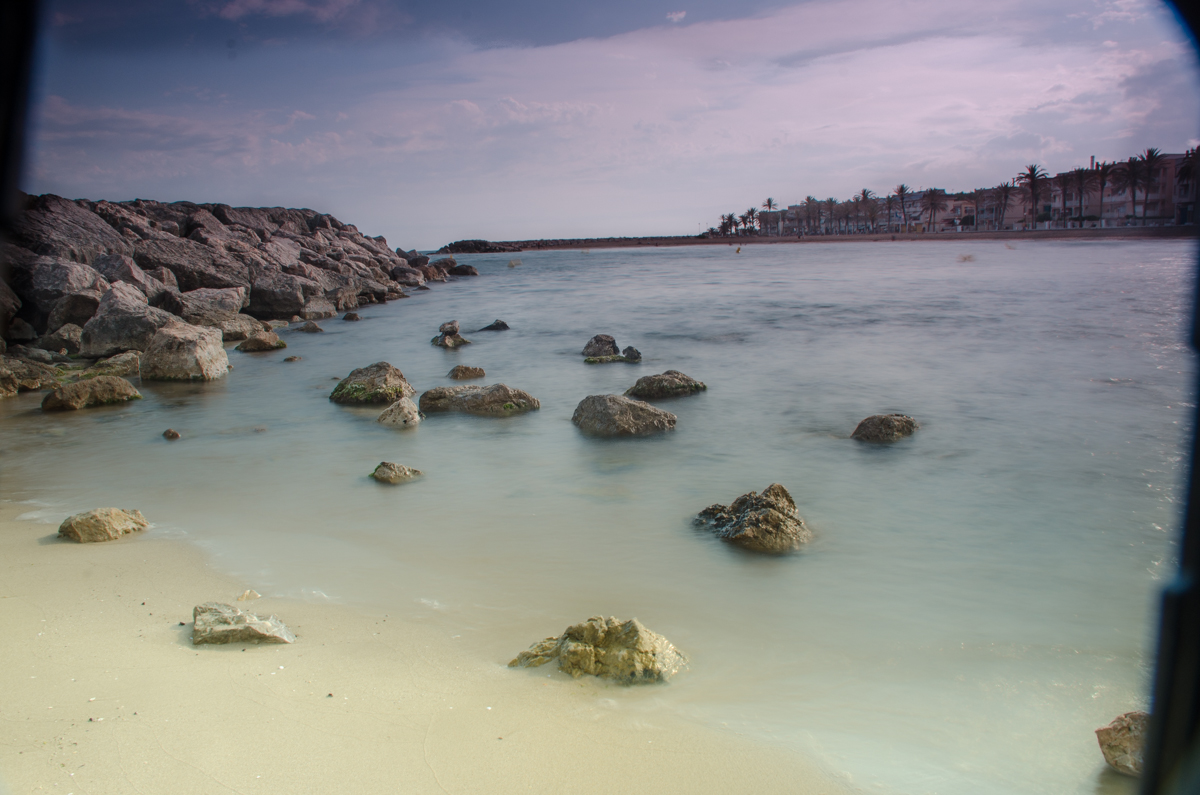
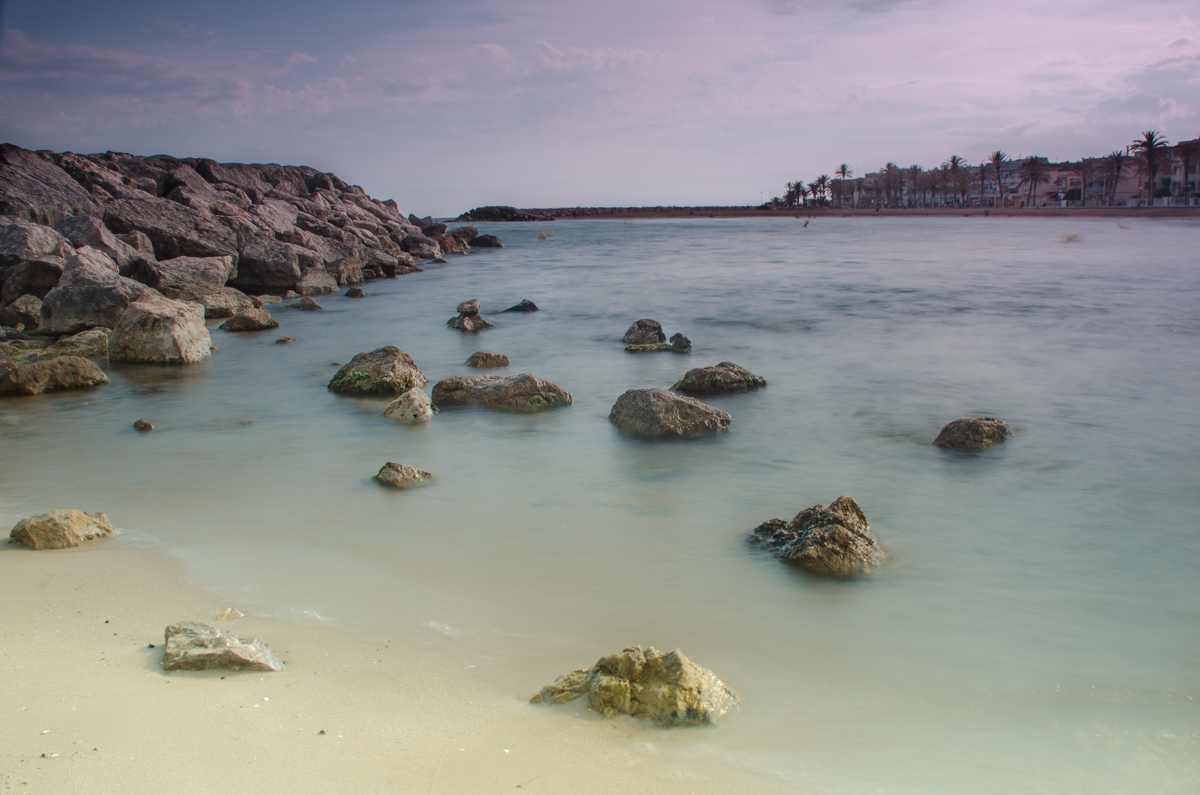
Cubelles long exposure

Cropping long exposure
In the upper image, you can see black areas that are in fact the filter holder. The lower photo is the same one, after cropping it a little using Lightroom.

#6. You might need to deal with some color cast correction

Depending on the quality of your filters, they might add a color cast to your photo.
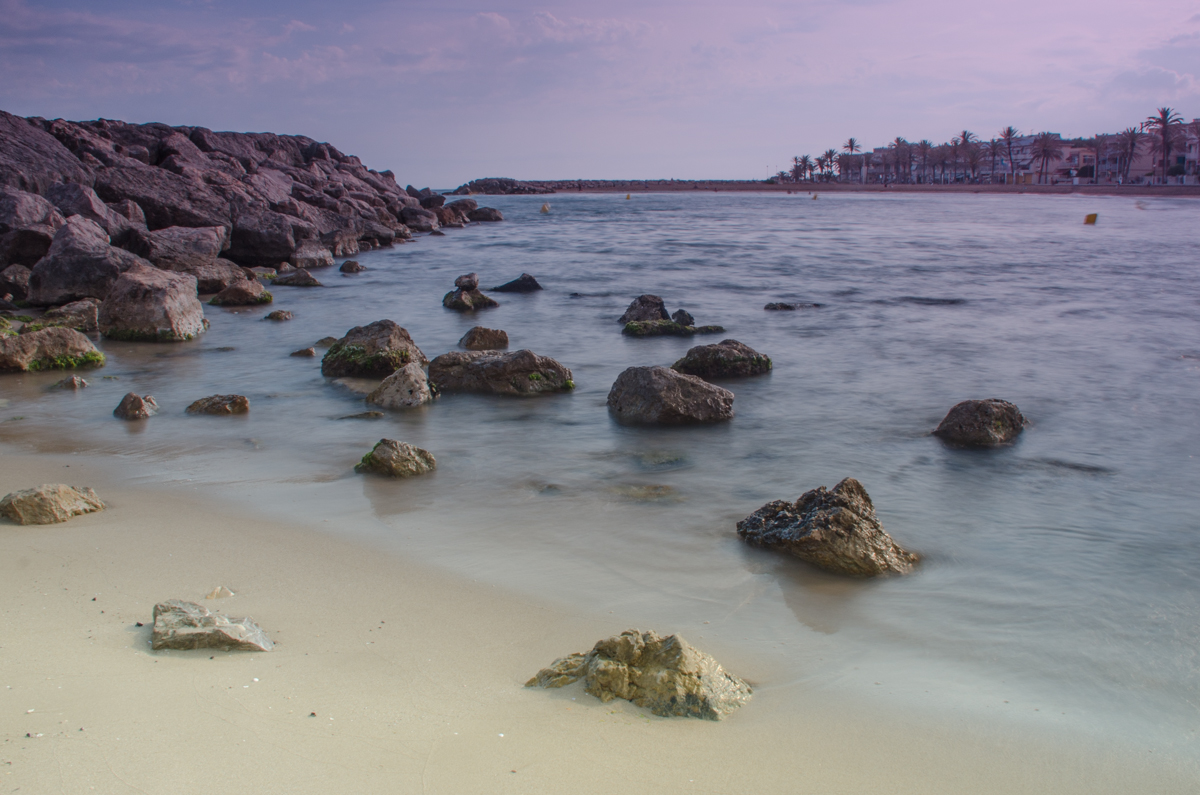
Color cast long exposure
This image has a purple tint due to the filter I used to take it. You can find better quality filters that don’t produce any color cast, but they are usually more expensive.

I am quite new to long exposure photography. When I decided to give it a try, I was not sure about spending a lot of money on my first filters. I got a filter kit that included a wide variety of filters in a really good price. Of course, they are not of the highest quality, but they still allowed me to experiment and discover that I do like this type of photography. As I use them quite a lot, I can think about investing in better ones in the future. For now, however, I stay with my cheap filters and I solve the color cast issue using Lightroom.
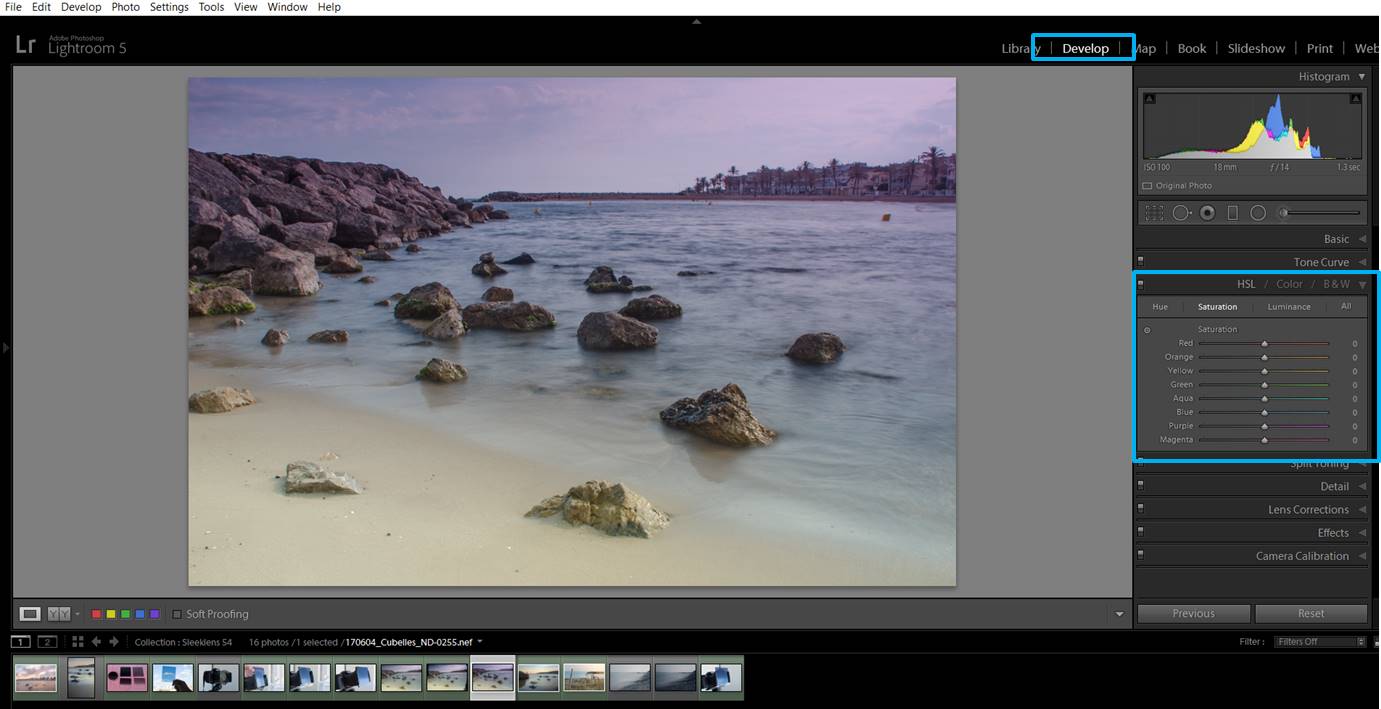
Long exposure edition
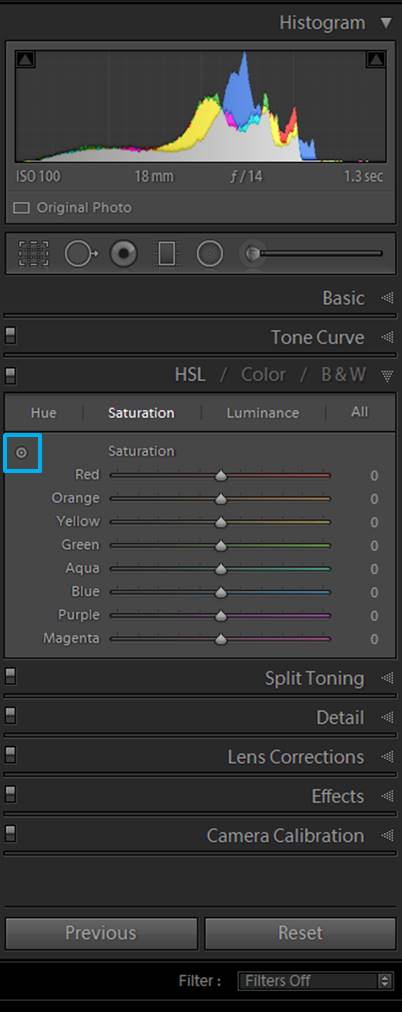
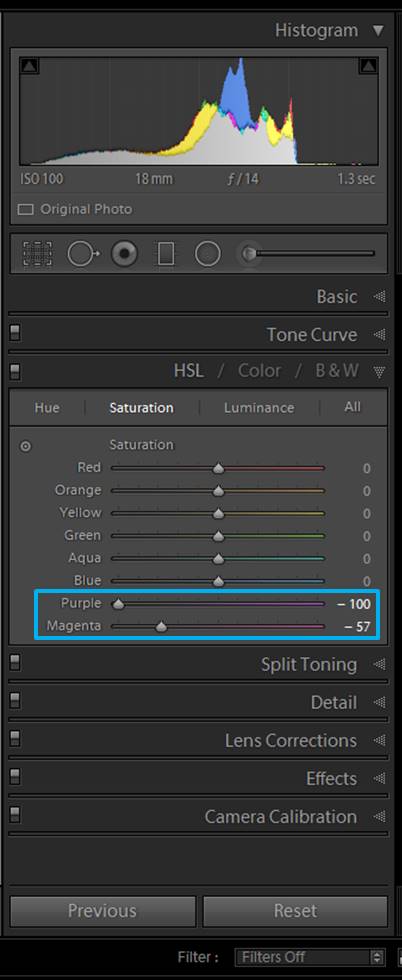
In the Develop module, look for the HSL/Color/B&W section and select Saturation.


Long exposure edition
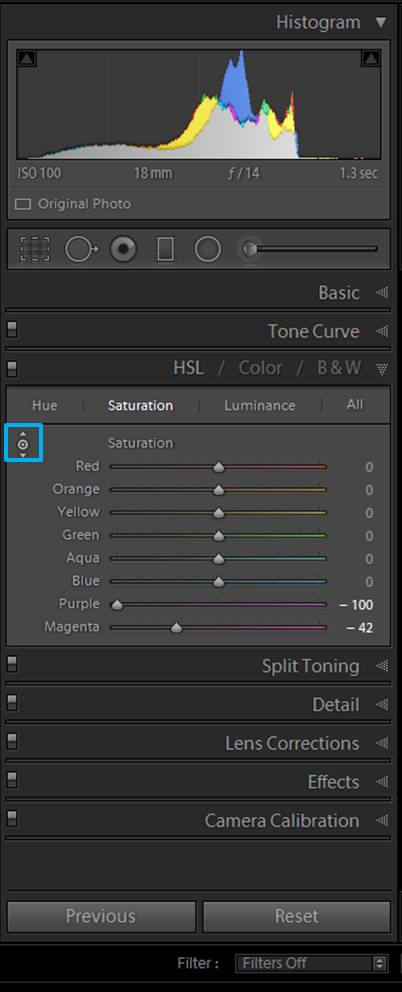
Play around with the sliders of the colors that are giving you the color cast. In my case, I put down the purple and the magenta.


Long exposure edition
If you don’t like playing around with the sliders, there is another way you can correct the color cast. Press in the little icon marked with a blue rectangle.


Long exposure edition
This icon changed shape. This shape is also in your cursor.


Long exposure edition
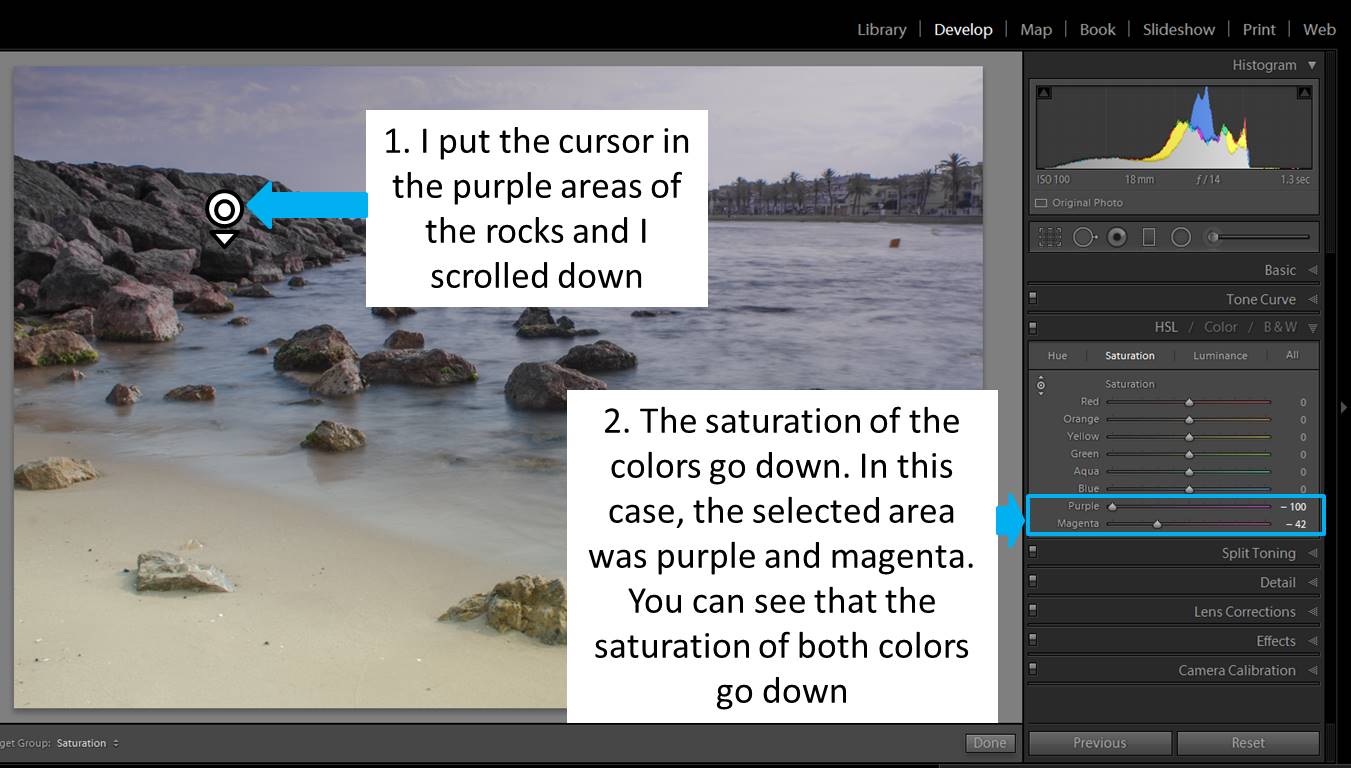
Click in the area of the photo you want to correct and scroll down (because you want to decrease the color saturation. To increase it, you need to scroll up).


Cropping long exposure
Here you have the final corrected image!

If you prefer Photoshop, you can also use it to remove the color cast. Julian H explains how to do it in his article “How to remove color cast using Photoshop”.

#7. Keep your filters clean if you don’t want to spend a lot of time removing spots

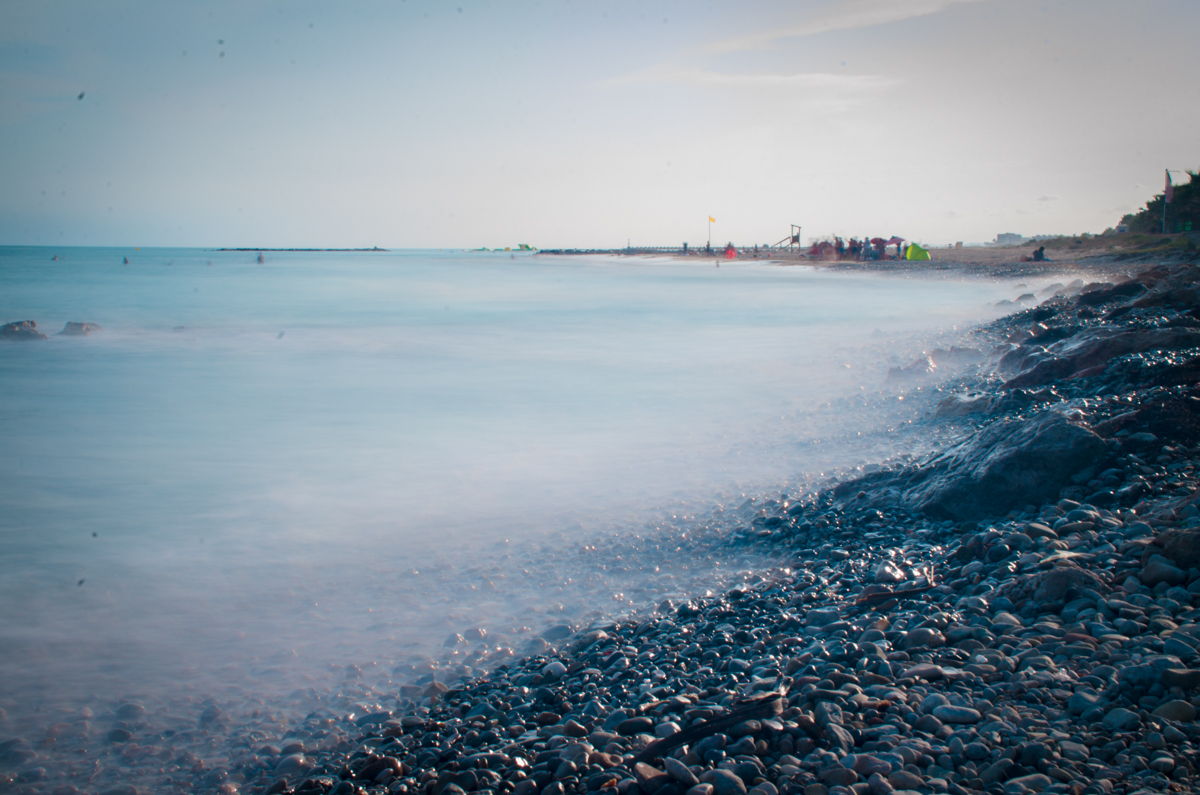
Your filters might seem clean,but when you see the photo on your computer you might discover it is full of spots of dust or drops…
Dust in filter long exposure
That day I didn’t clean the filters and I ended up with a lot of ugly spots in my photos.

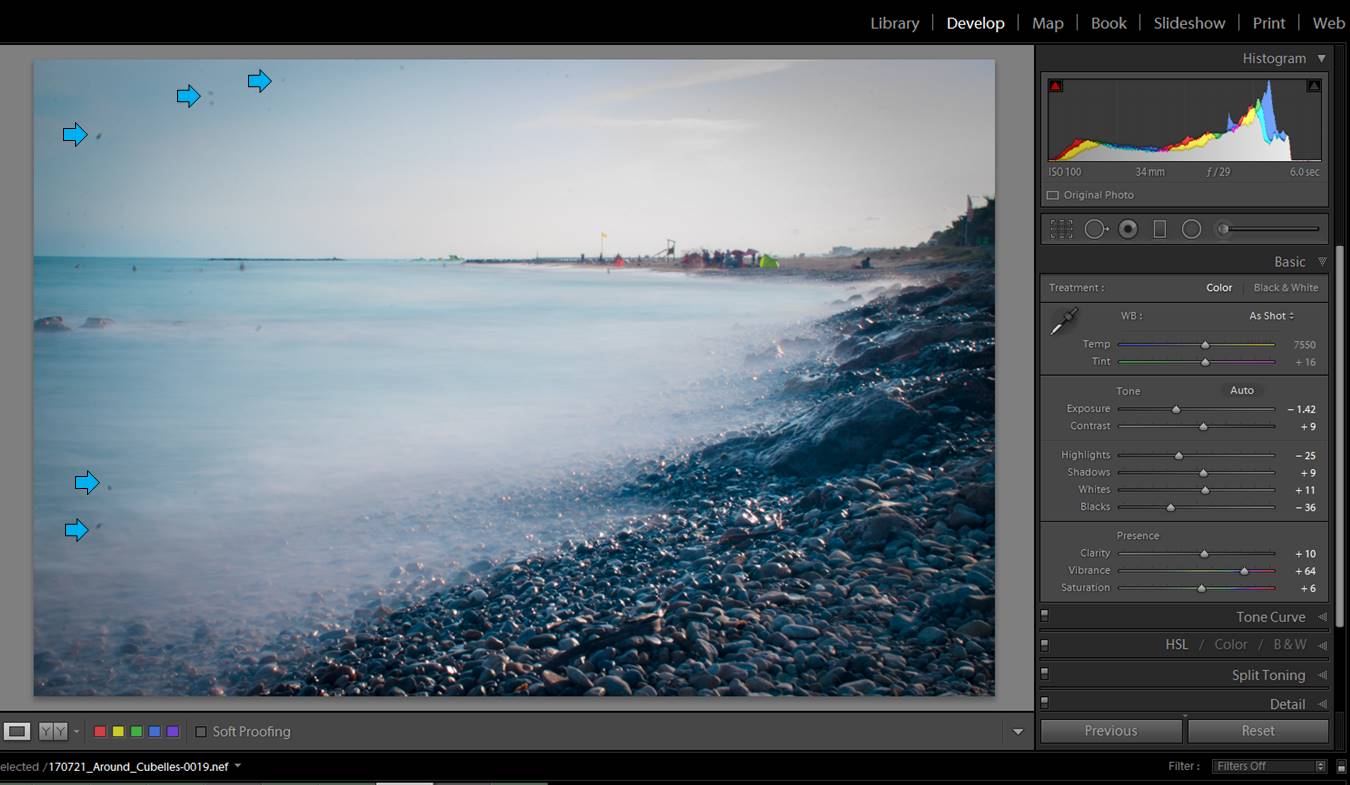
I remove them with Lightroom using the spot removal tool.
Long exposure edition
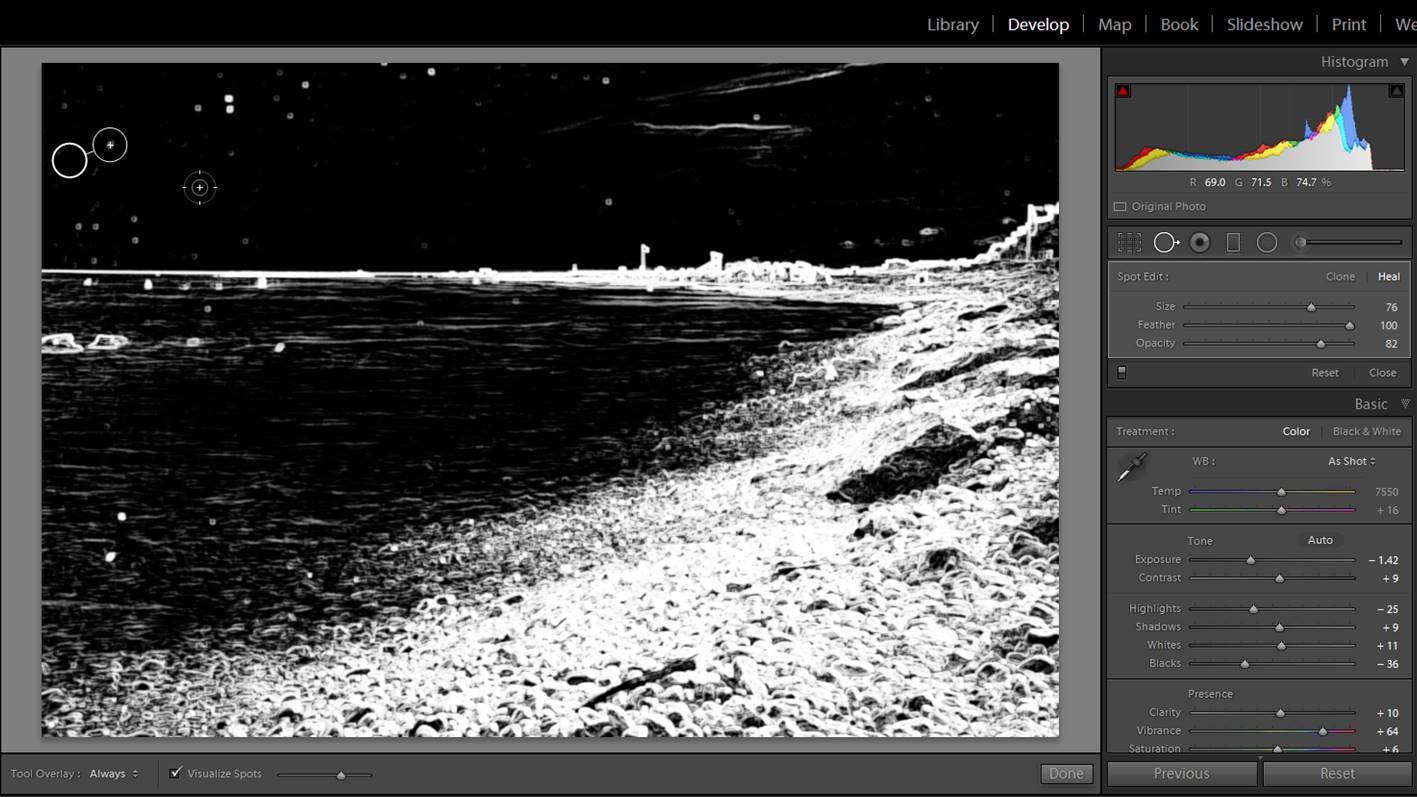
There are few dust spots that are quite visible in this photo.


Long exposure edition
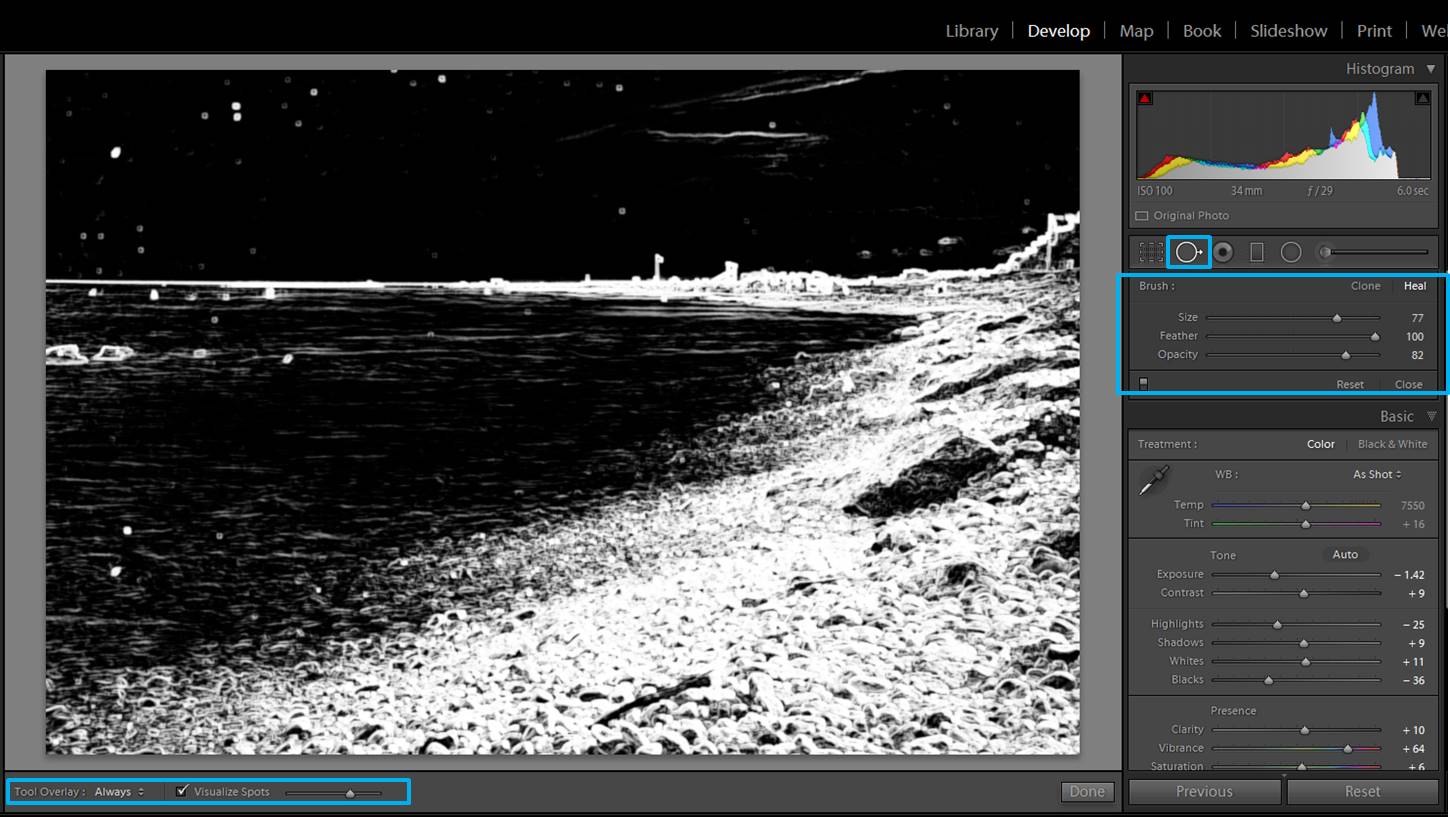
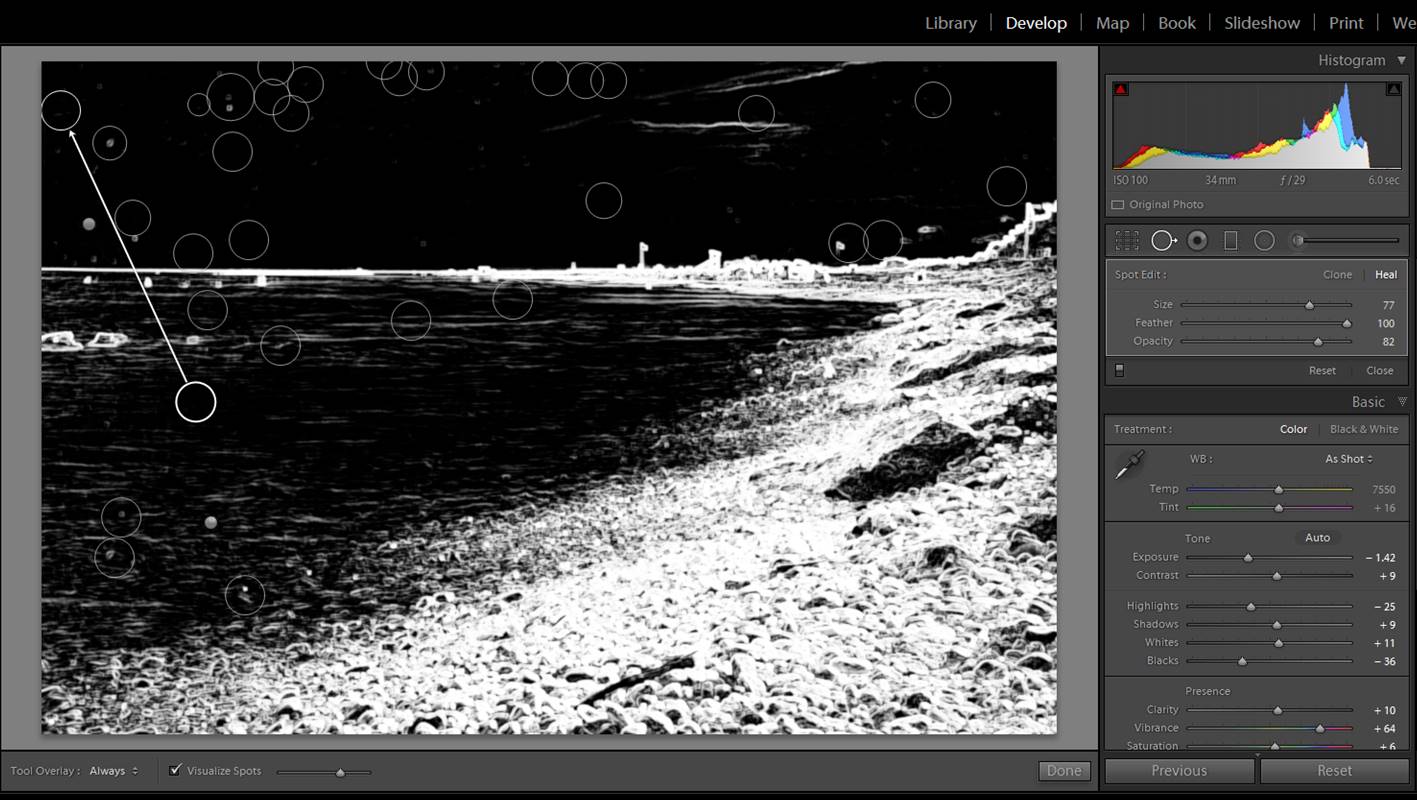
But there is a way to see the dust spots even better! Select the Spot removal tool (blue square), click on “Heal” and in the lower part of the screen click on “Visualize Spots”. You will see your photo in black with white contours. The dust spots are the little round white spots. There are a lot in this photo!


Long exposure edition
With the Spot Removal Tool, select one dust spot. You will see that Lightroom selects an area from which it is copying the content. Repeat for each dust spot.

Believe me, if you have a lot of them, it can get really tedious. Look how crazy it can get!:
Long exposure edition

I have learn that it is better to keep a cleaning cloth with your filters and spend some time cleaning them before using (even when they seem quite clean). A minute of cleaning in the field could save you hours later (depending on how many photos you have) in front of the computer.
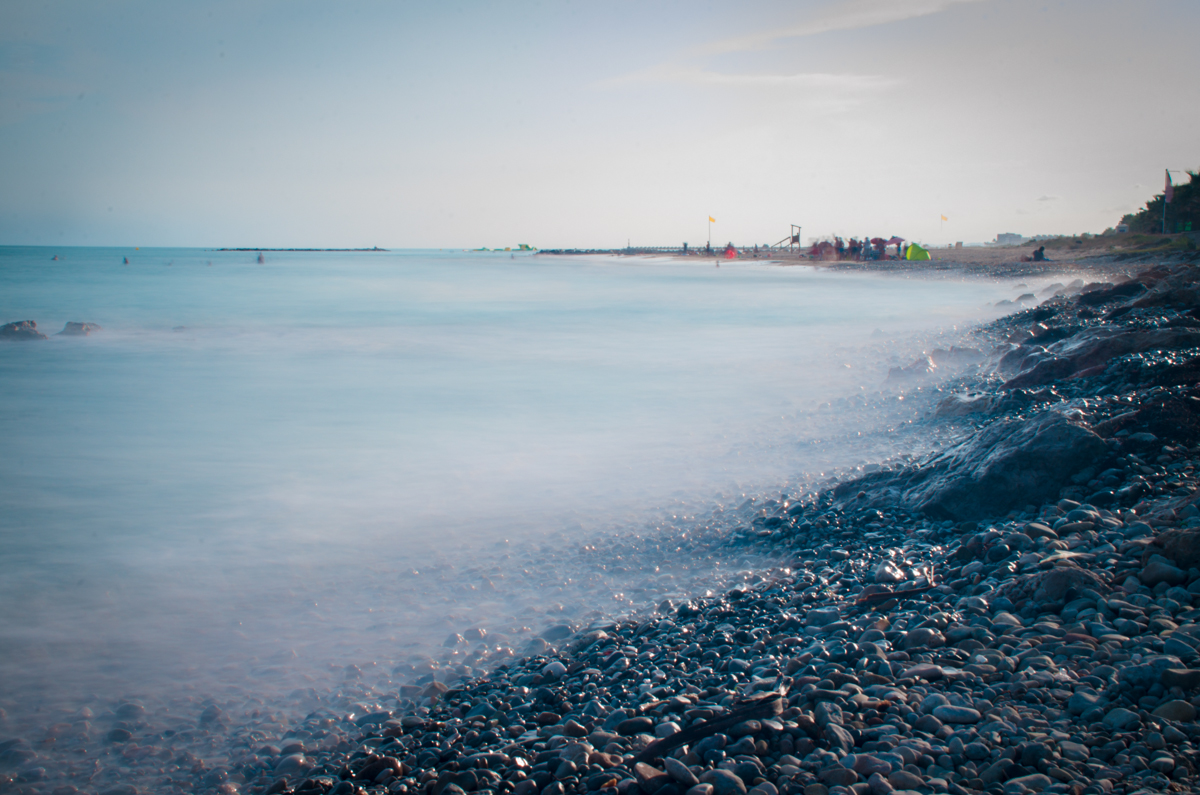
Long exposure cleaned from dust
Here the dust-free version of the photo.

#8.Take your time and enjoy nature

Long exposure photography is not fast photography. You need to set your tripod, choose filters (clean them), experiment different settings… I recommend you to take it as an opportunity to relax and enjoy nature. Sit down, bring something nice to eat and/or drink and have fun!

I hope you liked this article, please write me any questions or comments and have a happy shooting!

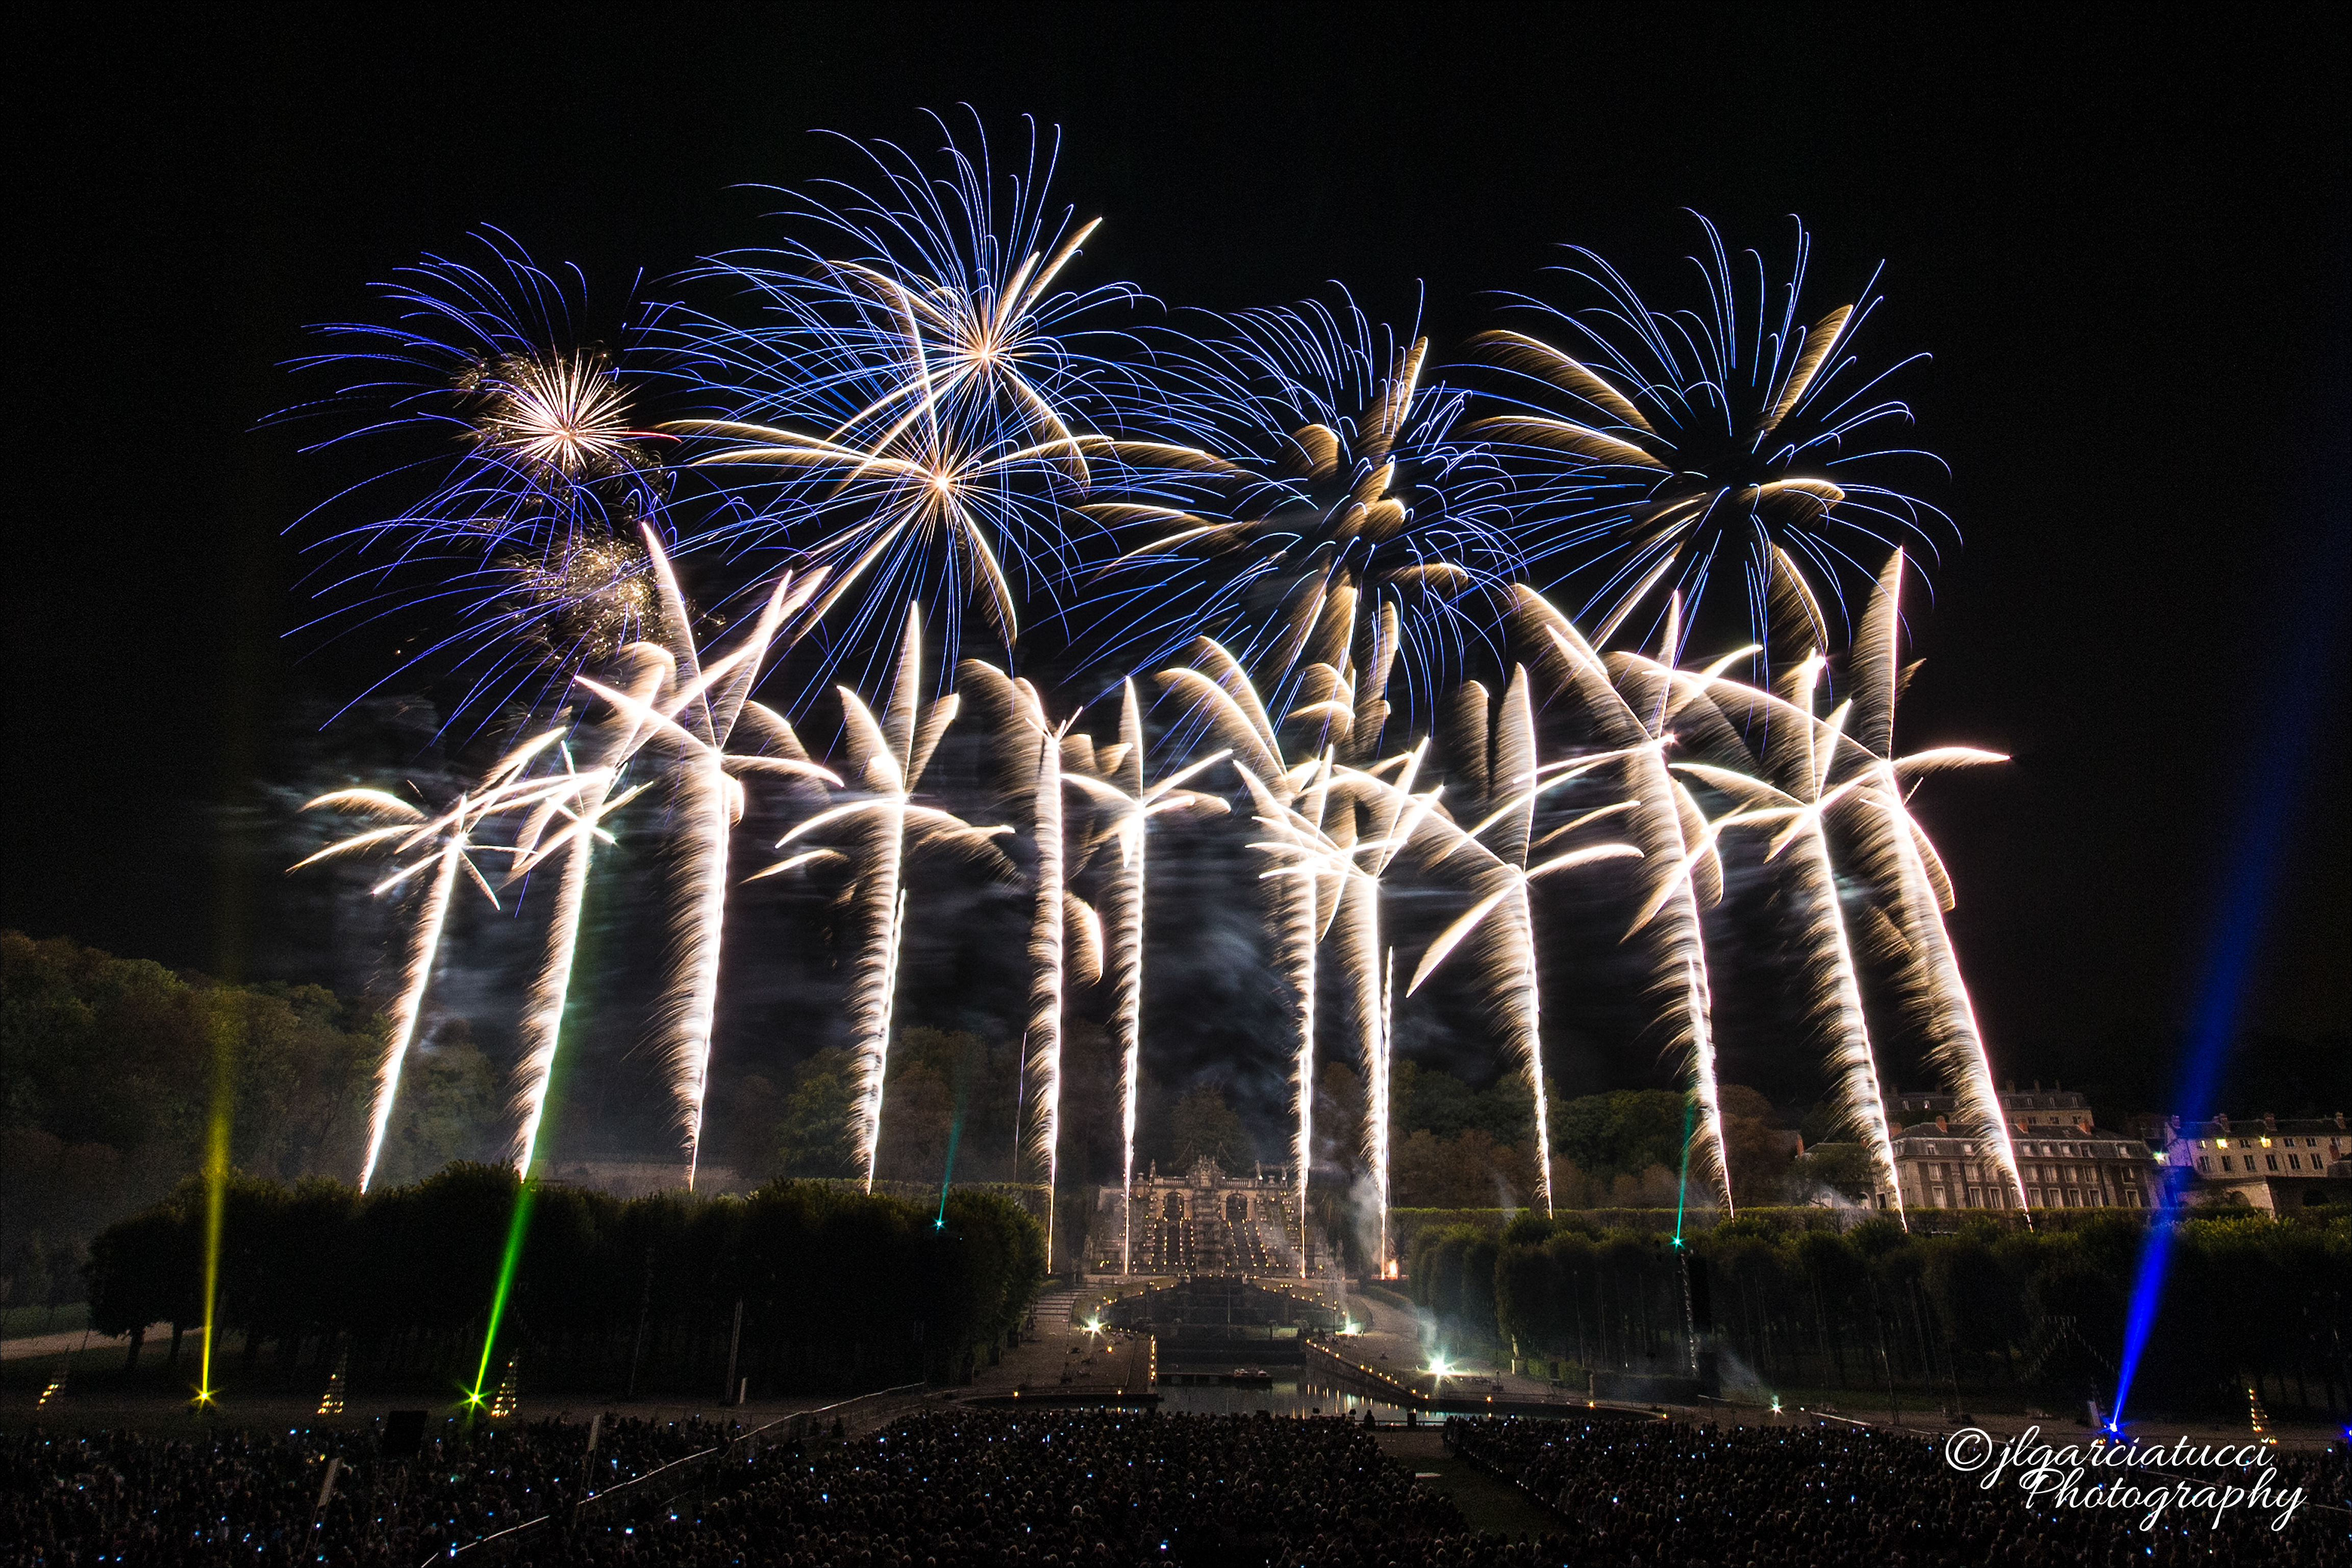
 

How to Capture Fireworks Photography

Throughout all history, humans have been fascinated by Fireworks, we all like the feeling of watching this combination of colors and explosions. This is not different for photographers, any photographer at one stage or another, dreams of shooting a great firework celebration, and who wouldn’t, so how to master Fireworks photography? This task for many of you that have not tried it might sound cumbersome and difficult to achieve. But don’t believe this myth with a few tips I will discuss in this article you will be set to go out there and start shooting Fireworks with great results.

This task for many of you that have not tried it might sound cumbersome and difficult to achieve. But don’t believe this myth with a few tips I will discuss in this article you will be set to go out there and start shooting Fireworks with great results.

fireworks photographyNikon D3100 ƒ/10 Sigma 10-20mm 1:4-5.6 EX DC HSM t:2s  ISO200

As many of other photographers when starting trying any technique, we try to think the more and more expensive equipment we get, we will get better results, this is not true. Is possible to get great results with non-high-end equipment.

For shooting fireworks you will need just the basics:

So Fireworks Photography How to?

Let’s start by discussing one by one the basic equipment required to go out there and start shooting.

15268271246_029310f947_bNikon D3100 ƒ/10 Sigma 10-20mm 1:4-5.6 EX DC HSM t:10s  ISO200

What Lens to use?

Most of the cases over 90% of the time I would recommend going wide, use a wide angle lens anything from 14mm~28mm.

Unless you plan to shoot the firework event from a really long distance (like a mountain or hill) to get the city skyline, but this brings other difficulties and this would require better and more expensive equipment.

The main approach of this article is based on the basis of shooting fireworks events from mid to close range distance, so go wide.

fireworks photographyNikon D3100 ƒ/8 Sigma 10-20mm 1:4-5.6 EX DC HSM t:4s  ISO200

Believe me, after you are stuck in the crowd looking for a good spot you will need to anticipate how high the fireworks will go over your subject, and you will need a wide angle lens for sure.

There are many wide angle lens that offers great quality for the price and performs great for fireworks photography and also other low light conditions. The first that comes up, if you are on a budget but want to get wide angle lens here are two I have used:

  • Sigma 10-20mm f/3.5 EX DC HSM (Good wide angle lens, fair quality and good results. Not for full frame sensors, Price range 450€)
  • Samyang 14 mm f/2.8 Aspherical AE AS IF ED UM (Very Good Lens for the price, Strongly recommended if you want also to do some astrophotography. Not AF, Price range 400€)

There is no need to have large aperture lenses used for low light photography.

Is wrongly believed that a large aperture lens f/2.8 or less is needed for fireworks photography this is why most of my fireworks photos are shot in the lens sweet spot aperture around f/8~f/11.

frieworks photography

Nikon D610 ƒ/8 Nikkor 28-300mm f/3.5-5.6 ED VR t:4s  ISO200

Tripod

Off course you will need a tripod, but which one? There are many good tripods out there. If you are into long exposure photography, night photography or any other that will need the use of a tripod, I suggest you buy from the beginning (if possible) a good carbon fiber tripod, because these tripods are really light and easy to carry around.

Look for versatility when looking out for a tripod, the different settings that will let you use it in different types of photography. For example, I use a Benro Carbon Fiber tripod that also can be set up as a monopod and different positions.

If you are on a budget any tripod will be good to start shooting fireworks events, remember is most likely that you will be moving around crowds and going light is the best way to go.

fireworks photographyNikon D610 ƒ/8 Nikkor 28-300mm f/3.5-5.6 ED VR t:10s ISO200 (not so good location due to crowded show)

Shutter Release

For remote shutter release, as many long exposure photographers will tell you to keep in your bag a wired shutter release. And why is this? from experience many of the wireless shutter release I’ve tried they tend to fail at one moment or another. In fireworks shows is critical you get your camera ready to shoot as soon as you want.

So if you like to carry around cordless shutter release is ok, but soon enough you will know the importance of taking your old fashion wired shutter release.

There are many white brands for any camera cheap shutter release you can choose from.

fireworks photography

Nikon D610 ƒ/8 Nikkor 28-300mm f/3.5-5.6 ED VR t:4s ISO200 (not so good location due to crowded show)

Camera Settings

Contrary to what you might believe, for fireworks, there is not need to have a fast lens (great aperture), you will always try to shoot on the sweet spot of your lens, this is usually f8-f11.

All photographers have their own tricks and you will get yours with practice, here are my favorite settings for shooting fireworks:

  • Always shoot in manual mode
  • Set your aperture in your lens’s sweet spot. I usually use f8 (as you can see in the examples)
  • Use low ISO settings 200-400, don’t go too high usually most bright fireworks with lots of white will tend to blow your exposure.
  • Set your focus to manual and focus at the subject distance, since you will be using a fairly good depth of field focus won’t be a problem.
  • Use your shutter release as soon you see the fireworks go up and hold the exposure until they have exploded.
  • Avoid shooting smoky parts of the show when you get too much smoke mixed with the fireworks is usually a blown out exposure not so easy to manage in post-production.

You can’t go wrong with these settings. Remember always to get really early to fireworks shows to get a good place and plan your shoot. So get out there and start shooting!.

Painting with light: A step forward to creative photographs

You might have probably heard that photography is an analog to painting, only that photographers use light instead of paint. While the title of this post can bring that to your mind, what I want to talk about here is about ways to manipulate light sources, or your camera, in order to alter the static nature of photography.

When you press the shutter button of your camera, you are basically letting light from different sources reach your sensor and that light is transformed into images by means of something called the photoelectric effect. Without getting into many details, if you alter the relative position or the intensity of the light sources while the shutter remains open, these changes will have a noticeable effect on your final image.

That said, there are different ways to achieve that alteration. In broad terms, you can either alter the location or intensity of the light source or you can alter the location of your camera. Let’s take a look at some examples of each case.

Changing your light source

In photography, you can have two types of light source, namely natural and artificial. Natural light sources can include the Sun, the Moon, the stars, fires or reflection of any of them from objects in your scene. Artificial light can include pretty much anything else like car lights, street lights, torches, etc.

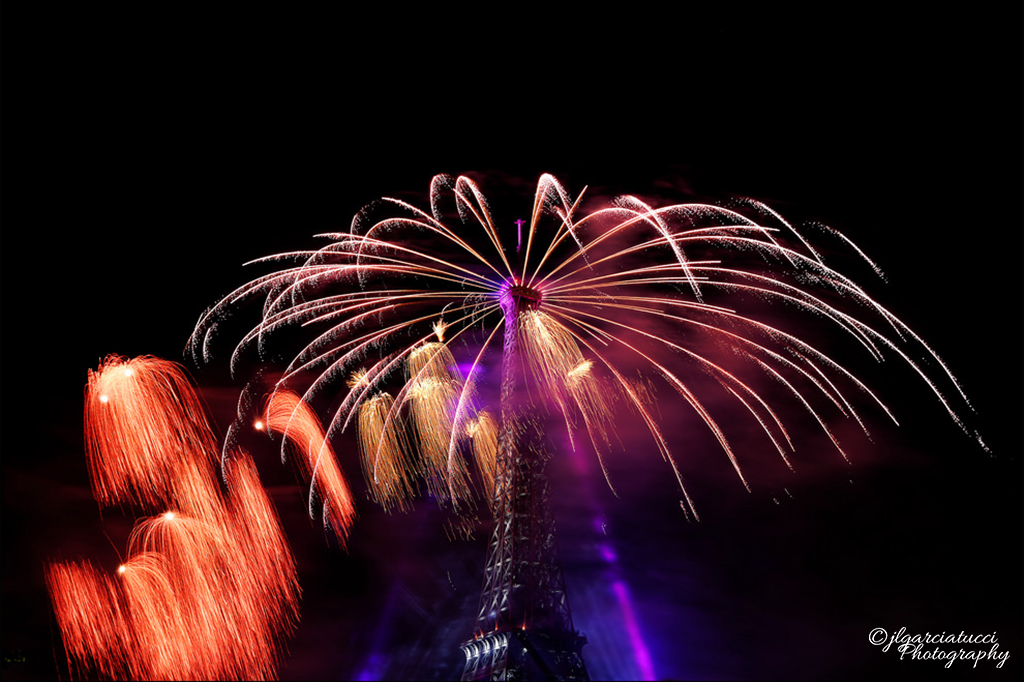
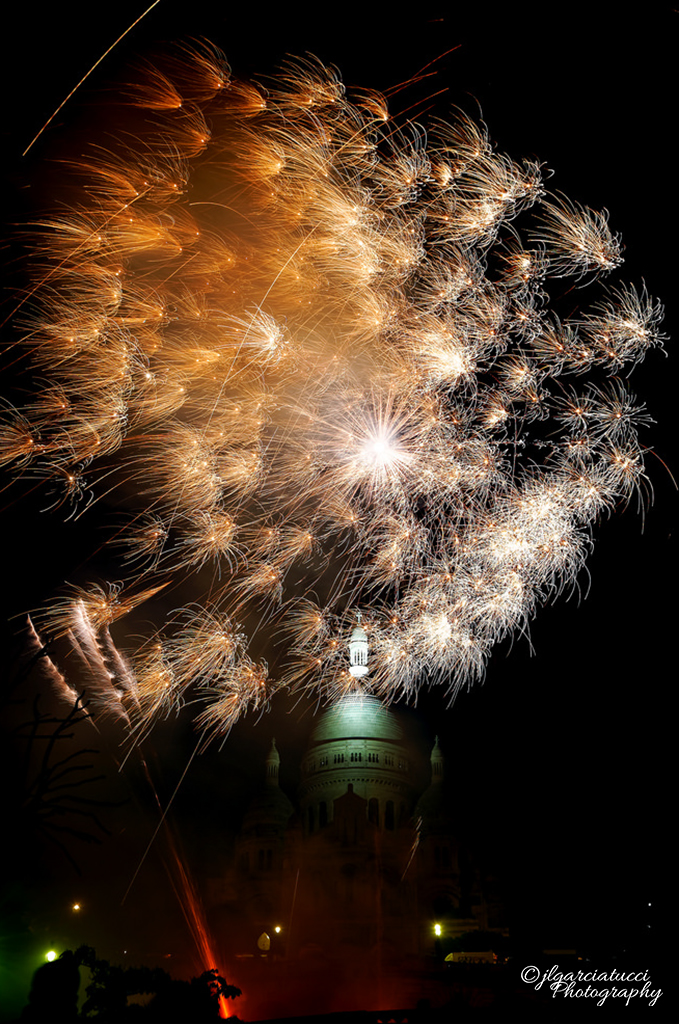
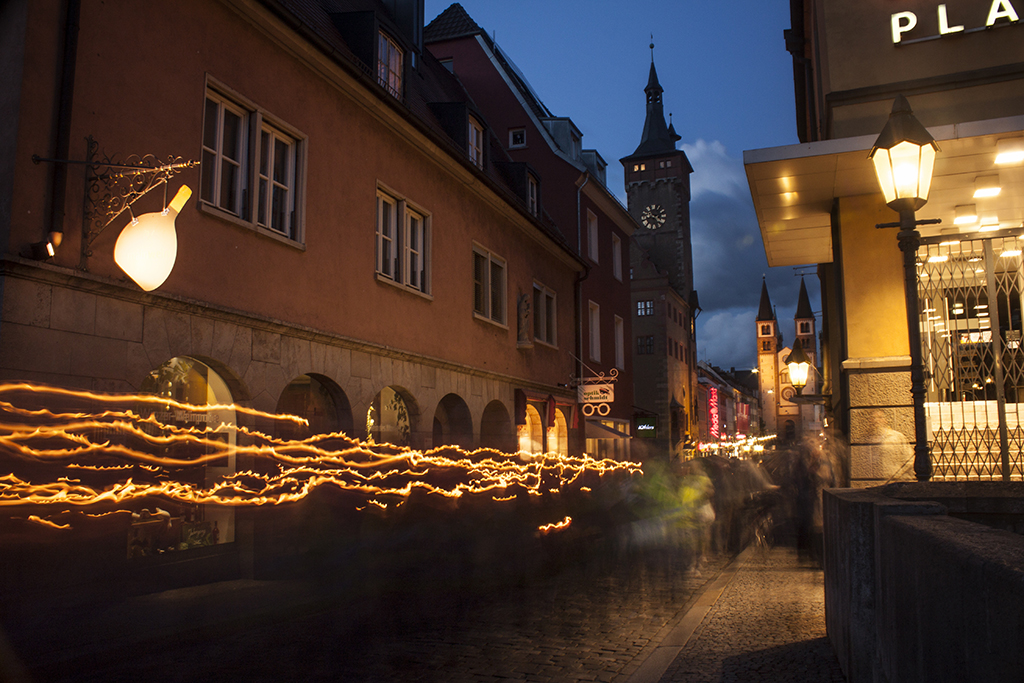
So moving your light sources can include, for instance, capturing light trails from moving objects like cars, bicycles, planes, boats or even artificial satellites. For this, of course, you need to set your camera on a tripod and set the shutter speed of your camera to a low value, usually on the order of seconds. The rest is just about composition.

paintinglight2

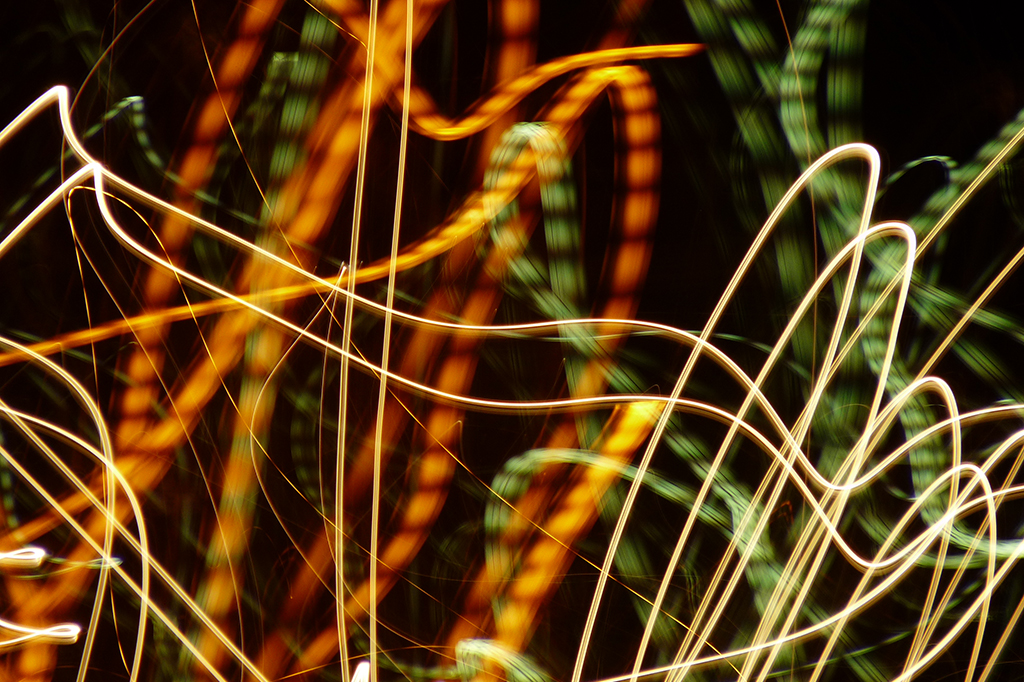
Other classical moving subjects include different rides on amusement parks, fireworks and small objects like torches or cell phones (with these you can actually draw things in front of your camera). Basically, anything that moves and can be included within a composition you like will completely change the nature of the final image so try many different things. Most of the times (not always) you will like the rest of your scene to be illuminated, so it usually is a good idea to take these photos during the so-called blue hour (about an hour after sunset or one hour before sunrise), while there still is some ambient light available.

paintinglight3
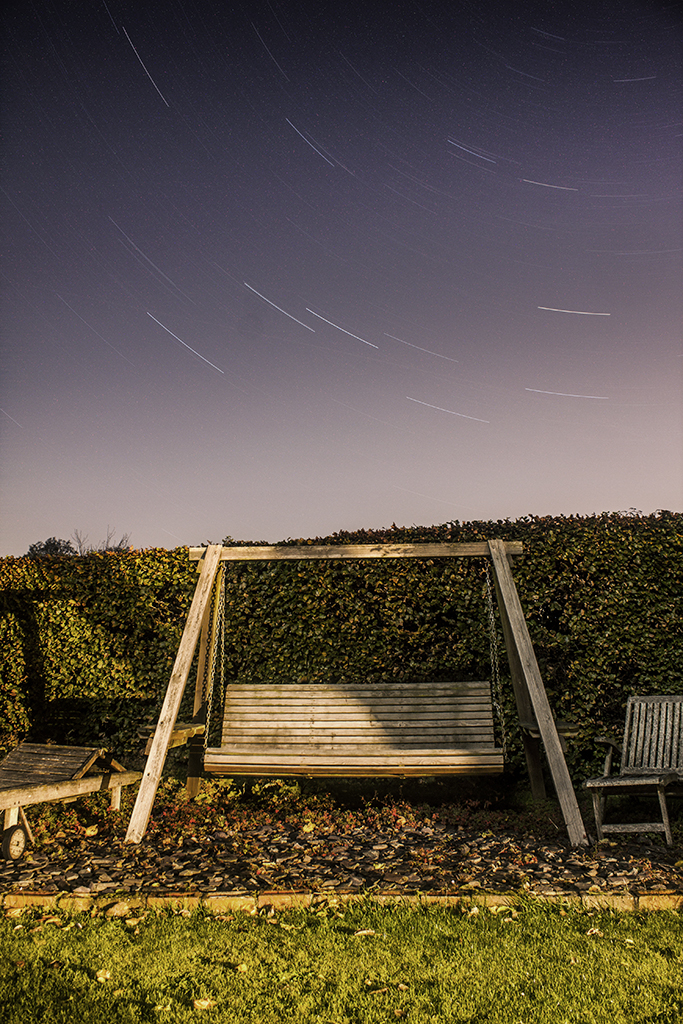
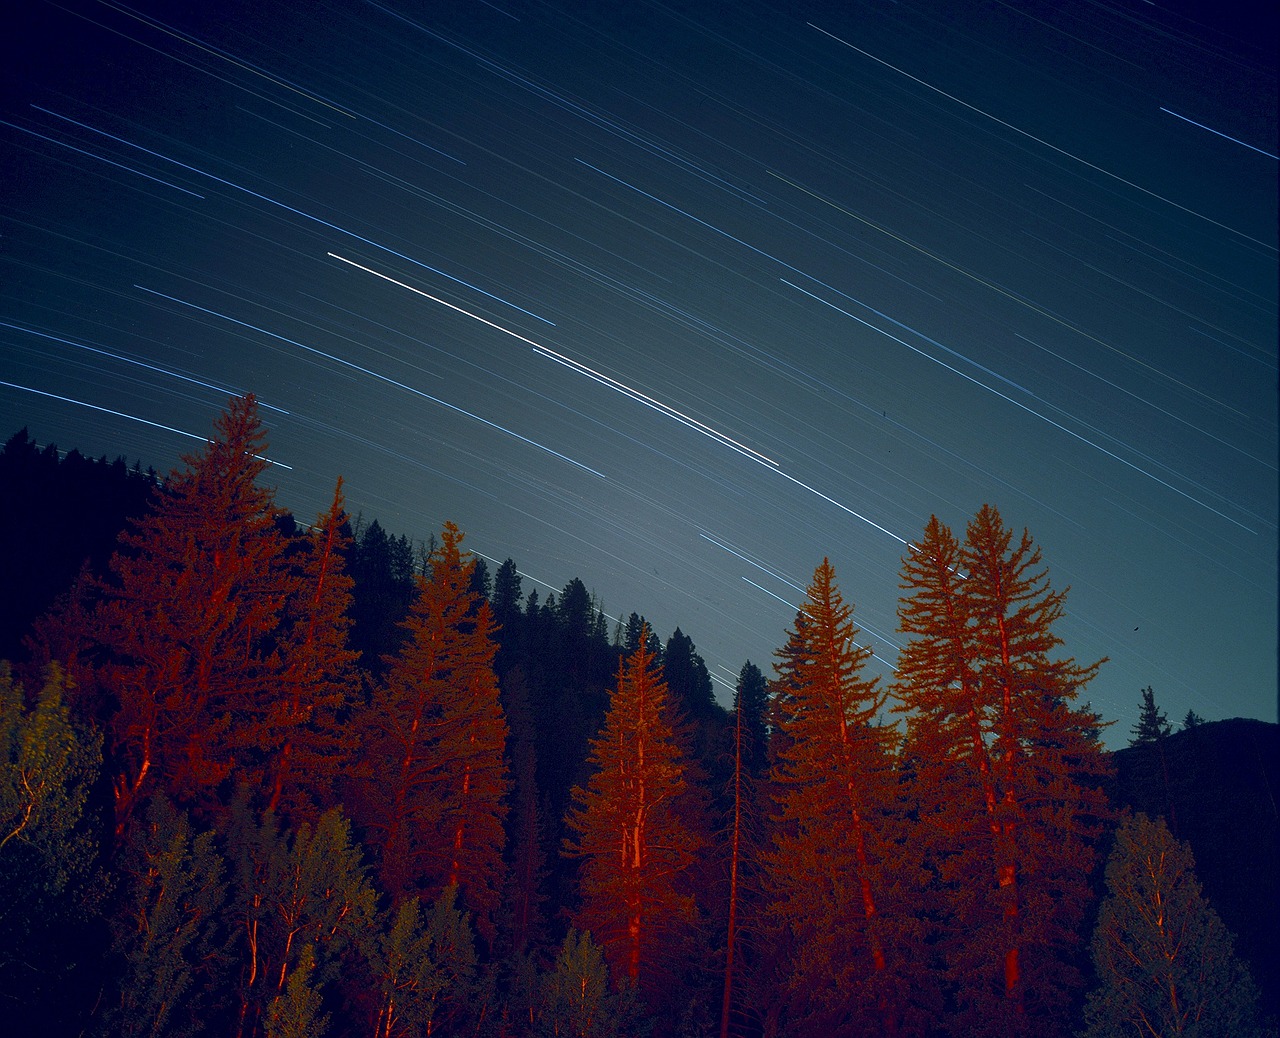
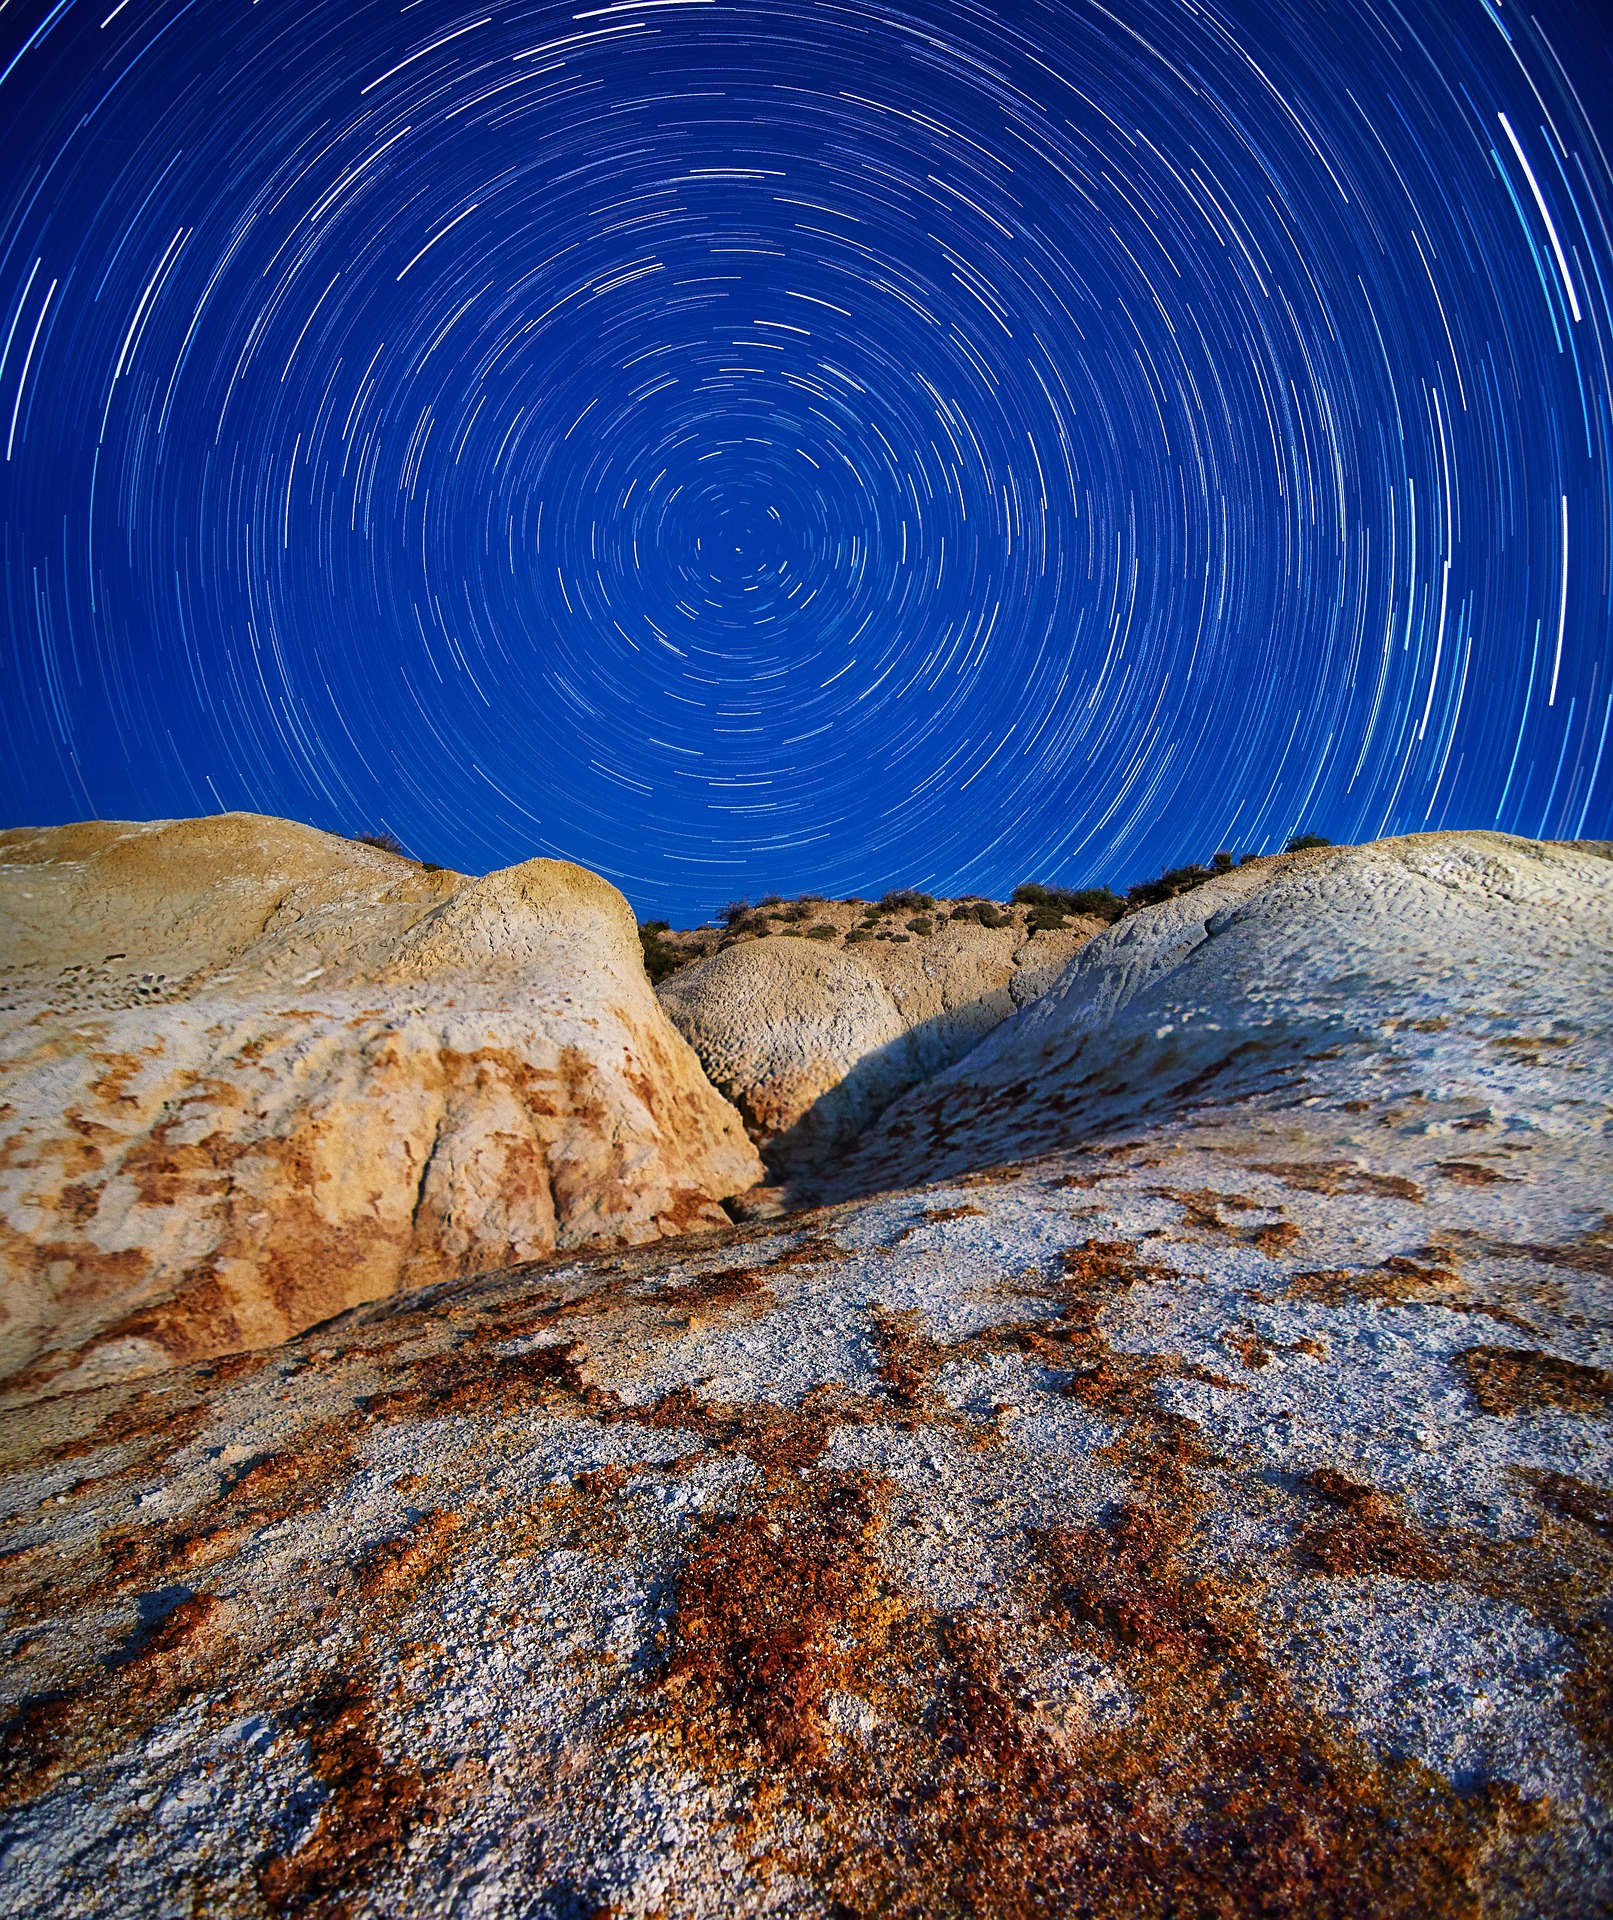
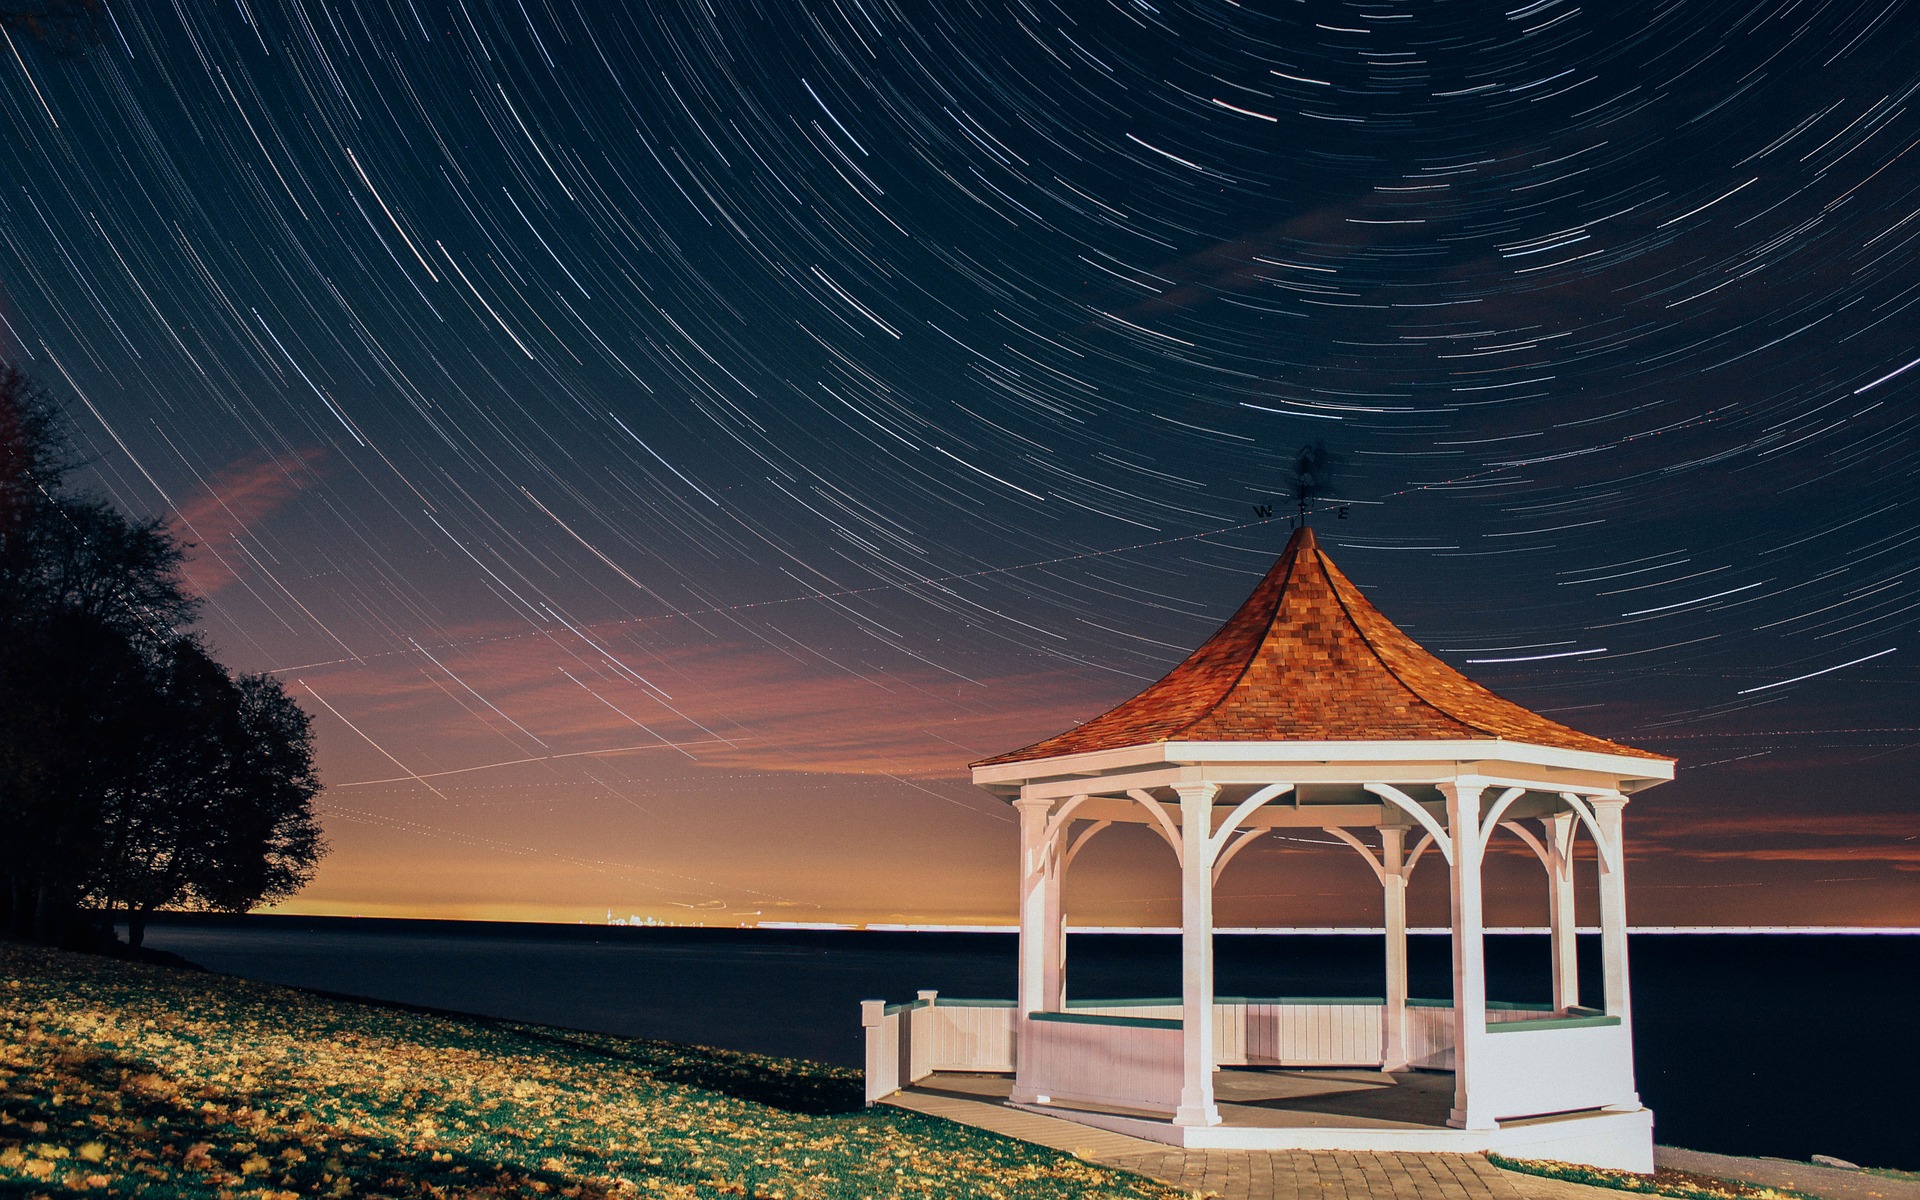
When talking about natural light sources, with some few exceptions, capturing the motion of the light sources will require significantly longer exposure times. Unless you are taking photos of short-lived events such as a falling meteorite, to capture the motion of any celestial body you will need to set the exposure time to at least about 15 seconds. If you want to capture star trails, you will have to take either one single photo with very long exposure time (about 3 or 4 hours) or take several shorter exposures (about 1 minute) for 3 or 4 hours and combine them afterward during post-processing.

paintinglight5

Moving your camera

A usually much less explored option is to move your camera while taking the photo. The reason why this is a less common approach is simply because it is much harder to get good results. While completely blurred subjects can be an interesting approach to explore, for an image to work in the sense of capturing the viewer’s attention, it usually is important for it to contain an easily identifiable subject. With the exception of abstract photography, you want your image to show something that the viewer can relate to and, if you move your camera while the shutter is open, this can be hard to achieve.

paintinglight4

So you basically need a way to get your camera to move with respect to the environment while being able to decently track at least parts of it. The most common way to achieve this is by mounting your camera on a fixed position of a moving object (car, train, etc.) or also by using a timelapse slider, although these will usually provide a rather slow movement, making it harder to come up with a nice composition.

paintinglight6

Another way of using the motion of the camera to capture dynamism is by using the panning technique. This involves capturing a photo of a moving subject following it with the camera as it passes by, with a shutter speed slow enough so that the background appears blurred. This is a very common technique in sports photography, especially in motor sports.

Essential Night Sky Timelapse Tips for Photographers

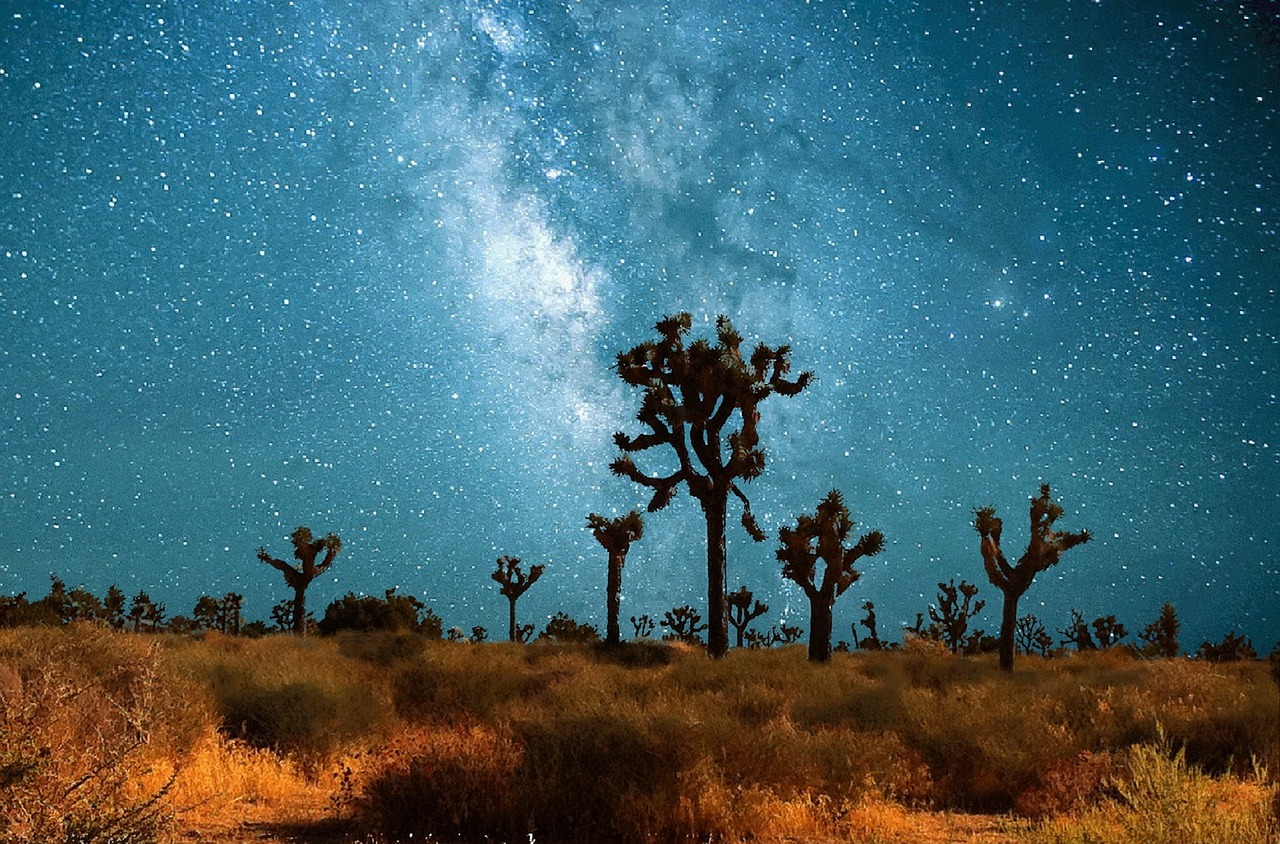
Some of the most beautiful images captured on film are of the night sky. The night sky is something that is truly beautiful, but we often see it is as something that is static and unchanging. In reality, the night sky is always moving, always changing, even over the course of one night, a few hours, or a few minutes. The best way to see this is through night sky timelapse photos. These photos are not the easiest to capture, but when things line up perfectly, you can get a photo that is truly stunning.

The Right Equipment

The first thing you are going to need to do is get the right equipment for the job. A point-and-shoot camera is not going to work here because long exposure is the key part of capturing the moving sky. In order to get the best photo, you need good equipment, including:

– An excellent DSLR camera

– A wide angle lens

night-sky-timelapse-1

Make sure that your DSLR has a timer on it that will allow you to get a long exposure, usually at least several minutes to even longer. You will also need to have a battery that is fully charged and a lot of room on your memory card.

If you have one, or can find one, get a dolly system that can lock onto a coordinate and move along with the sky. This is good for getting very dynamic pictures, but it wouldn’t get the stars streaking across the sky because it is moving at the same speed as the sky.

Other items to make sure you have included a chair, a backpack for everything you need, extra batteries and a dim flashlight so you can see what you are doing without causing your eyes to constantly readjust.

night-sky-timelapse-2

Think Ahead

Before you head out to capture the perfect picture, you need to have a plan in place. You want to know exactly what kind of shot you are going to get, and what you want out of the photo shoot. Are you looking to capture star trails, the moon streaking across the sky, or are you hoping to catch meteors during a meteor shower? Do you want the Milky Way in the picture, or do you want a clear sky of stars with no Milky Way photography? These are all things to consider.

You should get away from the city because light pollution is going to have a negative impact on your picture. It will prevent you from seeing most of the stars, so you really need to make sure you get out of the city and away from all those lights. The farther away you go, the more clear the sky will be and the more stars you will capture in your picture.

Don’t be afraid to go out to the middle of nowhere to get the picture that you want.

night-sky-timelapse-3

Your Settings

Thinking of your settings, you should have the following settings on your camera to make sure that you are getting the most out of your pictures:

Your aperture should be set to around f/2.8, while your shutter speed can be around 20 seconds to start with. Try setting your white balance to daylight, and an ISO of 2000.

Now, if you do a timelapse where you have pictures that you put into a movie program and let them run together, then 20 seconds for each photo will work fantastically. It will give the impression that the stars are actually moving across the sky in the video. As for creating star trails in a still photo, try a long exposure setting of 30 minutes on your camera. Doing this will give the impression that the stars are streaking across the sky, creating a really beautiful design.

Again, it is about knowing what you want before you go about it.

night-sky-timelapse-4

Putting it Together

If you decide to have the long exposure of 30 minutes, then all you do is press the shutter button and just let the camera do its thing. Once it is done, you can do your post production editing of the photo to make it stand out and give it a bit more dynamic power.

If you decide to go with a timelapse video, then each 20 second exposure will record a slight movement of the stars. Take about 200 of these, and then put it together in a single video in post. With your raw images, you can use Adobe Lightroom to enhance them, then take them into After Effects as a sequence and create the timelapse effect. You can then use Adobe Premier to do the final cut. Once you do that, then each picture represents one frame of the video, creating a movie that tracks the stars as they move across the sky.

night-sky-timelapse-5

Getting some great timelapse photos and videos can be very easy when you go out with a plan to capture the best images possible. Keep going out each night to create the picture you want, and you can expect a lot of people to be impressed with how you have captured the universe through the lens of your camera.

Long exposure photography – Step by Step Guide

This entry is about long exposure photography: How to capture light trails, motion in clouds or water and basically any other factor that adds dynamism to a picture.

When capturing a striking landscape or cityscape, if we carefully choose the point of view, the static scene itself will have enough elements to capture the viewer’s attention. However, we can always add some extra appeal by including some dynamic element.

There are some techniques in Photoshop to mimic some of these effects, but I certainly prefer to capture those with the camera. This way not only makes the post-processing simpler, but it also remains more truthful to the original scene we tried to catch. It is for this reason that I will not talk about artificial long exposure on this post.

firework-828652_1920

As a general rule (one that I would say will become obsolete relatively soon), long exposure usually works better with DSLR cameras. I know that technology is evolving quite fast nowadays. In fact, if I am not making justice to mirrorless cameras here, please forgive me; it’s been a while since the last time I used one! However, the main issue right now with compact cameras (including cell phones) is that they do not always allow the user to play with all the settings the way it is needed and the signal to noise ratio under low light conditions tends to be rather low when compared to DSLRs, especially with full frame ones.

But to be fair, let’s say that if your camera has a manual mode, then you will be able to follow everything I say here, so here we go.

Capturing light trails

Given that the workflow is the same for whatever moving subject you want to capture, I will describe, step-by-step, how to capture light trails.

Basically, light trails are just that. Trails left by moving light sources that could include passing cars, trains, planes, artificial satellites or even stars. The basic principle to create interesting images with all of them is the same: find a nice location with an interesting background or foreground (depending on what’s on your mind) and correctly configuring the settings on your camera, which of course will include leaving the shutter open for a relatively long time (the time will actually depend on the motion we are trying to capture).

Camera settings

So let’s consider the settings that we need to take into account when dealing with long exposure photography. These are:

  • Light sensitivity (ISO).
  • Exposure time.
  • Aperture (f-number).

Light sensitivity refers to exactly that. How sensitive to light your sensor is going to be while capturing an image. The name ISO (International Standards Organization) comes from the distant times when film photography was the norm. Back then, different films had different sensitivity based on the way they were produced. Now, without getting into technical details, your camera is able to capture almost as much light as desired, but unfortunately at a given price. When you choose a large ISO number, the camera applies some sort of multiplication factor to increase the captured number of photons (after all, that is what light is about, photons!). That sounds like a clever thing to do. However, camera sensors have an intrinsic level of noise that will also be multiplied by that same factor, thus producing noisy (a.k.a. grainy) images. For this reason, I would suggest always leave the ISO as low as possible (100 is a good value to start with).

camera-1067853_1920

Exposure time, as briefly mentioned above, is the time during which the shutter of your camera will be left open, allowing light to get into the sensor. This is usually given in seconds but beware: for short exposure times (shorter than a second), the number you see is the fraction of a second; for instance, if you see a 500 (could also be 1/500 depending on the camera), that means that the shutter will be left open a 500th of a second. When you go to longer exposure times, then the number shown will be seconds. Most DSLR cameras get down to 30 s and if you want to get even longer exposures, a so-called “bulb” mode is offered. In this mode, the shutter will be open as long as you press the shutter button (for this you should get a remote shutter release!).

Finally, the aperture is how much will the diaphragm of your camera will open. This has nothing to do with time, but rather with the physical area through which the light will go through. Now, to make things even more complicated, the way the aperture is defined makes it that the larger the f-number, the smaller the aperture, but I will explain a bit more later on.

So now we know what to take into account but, how do we capture the image we want?

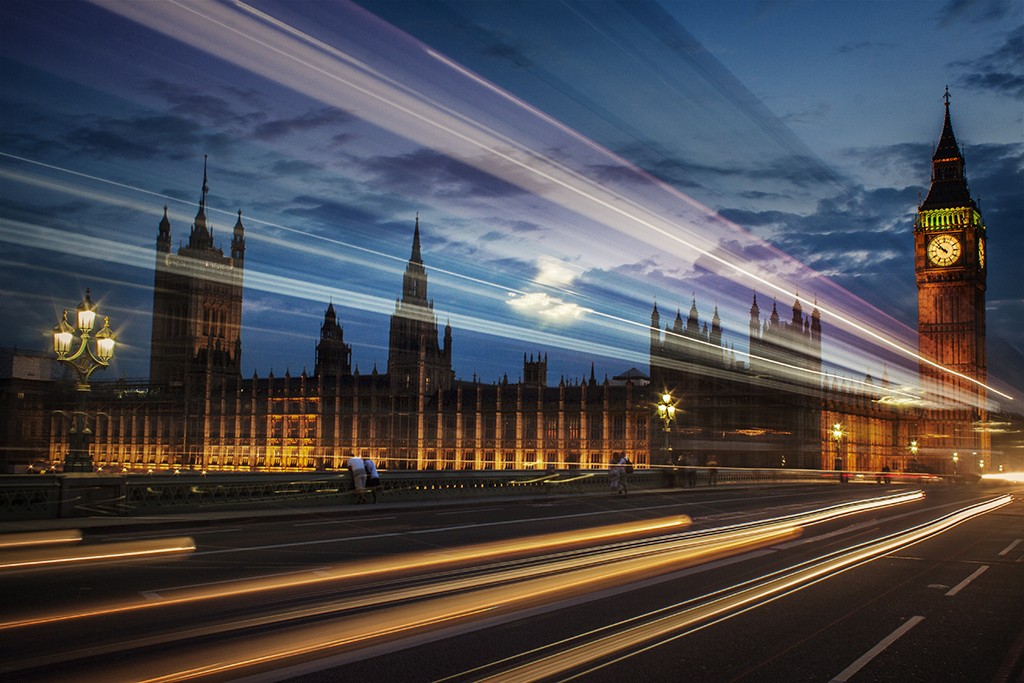
In terms of exposure time, anything between a couple of seconds and a couple of minutes might work depending on the scene. If you are after a photo of a landmark with trails from passing cars like the already famous capture of London buses passing in front of the Houses of Parliament, then a couple of seconds are enough. This one, for instance, was captured with an exposure time of 1.6 s:

longexposure_london

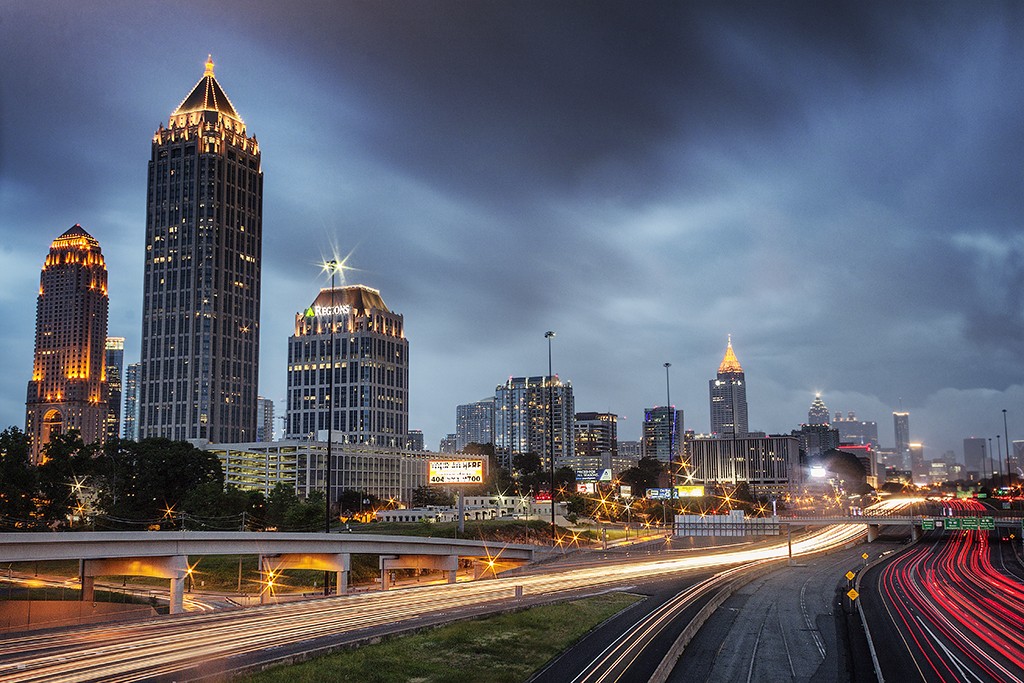
If what we are trying to capture is the light trails left by cars on a busy street, then it might make sense to push the exposure time a bit further, basically because that way the density of lights will increase, making the final result more interesting. The following one of Atlanta’s skyline at sunset was captured with an exposure time of 13 s:

longexposure_atlanta

Notice that here we can increase the number of light trails without loosing information on the image simply because, in contrast to the image from London, the subject of the photo are not behind the passing cars. Also notice the motion of the clouds, another interesting element that can be captured with long exposure.

So enough for exposure time. What is the role of the other element, namely the f-number? Well, for our purpose here, it has two main functions. One, compensate the exposure to get the exposure time we want to work well. In order to capture a well-balanced picture, the right amount of light needs to reach the sensor. Now, simply put, the right amount of light will be defined as a balance between the exposure time and the aperture you choose. It is quite an intuitive thing: if the aperture is large (small f-number), we will need a certain amount of time (relatively short) to get the desired light to reach the sensor. If the aperture is small (large f-number), then we will need to increase the time to get the same amount of light to get in!

photographer-410326_1920

Fortunately, we don’t need to calculate that since the camera already does that for us. What we need to look at is a small sequence of lines in the viewfinder or camera screen (called a photometer) that indicates how much light will reach the sensor with the current settings.

The other purpose is to create the star-like appearance on light sources and that you can see on the street lights in the two images above. Some people prefer not to get this, but I personally like it. To get this effect, you need to keep the f-number as large as possible. I would say above 16, as a general rule.

photographers-238565_1920

To the things described above, I need to add a couple of important things. First, use your tripod! It does not have to be a $500 tripod. A relatively basic one will do the job, but if you want to capture anything that moves without getting a blurred image, you will definitely need a tripod. And second, set a waiting time for the shutter of your camera to be released. Most cameras offer a 2 s or a 10 s option. The 2 s option is enough. The idea is to give a delay between the moment when you press the button and when the shutter is released to avoid the shaking produced by you pressing the button to blur the image.

And as a final step, you can process your images with Lightroom or Photoshop to enhance the information and details that are hard to capture at those times where the natural light is starting to fade.

Summary

So to summarize in a way easier to remember, if you want to capture light trails:

  1. Find a location with a nice subject that is behind a street.
  2. Wait until the time is right; you want the cars to have the lights on!
  3. Set your tripod.
  4. Set your camera to manual mode.
  5. Set the ISO to 100.
  6. Start setting your exposure time at around 5 s.
  7. Set the f-number accordingly to get a good reading in your photometer.
  8. Take the picture.
  9. Play with the exposure time to get the desired effect.
  10. Get that final look you are after by processing your files.

That’s it. Go out there and try this. Even when it might look a bit complicated in the beginning, you will get it in no time and capturing light trails can be a really fun experience and once you master these techniques, try combining them with other great ideas for night photography such as bokeh.