Adding fireworks to your images in Photoshopwww.sleeklens.com
In this post I want to show you an easy way to add bright objects to your images. This technique is suitable for any type of object that is brighter than the region where you want to add it but as an example I will add fireworks to a cityscape.
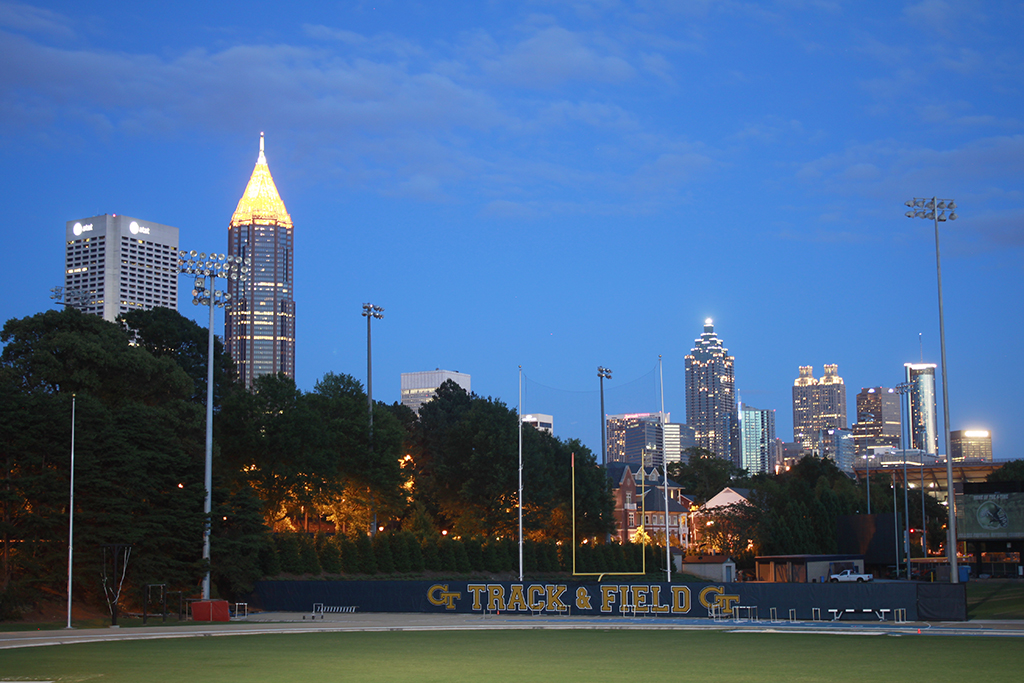
The first thing you need is, of course, an image you want to add the fireworks to. This will depend on what you are adding, but for fireworks, it of course makes sense to go for a blue hour or night image. The image below shows Atlanta’s skyline during the blue hour (about an hour after sunset). It was taken from the track & field stadium of the Georgia Tech University.
Another thing to take into account is to have enough space in the sky for the fireworks. The second thing you need is photos of fireworks. You might be able to do something with a single shot, but if you are out there capturing fireworks, try to get as many shots as you can. Selecting individual fireworks from different photos and combining them will give you a better result.
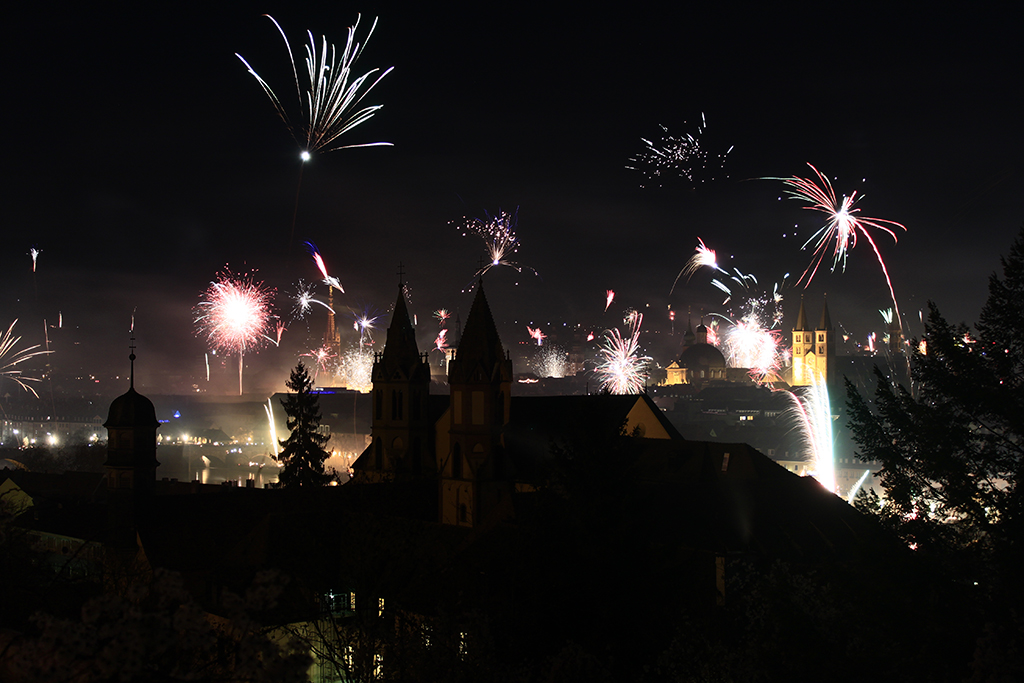
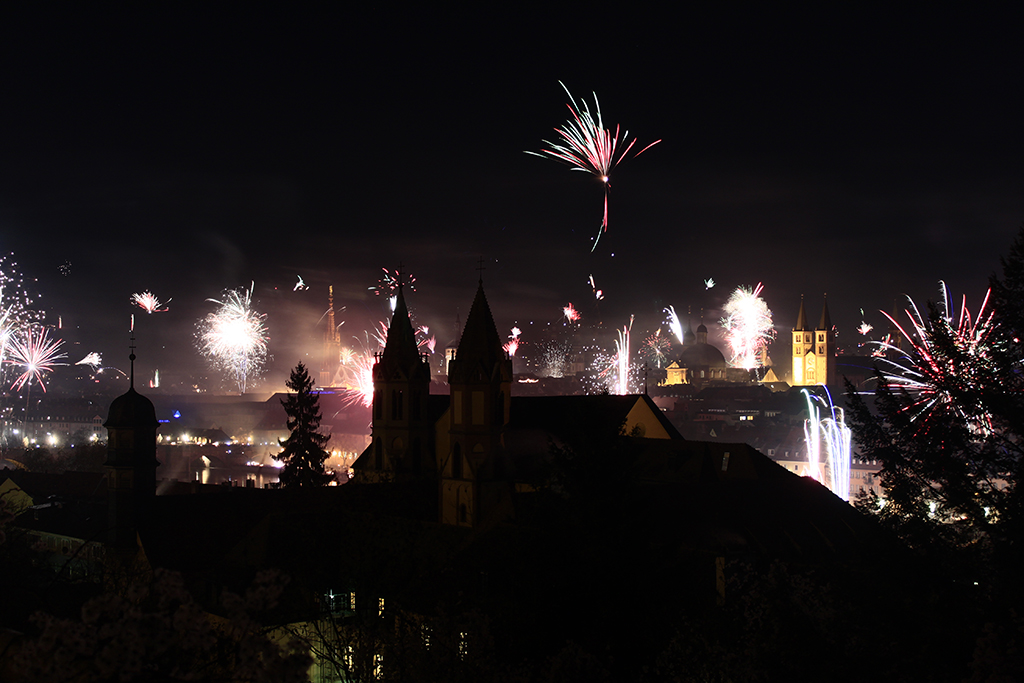
For this photo, I used a series of photos taken during New Year’s Eve in Würzburg, Germany.
I am only showing two images here for reasons of space, but for the final image I used four different captures. The reason to use different exposures is because the process of adding the fireworks to the original image is much easier when you are able to select one or two fireworks that are high in the sky so that you avoid adding other features that need to be removed afterwards such as parts of buildings or trees.
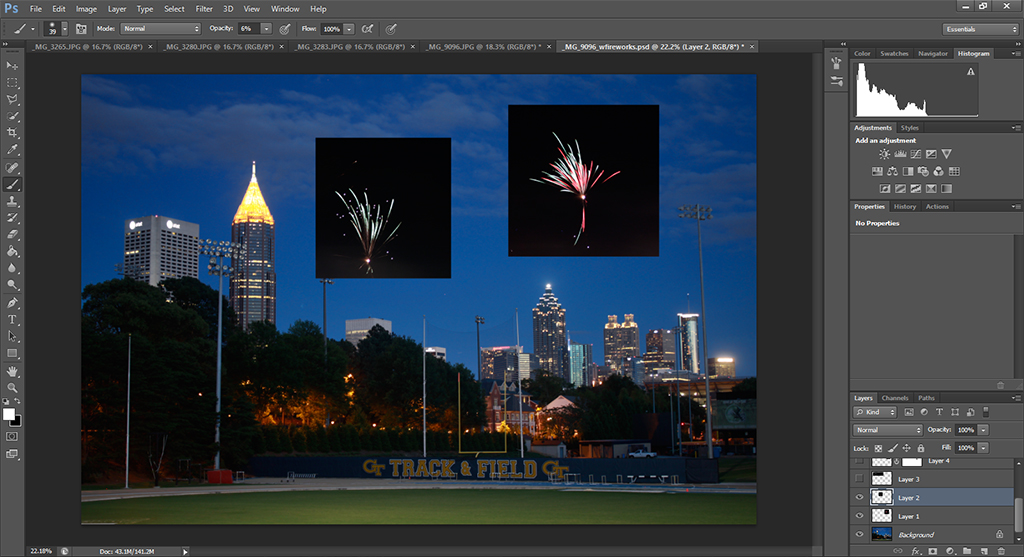
What you need to do is simply select a rectangular area containing the fireworks you want to transfer to the original image, copy the selection, go to the original image and paste it. The next screen capture shows the result after pasting two of the fireworks.
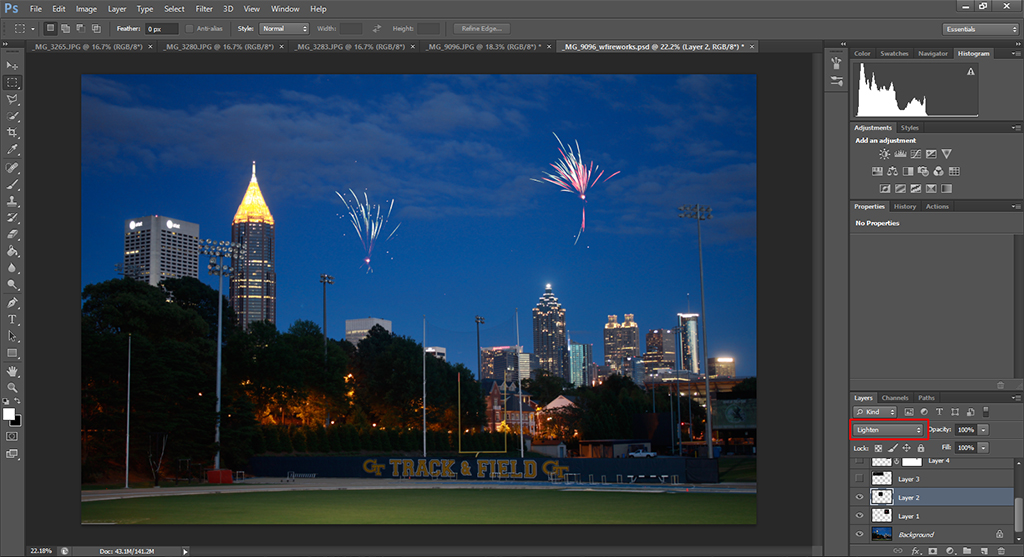
Since the skies have such a different color, by simple adding a new layer with the fireworks adds not only the lights we want to add, but also the square containing the sky from the other image. Fortunately, the availability of different blending modes in Photoshop makes the correction for this incredibly easy. What we need to do is tell Photoshop to only add the pixels that are brighter than the original image, and that is done by selecting the ‘Lighten’ blending mode in the box located above the layers.
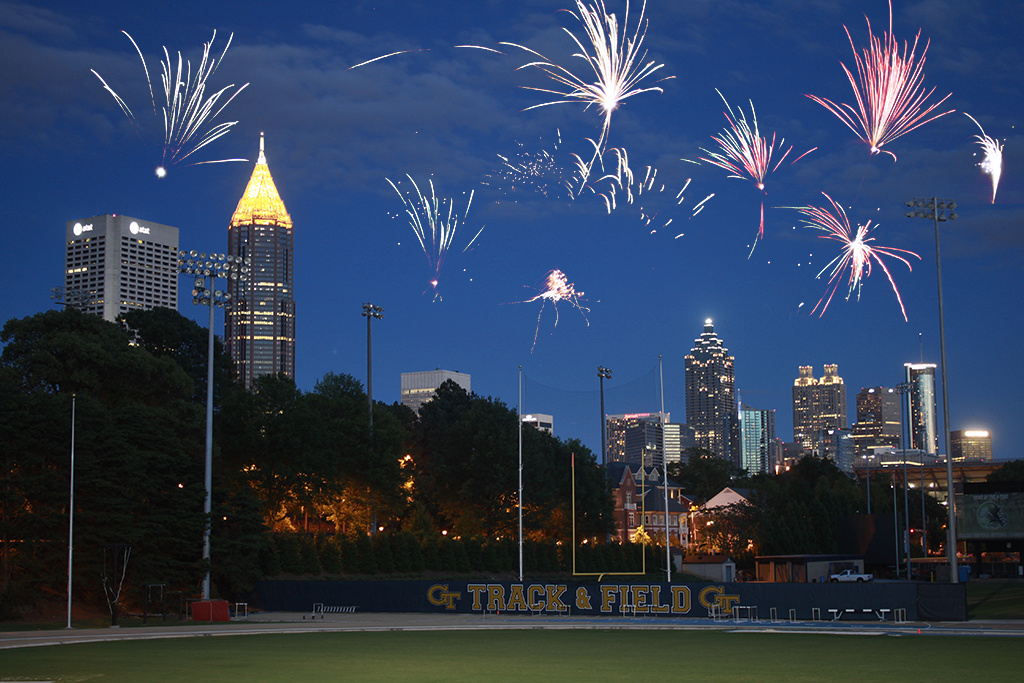
Then you just keep selecting and adding as many fireworks as you want. In general, it is good to have a few, but at the same time not too many. The main reason for this is that if you have too many fireworks, the final result starts to look a bit unrealistic, especially taking into account that a sky full of fireworks is usually full of smoke and adding a realistic smoke adds a level of complexity that I am not covering in this post.
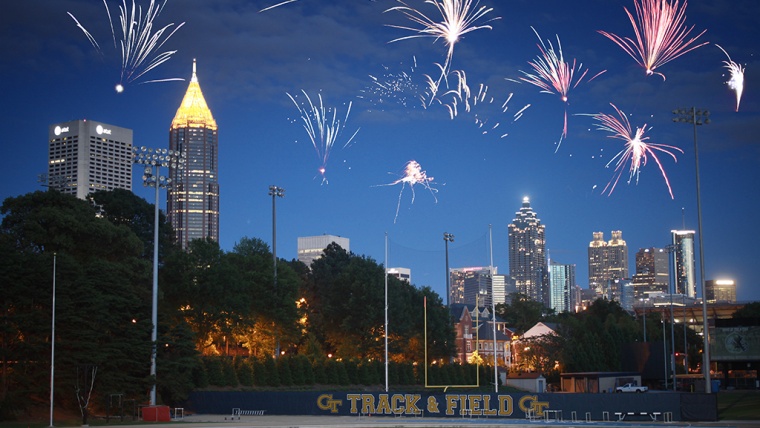
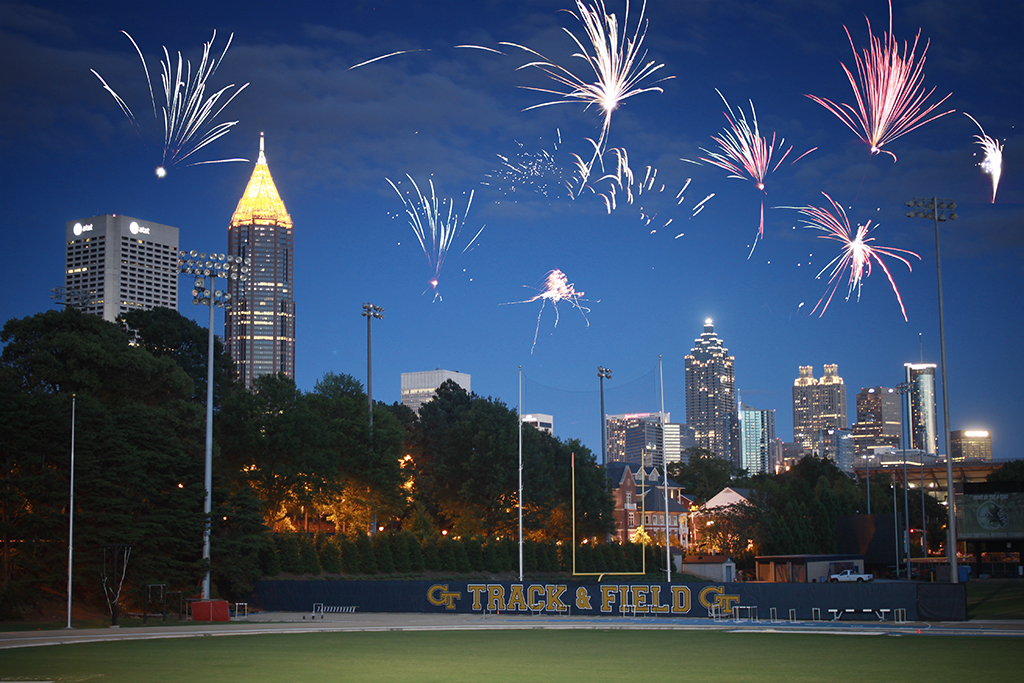
The following image is the result of adding a few more fireworks.
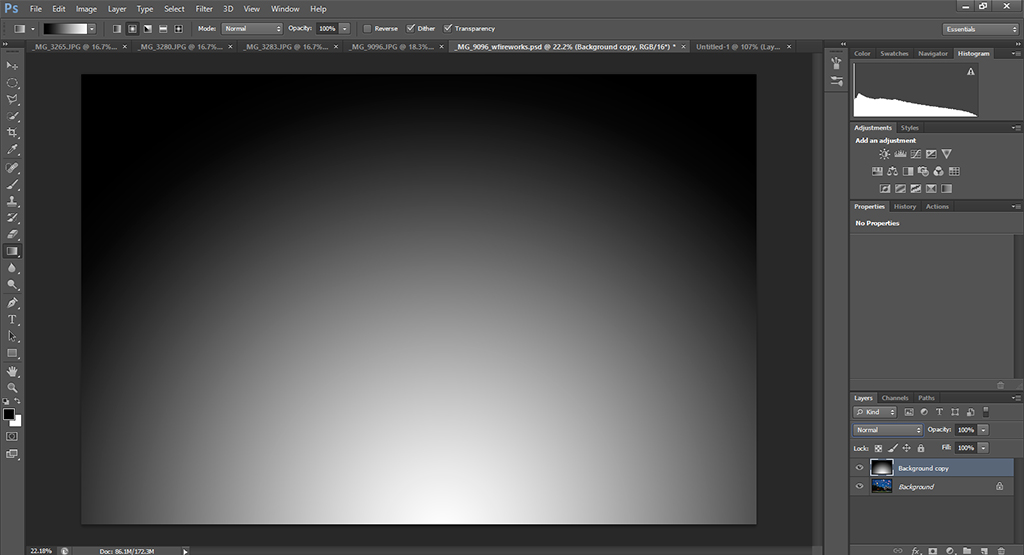
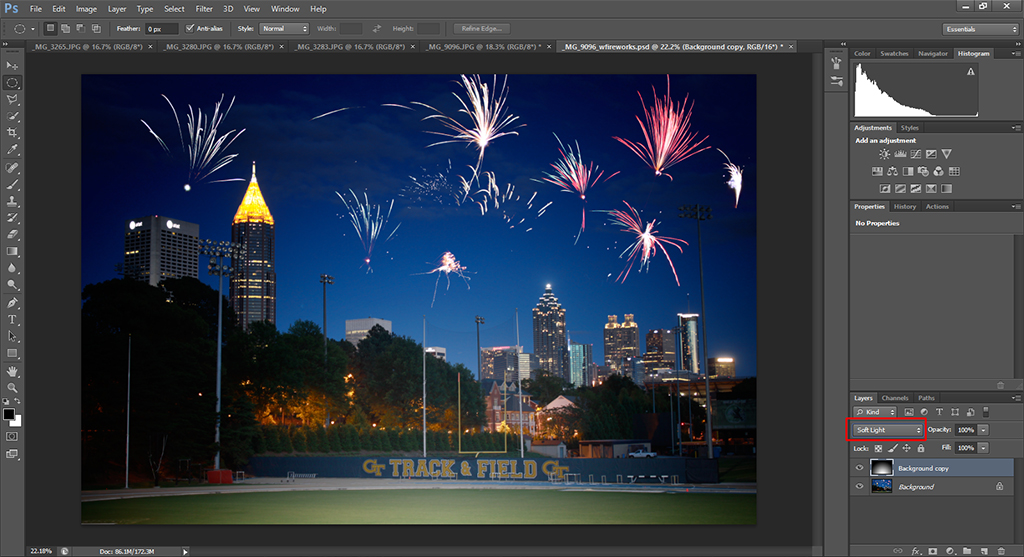
I still feel the image is a bit dark, especially in the foreground. To improve this, I decided to add a vignetting effect. To create a vignette effect, we are going to use the gradient tool in Photoshop. But first, it is a good idea to convert the image to 16 bits (Image -> Mode -> 16 Bits/Channel). This is to avoid the formation of ‘banding’. This banding appears because we are gradually changing the brightness of different areas of the image but with an 8 bit image, the minimum difference in brightness between two bands is noticeable to the human eye, whereas for the case of 16 bits it is not.
Then, we need to make sure that our foreground color is white and the background black. Next, we select the ‘Gradient Tool’, which is located on the same button as the ‘Paint Bucket Tool’. Because we want to lighten the foreground of the image, what we do is drag a line more or less at the middle of the image from the bottom part to the top part and this will create the mask.
The white areas of the mask will increase the brightness of the image while the black areas will decrease it. To apply the mask, we need to change the blending mode from ‘Normal’ to ‘Soft Light’.
In the above image the contrast between the light and the dark areas is just too strong. Actually, the light areas are too bright and the dark ones are too dark. To correct this, we simply choose the brush tool and adjust the mask according to our personal taste. After making these adjustments, I ended up with the following image.
And that’s it. You can apply this same method to add other bright objects such as a moon, star trails, etc. Just play around and you will end up with some interesting results.
As usual, if there is anything that is not clear from this post, just write me an email!
Leonardo Regoli is a self-taught amateur photographer currently based in Ann Harbor, Michigan (USA). His main interests are travel and landscape photography.


 Facebook
 Google +
Comments (0)
There are no comments yet.