Creating your own preset in Lightroomwww.sleeklens.com
Working as a graphic designer I usually have to develop corporate identities, and an essential part of the branding process is to establish a visual style for the photography, illustration, and images used in the brochures and editorial design as well. Some important factors are subject in the photo, lighting, cropping style, colors, depth of field and so on.
Another important factor is the post-processing that must follow these visual style criteria. Thanks to the Lightroom Presets, today we’re able to do this with ease and speed, editing dozens of the picture at the same time by just clicking one button! You must be saying, how can I create a preset to use in my own branding visual style? Don´t worry, this is what we’ll learn in this tutorial, and is so simple that it can be done in 5 steps. Ready?
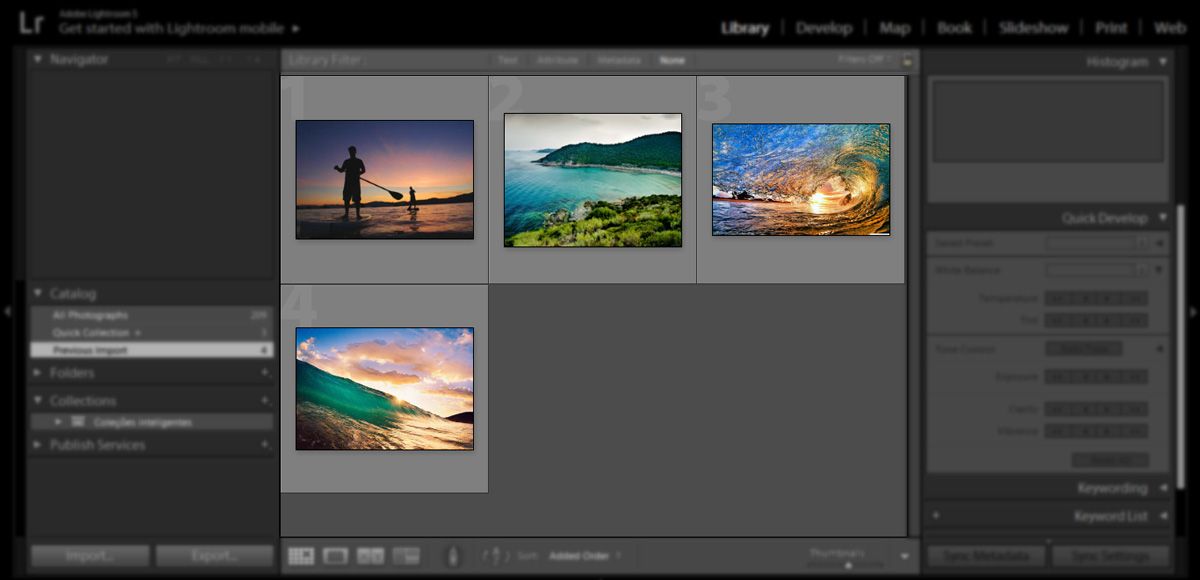
Step 1) Open Lightroom and import all the images that you want to apply the visual style too. In my case, I’ll be using this 4 stock pictures (found on Google) that imply the subject of my branding visual styles, such as sea, aquatic sports and dynamism.
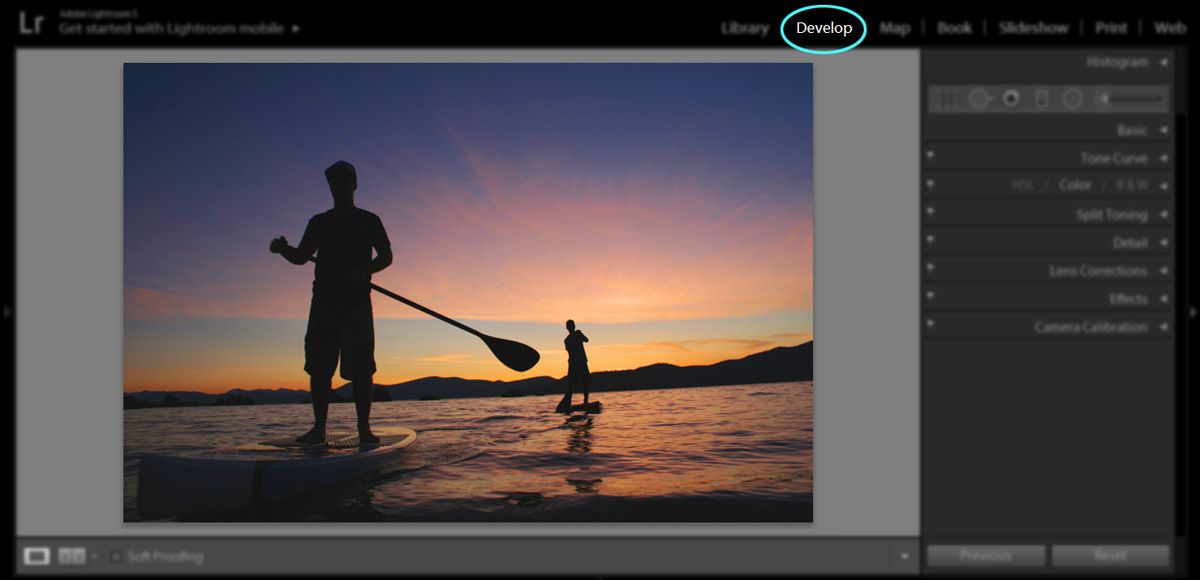
So we can create our preset, we must first adjust the settings of our picture according to our branding visual style. In this case, select your first picture and go to develop mode.
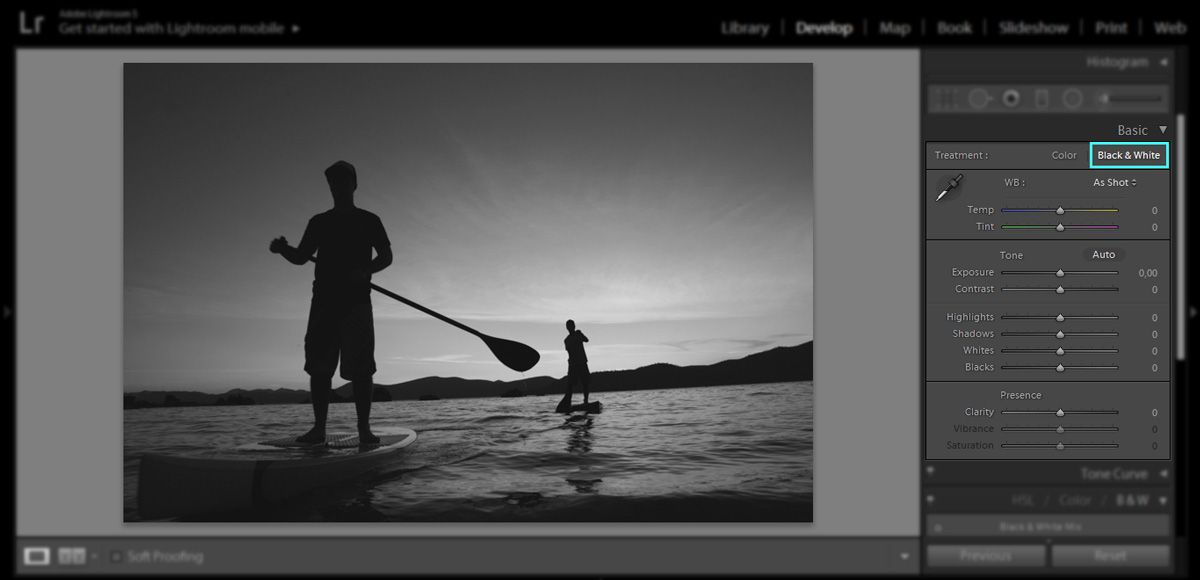
The first thing we must do is to eliminate all the colors of the original image, by going into the basic panel and clicking “Black & White”. This step will convert your image to black and white automatically, but you may tweak the dials according to your style of editing.
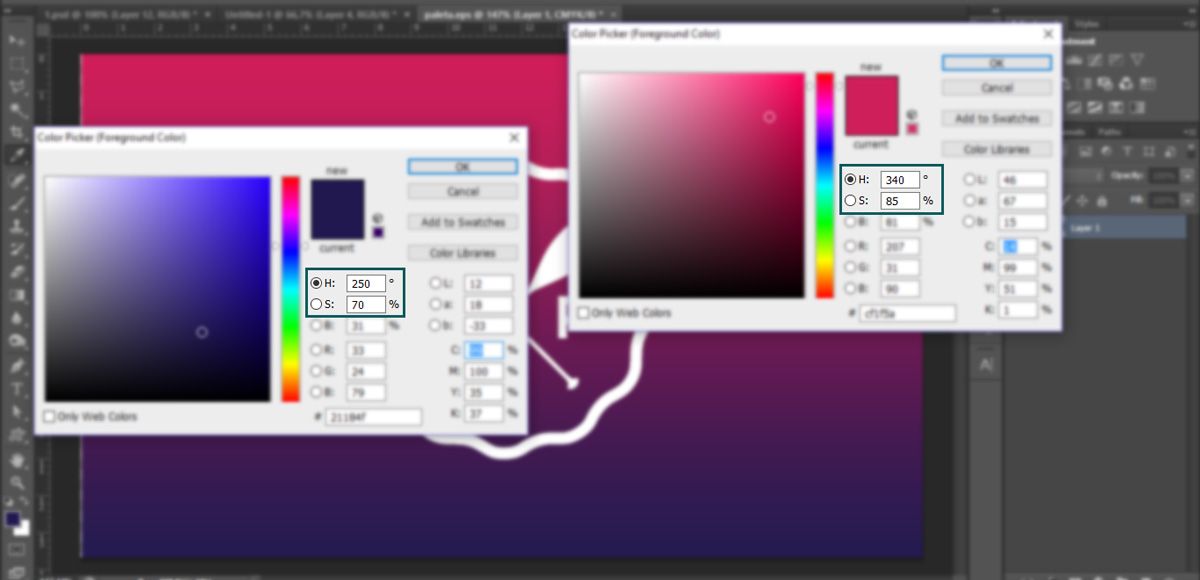
Step 2) Now, we’re gonna open the “split toning” panel on the right and work with the main colors of the branding visual style. In my example, I’m using the hue and saturation values I’ve found, using the eyedropper tool in Photoshop (image below).
What I did was, match these two values of hue and saturation and use it in the highlights and shadows dials of my image. I’ve used the lighter color for the highlights, and the darker color for the shadows, but feel free to explore the possibilities. I’ve also tweaked the balance value in order to achieve a better balance between the two colors.
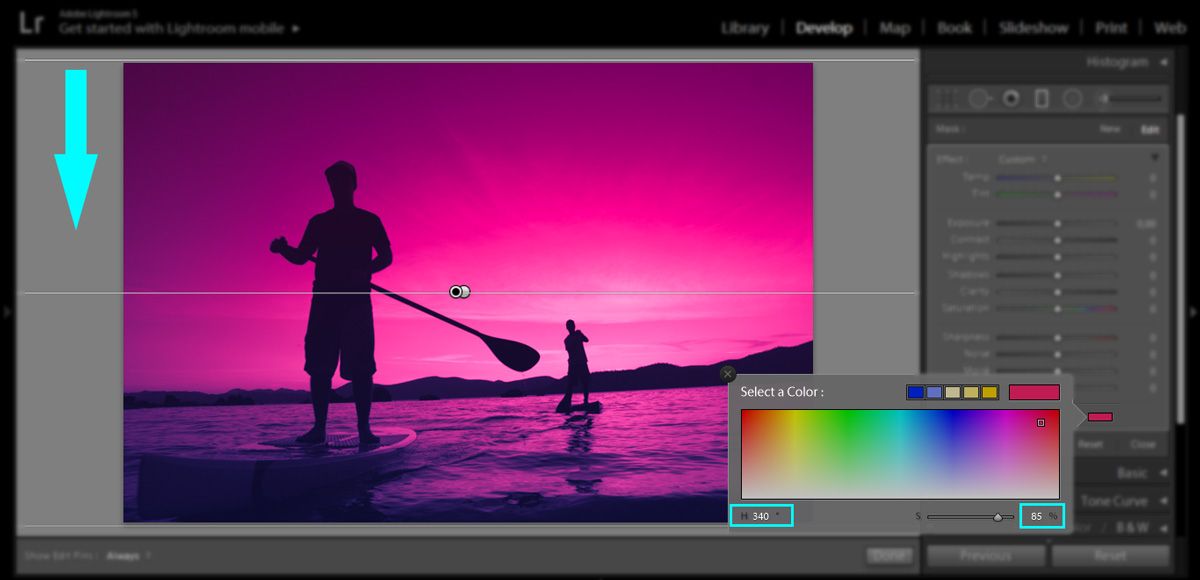
Step 3) Next step, we’re gonna create a graduated filter mask. Click the graduated filter tool, on the right panel and drag from the bottom edge of the image all the way to the top edge. You can leave the values default, but we’re gonna change the mask color with the same values of the previous step.
For the bottom of the image, I’ve used the darker color. Now we’re gonna do the same thing, but this time drags from the top edge of the image to the bottom and selects the lighter color on the color mask box:
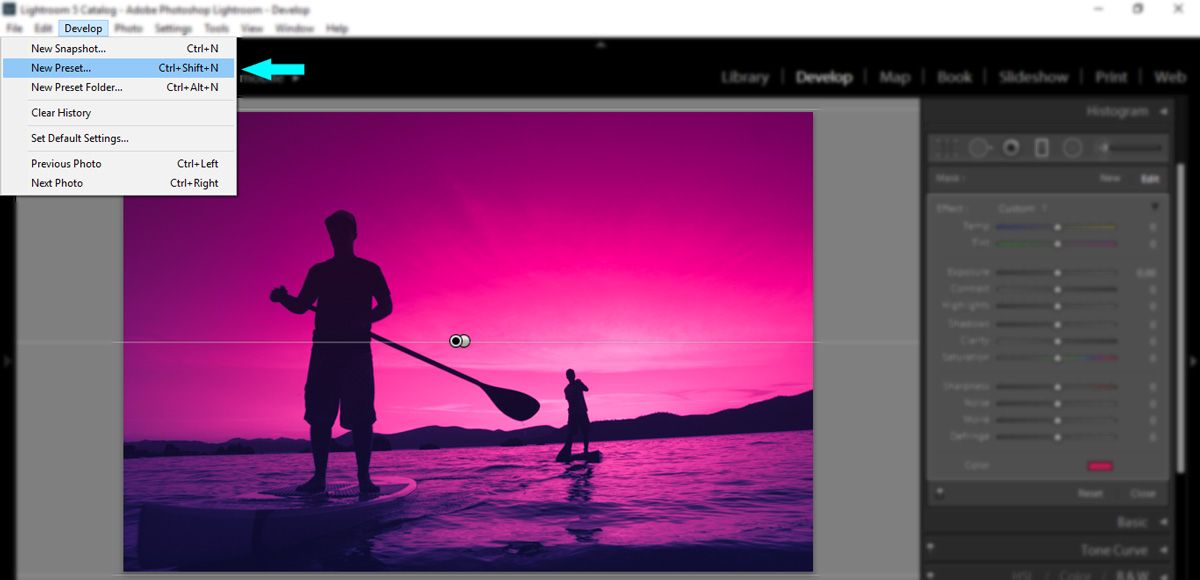
Step 4) This is the final aspect of the visual style we want for all of the images. Hit “Done” and let’s proceed to create the preset, in order to apply it to the other images. Still in develop mode, go to the top menu in “Develop > New Preset…”
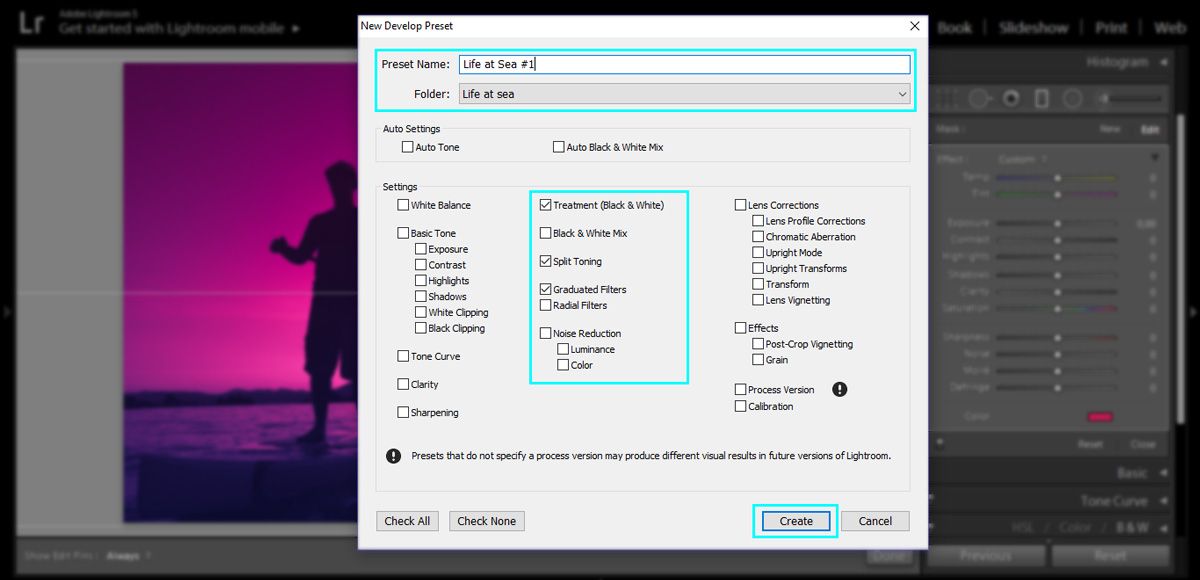
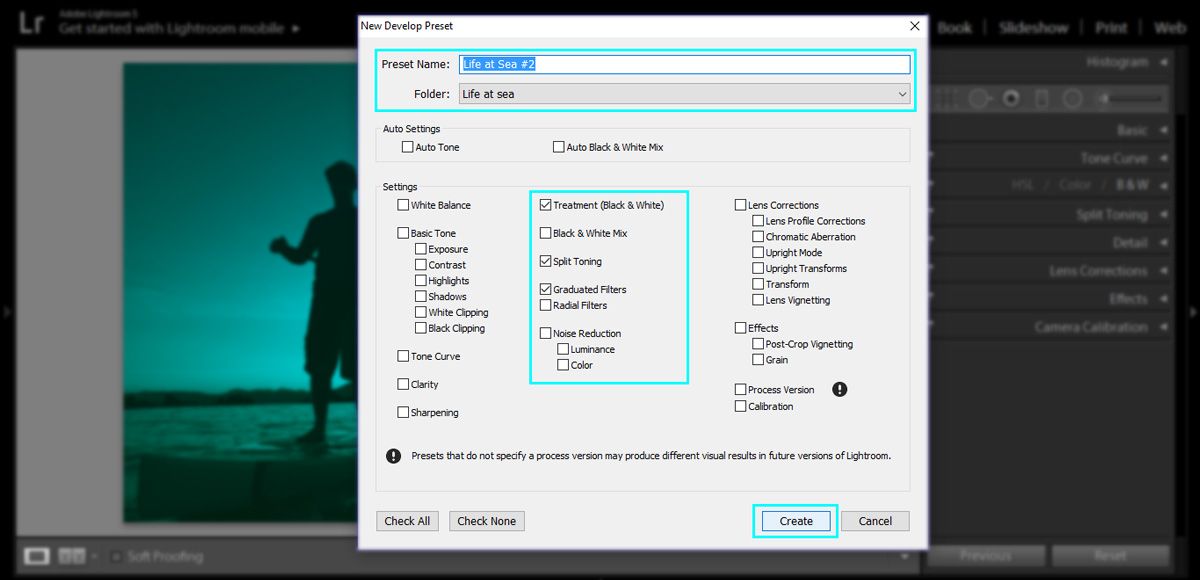
In the window that opens, we can choose a name for our preset. In the example below, I’ve also created a folder to eventually save other presets for this same branding project. You can see that I’ve only checked the boxes of the adjustments used for the preset, like split toning, graduated filter and also treatment (black & white). Click “Create” and our preset is now available in the Lightroom library.
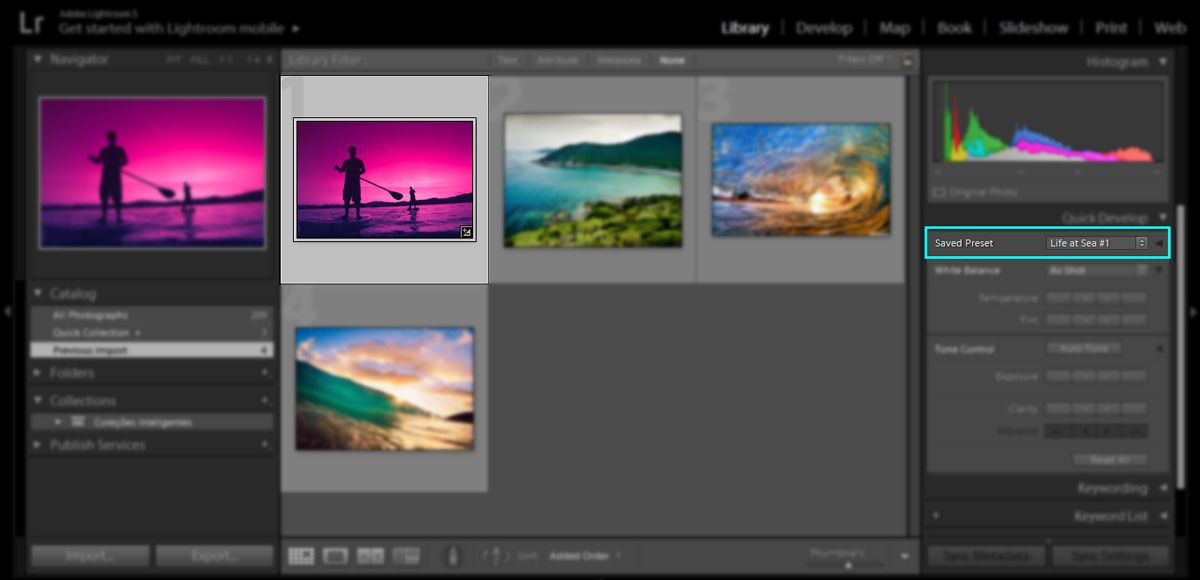
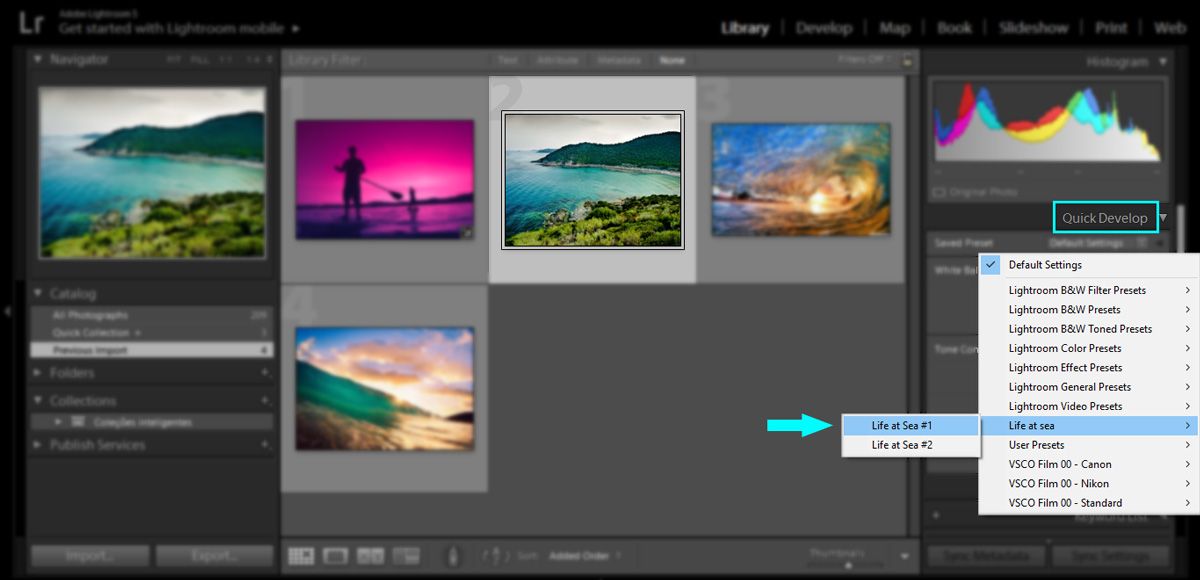
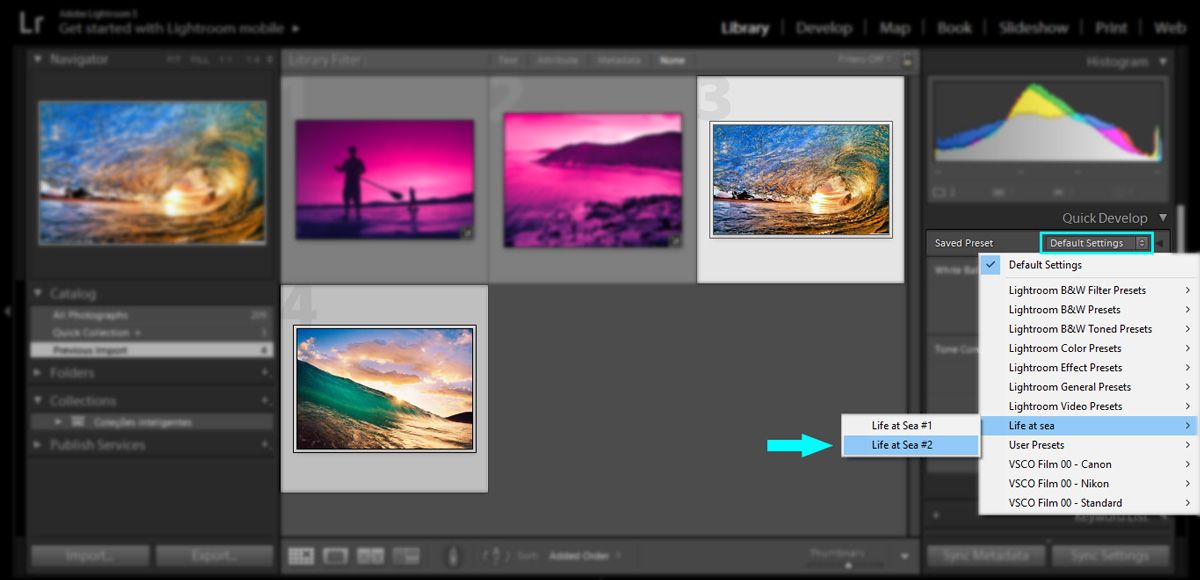
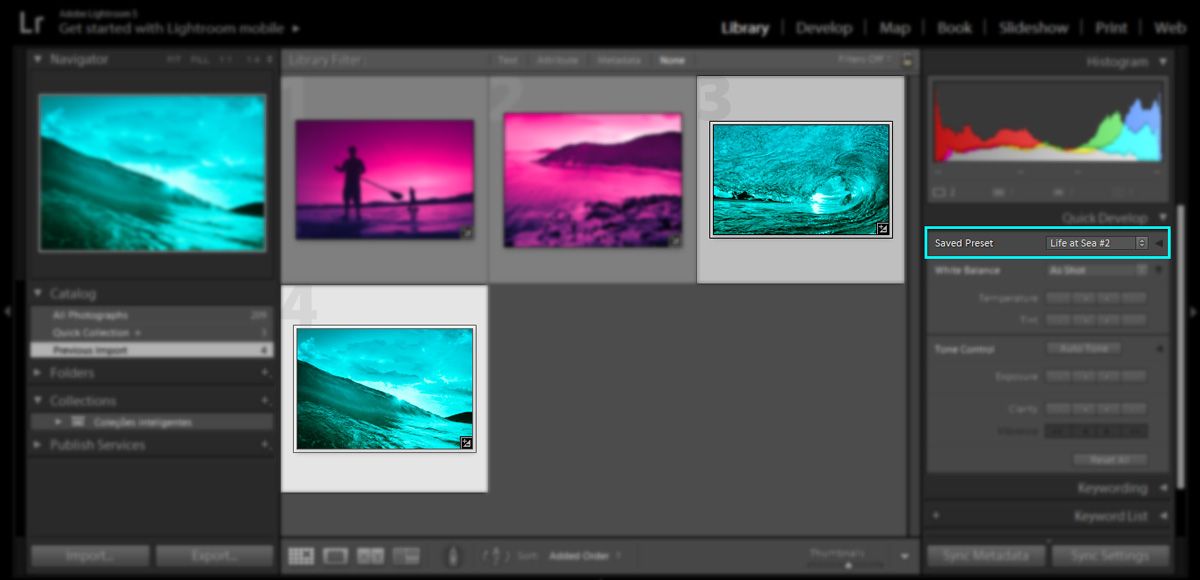
Step 5) In order to apply this preset to your picture, select the picture you want to use, then go to quick develop on the right panel and click on “saved preset”. In the drop down menu, go all the way to the folder you’ve created (the Lightroom default folder for created presets is “User presets”), click on the name of the preset and you’ll notice that the picture will instantly change to the applied preset.
For this example, I’ve also created another preset with different toning and colors, and after I was satisfied with the result, I just clicked on “Develop> New preset…” and created another preset using a different name.
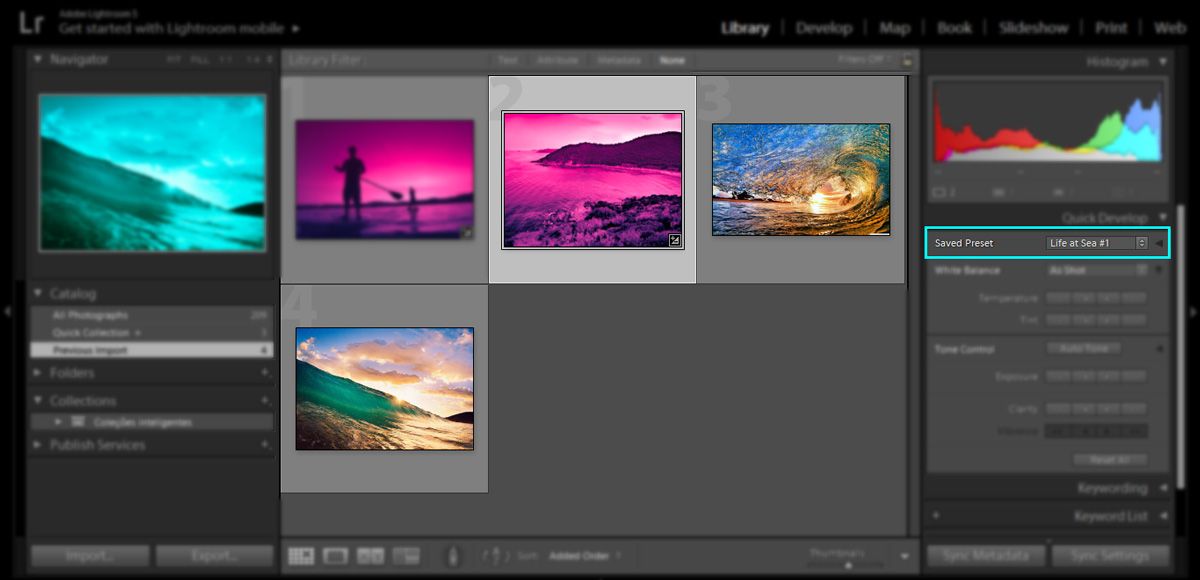
You can also apply the presets in several pictures at the same time, by selecting them and applying the preset the same way as before.
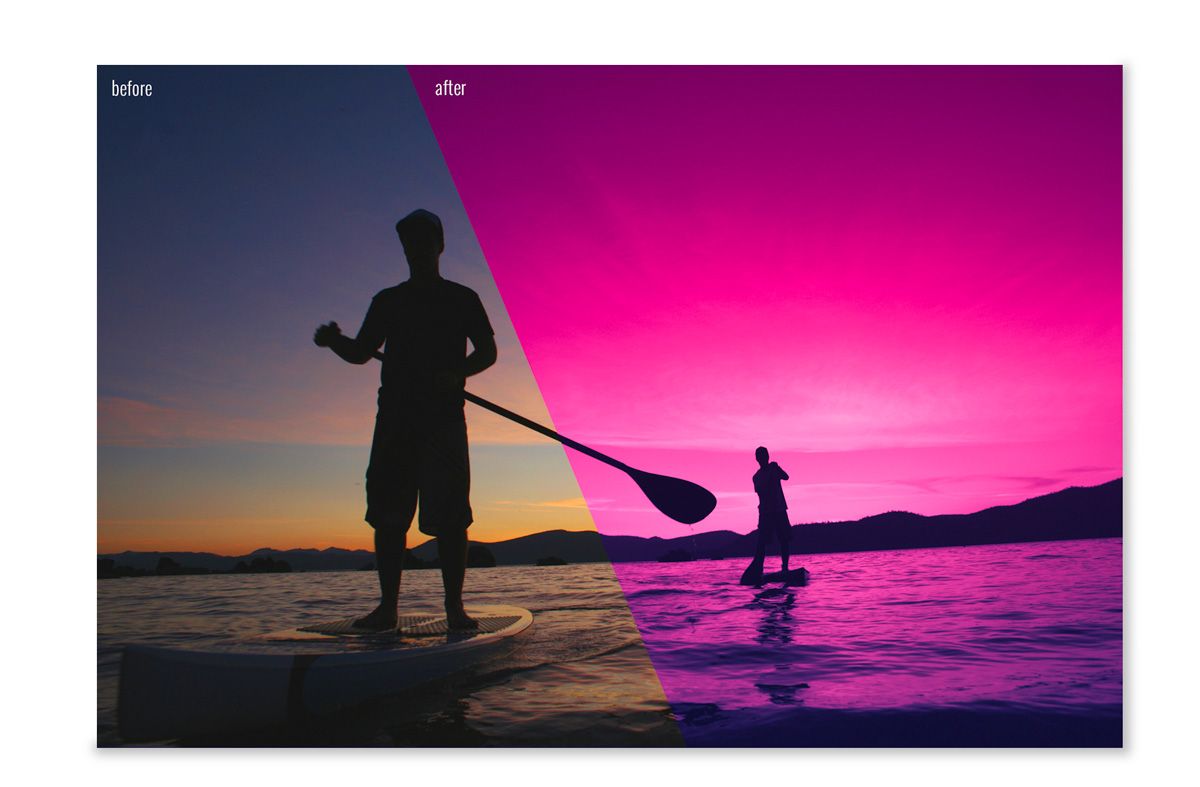
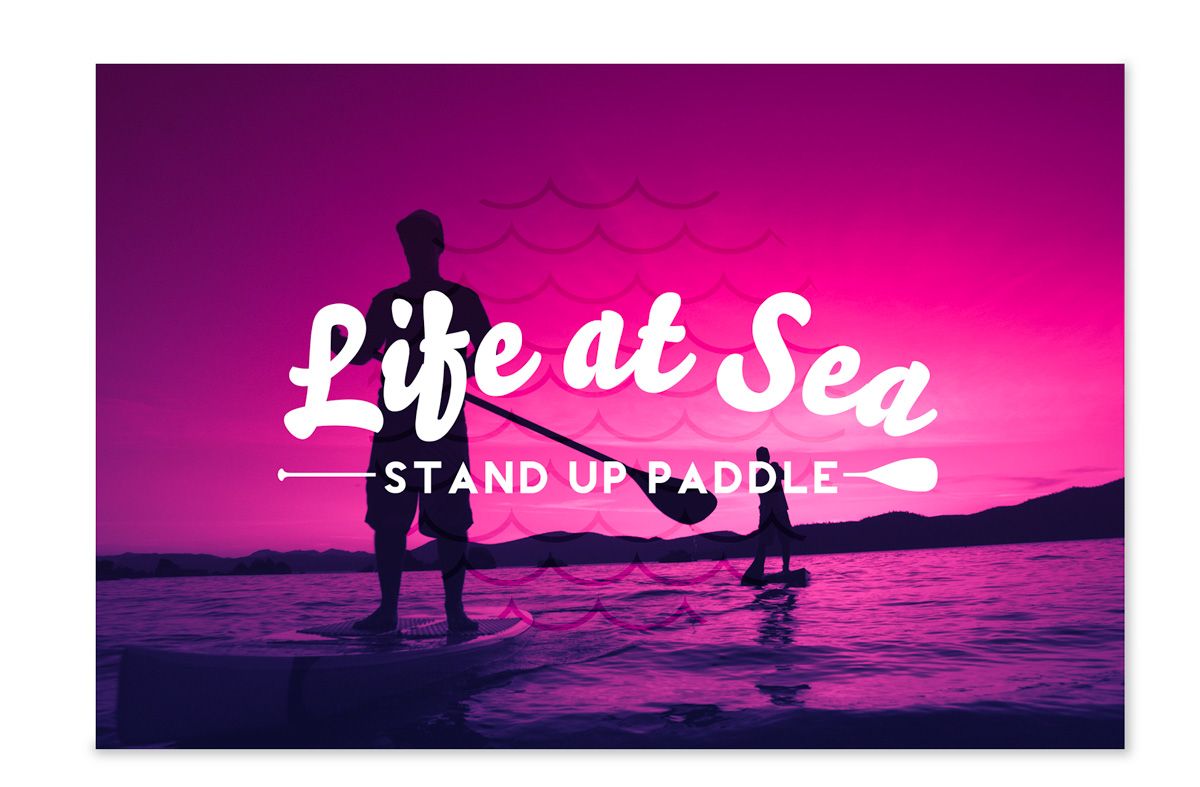
The final result is an image with the visual style of your branding project, and now you can apply the logo and graphic elements as you like. The best part is that it’s possible to create as many preset as you need for your project! One thing I’m sure of, you’ll never suffer again by having to apply the same visual style in your pictures one-by-one.
If you have any suggestions or doubts you can write a comment below or contact me directly. See you next time!


 Facebook
 Google +
Comments (0)
There are no comments yet.