Tag: lens

Haida nano pro: a review about the new GND and ND filters

Based in Ningbo, Haida is a company established in 2007, specializing in researching particularly the filters used on the photographic lens, and also other camera accessories.

Haida filters are among the best on the market and one of their best features is the great price-quality evaluation.

And as I’ve tried the new nano-coated products for months, and they survived many travels and extreme environments (like iced rocky beaches, deserts, salted water) I’ve been even more satisfied with the new stuff of the industry from Ningbo.

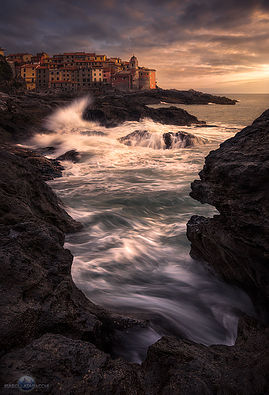
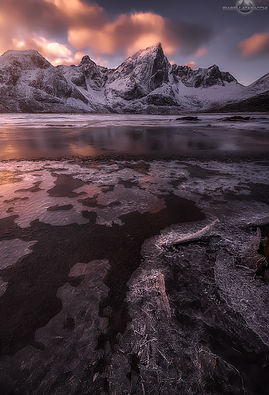
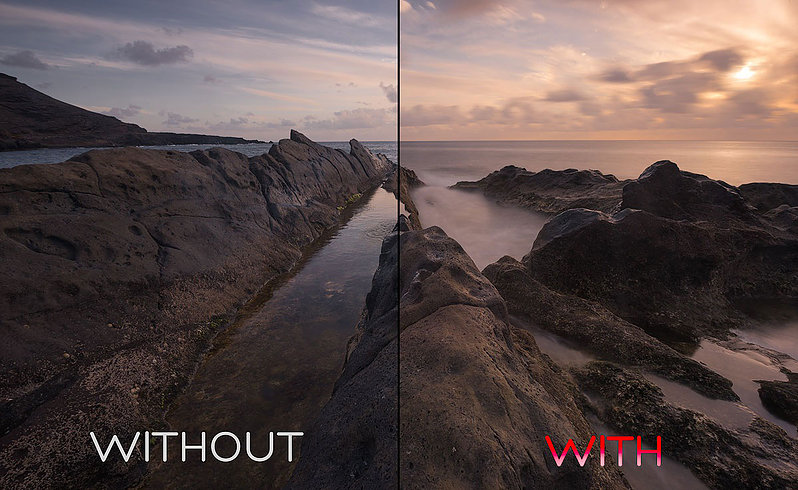
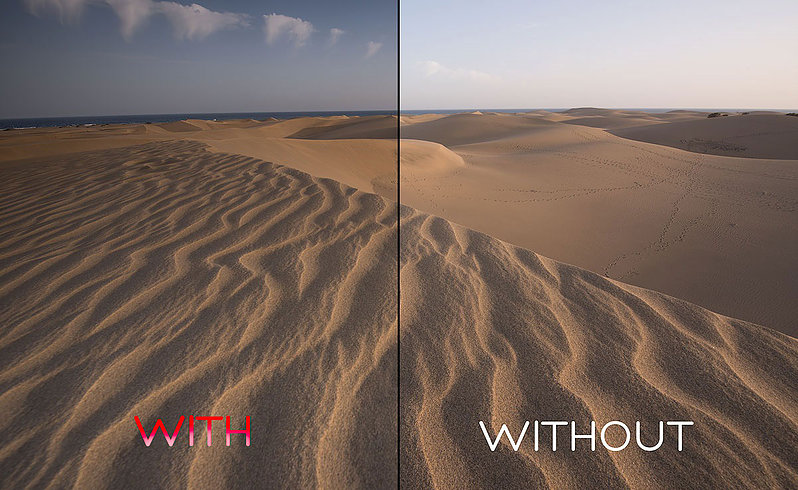
Here is some image I took with the new Haida filters.

tellaro isabella tabacchi

tenerife isabella tabacchi

norway isabella tabacchi

Now to the main characteristics of the products I tested:  Nano Pro MC ND 3.0 (1000x) 150×150 and Nano Pro MC Soft GND 0.9 150×170 filters.

The Nano coat

What does “Nano Pro” mean? Well, it’s the extremely thin, nano, a coat which covers the glass surface of the filter.

This is the great innovation of this new product line that makes the difference in comparison to the previous series. It gives resistance to dirt, reflections, and scratches.

Thanks to this coat, my filters fantastically survived sandy, earthy, rocky, icy places. 

Furthermore, as a landscaper, I often take shots to waterfalls and rocky beaches where the waves move on the reefs and splash some water on the filter. Thanks to this coat I have just to clean lightly with a towel cause the drops come away very easily.

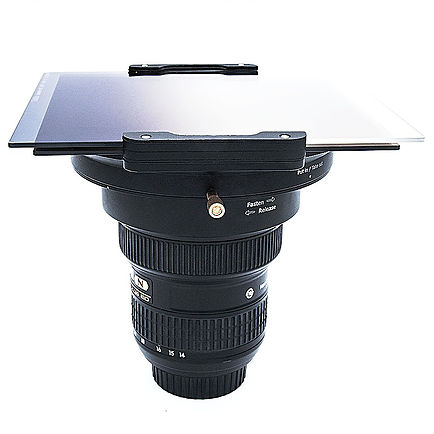
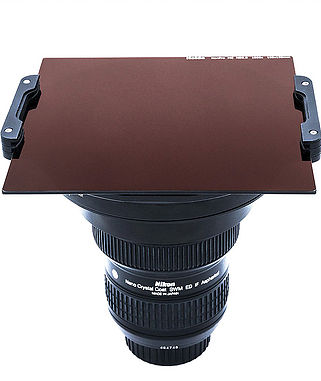
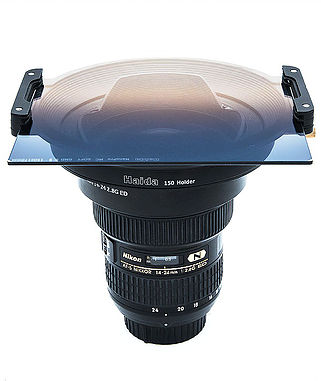
The holder

holder Haida

SaveSave

Canon Lens Review – A Look At The 10 Best Lenses For Canon

If you have a Canon DSLR, congratulations! You have access to quite possibly the greatest collection of lenses on Earth. While it’s more than possible to find some remarkable lenses for any DSLR — and I personally recommend checking out Sigma’s excellent Art line for any camera brand — Canon lenses are generally considered the best in the world. Sure, Leica and Zeiss offer some truly astounding glass, such as the Leica Noctilux-M 50mm f/0.95, that arguably outperform the very best from Canon. But if you want a huge selection of dozens of lenses with focal lengths ranging from 8mm to 800mm, look no further than Canon EF lenses.

But with such a massive selection to choose from, picking the lenses that are right for you can be a daunting task. If you’re into a specialized form of photography that requires a specific kind of lens, such as a fisheye, macro, tilt-shift, or super telephoto, then you likely already know what you need. However, if you’re just starting out with your Canon camera, a narrowed down selection of the best Canon has to offer may be helpful.

best cheap lenses for canon

There are three noteworthy nuances to the Canon lineup we should go through before we begin:

#1 The first thing to note is if your camera is full-frame or APS-C, already assuming it is an EF mount camera. This will determine what lenses are available to you, and you should always triple check that you’re buying a full-frame lens if you have a full-frame camera. If you have an APS-C camera, you can use any EF-mount lens, but be sure to note that the “equivalent focal length” of a full frame lens on a crop-sensor Canon is 1.6x the listed focal length. So if a full-frame lens is 35mm, on APS-C it would be 35mm x 1.6, or 56mm. APS-C only lenses are denoted as EF-S and shouldn’t be purchased for use with a full-frame camera.

#2 Another important element of the Canon lens system is the division of quality into three distinct tiers:

Silver: These are the everyday lenses that come in camera kits and are generally not the best Canon can make, with a flimsy, plastic build. Though they work fine, these lenses should generally be avoided if you want good image quality, though there are a few exceptions noted on this list. I almost always recommend buying a camera body only and choosing your lenses for yourself, since a kit lens won’t give you results that are much better than a point-and-shoot. These budget lenses have silver rings or no rings at all painted on the barrel.

Gold: The middle tier is essentially just a nicer version of the Silver series, often sporting similar optical design with higher quality glass or coating and a metal construction. some of these lenses are actually pretty good, and you can spot them by their gold ring on the barrel.

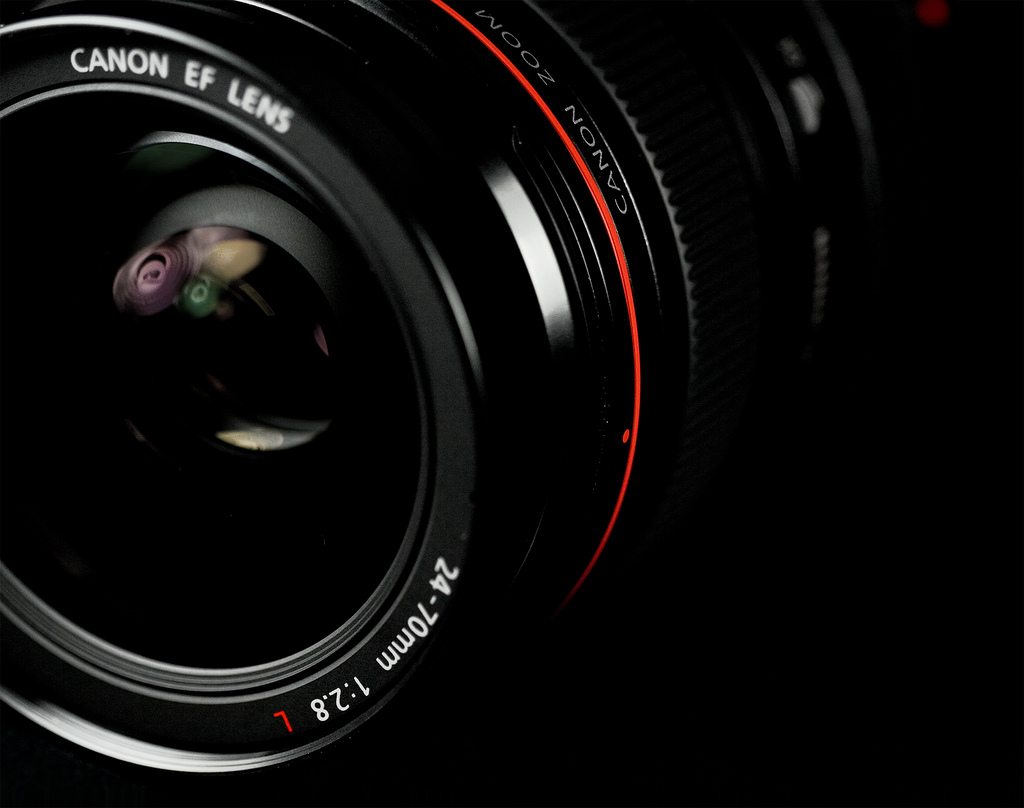
Luxury: Then, there is the L series. These are expensive, amazing lenses that pretty much every photographer lusts after. They are easily recognizable by the red ring painted at the end of the barrel, and by their high price tags. Though they have top-end optical and build quality, they are usually big and heavy regardless of the focal length. But if you’re going to take your Canon system seriously, you should save up and focus mostly on L lenses.

best lens for canon 6d

#3 There are a few acronyms that get tacked onto the beginning or end of a lens’s name (which is made up of the focal length and minimum selectable aperture, like 50mm f/1.8). Each denotes a special feature of that lens, which is helpful for quick comparisons. While there are a number of more obscure acronyms that are only found on a few lenses, all you really need to know are the common ones listed below:

EF: Canon’s designation for full-frame lenses, placed before the lens name

EF-S: Canon’s designation for APS-C lenses, placed before the lens name

IS: Image Stabilization, especially important in telephoto lenses

L: Luxury, this simply tells you it’s a top-of-the-line L series lens

STM: Stepper Motor, a low-vibration focusing motor that’s good for video, with non-mechanical manual focus. It’s generally not as fast or accurate as an UltraSonic Motor and comes in cheaper lenses.

USM/Micro USM: UltraSonic Motor, a fast, quiet, accurate autofocusing motor

I, II, III: These numerals denote if the lens is Mark I, Mark II, or Mark III, or how recent the design is. If a lens is updated it will usually receive a newer Mark in its name. No Mark designation means the lens is a Mark I, which is the case for most of the lenses in the list below. While newer mark lenses are typically a bit better, the improvement isn’t always worth the higher price.

My advice to any new photographer is to allocate about 2/3 of your total photography budget on getting two or three quality lenses. The lens you use will have a far greater impact on your images than the camera you use, and your lenses can stay with you your entire life while you will likely replace your camera every five years or so. If you want proof that the lens is far more important than the camera body, check out this great comparison video by the venerable DigitalRev TV. So if you can, save up and get one L lens instead of two or three non-L lenses and thank me later.

Okay, let’s dive into the list of the best Canon lenses out there. Since this is aimed at photographers who are new to the Canon lens lineup, we’ll go in order from the least expensive to the most expensive. But if you get multiple lenses, make sure they actually serve different purposes by having different focal lengths, physical sizes, or minimum apertures.

10 Best Canon Lenses 


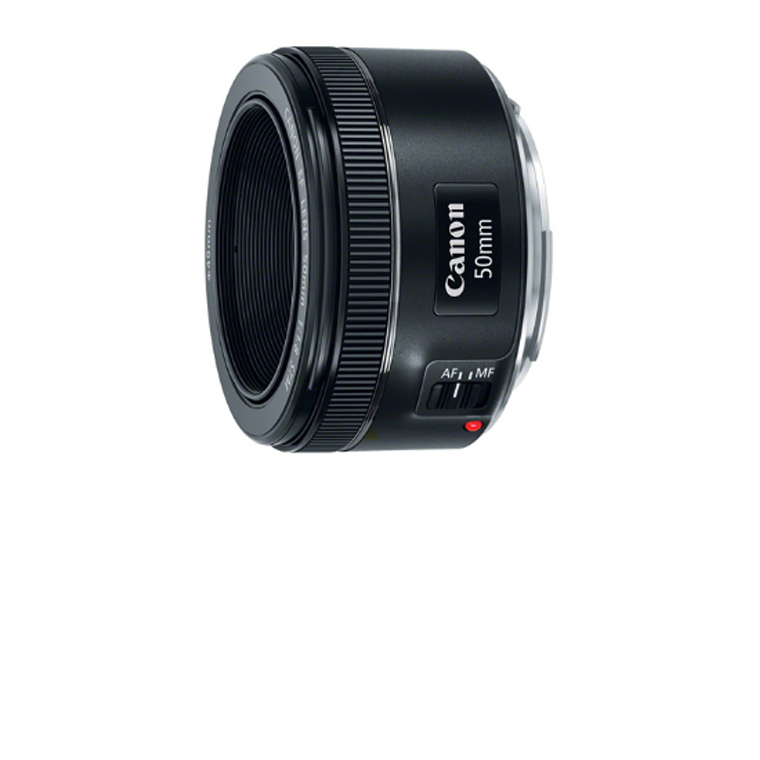
EF 50mm f/1.8 STMGo to Amazon
The nifty fifty! Every photographer needs a compact 50mm prime, and Canon has you covered with an excellent lens at an amazing price.
Watch video review
Overall rating:
46
Lightweight:
0
95
100
Zoom Range:
0
30
100
Stabilization:
0
20
100
Focus Speed:
0
40
100
Pros
  • Lightweight (Weight: 158g)
  • AF Capable
  • Silent
  • Smooth video focus
  • Cheap
Cons
  • Modest barrel distortion
  • Slower focus
  • Does not include stabilization
  • Narrower field of view on APS-C cameras.
Click to read the full Review
Considering the popularity of its predecesor, Canon decided to celebrate the 25th anniversary of its EF 50mm f/1.8 II Lens with a power upgrade; something that was amazingly valued by Canon's loyal customers.

It covers full-frame cameras and is an 80mm equivalent lens on APS-C. It's small and has a Stepper autofocus motor (Also known as Smooth Transitions for Motion or STM) that is equally suited for stills and video, something Canon is know for. While it's in the lowest, Silver tier of Canon lenses, it's still a no-brainer purchase because of the price point, fast minimum aperture, and sharp performance. A clear number 1 in this Canon lens review post.

Ideal for those situations were we're shooting at poor lit conditions, for portraits and also for our daily life photographs - in a few words: a lifelong companion.

(Sample photo courtesy of Canon.es)
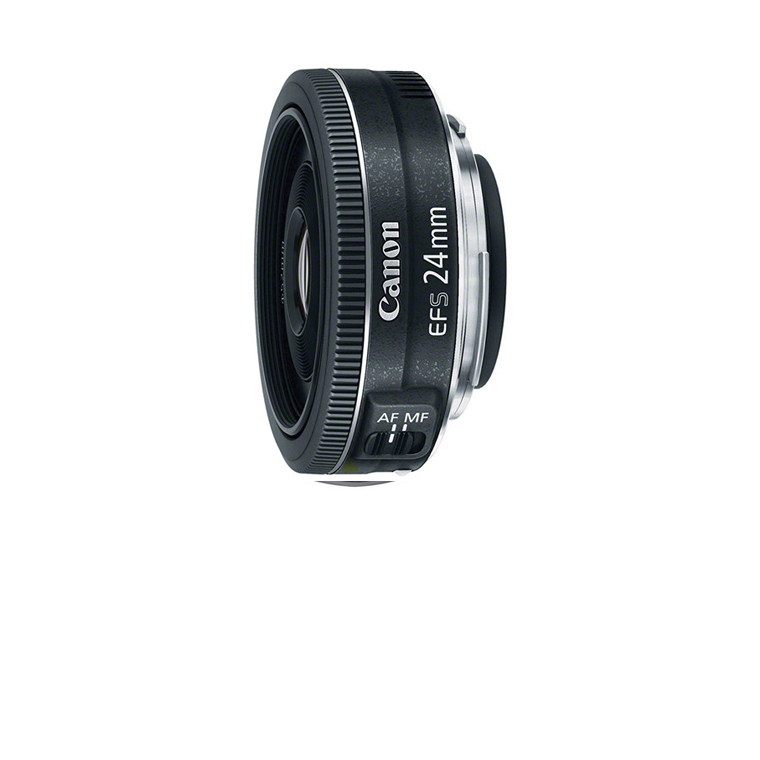
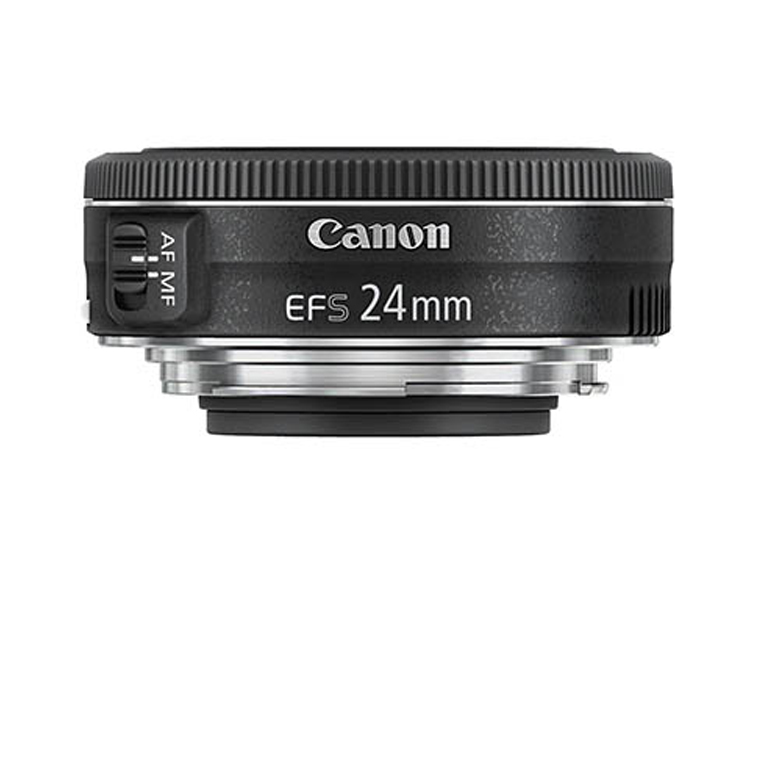
EF-S 24mm f/2.8 STMGo to Amazon
While not at all necessary, having a pancake lens is always kinda fun. As you can see, it's called a pancake lens because it's... shaped like a pancake. While the downside is that it has a relatively simple optical design that lacks a bit of sharpness, the upside is that it's just so darn flat!
Watch video review
Overall rating:
48
Lightweight:
0
97
100
Zoom Range:
0
30
100
Stabilization:
0
20
100
Focus Speed:
0
46
100
Pros
  • Lightweight (Weight: 127 g)
  • AF Capable
  • Real Sharp
  • Very Compact
  • Classic wide-angle field of view
  • Silent STM focus motor
Cons
  • Doesn't feature image stabilization
  • May show vignette effect
  • Not too accurate manual focus
Click to read the full Review
One of the main advantages of this lens is its focal length of 24 mm, which paired with an EOS APS-C camera, will get the same angle of view as with a target of 38 mm and a full frame camera. These conditions are similar to the way in which the human eye perceives images, so these photos will have a nice, natural look for your viewers.

This lens will make your camera feel much smaller and lighter and is great for street photography, since it's not very noticeable or intimidating. Though its optical quality isn't the absolute best, it still can take some great images and is a bargain for a useful wide angle lens.

This lens is also ideal for those DOF effects, as well as for night photography due to its big aperture value - as a great amount of light can be caught by the sensor without even requiring to use a Flash.

(Sample photo courtesy of Thomas Kraus)
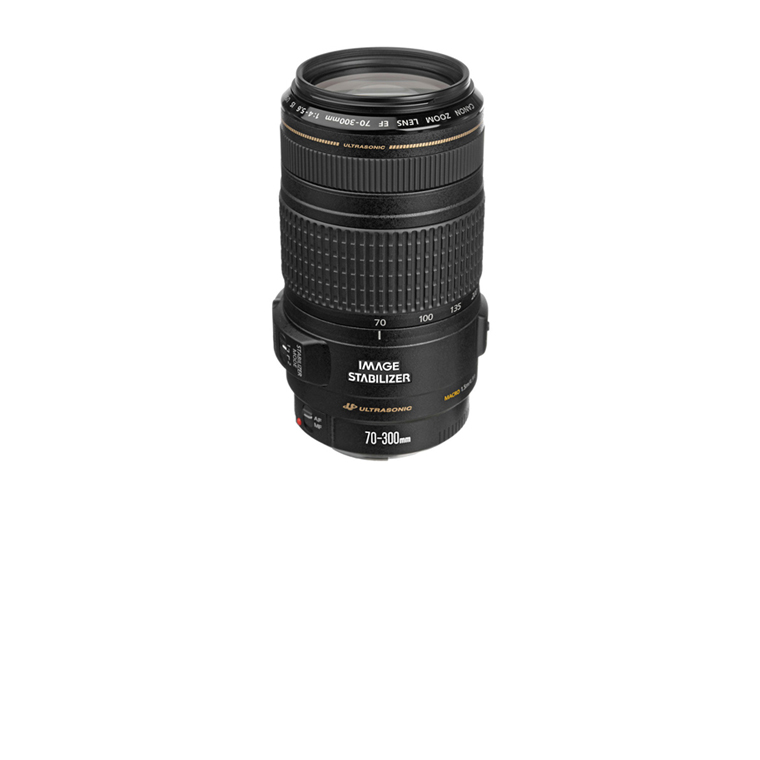
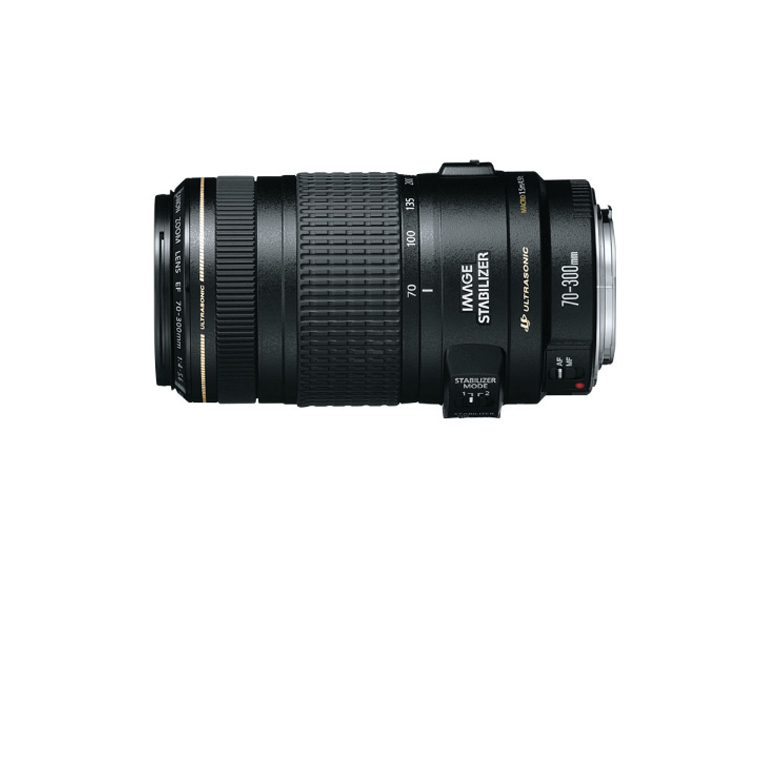
EF 70-300mm f/4-5.6 IS USMGo to Amazon
This baby has quite a bit of zoom range, and it's the first Gold lens on the list. Because of its super long reach, it doesn't have a great minimum aperture range, but that's the price you pay. It does, however, have optical image stabilization, which is something to look for in a telephoto lens.
Watch video review
Overall rating:
71
Lightweight:
0
30
100
Zoom Range:
0
90
100
Stabilization:
0
85
100
Focus Speed:
0
80
100
Pros
  • AF Capable
  • Ultrasonic Autofocus Motor
  • Zoom Ring Lock Lever
  • Optical Image Stabilization
Cons
  • Bulkier (Weight: 0.63 kg)
Click to read the full Review
The lens EF 70-300 mm f/5-5 6 IS USM is equipped with a three steps (IS) image stabilizer, which makes it ideal for working without a tripod. It is possible to use slower shutter speeds values, up to three steps more than would be possible in other cases, without decreasing the sharpness feeling of the image itself.

An element of the objective of UD glass (ultra low dispersion) corrects chromatic aberrations as well as offering resolution and contrasts elevated throughout the zoom range.

Its focus motor is virtually silent, very fast speed for a precise focus even in the most demanding situations.

A budget solution for those who desire to take a step further on travel/landscape/action photography.

(Sample photo courtesy of Fabio Scalabrini)
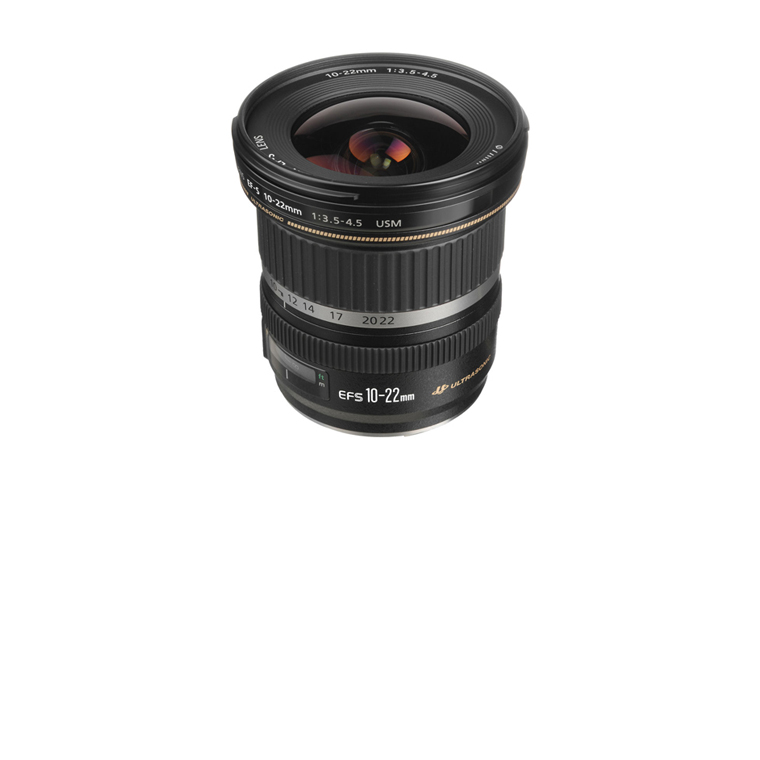
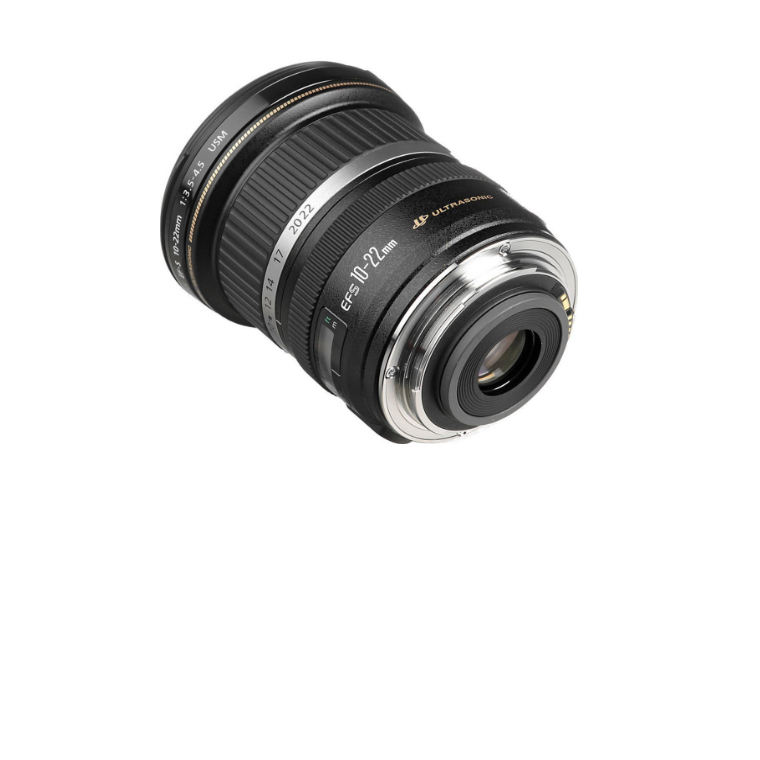
EF-S 10-22mm f/3.5-4.5 USMGo to Amazon
For creative photographers, this is your lens to go - It is capable of altering the perspective of the image in such a way to get incredible dynamic effects.
Watch video review
Overall rating:
61
Lightweight:
0
50
100
Zoom Range:
0
40
100
Stabilization:
0
80
100
Focus Speed:
0
75
100
Pros
  • AF Capable
  • Extreme wide angle coverage
  • Low geometric distortion
  • Ultrasonic Autofocus Motor
Cons
  • Weight: 0.35 kg
  • Lens hood not supplied as standard
  • Modest macro capabilities
  • Incompatible with full-frame bodies
Click to read the full Review
Before you get too excited, remember that this is another APS-C lens, meaning the equivalent focal length is 16-35mm. This is, however, still a very wide angle lens that's right on the border of being a fisheye. This is a great budget option for those looking for a wide angle zoom since it covers basically the entire range you would want. It's also another Gold lens, so you know the build quality will be pretty good too.

Another advantage of this lens relies on its ability to separate the background plane from the plane of the  subject to portray, reinforcing the feeling of presence while keeping an excellent sharpness value in both planes.

(Sample photo courtesy of Dave)
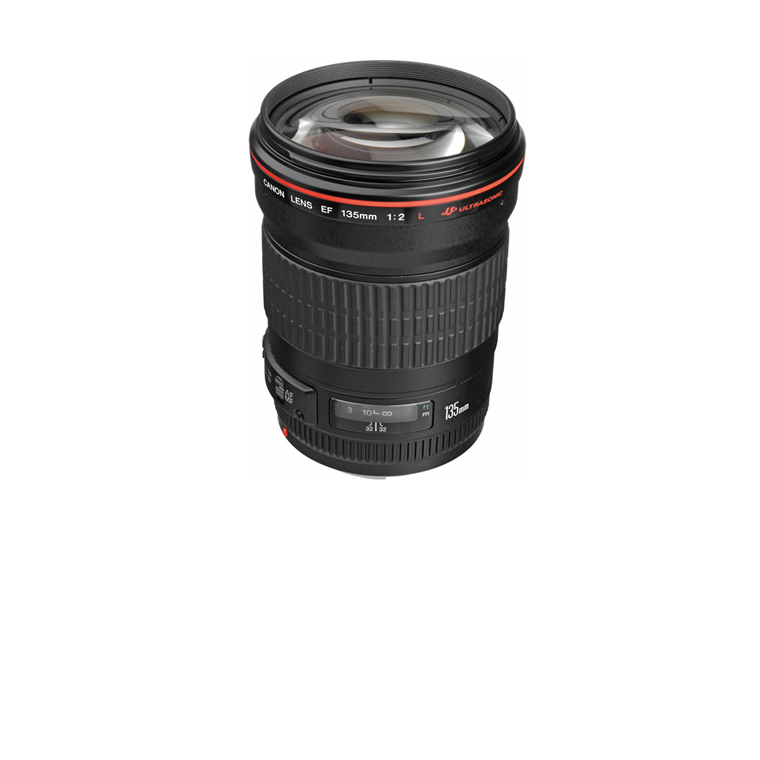
EF 135mm f/2L USMGo to Amazon
It is considered to be a lightweight option for a telephoto lens if you compare it to other similar models - comfortable enough for not requiring a tripod on your common daily-shooting sessions.
Watch video review
Overall rating:
68
Lightweight:
0
60
100
Zoom Range:
0
85
100
Stabilization:
0
50
100
Focus Speed:
0
75
100
Pros
  • AF capable
  • Medium weight (750g)
  • Focusing Range Limiter
  • Depth of Field Scale
  • Ultrasonic Focus Motor
  • Rear Focusing System
Cons
  • No optical stabilization
Click to read the full Review
The first L lens on the list, and it's a real beauty. 135mm is an awesome prime length for nature photography and probably the longest prime you'll want. This is perhaps the largest aperture available in a 135mm lens and it can make for some dramatic images of wildlife. The f/2 aperture is also helpful for nature photography because it can let in lots of light at dusk or dawn, when nature is at its best. You could even use this as a studio portrait lens, though you'll need a decent amount of space between you and your subject because of the longer than ideal focal length.

This lens model also features integration with E-TTL II flash metering, as well as featuring a circular aperture to create a smooth bokeh effect.

Keep in mind that this lens is supplied with a flexible case and lens hood.

(Sample photo courtesy of Marina Plevako)
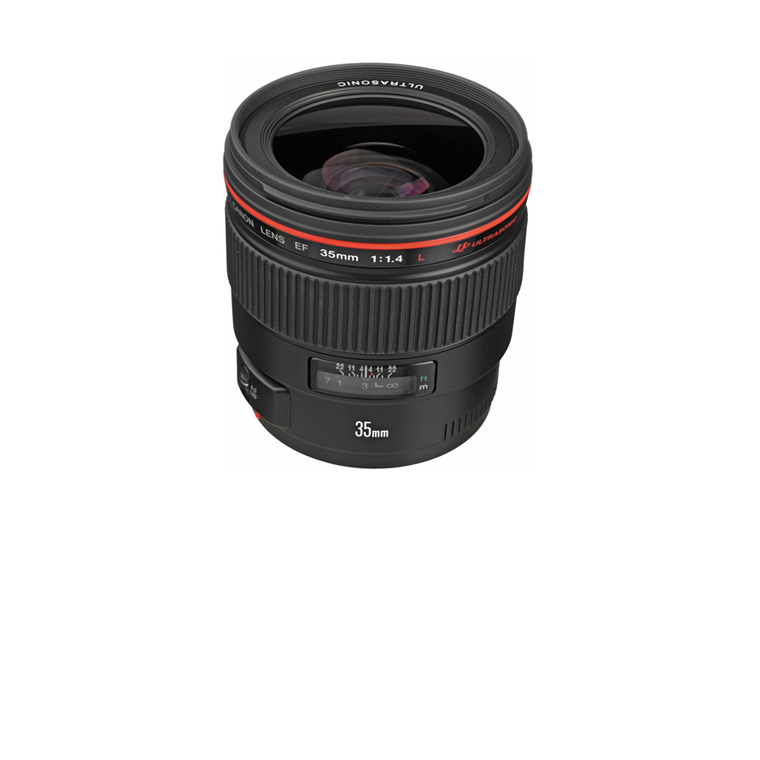
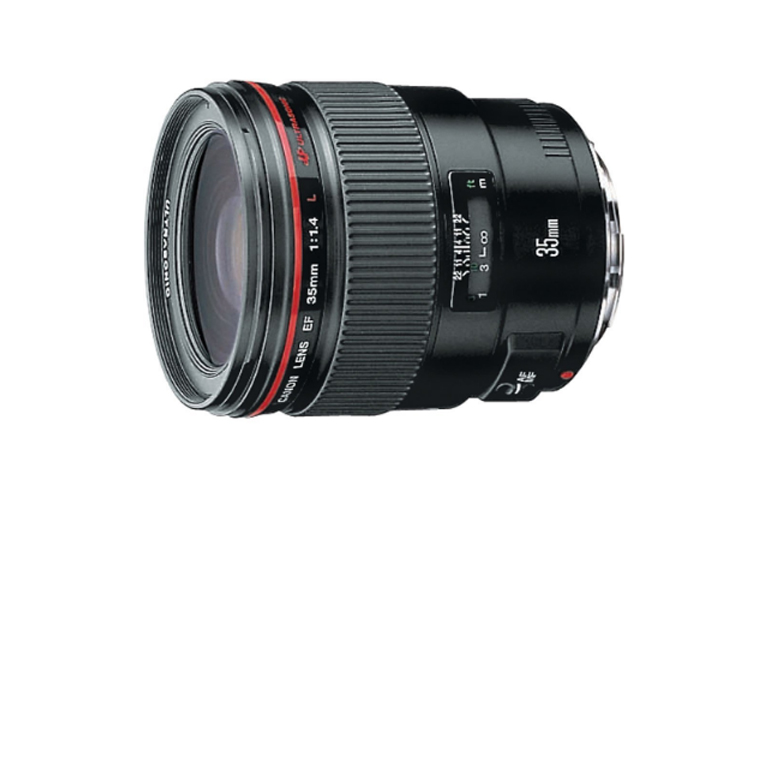
EF 35mm f/1.4L USMGo to Amazon
If you're a street photographer new to Canon, this is probably the lens you want. 35mm is, in my opinion, the best focal length you can have for street photography and really for photography in general. It's a very similar focal length to the human eye, more so than 50mm, and therefore the resulting images look very natural.
Watch video review
Overall rating:
75
Lightweight:
0
60
100
Zoom Range:
0
60
100
Stabilization:
0
85
100
Focus Speed:
0
95
100
Pros
  • AF Capable
  • Optically stabilized
  • Clear sharp lens
Cons
  • Heavy (Weight: 580 g)
  • Some distortion
  • Hood not included
Click to read the full Review
The large f/1.4 maximum aperture allows a broader passage of light in comparison with the optical lens, f/2.8, which makes it ideal for photography without a tripod with low light.
When doing photos with large aperture values, photographers can play with limiting the depth of field value. Through these effects of shallow approach can highlight a reason of the merits and is particularly effective when combined with great visual field wide-angle lens.

As well as with the EF 70-300mm f/4-5.6 IS USM, the Ultra-low dispersion (UD) optics and two aspherical lens elements provide incredible on all frame sharpness, even when the lens is used in its more angular opening.

Basically, if you can afford only one L lens you should seriously consider choosing this one.

(Sample photo courtesy of Michall Yantsen)
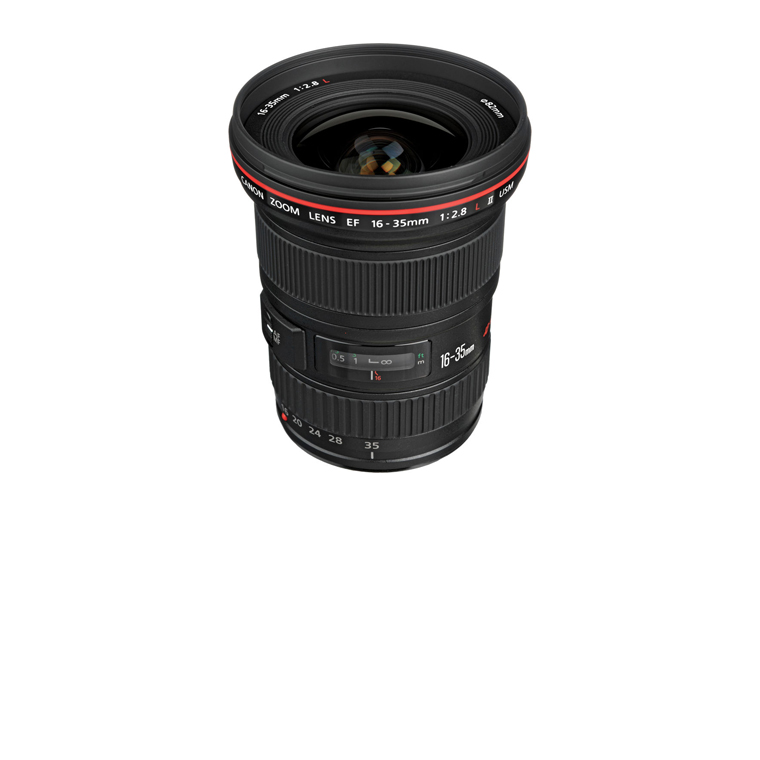
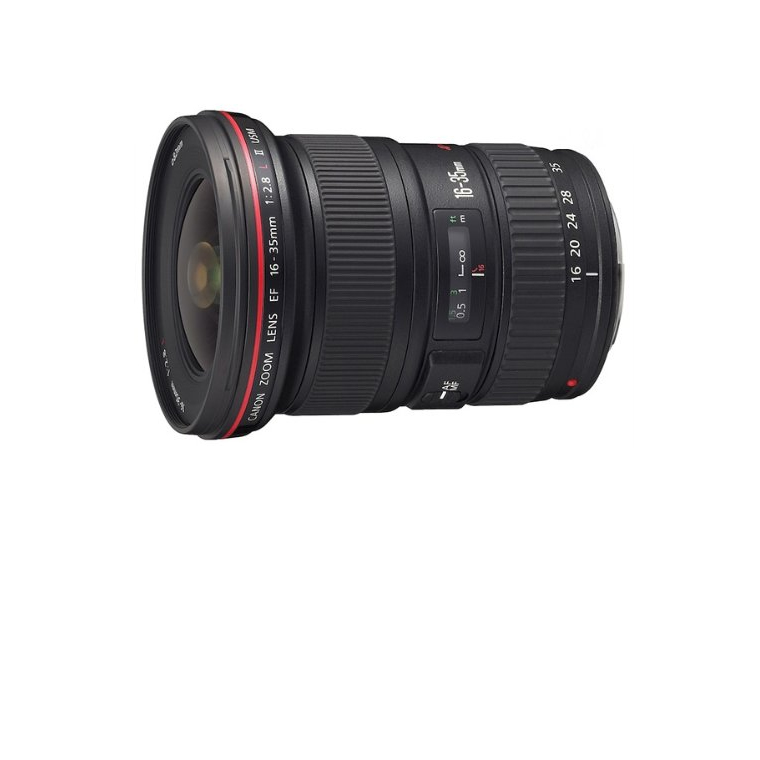
EF 16-35mm f/2.8L II USMGo to Amazon
This is essentially the big-boy (full-frame) equivalent of the EF-S 10-22mm listed above. It has an impressive f/2.8 aperture throughout its zoom range, which is generally the smallest aperture you can use to get pleasingly low depth of field when not shooting macro.
Watch video review
Overall rating:
56
Lightweight:
0
50
100
Zoom Range:
0
20
100
Stabilization:
0
75
100
Focus Speed:
0
80
100
Pros
  • Ultra-wide field of view
  • Fixed f/2.8 aperture
  • Really sharp
Cons
  • Heavy (Weight: 635 g)
  • Limited zoom range
Click to read the full Review
The USM (Ultrasonic Motor) ring controls the fast auto focus system with a nearly silent operation. Mechanical manual focusing can be cancelled without disconnecting the AF system. The lens offers a minimum focus distance of 0.28 m over the entire zoom range.

It also proves itself to be another cool option for getting Bokeh effects; as well as including a flexible case and lens hood, just as we previously seen with the EF 135mm f/2L USM.

This is a great lens for landscapes and should be preferred over its older, Mark I sibling.

(Sample photo courtesy of Normand Gaudreault)
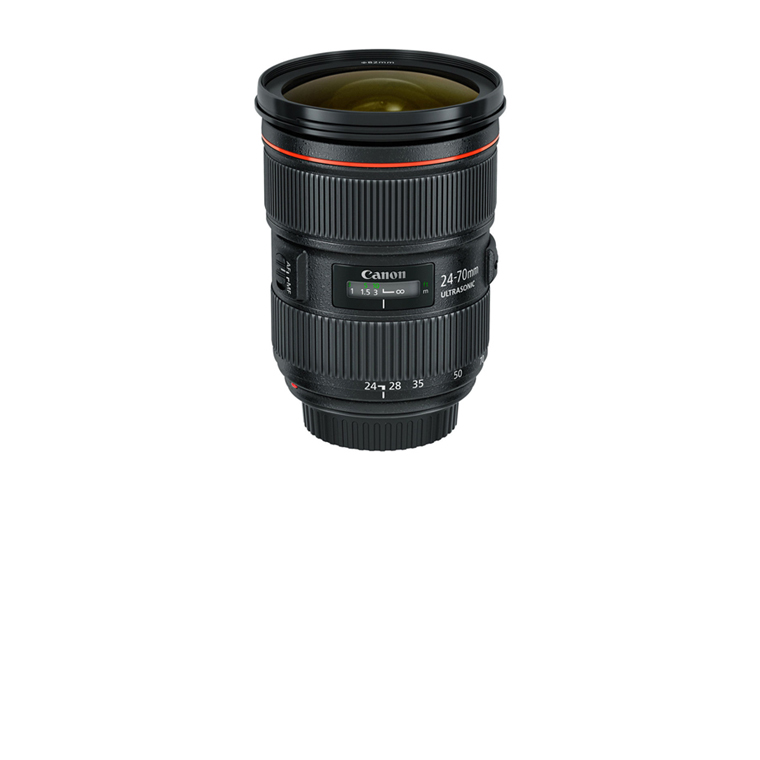
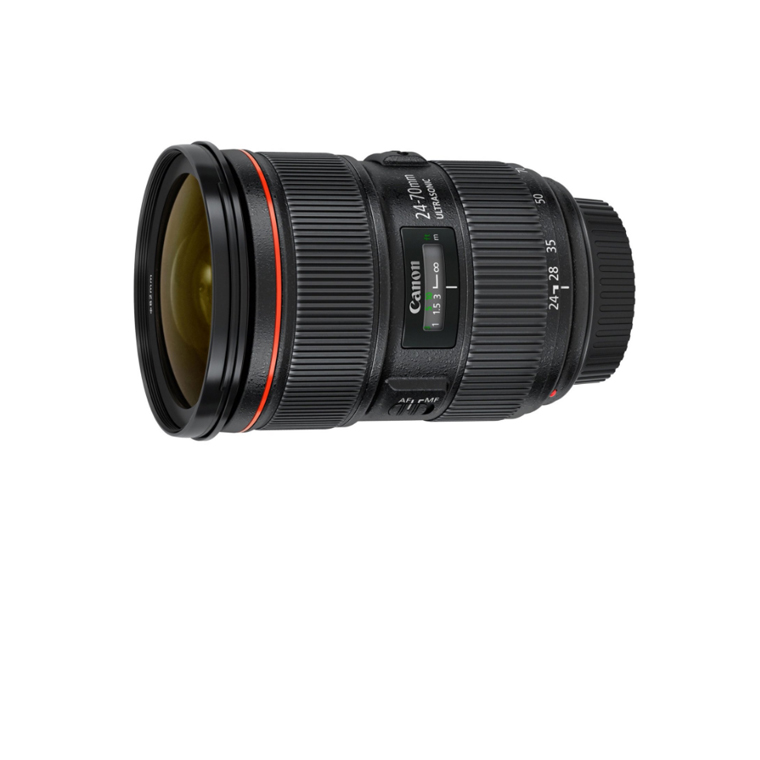
EF 24-70mm f/2.8L II USMGo to Amazon
In the photography gear version of the "Desert Island Game," this is the one lens to bring with you. It covers basically every focal length you could need with excellent quality and a bright/shallow aperture. Many street photographers prefer to use this as their go-to lens over a 35mm or 50mm prime, because it can shoot both of those focal lengths and more.
Watch video review
Overall rating:
55
Lightweight:
0
30
100
Zoom Range:
0
80
100
Stabilization:
0
20
100
Focus Speed:
0
90
100
Pros
  • Sharp Focus
  • AF Capable
  • Ultrasonic Focus Motor
Cons
  • Not Stabilized
  • Pricey: Heavy (Weight: 0.8kg)
Click to read the full Review
The sacrifice you make for tons of versatility is a smaller but still good f/2.8 aperture as compared to an f/1.4, and the lens is also fairly big and heavy.

It's famous for its unique, "reverse zoom" design that actually makes the lens physically longest at 24mm and physically shortest at 70mm.  A minimum distance of 0.38 m focus increases the versatility of the EF 24 - 70 mm f/2 8 L II USM, because that brings up 0. 21 x increase.

This is one of the, if not the, best all-arounders in photography and every Canon owner should try to own it at some point.

(Sample photo courtesy of Mikel L de Arregi)
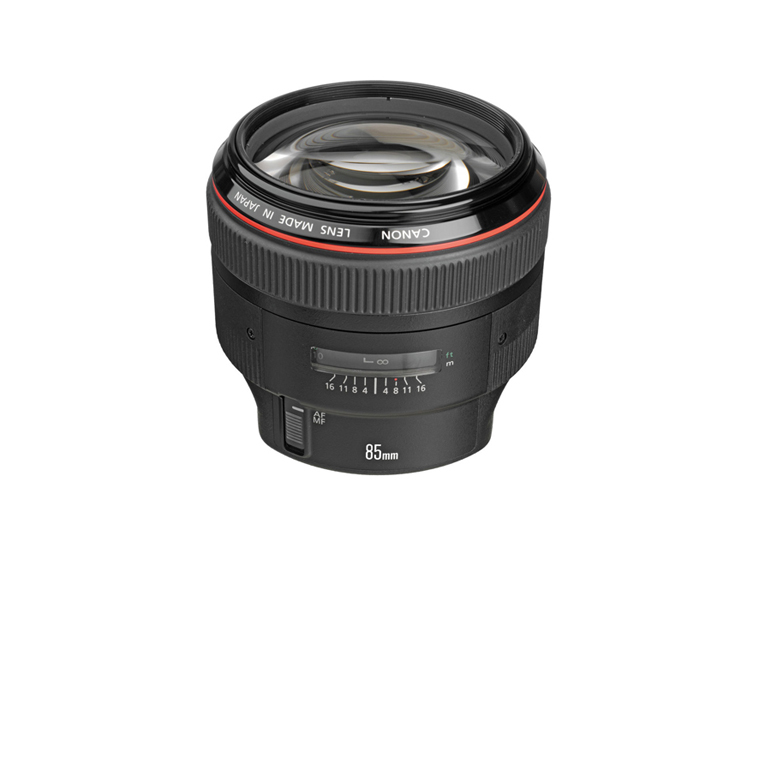
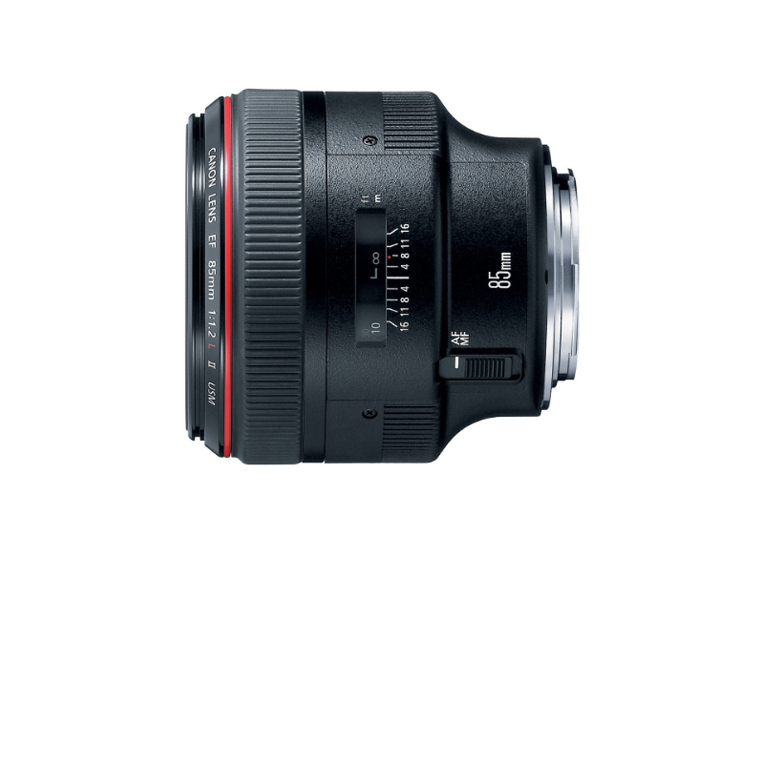
EF 85mm f/1.2L II USMGo to Amazon
One portrait lens to rule them all. This is the ideal focal length for gorgeous portraits, with an impressive f/1.2 aperture that can soften your background beyond recognition without a problem. But be warned, if you get this lens you may find yourself only shooting at f/1.2 and feeling disappointed and frustrated with the rest of your lenses for lacking this extreme aperture.
Watch video review
Overall rating:
55
Lightweight:
0
40
100
Zoom Range:
0
65
100
Stabilization:
0
30
100
Focus Speed:
0
85
100
Pros
  • Very shallow DOF capability
  • Best light-gathering lens
  • Amazingly sharp
Cons
  • Heavy (Weight: 1 kg)
  • Not AF Capable
  • No Stabilization, Expensive
Click to read the full Review
You can see just by looking at the shape of this lens the lengths Canon went to in order to accomplish this massive aperture, opening up the barrel diameter to accommodate an aperture that physically can't fit inside a typical Canon lens barrel.

Ultrasonic autofocus system as we have seen on other previous lenses, get ready to experiment its large f/1.2 maximum aperture, with in combination with the fast focus motor, it provides a remarkable speed to shoot in "low-light without flash" situations. The large aperture also provides precise control over depth of field to capture striking portraits.

If you're a fashion photographer, you need this lens. Anything else just isn't going to match the results you can get from this marvel of design.

(Sample photo courtesy of Bakabon Syorin)
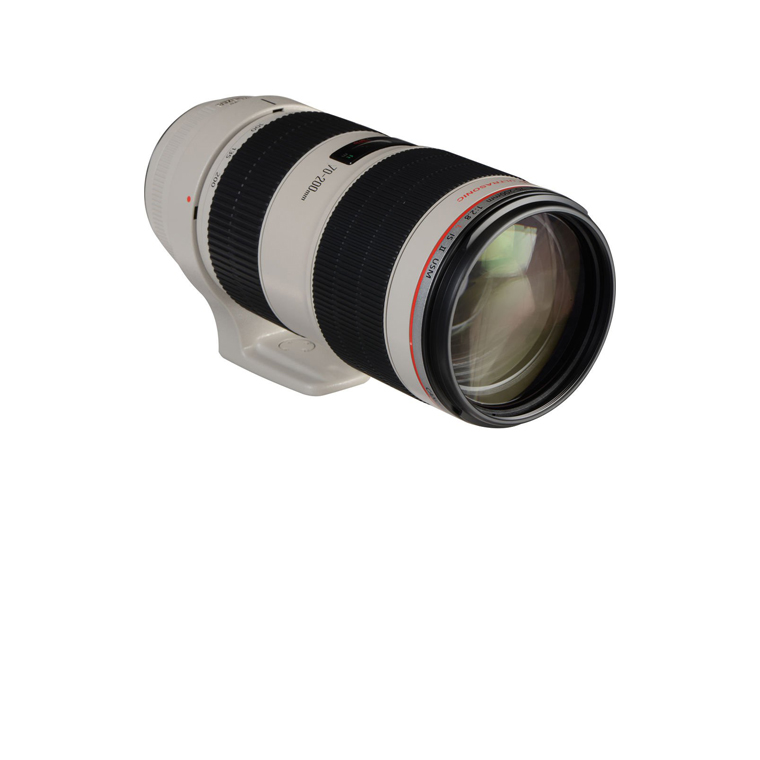
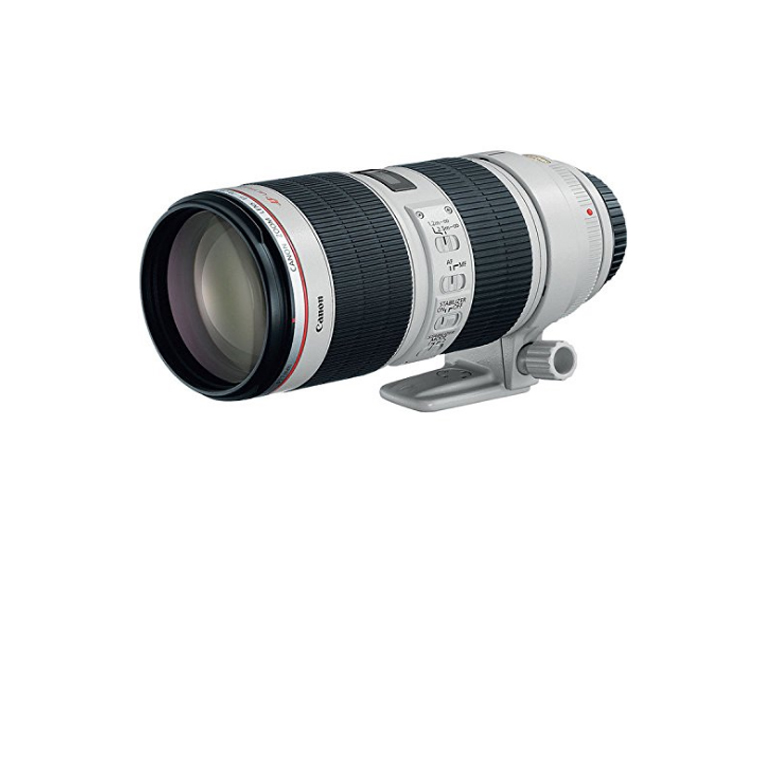
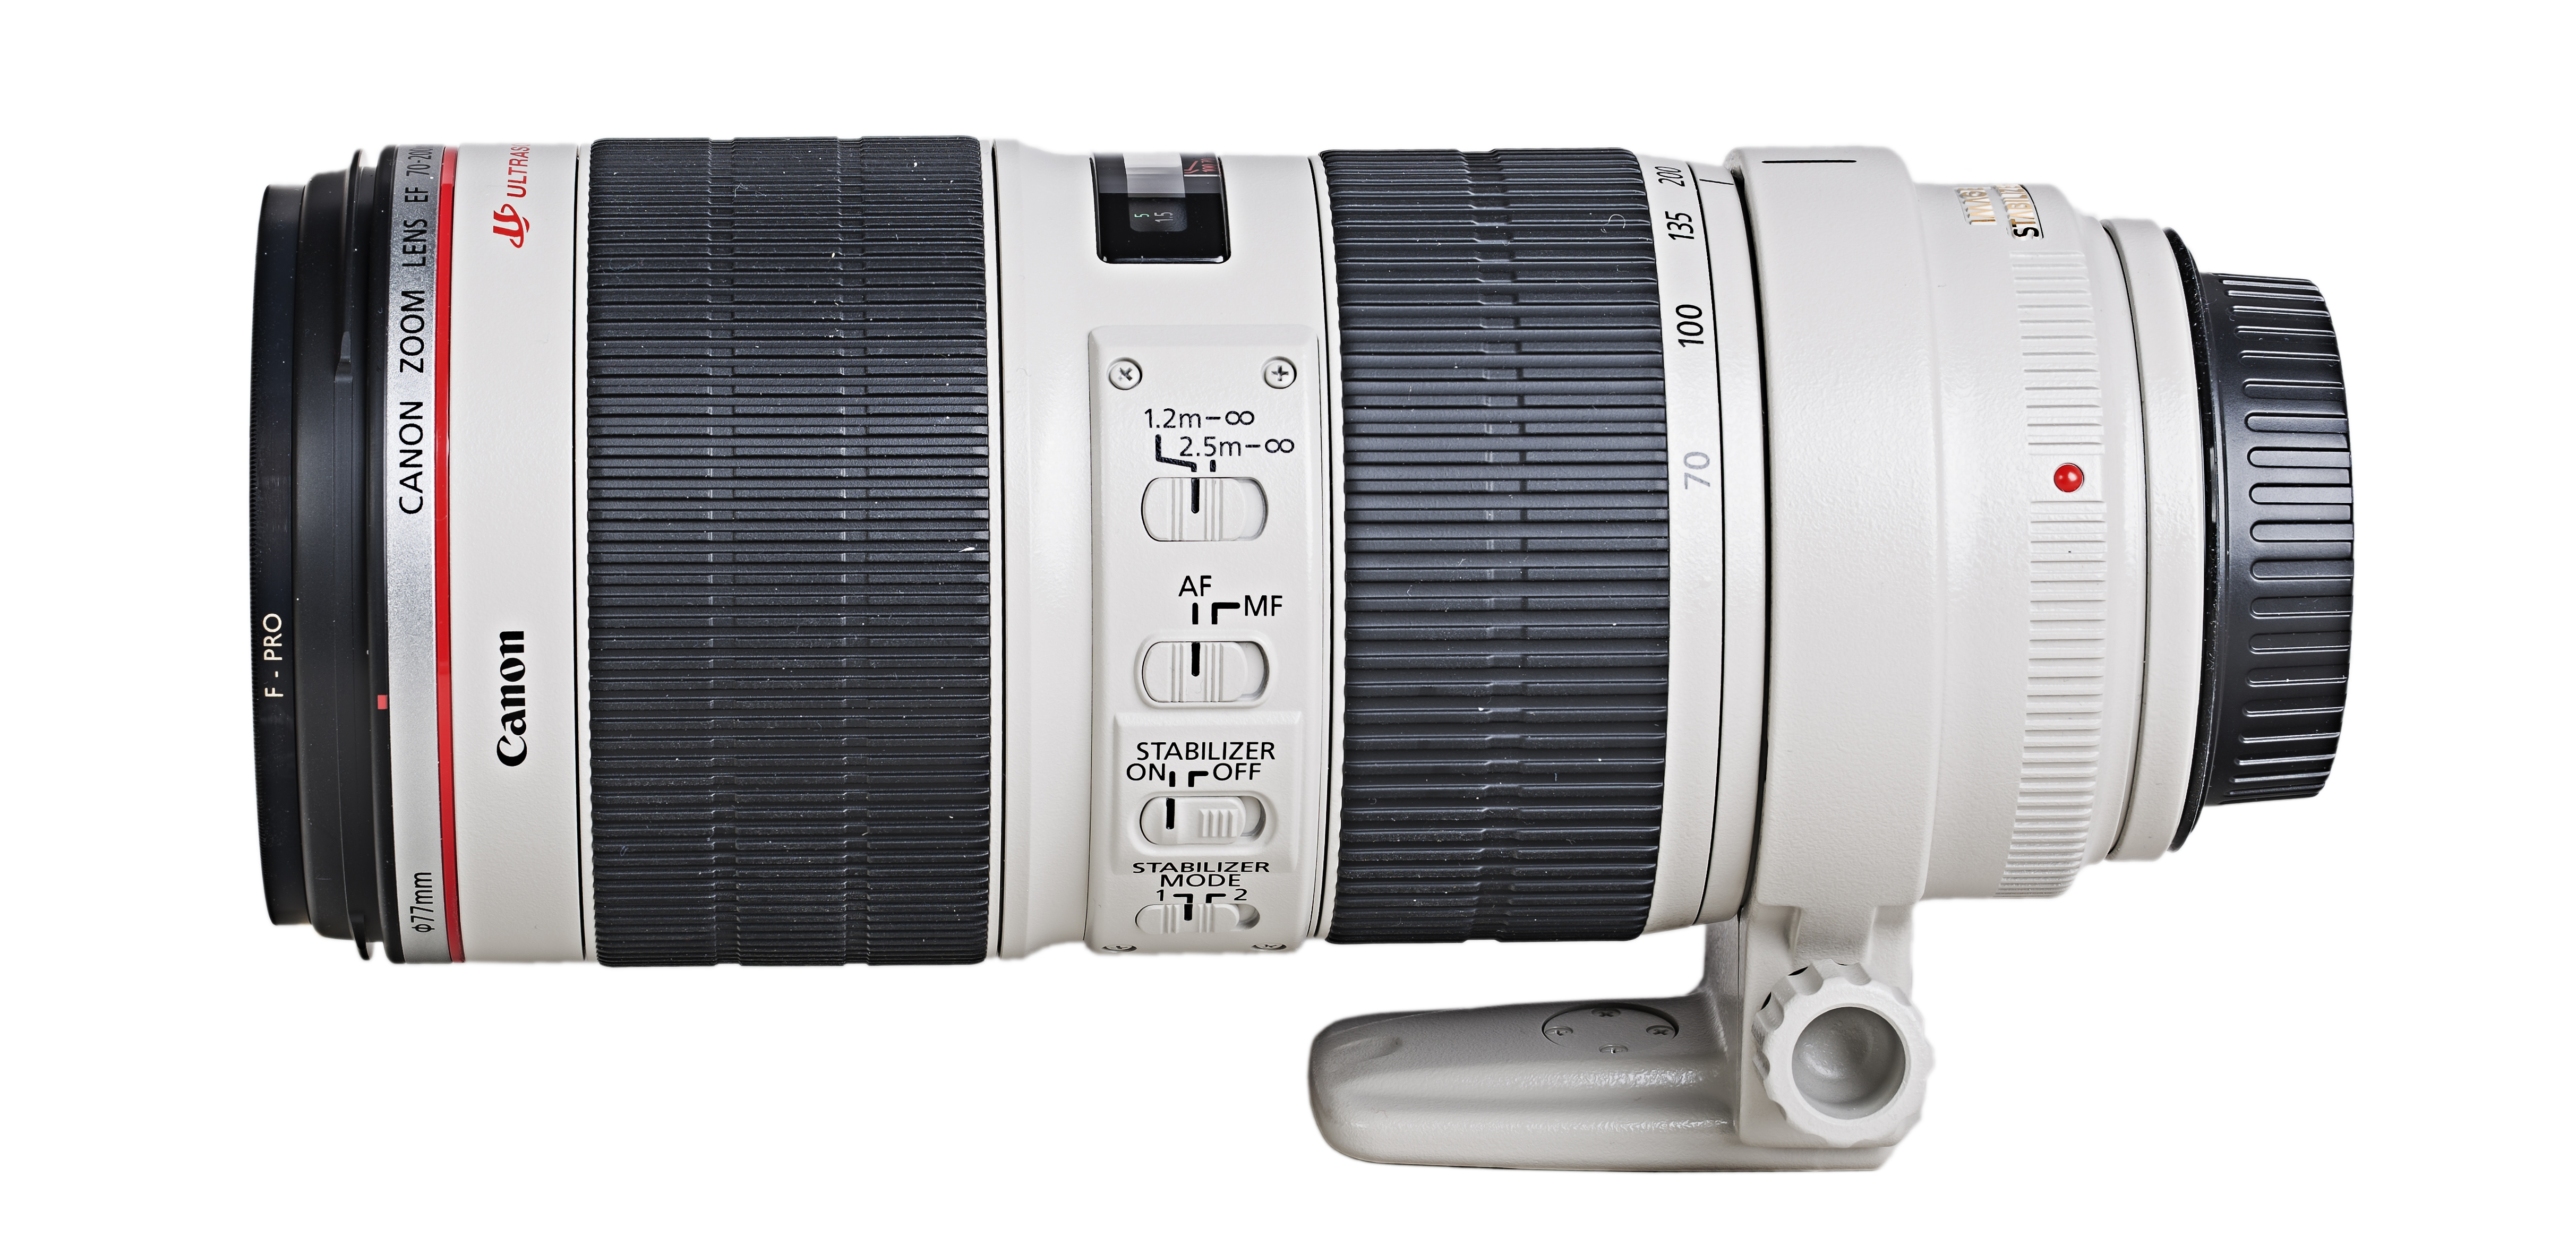
EF 70-200mm f/2.8L IS II USMGo to Amazon
This is another great lens for nature photographers, though it's very popular with sports photographers as well. Price must probably be its only downside, however it can be considered a sort of lifetime investment if you pair it with a Full-Frame camera.
Watch video review
Overall rating:
79
Lightweight:
0
20
100
Zoom Range:
0
100
100
Stabilization:
0
95
100
Focus Speed:
0
100
100
Pros
  • AF Capable
  • Optically stabilized
  • Extremely sharp lens
  • Includes hood and tripod collar
Cons
  • Heavy (Weight: 1 kg)
  • Expensive
  • Some distortion at 70mm
Click to read the full Review
The grey barrel and tripod mount are common signs that it's designed for specialty use where extreme zoom and speed is of the utmost importance, and massive size really isn't a concern.

With no less than 23 pieces of glass, this behemoth ways about 3.2 pounds and is not fun to carry. But if you need a lens like this then you're probably pretty serious about getting the shot, and you likely won't mind the extra work.

Thanks to the circular aperture of 8 sheets, it is possible to create a magnificent background bokeh effect, isolating subjects when using large aperture values.

(Sample photo courtesy of Martin Billard)

So there you have it, all the lenses you need to consider. Okay, it probably won’t hurt to look at just about every lens in Canon’s lineup if you’re so inclined, but when you get totally lost in your selection just come back here and know any of these lenses is an excellent choice.

Be sure to plan your lens purchases for the long term, not to patch a focal length range you need right now. For example, if you have no lenses at all, it may be tempting to fill out your bag right now with the EF 50mm f/1.8 STM, the EF 70-300mm f/4-5.6 IS USM and the EF-S 10-22mm f/3.5-4.5 USM for a total of about $1,225. However, if you eventually purchase an L lens you will likely make one or two of these lenses useless. Instead, it would be wise to perhaps choose the EF 135mm f/2L USM and the EF 50mm f/1.8 STM for about $1,125, then fill in the range with the EF 24-70mm f/2.8L II USM whenever you get the chance.

Whatever you choose, make sure to plan for a diverse and quality set of lenses that can last you a lifetime. Once you have the right lenses for your Canon, the rest of your gear will fall into place.

SaveSave

SaveSave

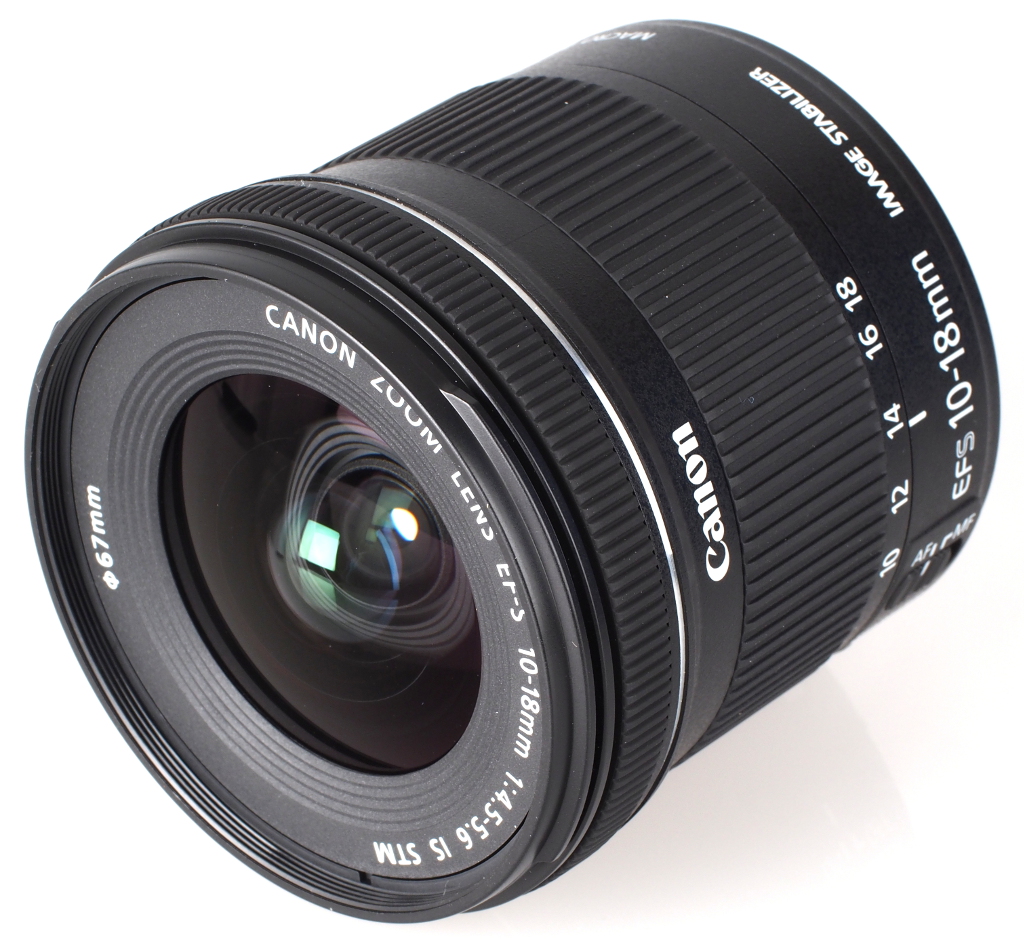
Gear review – Canon EF-S 10-18 mm

One of the main advantages of DLSR cameras over compact cameras is the ability to exchange lenses. No matter how wide the range of a zoom lens incorporated in a compact camera, the versatility that comes at hand with the possibility of choosing the lens of your preference is hard to match.

That said, apart from the obvious downside of having to carry bulky bags, lenses tend to be expensive, even more expensive than cameras. And there is no way around here. Since the price of the lens is in direct relation to the quality of the optics inside and the manufacturing process, if you want to achieve the best possible result, you will have to make important investments in your lenses.

However, from time to time, manufacturers manage to pull out incredible quality with relatively low retail prices, and that is what Canon achieved with the 10-18 mm. This wide angle lens has not-so-great aperture (probably the weakest point of all) at 4.5 – 5.6 but being fair, a wider aperture is one of the most difficult features to achieve and, given the overall quality and at a retail price of about $300 (compare this with $650 for its predecessor, the 10-22 mm), I feel there is not much to complain about.

Focusing

I am showing how outdated my lenses are here, but one of the improvements from some of my other lenses that I truly love in the 10-18 mm is the focus. First of all, by moving the focusing ring backwards, it is now much easier to get sharply focused images under specific conditions such as when using ND filters. If you ever tried to take a photo using a ND1000 filter and a lens with the focusing ring attached to the filter thread, you know what I mean. Dark ND filters do not let enough light in as to do the manual focusing with the filter on, meaning that one has to first focus and then attach the filter trying not to rotate the focusing ring in the process. By simply moving the focusing ring a few centimeters back, life became much easier than before!

sf1

In terms of auto-focus, the lens has the STM system. STM stands for stepping motor, which are a type of electronic motors capable of moving very small steps in a controlled fashion and they are very quiet. In general, if you have already used STM or USM lenses before, you might not be that surprised, but if your previous experience is with the old standard auto-focus for budget lenses such as the 18-55 mm kit lens (old version), you will be amazed. Also, even though it is not supposed to be as fast as the USM system, for normal purposes such as travel or landscape photography, the auto-focusing is pretty fast.

Focal length

But of course, if you are thinking about buying a wide angle lens, your main concern is probably the focal length. First of all, keep in mind that this is a lens that was designed for so-called APS-C sensors. The difference between full frame and crop sensors is beyond the scope of this review, but in general, a focal length of 10 mm on a crop sensor will be equivalent to a focal length of 10 x 1.6 = 16 mm in a full frame sensor, or in a 35 mm film. And, more importantly, do not try to attach a lens designed for a crop sensor to a full frame camera, or you will damage your sensor!

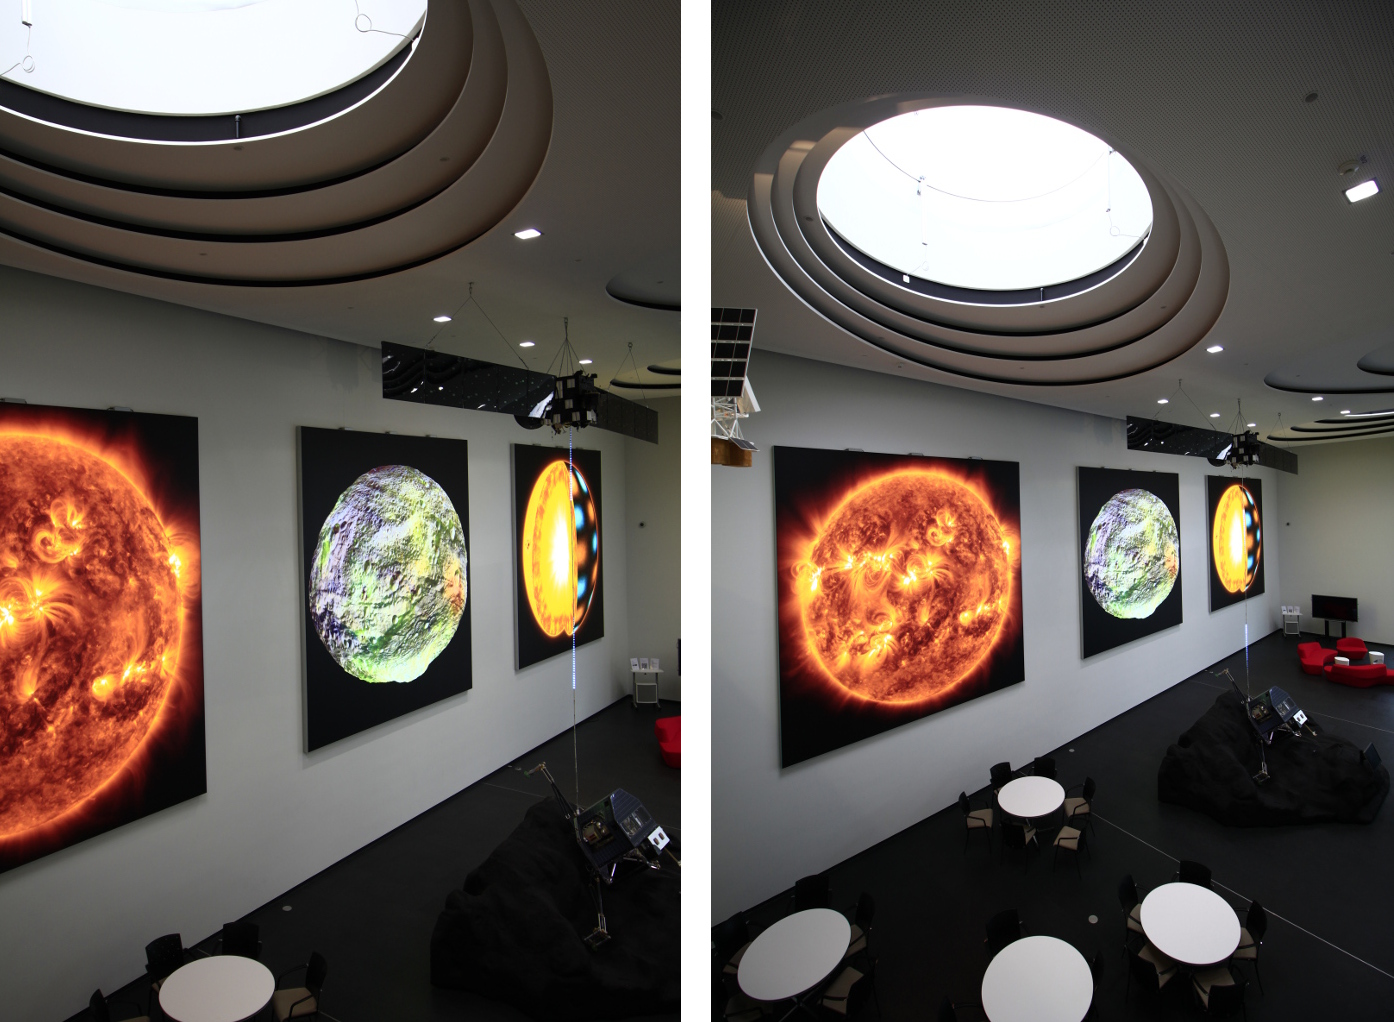
The following image shows the difference between the two extremes of the focal length (18 mm on the left and 10 mm on the right). The wide-angle provided by the 10 mm is great to capture indoor architecture shots. Notice, however, the distortion at the borders of the image, especially on the bottom left corner, where the white round table looks like an oval. This needs to be taken into account during post-processing.

18_10_mm

That said, the focal length range is a great complement to the kit lens, especially if your interest lies in travel, architecture, landscape or something more specific such as climbing photography, or any type of photography where you want to capture a subject and still be able to get a good portion of background on your frame.

Distortion

Something inevitable when dealing with wide angle lenses is the optical distortion. This is a consequence of how light rays are guided through the lens towards the camera sensor/film and, even though a careful manufacture can help in that sense, completely getting rid of it is an impossible task.

sf2

The 10-18 mm lens does a pretty decent job in this sense as well. Also, thanks to the many options for post-processing readily available nowadays, getting rid of the remaining distortion is an easy task. Still, the fact that some distortion will be present is something that you should keep in mind when taking photos with any wide angle lens so that you can plan your composition so that when you post-process your images no important information is lost.

Overall construction

Apart from some useful features such as having the focusing ring detached from the filter thread, the lens feels quite robust. Being part of the cheapest line of Canon lenses, the 10-18 mm is mainly constructed of plastic which can make it less resistant in the long term, but at the same time, it allowed Canon to build a very lightweight lens that makes it really easy to carry around.

Summary

In general, I would say that, even though the 10-22 mm is a faster lens than the 10-18 mm, for those amateur photographers that are either on a budget or just starting out and willing to try out different focal lengths without having to get a hole in the bank account, the 10-18 mm is definitely a great choice as a second lens.

SaveSave

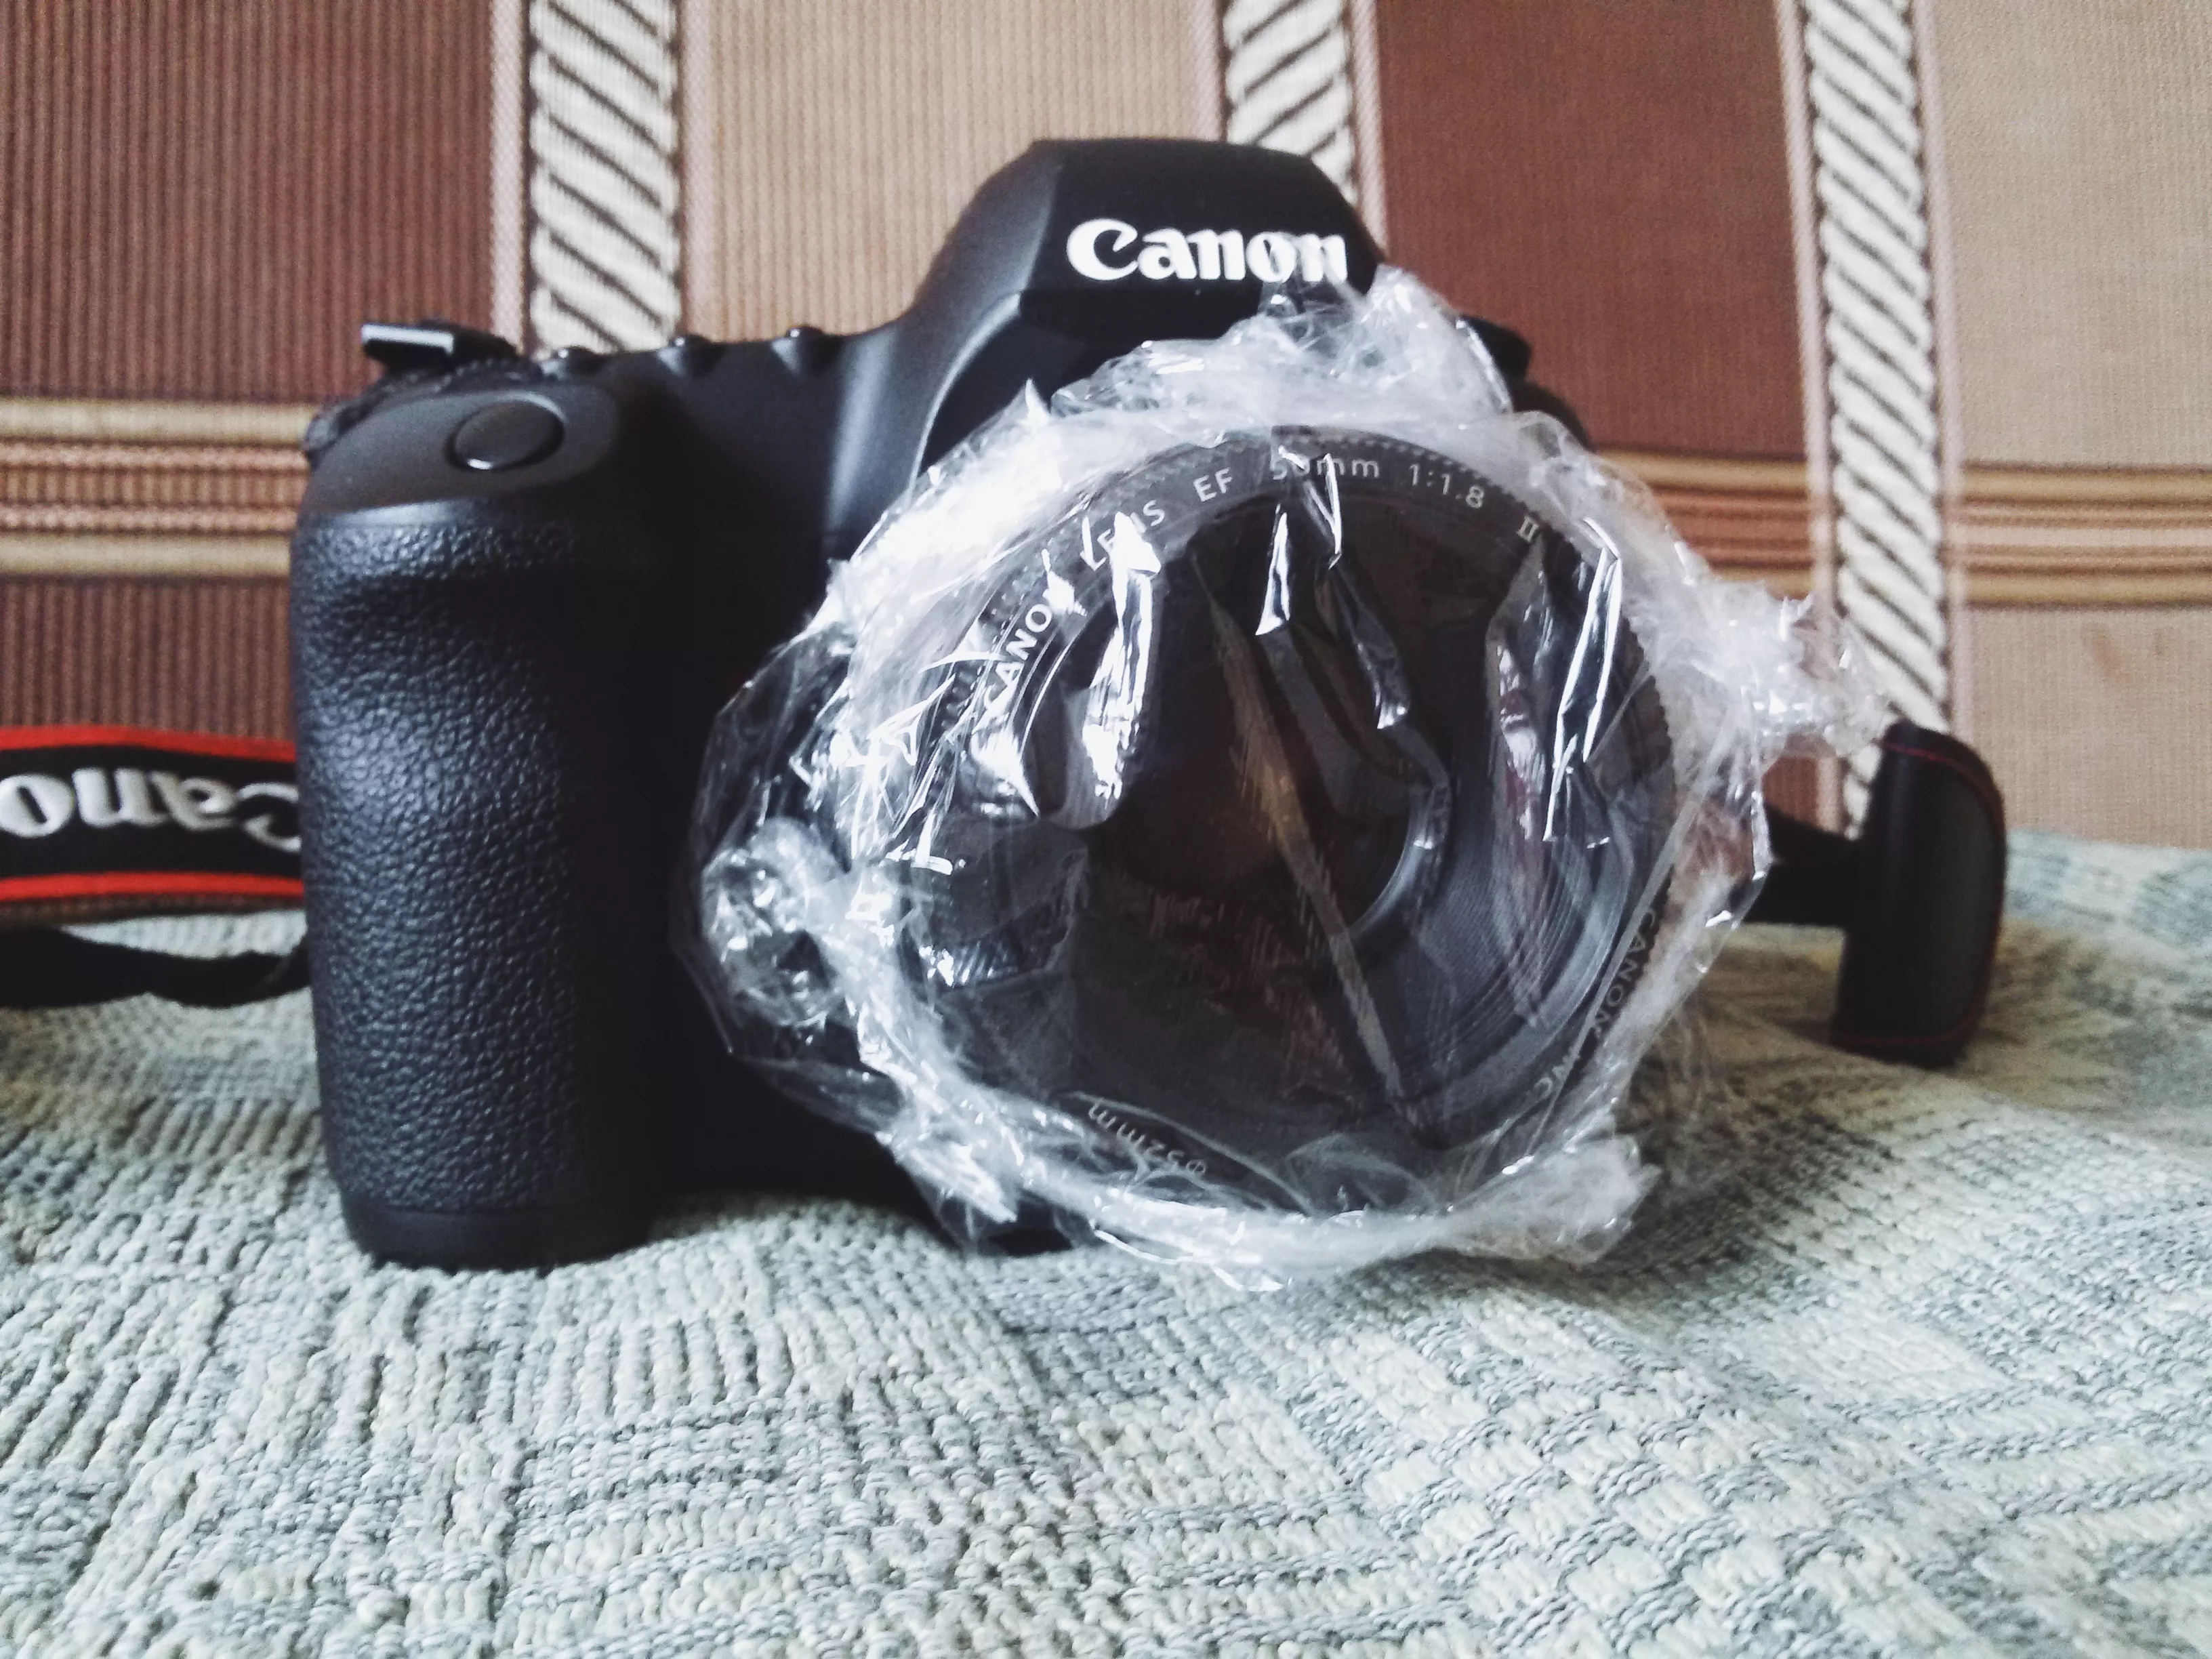
How to take enchanting photos using cellophane

It’s a given that professional photography equipment enhances every artist’s workflow and is an absolute joy to work with. However, professional tools aren’t the only things that can help you become a better photo-taker. There are many unlikely things in our homes which have the potential to add an extra touch of creativity to our work. Some obvious things, like lamps and mirrors, are often used by creatives because of their interesting ways of either creating or reflecting light. Other things, though occasionally used by artists, aren’t as popular. One of these handy little photo instruments can be found in almost every person’s kitchen: cellophane.

You might be wondering how cellophane, a transparent sheet mostly used for the preservation of food, can be used in the world of photography. You may have noticed that despite the sheet’s transparency, it can quickly become opaque when crumpled up. This haziness is ideal for the creation of enchanting photographs of all types. Whether you’re photographing animals, people, or something entirely different, cellophane can help you experiment with textures and clarity. This experimentation will compel your mind to absorb new ways of thinking creatively. In turn, these innovative ways of thinking will allow you to become a better, more observant, and more open-minded photographer with a bountiful supply of initiative.

Cellophane can be used in limitless ways, depending on your imagination. Though the following tips will help you look at photography from a creatively peculiar point of view, don’t stop there. Let these ideas be the foundation for even more fascinating and striking ideas.

/

//

Using cellophane to take photographs with blurred edges

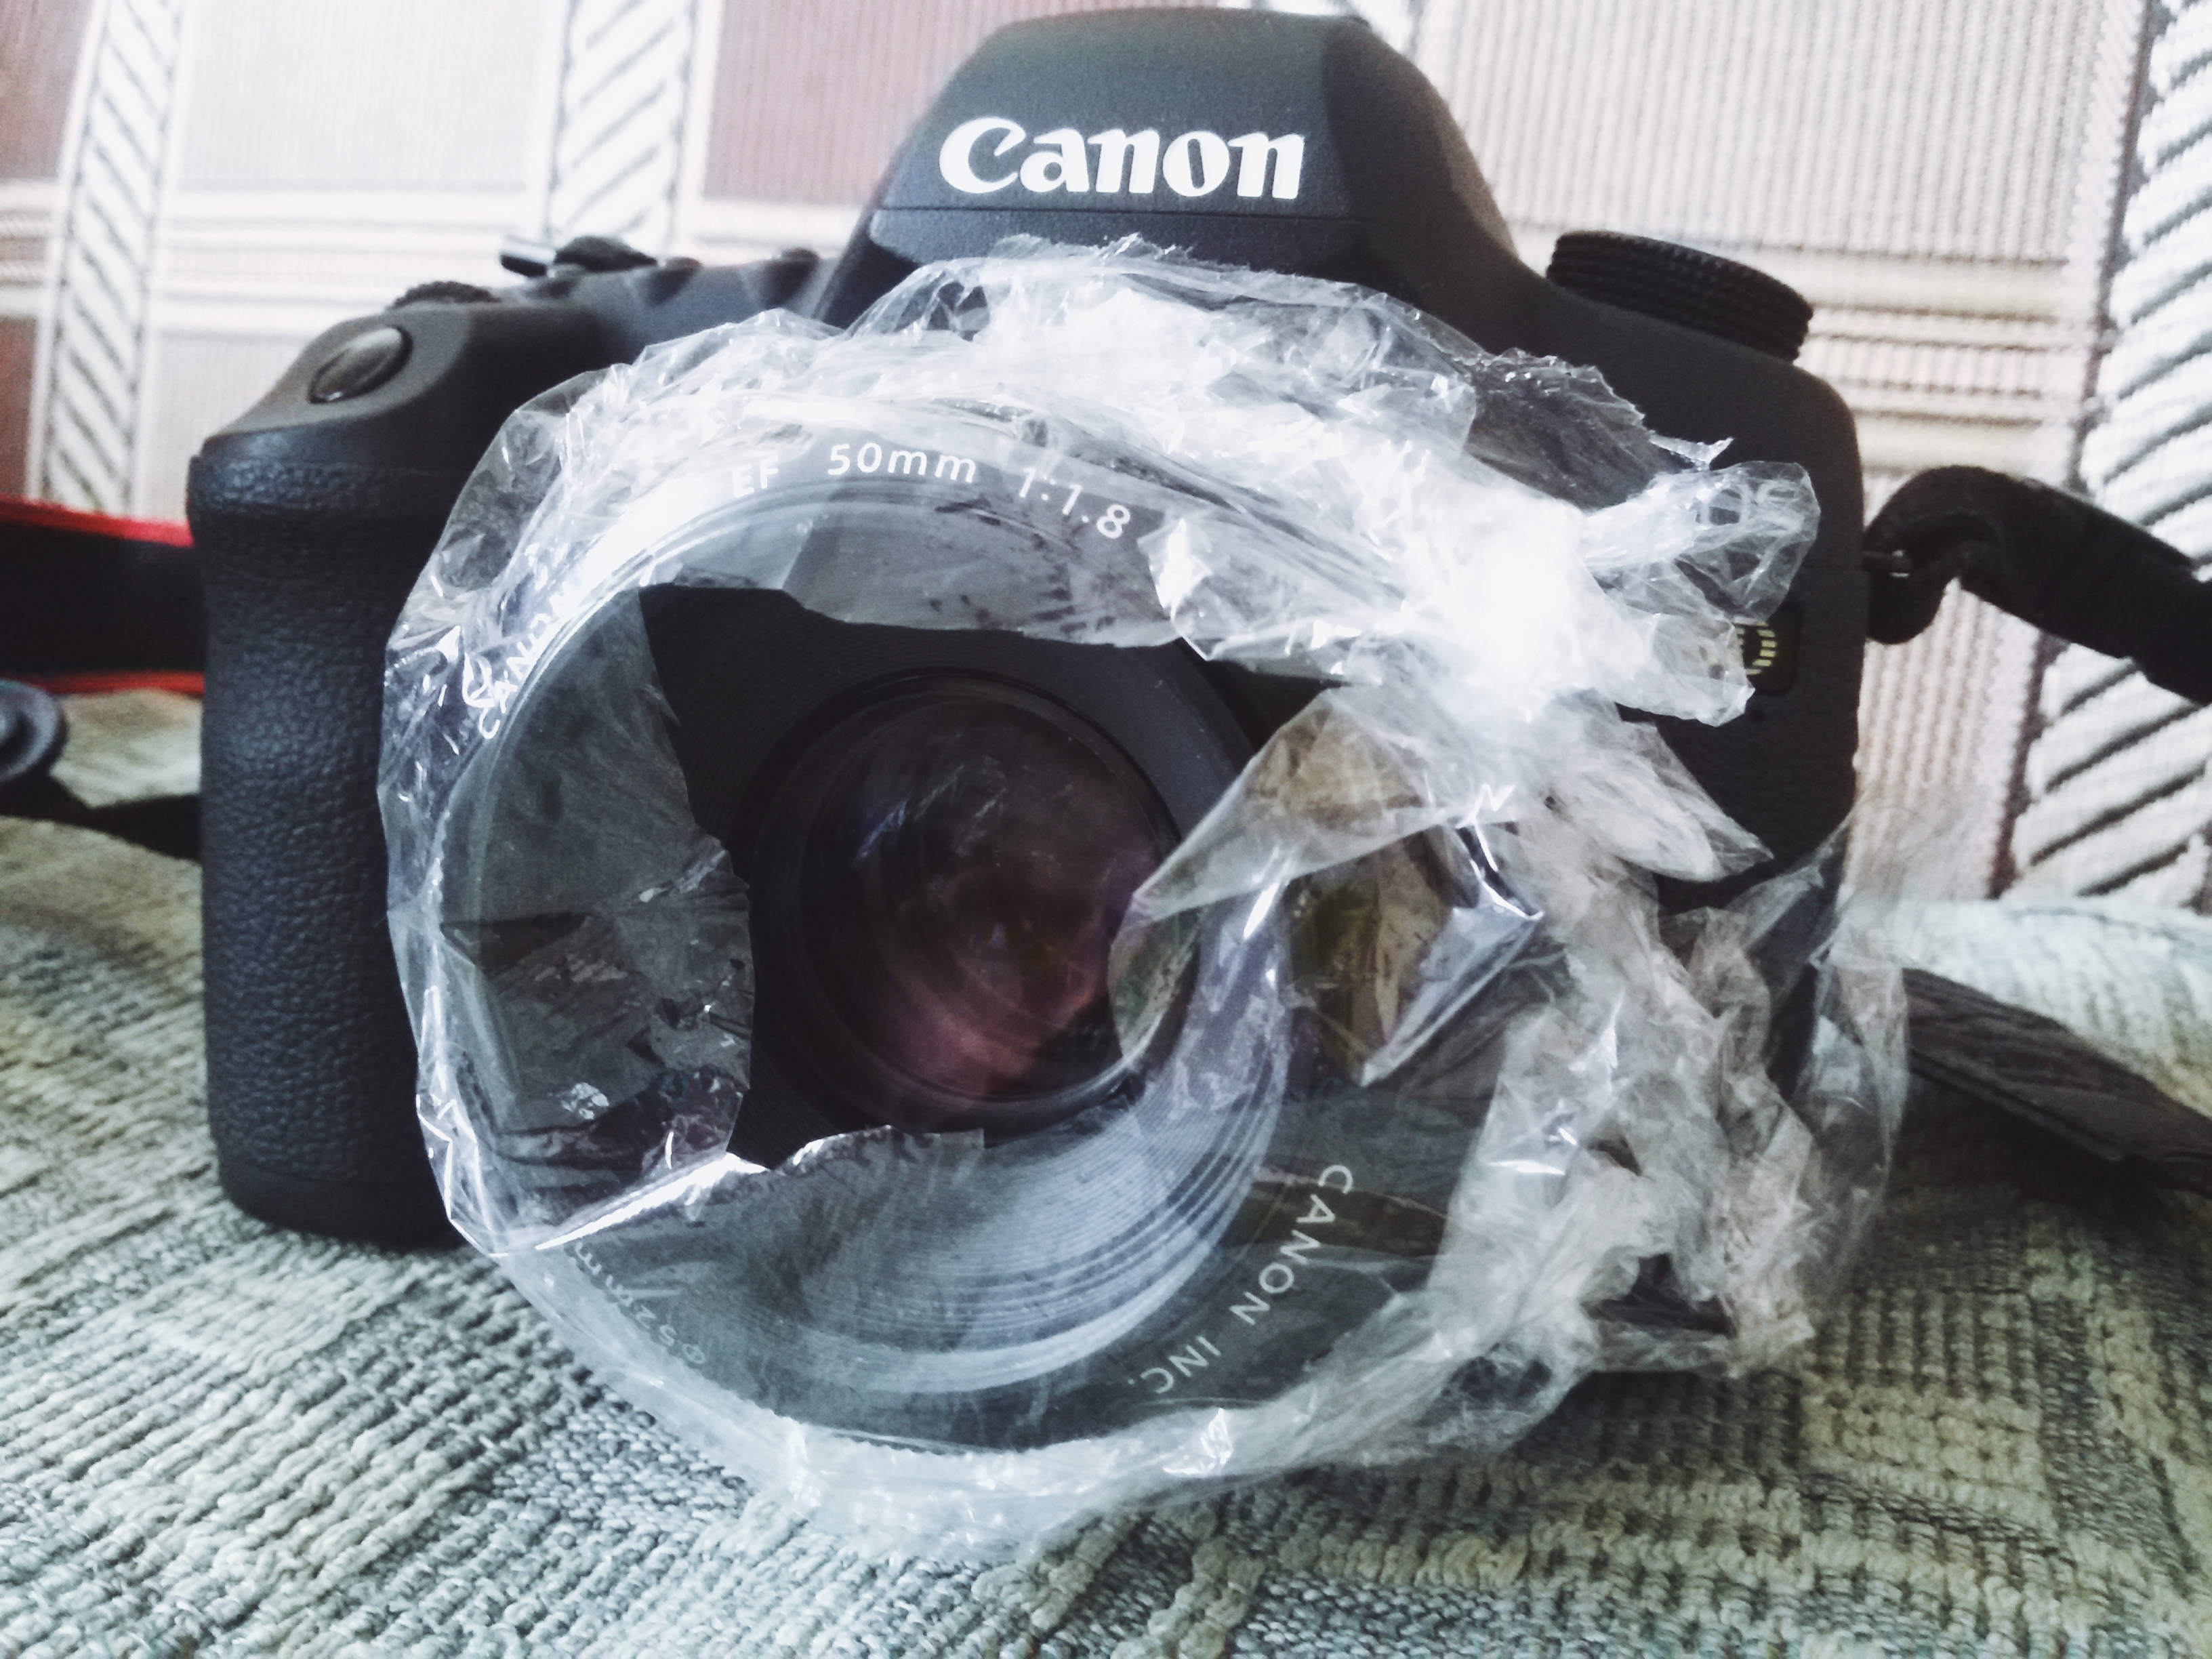
If you want your images to be sharp with a vignette of blurriness, cut your cellophane into a square that’s a little larger than your camera lens. Afterward, proceed to cut a hole in the center of the square – its size depends on how unclear you want the edges to be. The smaller the cut in the center, the blurrier your image will appear and the more challenging it will be to get sharp results. Once you’re happy with the results, wrap the cellophane square around your lens, making sure that the cut-out hole is placed roughly at the center of the lens.

/

Something to keep in mind is that it might be difficult to focus your lens manually due to the tightly wrapped cellophane. To make focusing easier, don’t wrap the cellophane square around your entire lens and leave some space for your fingers to change the focus. Though using tape is optional, it could prevent the cellophane from constantly falling off. Remember that it doesn’t have to be perfect or visually appealing since the effect itself is the most important part.

Using cellophane to take unclear yet dreamy photographs

To create photographs that are beautifully textured yet slightly unclear, cover your lens with cellophane in the same way as the previous method, but without the cut-out hole. Again, wrap it in such a way that will give you the opportunity to manually focus your lens. If you use auto-focus, loosely wrap the cellophane around your lens to give it enough space to find the right sharpness. The effect will make your photographs look like they were taken straight out of a dream. A certain level of sharpness will remain, though everything will be covered in a pleasant layer of cellophane fog.

/

If you want to be even more creative, combine freelensing with cellophane. This will result in unique and charming photographs. For more interesting results, crumple up the cellophane before using it. Adding textures to editing programs like Photoshop will further enhance your shots. If you use Lightroom, make sure to apply your favorite preset for even more stunning results. Using all of these tools and features will transform your images into works of art you’re proud of.

/ This portrait is a combination of cellophane, free textures, and a Lightroom preset.

The beauty of cellophane is its unpredictability. For photographers who are interested in experimenting creatively, this is an exciting chance to grow and to learn new things. No matter what genre of photography you cherish most, use cellophane during one of your shoots. The results might surprise you, teach you new things, or show you a completely new way of looking at photography. Whatever happens, you will be closer to becoming a more experimental and open-minded photographer.

Happy shooting!

//

A Short Guide To Different Camera Lenses

No matter how good compact cameras or smartphones get, there is one aspect in which they will never be able to overcome DSLRs (and, more recently, so-called system cameras): the ability to exchange lenses. While some people tend to argue that having a single large zoom on a compact camera is an advantage due to the portability it can provide, the truth is that the picture quality that can be achieved with a good lens specifically designed for a given type of photography is hard, if not impossible, to overcome.

lenses00

I take that, if you are reading this article, you most probably have a DSLR camera and you are either puzzled by what lens you should buy next or at least you are familiar with the feeling. Most photography enthusiasts first go out and buy a camera and only after some time taking photos they find out what type of photography they enjoy the most and only then start thinking about going beyond the kit lens. So let’s look at the different types of lenses out there and what their uses are.

One thing to keep in mind all the time is that, due to the crop factor, the focal lengths of different camera lenses will vary depending on whether the lens is intended to be used on a crop sensor o on a full frame camera. You must be very careful with this because not all the lenses on the market will work with your camera and, even more important, trying to fit some lenses to full frame cameras might actually damage it.

Different Types of Camera Lenses Guide

Kit lenses

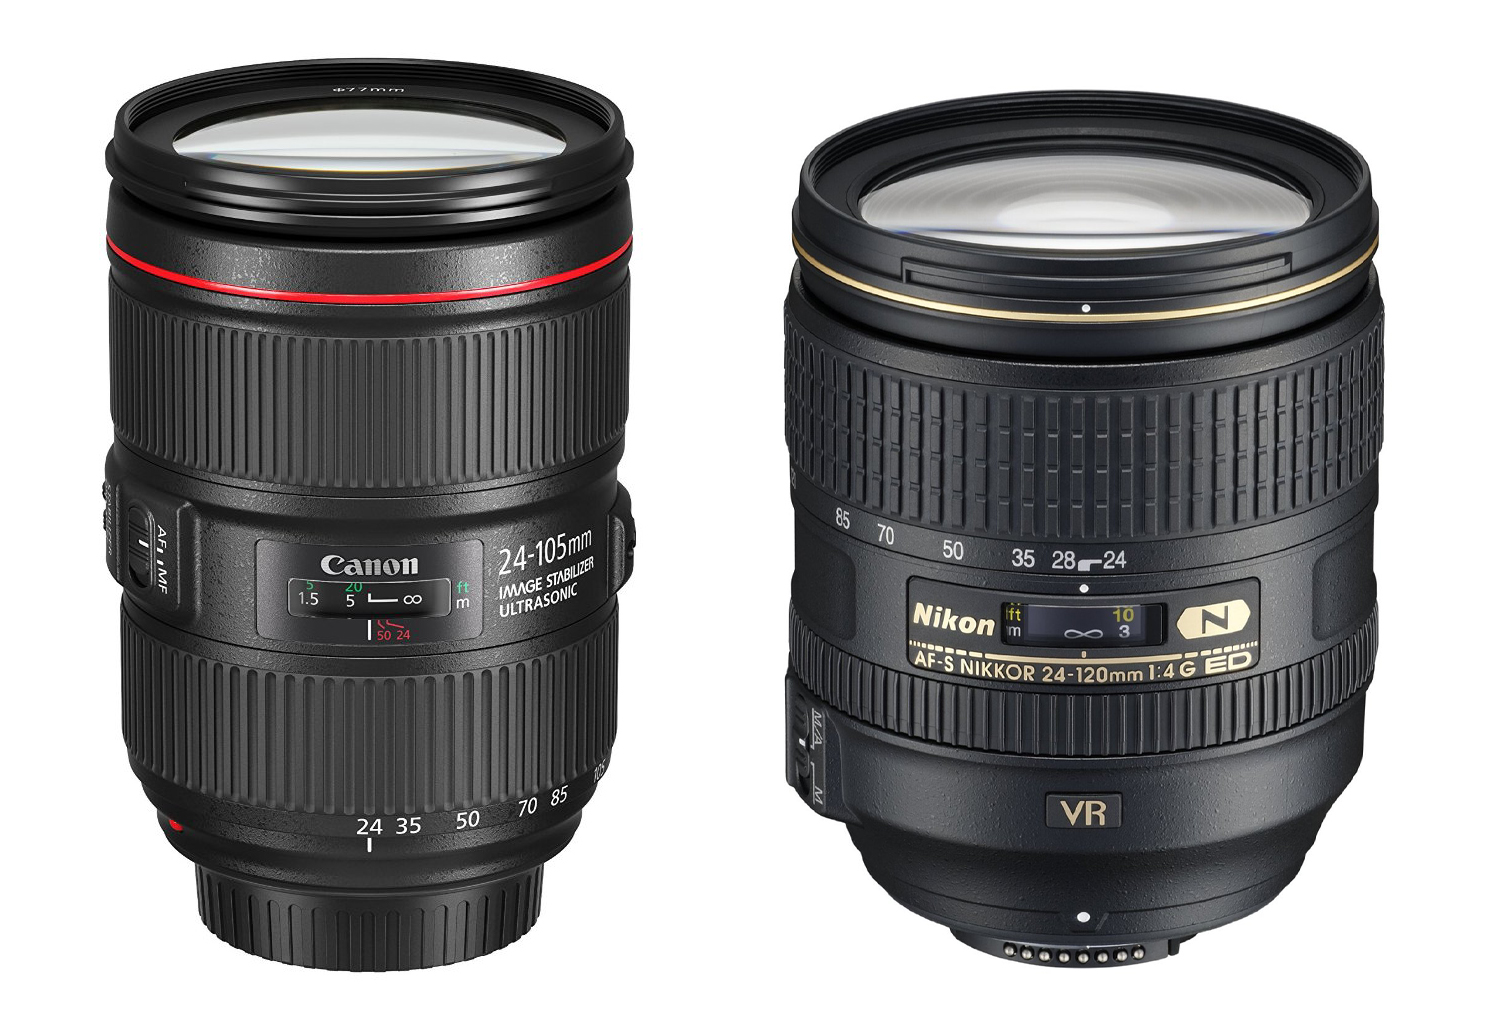
While this cannot really be a category on its own, I simply put it here to talk a bit about their capabilities and limitations. Kit lenses are basically those that manufacturers sell together with camera bodies. For most cameras, it is possible to buy either just the body or the body with one of those kit lenses. Usually, the quality of the kit lens depends on the quality of the camera, with full frame cameras offering the high quality option (like the EF 24-105mm f/4L IS II USM that comes with the Canon EOS 5D Mark IV or the 24-120mm f/4G ED VR Auto Focus-S that comes with the Nikon D-750). For most of the entry-level and mid-range cameras, while the quality of the kit lenses has improved with time, they are a good option for a limited amount of time and rather sooner than later you will feel the need for an upgrade.

lenses01

One of the most useful ways to look at the different lenses that are available on the market is by their focal length. These can be divided into five categories: fisheye, wide angle, mid-range, zoom, and telephoto. Different people use some of these terms differently, but I will clarify what I mean with each category further on.

Fisheye

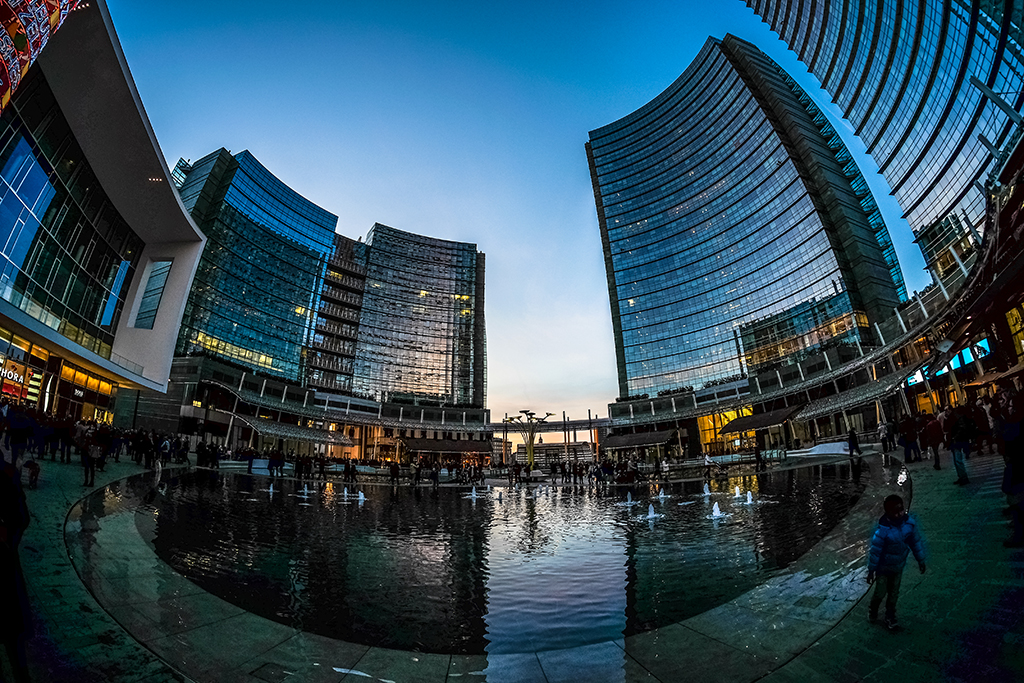
If you think of the available focal lengths as a continuum from short to long, fisheye lenses are located on the short end. They have focal lengths around 10 mm or less and can have a range of focal lengths (e.g. Canon EF 8-15mm f/4L Fisheye USM) or a fixed one (e.g. Nikon AF DX Nikkor 10.5mm f/2.8G ED). The short focal length is not the only special thing about fisheye lenses, though. The construction of the lens differs from normal wide angle lenses allowing them to provide fields of view close to 180 degrees producing highly distorted images.

They are commonly used in some specific applications such as all-sky cameras (used to study meteorological phenomena such as clouds or auroras monitoring) and can provide an interesting point of view for other types of photography such as landscapes or cityscapes. Unless you are really fascinated by how things look with the strong distortion created by these lenses, I would not recommend this as the first one to get after your kit lens.

lenses02

Wide angle lenses

With focal lengths a bit longer than fisheye lenses, wide angles are one of the most useful (and many times forgotten) objectives out there, especially if landscape and travel photography is what moves you. Wide angle lenses are built to minimize visual distortions and even though getting rid of the distortion completely is virtually impossible, the good ones do a pretty good job.

The main advantage of wide angle lenses is that they let you get closer to your subject while still covering most of it and a good part of the background. This makes them ideal for some types of photography such as sports, travel, and landscape photography. For instance, if you think of the latter, a common reason for landscape photos to come out rather dull when compared to what we saw is the lack of a main subject located relatively close to the camera. The use of a wide-angle lens gives you countless opportunities since you can simply get close to something like a flower or a rock and still capture the beauty of the background. The same can be said for travel or architecture photography.

lenses03

The price range of wide angle lenses vary significantly depending on what you choose. An amazing choice for those using Canon (although only for crop sensor cameras) is the relatively new Canon EF-S 10-18mm f/4.5-5.6 IS STM that provides great results with minimal distortion and at an incredibly affordable price. A Nikon alternative, although more expensive, is the Nikon AF-S DX NIKKOR 10-24mm f/3.5-4.5G ED.

Mid-range

By mid-range I mean lenses that are located, in terms of focal length, between wide-angle and telephoto objectives. Some of these, like the kit lenses that come with entry-level DSLRs (Canon EF-S 18-55mm f/3.5-5.6 IS II or NIKKOR 18-55mm f/3.5-5.6G VR II), are sold like all-purpose lenses and there is some truth on that. While the quality of these lenses is not the best, they are a good option to start making photos with. The wide end (18mm) is wide enough to allow you to capture many wide scenes like landscapes and the narrow end (55mm) is good enough for getting closer to some subjects, especially for taking portraits and some studio setups. The big limitation of these lenses is usually the aperture which is 5.6 at the narrow end, producing rather dark and dull results in some cases due to the deep depth of field.

If your main interest lies in portrait photography, this mid-range is in fact a good place to stay and there are many good options in the market with a wide range of prices. Canon offers three different options for fixed 50mm lenses which are perfect for portraits: the famous and affordable EF 50mm f/1.8 STM, the mid-priced EF 50mm f/1.4 USM and the expensive Canon EF 50mm f/1.2 L USM. Nikon has similar options with the AF FX NIKKOR 50mm f/1.8D and the AF-S FX NIKKOR 50mm f/1.4G. The magic of these lenses lies on their small size and the incredible depth of field, even with the cheaper options producing great portraits.

lenses04

If you are working with a full frame camera, your best choice for portraits is to get an 85mm which is almost equivalent to 50mm on crop sensor cameras. As I mentioned before, be aware of the compatibility of any lens you plan to buy with your camera to avoid unpleasant surprises. Also, if you are considering switching from crop sensor to full frame, be aware that the camera is not the only thing that will get considerably more expensive; lenses will also become more pricey.

Zoom & Telephoto

While these two terms are sometimes used without any discrimination between them, they tend to be related but are not the same. A zoom lens is any lens with a variable focal length while a telephoto is a lens with a large focal length (usually around 90mm and above). I decided to put them into the same category here because, while some of the objectives mentioned before (10-18mm or 18-55mm) are zoom lenses, the term is commonly associated with those really large and bulky ones that you can see when press people are taking photos at a stadium.

Once again, the price range here is huge. For Canon, you can get a good zoom range with the EF 75-300mm f/4-5.6 III. Once again, the issue with this lens is the aperture (5.6 at 300mm) although the truth is that to get a good aperture at telephoto ranges you might have to pay more than you are ready to like for instance the EF 400mm f/2.8L IS USM II. The construction of the lens, especially in the case of zoom lenses, to get large focal lengths and apertures is very complex and that is definitely reflected in the retail price.

In terms of use, telephoto lenses (both fixed focal length and zoom) are perfect for wildlife, street and sports photography. When capturing wildlife, it is usually difficult to get close enough to your subject before they run off scared or before your own life is at risk. Street photography is based on capturing everyday life of people on the street and, unless you want to get an angry stare or a fake pose, you need to stay unnoticed and thus a large focal length is necessary. Finally, to shoot sports events you will usually be located quite far from your subjects (like for instance a football player on a stadium).

lenses05

A good focal length to start with is 250 or 300mm. The already mentioned EF 75-300mm is quite affordable and will allow you to get close enough to some animals, although probably not enough to fill the frame if the animals are particularly afraid of people. A big problem with the cheapest options like the 75-300 is that they do not have image stabilization, meaning that when shooting at 300mm you will need to either shoot under very sunny conditions or shoot at very high ISO numbers which can produce very noisy results depending on your camera and how much you push it. Still, given the price, if you are simply exploring different aspects of photography, I would say is worth giving it a try.

If what moves you is sports photography, you will need a larger focal length and, more importantly, a faster lens. Here you are getting into the realm of really expensive gear (we are talking about usually more than $7000 for a lens) so this is most commonly reserved for professionals who are actually making money out of it. Still, if you can afford it, having something like the Canon EF 200-400mm f/4L IS USM Extender 1.4x (that is f/4 over the whole range!) can work miracles on your sports and wildlife photography.

There is another type of lens that, due to its intended use, falls into a completely different category that is independent of the focal length. I am talking about macro lenses. These lenses are intended to take photos of small subjects and people have gotten to the point of adapting microscope lenses to DSLR cameras to get amazing results. I will not go into details, however, because describing macro lenses and how to work with them would require a full post and I prefer to leave that for experts on the field.

I want to finish with a small list summarizing the types of lenses that I went through and their uses so you can use it as a quick guide to decided what to buy next.

  • Fisheye: lenses with small focal length (usually less than 10mm). Somewhat useful for architecture photography, but only if you are actually looking to create a heavily distorted image.
  • Wide angle: the perfect option for landscape, travel and architecture photography (both indoors and outdoors). Sometimes over-looked, this is a great second lens unless you are really motivated by street portraits, street, wildlife or sports photography.
  • Mid-range: your best choice if your main interest lies in studio and portrait photography. Pay special attention to the aperture. In general, anything with at least 2.8 is going to produce nice results.
  • Telephoto: if you are mostly interested in subjects that you cannot get closer to (wildlife, people on the street or sports events), getting something with a focal length of at least 250mm is your best shot. If you are only starting, think about buying on of the most affordable options in the market, although be ready to spend significant amounts of money if you want to upgrade your gear later on.

70-200mm Lens – How to Avoid Blurring?

It’s very common among the professional Canon users to grab our 70-200mm lens for indoor as well as for outdoor shoots. The lens is one of the top choices for portraits and product photography due to its versatility and interesting zoom range.

Lens Overview

Speaking of this versatile and powerful Canon lens, we can start to say that it was launched in 2010 as an update of the EF 70 – 200 mm F2.8 L IS USM from 2001. With a gap of 9 years and considering the advances in the technology of DSLR cameras, Canon redesigns this powerhouse by improving both the stabilization and optics, as well as autofocus and its design.

Optics consists of 23 elements in 19 groups, including more than 5 of them with the Ultra-Low Dispersion technology (UD), plus one with Fluorite Coating. The reason? Reducing the Chromatic Aberration of the lens.

Canon_Zoom-Lens_EF_70-200_F2.8L_IS_II_USM-01a_

Built-in metal, we are not talking about a light lens; however, it compensates for the weight with its excellent image quality and enhanced protection in regards to dust that can enter our camera, in addition to being weather sealed.

The Autofocus motor belongs to the technology of Canon Ultrasonic Motor (USM), being extremely agile while maintaining a silent profile.

27358305815_713c7db69e_k

Photo courtesy of Eric Schaffer

The price is something to consider in this lens since we are talking about high-end equipment for what should not amaze us that its initial price is higher than $1500.

The only difficulty that photographers face while using the lens is its weight. A Canon 70-200mm [ f 2.8 IS II ] lens weighs approximately 1600 gms. So, this lens when mounted on a full-frame camera like Canon 5D Mark III weighs almost 2.5 kilograms.

When weight matters

So, how do you take a sharp photograph while holding so much weight in your hand? You might use a tripod to bring in the extra support, balance, and stability. But do tripods work during all circumstances? Not really. How far does ‘Image Stabilisation’ in your lens, help? Not very much. True, it provides the minor stabilization features that you need and but that’s not all.

canon-ef-70-200mm-f-2-8l-is-ii-usm-lens

The way you hold your lens plays a major role. It can sometimes be the ‘break-it’ or ‘make-it’ factor for your photographs.

We are assuming here that you will be using the kit (Canon 5D MK III + Canon 70-200mm f/2.8L IS II lens) handheld and not by tripod mounted. The first thing to do is to rotate the tripod collar from the bottom side of the lens(while mounted with the camera) towards the top side. This way, the tripod collar won’t obtrude and disturb your grip with the lens.

Kindly note: Indoor shoots are tripod-mounted most of the time. So this article may not be applicable to you. But for those who shoot by hand-held devices, this article might be helpful.

A quick but effective solution

So, like I mentioned earlier, the way you hold the lens while shooting may affect your photograph, for good or for worse. Most of the time, we tend to hold the lens somewhere on its collar ( really close to the body of the camera). I used to do this too in my earlier days as a photographer. This helps us control the zoom ring better while composing the photograph. True, but it also indirectly affects the balance in your focus. This sometimes results in blurred images and lesser sharpness. This is because of improper positioning of your palm by the lens. By supporting the lens at the collar location by your palm you are letting more weight towards the front side of the lens which leads to improper balance and with blurred photographs.photographer-1191562_1920This can be overcome by slightly shifting your palm position towards the front side of the lens, which means you need to place your palm almost on the zoom ring. As soon as you shift your palm towards the front end of the lens, you immediately feel the perfect balance of weight while holding. But this situation restricts the zooming ability immediately before you press the shutter button. You have to be prepared in advance, as you cannot zoom as you used to before. Get your frame right, compose what you need and then click away!27010607034_afe1fb94d0_k

Photo courtesy of Pengcheng Pi

We hope this article helped ease your discomfort while shooting using the 70-200mm lens.

Please leave your comments below and let us know about your experience. 🙂

Header photo courtesy of Francesca Pippi

3 Rules for Budgeting Your Photography Gear

So, you’re either looking to get into photography or you’re looking to upgrade your equipment. Or you’re like me and you’re a little obsessed with scouting out the gear you want to get but will probably never pull the trigger and actually buy it. Fair enough.

Whether you’re an Instagram loving amateur looking to bump the quality of your posts or a seasoned fashion photographer who needs the latest gear to keep up with the crowd, there are some basic rules to budgeting your photography purchases. The guidelines below will help you get the most bang for your buck.

Copyright An Mai
Copyright An Mai

1. Actually have a budget (or two)

Regardless of your situation, you’re gonna need a budget (even if it’s a hypothetical one). It’s all too easy to purchase one camera and get roped into buying tons of supporting gear to match your fancy new shooter, and before you know it you’ve sunk thousand of dollars that you didn’t want to spend into your setup. Do not do this. Instead, come up with two numbers, one that is the best case scenario low budget you’d love to get away with, and the other being the high budget total that you’d still be comfortable spending on all of your gear, then aim for the low one and you’ll probably end up at the high one.

Depending on your situation and photographic needs, your numbers will probably range anywhere between $500 to $10,000 or more, only you can figure that out for yourself. But keep in mind that the gear doesn’t make the image, the photographer does. No camera and lens, no matter how expensive, will make you a good photographer, and the best photographers can make amazing photos using just about anything.

Copyright Peter Zuco

 2. Keep what you can

If you’ve already invested $3,000 in Canon lenses, don’t switch to Nikon. This should be obvious but many people jump to whichever system has the best looking gear at the moment and completely abandon the often significant financial investment they’ve already made in another system. But guess what, no camera company makes anything significantly better than all the other camera companies. Every camera on the market takes good photos, some take great photos, basically none of them take mediocre photos. The difference between a $400 camera and a $4,000 camera is minuscule at best, and the difference between Sony’s latest offering and Panasonic’s best gear is even less significant. You are far better off keeping your budget down by utilizing as much of your current gear as you can than selling it for a loss just to get into a different (but rarely better) camera system.

If you don’t have any gear yet, then this rule is even more important for you. THINK LONG TERM. For all the reasons listed above, whatever photo equipment you get first will likely decide what type of equipment you buy from then on. So if you buy a Canon Rebel body and a couple Canon lenses right now (a great long-term choice) then you probably won’t want to buy a Fujifilm camera next because then your Canon lenses will be useless (don’t expect to rely on converters). Before you know it, you’re entirely entrenched in the Canon system and it will cost thousands of dollars to get out of it. You can read up on which camera brand is right for you in this helpful Sleeklens guide.

Copyright Kieth Williamson
Copyright Keith Williamson

3. Trust the 2-1-1 rule

This is easily the biggest mistake any new photographer makes when buying photography gear. Most people spend all of their money, or close to it, on the camera. WRONG. If your budget is $1,000 don’t spend it on a Canon 70D with a kit lens, in fact, you should almost never buy a kit lens at all. (For those who don’t know, a “kit lens” is the zoom lens included with a camera body that usually covers a large focal range, like 18-105mm, but is almost always very low quality.) So what exactly is the 2-1-1 rule? It’s a ratio: 2 parts of your budget on lenses, 1 part on the camera, 1 part on everything else.

This may seem crazy to new photographers, but you should be concentrating on the lenses you’re getting, not the camera body. Why? Most camera companies use the exact same Sony sensors. While there are other factors that go into the quality of a camera body, the sensor is easily the most important one. Even companies that don’t use Sony sensors (like Fujifilm) use the same technology and produce almost the same images. The camera body really doesn’t matter that much, it’s mostly a personal preference. The only truly important elements of a camera body that affect the final image are the sensor size, technology, and megapixel count. Even then, there are pros and cons to all possibilities and they don’t have a huge affect on the final photograph.

3479553798_01312d8f52_b-2
Copyright G M

Lenses, on the other hand, all but decide the quality of your images. Camera companies make their own lenses, all of which have some stellar options, and many third part companies like Sigma make some great lenses too. While, like cameras, there is little difference from one brand to the next, there is a significant difference from one “tier” to the next. It’s really difficult to get those stunning photos with micro-contrast, a low depth of field, and beautiful color and tonal gradations with a cheapo zoom lens. It might be impossible. Compare that to a Canon L lens, for example, which can make virtually any snap look decent, and you’ll see why the lens is the key.

The last 25% of you budget should be reserved for supporting gear like bags, UV filters, strobe lights if you need them, that kind of thing. If you already have equipment you’re planning on keeping (which you’d be wise to do) then you should follow the 2-1-1 rule for your total set of equipment, not what you’re buying right now.

Finding the right photo gear may seem like an impossible task, but as long as you keep those three rules in mind (especially the 2-1-1 rule) you’ll end up with a kit you can be proud to call your own.

Daylight long exposure – Using ND filters

In a recent post, we talked about getting things right when playing with long exposure photography. Today I want to focus on how to get the nice effects that come with long exposure without having to wait until the Sun is already below the horizon. In this article I will be showing you how to get effects like moving clouds or soft-looking water during the day, by means of a specific type of filter called Neutral Density (ND).

Light as we perceive it is formed by a continuum of wavelengths that go from the red to the violet colors, as demonstrated by Isaac Newton back in 1666. If we filter out only one wavelength, we would be left with a picture lacking that specific color. ND filters are designed to equally reduce the intensity of all the wavelengths leaving us, in theory, with a darker version of the original image, without any kind of color cast.

camera-635792_1920

I say ‘in theory’ because so far I haven’t seen any ND filter that does not alter the white balance of the final image. It is true that I might not own the best filter in market, but many people reading this will probably not as well. In any case, the color cast introduced by ND filters is easily removable during post-processing, so don’t get discouraged.

Types of ND filters

ND filters are classified according to the amount of light they block. There are two main scales used and you might find either of them when buying one. One refers directly to the amount of light being blocked (or the inverse of the amount of light that is allowed to reach the sensor of the camera). The other refers to the f-stop numbers that one would have to compensate for in order to get the same final exposure. These two scales are linearly related, so which one will you use is basically a matter of personal taste.

accessories-19827_1920

Apart from the classification just mentioned, there are other types of ND filters that differ in nature and have other uses, the most common one being the graduated ND, which is basically what the name says. The ND effect is gradually increased (or decrease, depending on what you choose) in one direction. These filters are usually square and are normally used to correctly expose scenes where the sky is much brighter than the ground (high dynamic range). These were very popular in the times of film photography but nowadays, with the help of post-processing, it is fairly straightforward to deal with this problem, so it is not so common to see someone using on of these anymore.

When and how to use them

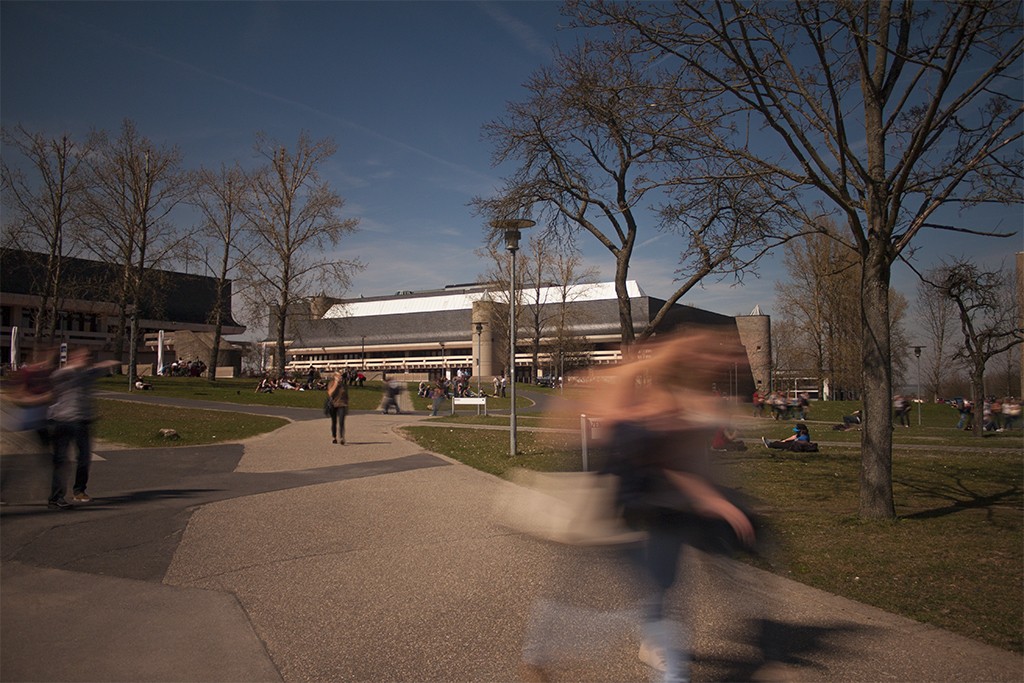
As with anything in photography, this is a subjective matter. The obvious answer is: whenever you want to add dynamism to your images. However, there needs to be a dynamic element in order to capture it. For instance, if you are on a cloudless day, no matter how hard you try, you will not get moving clouds in your picture, unless you add them with Photoshop afterwards! So try to think what can be captured moving relatively faster than your subject: clouds, water, passing cars/people, smoke from chimneys, etc.

_MG_0047_1024_nob

In terms of how to use them, as with any other filter, you basically stack it in front of your lens and that’s pretty much it. There are two types of filters: screw-on and square filters. Screw-on filters are more comfortable to use and usually produce better images since there is no possibility of reflections coming in from the back of the filter. They are, however, a bit more difficult to deal with when stacking several filters on top of each other.

Another important thing to keep in mind, especially with really dark NDs (e.g. ND1000) is that once you screw it on your lens you will not be able to see anything through the viewfinder. If the scene is not dark yet, you will be able to focus using the Live View mode of your camera but if it is already dark, it will be impossible to focus with the filter on so be prepared to focus before screwing the filter on. For this, you have to be very careful when attaching the filter so that you don’t move the focus ring (unless you are using the newer lenses with the focus ring moved back). Square filters are easier in this sense (it is usually easier to keep the focus while stacking the filters on the holder).

_MG_4071_1024_nob

Now that you’ve attached the filter to the lens, you are all set up to take your photo. Apart from what I already said, using a tripod is a must and, as I mentioned in the long exposure post, using the time delay function of your camera (2 s should be enough) is always a good idea to avoid any shake of the camera while taking the photo.

Post-processing

As I mentioned before, most of the times when using ND filters you will notice a color cast towards the red when you open the files on Lightroom or Photoshop. This effect, more prominent for darker filters, is easily corrected if you shoot RAW (always shoot RAW!).

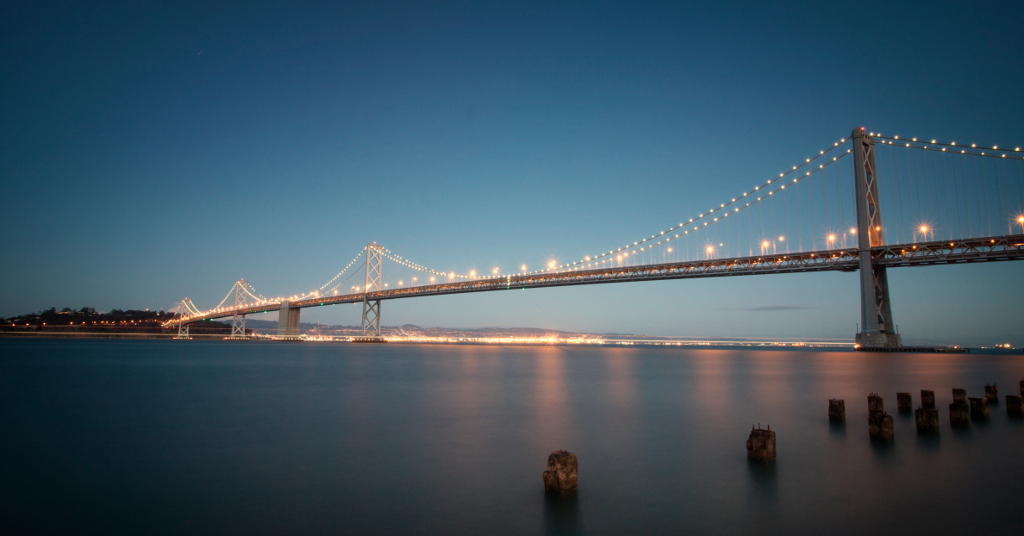
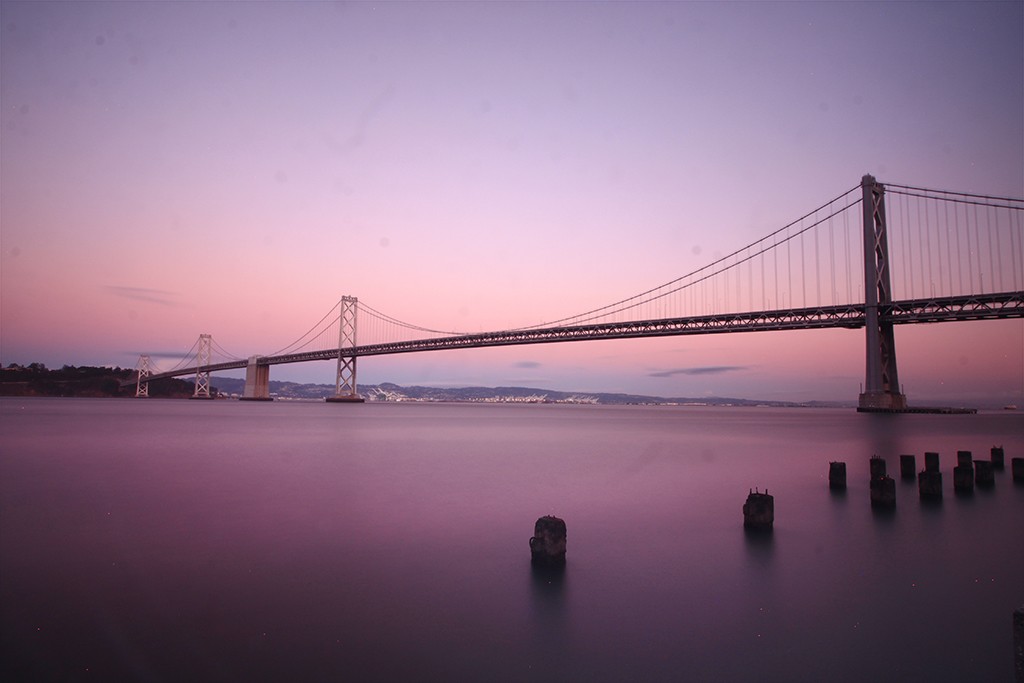
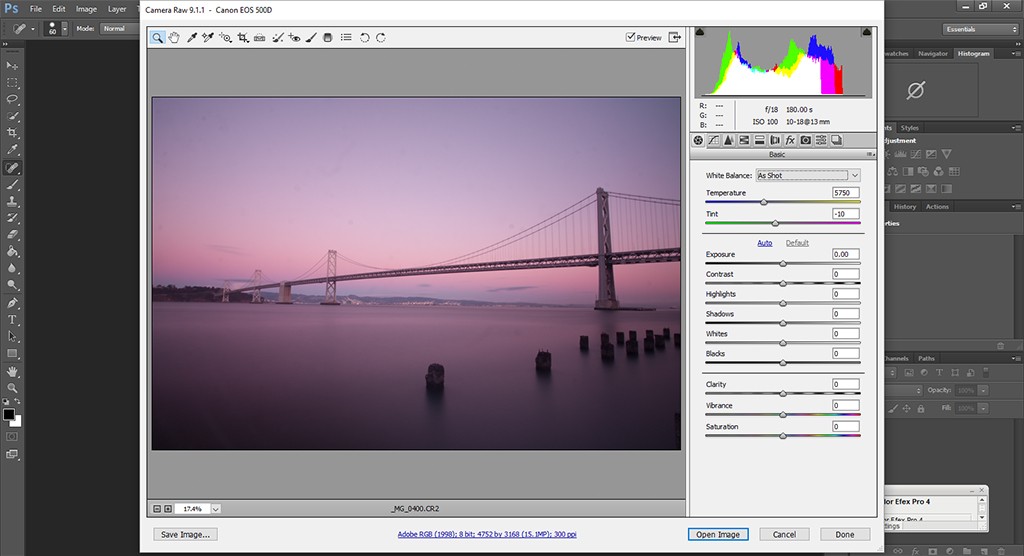
Take, for instance, this image of the Bay Area bridge in San Francisco. The photo was taken at sunset with an ND1000 filter to get a smooth effect on the water.

_MG_0400_1024_noproc

Right from the beginning, it is evident that a color cast is present, especially on the water. That is where the purple color comes from. Also, if you look more closely, this photo also shows some other problems that arise with the use of ND filters. Since you are exposing for a long time (180 s for this one), some of the problems of your camera that are usually not noticeable will now be. This includes dust in the lens or sensor (small dark spots visible in the sky and the water) as well as damaged pixels in the sensor (visible as very small white or red points visible here on the bottom right corner). Removing them is fairly easy in Photoshop, but we leave that for a future post. For now, let’s take a look at how to get rid of the color cast.

This is also a very straightforward task and the only thing you need to do is open your RAW file in Photoshop.

ndfilters_1

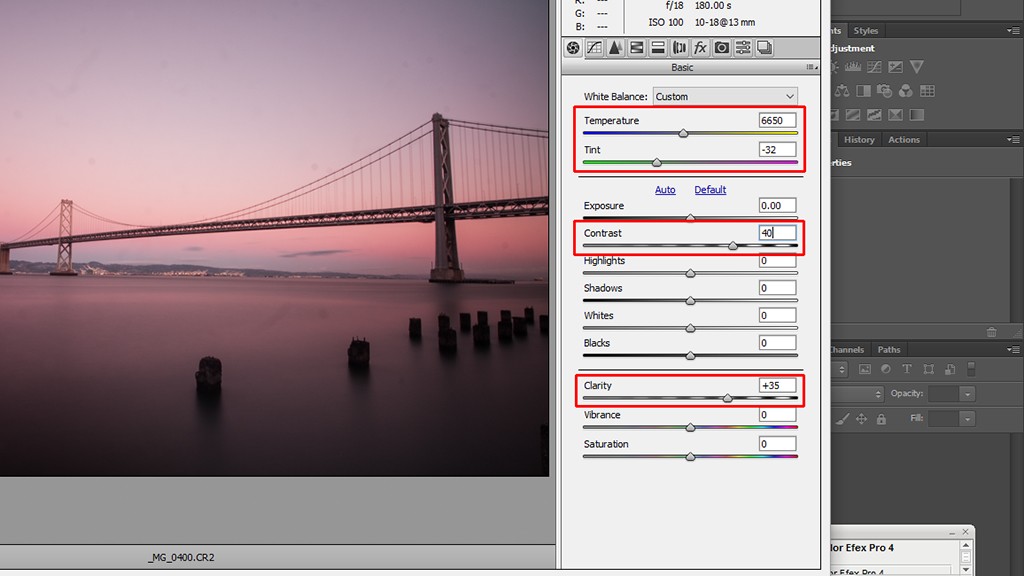
And this is where you see one of the big advantages of shooting RAW. By playing with the ‘Temperature’ and ‘Tint’ sliders, you will be able to get a more natural look of your scene. That said, sometimes the color cast introduced by the ND filters give a weird but still appealing look so, as usual, it is up to you how much you want to correct for it. What I did for this particular image was to increase the temperature, move the tint slider towards the green (to get rid of the purple on the water) and I additionally increased the contrast and the clarity. This last one provides an extra increase in small scale contrast, something like adding structure to the image.

ndfilters_2

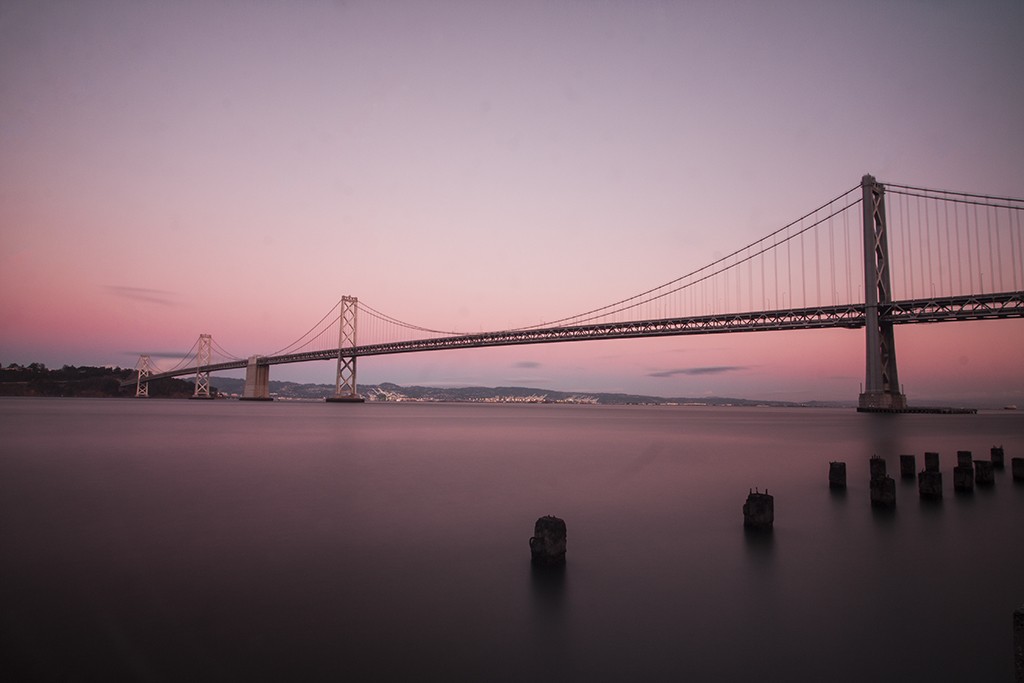
After doing this and removing the dark and light spots mentioned before, I have my final image. This one has no further post-processing, but you can always enhance different aspects with the versatile tools that Lightroom and Photoshop provide.

_MG_0400_1024_poc

And that’s it. If you enjoy long exposure photography, I strongly suggest you give this a try. The simple addition of an ND filter will give your images a completely different mood and I am sure you will enjoy the whole process. If you have any question, please contact me and I will do my best to help you.

Photoshop Sharpness – Getting the most out of your camera

Today I want to address a problem that most of us face at some point during our lives (that sounds dramatic, but it is true, at least if you care about photography anyway!): how to get a perfectly sharp image.

There are a couple of great articles on the Sleeklens blog covering sharpening and noise reduction (two things that are deeply intertwined) in Lightroom, so for this entry I will focus on how to get the sharpest image right from your camera so that the post-processing is as simple as possible. And, for those situations where we had to deal with some blurriness anyway, I will briefly explain a nice technique for that in Photoshop as well.

Capturing the image

First of all, let’s define sharpness, for the purpose of this article, as the contrary to blurriness. This helps us focus on what we need to do to get a sharp image, which is the same as getting an image as free of blurriness as possible.

But where does blurriness come from? In photography, this can originate as an effect of moving the camera or a subject in motion while taking a photo (motion blur), or by more specific aspects related to the camera itself, the lens or filters being used (Gaussian blur). Then there is also the artificial blur that can be introduced with so-called low pass filters, but we are not concerned with that right now.
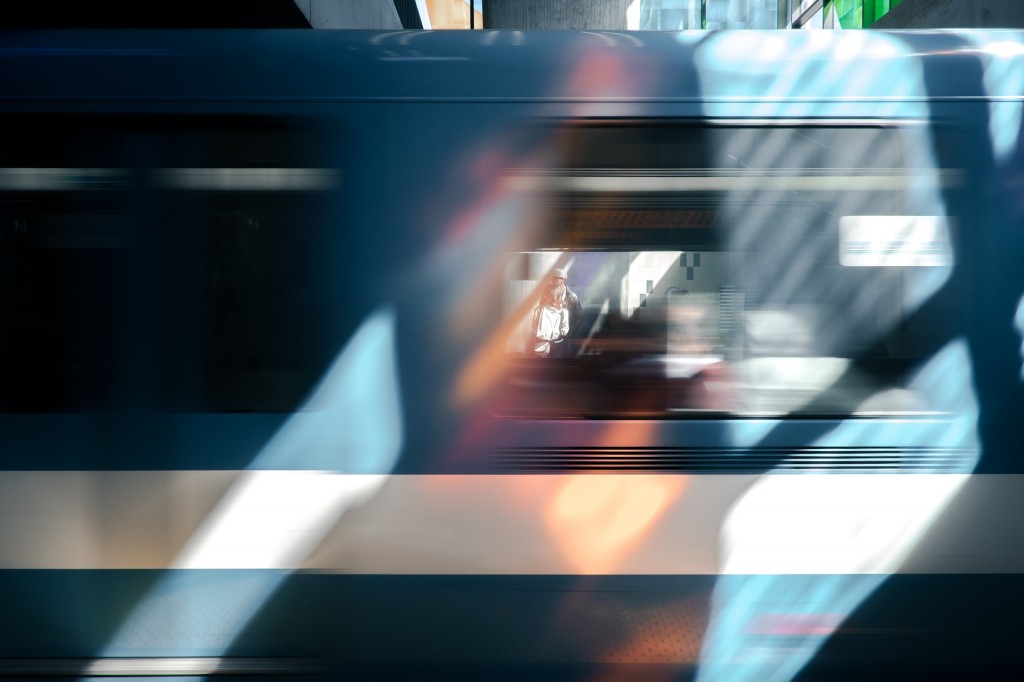
train-828597_1920

So let’s start with the easy one: motion blur. Unless you are trying to capture moving objects with long exposure photography or experimenting with your camera in different ways, motion blur is something you want to avoid. And there is only one way to do it: get a sturdy tripod and use it whenever you can. Many people only get their tripods out of their bags when they want to take photos under low light conditions, but I really recommend always using your tripod, unless you are after an action shot that happens too quick to set the tripod or if you don’t carry one at all.

That said, even with a very good tripod, a mild wind can shake your camera in a way you cannot perceive but still make your final image look blurry, so if there is any wind at all, try to put your body between the wind and your camera to block as much as you can. Sometimes this might prove harder than it seems, but most of the time this is as much as you can do.
camera-961942_1920

Finally, use the delay function of your camera to give some time for the tripod to stabilize after pressing the shutter button. Two seconds are usually enough, but the exact time will depend on the camera you use.

Now let’s move on to the hard part. Sometimes you might notice that even on a perfectly still day and after spending $500 on a tripod, after you take your photo, go back home and open your file on Photoshop or Lightroom, you realize that the image is blurry anyway! But before throwing away your tripod or getting a new camera, read on (even though it is true that better cameras produce sharper images, chances are that you have some things that you are able to improve in your workflow before thinking about that!).
camera-1125872_1920

One easy thing to try if you are taking long exposures is to turn off the image stabilization of your lens. That sounds counter-intuitive, but if you are using a tripod and taking relatively long exposures, the image stabilization system can actually try to compensate for some motion that is not there, finally producing a slightly blurred image. Image stabilization has helped to push the exposure time at which we definitely need a tripod a lot, but when using a tripod, it becomes unnecessary so taking it out of the way might be helpful sometimes.

The next one is related to the focal length you use. Building lenses is a delicate and difficult task. And building lenses that retain the same sharpness throughout the whole focal length range is almost impossible. It is for this reason that lenses have something called ‘sweet spot’. Simply put, when you take the aperture to the extremes (very small or very large f-numbers) your lens will produced less sharp images. Each lens is different, so the only way to find out the ideal range for your lens is to go out and take the same image only changing the f-number, but as a rule of thumb, staying three steps away from the limits should work quite well.
filter-87327_1920

Finally, using certain types of filters will also affect the overall sharpness of your image. Probably the filters that have the worst effect are neutral density (ND) filters. These filters, used to capture long exposure images in daylight, can have very strong effects both in the sharpness of your image and in the white balance.

But what happens if you end up with a blurry image anyway? You might have needed to use an ND filter or you just did not realize your image was blurry until you got home. What can you do?

Frequency separation in Photoshop

Photoshop, as well as Lightroom, has a set of filters devoted to the sharpening of your images. They are simple to use but they also have a downside: when you want to remove the blurriness of an image, what the filters do is enhance the borders by applying a so-called high pass filter. The problem with high pass filters is that they tend to introduce noise, and this noise can sometimes damage parts of your image, especially those with low contrast such as the sky.

Take a look at this image, captured in the Cordillera Blanca in Peru:
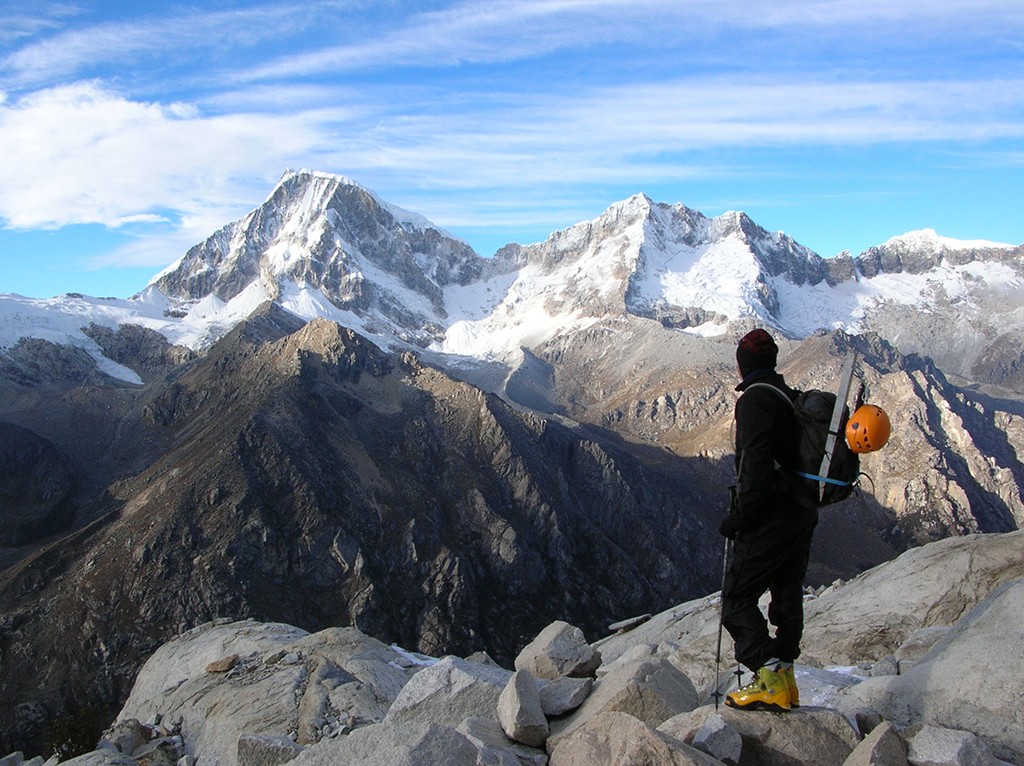
DSCN1995_withouthsharp DSCN1995_withsharp

The top image is the original file without any added effect while for the bottom one a simple sharpening filter was added (Filter -> Sharpen -> Smart Sharpen… in Photoshop). They both might look pretty similar, but if you look closely enough, the top one is a bit blurry, especially noticeable in the mountains. This has been improved in the bottom one, but the problem I mentioned before is there: the sky looks now rather noisy. This is easier to see if we zoom in to 100%:

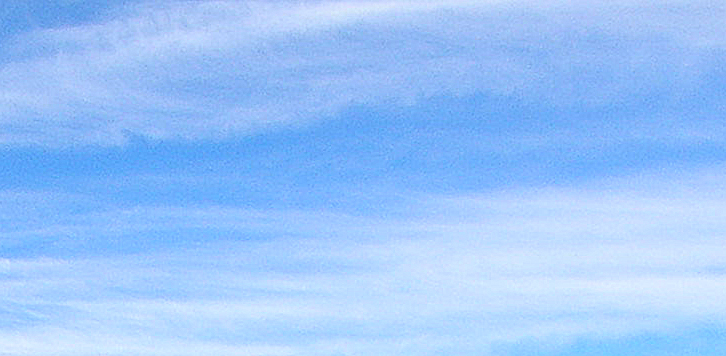
sky_withoutsharp

sky_withsharp

You can improve the situation by creating a layer mask in Photoshop and masking out the sharpening effect on the sky, but then it gets quite complicated when you try to select the horizon. Luckily enough, there is a nice technique called ‘frequency separation’ that comes to our rescue.

The term frequency separation comes from the fact that images, same as for instance music, are formed of many different components that have different frequencies. While in music high frequency refers to high pitch tones and low frequency to low pitch tones, in photography high frequency refers to regions where there are many changes in contrast within a small area while low frequency refers to regions with few changes over that same area. For instance, in our image, the sky is a low-frequency area (because for a given area there are not many changes in color) while the mountains are high-frequency areas.

So what we want to do is separate the low-frequency part of our image from the high-frequency part in order to be able to separately edit them. This way, we can increase the sharpness in the high-frequency part (mountains in this case) without affecting the low-frequency part (sky).

The first thing we do is duplicate our base layer twice. You can name these new layers however you want. I called them here ‘Low Frequency’ and ‘High Frequency’.
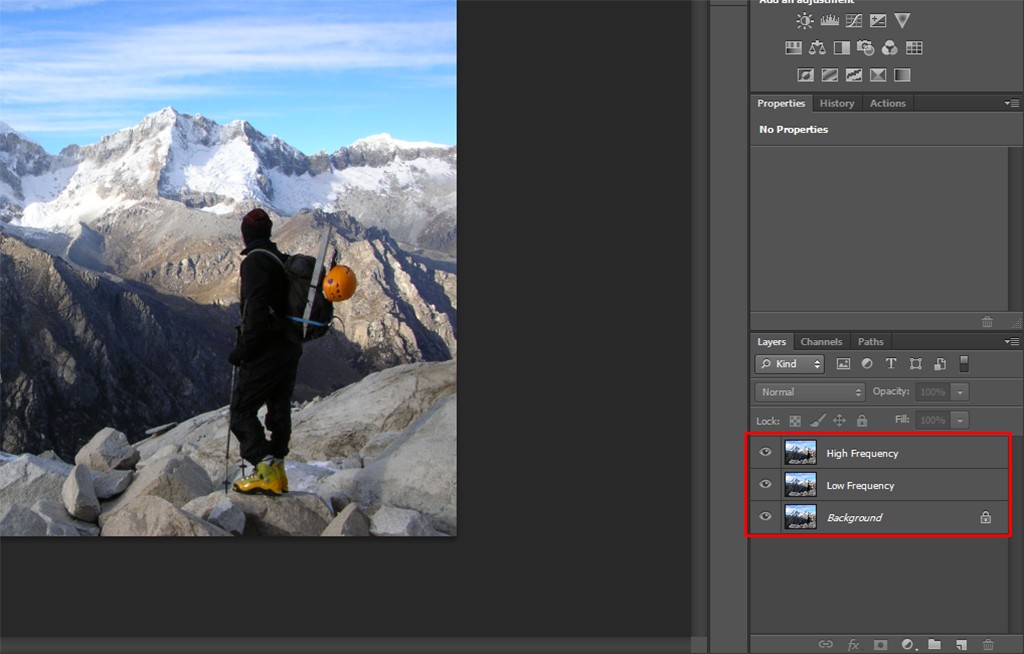
fsep1

The next thing to do is separate the frequencies. The low-frequency component is achieved by blurring the image until you see a uniform sky (or any other part of your image that you don’t want to get modified when applying the sharpening filter later on). The amount of blur will vary, but it usually is relatively large (around 10 pixels or more), so that the whole image looks blurry. For this you make the top layer (high frequency) invisible, select the middle layer (low frequency), go to Filter -> Blur -> Gaussian Blur… and apply the amount you feel happy with. In my case, I chose 50 pixels.
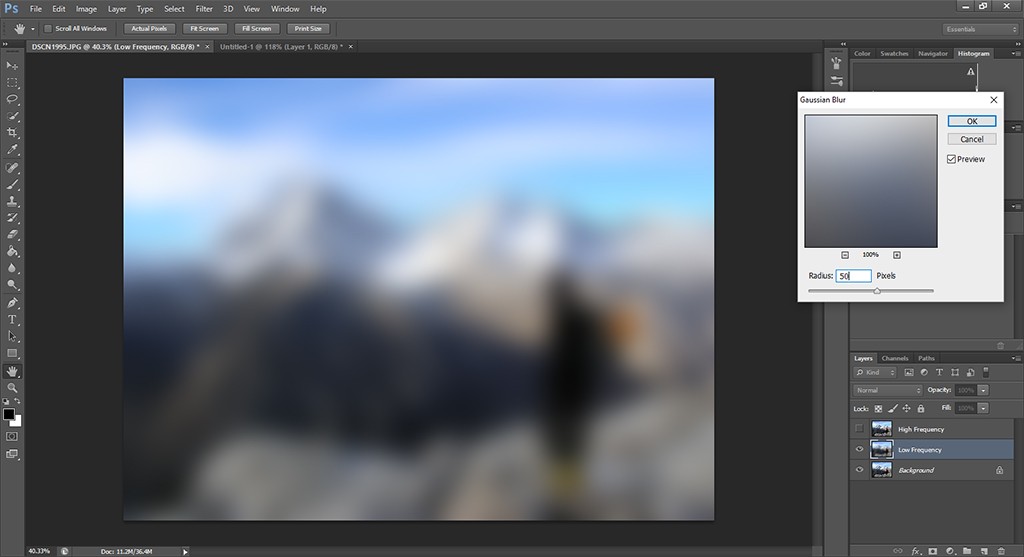
fsep2

For the high-frequency component, we make the top layer visible again, go to Image -> Apply Image… and select Subtract as the Blending method and apply it to the Low-Frequency layer (see the different parameters in the next figure).
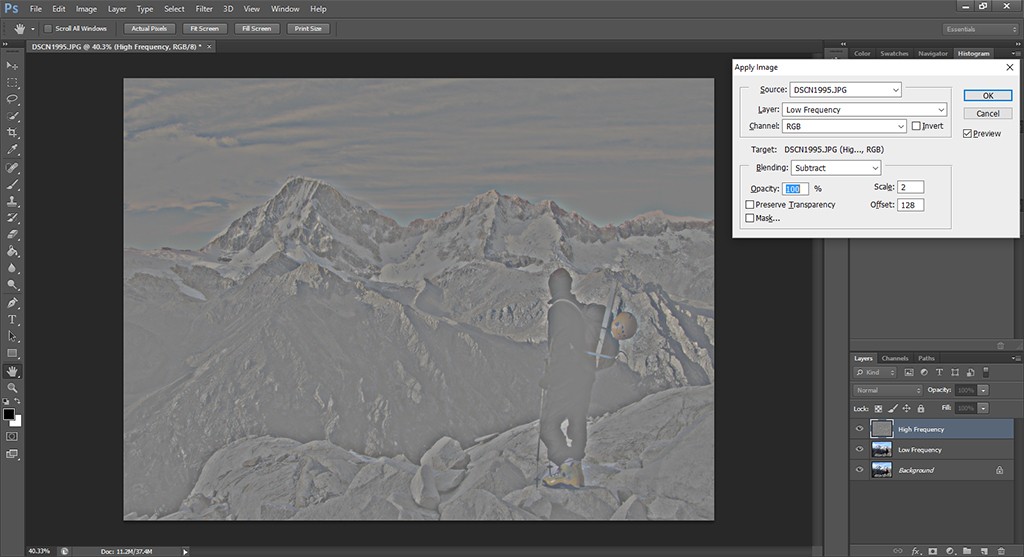
fsep3

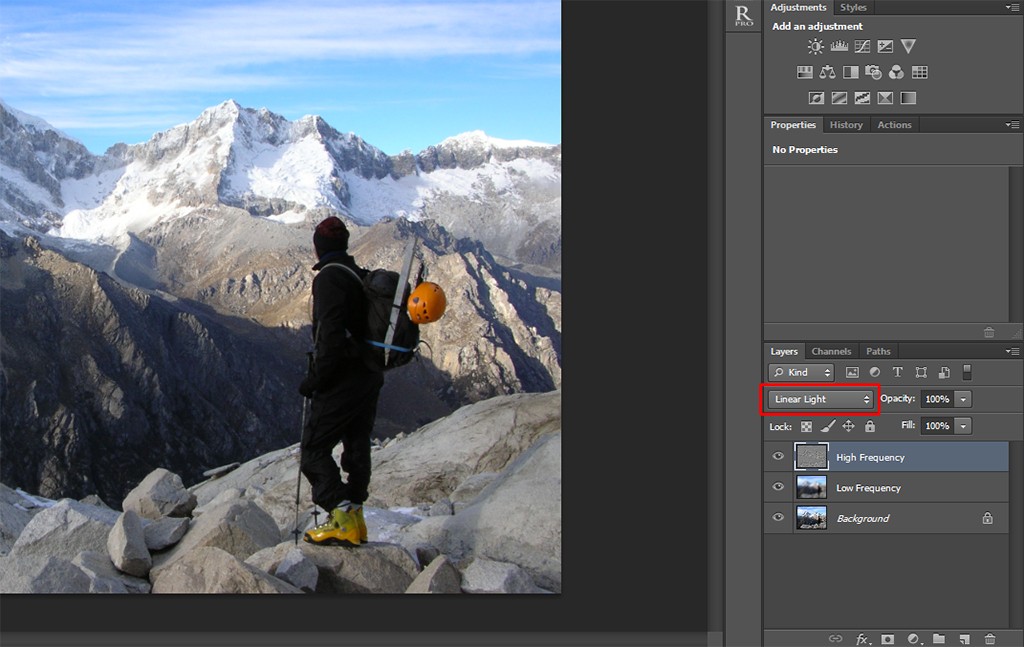
After you do this last step, the image will look like the one above. This is because you are looking at the difference between the two layers. To get a normal image again, just change ‘Normal’ to ‘Linear Light’ in the drop-down menu right above your layers and to the left of opacity.
fsep4

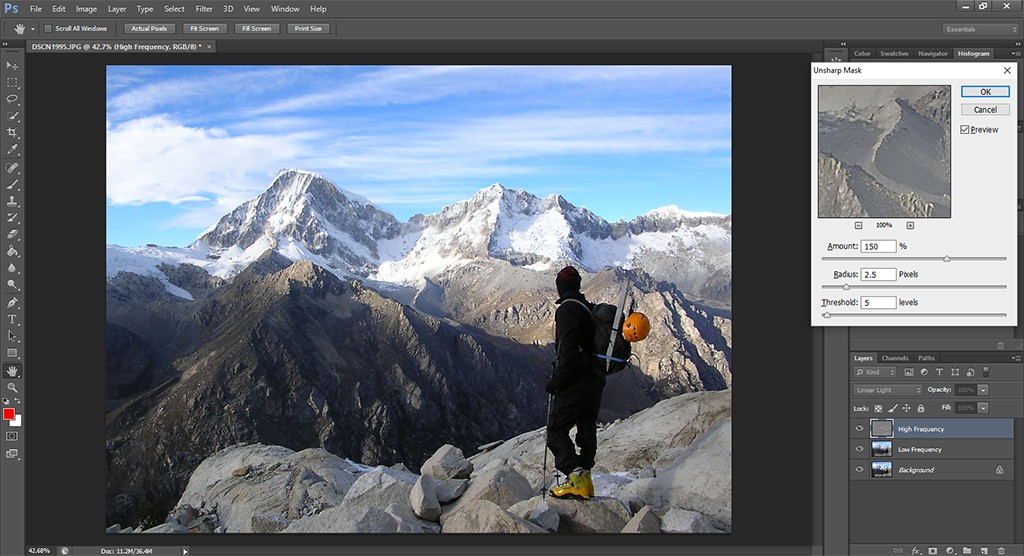
We are now ready to apply the sharpening filter. For this, we select the top layer, go to Filter -> Sharpen -> Unsharp Mask… and we select the values according to what makes our image look the way we want.
fsep5

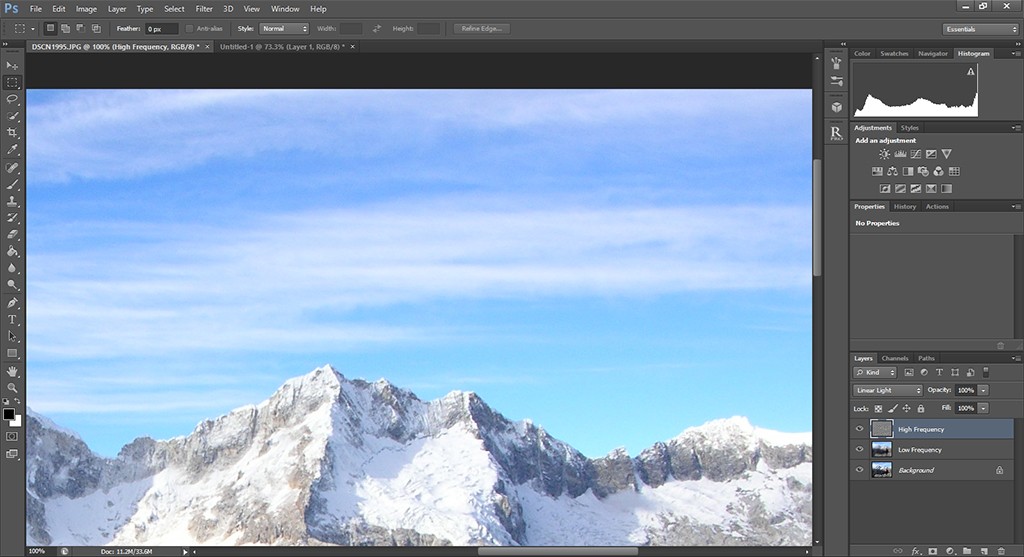
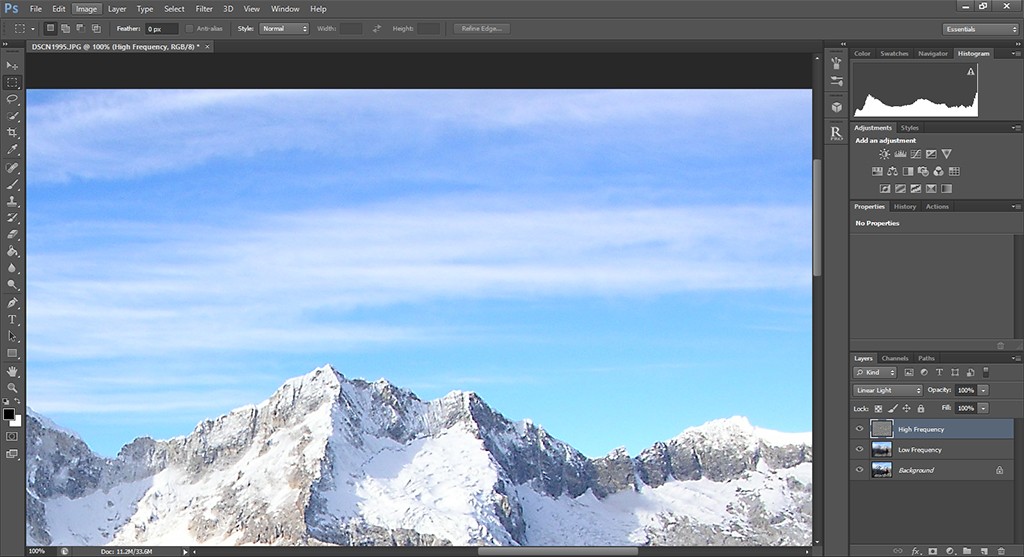
Notice that we are able to select relatively large values for the Amount and the Radius and, as we will see in the next couple of images, the sky is unaffected by this.
fsep_nosharp

fsep_sharp

The top image shows a 100% view of a part of the image before the sharpening and the bottom image shows the same area after the sharpening. Notice that the sharpening is visible in the mountains but not in the sky, thus avoiding the appearance of unwanted noise. The really neat thing about frequency separation is that we don’t need to worry about a very precise horizon selection, but with just a few steps, everything is automatically done.

I know this might sound a bit complicated at first (it was for me, at least!) but with practice you will work it out. So, as usual, have fun with it!