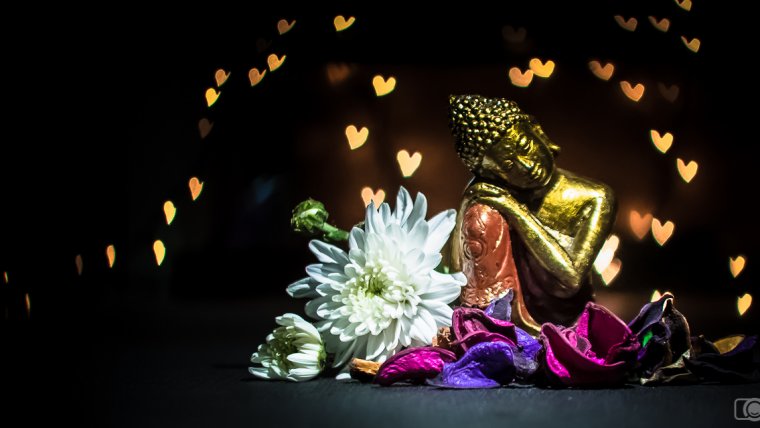
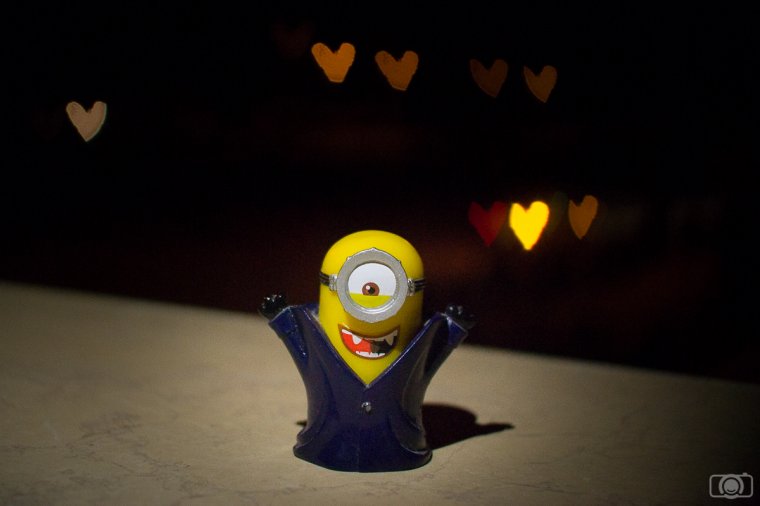
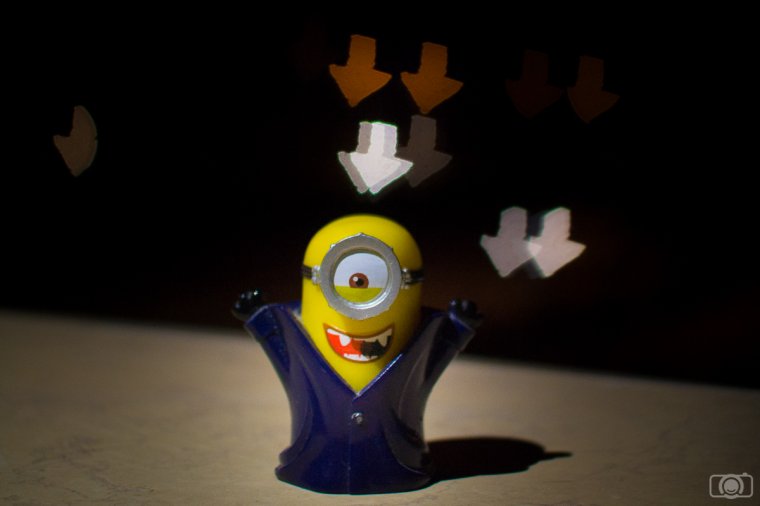
Have you ever seen those photos with this effect where light sources are shaped like hearts or stars? The effect is called bokeh and to take this kind of photos you need 2 things: knowing how to create a bokeh and a kit for the shapes.
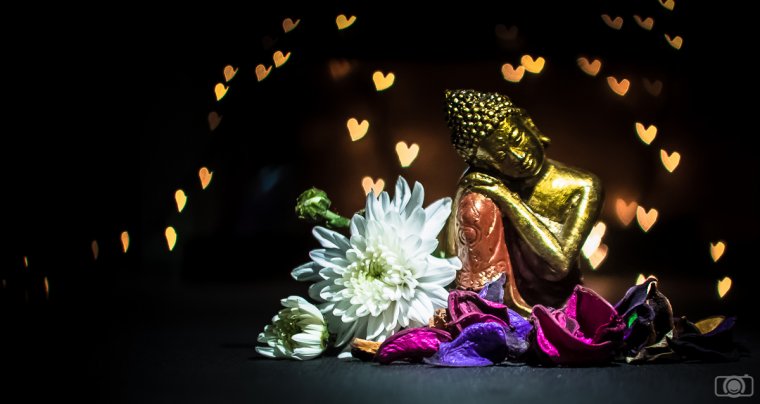
So what is Bokeh? Bokeh is an effect which happens when you set the focus so that the background of the photo is blurry. When this happens, light sources in the background are also blurry and so they look in the photo like bright circles. Usually, the bokeh is achieved by using wide apertures. You will need to play with the depth of field in order to get the blurry effect you want. You can have a look at the article of our colleague Arnel Hasanovic to learn in more detail how to shoot photos with bokeh.
Today I am going to focus on the second thing you need to get this creatively shaped bokeh: the bokeh kit. You can get a kit on Amazon. However, you can also do it yourself. First of all, creating these bokeh kits is easy and cheap and you don’t need any special equipment. Second, you can get your family and friends involved in your bokeh project, making the experience even funnier. In addition, creating your own kit will allow you to be more creative because you can create any shape you want and not be restricted to the shapes that come in a commercial kit.
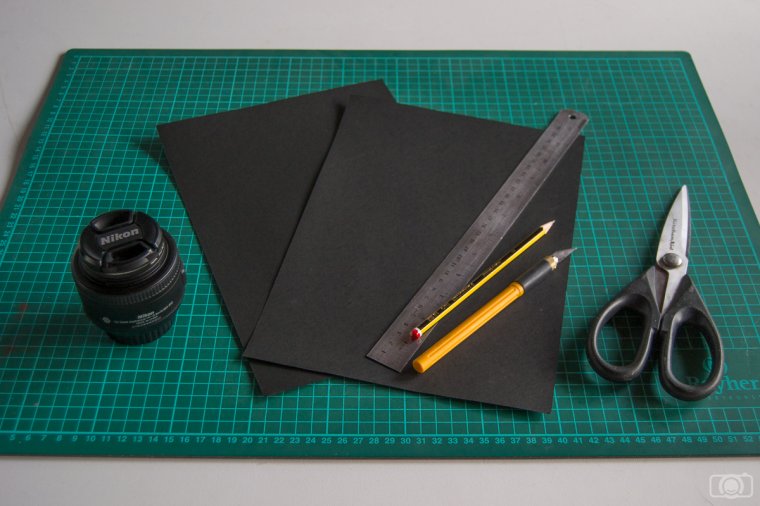
Let’s start with the list of things you will need to create your bokeh kit:
– A sheet of dark Bristol/thick paper (I prefer black, for not adding a color cast to your photos)
– Pencil
– Scissors and/or scalpel
– A lens (preferably a lens with a wide aperture).
– A drawing compass, a ring or other small round object
– Optional: glue/another type of adhesive substance
Step one:
Draw a circle with the diameter of the lens that you want to use. The easiest way for me to do it was to use the lens itself as a mold (I recommend to place a filter on the lens to protect it)
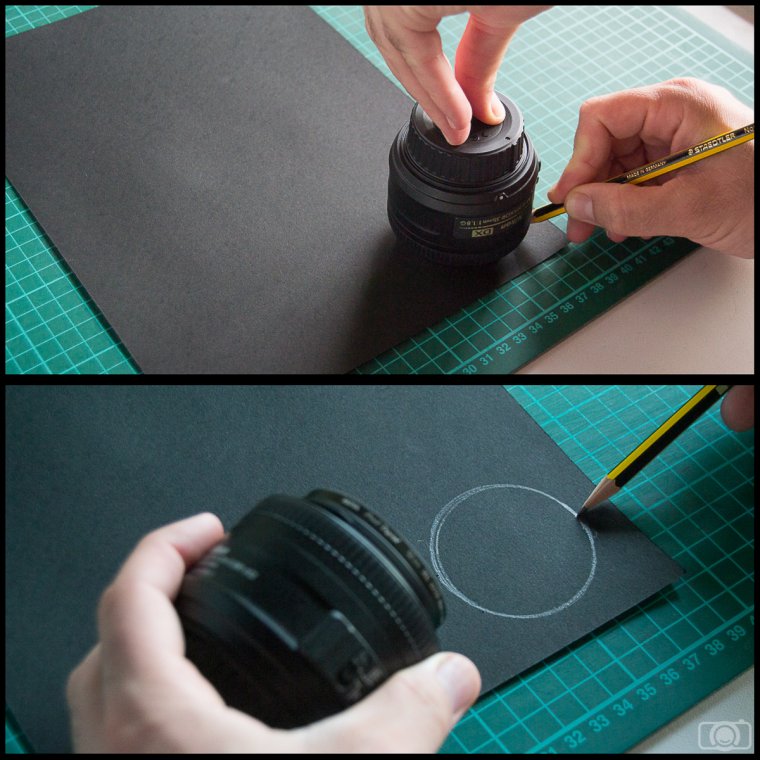
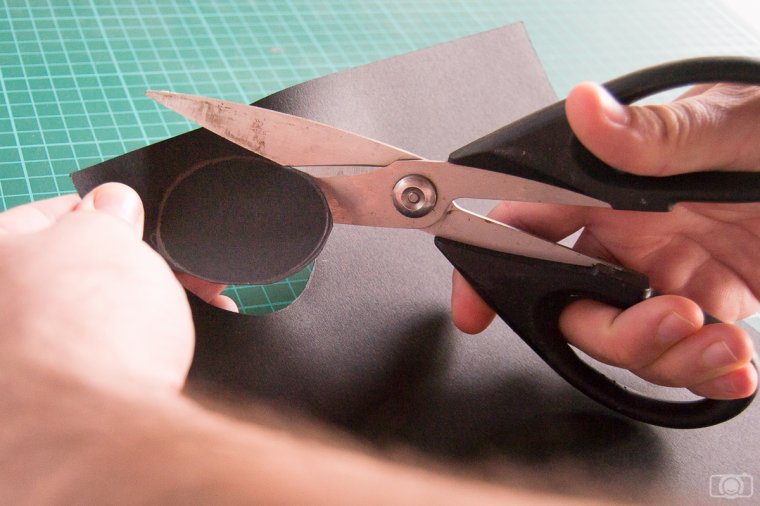
Step two:
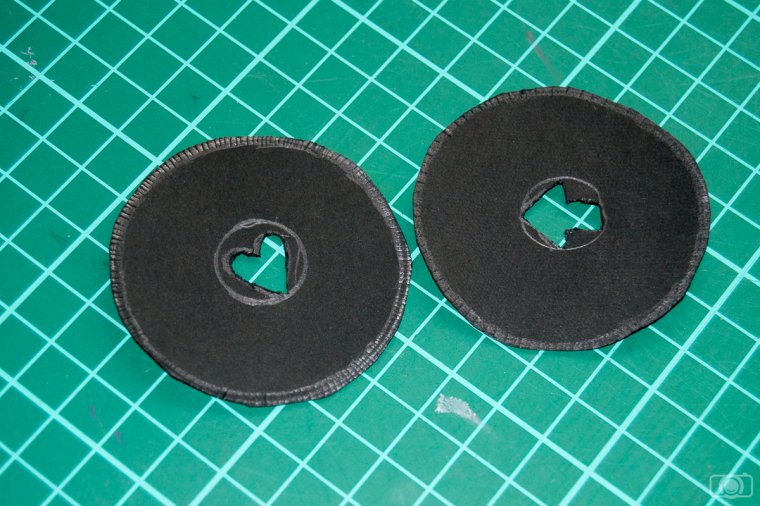
Cut out the circle, this will be your bokeh cap.
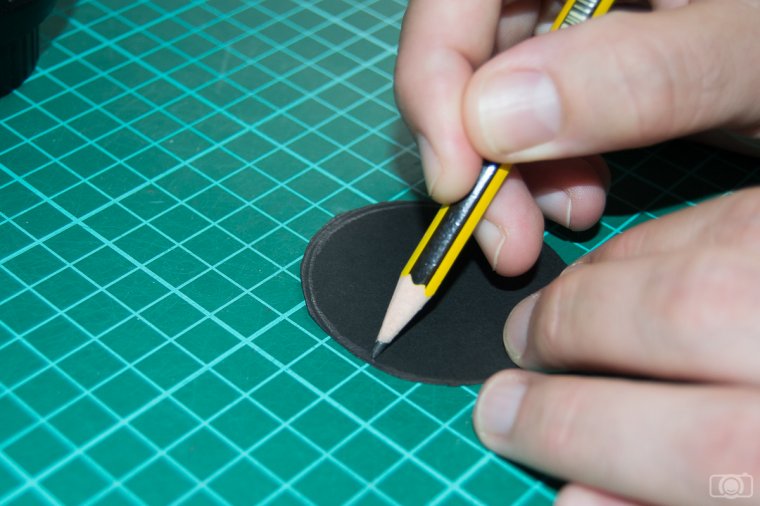
Step three:
Trace a second circle on the bokeh cap, about two millimeters smaller than the diameter of the cap. You can do it approximate or you can measure it with the ruler or a drawing compass.
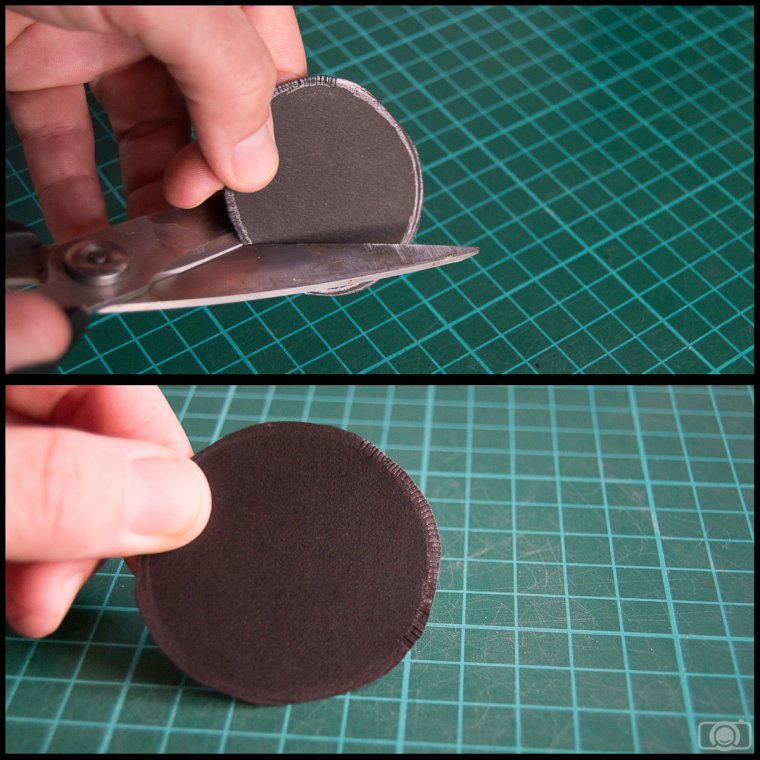
Step four:
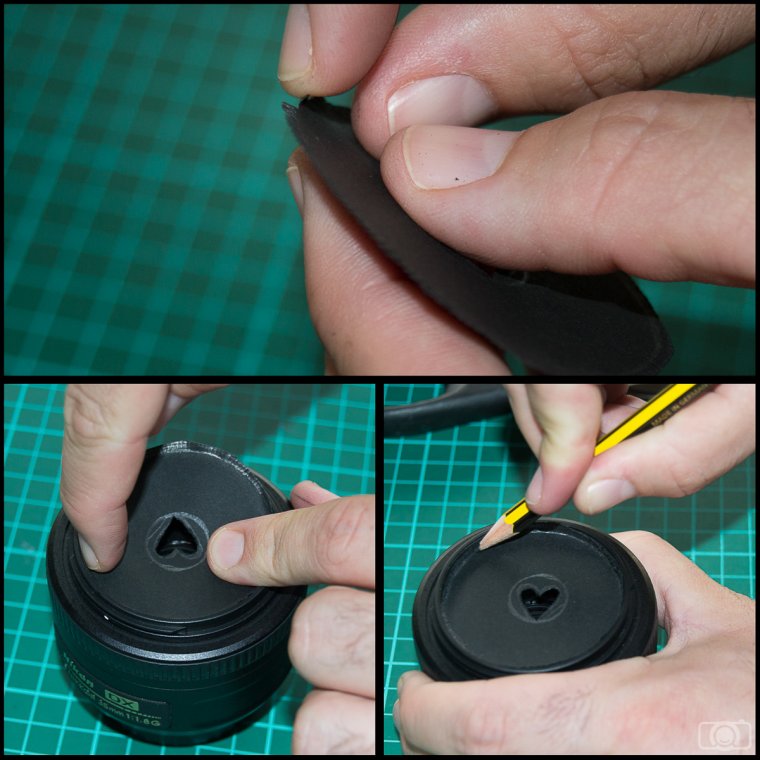
Using your scissors, make one millimeter long cuts from the cap’s circumference towards the center (the line you drew in step three will help you to do it accurately). Make the cuts as dense as possible.
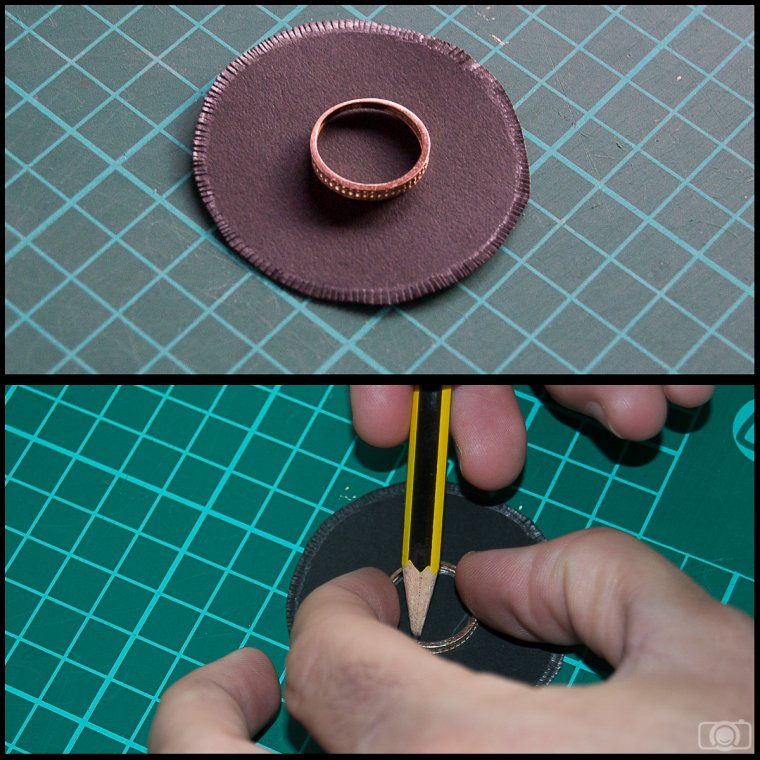
Step five:
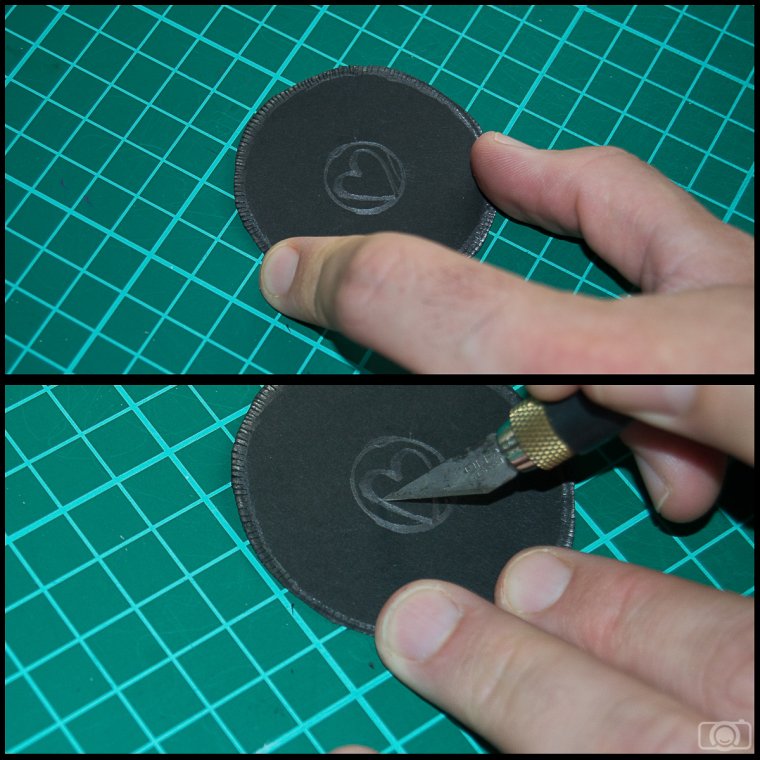
Using a drawing compass or a ring, draw another circle in the center of your bokeh cap (the ruler can be handy here as well, to place the center in the right spot). It should be small, around 2 centimeters in diameter. This circle is the maximum size of the hatch you should make in the following steps.
Step six:
Draw the shape you want for your bokeh effect inside the circle you draw in step five. Make sure to draw it as centered as possible. And now the most important thing: use a scalpel to cut out the shape of the hatch. Be as exact as you can. The more accurate you are with cutting the shape, the nicer and sharper the effect will be, make sure to trim all the edges too.
Step seven:
Fold the little cuts you made in step four, all in one direction and fit the cap into your lens. You can tighten the cap at the rim to the lens by using a pencil or a Q-tip (but do it gently, not to damage the lens).
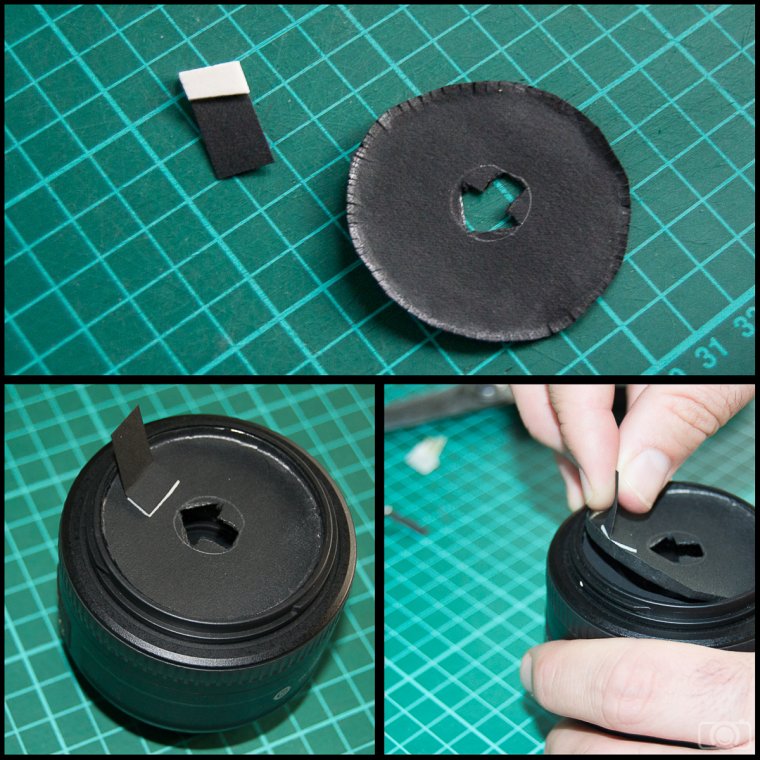
Optional step:
You can make a little handle that will help you to remove the cap when you finish by gluing a small strip of paper close to the rim of the cap. I used a two-sided sticky pad.
And that’s all! You now can go and take super cool photos with a shaped bokeh effect! I took some photos with our Minion. Who is going to be your model? Have a happy shooting!


Please verify your software version before proceeding.
 I’ve verified my software version


 Facebook
 Google +
Comments (2)
You are right Henry!! However, I was aiming here for something a bit more crafty. Thank you!!
There is an even easier and more powerful way to do this with a laser or inkjet printer: https://www.youtube.com/watch?v=ladFNJ5uO4Y