Tag: canon

Canon Lens Review – A Look At The 10 Best Lenses For Canon

If you have a Canon DSLR, congratulations! You have access to quite possibly the greatest collection of lenses on Earth. While it’s more than possible to find some remarkable lenses for any DSLR — and I personally recommend checking out Sigma’s excellent Art line for any camera brand — Canon lenses are generally considered the best in the world. Sure, Leica and Zeiss offer some truly astounding glass, such as the Leica Noctilux-M 50mm f/0.95, that arguably outperform the very best from Canon. But if you want a huge selection of dozens of lenses with focal lengths ranging from 8mm to 800mm, look no further than Canon EF lenses.

But with such a massive selection to choose from, picking the lenses that are right for you can be a daunting task. If you’re into a specialized form of photography that requires a specific kind of lens, such as a fisheye, macro, tilt-shift, or super telephoto, then you likely already know what you need. However, if you’re just starting out with your Canon camera, a narrowed down selection of the best Canon has to offer may be helpful.

best cheap lenses for canon

There are three noteworthy nuances to the Canon lineup we should go through before we begin:

#1 The first thing to note is if your camera is full-frame or APS-C, already assuming it is an EF mount camera. This will determine what lenses are available to you, and you should always triple check that you’re buying a full-frame lens if you have a full-frame camera. If you have an APS-C camera, you can use any EF-mount lens, but be sure to note that the “equivalent focal length” of a full frame lens on a crop-sensor Canon is 1.6x the listed focal length. So if a full-frame lens is 35mm, on APS-C it would be 35mm x 1.6, or 56mm. APS-C only lenses are denoted as EF-S and shouldn’t be purchased for use with a full-frame camera.

#2 Another important element of the Canon lens system is the division of quality into three distinct tiers:

Silver: These are the everyday lenses that come in camera kits and are generally not the best Canon can make, with a flimsy, plastic build. Though they work fine, these lenses should generally be avoided if you want good image quality, though there are a few exceptions noted on this list. I almost always recommend buying a camera body only and choosing your lenses for yourself, since a kit lens won’t give you results that are much better than a point-and-shoot. These budget lenses have silver rings or no rings at all painted on the barrel.

Gold: The middle tier is essentially just a nicer version of the Silver series, often sporting similar optical design with higher quality glass or coating and a metal construction. some of these lenses are actually pretty good, and you can spot them by their gold ring on the barrel.

Luxury: Then, there is the L series. These are expensive, amazing lenses that pretty much every photographer lusts after. They are easily recognizable by the red ring painted at the end of the barrel, and by their high price tags. Though they have top-end optical and build quality, they are usually big and heavy regardless of the focal length. But if you’re going to take your Canon system seriously, you should save up and focus mostly on L lenses.

best lens for canon 6d

#3 There are a few acronyms that get tacked onto the beginning or end of a lens’s name (which is made up of the focal length and minimum selectable aperture, like 50mm f/1.8). Each denotes a special feature of that lens, which is helpful for quick comparisons. While there are a number of more obscure acronyms that are only found on a few lenses, all you really need to know are the common ones listed below:

EF: Canon’s designation for full-frame lenses, placed before the lens name

EF-S: Canon’s designation for APS-C lenses, placed before the lens name

IS: Image Stabilization, especially important in telephoto lenses

L: Luxury, this simply tells you it’s a top-of-the-line L series lens

STM: Stepper Motor, a low-vibration focusing motor that’s good for video, with non-mechanical manual focus. It’s generally not as fast or accurate as an UltraSonic Motor and comes in cheaper lenses.

USM/Micro USM: UltraSonic Motor, a fast, quiet, accurate autofocusing motor

I, II, III: These numerals denote if the lens is Mark I, Mark II, or Mark III, or how recent the design is. If a lens is updated it will usually receive a newer Mark in its name. No Mark designation means the lens is a Mark I, which is the case for most of the lenses in the list below. While newer mark lenses are typically a bit better, the improvement isn’t always worth the higher price.

My advice to any new photographer is to allocate about 2/3 of your total photography budget on getting two or three quality lenses. The lens you use will have a far greater impact on your images than the camera you use, and your lenses can stay with you your entire life while you will likely replace your camera every five years or so. If you want proof that the lens is far more important than the camera body, check out this great comparison video by the venerable DigitalRev TV. So if you can, save up and get one L lens instead of two or three non-L lenses and thank me later.

Okay, let’s dive into the list of the best Canon lenses out there. Since this is aimed at photographers who are new to the Canon lens lineup, we’ll go in order from the least expensive to the most expensive. But if you get multiple lenses, make sure they actually serve different purposes by having different focal lengths, physical sizes, or minimum apertures.

10 Best Canon Lenses 


EF 50mm f/1.8 STMGo to Amazon
The nifty fifty! Every photographer needs a compact 50mm prime, and Canon has you covered with an excellent lens at an amazing price.
Watch video review
Overall rating:
46
Lightweight:
0
95
100
Zoom Range:
0
30
100
Stabilization:
0
20
100
Focus Speed:
0
40
100
Pros
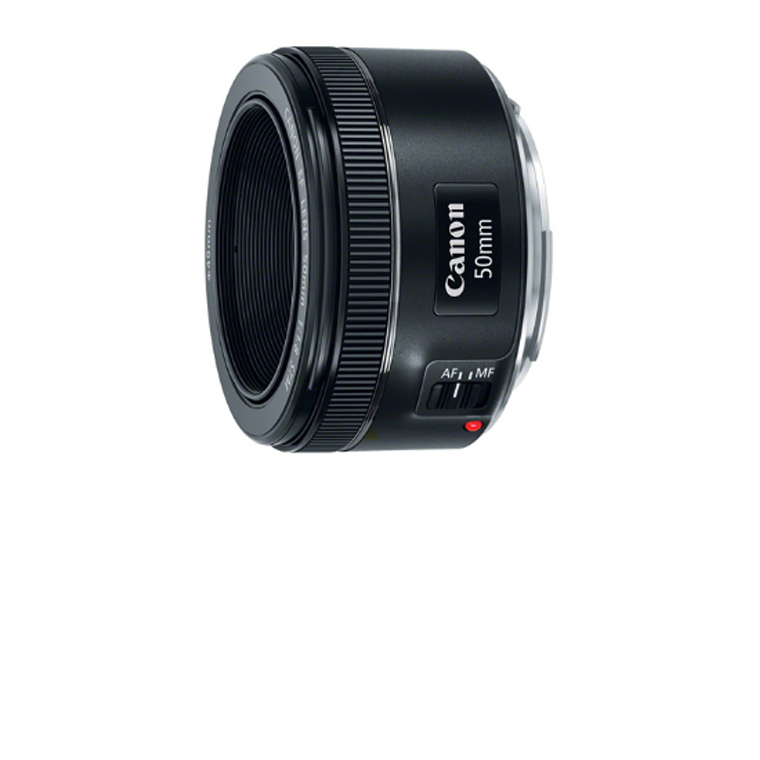
  • Lightweight (Weight: 158g)
  • AF Capable
  • Silent
  • Smooth video focus
  • Cheap
Cons
  • Modest barrel distortion
  • Slower focus
  • Does not include stabilization
  • Narrower field of view on APS-C cameras.
Click to read the full Review
Considering the popularity of its predecesor, Canon decided to celebrate the 25th anniversary of its EF 50mm f/1.8 II Lens with a power upgrade; something that was amazingly valued by Canon's loyal customers.

It covers full-frame cameras and is an 80mm equivalent lens on APS-C. It's small and has a Stepper autofocus motor (Also known as Smooth Transitions for Motion or STM) that is equally suited for stills and video, something Canon is know for. While it's in the lowest, Silver tier of Canon lenses, it's still a no-brainer purchase because of the price point, fast minimum aperture, and sharp performance. A clear number 1 in this Canon lens review post.

Ideal for those situations were we're shooting at poor lit conditions, for portraits and also for our daily life photographs - in a few words: a lifelong companion.

(Sample photo courtesy of Canon.es)
EF-S 24mm f/2.8 STMGo to Amazon
While not at all necessary, having a pancake lens is always kinda fun. As you can see, it's called a pancake lens because it's... shaped like a pancake. While the downside is that it has a relatively simple optical design that lacks a bit of sharpness, the upside is that it's just so darn flat!
Watch video review
Overall rating:
48
Lightweight:
0
97
100
Zoom Range:
0
30
100
Stabilization:
0
20
100
Focus Speed:
0
46
100
Pros
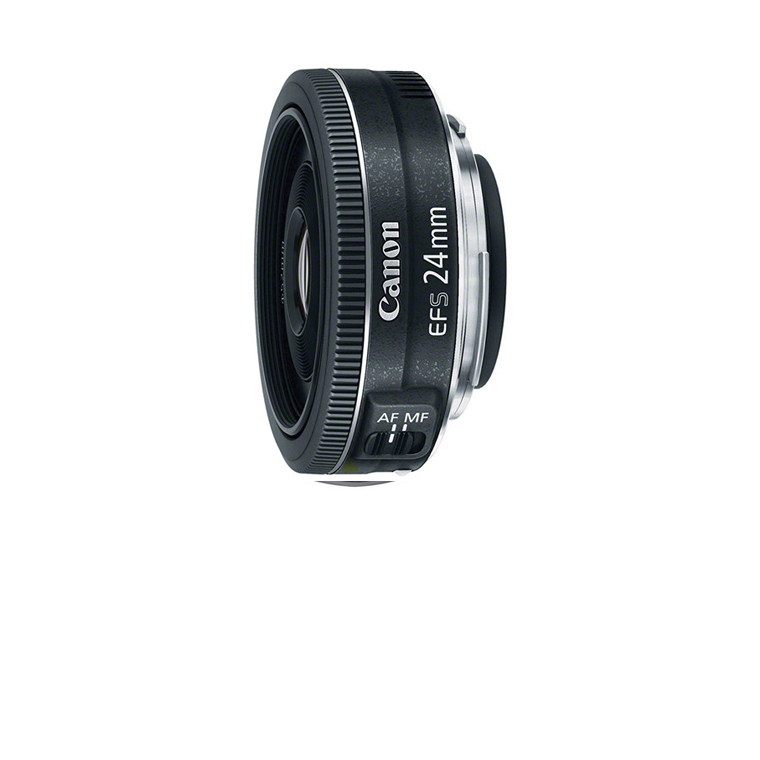
  • Lightweight (Weight: 127 g)
  • AF Capable
  • Real Sharp
  • Very Compact
  • Classic wide-angle field of view
  • Silent STM focus motor
Cons
  • Doesn't feature image stabilization
  • May show vignette effect
  • Not too accurate manual focus
Click to read the full Review
One of the main advantages of this lens is its focal length of 24 mm, which paired with an EOS APS-C camera, will get the same angle of view as with a target of 38 mm and a full frame camera. These conditions are similar to the way in which the human eye perceives images, so these photos will have a nice, natural look for your viewers.

This lens will make your camera feel much smaller and lighter and is great for street photography, since it's not very noticeable or intimidating. Though its optical quality isn't the absolute best, it still can take some great images and is a bargain for a useful wide angle lens.

This lens is also ideal for those DOF effects, as well as for night photography due to its big aperture value - as a great amount of light can be caught by the sensor without even requiring to use a Flash.

(Sample photo courtesy of Thomas Kraus)
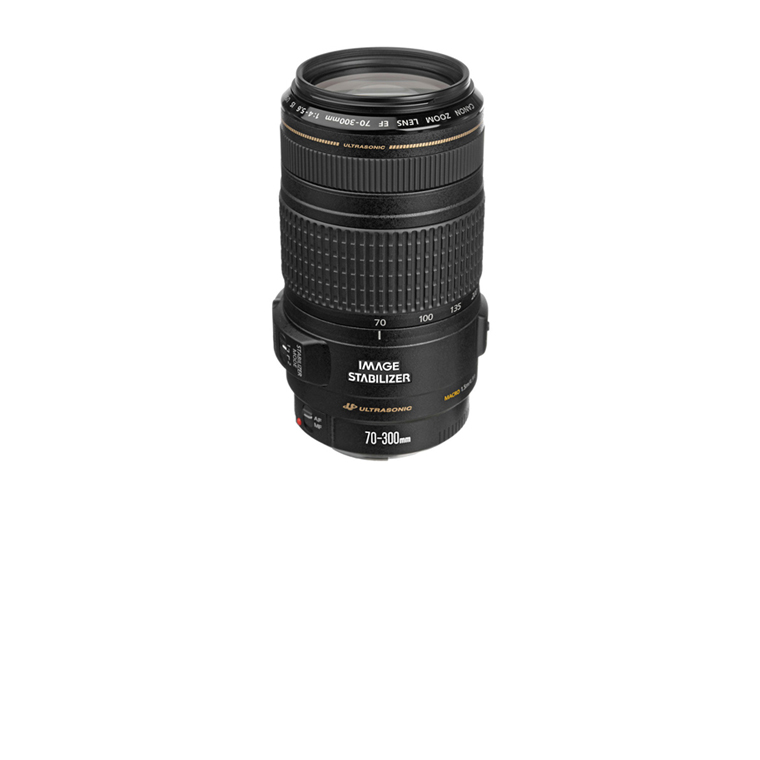
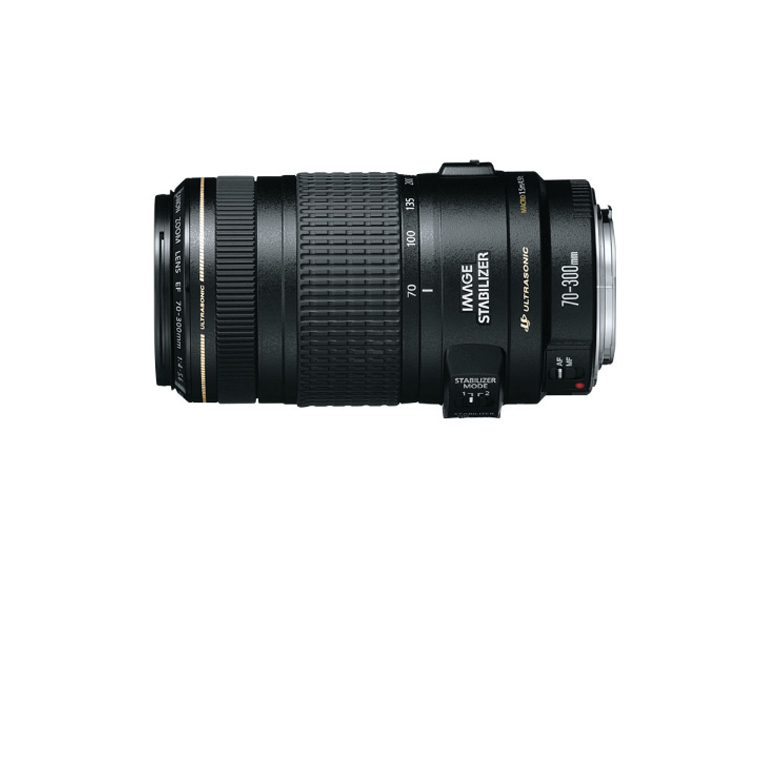
EF 70-300mm f/4-5.6 IS USMGo to Amazon
This baby has quite a bit of zoom range, and it's the first Gold lens on the list. Because of its super long reach, it doesn't have a great minimum aperture range, but that's the price you pay. It does, however, have optical image stabilization, which is something to look for in a telephoto lens.
Watch video review
Overall rating:
71
Lightweight:
0
30
100
Zoom Range:
0
90
100
Stabilization:
0
85
100
Focus Speed:
0
80
100
Pros
  • AF Capable
  • Ultrasonic Autofocus Motor
  • Zoom Ring Lock Lever
  • Optical Image Stabilization
Cons
  • Bulkier (Weight: 0.63 kg)
Click to read the full Review
The lens EF 70-300 mm f/5-5 6 IS USM is equipped with a three steps (IS) image stabilizer, which makes it ideal for working without a tripod. It is possible to use slower shutter speeds values, up to three steps more than would be possible in other cases, without decreasing the sharpness feeling of the image itself.

An element of the objective of UD glass (ultra low dispersion) corrects chromatic aberrations as well as offering resolution and contrasts elevated throughout the zoom range.

Its focus motor is virtually silent, very fast speed for a precise focus even in the most demanding situations.

A budget solution for those who desire to take a step further on travel/landscape/action photography.

(Sample photo courtesy of Fabio Scalabrini)
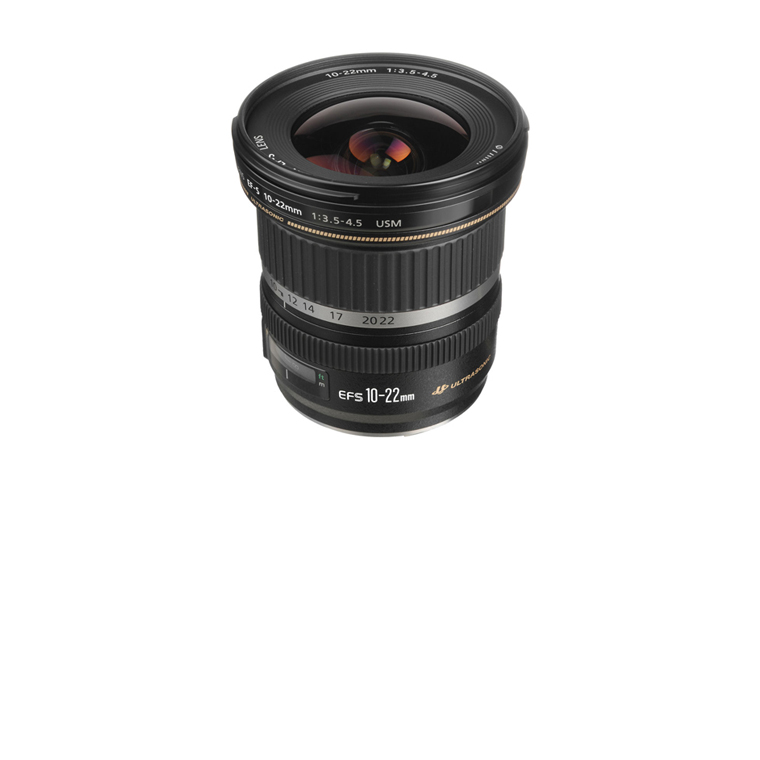
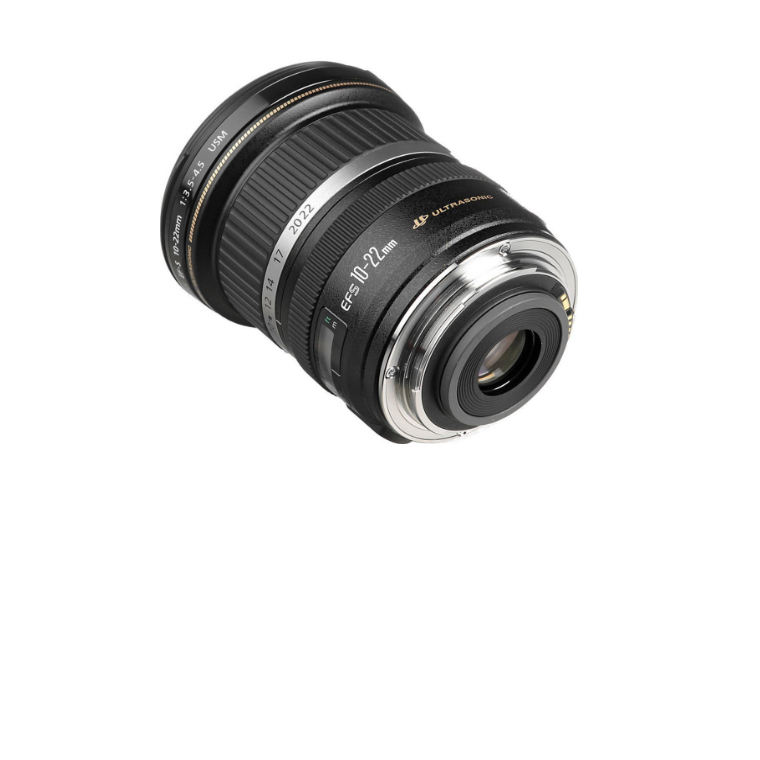
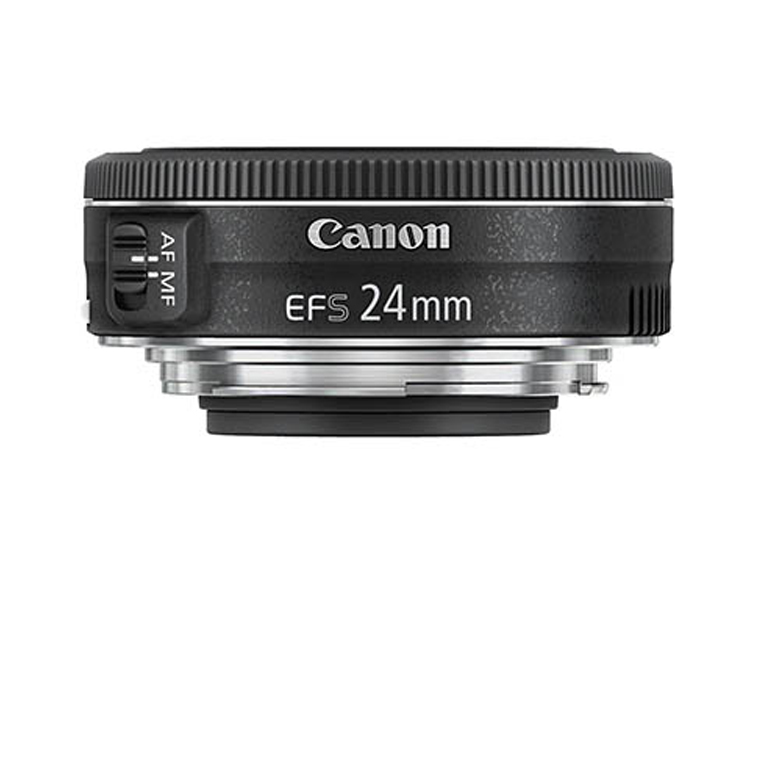
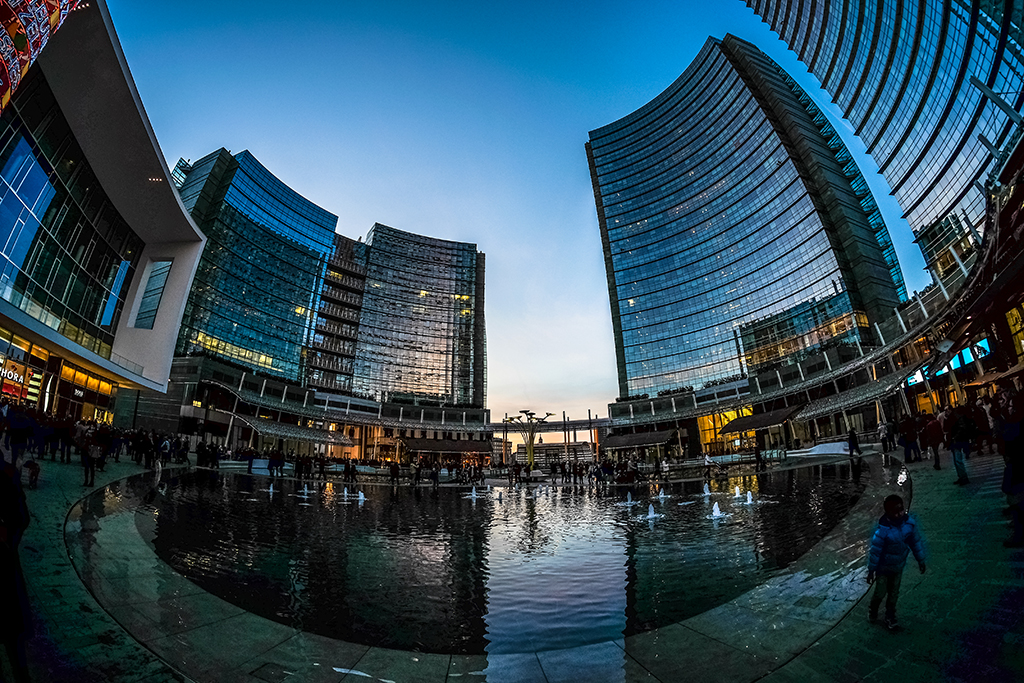
EF-S 10-22mm f/3.5-4.5 USMGo to Amazon
For creative photographers, this is your lens to go - It is capable of altering the perspective of the image in such a way to get incredible dynamic effects.
Watch video review
Overall rating:
61
Lightweight:
0
50
100
Zoom Range:
0
40
100
Stabilization:
0
80
100
Focus Speed:
0
75
100
Pros
  • AF Capable
  • Extreme wide angle coverage
  • Low geometric distortion
  • Ultrasonic Autofocus Motor
Cons
  • Weight: 0.35 kg
  • Lens hood not supplied as standard
  • Modest macro capabilities
  • Incompatible with full-frame bodies
Click to read the full Review
Before you get too excited, remember that this is another APS-C lens, meaning the equivalent focal length is 16-35mm. This is, however, still a very wide angle lens that's right on the border of being a fisheye. This is a great budget option for those looking for a wide angle zoom since it covers basically the entire range you would want. It's also another Gold lens, so you know the build quality will be pretty good too.

Another advantage of this lens relies on its ability to separate the background plane from the plane of the  subject to portray, reinforcing the feeling of presence while keeping an excellent sharpness value in both planes.

(Sample photo courtesy of Dave)
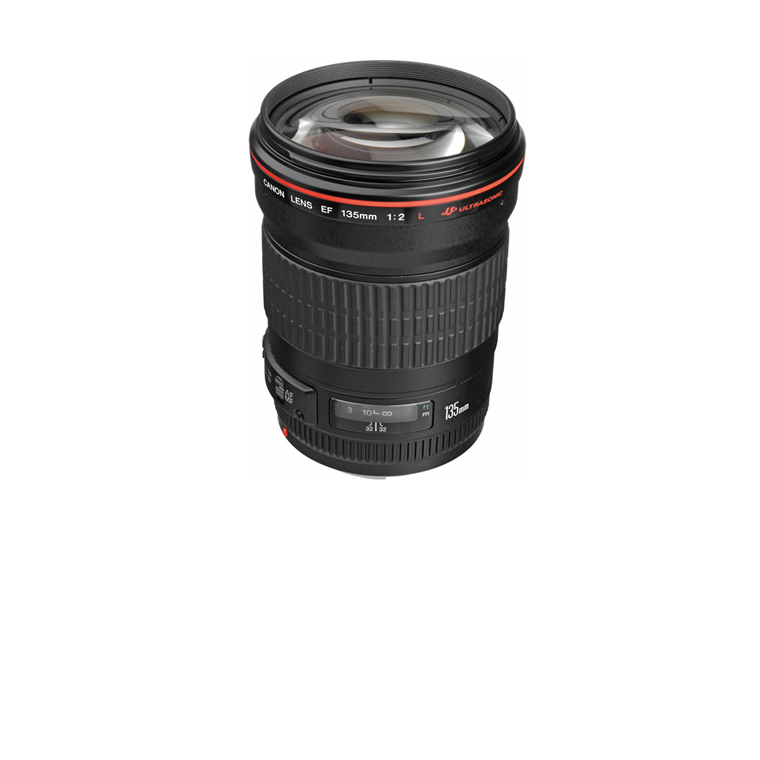
EF 135mm f/2L USMGo to Amazon
It is considered to be a lightweight option for a telephoto lens if you compare it to other similar models - comfortable enough for not requiring a tripod on your common daily-shooting sessions.
Watch video review
Overall rating:
68
Lightweight:
0
60
100
Zoom Range:
0
85
100
Stabilization:
0
50
100
Focus Speed:
0
75
100
Pros
  • AF capable
  • Medium weight (750g)
  • Focusing Range Limiter
  • Depth of Field Scale
  • Ultrasonic Focus Motor
  • Rear Focusing System
Cons
  • No optical stabilization
Click to read the full Review
The first L lens on the list, and it's a real beauty. 135mm is an awesome prime length for nature photography and probably the longest prime you'll want. This is perhaps the largest aperture available in a 135mm lens and it can make for some dramatic images of wildlife. The f/2 aperture is also helpful for nature photography because it can let in lots of light at dusk or dawn, when nature is at its best. You could even use this as a studio portrait lens, though you'll need a decent amount of space between you and your subject because of the longer than ideal focal length.

This lens model also features integration with E-TTL II flash metering, as well as featuring a circular aperture to create a smooth bokeh effect.

Keep in mind that this lens is supplied with a flexible case and lens hood.

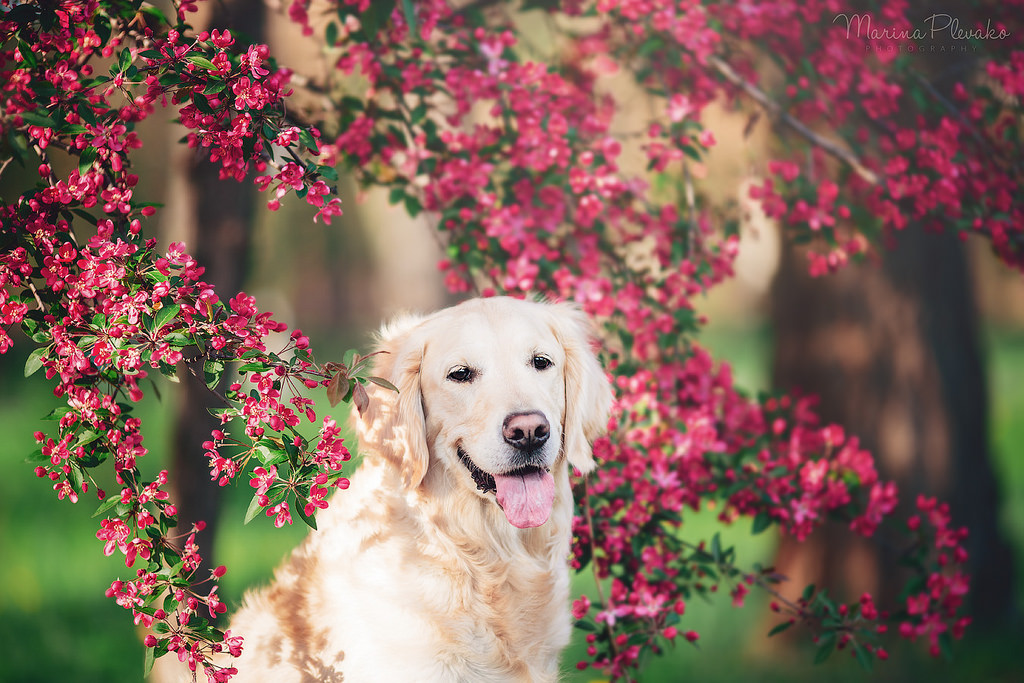
(Sample photo courtesy of Marina Plevako)
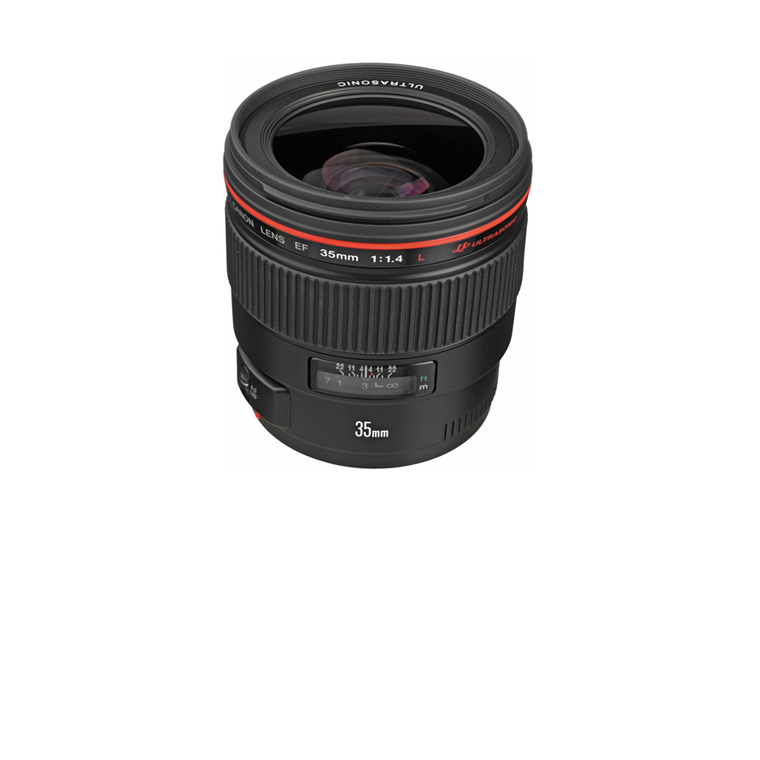
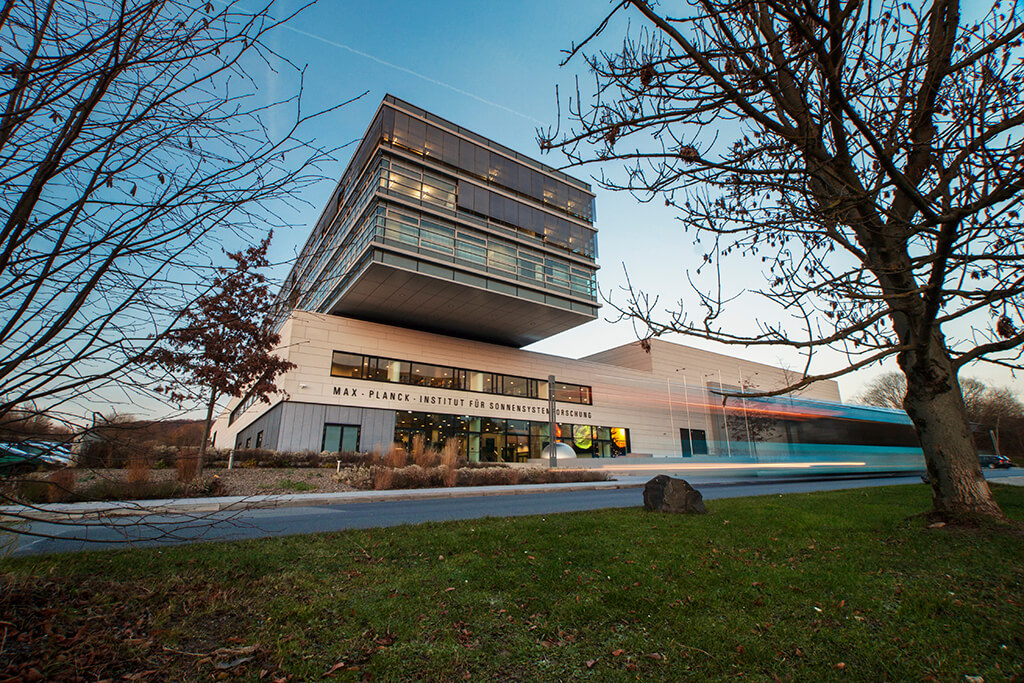
EF 35mm f/1.4L USMGo to Amazon
If you're a street photographer new to Canon, this is probably the lens you want. 35mm is, in my opinion, the best focal length you can have for street photography and really for photography in general. It's a very similar focal length to the human eye, more so than 50mm, and therefore the resulting images look very natural.
Watch video review
Overall rating:
75
Lightweight:
0
60
100
Zoom Range:
0
60
100
Stabilization:
0
85
100
Focus Speed:
0
95
100
Pros
  • AF Capable
  • Optically stabilized
  • Clear sharp lens
Cons
  • Heavy (Weight: 580 g)
  • Some distortion
  • Hood not included
Click to read the full Review
The large f/1.4 maximum aperture allows a broader passage of light in comparison with the optical lens, f/2.8, which makes it ideal for photography without a tripod with low light.
When doing photos with large aperture values, photographers can play with limiting the depth of field value. Through these effects of shallow approach can highlight a reason of the merits and is particularly effective when combined with great visual field wide-angle lens.

As well as with the EF 70-300mm f/4-5.6 IS USM, the Ultra-low dispersion (UD) optics and two aspherical lens elements provide incredible on all frame sharpness, even when the lens is used in its more angular opening.

Basically, if you can afford only one L lens you should seriously consider choosing this one.

(Sample photo courtesy of Michall Yantsen)
EF 16-35mm f/2.8L II USMGo to Amazon
This is essentially the big-boy (full-frame) equivalent of the EF-S 10-22mm listed above. It has an impressive f/2.8 aperture throughout its zoom range, which is generally the smallest aperture you can use to get pleasingly low depth of field when not shooting macro.
Watch video review
Overall rating:
56
Lightweight:
0
50
100
Zoom Range:
0
20
100
Stabilization:
0
75
100
Focus Speed:
0
80
100
Pros
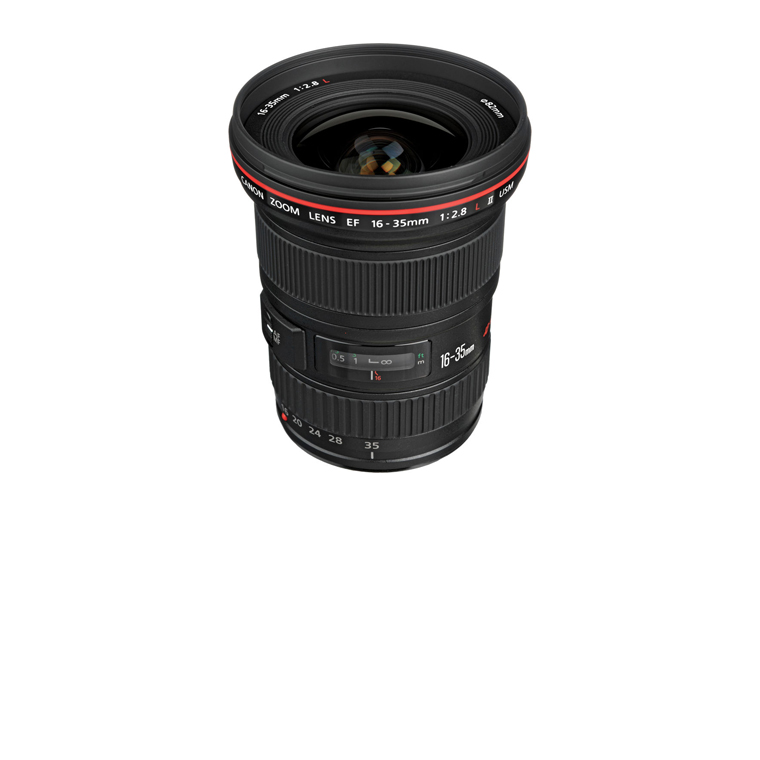
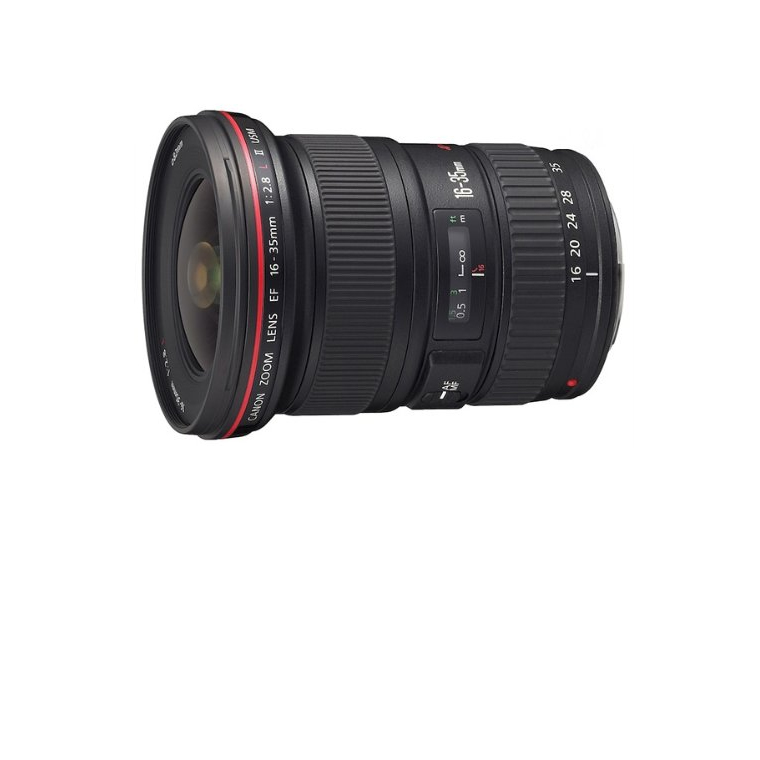
  • Ultra-wide field of view
  • Fixed f/2.8 aperture
  • Really sharp
Cons
  • Heavy (Weight: 635 g)
  • Limited zoom range
Click to read the full Review
The USM (Ultrasonic Motor) ring controls the fast auto focus system with a nearly silent operation. Mechanical manual focusing can be cancelled without disconnecting the AF system. The lens offers a minimum focus distance of 0.28 m over the entire zoom range.

It also proves itself to be another cool option for getting Bokeh effects; as well as including a flexible case and lens hood, just as we previously seen with the EF 135mm f/2L USM.

This is a great lens for landscapes and should be preferred over its older, Mark I sibling.

(Sample photo courtesy of Normand Gaudreault)
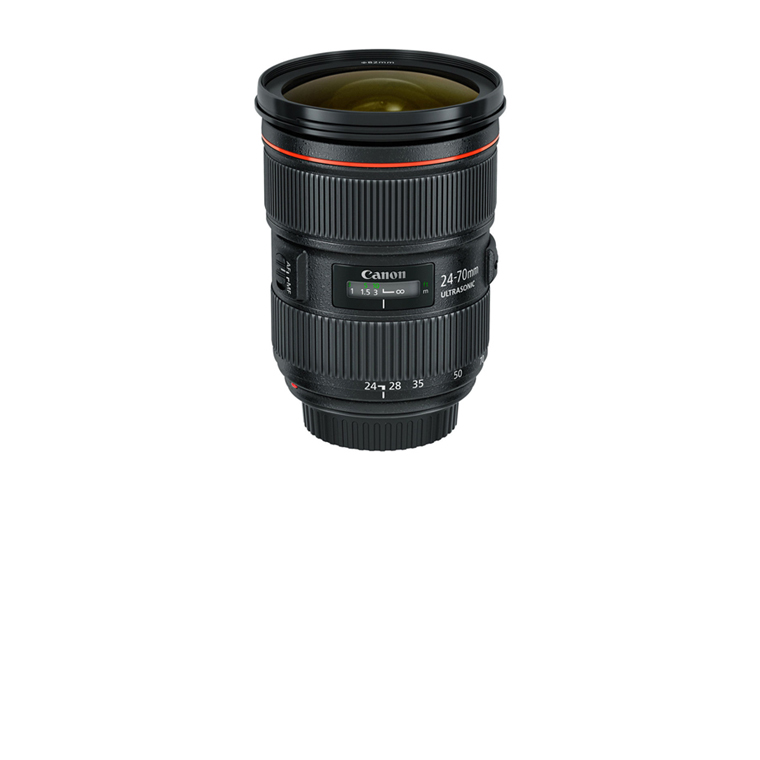
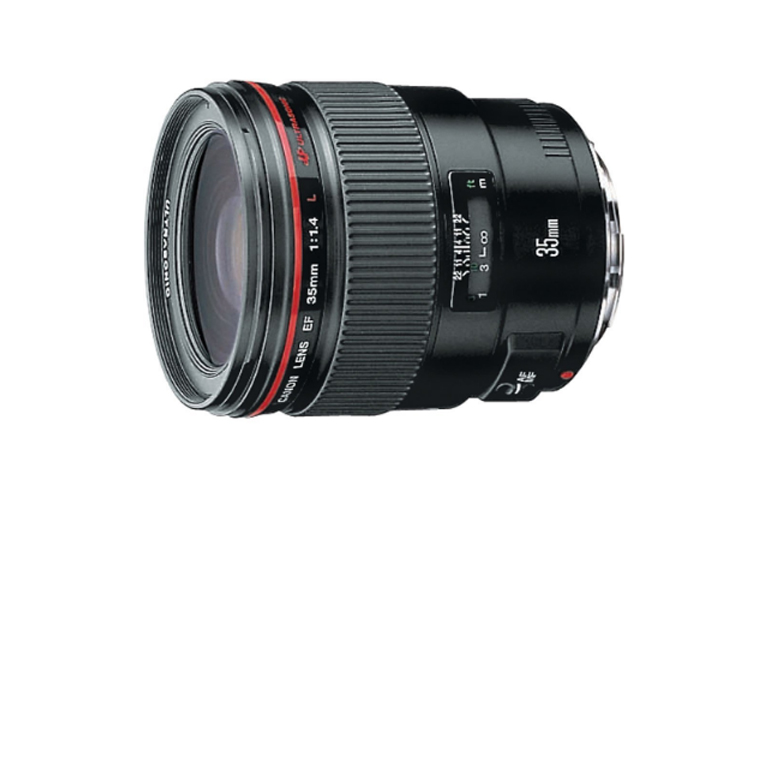
EF 24-70mm f/2.8L II USMGo to Amazon
In the photography gear version of the "Desert Island Game," this is the one lens to bring with you. It covers basically every focal length you could need with excellent quality and a bright/shallow aperture. Many street photographers prefer to use this as their go-to lens over a 35mm or 50mm prime, because it can shoot both of those focal lengths and more.
Watch video review
Overall rating:
55
Lightweight:
0
30
100
Zoom Range:
0
80
100
Stabilization:
0
20
100
Focus Speed:
0
90
100
Pros
  • Sharp Focus
  • AF Capable
  • Ultrasonic Focus Motor
Cons
  • Not Stabilized
  • Pricey: Heavy (Weight: 0.8kg)
Click to read the full Review
The sacrifice you make for tons of versatility is a smaller but still good f/2.8 aperture as compared to an f/1.4, and the lens is also fairly big and heavy.

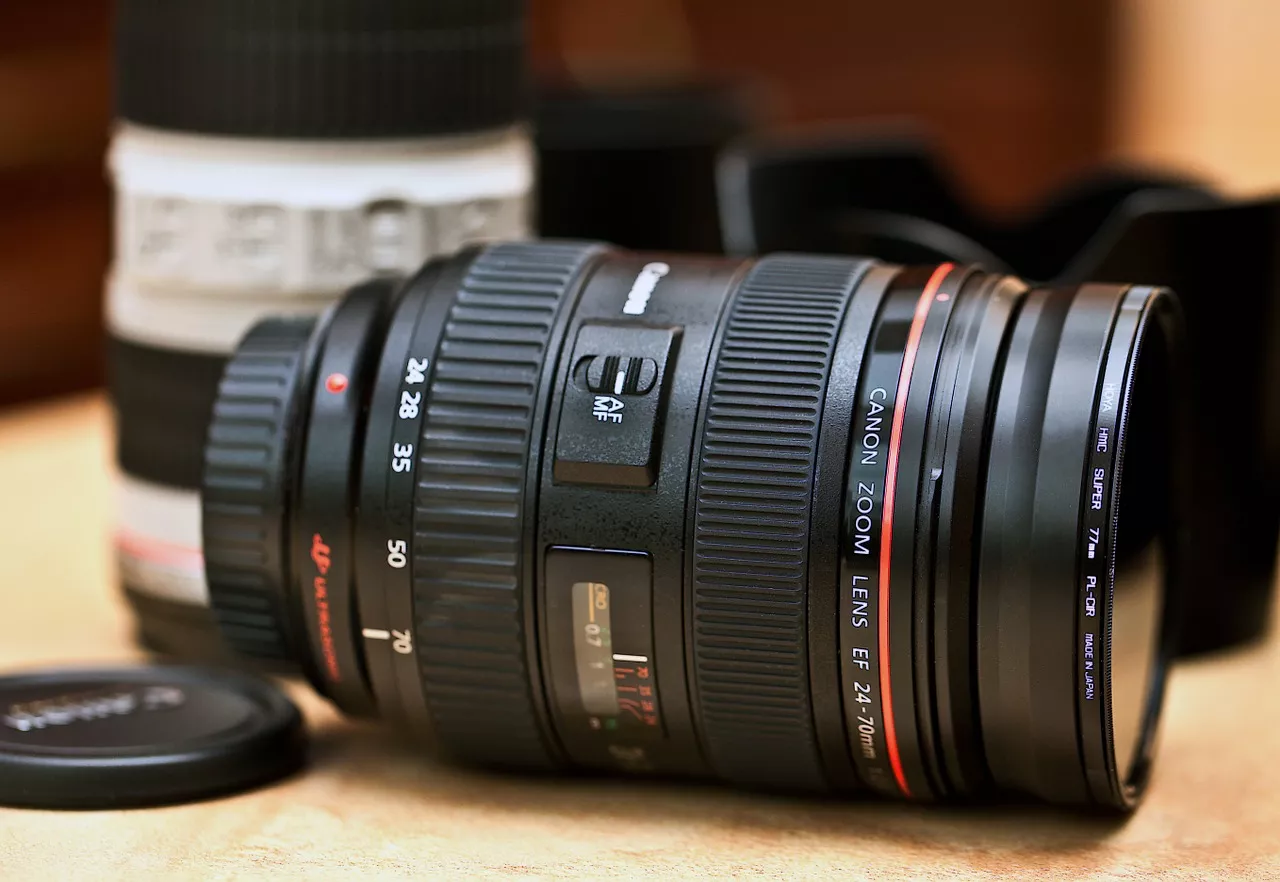
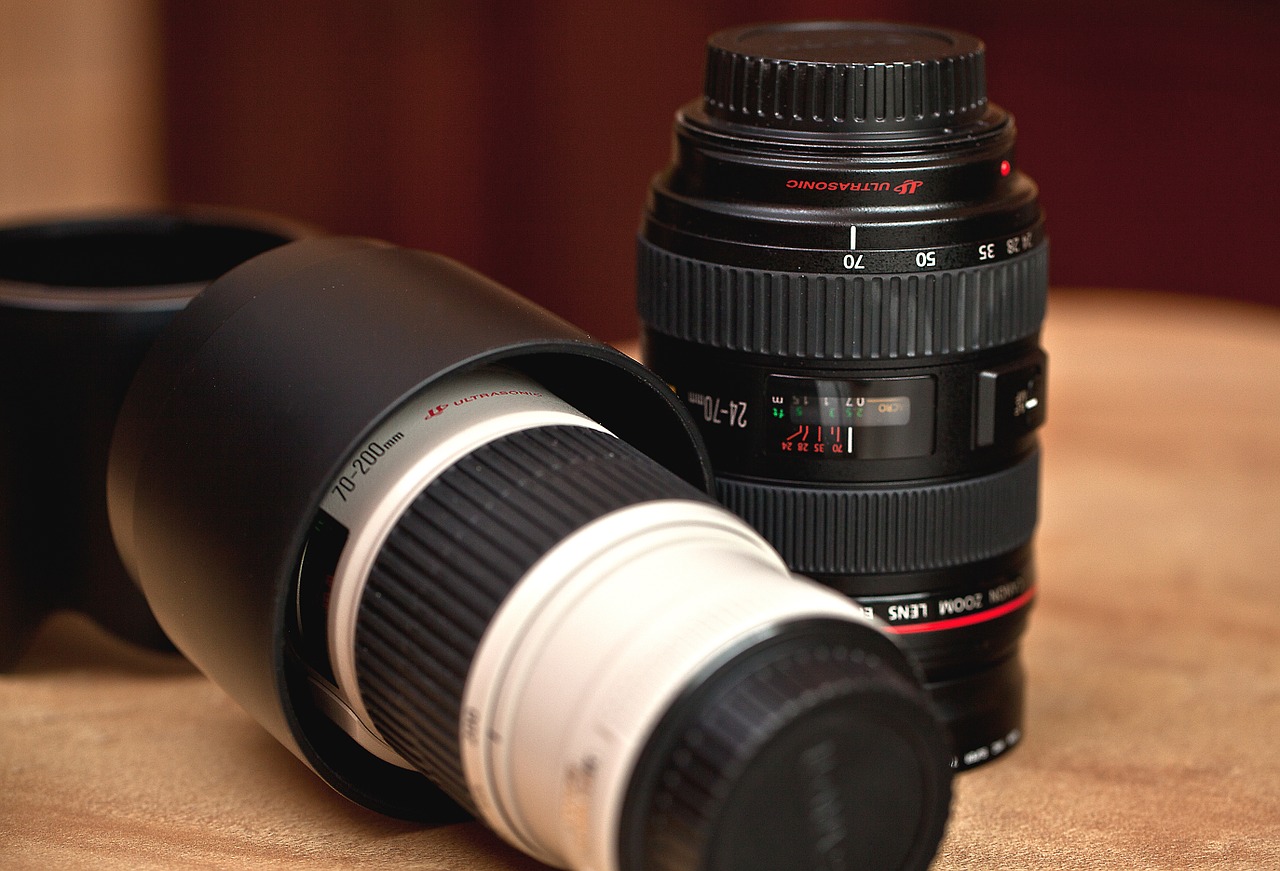
It's famous for its unique, "reverse zoom" design that actually makes the lens physically longest at 24mm and physically shortest at 70mm.  A minimum distance of 0.38 m focus increases the versatility of the EF 24 - 70 mm f/2 8 L II USM, because that brings up 0. 21 x increase.

This is one of the, if not the, best all-arounders in photography and every Canon owner should try to own it at some point.

(Sample photo courtesy of Mikel L de Arregi)
EF 85mm f/1.2L II USMGo to Amazon
One portrait lens to rule them all. This is the ideal focal length for gorgeous portraits, with an impressive f/1.2 aperture that can soften your background beyond recognition without a problem. But be warned, if you get this lens you may find yourself only shooting at f/1.2 and feeling disappointed and frustrated with the rest of your lenses for lacking this extreme aperture.
Watch video review
Overall rating:
55
Lightweight:
0
40
100
Zoom Range:
0
65
100
Stabilization:
0
30
100
Focus Speed:
0
85
100
Pros
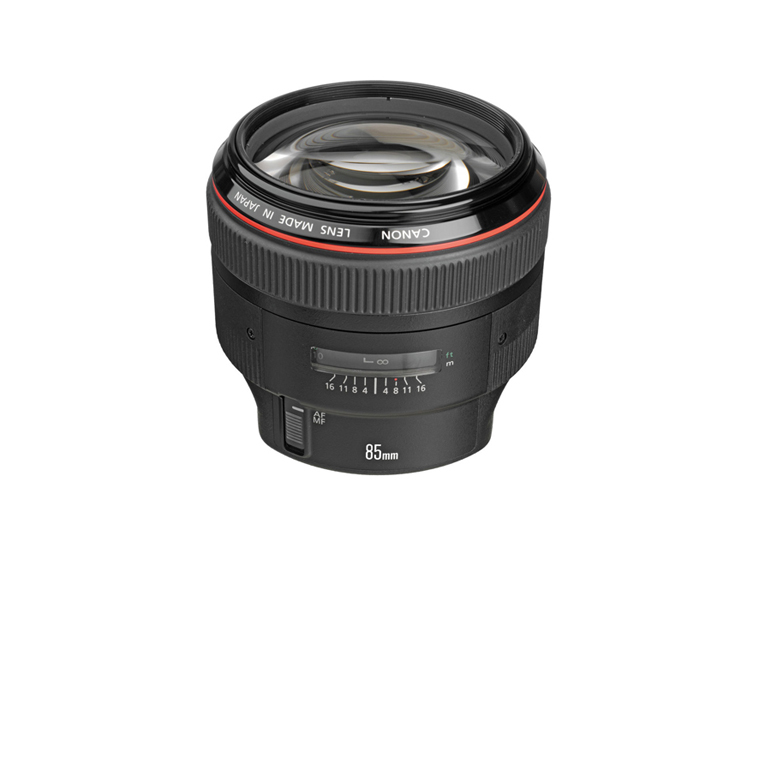
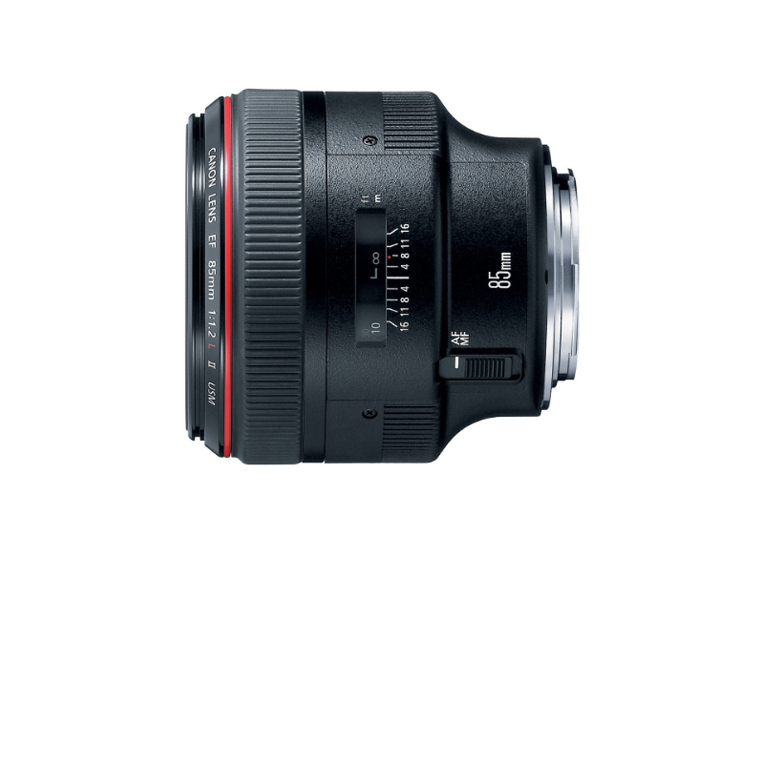
  • Very shallow DOF capability
  • Best light-gathering lens
  • Amazingly sharp
Cons
  • Heavy (Weight: 1 kg)
  • Not AF Capable
  • No Stabilization, Expensive
Click to read the full Review
You can see just by looking at the shape of this lens the lengths Canon went to in order to accomplish this massive aperture, opening up the barrel diameter to accommodate an aperture that physically can't fit inside a typical Canon lens barrel.

Ultrasonic autofocus system as we have seen on other previous lenses, get ready to experiment its large f/1.2 maximum aperture, with in combination with the fast focus motor, it provides a remarkable speed to shoot in "low-light without flash" situations. The large aperture also provides precise control over depth of field to capture striking portraits.

If you're a fashion photographer, you need this lens. Anything else just isn't going to match the results you can get from this marvel of design.

(Sample photo courtesy of Bakabon Syorin)
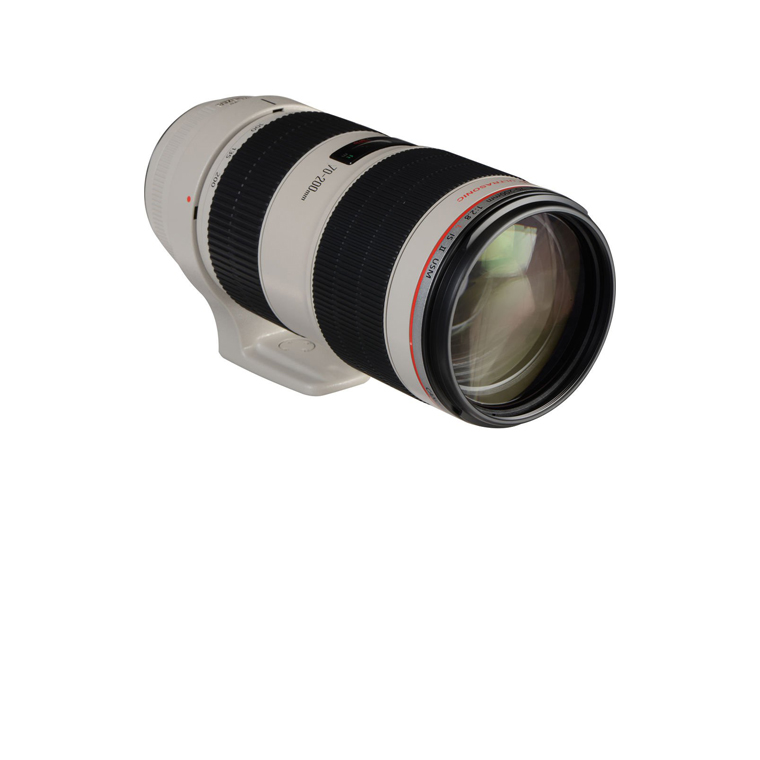
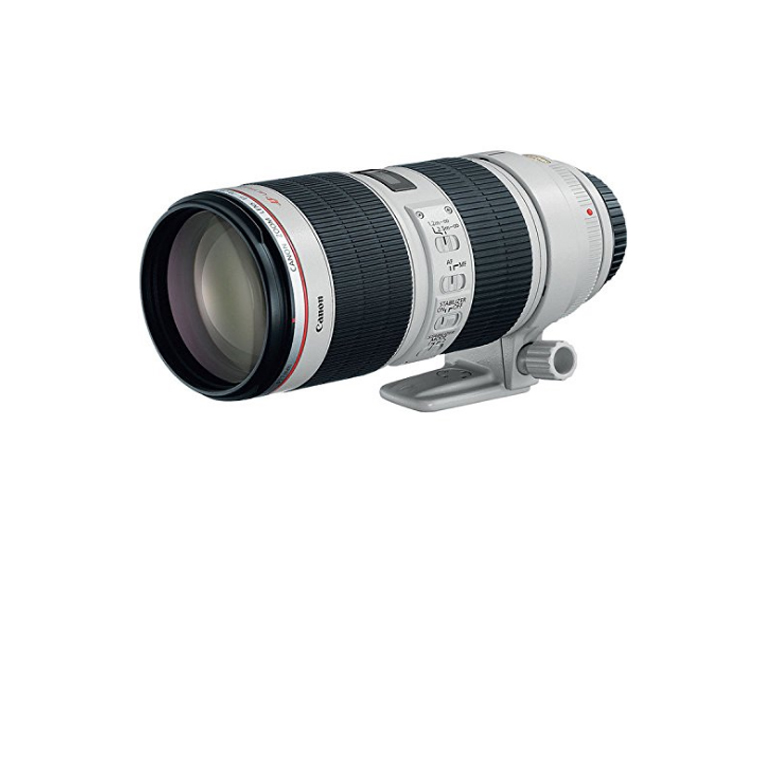
EF 70-200mm f/2.8L IS II USMGo to Amazon
This is another great lens for nature photographers, though it's very popular with sports photographers as well. Price must probably be its only downside, however it can be considered a sort of lifetime investment if you pair it with a Full-Frame camera.
Watch video review
Overall rating:
79
Lightweight:
0
20
100
Zoom Range:
0
100
100
Stabilization:
0
95
100
Focus Speed:
0
100
100
Pros
  • AF Capable
  • Optically stabilized
  • Extremely sharp lens
  • Includes hood and tripod collar
Cons
  • Heavy (Weight: 1 kg)
  • Expensive
  • Some distortion at 70mm
Click to read the full Review
The grey barrel and tripod mount are common signs that it's designed for specialty use where extreme zoom and speed is of the utmost importance, and massive size really isn't a concern.

With no less than 23 pieces of glass, this behemoth ways about 3.2 pounds and is not fun to carry. But if you need a lens like this then you're probably pretty serious about getting the shot, and you likely won't mind the extra work.

Thanks to the circular aperture of 8 sheets, it is possible to create a magnificent background bokeh effect, isolating subjects when using large aperture values.

(Sample photo courtesy of Martin Billard)

So there you have it, all the lenses you need to consider. Okay, it probably won’t hurt to look at just about every lens in Canon’s lineup if you’re so inclined, but when you get totally lost in your selection just come back here and know any of these lenses is an excellent choice.

Be sure to plan your lens purchases for the long term, not to patch a focal length range you need right now. For example, if you have no lenses at all, it may be tempting to fill out your bag right now with the EF 50mm f/1.8 STM, the EF 70-300mm f/4-5.6 IS USM and the EF-S 10-22mm f/3.5-4.5 USM for a total of about $1,225. However, if you eventually purchase an L lens you will likely make one or two of these lenses useless. Instead, it would be wise to perhaps choose the EF 135mm f/2L USM and the EF 50mm f/1.8 STM for about $1,125, then fill in the range with the EF 24-70mm f/2.8L II USM whenever you get the chance.

Whatever you choose, make sure to plan for a diverse and quality set of lenses that can last you a lifetime. Once you have the right lenses for your Canon, the rest of your gear will fall into place.

SaveSave

SaveSave

Gear review – Canon EF-S 10-18 mm

One of the main advantages of DLSR cameras over compact cameras is the ability to exchange lenses. No matter how wide the range of a zoom lens incorporated in a compact camera, the versatility that comes at hand with the possibility of choosing the lens of your preference is hard to match.

That said, apart from the obvious downside of having to carry bulky bags, lenses tend to be expensive, even more expensive than cameras. And there is no way around here. Since the price of the lens is in direct relation to the quality of the optics inside and the manufacturing process, if you want to achieve the best possible result, you will have to make important investments in your lenses.

However, from time to time, manufacturers manage to pull out incredible quality with relatively low retail prices, and that is what Canon achieved with the 10-18 mm. This wide angle lens has not-so-great aperture (probably the weakest point of all) at 4.5 – 5.6 but being fair, a wider aperture is one of the most difficult features to achieve and, given the overall quality and at a retail price of about $300 (compare this with $650 for its predecessor, the 10-22 mm), I feel there is not much to complain about.

Focusing

I am showing how outdated my lenses are here, but one of the improvements from some of my other lenses that I truly love in the 10-18 mm is the focus. First of all, by moving the focusing ring backwards, it is now much easier to get sharply focused images under specific conditions such as when using ND filters. If you ever tried to take a photo using a ND1000 filter and a lens with the focusing ring attached to the filter thread, you know what I mean. Dark ND filters do not let enough light in as to do the manual focusing with the filter on, meaning that one has to first focus and then attach the filter trying not to rotate the focusing ring in the process. By simply moving the focusing ring a few centimeters back, life became much easier than before!

sf1

In terms of auto-focus, the lens has the STM system. STM stands for stepping motor, which are a type of electronic motors capable of moving very small steps in a controlled fashion and they are very quiet. In general, if you have already used STM or USM lenses before, you might not be that surprised, but if your previous experience is with the old standard auto-focus for budget lenses such as the 18-55 mm kit lens (old version), you will be amazed. Also, even though it is not supposed to be as fast as the USM system, for normal purposes such as travel or landscape photography, the auto-focusing is pretty fast.

Focal length

But of course, if you are thinking about buying a wide angle lens, your main concern is probably the focal length. First of all, keep in mind that this is a lens that was designed for so-called APS-C sensors. The difference between full frame and crop sensors is beyond the scope of this review, but in general, a focal length of 10 mm on a crop sensor will be equivalent to a focal length of 10 x 1.6 = 16 mm in a full frame sensor, or in a 35 mm film. And, more importantly, do not try to attach a lens designed for a crop sensor to a full frame camera, or you will damage your sensor!

The following image shows the difference between the two extremes of the focal length (18 mm on the left and 10 mm on the right). The wide-angle provided by the 10 mm is great to capture indoor architecture shots. Notice, however, the distortion at the borders of the image, especially on the bottom left corner, where the white round table looks like an oval. This needs to be taken into account during post-processing.

18_10_mm

That said, the focal length range is a great complement to the kit lens, especially if your interest lies in travel, architecture, landscape or something more specific such as climbing photography, or any type of photography where you want to capture a subject and still be able to get a good portion of background on your frame.

Distortion

Something inevitable when dealing with wide angle lenses is the optical distortion. This is a consequence of how light rays are guided through the lens towards the camera sensor/film and, even though a careful manufacture can help in that sense, completely getting rid of it is an impossible task.

sf2

The 10-18 mm lens does a pretty decent job in this sense as well. Also, thanks to the many options for post-processing readily available nowadays, getting rid of the remaining distortion is an easy task. Still, the fact that some distortion will be present is something that you should keep in mind when taking photos with any wide angle lens so that you can plan your composition so that when you post-process your images no important information is lost.

Overall construction

Apart from some useful features such as having the focusing ring detached from the filter thread, the lens feels quite robust. Being part of the cheapest line of Canon lenses, the 10-18 mm is mainly constructed of plastic which can make it less resistant in the long term, but at the same time, it allowed Canon to build a very lightweight lens that makes it really easy to carry around.

Summary

In general, I would say that, even though the 10-22 mm is a faster lens than the 10-18 mm, for those amateur photographers that are either on a budget or just starting out and willing to try out different focal lengths without having to get a hole in the bank account, the 10-18 mm is definitely a great choice as a second lens.

SaveSave

Old DSLR vs. New DSLR Cameras

In this post, I want to address one of the decisions that people buying a new DSLR camera will have to face at some point or another. I will focus on Canon DSLRs because some of the current models have the particularity of not being replaced by new models but simply by new ‘versions’ of themselves.

The issue with new versions (labeled by Canon as Mark X with the X indicating the version number) is that they are usually significantly more expensive than their predecessors. Take, for instance, the workhorse of Canon’s full frame cameras, the EOS 5D. So far, there have been 6 different versions of the 5D with the Mark IV being the last one to use the ‘Mark’ versioning system (the last two versions were called 5DS and 5DSR).

Cologne Cathedral

If you compare the prices of the four last versions (Mark III, Mark IV, 5DS and 5DSR) you will see that they range (for the body only) from about $2500 for the Mark III to about $3700 for the 5DSR, with the Mark VI and the 5DS being priced at about $3500 each.

Since there is no price difference between the Mark IV and the 5DS and given the small difference between them and the 5DSR, I will focus here on the differences between the 5D Mark III and the 5D Mark IV, putting special emphasis on whether those differences justify the price gap or not at the moment of considering buying a new camera.

Canon EOS 5D Mark III vs. Mark IV

Probably the first noticeable difference between these two cameras is their resolution in terms of number of pixels. While the Mark III has 22.3 MP, the Mark IV has 30 MP. This might already look like a good argument for paying the extra money for the Mark IV but, the truth is that the number of pixels of a camera is an overrated feature.

Unless you are planning on shooting without paying any attention to composition and relying on cropping during post-processing to get the scene you wanted on the first place, a larger number of pixels is useful only when it comes to printing your images. In that sense, with both 22.3 and 30 MP you can make prints with sizes of up to 40″ x 60″ (that’s about a meter on the smallest side!) with good quality. That said, for most photographers, the difference might not actually be worth the extra $1000.

Athens

According to the DxO scores, another specification where the Mark IV surpasses the performance of the Mark III is the dynamic range, with values of 13.6 for the former and 11.7 for the latter. These numbers are exposure stops and basically measure the range between the maximum and minimum exposure that contain useful information on them. The difference here means that the Mark IV will provide you with almost two extra stops which is something noticeable and can make a difference when working under certain difficult light conditions. Once again, though, and given that you can easily compensate two stop values by performing bracketing and exposure blending, I can imagine that most users will get away just fine with a value of 11.7 and save the extra money.

There are a few other small differences between both models but in most cases, they are rather small. For instance, in terms of continuous shooting, the Mark III provides 6 fps while the Mark IV provides 7; not a remarkable difference even if you are shooting fast-moving subjects. Another important aspect to take into account when buying a new camera is the auto-focus (AF) system and the number of AF points. In this respect, both cameras possess 61 AF points, although the Mark IV system is a bit more sophisticated.

Prague

If you use your camera to take not only photos but also videos, this might be a point where finally paying the extra $1000 might make sense. The Mark IV, unlike the Mark III, provides 4K video and also provides an AF system while taking videos. If you ever tried to make a video with a DSLR that does not provide AF while filming, you know how necessary this feature is!

As with pretty much everything in photography, the final decision of whether it is worth it to pay more for a camera like the Mark IV instead of going with the older model will be a very personal one and will depend mostly on what you use the camera for. Still, for most photographers who care more about photography than technological advances per se, it might be a wiser choice to go with the older model and spend the extra amount on a good lens.

In any case, before buying a new camera (which usually represents an important investment), take your time to evaluate the different models out there in the market and pay special attention to the features that you really need. After all, do you really need a touchscreen camera if that means that the price of two equally capable cameras will differ because if that?

If you have any question related to this article, please leave a comment below and I will be happy to answer and, whatever camera you get I hope you have a great time with it!

Extending the functionality of your Canon with Magic Lantern

Modern cameras, specially DSLRs, have so many different features that it actually takes a while to go through all of them after you buy them, and sometimes you even find yourself discovering new functionalities years after you started using yours. However, it is not uncommon to stand in a situation in which you wish your camera could do a bit more.

As a Canon user myself, a few years ago I found out that Canon does indeed provide a library for you to add new, or change existing, functionalities of the built-in software (so-called firmware). Of course, to do this, you need to know how to program and you also need the time to do it.

ml1

Luckily, a group of developers have been building a variety of new and extended functionalities for Canon cameras under the name of Magic Lantern (ML) and you can download this for free and upload it to your camera.

A word of warning is necessary here, though. Canon itself is not involved at all and does not endorse the use of ML, meaning that installing the package will void your warranty and you might find some issues while using it and, more importantly, in an extreme case, your camera might stop to work. For this reason, only install this (or any other third-party firmware) at your own risk!

Installation

Since different cameras have different processors and functionalities, ML is not available for all the cameras manufactured by Canon. According to their website, the models currently supported are: 5D2, 5D3, 6D, 7D, 50D, 60D, 500D/T1i, 550D/T2i, 600D/T3i, 650D/T4i, 700D/T5i, 1100D/T3, EOS M.

I used ML on a Canon 500D/T1i and, for this reason, all the different features I mention in this post will be related to that specific model. Notice that the available features might differ from one camera to the other.

To install the firmware follow the simple instructions given on the ML website. The installation procedure is quite simple and, in general, it is the same procedure that you would follow in order to update the firmware of your camera.

Using ML

Once you install the firmware and restart your camera, you are pretty much ready to go. The first thing you will notice is that not much has changed. You still have access to the standard features of your camera, menus included. However, if you press the ‘delete’ button while on the main screen, the ML menu will appear.

The menu consists of 12 sections, each of them with different options regarding different aspects of the camera. Some of them are related to audio and video while others are related to photography. Here I will only mention the first two and will concentrate on those options that can help you improve the functionalities of your camera when taking photos.

The very first menu is called Audio and has three options, namely ‘Analog Gain’, ‘Speaker Volume’ and ‘Beep, test tones’. An important thing to notice here is that, among the three options, the two first can be changed by single pressing the ‘Set’ key while the last one has a set of sub-options that can be accessed by pressing the ‘Record’ button (the same one you use to start or stop recording videos).

The second menu is an important one for photography. It is called ‘Expo’ and, as the name implies, it has a set of options related to the exposure settings of your camera. As you will see, most of the options provided by ML are not new features, but extensions of the existing ones.

The first option inside the ‘Expo’ menu is called ‘White Balance’. By pressing the ‘Record’ button, ML will display a sub-menu with different options. The first one allows you to select the temperature of the light you are dealing with from a minimum value of 1500K to a maximum of 15000K with varying steps along the scale (100K in the lower end and 500K in the higher end). While it would make sense to enable the selection of automatic white balance inside ML, I wasn’t able to find it so I guess you will always have to go back to the normal Canon menu to do it.

ml2

While most of the people tend to use automatic white balance (and, the truth be said, if you shoot in RAW it makes total sense to do it since you can correct it later on), understanding the concept of light temperature and applying it when selecting the white balance can make your life easier. For instance, by selecting a temperature close to 5900K, you will tend to get well-balanced colors when shooting on broad sunlight.

The rest of the options under the ‘White Balance’ sub-menu are intended to shift the white balance towards cooler or warmer colors. Two options (‘WBShift G/M’ and ‘WBShift B/A’) are similar to the options provided by the original software but ML also provides three options (R, G and B ‘Multiplier’) that allows you to give more weight to either red, green or blue colors respectively. The last option on this section, called ‘Auto adjust Kelvin + G/M’, is intended to make an auto-adjustment of the white balance while on LiveView mode.

The next sub-menu is an important and a bit difficult-to-understand one. It is called ISO (again, a rather self-explanatory name). The complication arises from how ISO numbers are treated inside digital cameras. The sub-menu contains four different settings, namely ‘Equivalent ISO’, ‘Canon analog ISO’, ‘Canon digital ISO’ and ‘ML digital ISO’. Getting a proper understanding of ISO number is beyond the scope of this article, but in general, when you change the ISO number on a digital camera you are changing the gain of the digital sensor.

ml3

Finding reliable information on the topic can be challenging, but the way it seems to work is that the ‘Canon analog ISO’ is related to the gain of the electron multipliers inside the read-out circuitry of the camera, while the ‘Canon digital ISO’ is a digital gain applied once the RAW data is saved (somewhere downstream along the pipeline). In any case, even by suggestion from ML itself, it is advisable to leave the digital value at zero and play with the analogue one. The last function, ‘ML digital ISO’, allows you to improve the highlights while working with movies. An advantage of the ISO management by ML is that it lets you select intermediate values like 160 instead of jumping from 100 to 200, making it possible to make finer adjustments in sensitivity and thus giving you more control over the noise.

mlpt2_1

‘Picture Style’ is very similar to the original option available in the Canon menu, so nothing interesting to mention here. The ‘Expo. Lock’ options allow you to lock the exposure setting while in manual mode, even if you change the exposure time, aperture or ISO value. While I haven’t used it much myself, I think this might be a good option if you are taking photos of different subjects under static light conditions. For instance, it could help you capture a landscape and right after a fast moving animal by changing the shutter speed (exposure time) without having to adjust for the exposure. In a way, this is like the Tv and Av modes combined.

The following option, ‘Expo. Presets’, allows you to set two different presets and quickly toggle between them by using either the ‘SET’ or the ‘DISP.’ buttons on your camera. Once you set either option, simply go to your main screen, set the settings you want for your first preset (shutter speed, aperture, ISO and white balance). Next, press the corresponding key (‘SET’ or ‘DISP.’), set the settings for your second preset and you’re done. Each time you press the toggling key your camera will automatically load the other preset. This is, again, particularly useful when you are shooting different types of subjects during a photographic session.

mlpt2_2

The ‘Expo. Override’ option is supposed to bypass Canon limits in terms of exposure to give you more control but, at least for the camera I use (a Canon Rebel T1i), not much can be done. This might differ for different models, though, so it makes sense to give it a try. The final option on the ‘Expo’ menu is the so-called ‘ExpSim’. This is actually an interesting feature (although with some glitches) that only works in LiveView mode.

When you activate the ‘ExpSim’ option, once in LiveView mode you will get live information about the exposure of your image. On the bottom left a corner of the screen you can see a histogram showing you the color and intensity balance (R, G and B channels as well as the sum of all). On the center, you get a plot showing you the overall balance of your image that can help you realize whether the whole scene will be adequately exposed once you take the photo. The cursor itself will give you information of the intensity level (in percentage) of the exact area where you are pointing. Finally, if parts of your image are overexposed (intensity level higher than 100%), those areas will be shaded on the screen. That way you can know whether you should make adjustments to your settings even before capturing the photo.

mlpt2_3

There is a downside to the ‘ExpSim’ feature (and, in fact, to many features of ML) and that is that the LiveView screen becomes a bit cluttered, with some of the information provided by ML actually being shown on top of that provided by Canon. Also, if you override the FPS value (a feature available on the ‘Movie’ menu), the whole LiveView screen becomes pretty much useless, with superimposed and flickering images all over.

I hope you started to have a good feeling about the neat features of ML. While many of the functions can be too specific for most users (and some are simply experimental with hardly any practical use), some others, such as ‘ExpSim’, are incredibly useful functions that let you wondering why Canon did not implement them in the first place.

mlpt3_1

Many of the ML features are related to enhancements in the information that is made available on the screen while in LiveView mode. The third menu is called ‘Overlay’ and it contains all the different layers of information that can be added to your LiveView screen.

The ‘Overlay’ menu

The very first option (‘Global Draw’) lets you turn the selected overlays on and off (all of them at once). The following options are for specific functionalities. ‘Zebras’ overlays a pattern over areas that are over- or underexposed. Under the sub-menu you can select the type of pattern you want to use, if you want to use the overlay for underexposure, overexposure, both or none and also what level of intensity you want to set as a threshold. For the thresholds, it is useful to set one close to 100% (something between 95% and 99%) for the overexposure but not so close to zero for the underexposure (at least above 15% should work in many situations). The ultimate choice will depend on your application, so there might be a bit of trial and error involved here.

ML also gives you the possibility to get information about the exposure, not only taking into account the selected picture style, but also the RAW information, something that Canon‘s inbuilt firmware cannot do. This is especially useful if you are an avid user of the RAW format.

mlpt3_2

One of the brilliant features of ML is the next option on the list, namely the ‘Focus Peak’. If you activate this function, while in LiveView, the software will provide you with information on what parts of your scene are in focus. The function can use two different methods (or a combination of both) to determine what parts are in focus. The two methods are edge detection (which is the best option under low-light conditions) and by looking at fine details, which can be more accurate but needs much more ambient light. Unfortunately, no matter how good the algorithms are, it cannot do much under very low-light conditions, which is something you have to expect, given that any focusing algorithm works with light.

The next option, ‘Magic Zoom’, is supposed to allow you to check the focusing with an amplification of a given part of the scene (something similar to the functionality provided by Canon) even during recording of a video. However, at least for me, the option does not work properly on the small screen flickers continuously making it impossible to get any useful information out of it. As I said in the previous posts, though, ML can perform differently in different models, so you might want to try this anyway (I use a Canon 500D/Rebel T1i).

The ‘Cropmarks’ function allows you to overlay custom grids that will help you frame your subjects. Among the most useful ones are the ‘CRSSMTR2.BMP’ which is basically a cross aligned with the screen that can allow you to make sure your subject is straight, and the ‘PASSPORT.BMP’ that places the silhouette of a head to make it easier when framing a subject for a standard portrait.

mlpt3_3

The ‘Ghost image’ function overlays an image while in LiveView. While this might be useless for many people in many situations, it can be very helpful if you want, for instance, to capture a scene under different conditions. Suppose you want to take a photo of a landscape during the changing seasons, by overlaying the image you took before you can easily stand in the exact same position for the new one.

The ‘Spotmeter’ is another particularly useful image when dealing with harsh light conditions like a very large contrast (high dynamic range). This overlay creates a region marked by a small square and provides you with information about the brightness of the pixels within that square. By using this function you can easily correct your exposures to get information on all regions of the scene and avoid getting back home and realizing that parts of your image where completely over- or underexposed.

The following option, ‘False color’, colorizes the scene with a defined colormap that matches the brightness levels (from 0 to 255). I personally find this a bit cumbersome since it fills the whole screen and, at least for what I’ve seen, having information only of the over- and underexposed areas (with the ‘Zebras’ feature) is much more useful.

mlpt3_4

Similar to the histogram plots provided by Canon, ML has its own histogram feature which is more customizable. In addition, it provides another type of plot, called ‘Waveform’, which I already described in the first post of this series and that gives you a hint of the overall brightness.

The last option within the ‘Overlay’ menu is called ‘Vectorscope’. In simple terms, this is a different way to present a color histogram that can be useful to define a custom white balance. If you turn this option on when in LiveView mode you will see a circle divided into eight sectors with the basic colors of a white balance chart distributed among them (yellow, red, magenta, blue, cyan and green). ML will then calculate the overall color of the scene and indicate the amount of each color in a graphical way. In an ideal case, you want a balanced image, so you can adjust your white balance to counteract any strong deviation towards any of the colors.

mlpt4_1

The ‘Shoot’ menu

The shoot menu consists of nine features, the first one being called ‘Advanced Bracket’. As you might suspect already, this function extends the in-built bracketing function of the Canon software. The original bracketing capabilities of Canon cameras has always been rather limited, and this has become more obvious to many users when HDR gained incredibly popularity in the last few years.

By default, when performing exposure bracketing, Canon usually allows the user to take only three separate shots with steps of up to 2 EV. ML allows you to choose between three different types of bracketing, namely ‘Exposure (Tv,Ae)’, similar to the traditional bracketing that changes the exposure time in manual mode, ‘Exposure (Flash)’, that changes the flash exposure compensation and ‘DOF (Aperture)’, that keeps the exposure constant while it changes the aperture to exposure time ratio.

In terms of number of shots, ML can either make the choice automatically (based on the brightness balance of the scene) or let you choose between 2 and 12 shots. In terms of step, you can choose between 0.5 EV and 8 EV. Finally, you can also use the ISO number as a bracketing variable. In general, that is a huge increase in the native capabilities of Canon cameras and it will certainly make your life much easier when dealing with scenes with high dynamic range.

mlpt4_2

The next feature, called ‘Intervalometer’, is definitely another one of the great additions by ML. The intervalometer allows you to take pictures at fixed intervals of time. This is a great feature for taking time lapses and also very long exposures such as star trails. You can choose an interval between 0 seconds (basically burst mode) all the way to 8 hours. This gives you enough range to set your camera to take photos of moving objects or animals using the smallest intervals or time lapses to even capture the pass of days using the largest intervals (ideal, for instance, to capture the change of seasons!). You can also set a trigger, when to start and also when to stop (after how many shots).

The ‘Bulb Timer’ option allows you to set a specific exposure time for the BULB mode of your camera. This is useful for when you want to set exposure times longer than 30 s but do not want to use a remote shutter or you simply want to set a specific exposure time while not having to worry about manually stopping the exposure. The time can range from 1 seconds to 8 hours. If you’ve ever faced the situation of capturing a minutes-long exposure during a cold night, you will certainly appreciate this feature!

Another nice feature especially useful when working with large focal lengths is the ‘LCDsensor Remote’. Sometimes, after carefully focusing and with your camera set on the tripod, it is quite difficult to avoid the shake of the camera after pressing the shutter button. This feature transforms the small sensor located next to the LCD screen (the one intended to turn off the screen when you are looking through the viewfinder) into a sort of remote control. By simply passing your hand in front of this sensor, the shutter will be released. This way you can avoid pressing the shutter button and eliminate the main shaking source without having to resort to long shutter delays.

mlpt4_3

Similar to the ‘LCDsensor Remote’, the next feature is also intended to take photos while you are away from your camera. The ‘Audio RemoteShot’ allows you to release the shutter by making a loud noise. You can in fact set how loud you want to go by setting the trigger in terms of decibels (dB). This feature is very useful when taking group photos or also when you want to capture for instance an animal that makes some sort of noise.

Probably an even better feature for wildlife photography is the next feature, simply called ‘Motion Detect’. As the name implies, the trigger will be a change in the scene, although it also allows you to define it as no change at all (to make the camera take the photo once the camera has become steady after a shake). As a change, it can take a large change (called ‘Expo. change’) or a small one (called ‘Frame diff.’). In all the cases, you can also define a trigger level (how much of a motion it will detect before being triggered) and the size of the area where the camera will measure the change.

The next feature, ‘Mirror Lockup’, is another useful tool for wildlife photographers. When you get close to your subject, it is quite common for them to get scared and run off when they hear the sound of the mirror of your camera being lifted. For this, you can actually lock the mirror in the upright position and only expose the sensor when pressing the shutter button. If you are a keen wildlife photographer it might still make sense to get a camera with a relatively quiet shutter (the Canon EOS 500D that I use is quite loud) since even with this feature you will eventually have to release the mirror anyway. Also, remember that keeping the mirror up uses a significant amount of battery!

The ‘Flash Tweaks’ feature is related to, you guessed, flashes. It contains a wide-range flash exposure compensation (from -10 EV to +3 EV), the option of taking one photo with flash and one without flash without changing any setting in-between and also a tweak to allow you to use 3rd party flashes while in LiveView mode.

mlpt4_4

The final option, ‘Shoot Preferences’, is a sub-menu containing a set of general features. The first one allows you to define how many photos you want to take at once for each trigger event. This is intended to work with some of the other ML features I’ve described above such as the intervalometer, motion detect and audio remote. You can set the camera to take up to 9 photos. Once again, quite a useful feature for wildlife photographers. The second option is related to the use of autofocus while in intervalometer, audio remote and motion detect. This can be particularly useful if the subject triggering the action (especially in the cases of audio remote and motion detect) can be located at different distances from your camera. As the warning on ML says, though, keep in mind that, if the camera is not able to focus, no picture will be taken at all.

The next feature, ‘Post scripts’, allows you to apply post-processing scripts for bracketing and focus stacking. I haven’t tried this feature, though, so I am not sure how good it might perform. However, given how powerful post-processing tools like Photoshop are, I am not sure how useful it might be to get some low-level in-camera post-processing. It might be fun, though, to play around with some programming and writing your own script, which you can then load into your camera.

If you are into script programming, you can use the next option, ‘Intervalometer Script’, to write a script to program the intervalometer sequences. ML allows you to use Bash and MS-DOS scripting but, once again, I haven’t tried writing any script myself so I cannot comment a lot on this one.

The very final option, ‘Snap Simulation’, is intended to try the post-processing scripts by taking virtual pictures. As with the two scripting functions, I haven’t used this one, so no comments!

mlpt4_5

So that’s it for ML! I hope you got at least a bit curious about it and you give it a try. As mentioned in the first post of this series, installing ML could cause your camera to fail, although I have never heard of any specific case (it might just be a liability issue) but you must keep this in mind. There are some other interesting features I didn’t go through (like some related to focusing or video) so go ahead and explore by yourself. It of course depends on your needs, but I really believe that some of the features offered by ML are incredibly useful and, in fact, I find it quite weird that Canon has not expanded its firmware to include them.

If you finally decide to give it a try and run into trouble or have any question regarding its use, please let me know by writing a comment and I will be happy to help you!

A Short Guide To Different Camera Lenses

No matter how good compact cameras or smartphones get, there is one aspect in which they will never be able to overcome DSLRs (and, more recently, so-called system cameras): the ability to exchange lenses. While some people tend to argue that having a single large zoom on a compact camera is an advantage due to the portability it can provide, the truth is that the picture quality that can be achieved with a good lens specifically designed for a given type of photography is hard, if not impossible, to overcome.

lenses00

I take that, if you are reading this article, you most probably have a DSLR camera and you are either puzzled by what lens you should buy next or at least you are familiar with the feeling. Most photography enthusiasts first go out and buy a camera and only after some time taking photos they find out what type of photography they enjoy the most and only then start thinking about going beyond the kit lens. So let’s look at the different types of lenses out there and what their uses are.

One thing to keep in mind all the time is that, due to the crop factor, the focal lengths of different camera lenses will vary depending on whether the lens is intended to be used on a crop sensor o on a full frame camera. You must be very careful with this because not all the lenses on the market will work with your camera and, even more important, trying to fit some lenses to full frame cameras might actually damage it.

Different Types of Camera Lenses Guide

Kit lenses

While this cannot really be a category on its own, I simply put it here to talk a bit about their capabilities and limitations. Kit lenses are basically those that manufacturers sell together with camera bodies. For most cameras, it is possible to buy either just the body or the body with one of those kit lenses. Usually, the quality of the kit lens depends on the quality of the camera, with full frame cameras offering the high quality option (like the EF 24-105mm f/4L IS II USM that comes with the Canon EOS 5D Mark IV or the 24-120mm f/4G ED VR Auto Focus-S that comes with the Nikon D-750). For most of the entry-level and mid-range cameras, while the quality of the kit lenses has improved with time, they are a good option for a limited amount of time and rather sooner than later you will feel the need for an upgrade.

lenses01

One of the most useful ways to look at the different lenses that are available on the market is by their focal length. These can be divided into five categories: fisheye, wide angle, mid-range, zoom, and telephoto. Different people use some of these terms differently, but I will clarify what I mean with each category further on.

Fisheye

If you think of the available focal lengths as a continuum from short to long, fisheye lenses are located on the short end. They have focal lengths around 10 mm or less and can have a range of focal lengths (e.g. Canon EF 8-15mm f/4L Fisheye USM) or a fixed one (e.g. Nikon AF DX Nikkor 10.5mm f/2.8G ED). The short focal length is not the only special thing about fisheye lenses, though. The construction of the lens differs from normal wide angle lenses allowing them to provide fields of view close to 180 degrees producing highly distorted images.

They are commonly used in some specific applications such as all-sky cameras (used to study meteorological phenomena such as clouds or auroras monitoring) and can provide an interesting point of view for other types of photography such as landscapes or cityscapes. Unless you are really fascinated by how things look with the strong distortion created by these lenses, I would not recommend this as the first one to get after your kit lens.

lenses02

Wide angle lenses

With focal lengths a bit longer than fisheye lenses, wide angles are one of the most useful (and many times forgotten) objectives out there, especially if landscape and travel photography is what moves you. Wide angle lenses are built to minimize visual distortions and even though getting rid of the distortion completely is virtually impossible, the good ones do a pretty good job.

The main advantage of wide angle lenses is that they let you get closer to your subject while still covering most of it and a good part of the background. This makes them ideal for some types of photography such as sports, travel, and landscape photography. For instance, if you think of the latter, a common reason for landscape photos to come out rather dull when compared to what we saw is the lack of a main subject located relatively close to the camera. The use of a wide-angle lens gives you countless opportunities since you can simply get close to something like a flower or a rock and still capture the beauty of the background. The same can be said for travel or architecture photography.

lenses03

The price range of wide angle lenses vary significantly depending on what you choose. An amazing choice for those using Canon (although only for crop sensor cameras) is the relatively new Canon EF-S 10-18mm f/4.5-5.6 IS STM that provides great results with minimal distortion and at an incredibly affordable price. A Nikon alternative, although more expensive, is the Nikon AF-S DX NIKKOR 10-24mm f/3.5-4.5G ED.

Mid-range

By mid-range I mean lenses that are located, in terms of focal length, between wide-angle and telephoto objectives. Some of these, like the kit lenses that come with entry-level DSLRs (Canon EF-S 18-55mm f/3.5-5.6 IS II or NIKKOR 18-55mm f/3.5-5.6G VR II), are sold like all-purpose lenses and there is some truth on that. While the quality of these lenses is not the best, they are a good option to start making photos with. The wide end (18mm) is wide enough to allow you to capture many wide scenes like landscapes and the narrow end (55mm) is good enough for getting closer to some subjects, especially for taking portraits and some studio setups. The big limitation of these lenses is usually the aperture which is 5.6 at the narrow end, producing rather dark and dull results in some cases due to the deep depth of field.

If your main interest lies in portrait photography, this mid-range is in fact a good place to stay and there are many good options in the market with a wide range of prices. Canon offers three different options for fixed 50mm lenses which are perfect for portraits: the famous and affordable EF 50mm f/1.8 STM, the mid-priced EF 50mm f/1.4 USM and the expensive Canon EF 50mm f/1.2 L USM. Nikon has similar options with the AF FX NIKKOR 50mm f/1.8D and the AF-S FX NIKKOR 50mm f/1.4G. The magic of these lenses lies on their small size and the incredible depth of field, even with the cheaper options producing great portraits.

lenses04

If you are working with a full frame camera, your best choice for portraits is to get an 85mm which is almost equivalent to 50mm on crop sensor cameras. As I mentioned before, be aware of the compatibility of any lens you plan to buy with your camera to avoid unpleasant surprises. Also, if you are considering switching from crop sensor to full frame, be aware that the camera is not the only thing that will get considerably more expensive; lenses will also become more pricey.

Zoom & Telephoto

While these two terms are sometimes used without any discrimination between them, they tend to be related but are not the same. A zoom lens is any lens with a variable focal length while a telephoto is a lens with a large focal length (usually around 90mm and above). I decided to put them into the same category here because, while some of the objectives mentioned before (10-18mm or 18-55mm) are zoom lenses, the term is commonly associated with those really large and bulky ones that you can see when press people are taking photos at a stadium.

Once again, the price range here is huge. For Canon, you can get a good zoom range with the EF 75-300mm f/4-5.6 III. Once again, the issue with this lens is the aperture (5.6 at 300mm) although the truth is that to get a good aperture at telephoto ranges you might have to pay more than you are ready to like for instance the EF 400mm f/2.8L IS USM II. The construction of the lens, especially in the case of zoom lenses, to get large focal lengths and apertures is very complex and that is definitely reflected in the retail price.

In terms of use, telephoto lenses (both fixed focal length and zoom) are perfect for wildlife, street and sports photography. When capturing wildlife, it is usually difficult to get close enough to your subject before they run off scared or before your own life is at risk. Street photography is based on capturing everyday life of people on the street and, unless you want to get an angry stare or a fake pose, you need to stay unnoticed and thus a large focal length is necessary. Finally, to shoot sports events you will usually be located quite far from your subjects (like for instance a football player on a stadium).

lenses05

A good focal length to start with is 250 or 300mm. The already mentioned EF 75-300mm is quite affordable and will allow you to get close enough to some animals, although probably not enough to fill the frame if the animals are particularly afraid of people. A big problem with the cheapest options like the 75-300 is that they do not have image stabilization, meaning that when shooting at 300mm you will need to either shoot under very sunny conditions or shoot at very high ISO numbers which can produce very noisy results depending on your camera and how much you push it. Still, given the price, if you are simply exploring different aspects of photography, I would say is worth giving it a try.

If what moves you is sports photography, you will need a larger focal length and, more importantly, a faster lens. Here you are getting into the realm of really expensive gear (we are talking about usually more than $7000 for a lens) so this is most commonly reserved for professionals who are actually making money out of it. Still, if you can afford it, having something like the Canon EF 200-400mm f/4L IS USM Extender 1.4x (that is f/4 over the whole range!) can work miracles on your sports and wildlife photography.

There is another type of lens that, due to its intended use, falls into a completely different category that is independent of the focal length. I am talking about macro lenses. These lenses are intended to take photos of small subjects and people have gotten to the point of adapting microscope lenses to DSLR cameras to get amazing results. I will not go into details, however, because describing macro lenses and how to work with them would require a full post and I prefer to leave that for experts on the field.

I want to finish with a small list summarizing the types of lenses that I went through and their uses so you can use it as a quick guide to decided what to buy next.

  • Fisheye: lenses with small focal length (usually less than 10mm). Somewhat useful for architecture photography, but only if you are actually looking to create a heavily distorted image.
  • Wide angle: the perfect option for landscape, travel and architecture photography (both indoors and outdoors). Sometimes over-looked, this is a great second lens unless you are really motivated by street portraits, street, wildlife or sports photography.
  • Mid-range: your best choice if your main interest lies in studio and portrait photography. Pay special attention to the aperture. In general, anything with at least 2.8 is going to produce nice results.
  • Telephoto: if you are mostly interested in subjects that you cannot get closer to (wildlife, people on the street or sports events), getting something with a focal length of at least 250mm is your best shot. If you are only starting, think about buying on of the most affordable options in the market, although be ready to spend significant amounts of money if you want to upgrade your gear later on.

Travel Photography: The Perfect Combo of Capturing & Exploring

Every city has its own flair and specialty. When we travel to any country and explore different cities we enjoy and discover something new. A trip to a new place makes us feel our holiday was well spent. Being a tourist means “a person who travels to explore a place for pleasure”, this means we can be a tourist anywhere even in our own city. Having lived in Jakarta, I wouldn’t have thought of discovering my city as a tourist. Jakarta is the capital city of Indonesia and Indonesia is known to be the World’s Largest Archipelago. A city that is vibrant filled with cheerful people willing to help and guide you anytime, anywhere. Each city has their specific landmarks that is a must visit. In Jakarta, there are not many places to visit but some give a completely new outlook on what our city is all about.

There are many ways to see your city like a tourist, you can have a group of like-minded friends and go together or join a group of explorers who do tours to various parts of the city. I chose to do the latter and have found many new things about my city. By seeing new things, learning more about my culture has helped me to grow through photography.

Capturing is about Perspective or Vista, a way we see everything around us. Thus, taking pictures through exploring helps to motivate the photographer to gain perspective and have an outlook. Through my trips, I saw my city in a new way and tried to click as many photos as I could to treasure the moments. Whilst clicking, I was able to experiment with my camera to understand the principles of Photography. I learned the meaning of ISO, Aperture, Exposure, Focus,  and White Balance and how to use them during my captures. Through the process, I realized once you understood how to balance the light with ISO and Aperture the rest goes with how we feel during the moment. Although, I am not even close to mastering these main features but the mystery behind the balance allows me to keep sharpening my skills.

Through the photos below, I shall share my experiences when taking them.

Jatinegara

Buddhist Temple in Jatinegara (iPhone)

This shot was taken last year, during our Jatinegara walk as we stopped by a Buddhist Temple in the area. Inside the temple, I was taking a couple of shots and trying to find the correct point of view to get the right lighting. The top portion with the Chinese writing and lanterns plus how the doors were opened peeking towards the opposite direction was quite fascinating. This helped me frame the top and capture the shot.

Bokeh at Buddhist Temple Jatinegara (Canon)

Trying to achieve the “Bokeh” effect. This was quite a spontaneous shot whilst at the Temple.

Angle (Canon)

When crossing the bridge, from a distance, this particular scene had formed a sort of symmetry in my mind.  The lines, curve, and shadow gave this moment a more crisp look. These aspects tempted me to click.

Looking Down (Canon)

Taking photos with different views and colors has always intrigued me. What better way to try it out whilst looking down. The row of colorful books with passers-by was an opportunity not to be missed.

The Lady with a Smile (Canon)

This smiling lady with her baby sitting at her small hijab stall caught my attention instantaneously.

MONAS and MOSQUE

Monas (Canon)

Monas our National Monument is a crucial landmark in Jakarta with its famous history and scenic top view of Jakarta. Whilst climbing up the monument, the steps and a portion of the monument formed a specific frame in my shot.

Monas View (Canon)

Upon reaching the peak of Monas, we were able to have a view of Jakarta from all angles. It was quite interesting to take a couple of shots and see the city from the top.

Mosque (Canon)

The exterior view of the Mosque (Masjid Istiqlal) can be seen in the previous photo. This is known to be the largest mosque in Southeast Asia and here, you can see the interior of the mosque. The architecture of this building is intricate and captivating yet, it can be tricky to try to shoot every aspect of it.

SUNDA KELAPA

Sunda Kelapa (Canon)

A reflection of the two buildings and an old traditional house was hard to ignore as we were exploring the slum area in Sunda Kelapa. The Sunda Kelapa is another important landmark as it is the Old port of Jakarta.

TAMAN SUROPATI (MENTENG)

Taman Suropati (Canon)

The greenery and serene atmosphere around this lovely park in Menteng area (the first residential area in Jakarta) felt like a perfect moment to shoot. An alley filled with tall trees in the morning hours completed the setting.

Stadium (Canon)

Getting to our National Stadium was quite a challenge as it was a rainy day.  The experience of being in this huge empty stadium with the sound of rain inspired me to feel the moment and then click.

Gelora Karno Stadium (Canon)

This second photo of the Stadium was a shot where I was trying to attempt to get a minimalist touch and a semi-circle shape within it.

The photos above have a variety of different photography styles that I have tried to achieve. Certain aspects and styles of photography by some renowned photographers have encouraged me to try different styles.

Did exploring make me enjoy taking photos more? Yes, it, in fact, made me want to take more photos not because I had to but because when seeing a place, there are so many wonders around that can be clicked from various angles. Capture and explore can be a perfect combo for those of you who would like to grow through photography. The journey to keep taking photos carries on and we need to find ways to keep the passion of photography alive within us. Seeing your city from a new perspective like a tourist would can broaden your imagination and creativity as a photographer.

70-200mm Lens – How to Avoid Blurring?

It’s very common among the professional Canon users to grab our 70-200mm lens for indoor as well as for outdoor shoots. The lens is one of the top choices for portraits and product photography due to its versatility and interesting zoom range.

Lens Overview

Speaking of this versatile and powerful Canon lens, we can start to say that it was launched in 2010 as an update of the EF 70 – 200 mm F2.8 L IS USM from 2001. With a gap of 9 years and considering the advances in the technology of DSLR cameras, Canon redesigns this powerhouse by improving both the stabilization and optics, as well as autofocus and its design.

Optics consists of 23 elements in 19 groups, including more than 5 of them with the Ultra-Low Dispersion technology (UD), plus one with Fluorite Coating. The reason? Reducing the Chromatic Aberration of the lens.

Canon_Zoom-Lens_EF_70-200_F2.8L_IS_II_USM-01a_

Built-in metal, we are not talking about a light lens; however, it compensates for the weight with its excellent image quality and enhanced protection in regards to dust that can enter our camera, in addition to being weather sealed.

The Autofocus motor belongs to the technology of Canon Ultrasonic Motor (USM), being extremely agile while maintaining a silent profile.

27358305815_713c7db69e_k

Photo courtesy of Eric Schaffer

The price is something to consider in this lens since we are talking about high-end equipment for what should not amaze us that its initial price is higher than $1500.

The only difficulty that photographers face while using the lens is its weight. A Canon 70-200mm [ f 2.8 IS II ] lens weighs approximately 1600 gms. So, this lens when mounted on a full-frame camera like Canon 5D Mark III weighs almost 2.5 kilograms.

When weight matters

So, how do you take a sharp photograph while holding so much weight in your hand? You might use a tripod to bring in the extra support, balance, and stability. But do tripods work during all circumstances? Not really. How far does ‘Image Stabilisation’ in your lens, help? Not very much. True, it provides the minor stabilization features that you need and but that’s not all.

canon-ef-70-200mm-f-2-8l-is-ii-usm-lens

The way you hold your lens plays a major role. It can sometimes be the ‘break-it’ or ‘make-it’ factor for your photographs.

We are assuming here that you will be using the kit (Canon 5D MK III + Canon 70-200mm f/2.8L IS II lens) handheld and not by tripod mounted. The first thing to do is to rotate the tripod collar from the bottom side of the lens(while mounted with the camera) towards the top side. This way, the tripod collar won’t obtrude and disturb your grip with the lens.

Kindly note: Indoor shoots are tripod-mounted most of the time. So this article may not be applicable to you. But for those who shoot by hand-held devices, this article might be helpful.

A quick but effective solution

So, like I mentioned earlier, the way you hold the lens while shooting may affect your photograph, for good or for worse. Most of the time, we tend to hold the lens somewhere on its collar ( really close to the body of the camera). I used to do this too in my earlier days as a photographer. This helps us control the zoom ring better while composing the photograph. True, but it also indirectly affects the balance in your focus. This sometimes results in blurred images and lesser sharpness. This is because of improper positioning of your palm by the lens. By supporting the lens at the collar location by your palm you are letting more weight towards the front side of the lens which leads to improper balance and with blurred photographs.photographer-1191562_1920This can be overcome by slightly shifting your palm position towards the front side of the lens, which means you need to place your palm almost on the zoom ring. As soon as you shift your palm towards the front end of the lens, you immediately feel the perfect balance of weight while holding. But this situation restricts the zooming ability immediately before you press the shutter button. You have to be prepared in advance, as you cannot zoom as you used to before. Get your frame right, compose what you need and then click away!27010607034_afe1fb94d0_k

Photo courtesy of Pengcheng Pi

We hope this article helped ease your discomfort while shooting using the 70-200mm lens.

Please leave your comments below and let us know about your experience. 🙂

Header photo courtesy of Francesca Pippi

Finding the Goldilocks Zone of Megapixel Count

This one’s too big. This one’s too small. This one’s just right. Photographers constantly make compromises in everything we do. Whether it’s choosing an ISO that will allow fast enough shutter speeds without introducing unpleasant noise; setting sharpness to give clarity without a fake look; or simply setting the size of your JPEGs, there’s something gained and something lost in each decision.

Deciding how many megapixels you need is no different. While most of the choices above can be made by simply looking at your image, megapixel counts take a bit of technical knowledge and foresight. Ultimately, your ideal sensor resolution is a matter of choice like any other, but knowing what’s at stake and what options are available can make this important decision much easier. Before we begin, you may find it helpful to read our article on choosing the sensor size that’s right for you, which is a separate issue to consider altogether.

3 Bears
Momma Bear, Papa Bear, and Baby Bear

The name of the game is image size versus file size. While there are many other consequences to consider, this balance is the heart of what’s at stake when choosing a megapixel count. More megapixels means higher resolution, but much larger files. But what exactly is necessary when it comes to resolution and what is superfluous? The answer to that question depends on your needs. For example, a good quality physical print is usually 300 dpi (dots per inch), meaning if you wanted to print an image 8 inches wide and 6 inches high, you would need a resolution of 2,400 x 1,800 pixels or 4.32 megapixels. So if you use every pixel of a camera, you only need a 4.32-megapixel camera to make a good quality image of this size. However, if you know your photo will be viewed on the web, where resolution is locked at 72 PPI (pixels per inch), then the same 4.32mp camera could be viewed on a screen that’s 33.3 inches wide by 25 inches high. That’s a pretty big computer screen.

But some high-end cameras have resolutions of 50mp or higher. While this seems completely ridiculous at first, it’s not as crazy as you’d think. Because the number of pixels needed to make a larger print increases exponentially, a 50.3mp image is actually a resolution of 8,688 x 5,792 pixels. That yields a 300 dpi print of 29 inches wide and 19.3 inches high, a lovely size to the frame on a wall. But with an increased print size comes and exponentially increased files size as well. If you’re taking photos in high-quality RAW format (which you usually should), each of these 50.3mp files is up to a whopping 75.5 MB (megabytes) as compared to the 6.5 MB of the 4.32mp camera. To put the high-res file size into perspective, if you spent an afternoon shooting  200 photos, you’d have 15.1 GB (gigabytes) of images. That kind of data builds up fast. Most people never consider the cost and difficulty of storing large files when buying a camera, but it’s definitely important to keep in mind. If you’d like to see what file, print, and web size results from different image resolutions, I’d suggest using this megapixel calculator tool.

computer-767781_1280

Some other considerations to make when picking a resolution size is how this impacts the camera overall. A camera’s megapixel count interacts with its sensor size. More megapixels in a smaller sensor means each individual pixel is smaller and therefore absorbs less light for any given photo. This tradeoff will typically result in a noisier image, though modern camera software goes a long way to resolving this. So if low light performance is important to you, you may want to stick with not only a larger sensor size, but also a lower megapixel count. It may be counterintuitive, but in many cases having fewer megapixels creates better images. There are of course other factors that relate to a camera’s mp stat, such as battery life, price, and ISO range, but the print/web dimensions, file sizes, and low light performance are the most direct results of any given megapixel count.

To wrap things up, we’ll briefly look at three major megapixel groups, discuss their capabilities and limitations, and give some example cameras.

Canon 5d Mark I, 12mp

1. Low-Res (Less than 16mp)

Typically, cameras in this range are 12mp, which not too long ago was very impressive. If your photos are only ever going to be seen online, then this is plenty big enough. However, if you want to have decent sized, decent quality prints then you’ll want more than this, but honestly, this is more than enough resolution for most people. Cameras in this category include the full-frame Canon 5D Mark I, the full-frame, mirrorless Sony a7s II, and the iPhone 6s.

12mp camera yields:

  • 300 dpi prints of 13.3 x 10 inches
  • RAW files up to 18 MB
  • JPEGs up to 2.5 MB

Nikon D3200, 24mpNikon D3200, 24.2mp2. Medium-Res (16-30mp)

While there are many excellent Micro Four Thirds cameras that have 16mp sensors, the staple size in this segment is 24mp, though 20mp is also common. These offer plenty of detail to meet almost anyone’s needs without going overboard or being too expensive, which is probably why it’s such a popular resolution. Some medium-res cameras include the Sony Alpha a6300, the Canon Rebel T6i, and the Olympus EM-5.

24mp camera yields:

  • 300 dpi prints of 20 x 13.3 inches
  • RAW files up to 36 MB
  • JPEGs up to 3.6 MB

Sony a7R II, 42mp © Dongheon ShinSony a7R II

, 42mp © Dongheon Shin

3. High-Res (30-50mp)

These are professional grade. There aren’t too many different cameras sold at this level of resolution, though the ones that offer it are extremely popular. This amount of detail is only necessary for pros who need to make large prints (or sometimes just impress clients) and who have the equipment and know-how to manage large files. Cameras like this include the Canon 5D SR, the Sony a7R II, and the Pentax K-1.

42mp camera yields:

  • 300 dpi prints of 26.5 x 17.7 inches
  • Raw files up to 63.3 MB
  • JPEGs up to 4.4 MB

Anything above high-res is considered ultra-high-res and is only available in medium format cameras. That kind of resolving power is only necessary for the rarest of occasions, but it can certainly make for some amazing shots. While these cameras can easily make prints over 3 feet wide, they can also take raw photos over 150 MB in size. Like every other camera decision, the megapixel count you choose is a matter of taste and should be decided based on your individual needs. But if you keep in mind the tradeoffs between maximum image dimensions, files sizes, and the rest of the camera’s performance, you’ll be able to find the resolution that’s just right.