Tag: modes

Digital Camera Modes Explained – Photography for Beginners

Assuming you take photography a bit more seriously than simply taking snapshots during your holidays (and most of you probably do, since you are reading a specialized website), you might have noticed that your camera has different modes that usually come in the form of a dial. This is pretty standard nowadays not only for DSLR but also for many compact cameras, except for the most basic ones.

If you still have a camera that only has automatic modes, you are missing a huge part of what photography means like taking advantage of the manual mode, so I would really encourage you to go out and get a new one.

In any case, what I want to address here is the meaning and usefulness of each of the different modes that are usually available in modern digital cameras. While the available modes might vary slightly from one camera to the other, I will be using as a guide the dial of an entry-level Canon DSLR (EOS 500D or Rebel T1i). This should cover most of the modes that you will find out there.

modes1

14 Digital Camera Modes

In total, 14 modes are available of which only one is really manual. The rest of the modes (apart from the video mode, which is of course intended to make videos) are designed to imitate adjustments that you would make in specific situations. But let’s look at each of them individually in the order shown in the image.

A-DEP

This mode is intended to keep all the objects in a scene in focus. Its name stands for Automatic DEPth of field and while in this mode, your camera will automatically select the aperture and will then adjust the exposure time accordingly. You still keep some control over other features such as ISO, exposure compensation and white balance.

M – Manual Mode

The reason why you buy a good camera on the first place: the manual mode. Even though a great amount of technology is behind each of the other modes of your camera, I would say that still nothing compares to the traditional manual mode. In fact, except for really special occasions, many photographers rarely use any of the other modes.

modes7

In manual mode you have control over everything that can be controlled in your camera. Even though it might be a bit intimidating at first and that it might indeed take a while to get used to it, it is definitely worth the effort. In the end, you will most probably find yourself shooting in this mode most of the time.

Av – Aperture Priority

One of the most used modes after manual or full automatic. When the dial is in this mode, using the main dial you can adjust the aperture and your camera will adjust the exposure time accordingly to achieve a well exposed image.

This mode is ideal if you want to get control over your depth of field but want to speed up the process of capturing your photo a bit. As with the A-DEP mode, you can still control many of the other parameters such as ISO, exposure compensation and white balance.

modes2

Tv (or S) Shutter Priority Mode

This mode is something like the complement of Av. It is usually called shutter priority and here you can set the exposure time and your camera will take care of the aperture.

This mode is often used when dealing with fast-moving subjects such as in wildlife or sports photography. Once again, you keep control of most of the features.

P – Programmed mode

When using this mode, the camera will automatically select both the aperture and the exposure time in order to get a proper exposure, but with the main dial you can change the combination of both and in general you still keep control over most of the other features.

modes5

CA – Creative Auto

This is very similar to the full automatic mode (see below). CA stands for Creative Auto and, while in this mode, you can control, in a user-friendly way, the exposure or the depth of field. The rest of the features are controlled by the camera.

Full Auto

This is the green square in the mode dial. This mode is the equivalent to a point-and-shoot camera. Your camera will take all the decisions for you so under non ideal light conditions it can be pretty difficult to get the image you want. Additionally, if you have a DSLR, you should definitely move away from the full auto mode!
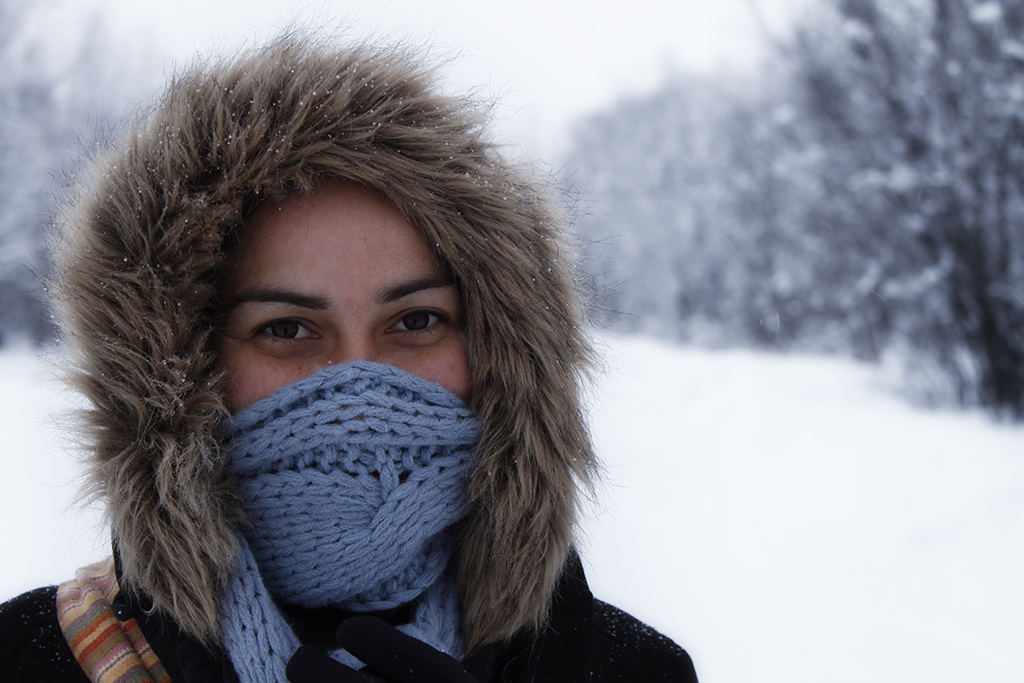
Portrait

Depicted with a head silhouette, this is an automatic mode intended for portrait photography. Since portrait photography benefits from a shallow depth of field, what your camera does when this mode is selected is set the widest aperture that your lens allows and adjust the exposure time accordingly. Once again, you loose control over all the features of your camera.
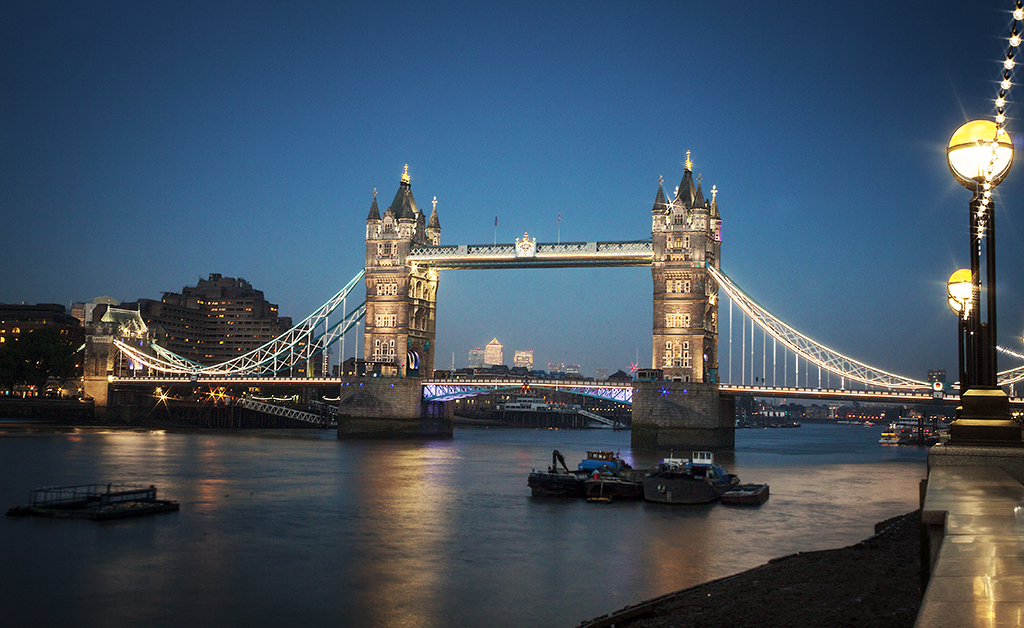
modes3

Landscape

This mode is something like the complement of the portrait mode. It is depicted by the shape of a mountain and a cloud. In contrast to portrait photography, landscape photography usually benefits from a wide depth of field, so in this mode your camera will set the narrowest aperture allowed by your lens and adjust the exposure time accordingly. No control over any feature.
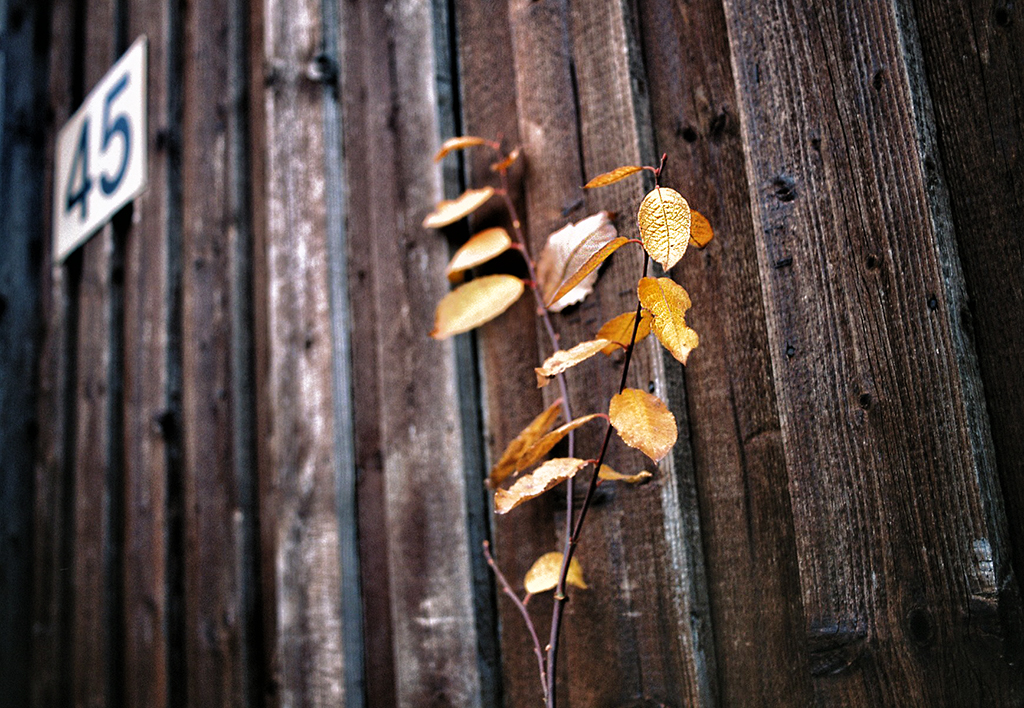
Close up

Usually indicated with a flower, this mode is similar to the portrait mode in the sense that it is intended for producing blurred backgrounds (shallow depth of field). However, the aperture setting is not strictly set to the widest value, so it can produce images that keep a full object (like a flower) in focus. It can also be used as a quick approach to macro photography. No control over any feature.
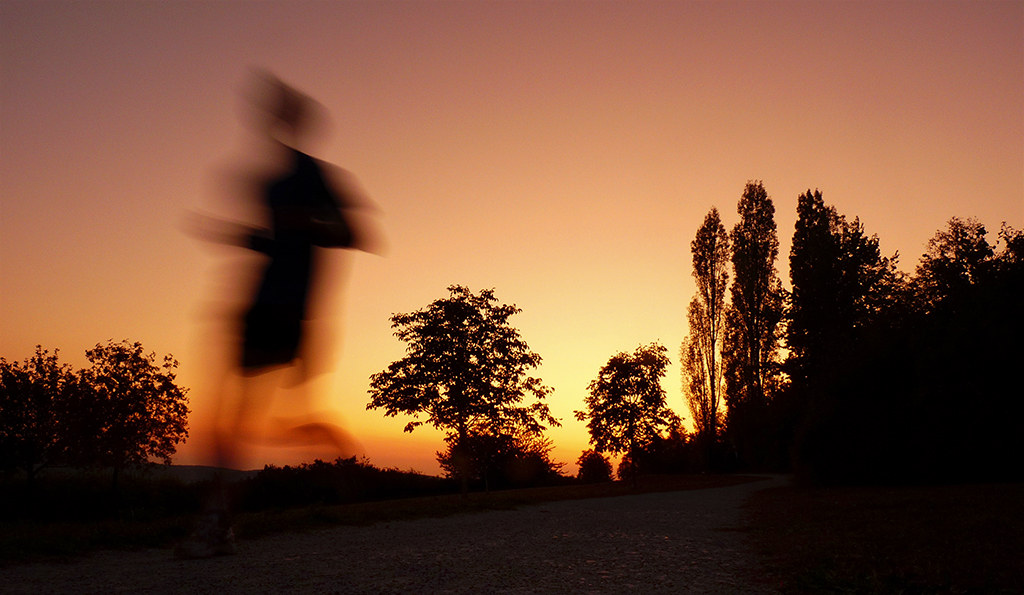
Sports

As mentioned before, sports photography can benefit from fast shutter speed, so this mode, symbolized with the silhouette of a person running,  prioritizes setting a fast shutter speed and adjusts the aperture accordingly to produce the right exposure. No control over any feature.

modes6

Night portrait

Depicted with the silhouette of a person within a black square and a star, this mode is intended for, as the name says, night portraits. While in this mode, your camera will combine the use of a flash with a wide aperture in order to get a somewhat illuminated by diffuse background. In any case, the result will end up not as nice as one would expect, mostly because a nice night portrait is a rather technical photo to make and you would usually require more sophisticated equipment such as external flashes. No control over any feature.

Flash Off

This mode, the last one before the Video mode, is the same as Full Auto but prevents the in-built flash from being released. Since the camera does take into account the use of the flash when compensating the exposure, these two modes will give different values for exposure time and aperture, even when shooting the same scene. No control over any feature.

Video

The last mode, symbolized with a video camera, is self-explanatory. It will automatically adjust all the settings while capturing video, meaning that the aperture will change dynamically if the light conditions do the same. You keep control over some features such as the exposure compensation and, some cameras (not the 500D though) will also adjust the focus. In any case, if you capture videos with your DSLR, you will want to have a lens with a silent focus system (like STM or USM for Canon cameras), since any noise produced by the autofocus will be recorded.

I hope this post was helpful to get an idea on the different possibilities that your camera can offer and, if you have any question, just send me an email!

Adobe Photoshop Layer Blending Modes Masterclass – Part III

In two previous posts we analyzed four groups of blending modes. In the first one, I introduced the blending modes and explained in detail the ‘Normal’ and ‘Darken’ groups while in the second one I explained the ‘Lighten’ and ‘Contrast’ groups. In this final post of the series I will explain the last two groups of blending modes, namely the ‘Simple’ and ‘Properties’.

Just as I reminder, below I show the image showing the different blending modes in Photoshop once again.

blending3

As with the two previous entries, I will be using, as bottom layer, an image of Porto, a beautiful city in Portugal, and a gradient mask as the top layer.

Simple

Naming this group is not so straightforward since the results that arise from applying the four blending modes that are contained is quite different. I called it ‘Simple’ because the algorithms used are simple mathematical functions.

The first mode, ‘Difference’, does exactly that. It subtracts, pixel by pixel, one image from the other. However, when doing the subtraction it takes into account which pixel is brighter and does the subtraction in such a way that the result is always positive. This means that for some pixels, the final result might be top layer minus bottom layer while for some others it might be bottom layer minus top layer.

The next mode, ‘Exclusion’, is very similar to ‘Difference’ only that the final result has a lower contrast. When blending with white or black, there is no difference between both modes. While using a white mask produces the inverse of the original image as a result, using a black mask leaves the image unchanged.

The ‘Subtract’ mode calculates the simple difference of both images. In contrast to the ‘Difference’ mode, here the result is bottom layer minus top layer no matter the values of each. This difference can cause negative values and these are all set to zero, meaning that all those pixels will be black. Using a flat gray mask result in a darker version of the original image.

The last mode of the group, ‘Divide’, makes a pixel by pixel division of the bottom layer by the top layer. The division, however, is calculated using normalized values where black is zero and white is one (instead of 0 to 255) so using a black mask will yield a completely white image in the end (division by zero) while using a white mask will leave the original image unchanged (division by one).

The following collage shows the four blending modes at work using our two layers. The results are organized in clockwise order starting from the top left corner.

blending13

Properties

And so we get to the final group of blending modes. This group has the particularity that it addresses specific properties of the original image. Since the properties addresses are related to the color of the image, I will be using a modified mask for these four final modes. The following image shows the same gradient mask used for the previous modes, only that it has been colored to better reflect the effect of applying it to the original image.

blending14

The first mode is called ‘Hue’ and it obviously changes the hue of the image. Applying this blending mode keeps the luminance and saturation of the original pixels exactly as they were but adjusts the hue according to the mask being used.

In the case of the ‘Saturation’ mode, the luminance and hue of the original image are preserved and the saturation of the mask is used to produce the final image.

The next mode, ‘Color’, preserves only the luminance of the original image and adds the hue and saturation of the mask to create the final image. This makes this mode a great choice when trying to add color to black and white images or to achieve a sepia tone.

The last mode is called ‘Luminosity’ and, of course, it changes the luminosity of the image while preserving the original hue and saturation. It can be regarded as the opposite of the ‘Color’ mode so, by choosing the right mask, it can serve to turn images into black and white, even though there are definitely easier ways to achieve this.

The following collage shows the results of applying the four blending modes just described to blend the colored mask and our original image. Again, the images are organized clockwise starting from the top left corner.

blending15

As I said at the beginning of the first entry of the series, blending modes are a powerful but often overlooked feature of Photoshop. It is true that, depending on your specialty, you will end up using some of the modes more than others and you will probably never use some of them. However, getting familiar with those that work well for you will definitely boost your personal workflow, so play around with them and remember that sometimes the results might be simply unexpected depending on your image and the mask you used.

As usual, if something was not clear for you, just let me know by means of a comment or simply an email.

Adobe Photoshop Layer Blending Modes Masterclass – Part II

In the previous post of this series we looked at the different blending modes available in Photoshop and how they are organized in six different categories. The following image shows the list of blending modes as it can be found in Photoshop.

blending3

We also looked in detail the first two groups, namely the ‘Normal’ (1) and ‘Darken’ (2) groups. In this post I will describe what the third (‘Lighten’) and fourth (‘Contrast’) groups are about and what each individual mode within those groups does when used to combine or blend two layers. For this, I will be using the same two layers that we used for the first post.

Lighten

Under this category you will find five different blending modes, the same number as in the ‘Darken’ one. In fact, the names and functionalities are very similar in both categories, only that the ‘Lighten’ one can be regarded as the opposite of the ‘Darken’ one. While the five blending modes of the second category produce a darker image, the five contained in this one produce a brighter final image. Also, as you will see now, the algorithm used by each mode is pretty much the same.

The first mode in the category is simply called ‘Lighten’. When this mode is applied, Photoshop looks at each pixel in both layers and replaces the corresponding pixel in the final image by a combination of both, giving a strong weight to the brightest one. This yields, in general, an image that is too bright, even though, as with every blending mode, the final result largely depends on the mask being used. The following image shows the result of blending our two layers with the ‘Lighten’ mode at 100% opacity.

blending7

If you compare the result of using this mode with that of using the ‘Darken’ mode, you will see that both are kind of complementary. While the pixels blended with a white mask are unchanged in the ‘Darken’ mode, those blended with a black mask remain unchanged now. An interesting effect of using this mode with a gray mask (which is basically what happens at the center of the image above) is a foggy appearance. Even though there are more sophisticated ways of adding fog to your images, this is a simple method that can work well under some specific situations, especially if you change the opacity of the layers at different locations. This mode is also very useful when adding brighter elements to an image, such as fireworks or the moon.

The second mode in the category is called ‘Screen’. In a similar way to the ‘Multiply’ mode, this mode also makes use of the multiplication function to produce the final image, only that the two operands are in this occasion the inverse of the bottom and top layers. The final result is a lighter color but the result is much more subtle than when applying the ‘Lighten’ mode. This mode can also give nice results when adding brighter elements, even though it tends to give the feeling of transparency on both layers.

The ‘Color Dodge’ mode is analogue to the ‘Color Burn’ one. In this case, Photoshop looks at the color information of each layer and the final image results in one with lighter colors. This is achieved by reducing the contrast between the two original colors. The ‘Linear Dodge’ mode does something similar, only that it takes the color of the original image and increases the brightness by a factor that depends on the color of the mask. Since both modes apply different algorithm, even though both will produce images with lighter colors than the original one, the specific colors will differ from each other.

The final mode in this category is called ‘Lighter Color’. As with ‘Darker Color’, this mode simply reads the value of each pixel within each layer and assigns the lighter color to each specific pixel in the final image. As with ‘Lighten’, the results tend to be rather strong, making it suitable only for situation where very specific results want to be achieved.

The following collage shows the results of applying each of the four described modes to blend our two layers. The images are organized in clockwise direction, starting from the top left corner.

blending8

Contrast

This group contains arguably the most used blending modes after the ‘Normal’ one. These modes are aimed at improving the contrast of a given image and can be regarded as a combination of the ‘Darken’ and ‘Lighten’ groups. While for the two previous groups the use of white or black masks left some pixels unchanged depending on which mode was being used, here both colors will have an effect on the image, while some shades of gray will leave the image unchanged.

This is also the largest group of all, with seven different blending modes to choose from. The first one, ‘Overlay’, is a combination of the ‘Multiply’ and ‘Screen’ modes. Depending on the lightness or darkness of a given pixel in the original image, the algorithm will make a combination of that original pixel with the multiplied or screened one to produce a final image with stronger contrast. The following image shows the result of applying the ‘Overlay’ mode to our two layers.

blending9

As you can see, the colors and details are much more preserved than for the previous modes, even though I used exactly the same layer. This is because Photoshop is preserving those details by just darkening dark pixels but lightening light ones instead of darkening or lightening everything at once.

The second mode, ‘Soft Light’, produces a similar result, only that softer in the way that the contrast is not increased as much. The algorithm looks at the pixel values of the mask and it darkens or lightens the pixels using a burning or dodging method depending on whether a given pixel is lighter or darker than 50%. This method, as well as the ‘Overlay’ are suitable for creating nice vignetting effects.

The ‘Hard Light’ mode uses a similar algorithm to the ‘Overlay’, only that the pixels used to determine whether a multiplication or a screening is applied are the ones from the mask. Depending on the mask used, highlights (for gray mask values larger than 50%) or shadows (for gray mask values smaller than 50%) will be added to the image. The following image shows the effect of the ‘Soft Light’ (left) and ‘Hard Light’ (right) blending modes.

blending10

The next two modes, ‘Vivid Light’ and ‘Linear Light’ are combinations of the ‘Color Burn’ and ‘Color Dodge’ and the ‘Linear Burn’ and ‘Linear Dodge’ respectively. While each of the latter methods act upon the darkest or lightest pixels producing in general darker or lighter images, the ‘Vivid Light’ and ‘Linear Light’ modes act upon all the pixels increasing the contrast all over the image. The following image shows the result of applying these two methods to our layers.

blending11

The last two blending modes of the ‘Contrast’ group are the ‘Pin Light’ and the ‘Hard Mix’. The ‘Pin Light’ is a very specific method that sets the value of the final image based on the pixels of the top layer. If the value of the top layer is darker than 50% gray, the pixels of the original image that are lighter than the mask are replaced by a combination of both layers while those that are darker remain unchanged. If the value of the top layer is lighter than 50% gray, the opposite happens.

The ‘Hard Mix’ mode takes the RGB values of the mask and adds them to the original image channel by channel. It then maximizes the color contrast by taking the R, G and B values of each pixel to 255 or 0, depending on whether the resulting value from the addition is larger or smaller than 255. This way, an image with extremely high color contrast and a limited palette results. The following image shows the result of applying these last two ‘Contrast’ modes to our images.

blending12

While the ‘Overlay’, ‘Soft Light’, ‘Vivid Light’ and ‘Linear Light’ are some of the most commonly used blending modes, the rest of the modes in this group are very specific and rarely used, at least for landscape and travel photography. However, from time to time it is a good idea to play with all the available blending modes since, due to the complexity of the algorithms involved, many times the results are completely unforeseeable and thus something interesting might arise from using them.

I hope you enjoyed this second part of this series and, as usual, just leave a comment or write me an email if you have any question.

Adobe Photoshop Layer Blending Modes Masterclass – Part I

In this series I want to address in some detail a Photoshop feature that, without being too complicated to understand, it does usually take a long time to get used to and that is the blending modes.

A blending mode is a specific algorithm that Photoshop applies to combine two layers, from now on called top and bottom. For this, an equation involving the pixels of both images is used to calculate the pixels of the final blended image. The calculation is applied pixel-by-pixel, in contrast to the calculations made when using filters, where a convolution process involving surrounding pixels is usually applied.

The exact equation that Photoshop applies for each blending mode is, for obvious reason, not known, but what we are interested on is the final result, so I will take an image and go through each of the different modes available and try to explain what’s going on. This way, you can get an idea of what each mode is suitable for and include them in your personal post-processing workflow.

During this post I will be using the following two images:

blending1

blending2

The first one is an image of Porto, a city in Portugal very close to the northern border with Spain. The second one is simply a gradient mask which serves nicely to the purpose of showing the effect of different blending modes as we will see later on.

Blending mode groups

The first thing you will notice when working with different blending modes is that they are grouped in different categories, even though Photoshop decided not to explicitly name these categories. The following image shows the different blending modes with the categories numbered.

blending3

The reason why the blending modes are categorized the way they are is because all the modes within a group behave in a similar way. Even though these are not official names given by Adobe, we could call each group like this:

  1. Normal: these are the most common blending modes, close to simply putting a layer on top of the other without much calculations involved (this is indeed what the ‘Normal’ mode does).
  2. Darken: these are modes that give as a result an image that is darker than the original one.
  3. Lighten: these are modes that give as a result an image that is brighter than the original one.
  4. Contrast: these modes act directly on the contrast of the original image tending to provide a final image with improved contrast; some of the most commonly used modes belong to this group.
  5. Simple: these modes perform simple mathematical operations and the final result depends strongly on the two images being blended.
  6. Properties: this final group contains modes that act upon specific image properties.

Now let’s look at the specific modes within each of the groups.

Normal

Inside this category there are only two blending modes, namely ‘Normal’ and ‘Dissolve’. While the ‘Normal’ mode does a linear combination of both layers, the ‘Dissolve’ simply combines, in a pseudo-random way, pixels from each of the two images. Both modes are completely opaque meaning that, unless the opacity of the top layer is reduced from 100%, only the top layer will be visible. Below there is an image showing the result of applying both blending modes to our images with an opacity of 50% (left ‘Normal’ and right ‘Dissolve’).

blending4

The ‘Normal’ mode simply darkens the regions where the mask is black and lightens the regions where the mask is white while the ‘Dissolve’ does something similar but some of the mask pixels are left untouched, giving the impression that the image is, precisely, dissolving.

Darken

Here we can find five different modes, all of them aimed at darkening the original image. The first one, simply called ‘Darken’, is a simple algorithm that compares the brightness of each pixel in both layers and makes a combination of both pixels giving more weight to the darkest one to the final image. This gives in general a pretty dark image, even though the final result will largely depend on the mask being used. The following image shows the result of blending our two layers with this method with a 100% opacity.

blending5

Even though some of the pixels on the houses at the right look like if they were overexposed giving a feeling of being brighter than originally, if you use the ‘Eyedropper Tool’ in Photoshop to compare both colors you will see that the resulting pixels are indeed brighter. The apparent overexposure is a result of the eye comparing adjacent colors and, since they are close to dark grays and blacks, they look rather bright.

The ‘Multiply’ mode does exactly that: it multiplies the pixels of the bottom layer by the brightness level of the top layer, with the brightness range being normalized to values between zero (black) to one (white). This normalization is done to achieve the desired result, which is leaving the image unchanged when being blended with white (multiplying by one) and completely disappearing the image when blending it with black (multiplying by zero). This mode, if a gray mask is used, tends to give a decent result when darkening an image.

The ‘Color Burn’ mode works taking into account not only the brightness of each pixel but also the color information. The final result is an image with darker colors, meaning that not only the brightness will change but also the colors. There are two ways of darkening colors. One is by increasing the contrast between two colors and the other one is by decreasing the brightness of the original color. While the ‘Color Burn’ mode applies the first method (with the two colors being the colors of the two original layers), the ‘Linear Burn’ makes use of the second one, simply decreasing the brightness of a given pixel according to the value of the corresponding pixel of the mask. For these two methods, if the image is blended with a white mask, no change will occur.

The final mode in this category, ‘Darker Color’, is very similar to the first one, ‘Darken’ with the difference that, while some combination of colors is made in the ‘Darken’ mode, non is made with ‘Darker Color’, where a simple replacement of the pixel is made according to the values contained in each layer. The following collage shows the results of applying the four modes just described ordered from top left in clockwise direction.

blending6_new

In upcoming posts I will go through the rest of the modes that include what can be regarded as the inverse of the ‘Darken’ modes, namely the ‘Lighten’ modes, a combination of these two, namely the ‘Contrast’ modes and two special groups that are usually applied in more specific situations, namely the ‘Simple’ and ‘Properties’ groups.

Want to become a master of photoshop’s clone tool.

Stay tuned and, as usual, don’t hesitate to contact me if you have any question.