Tag: blending

Photomerge Secrets in Photoshop

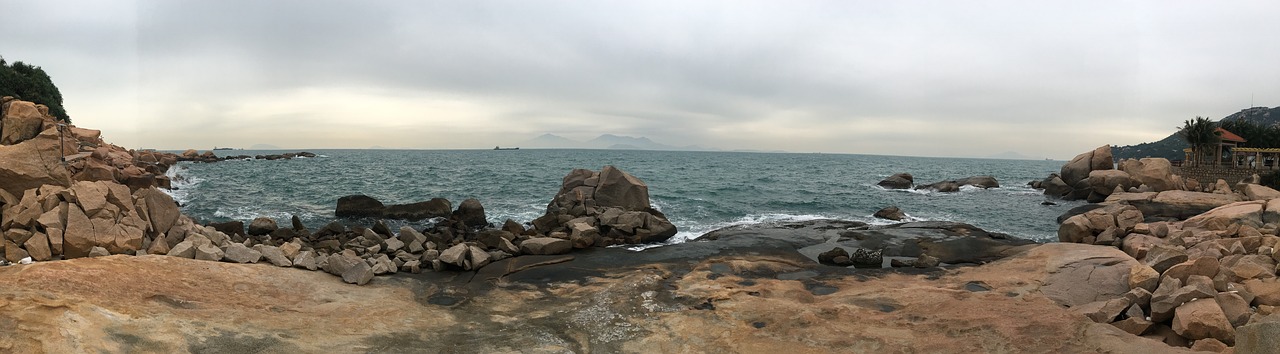
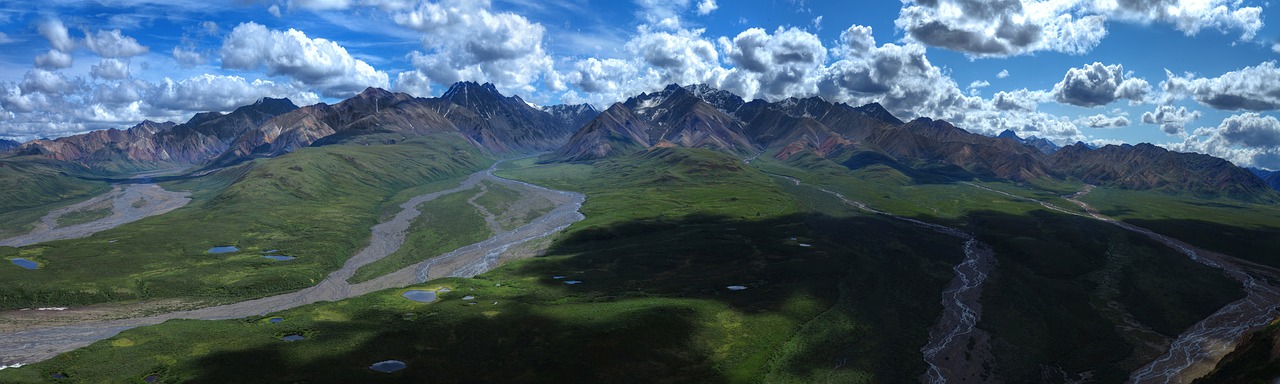
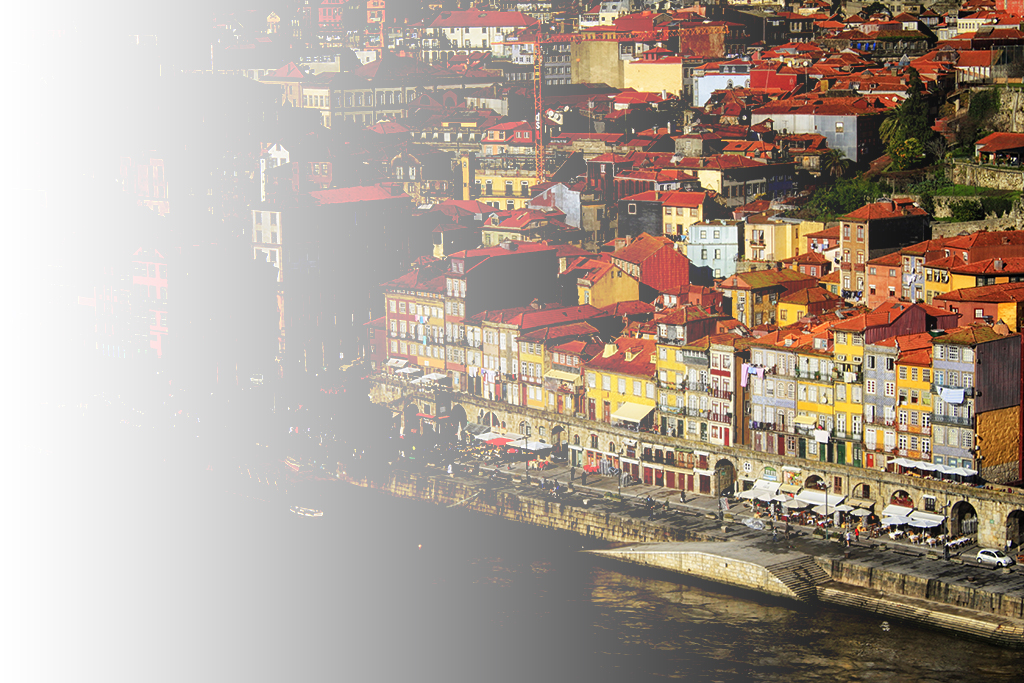
Panoramic photos give viewers the surprising sensation of looking at an actual view rather than a flat image. These wide images engage peripheral vision and give a depth, unlike any other photographic style. To get these stunning visuals, however, photographers have to master photomerge. Although the function has many uses outside of regular panoramas, it’s best known for connecting many separate shots of the same, horizontal view.

Photomerge can also compensate for restrictive lenses and limited views. If a photographer can’t fit an entire beach-lined cliff into a single shot, they can take a number of photos that can be joined together in post-production. Photoshop’s photomerge is versatile and necessary in the age of digital photography, but it can be frustrating. A few tips, tricks, and secrets can make the process easier.

beach panorama

Organize Your Images

The biggest and easiest photomerging mistake to make is to not organize your shots before beginning the process. Photo order is everything. Without it, you’ll get a jumbled mess. It’s a lot of wasted time and a headache waiting to happen. The secret to avoiding 90 percent of your issues when merging photos is to take the time to check and double check your image order at the very beginning.

Not All Settings Are Created Equal

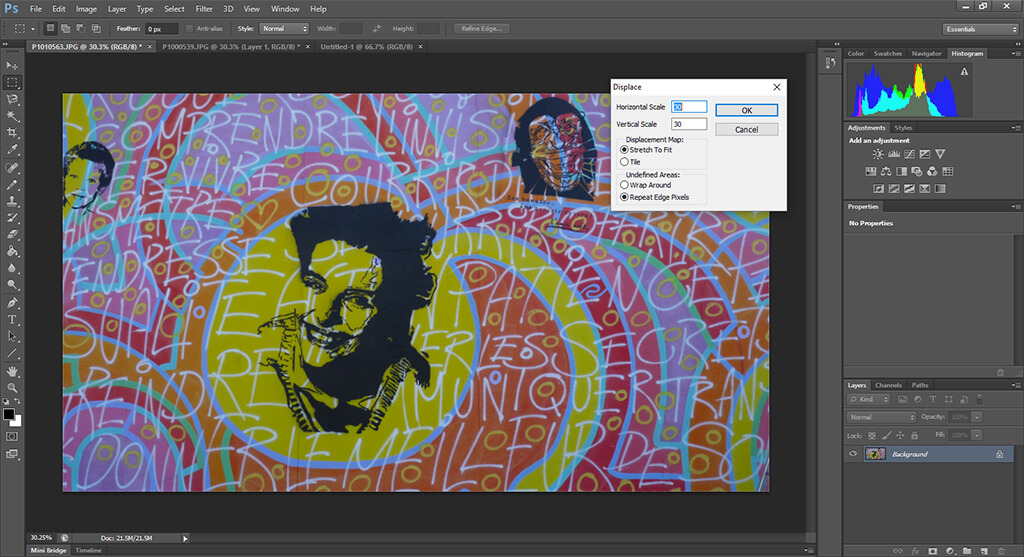
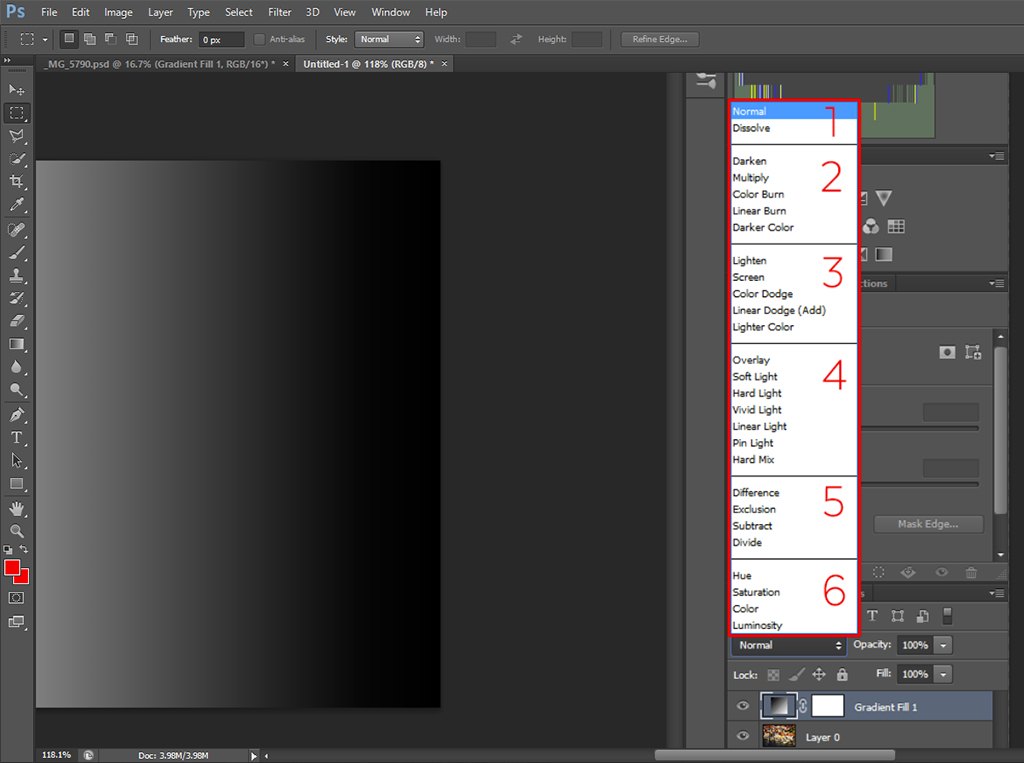
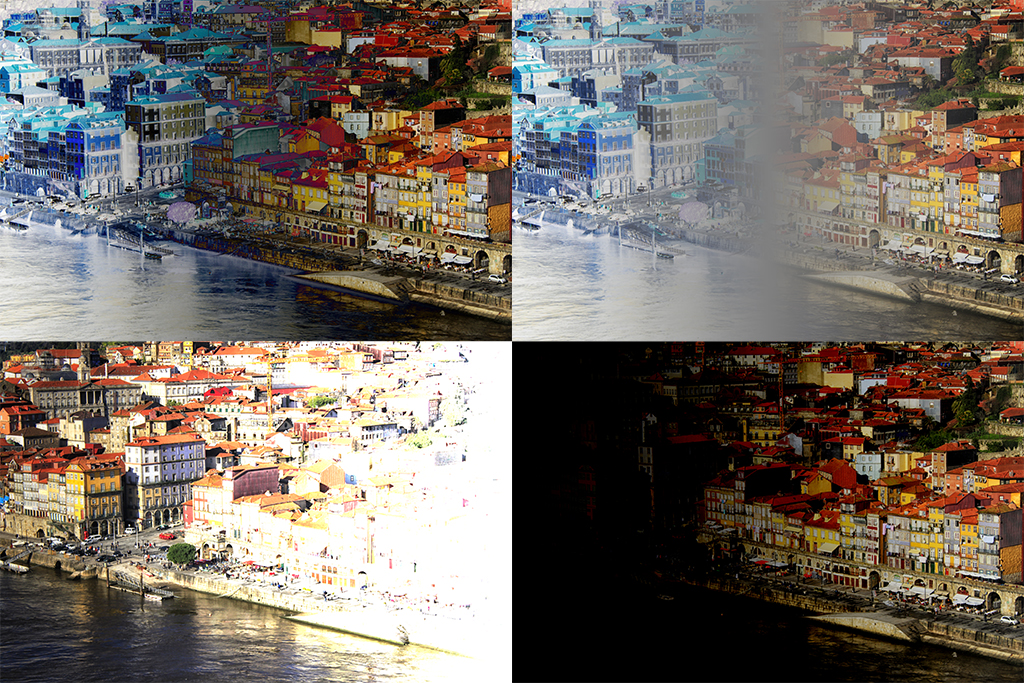
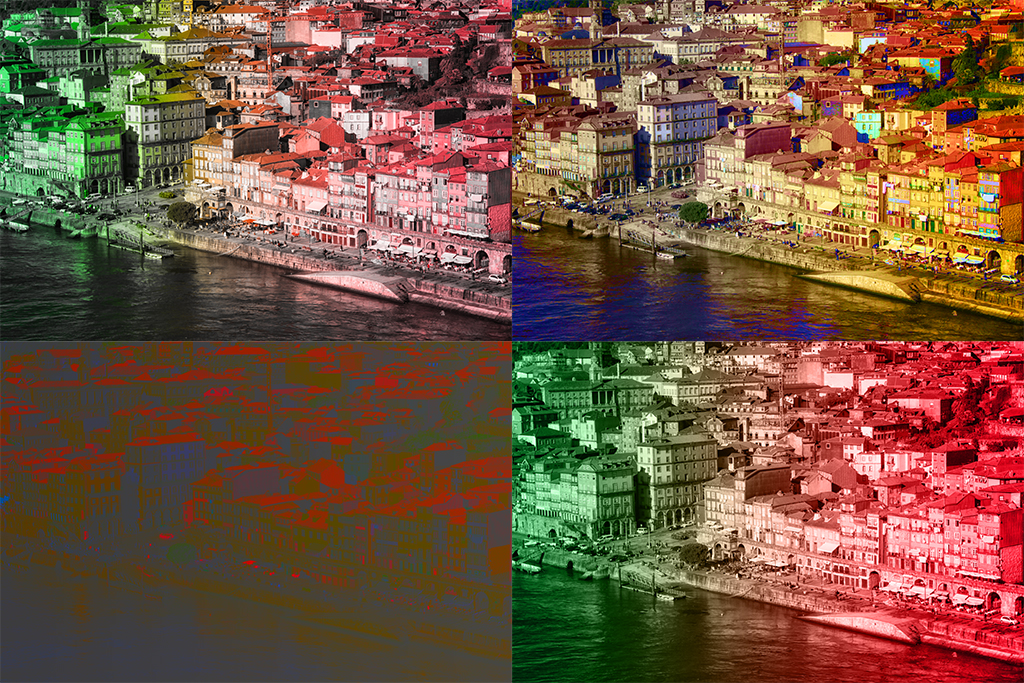
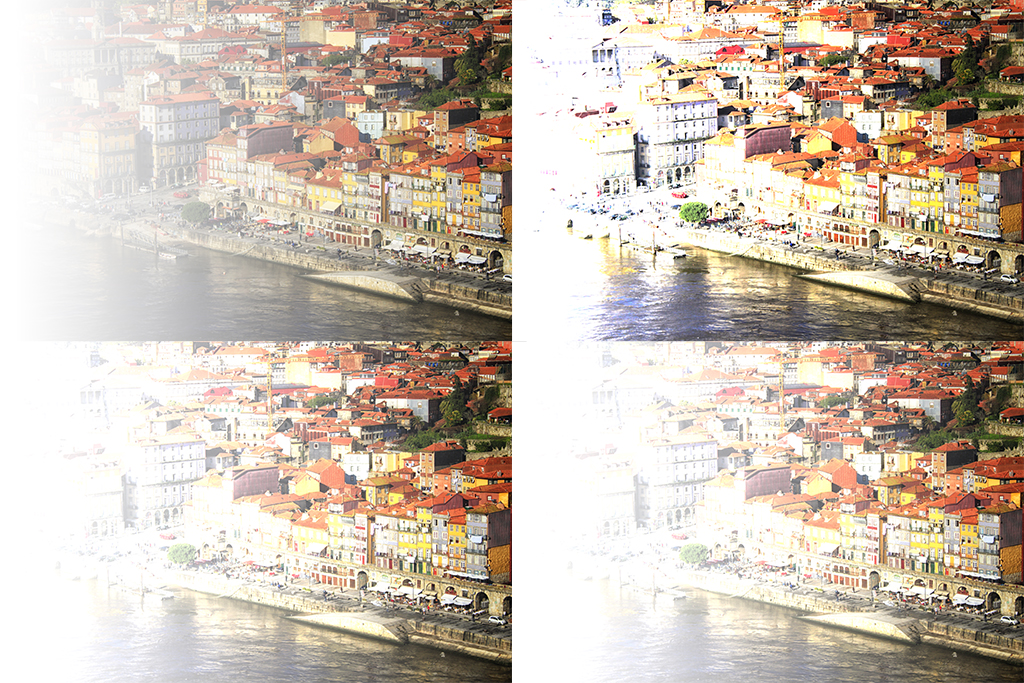
The different merging functions in Photoshop create extremely different images. Many will warp your images to make them fit together, and others will leave choppy edges that need to be trimmed out during a later step in post-production. Depending on the scale, number, and orientation of the photos, many of these settings will turn out very poorly. Some, such a spherical, only work in certain conditions, and few stay true to your intended perspective. This means the auto setting isn’t always your friend.

warped photomerge image

Experiment with all the different settings so you understand exactly what they do. Ideally, run the same set of photos through each setting for the best comparison of the differences between settings. Everyone’s tastes are different, but you’ll be able to clearly note which settings heavily distort images (perspective, cylindrical, and spherical) and which generate the fewest changes in your source material (collage, reposition). Remember, the setting makes the image. You don’t want to have to worry about fixing distorted images in post.

Uniformity

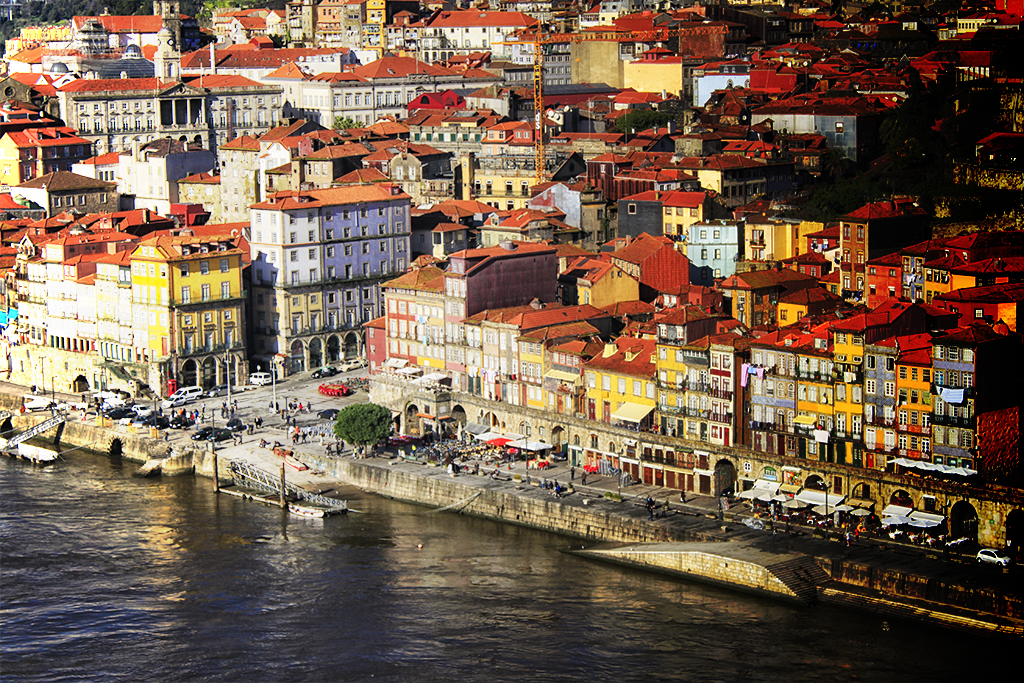
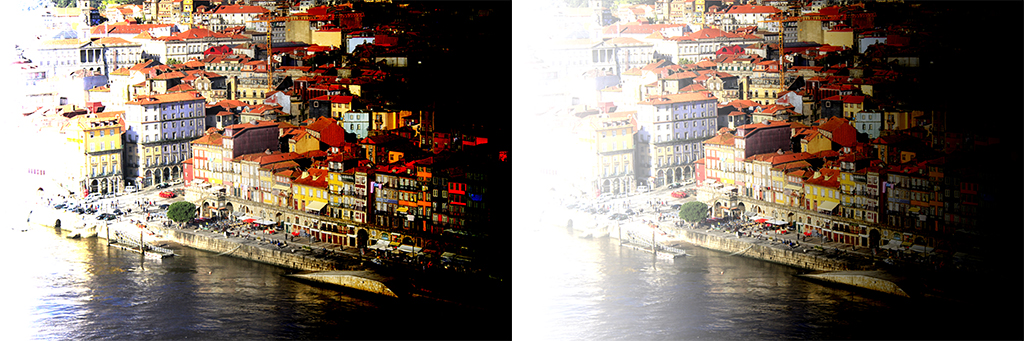
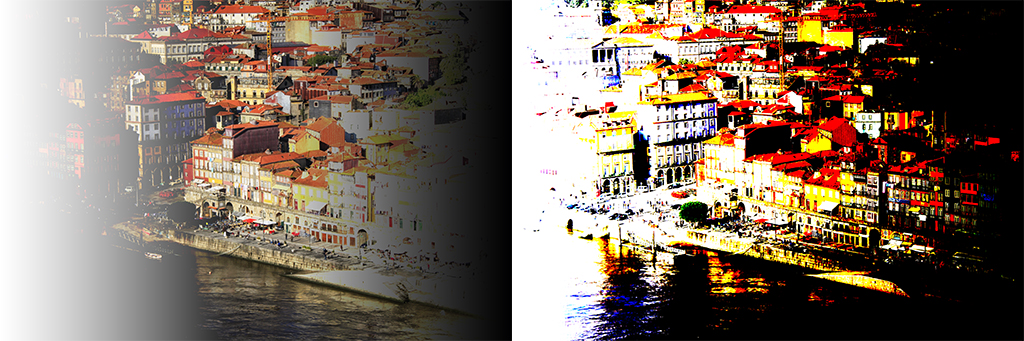
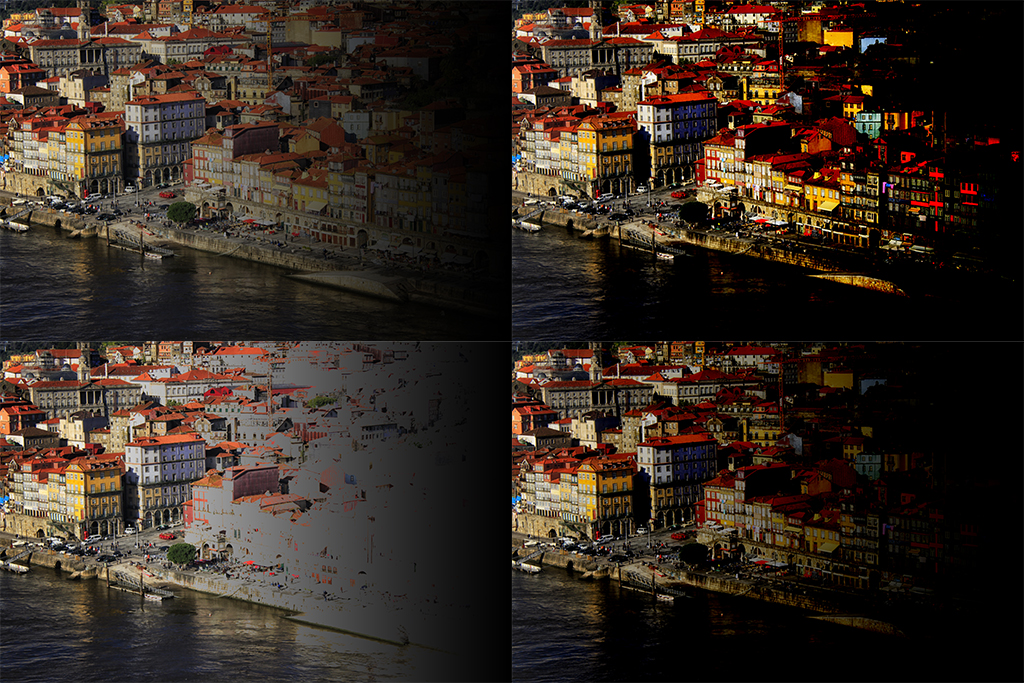
There are two easy ways to make your separate pictures blend seamlessly into a unified whole. Once you’ve organized your images and selected your optimal setting, stop to select a few additional options. First, use blending. By checking each Blend Image box, you give Photoshop the power to automatically adjust for exposure discrepancies, color variation, and other slight differences that would disturb the final image’s uniformity.

photomerge blending

Vignette Removal is your second tool. Shadows occasionally creep into your shots, especially from things like the lens hood. Vignette Removal adjusts the image to compensate for those dark spots. It effectively erases them, so you don’t have multiple camera hood shadows across your panorama.

Manual Corrections

As we’ve mentioned before, auto settings will only take you so far. If you want to get the absolute best results from your merged images, you’re going to have to dig into the more detailed settings. This process begins before you even order your photos. Try making images as similar as possible before merging in order to prevent loss of detail.

Start with something simple, like exposure. Lowering exposure while increasing recovery will boost fine detail. If the shadows get too dark, adjust the fill light bar. Use this three-step process on all the images you plan to merge. The color and exposure may not be exactly the same across the board, but you can eyeball your shots well enough to prevent the Blend and Vignette functions from going overboard. This should even save you time when you sit down for final edits.

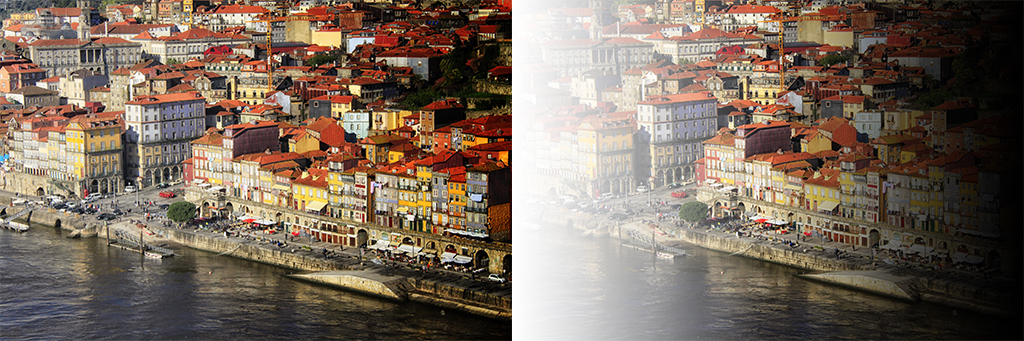
Accept that There is No Perfect Merge

The ultimate secret of any photography tool is that it cannot produce a perfect image, especially not through automatic settings alone. The good news is, Photomerge isn’t the only feature in Photoshop. Once you have your merged image, it’s time to get serious about cropping.

photomerge cropping

Even though you may have blended five or six images, you may discover that it’s really the combination of one, two, and three (with a sliver of four) that have the best composition. You can’t know what a merged image will look like until after the process is complete, so don’t be surprised if you end up taking fewer pixels from the final merge than you expected. Crop well, crop thoroughly, and don’t feel bad about leaving a lot of image on the chopping block.

Photomerge is all about preparation, careful selection, and lots of cropping. You may not be able to get it right the first time, but by taking control of automated functions like Blend, you can improve your results. You can make the final image even better by performing some basic editing before you merge. In the end, don’t be afraid to crop. Photomerge is only one step in post-production.

Displacement maps in Photoshop

Photoshop is a great tool not only for photographers but also for graphic designers. Some of the available features are definitely thought for photography while some others are almost exclusively oriented to graphic design. There are, however, some tools that can be used for both purposes and displacement maps is definitely one of those.

So what are displacement maps? I have to say that, at least to me, the name is far from self-explanatory. Displacement maps are a way to combine two images in a way that one merges into the other in a natural-looking way. The difference with simple merging is that there will be a primary and a secondary image, and the secondary one will be modified in Photoshop Textures and/or point of view so that it is somehow ‘immersed’ in the primary one.

That sounds a bit confusing, I know. So let’s work with an example to make things clearer. Consider the following two images.

dispmaps02

dispmaps03

The first one is a texture of a tree and the second one a section of the Berlin Wall. So let’s say we want to make the painting look like if it was painted on the tree. There are two things that would change in the image if that was the case. The first one is that one would expect some level of transparency so that the structure of the tree would be visible. This can be achieved by playing with the available blending modes in Photoshop.

The second would be that the shapes withing the painting would be distorted due to the 3-dimensional nature of the tree surface. This is where displacement maps come into play.

In order to work with displacement maps you basically need three components: the two images that you want to combine and the displacement map itself. We have already seen the two images, so let’s take a look at the displacement map.

A displacement map is simply a high-contrast version of the image that will provide the texture. In other words, it is a high-contrast version of the bottom image, the tree in our case. What you have to do is basically open the image, convert it to black and white and increase the contrast a fair amount.

The reason for converting the image to black and white is that we want to work with the lighting contrast, not the color contrast. There are different ways to convert an image but since we are simply interested in getting rid of the colors without using any digital filter, simply going to ‘Image -> Adjustments -> Hue/Saturation…’ and reducing the saturation to a minimum will do the trick. As usual, before making any change either save your original image with a different name or duplicate your base layer (right-click on the name of the layer, usually ‘Background’ and click on ‘Duplicate Layer…’). This way you will avoid the mistake of replacing your original file and loosing it for good.

Now go to ‘Image -> Adjustments -> Brightness/Contrast…’ and increase the contrast until you are happy with the result. This is a subjective step, but in general I would say that you should increase the contrast until you start seeing some parts of the image to get clearly overexposed. For the image of the tree here, I increased it to 100. Bear in mind that for some images you might have to increase the contrast even further. If that is the case, simply repeat the process as many times as necessary.

dispmaps04

And that’s it. This will be our displacement map. The next step is to save the file with any name we want with a .PSD extension. Next, we go to our original image of the Berlin Wall and apply the displacement map to it. For this, go to ‘Filter -> Distort -> Displace…’ and a dialog like the one in the following image will appear.

dispmaps05

The scales are a factor by which the image will be distorted to match the displacement map and you usually want to keep them to relatively low values. You can of course experiment with these values and see the results you get. The next two options correspond to how the displacement will actually work and they are important when the image and the displacement maps are not the same size. In general, it is best to match the sizes before distorting the image, since the result is much smoother.

After you click ‘OK’, a dialog will appear asking you to select the file containing the displacement map. This is the one we already created before. After applying it, your image will look strange, like the one below.

dispmaps06

While it might be a bit hard to see, the image already has the tree patterns somehow embedded. Now you have to select the whole image (Ctrl+A in Windows, Cmd+A in Mac), copy it (Ctrl+C in Windows or Cmd+C in Mac) and paste it (Ctrl+V in Windows and Cmd+V in Mac) on the original tree image in order to create a new layer on top of it.

Next, change the blending mode to ‘Multiply’ and you have your blended images that makes it look like if the painting was indeed created over the tree! You can adjust the opacity of the top layer as well as the contrast and saturation in order to get the result you want, but in general, as you can see, the whole process consists of just a couple of steps and the result is amazing.

dispmaps07

Now go ahead and re-visit your images to find where you could apply this and give it a try. And, as usual, don’t hesitate to post any question in the comments.

How to master the content aware and patch tool in photoshop?

Adobe Photoshop Layer Blending Modes Masterclass – Part III

In two previous posts we analyzed four groups of blending modes. In the first one, I introduced the blending modes and explained in detail the ‘Normal’ and ‘Darken’ groups while in the second one I explained the ‘Lighten’ and ‘Contrast’ groups. In this final post of the series I will explain the last two groups of blending modes, namely the ‘Simple’ and ‘Properties’.

Just as I reminder, below I show the image showing the different blending modes in Photoshop once again.

blending3

As with the two previous entries, I will be using, as bottom layer, an image of Porto, a beautiful city in Portugal, and a gradient mask as the top layer.

Simple

Naming this group is not so straightforward since the results that arise from applying the four blending modes that are contained is quite different. I called it ‘Simple’ because the algorithms used are simple mathematical functions.

The first mode, ‘Difference’, does exactly that. It subtracts, pixel by pixel, one image from the other. However, when doing the subtraction it takes into account which pixel is brighter and does the subtraction in such a way that the result is always positive. This means that for some pixels, the final result might be top layer minus bottom layer while for some others it might be bottom layer minus top layer.

The next mode, ‘Exclusion’, is very similar to ‘Difference’ only that the final result has a lower contrast. When blending with white or black, there is no difference between both modes. While using a white mask produces the inverse of the original image as a result, using a black mask leaves the image unchanged.

The ‘Subtract’ mode calculates the simple difference of both images. In contrast to the ‘Difference’ mode, here the result is bottom layer minus top layer no matter the values of each. This difference can cause negative values and these are all set to zero, meaning that all those pixels will be black. Using a flat gray mask result in a darker version of the original image.

The last mode of the group, ‘Divide’, makes a pixel by pixel division of the bottom layer by the top layer. The division, however, is calculated using normalized values where black is zero and white is one (instead of 0 to 255) so using a black mask will yield a completely white image in the end (division by zero) while using a white mask will leave the original image unchanged (division by one).

The following collage shows the four blending modes at work using our two layers. The results are organized in clockwise order starting from the top left corner.

blending13

Properties

And so we get to the final group of blending modes. This group has the particularity that it addresses specific properties of the original image. Since the properties addresses are related to the color of the image, I will be using a modified mask for these four final modes. The following image shows the same gradient mask used for the previous modes, only that it has been colored to better reflect the effect of applying it to the original image.

blending14

The first mode is called ‘Hue’ and it obviously changes the hue of the image. Applying this blending mode keeps the luminance and saturation of the original pixels exactly as they were but adjusts the hue according to the mask being used.

In the case of the ‘Saturation’ mode, the luminance and hue of the original image are preserved and the saturation of the mask is used to produce the final image.

The next mode, ‘Color’, preserves only the luminance of the original image and adds the hue and saturation of the mask to create the final image. This makes this mode a great choice when trying to add color to black and white images or to achieve a sepia tone.

The last mode is called ‘Luminosity’ and, of course, it changes the luminosity of the image while preserving the original hue and saturation. It can be regarded as the opposite of the ‘Color’ mode so, by choosing the right mask, it can serve to turn images into black and white, even though there are definitely easier ways to achieve this.

The following collage shows the results of applying the four blending modes just described to blend the colored mask and our original image. Again, the images are organized clockwise starting from the top left corner.

blending15

As I said at the beginning of the first entry of the series, blending modes are a powerful but often overlooked feature of Photoshop. It is true that, depending on your specialty, you will end up using some of the modes more than others and you will probably never use some of them. However, getting familiar with those that work well for you will definitely boost your personal workflow, so play around with them and remember that sometimes the results might be simply unexpected depending on your image and the mask you used.

As usual, if something was not clear for you, just let me know by means of a comment or simply an email.

Adobe Photoshop Layer Blending Modes Masterclass – Part II

In the previous post of this series we looked at the different blending modes available in Photoshop and how they are organized in six different categories. The following image shows the list of blending modes as it can be found in Photoshop.

blending3

We also looked in detail the first two groups, namely the ‘Normal’ (1) and ‘Darken’ (2) groups. In this post I will describe what the third (‘Lighten’) and fourth (‘Contrast’) groups are about and what each individual mode within those groups does when used to combine or blend two layers. For this, I will be using the same two layers that we used for the first post.

Lighten

Under this category you will find five different blending modes, the same number as in the ‘Darken’ one. In fact, the names and functionalities are very similar in both categories, only that the ‘Lighten’ one can be regarded as the opposite of the ‘Darken’ one. While the five blending modes of the second category produce a darker image, the five contained in this one produce a brighter final image. Also, as you will see now, the algorithm used by each mode is pretty much the same.

The first mode in the category is simply called ‘Lighten’. When this mode is applied, Photoshop looks at each pixel in both layers and replaces the corresponding pixel in the final image by a combination of both, giving a strong weight to the brightest one. This yields, in general, an image that is too bright, even though, as with every blending mode, the final result largely depends on the mask being used. The following image shows the result of blending our two layers with the ‘Lighten’ mode at 100% opacity.

blending7

If you compare the result of using this mode with that of using the ‘Darken’ mode, you will see that both are kind of complementary. While the pixels blended with a white mask are unchanged in the ‘Darken’ mode, those blended with a black mask remain unchanged now. An interesting effect of using this mode with a gray mask (which is basically what happens at the center of the image above) is a foggy appearance. Even though there are more sophisticated ways of adding fog to your images, this is a simple method that can work well under some specific situations, especially if you change the opacity of the layers at different locations. This mode is also very useful when adding brighter elements to an image, such as fireworks or the moon.

The second mode in the category is called ‘Screen’. In a similar way to the ‘Multiply’ mode, this mode also makes use of the multiplication function to produce the final image, only that the two operands are in this occasion the inverse of the bottom and top layers. The final result is a lighter color but the result is much more subtle than when applying the ‘Lighten’ mode. This mode can also give nice results when adding brighter elements, even though it tends to give the feeling of transparency on both layers.

The ‘Color Dodge’ mode is analogue to the ‘Color Burn’ one. In this case, Photoshop looks at the color information of each layer and the final image results in one with lighter colors. This is achieved by reducing the contrast between the two original colors. The ‘Linear Dodge’ mode does something similar, only that it takes the color of the original image and increases the brightness by a factor that depends on the color of the mask. Since both modes apply different algorithm, even though both will produce images with lighter colors than the original one, the specific colors will differ from each other.

The final mode in this category is called ‘Lighter Color’. As with ‘Darker Color’, this mode simply reads the value of each pixel within each layer and assigns the lighter color to each specific pixel in the final image. As with ‘Lighten’, the results tend to be rather strong, making it suitable only for situation where very specific results want to be achieved.

The following collage shows the results of applying each of the four described modes to blend our two layers. The images are organized in clockwise direction, starting from the top left corner.

blending8

Contrast

This group contains arguably the most used blending modes after the ‘Normal’ one. These modes are aimed at improving the contrast of a given image and can be regarded as a combination of the ‘Darken’ and ‘Lighten’ groups. While for the two previous groups the use of white or black masks left some pixels unchanged depending on which mode was being used, here both colors will have an effect on the image, while some shades of gray will leave the image unchanged.

This is also the largest group of all, with seven different blending modes to choose from. The first one, ‘Overlay’, is a combination of the ‘Multiply’ and ‘Screen’ modes. Depending on the lightness or darkness of a given pixel in the original image, the algorithm will make a combination of that original pixel with the multiplied or screened one to produce a final image with stronger contrast. The following image shows the result of applying the ‘Overlay’ mode to our two layers.

blending9

As you can see, the colors and details are much more preserved than for the previous modes, even though I used exactly the same layer. This is because Photoshop is preserving those details by just darkening dark pixels but lightening light ones instead of darkening or lightening everything at once.

The second mode, ‘Soft Light’, produces a similar result, only that softer in the way that the contrast is not increased as much. The algorithm looks at the pixel values of the mask and it darkens or lightens the pixels using a burning or dodging method depending on whether a given pixel is lighter or darker than 50%. This method, as well as the ‘Overlay’ are suitable for creating nice vignetting effects.

The ‘Hard Light’ mode uses a similar algorithm to the ‘Overlay’, only that the pixels used to determine whether a multiplication or a screening is applied are the ones from the mask. Depending on the mask used, highlights (for gray mask values larger than 50%) or shadows (for gray mask values smaller than 50%) will be added to the image. The following image shows the effect of the ‘Soft Light’ (left) and ‘Hard Light’ (right) blending modes.

blending10

The next two modes, ‘Vivid Light’ and ‘Linear Light’ are combinations of the ‘Color Burn’ and ‘Color Dodge’ and the ‘Linear Burn’ and ‘Linear Dodge’ respectively. While each of the latter methods act upon the darkest or lightest pixels producing in general darker or lighter images, the ‘Vivid Light’ and ‘Linear Light’ modes act upon all the pixels increasing the contrast all over the image. The following image shows the result of applying these two methods to our layers.

blending11

The last two blending modes of the ‘Contrast’ group are the ‘Pin Light’ and the ‘Hard Mix’. The ‘Pin Light’ is a very specific method that sets the value of the final image based on the pixels of the top layer. If the value of the top layer is darker than 50% gray, the pixels of the original image that are lighter than the mask are replaced by a combination of both layers while those that are darker remain unchanged. If the value of the top layer is lighter than 50% gray, the opposite happens.

The ‘Hard Mix’ mode takes the RGB values of the mask and adds them to the original image channel by channel. It then maximizes the color contrast by taking the R, G and B values of each pixel to 255 or 0, depending on whether the resulting value from the addition is larger or smaller than 255. This way, an image with extremely high color contrast and a limited palette results. The following image shows the result of applying these last two ‘Contrast’ modes to our images.

blending12

While the ‘Overlay’, ‘Soft Light’, ‘Vivid Light’ and ‘Linear Light’ are some of the most commonly used blending modes, the rest of the modes in this group are very specific and rarely used, at least for landscape and travel photography. However, from time to time it is a good idea to play with all the available blending modes since, due to the complexity of the algorithms involved, many times the results are completely unforeseeable and thus something interesting might arise from using them.

I hope you enjoyed this second part of this series and, as usual, just leave a comment or write me an email if you have any question.

Adobe Photoshop Layer Blending Modes Masterclass – Part I

In this series I want to address in some detail a Photoshop feature that, without being too complicated to understand, it does usually take a long time to get used to and that is the blending modes.

A blending mode is a specific algorithm that Photoshop applies to combine two layers, from now on called top and bottom. For this, an equation involving the pixels of both images is used to calculate the pixels of the final blended image. The calculation is applied pixel-by-pixel, in contrast to the calculations made when using filters, where a convolution process involving surrounding pixels is usually applied.

The exact equation that Photoshop applies for each blending mode is, for obvious reason, not known, but what we are interested on is the final result, so I will take an image and go through each of the different modes available and try to explain what’s going on. This way, you can get an idea of what each mode is suitable for and include them in your personal post-processing workflow.

During this post I will be using the following two images:

blending1

blending2

The first one is an image of Porto, a city in Portugal very close to the northern border with Spain. The second one is simply a gradient mask which serves nicely to the purpose of showing the effect of different blending modes as we will see later on.

Blending mode groups

The first thing you will notice when working with different blending modes is that they are grouped in different categories, even though Photoshop decided not to explicitly name these categories. The following image shows the different blending modes with the categories numbered.

blending3

The reason why the blending modes are categorized the way they are is because all the modes within a group behave in a similar way. Even though these are not official names given by Adobe, we could call each group like this:

  1. Normal: these are the most common blending modes, close to simply putting a layer on top of the other without much calculations involved (this is indeed what the ‘Normal’ mode does).
  2. Darken: these are modes that give as a result an image that is darker than the original one.
  3. Lighten: these are modes that give as a result an image that is brighter than the original one.
  4. Contrast: these modes act directly on the contrast of the original image tending to provide a final image with improved contrast; some of the most commonly used modes belong to this group.
  5. Simple: these modes perform simple mathematical operations and the final result depends strongly on the two images being blended.
  6. Properties: this final group contains modes that act upon specific image properties.

Now let’s look at the specific modes within each of the groups.

Normal

Inside this category there are only two blending modes, namely ‘Normal’ and ‘Dissolve’. While the ‘Normal’ mode does a linear combination of both layers, the ‘Dissolve’ simply combines, in a pseudo-random way, pixels from each of the two images. Both modes are completely opaque meaning that, unless the opacity of the top layer is reduced from 100%, only the top layer will be visible. Below there is an image showing the result of applying both blending modes to our images with an opacity of 50% (left ‘Normal’ and right ‘Dissolve’).

blending4

The ‘Normal’ mode simply darkens the regions where the mask is black and lightens the regions where the mask is white while the ‘Dissolve’ does something similar but some of the mask pixels are left untouched, giving the impression that the image is, precisely, dissolving.

Darken

Here we can find five different modes, all of them aimed at darkening the original image. The first one, simply called ‘Darken’, is a simple algorithm that compares the brightness of each pixel in both layers and makes a combination of both pixels giving more weight to the darkest one to the final image. This gives in general a pretty dark image, even though the final result will largely depend on the mask being used. The following image shows the result of blending our two layers with this method with a 100% opacity.

blending5

Even though some of the pixels on the houses at the right look like if they were overexposed giving a feeling of being brighter than originally, if you use the ‘Eyedropper Tool’ in Photoshop to compare both colors you will see that the resulting pixels are indeed brighter. The apparent overexposure is a result of the eye comparing adjacent colors and, since they are close to dark grays and blacks, they look rather bright.

The ‘Multiply’ mode does exactly that: it multiplies the pixels of the bottom layer by the brightness level of the top layer, with the brightness range being normalized to values between zero (black) to one (white). This normalization is done to achieve the desired result, which is leaving the image unchanged when being blended with white (multiplying by one) and completely disappearing the image when blending it with black (multiplying by zero). This mode, if a gray mask is used, tends to give a decent result when darkening an image.

The ‘Color Burn’ mode works taking into account not only the brightness of each pixel but also the color information. The final result is an image with darker colors, meaning that not only the brightness will change but also the colors. There are two ways of darkening colors. One is by increasing the contrast between two colors and the other one is by decreasing the brightness of the original color. While the ‘Color Burn’ mode applies the first method (with the two colors being the colors of the two original layers), the ‘Linear Burn’ makes use of the second one, simply decreasing the brightness of a given pixel according to the value of the corresponding pixel of the mask. For these two methods, if the image is blended with a white mask, no change will occur.

The final mode in this category, ‘Darker Color’, is very similar to the first one, ‘Darken’ with the difference that, while some combination of colors is made in the ‘Darken’ mode, non is made with ‘Darker Color’, where a simple replacement of the pixel is made according to the values contained in each layer. The following collage shows the results of applying the four modes just described ordered from top left in clockwise direction.

blending6_new

In upcoming posts I will go through the rest of the modes that include what can be regarded as the inverse of the ‘Darken’ modes, namely the ‘Lighten’ modes, a combination of these two, namely the ‘Contrast’ modes and two special groups that are usually applied in more specific situations, namely the ‘Simple’ and ‘Properties’ groups.

Want to become a master of photoshop’s clone tool.

Stay tuned and, as usual, don’t hesitate to contact me if you have any question.