So picture this, you’re out taking photos and you get some awesome shots of iconic buildings but when you get back to your studio or as I like to call it my living room 🙂 you look over all your great images that you had taken that day and you realize to your absolute horror that they are all distorted on the edges and the straight pillars etc are all warped a little because your camera was unable to fit the entire image incorrectly.
Well yes, this could be an issue if there was no such thing as Photoshop, but luckily for us there is so it’s no big deal and I’ll be showing you how little of a deal it actually is and that you won’t have to worry about it anymore once you figure out how to do this thanks to this free tutorial courtesy of Sleeklens.
Now for this type of editing work I used to use the features that Adobe Lightroom provided for me a lot but I’m a simplistic kind of fellow so I just started to use Photoshop now to cover pretty much all my image editing.
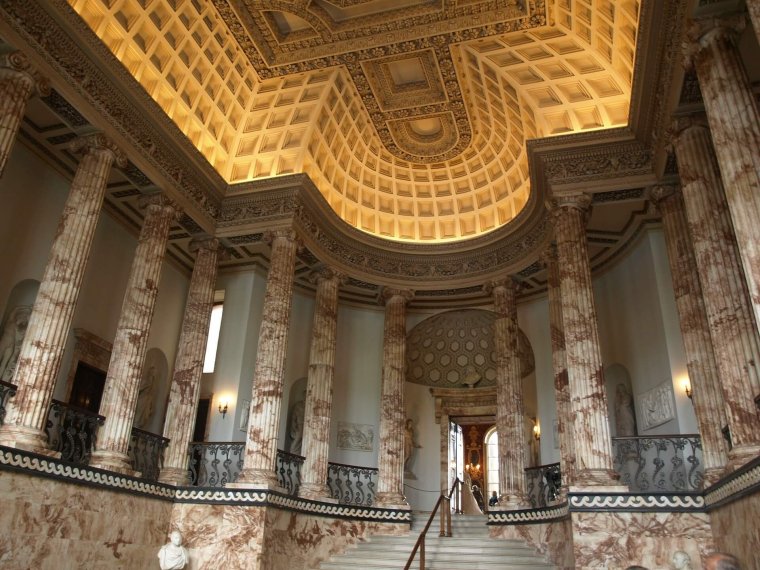
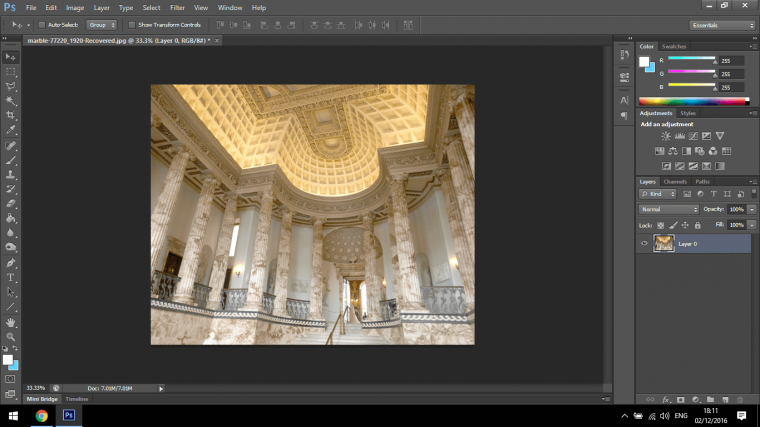
So if you take a look at the image below you will notice that it has a quite unhealthy pull to the top center as if the image was to keep going it would eventually reach a disappearing point somewhere at some stage.
The worst is when you have pillars like the ones in this image and they are curved, that really doesn’t look good if you are planning on using your images for anything professional, you’ll be pretty much called out on that straight away and you don’t want that as a Photographer, Freelancer or whatever because the client could be thinking do you actually know what you’re doing, in some cases it could lose you the actual contract and that is the last thing we want, especially is the is reviews at stake, nobody wants to get a bad review!
This inward warping we do not need and this warping we can do without thanks to Photoshop.
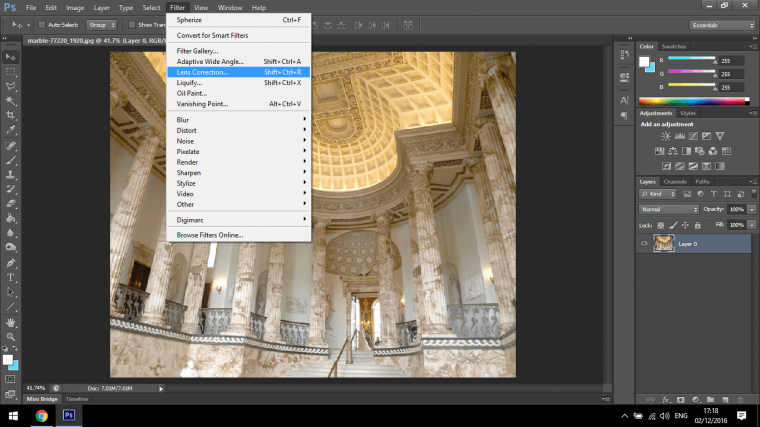
Ok, so what you could do is to go to Filter and Lens correction and give that a go which might just do the job for you, but what I want to take a look at today is the new feature to Adobe Photoshop CS6.
So what we’ll be looking at is The Adaptive Wide Angle Filter, this is directly from the Lens Correction Filter, so if you go back to the image above you will see it right there, alternatively, you can use the shortcut Shift+Ctrl+A.
Side Note:
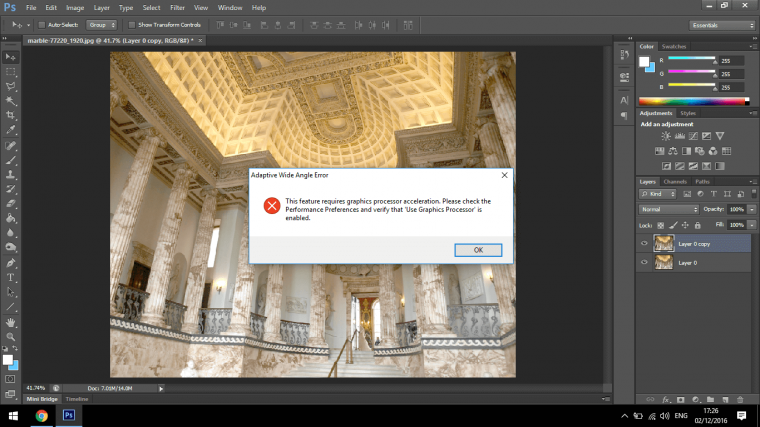
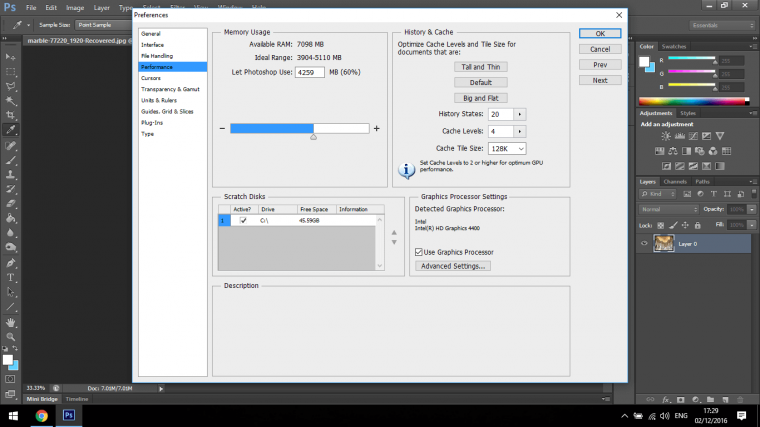
You may get a pop-up like an image below,
Don’t worry I’ll show you how to fix this now.
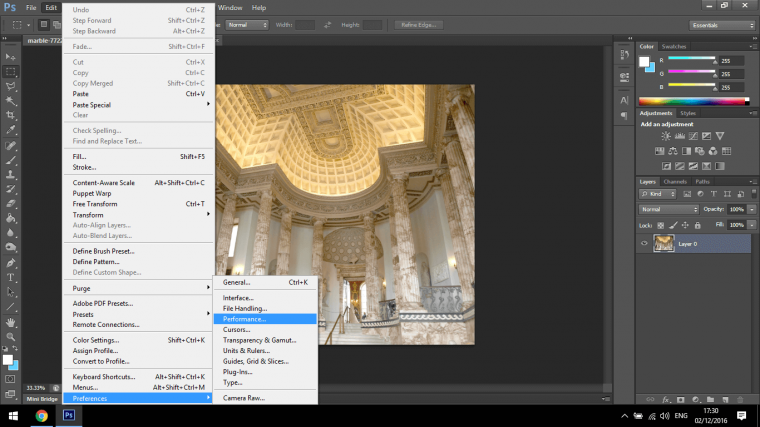
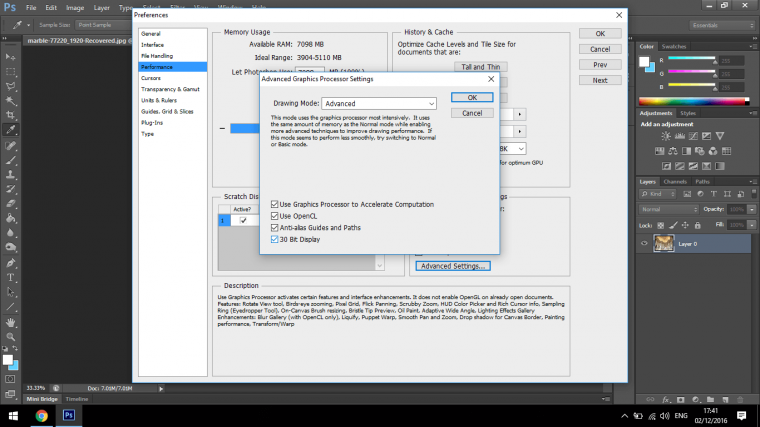
You fix this simply by going to Edit – Preferences – Performance
Make sure Use Graphic Processor is clicked.
Then go into Advanced Settings and click all the boxes if they haven’t already been clicked.
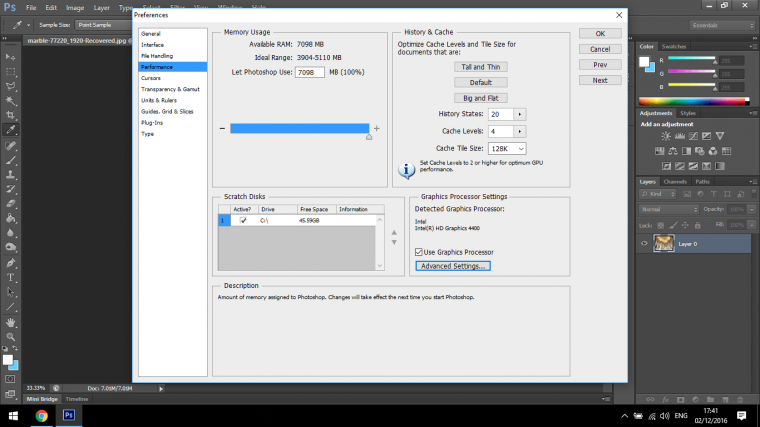
For the Memory Usage, I boosted that right up to full.
This should do the trick for you, then you can just go back to what you were going to do in the first place and all should be well.
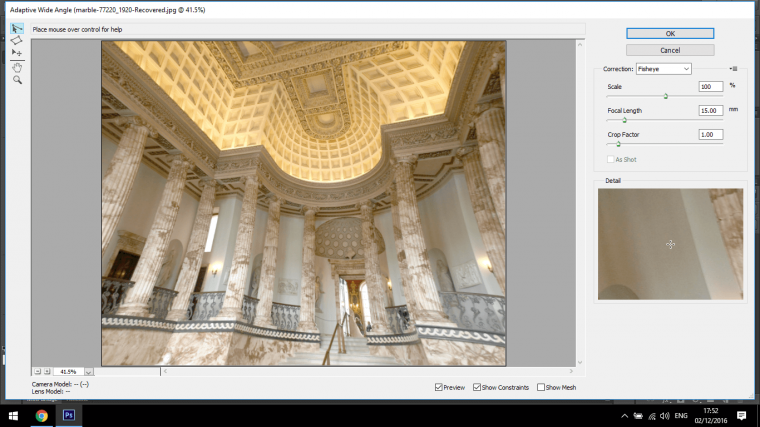
Your screen should now look like what I have in the image below.
So in the Correction Dropbox, you will see several options that you can use, I would say have a look at those after we complete this tutorial but for now we will just concentrate on the Fish Eye option.
Under that Dropbox, you will see 3 sliders
Scale
The Scale is just standard scale, you can use this to zoom in on the image.
These are the two main sliders that you will be using to correct your image, so play around with them until you’re happy and your image is looking acceptable.
At the bottom, you can see an option box that you can click on and off to Preview the effects that you have done, then press OK when you feel your job has been done.
The change should be pretty spectacular compared to what the original image you started out with looked like.
Graduated from college in 2002 with a degree in Art & Design, I started exploring my way in Graphic Design and Professional Post Production. Full-time freelancer since 2011.


 Facebook
 Google +
Comments (0)
There are no comments yet.