In the previous post of this series we looked at the different blending modes available in Photoshop and how they are organized in six different categories. The following image shows the list of blending modes as it can be found in Photoshop.
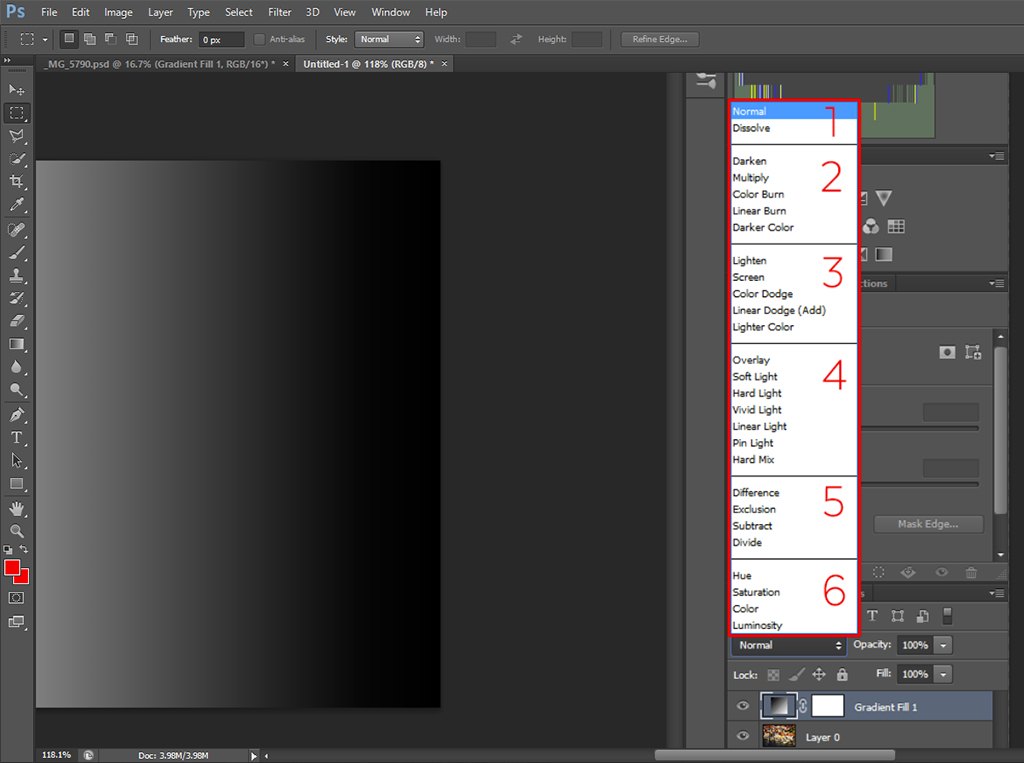
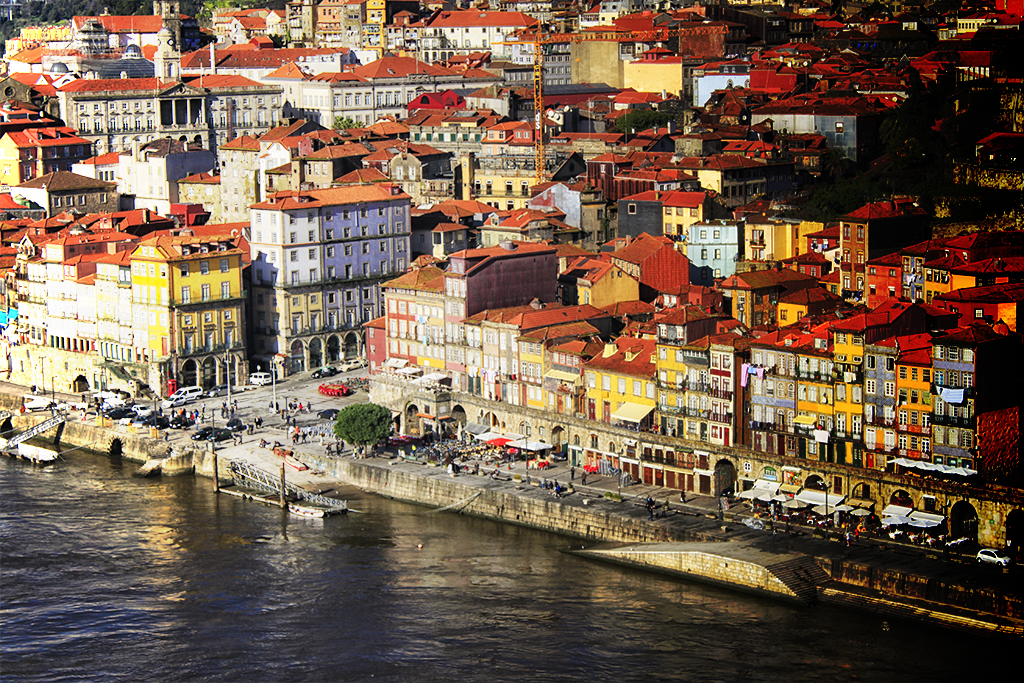
We also looked in detail the first two groups, namely the ‘Normal’ (1) and ‘Darken’ (2) groups. In this post I will describe what the third (‘Lighten’) and fourth (‘Contrast’) groups are about and what each individual mode within those groups does when used to combine or blend two layers. For this, I will be using the same two layers that we used for the first post.
Under this category you will find five different blending modes, the same number as in the ‘Darken’ one. In fact, the names and functionalities are very similar in both categories, only that the ‘Lighten’ one can be regarded as the opposite of the ‘Darken’ one. While the five blending modes of the second category produce a darker image, the five contained in this one produce a brighter final image. Also, as you will see now, the algorithm used by each mode is pretty much the same.
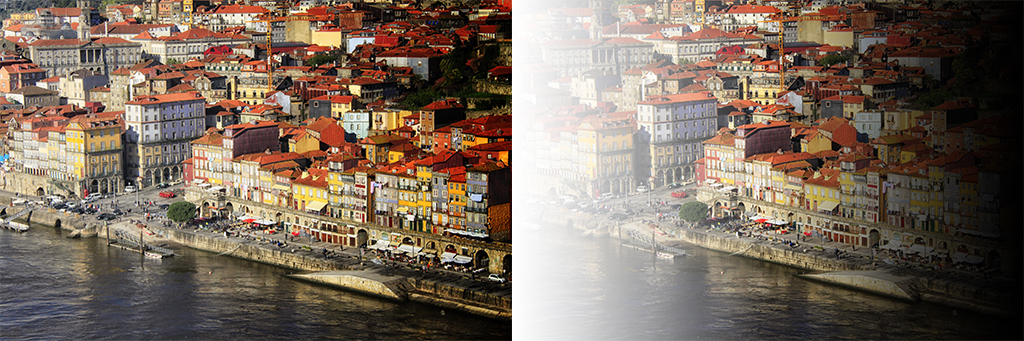
The first mode in the category is simply called ‘Lighten’. When this mode is applied, Photoshop looks at each pixel in both layers and replaces the corresponding pixel in the final image by a combination of both, giving a strong weight to the brightest one. This yields, in general, an image that is too bright, even though, as with every blending mode, the final result largely depends on the mask being used. The following image shows the result of blending our two layers with the ‘Lighten’ mode at 100% opacity.
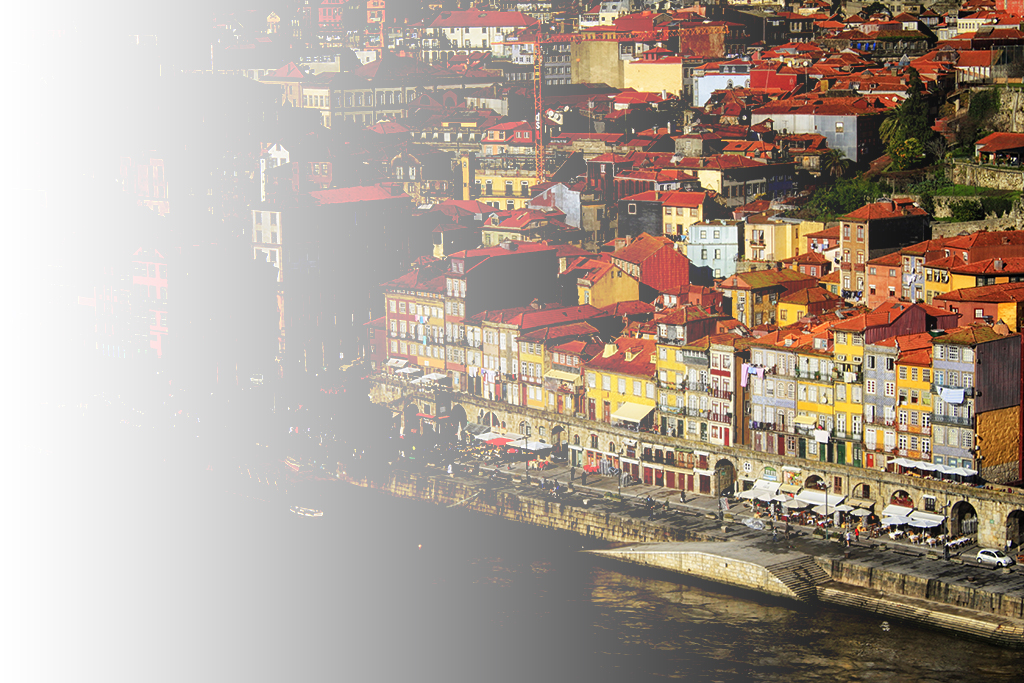
If you compare the result of using this mode with that of using the ‘Darken’ mode, you will see that both are kind of complementary. While the pixels blended with a white mask are unchanged in the ‘Darken’ mode, those blended with a black mask remain unchanged now. An interesting effect of using this mode with a gray mask (which is basically what happens at the center of the image above) is a foggy appearance. Even though there are more sophisticated ways of adding fog to your images, this is a simple method that can work well under some specific situations, especially if you change the opacity of the layers at different locations. This mode is also very useful when adding brighter elements to an image, such as fireworks or the moon.
The second mode in the category is called ‘Screen’. In a similar way to the ‘Multiply’ mode, this mode also makes use of the multiplication function to produce the final image, only that the two operands are in this occasion the inverse of the bottom and top layers. The final result is a lighter color but the result is much more subtle than when applying the ‘Lighten’ mode. This mode can also give nice results when adding brighter elements, even though it tends to give the feeling of transparency on both layers.
The ‘Color Dodge’ mode is analogue to the ‘Color Burn’ one. In this case, Photoshop looks at the color information of each layer and the final image results in one with lighter colors. This is achieved by reducing the contrast between the two original colors. The ‘Linear Dodge’ mode does something similar, only that it takes the color of the original image and increases the brightness by a factor that depends on the color of the mask. Since both modes apply different algorithm, even though both will produce images with lighter colors than the original one, the specific colors will differ from each other.
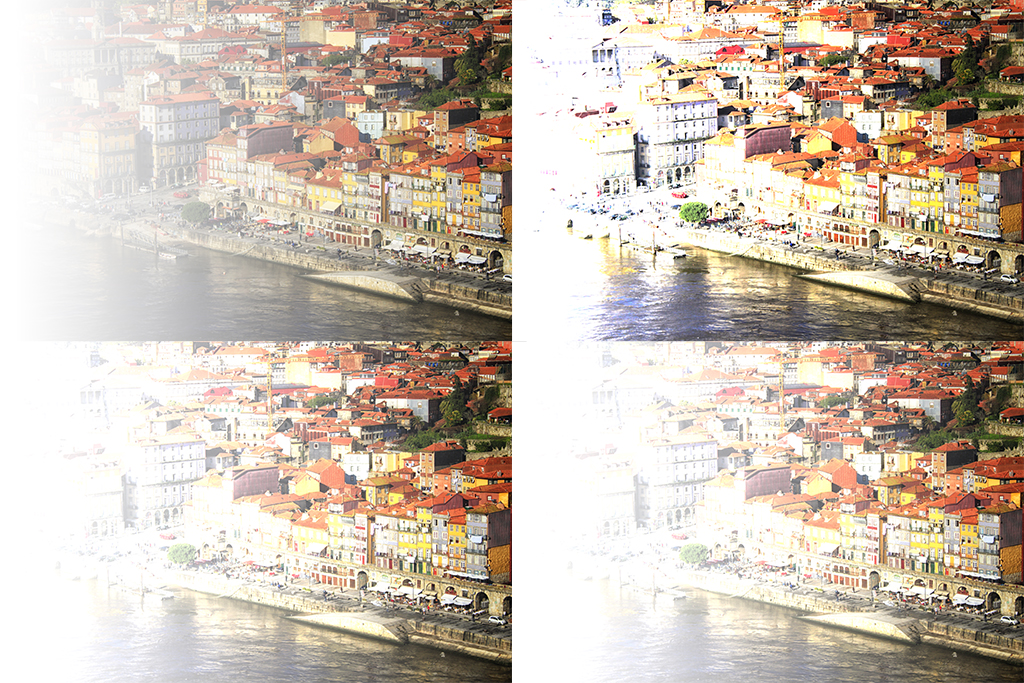
The final mode in this category is called ‘Lighter Color’. As with ‘Darker Color’, this mode simply reads the value of each pixel within each layer and assigns the lighter color to each specific pixel in the final image. As with ‘Lighten’, the results tend to be rather strong, making it suitable only for situation where very specific results want to be achieved.
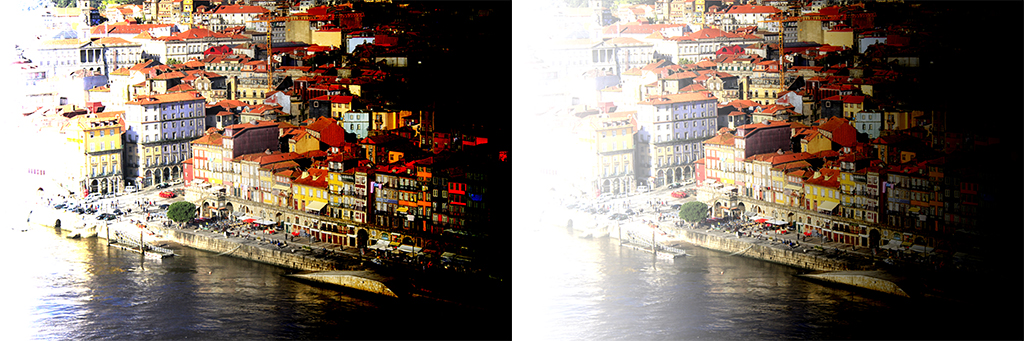
The following collage shows the results of applying each of the four described modes to blend our two layers. The images are organized in clockwise direction, starting from the top left corner.
This group contains arguably the most used blending modes after the ‘Normal’ one. These modes are aimed at improving the contrast of a given image and can be regarded as a combination of the ‘Darken’ and ‘Lighten’ groups. While for the two previous groups the use of white or black masks left some pixels unchanged depending on which mode was being used, here both colors will have an effect on the image, while some shades of gray will leave the image unchanged.
This is also the largest group of all, with seven different blending modes to choose from. The first one, ‘Overlay’, is a combination of the ‘Multiply’ and ‘Screen’ modes. Depending on the lightness or darkness of a given pixel in the original image, the algorithm will make a combination of that original pixel with the multiplied or screened one to produce a final image with stronger contrast. The following image shows the result of applying the ‘Overlay’ mode to our two layers.
As you can see, the colors and details are much more preserved than for the previous modes, even though I used exactly the same layer. This is because Photoshop is preserving those details by just darkening dark pixels but lightening light ones instead of darkening or lightening everything at once.
The second mode, ‘Soft Light’, produces a similar result, only that softer in the way that the contrast is not increased as much. The algorithm looks at the pixel values of the mask and it darkens or lightens the pixels using a burning or dodging method depending on whether a given pixel is lighter or darker than 50%. This method, as well as the ‘Overlay’ are suitable for creating nice vignetting effects.
The ‘Hard Light’ mode uses a similar algorithm to the ‘Overlay’, only that the pixels used to determine whether a multiplication or a screening is applied are the ones from the mask. Depending on the mask used, highlights (for gray mask values larger than 50%) or shadows (for gray mask values smaller than 50%) will be added to the image. The following image shows the effect of the ‘Soft Light’ (left) and ‘Hard Light’ (right) blending modes.
The next two modes, ‘Vivid Light’ and ‘Linear Light’ are combinations of the ‘Color Burn’ and ‘Color Dodge’ and the ‘Linear Burn’ and ‘Linear Dodge’ respectively. While each of the latter methods act upon the darkest or lightest pixels producing in general darker or lighter images, the ‘Vivid Light’ and ‘Linear Light’ modes act upon all the pixels increasing the contrast all over the image. The following image shows the result of applying these two methods to our layers.
The last two blending modes of the ‘Contrast’ group are the ‘Pin Light’ and the ‘Hard Mix’. The ‘Pin Light’ is a very specific method that sets the value of the final image based on the pixels of the top layer. If the value of the top layer is darker than 50% gray, the pixels of the original image that are lighter than the mask are replaced by a combination of both layers while those that are darker remain unchanged. If the value of the top layer is lighter than 50% gray, the opposite happens.
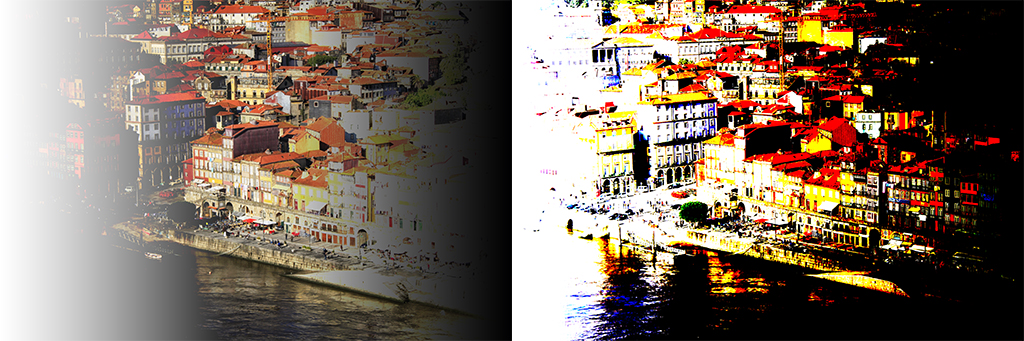
The ‘Hard Mix’ mode takes the RGB values of the mask and adds them to the original image channel by channel. It then maximizes the color contrast by taking the R, G and B values of each pixel to 255 or 0, depending on whether the resulting value from the addition is larger or smaller than 255. This way, an image with extremely high color contrast and a limited palette results. The following image shows the result of applying these last two ‘Contrast’ modes to our images.
While the ‘Overlay’, ‘Soft Light’, ‘Vivid Light’ and ‘Linear Light’ are some of the most commonly used blending modes, the rest of the modes in this group are very specific and rarely used, at least for landscape and travel photography. However, from time to time it is a good idea to play with all the available blending modes since, due to the complexity of the algorithms involved, many times the results are completely unforeseeable and thus something interesting might arise from using them.
I hope you enjoyed this second part of this series and, as usual, just leave a comment or write me an email if you have any question.


Please verify your software version before proceeding.
 I’ve verified my software version


 Facebook
 Google +
Comments (1)
nice