Adobe Photoshop Layer Blending Modes Masterclass – Part IIIwww.sleeklens.com
In two previous posts we analyzed four groups of blending modes. In the first one, I introduced the blending modes and explained in detail the ‘Normal’ and ‘Darken’ groups while in the second one I explained the ‘Lighten’ and ‘Contrast’ groups. In this final post of the series I will explain the last two groups of blending modes, namely the ‘Simple’ and ‘Properties’.
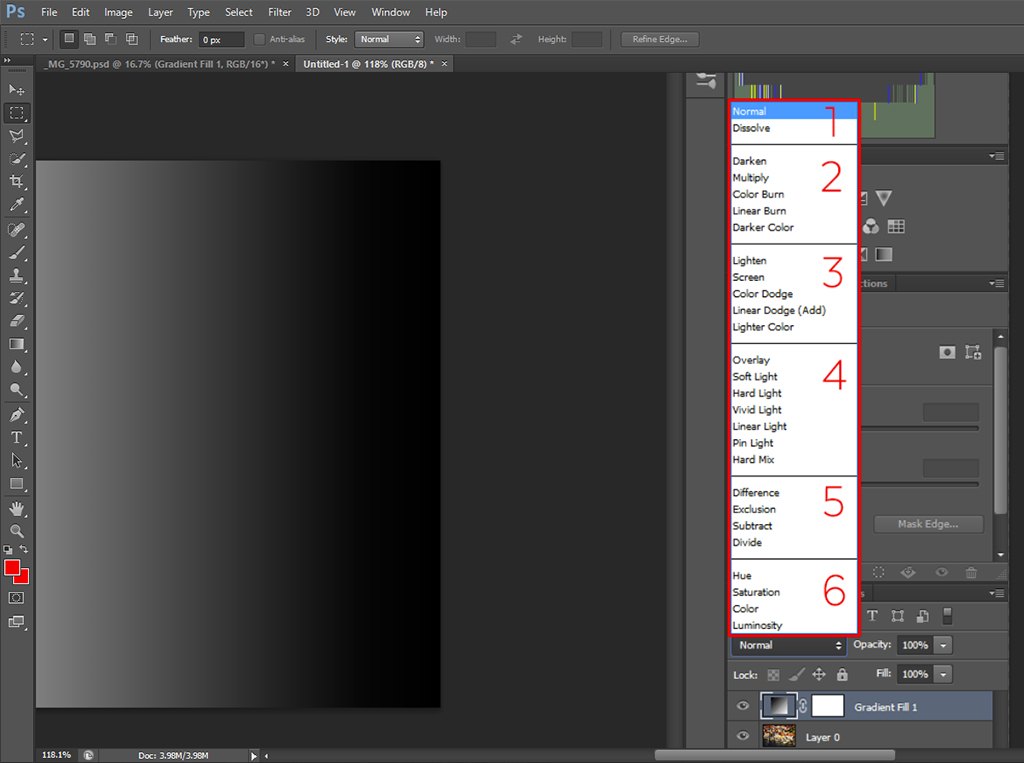
Just as I reminder, below I show the image showing the different blending modes in Photoshop once again.
As with the two previous entries, I will be using, as bottom layer, an image of Porto, a beautiful city in Portugal, and a gradient mask as the top layer.
Simple
Naming this group is not so straightforward since the results that arise from applying the four blending modes that are contained is quite different. I called it ‘Simple’ because the algorithms used are simple mathematical functions.
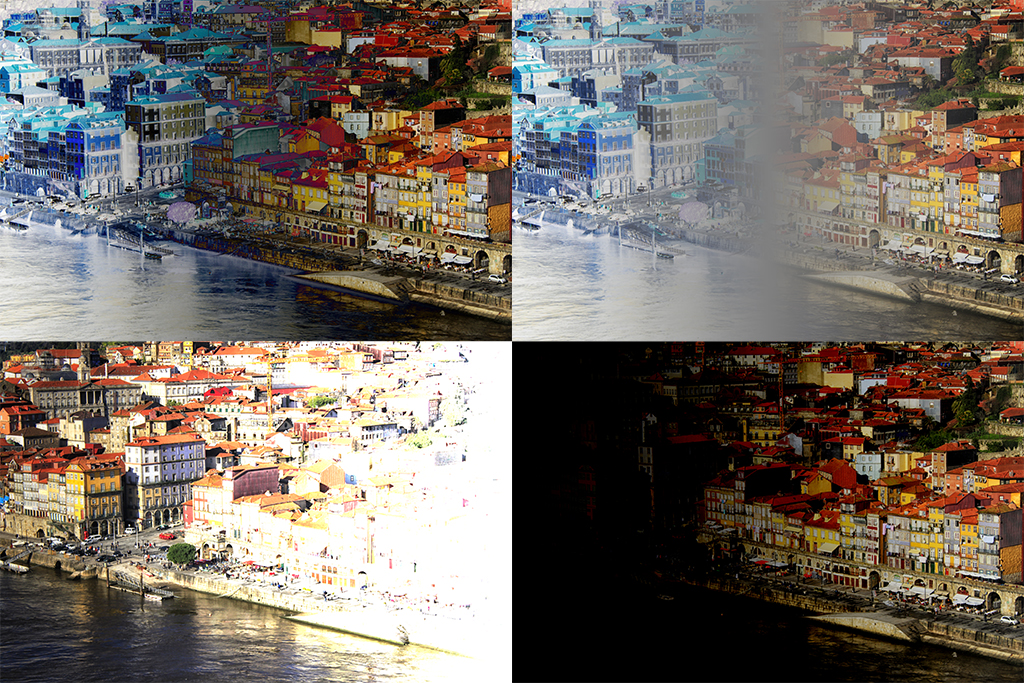
The first mode, ‘Difference’, does exactly that. It subtracts, pixel by pixel, one image from the other. However, when doing the subtraction it takes into account which pixel is brighter and does the subtraction in such a way that the result is always positive. This means that for some pixels, the final result might be top layer minus bottom layer while for some others it might be bottom layer minus top layer.
The next mode, ‘Exclusion’, is very similar to ‘Difference’ only that the final result has a lower contrast. When blending with white or black, there is no difference between both modes. While using a white mask produces the inverse of the original image as a result, using a black mask leaves the image unchanged.
The ‘Subtract’ mode calculates the simple difference of both images. In contrast to the ‘Difference’ mode, here the result is bottom layer minus top layer no matter the values of each. This difference can cause negative values and these are all set to zero, meaning that all those pixels will be black. Using a flat gray mask result in a darker version of the original image.
The last mode of the group, ‘Divide’, makes a pixel by pixel division of the bottom layer by the top layer. The division, however, is calculated using normalized values where black is zero and white is one (instead of 0 to 255) so using a black mask will yield a completely white image in the end (division by zero) while using a white mask will leave the original image unchanged (division by one).
The following collage shows the four blending modes at work using our two layers. The results are organized in clockwise order starting from the top left corner.
Properties
And so we get to the final group of blending modes. This group has the particularity that it addresses specific properties of the original image. Since the properties addresses are related to the color of the image, I will be using a modified mask for these four final modes. The following image shows the same gradient mask used for the previous modes, only that it has been colored to better reflect the effect of applying it to the original image.
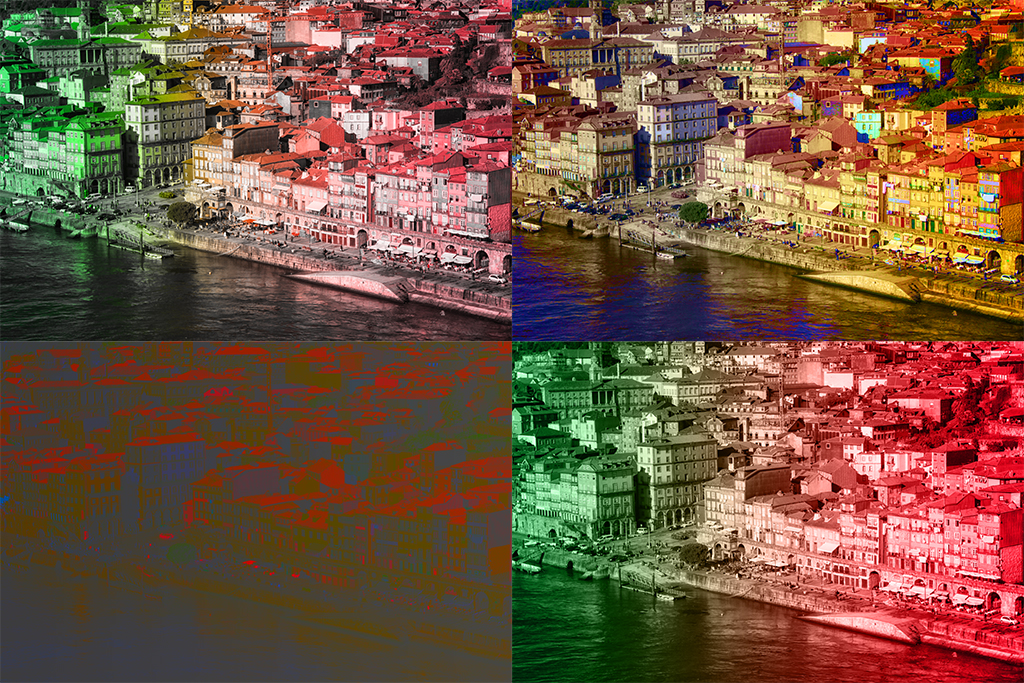
The first mode is called ‘Hue’ and it obviously changes the hue of the image. Applying this blending mode keeps the luminance and saturation of the original pixels exactly as they were but adjusts the hue according to the mask being used.
In the case of the ‘Saturation’ mode, the luminance and hue of the original image are preserved and the saturation of the mask is used to produce the final image.
The next mode, ‘Color’, preserves only the luminance of the original image and adds the hue and saturation of the mask to create the final image. This makes this mode a great choice when trying to add color to black and white images or to achieve a sepia tone.
The last mode is called ‘Luminosity’ and, of course, it changes the luminosity of the image while preserving the original hue and saturation. It can be regarded as the opposite of the ‘Color’ mode so, by choosing the right mask, it can serve to turn images into black and white, even though there are definitely easier ways to achieve this.
The following collage shows the results of applying the four blending modes just described to blend the colored mask and our original image. Again, the images are organized clockwise starting from the top left corner.
As I said at the beginning of the first entry of the series, blending modes are a powerful but often overlooked feature of Photoshop. It is true that, depending on your specialty, you will end up using some of the modes more than others and you will probably never use some of them. However, getting familiar with those that work well for you will definitely boost your personal workflow, so play around with them and remember that sometimes the results might be simply unexpected depending on your image and the mask you used.
As usual, if something was not clear for you, just let me know by means of a comment or simply an email.
Leonardo Regoli is a self-taught amateur photographer currently based in Ann Harbor, Michigan (USA). His main interests are travel and landscape photography.


 Facebook
 Google +
Comments (0)
There are no comments yet.