Tag: beginner

What is Shutter Speed?

When it comes to photography basics, mastering the the exposure triangle is imperative to taking a well-lit photograph. In this post we will talk about one of the three elements that control exposure: shutter speed.

What is Shutter Speed?

Your camera has a shutter, which is a curtain in front of the sensor. When this curtain is closed the light can’t reach to the camera sensor. The shutter curtain opens and let light into your camera. When you press the camera shutter button, it is open just for a certain time (usually for fractions of seconds or one/few seconds). The amount of time that it is open is the time that the camera sensor is exposed to light, it is known as “shutter speed”.

Shutter speed is measured in either seconds or fractions of seconds. Keep in mind that in the second case, the bigger is the denominator of the fraction, the shorter is the time that the camera shutter is open. For example, 1/4000sec is a much faster shutter speed than 1/250sec.

What is shutter speed scheme


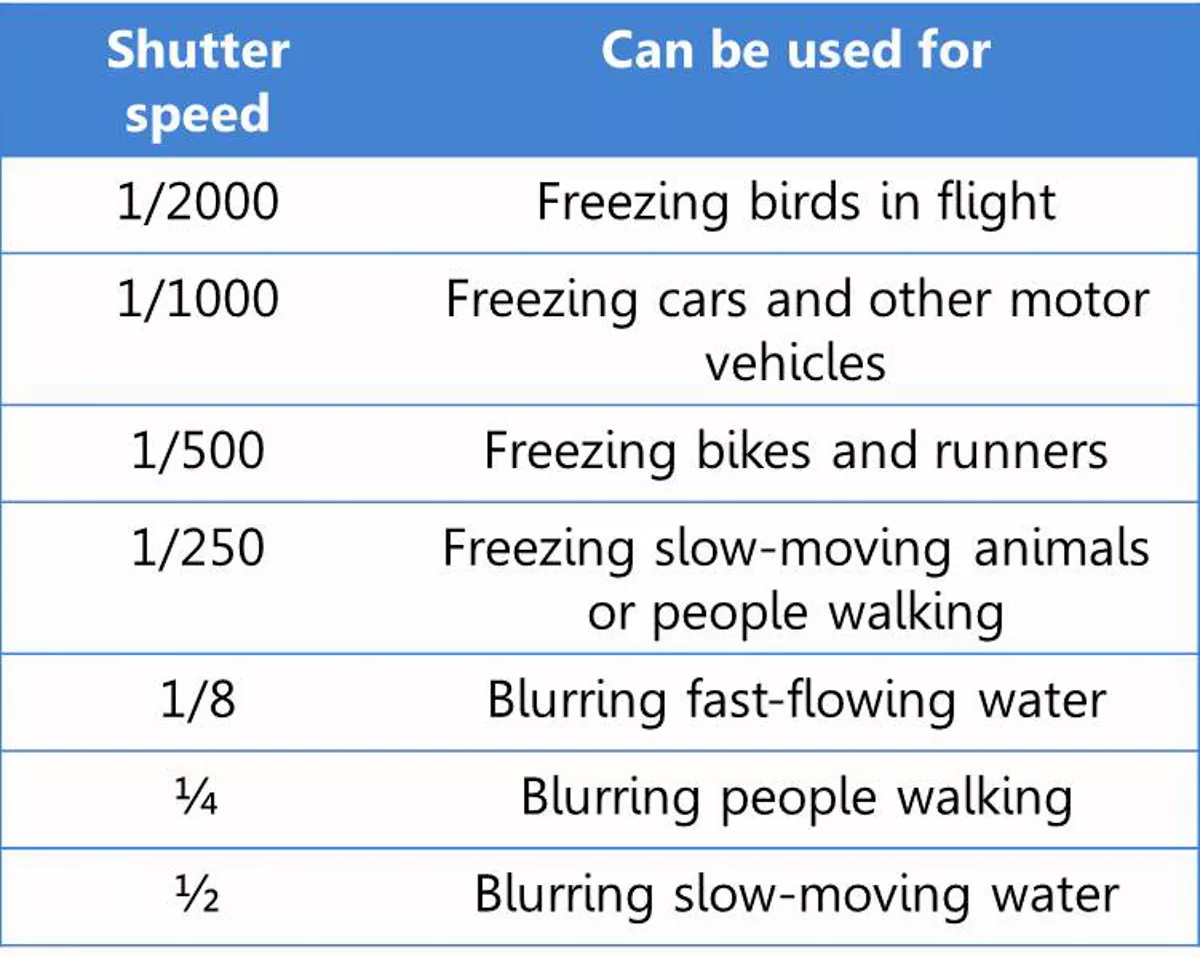
Shutter speed can be used creatively because short shutter speeds (also known as a faster shutter speed) freeze action while long speeds (also called slow shutter speed) can create motion blur. In the latter case, moving objects appear blurry along the direction of their movement. It is useful to know which shutter speeds are good for freezing or blurring some common actions. These numbers will give you a good starting point for your own experimentation.

Shutter speed table
The numbers in this table are an approximation.

When you are shooting at lower shutter speeds, you can get blurriness even if you don’t want it. This happens especially when you are taking pictures holding the camera in your hands. When the shutter speeds are slow, the slightest movement of your hands makes the picture blurry (I mean the unwanted “OMG this mountain looks blurry”—this is known as camera shake, not the creative blurriness we were talking in the previous paragraph). For that reason it is recommended to use a tripod when using a slow shutter speed.

What is the threshold between using tripod and not? It is said that you need to use a tripod when your shutter speed is less than 1/focal length. The result of the equation is expressed in seconds. Focal length is the measure of how much you are zooming. It is easier to understand with an example: if you are using a focal length of 35mm, then you need a tripod when the shutter speed is 1/35sec. For myself, I know that I need a tripod when I shoot slower than 1/80sec, doesn’t matter the focal length I am using. I guess there is a personal factor here. If you don’t have a tripod, look for alternatives that can help you to stabilize your camera. For example, you can lean on solid and stable things (trees, walls, light posts, tables…).

Benefits of Using Different Types of Shutter Speeds

With this understanding, let’s look at the benefits of using different types of shutter speed.

In the tutorial video above, we have a photo capturing a waterfall and this is taken at a faster shutter speed. What this does is that it is freezing the water coming out of the waterfall. But we have seen amazing waterfall photos with silky smooth waters and those are taken at a slower shutter speed. What this does is that when the camera opens the shutter, it’s seeing the motion of the water and then closing, allowing it to show the motion of the water thus giving a silky smooth appearance of the water.

We also have another example of light coming into the camera. If we have the photo and want to take a photo of it, we are going to have a very slow shutter speed with everything set neutral, we will have a dark image. We need to make sure it is exposed to the right situation. We will, therefore, allow more light to come into the camera, using a longer shutter speed. It’s going to vary from scene to scene and this is what we call ‘exposure triangle’ where you try to have everything calculated including the shutter speed. So, when you have a longer shutter speed, you are allowing the collect manner of light to hit the sensors thus giving you the proper exposure.

Shutter Speed Practice Exercises

Messing around with shutter speed can help you to set the tone or add emotion to an image. In essence, the less motion in a photo, one could say there are more tension and drama to be seen.

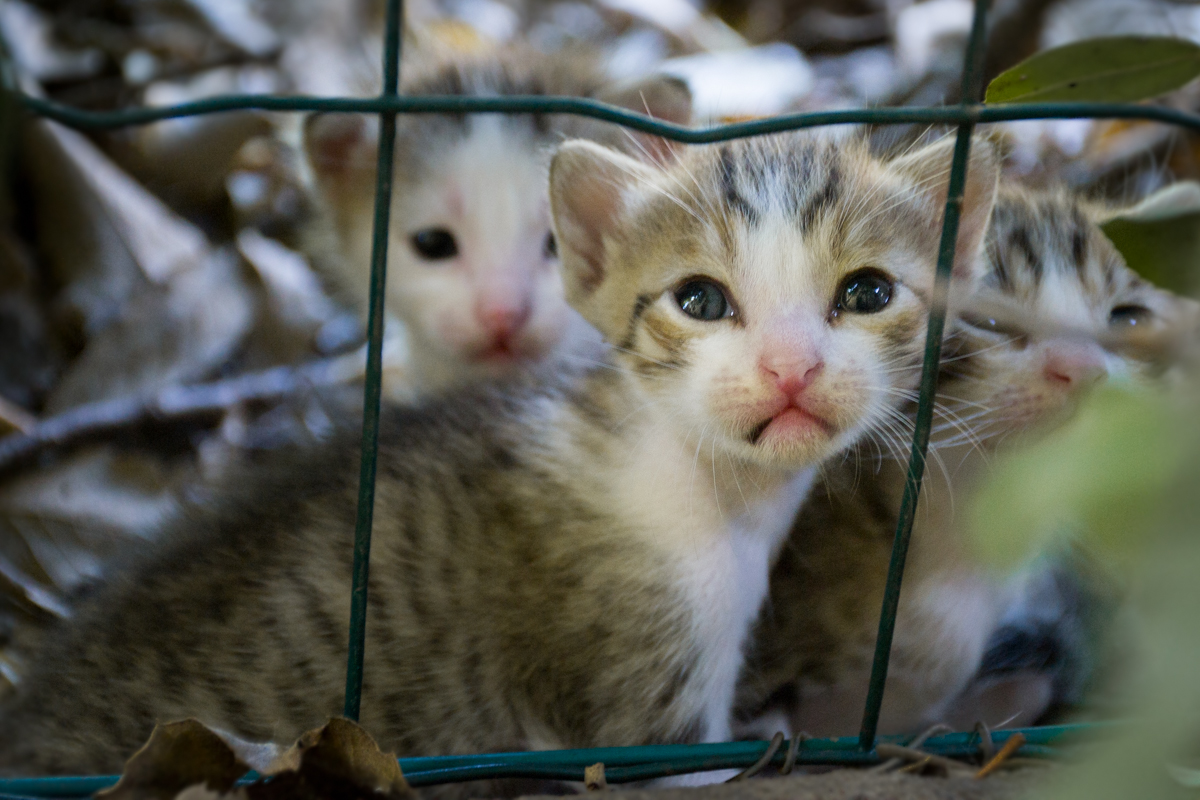
Imagine catching a still frame of a friend or group of friends laughing simultaneously. Within that image, with a fast shutter speed, you’re guaranteed to capture the raw emotion on each face. As opposed to our example of the waterfall, where the camera captures the movement of the water, giving it a soft, cotton type look. This then makes the image more soothing, peaceful and serene. You can try these shots in low light conditions or make use of the shutter priority mode where the camera automatically adjusts your ISO and aperture levels  so you don’t end up with an overexposed image.

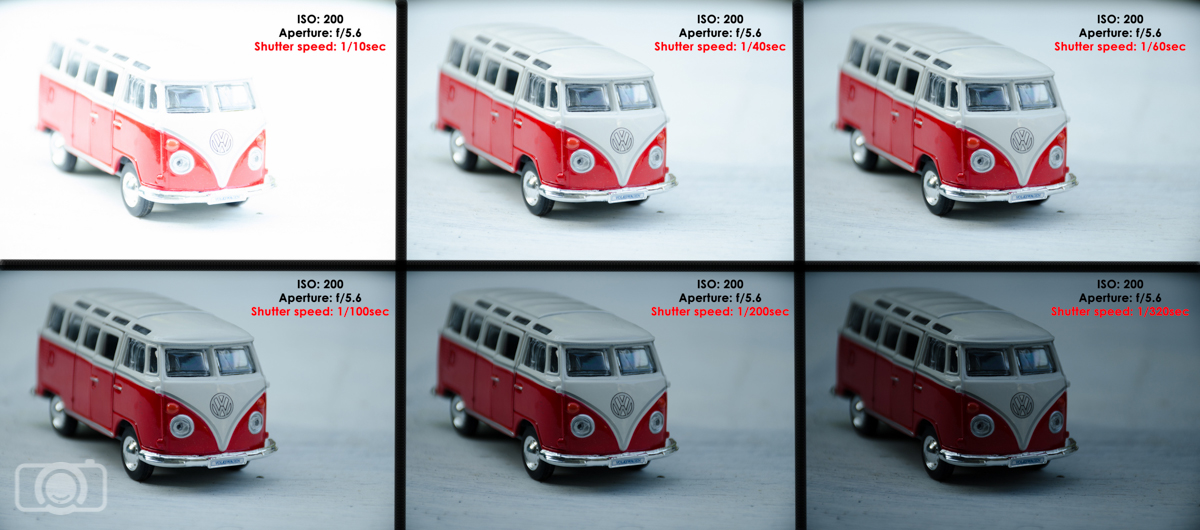
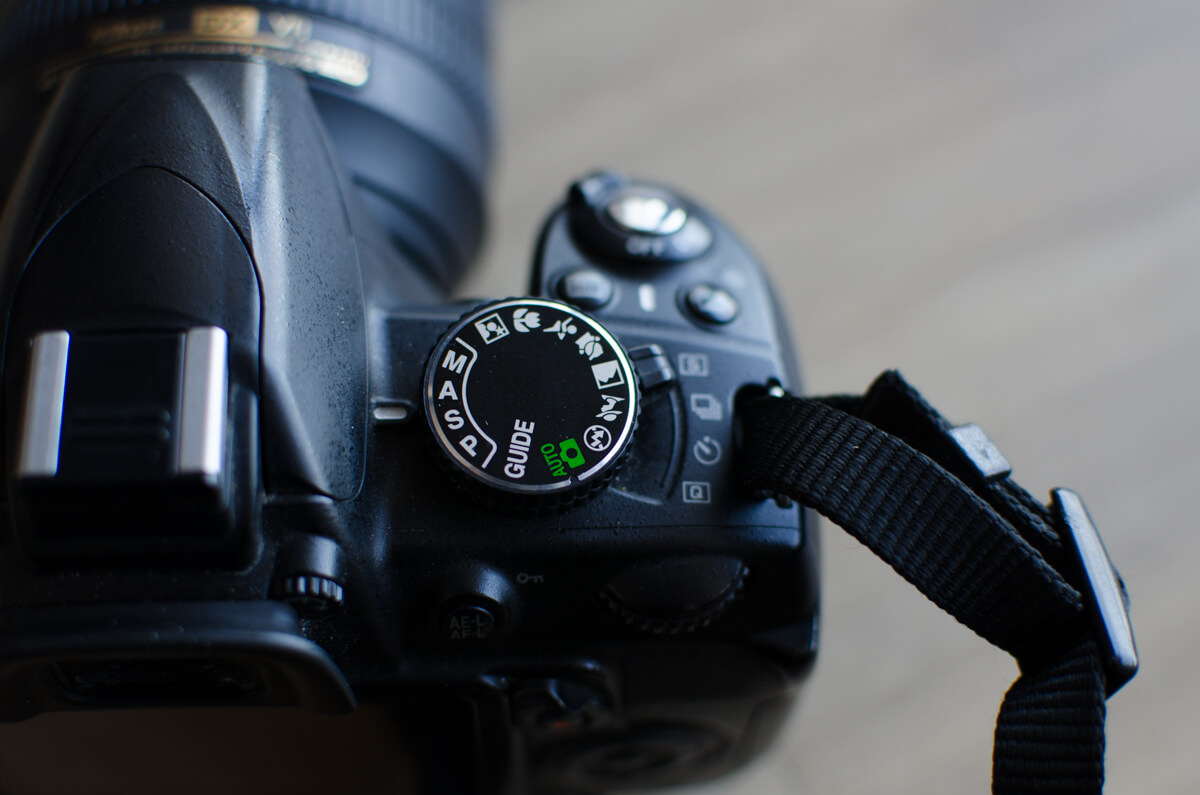
Exercise 1: Understand How Shutter Speed Affects Light

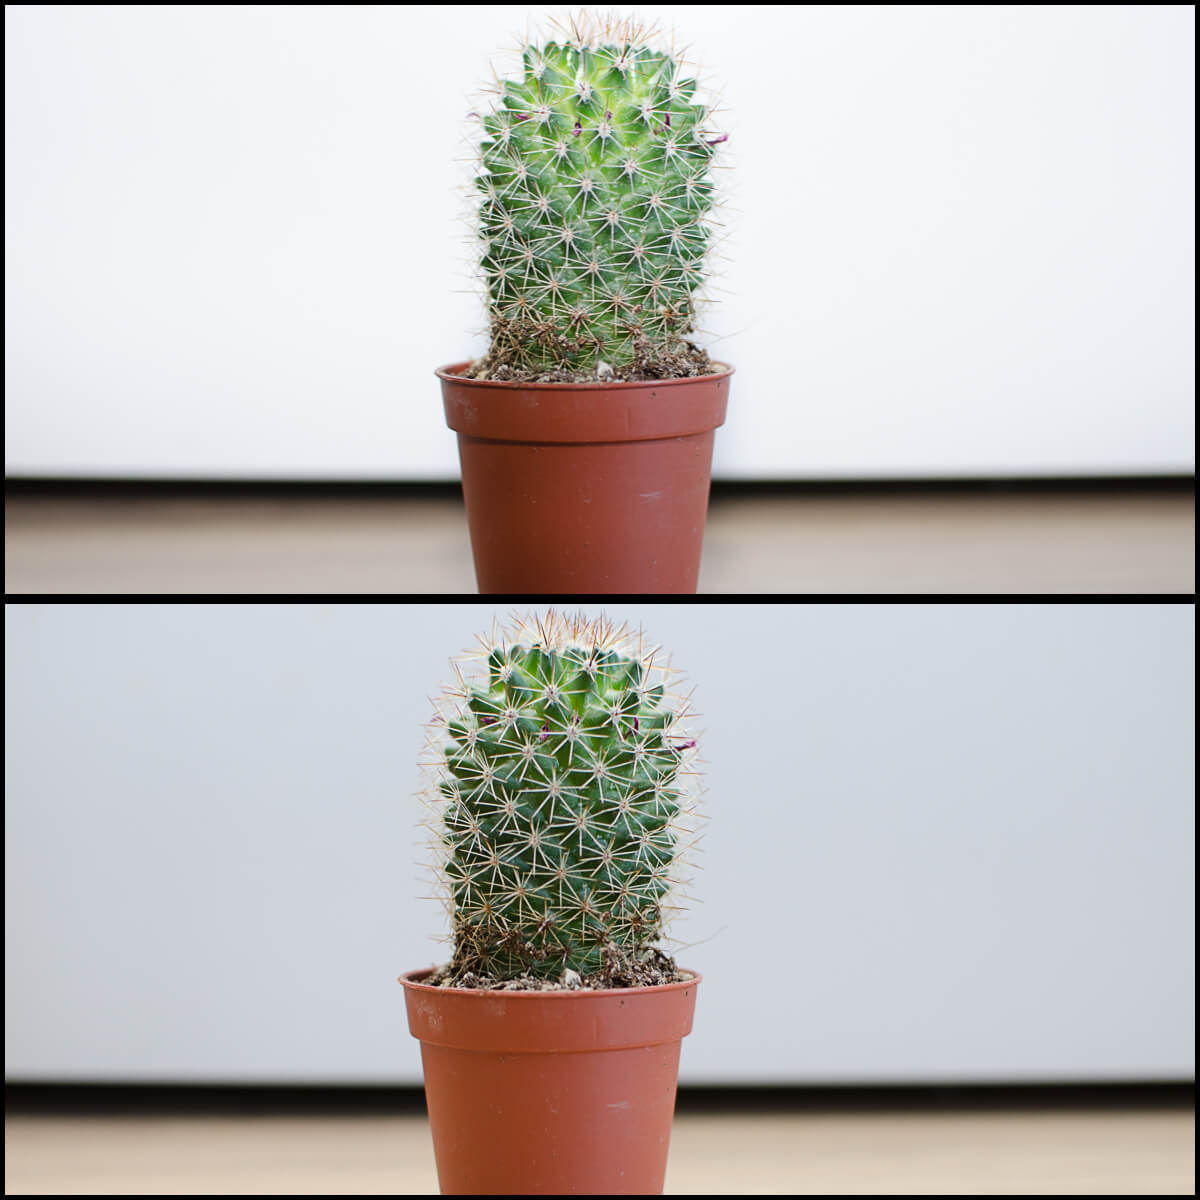
For this exercise you need to set your camera on manual mode. Then, fix the ISO to a certain value. ISO 100 or 200 is a good way to start. After that, fix the aperture. You can try a value of f/5.6. Find a subject for your photos and set the camera on a tripod (or any alternative means of stabilization). Take a photo using a slow shutter speed (for example 1/10sec). Take photos changing the camera shutter speed progressively. Once you are done, check what happened with the exposure of your photos. The only thing that changed between your photos was the shutter speed because you fixed the ISO and aperture. So whatever changes you see in the exposure are due to the changes in the shutter speed. You can repeat this exercise with new values of ISO and/or aperture and see what happens!

The numbers in this table are an approximation.

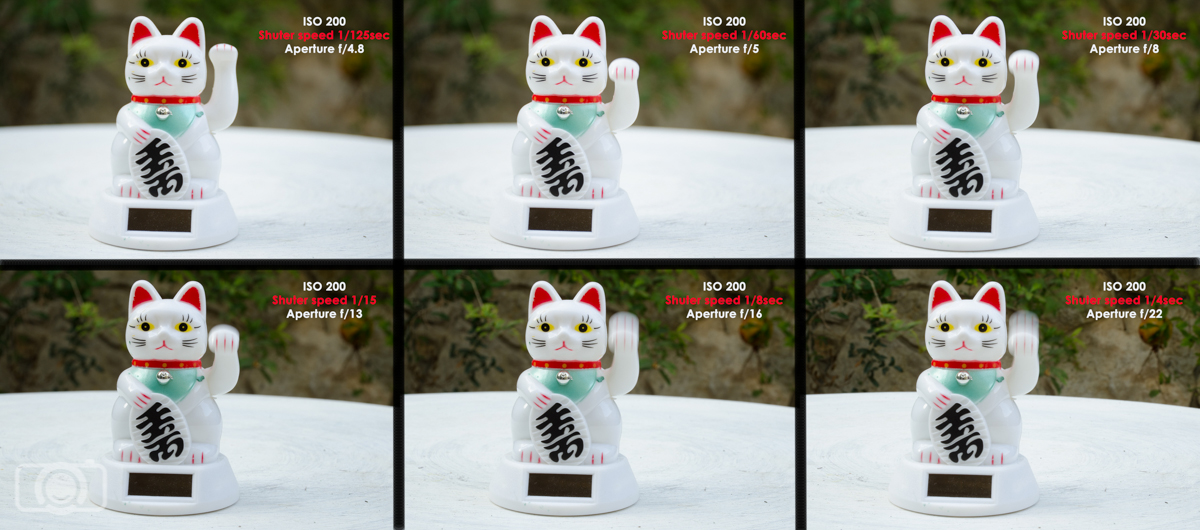
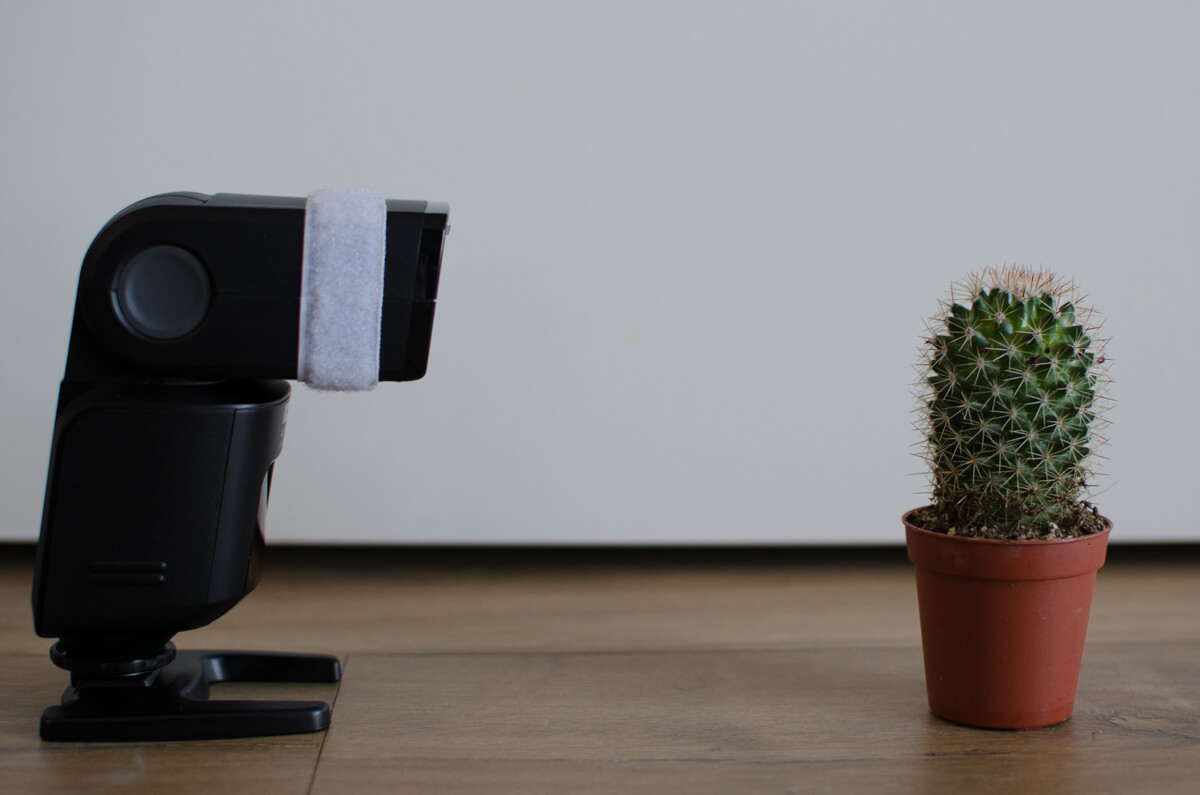
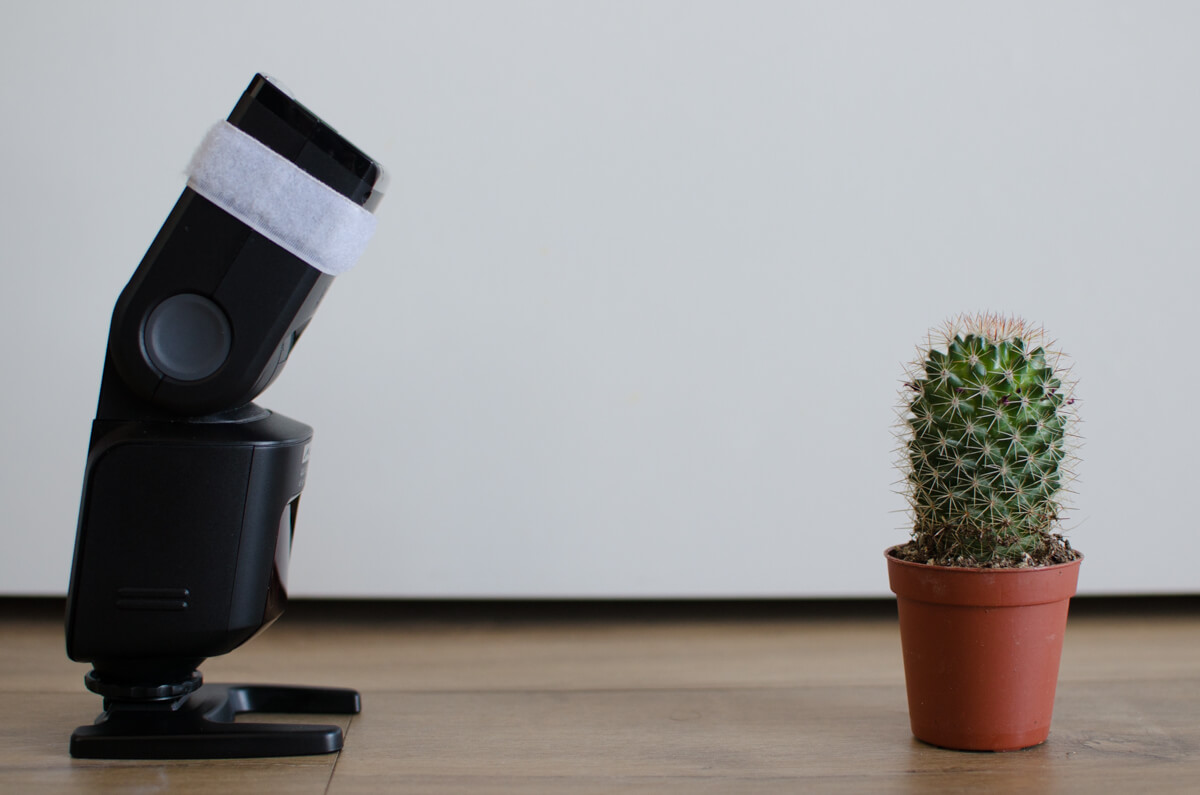
Exercise 2: Understand How Shutter Speed Works with Other Camera Settings

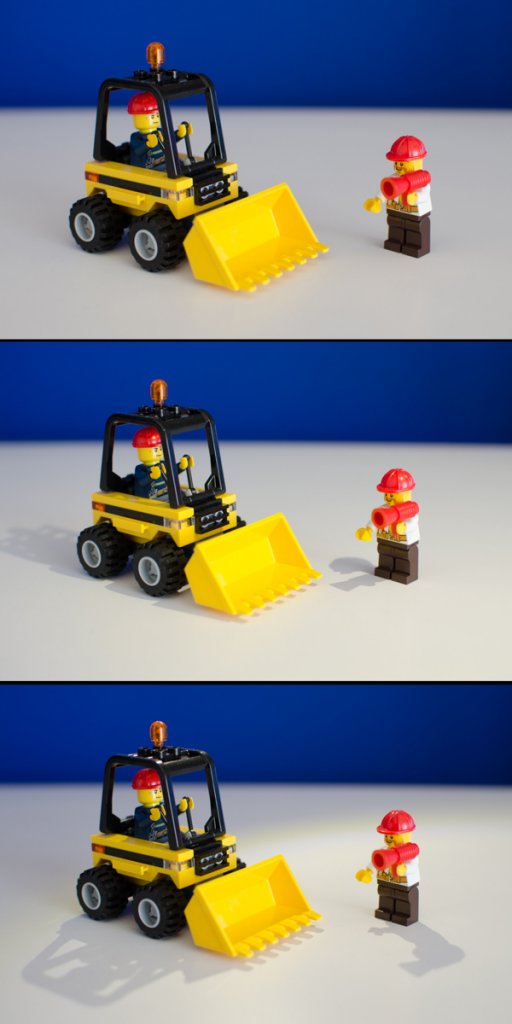
For this exercise you need to set your camera in Shutter Speed Mode. Set the ISO on a fixed value, for example ISO 100 or 200.  Find a moving subject for your photos (I used a Maneki-neko—this cat turned out to be really useful for practicing exposure) and set the camera on your tripod.

Take photos while changing the camera shutter speed progressively. As you are using shutter speed mode, the camera is constantly changing the aperture in order to get what it considers a good exposure, so all your photos will look the same from the point of view of amount of light. Go over your photos and see which aperture value the camera used for each shutter speed value. The faster the shutter speed, the lower is the light going into the lens (because the lens is open just for a short time) and to compensate for that, the aperture needs to be bigger (remember that bigger aperture is expressed with lower f numbers). Have a look at your photos. Did you managed to freeze the movement? At which shutter speed? Do you have any photos with motion blur?

Exercise 2 shutter speed
When you use Shutter speed mode, you play changing with the shutter speed and the camera will adjust the aperture in order to obtain a well exposed photo.

Depending on the lens you are using, It is possible that the camera won’t be able to compensate for the shutter speed by the aperture. For example, the lens that I used today is an AF-S Nikkor 18-140mm 1:3.5-5.6G; its aperture can open to a maximum of f/3.5. Other lenses can open more and reach f/1.8. Check always which is the maximum aperture of your lens and take into account that if you zoom in, this value will change a little (for example, when I zoom to 140mm with my lens, I can open it not to f/3.5 but only to f/4.8). If you reach the aperture limit of your lens, what you can do to get a well exposed photo is use a slower shutter speed. If you still want to keep the fast shutter speed, as you can’t change the aperture (you reached its limit), you will need to play with the ISO settings. You can have a look to our college  Damon Pena’s post to see another example of ISO adjusting.

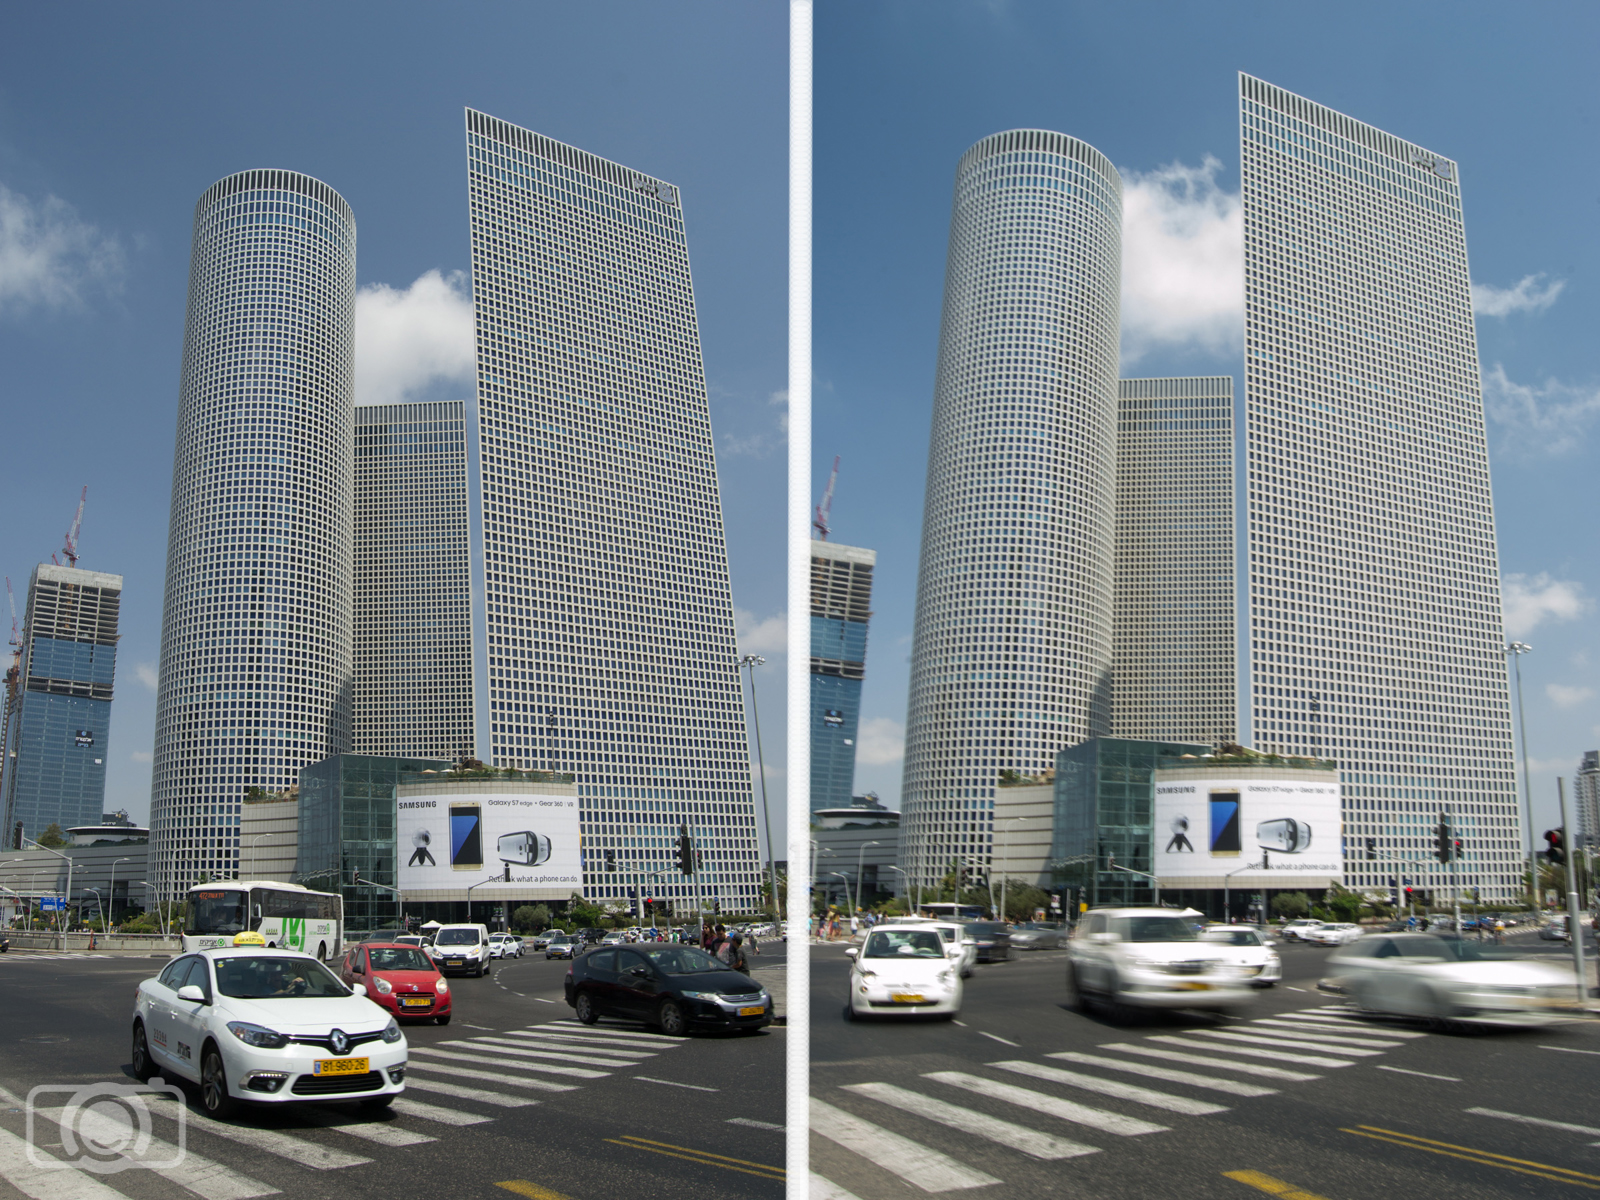
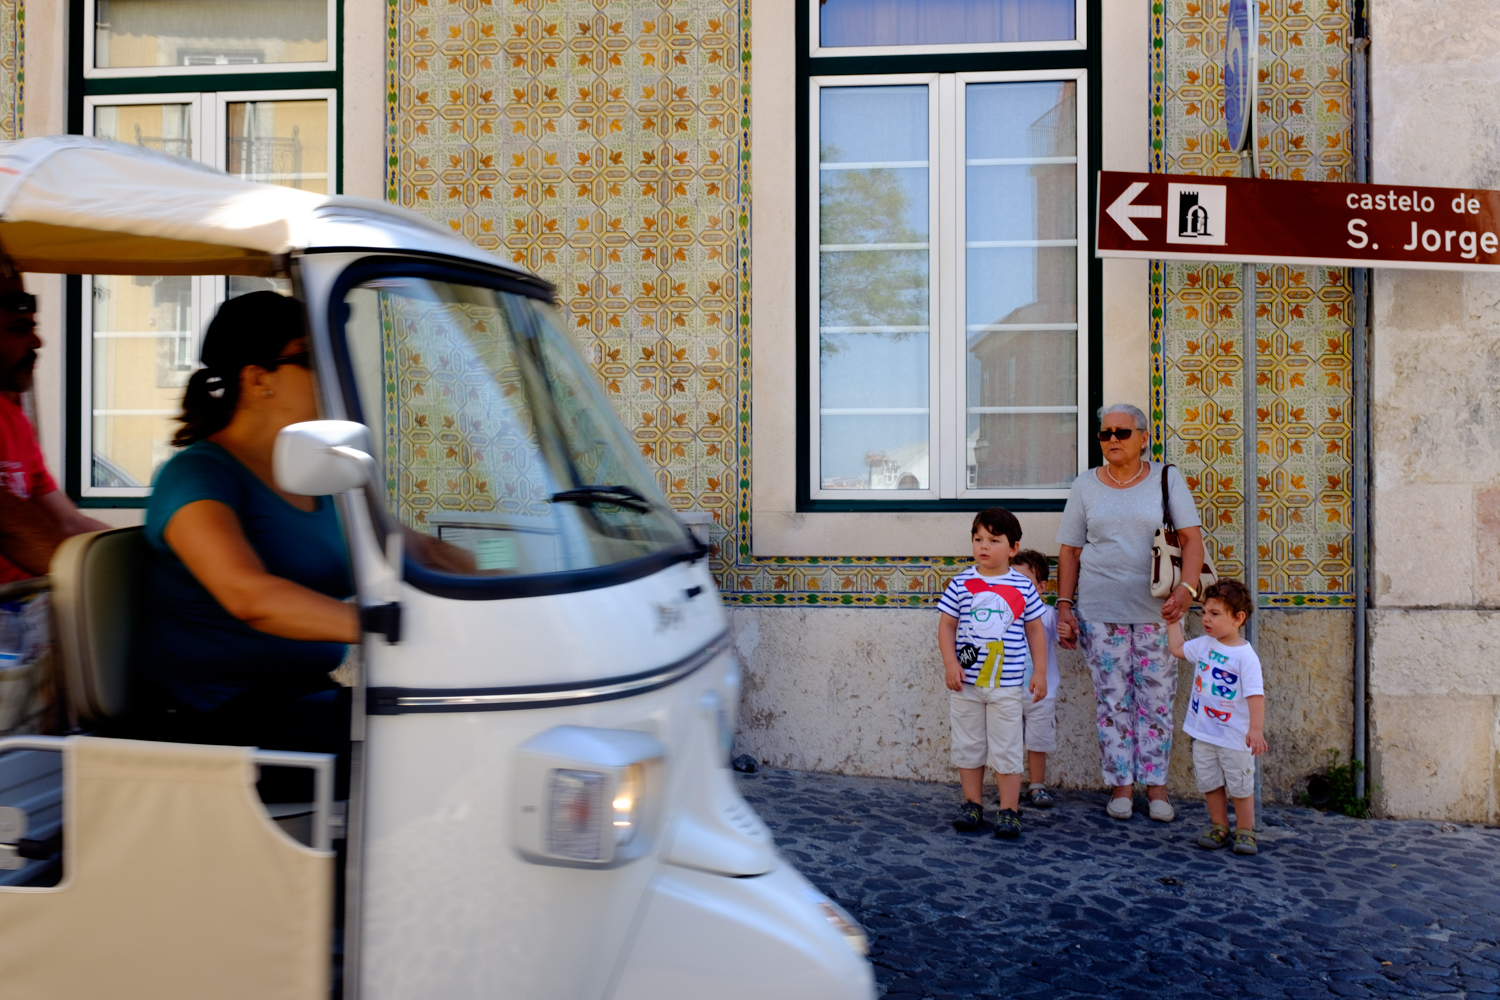
Exercise 3: Freezing and Blurring Moving Objects

This is one of my favorite exercises! Go to the street and take photos of moving things. Cars are perfect subjects. Set your camera in the same way as in exercise 2 (Shutter Mode and ISO 100 or 200).  Use your tripod/alternative option to stabilize the camera. Pick a fast shutter speed and take a photo of a moving car. Did you manage to freeze it? Change to a slow shutter speed. Is the car blurry now? You can try also to freeze/blur bikes, runners, walking people, pets. Try to use varying shutter speeds to see how the camera setting affects motion.

Shutter speed and movement
I took these two photos in a busy junction in Tel Aviv (Israel). In the left my camera was set on: ISO 100, f/9and shutter speed 1/160sec. The cars were not going too fast, so I managed to freeze them. In the right my settings were ISO 100, f/22 and shutter speed 1/6sec. At this shutter speed I got the blur motion I was looking for.

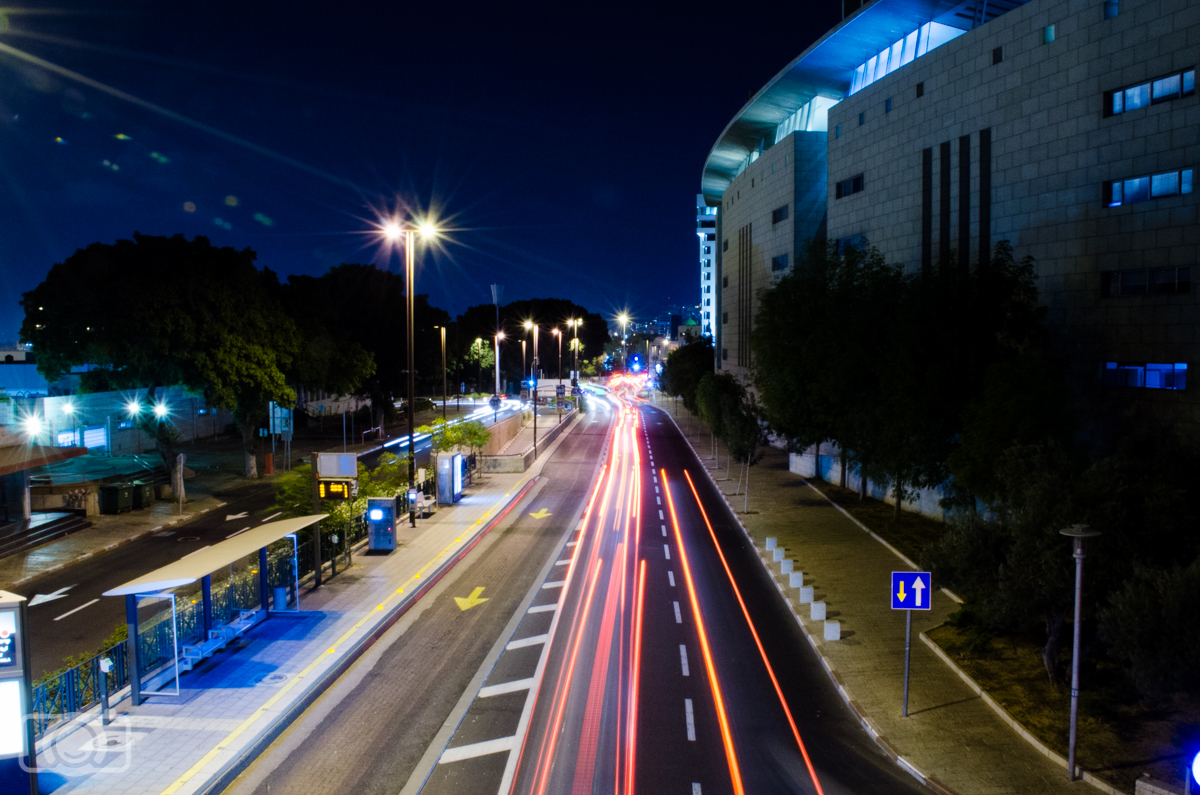
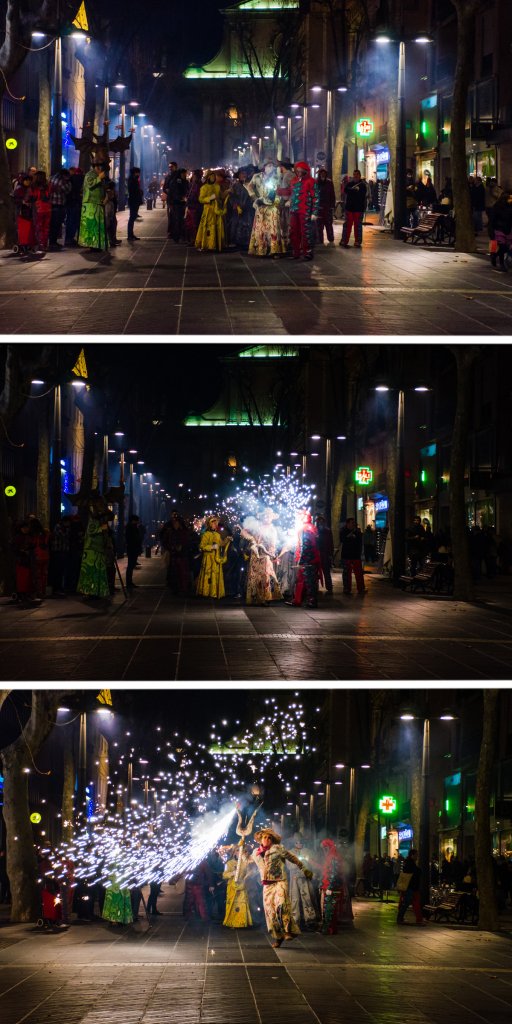
Exercise 4: Night Photography

If you like night photography, you might also like playing with light trails. Light trails are the lines recorded from the movement of a point of light (like for example cars) during the exposure. Set your camera on a tripod (important). With the camera on Manual mode, set a low ISO, an aperture higher than f/8 and try different long shutter speeds until you get the light trails you like. Maybe you will need to reset ISO and aperture values to get a good result.

Night long exposure
Light trails are always fun. I set my tripod and camera on a bridge in Haifa (Israel). I tried several settings and I ended up using ISO 500 (although you can use lower ISOs too), f/22 and a shutter speed of 6 seconds. This shutter speed worked well in my case because it allowed me to capture long light trails. Shorter shutter speeds also allowed me to capture light trails, but they were short (They didn’t stretch all over the road).

I hope these exercises will help you to get familiar with shutter speed. Soon you will be able to get more creative by freezing and blurring your subjects. Have a happy shooting!!

Complete guide to flash for beginners (III): Tips for using an external flash

If you are still reading this article series is probably because you decided that you need an external flash or you even got already one! Congratulations! You did the harder part. Now it is time to have fun! Unlike with the built-in-flash, shooting with an external one is a bit more than pointing and firing. If you don´t know yet how to handle your new gadget, don´t worry! We will give you some tips that will help you starting using it.

#1. If you want to use the TTL, you need to set your camera in Aperture Mode

This might seem obvious for a lot of photographers, but I did not know it when I started using the external flash. I usually  shoot in Manual, so the TTL was not working for me. I was kind of: “What happens to this flash? Maybe I have to ask for a refund because it doesn’t work!”.  So remember: No Aperture mode= No TTL!

flash guide

#2. Wait a little between shots to give time to the flash to load 

Maybe you are used to shoot several photos in a raw or in continuous mode. External flashes need some time to load , so if you shoot too fast, some of the times it won´t fire.

#3. Become a Bouncing master

Bouncing is  one of the most important things you can do while using a external flash.  It is not common to flash directly to the subject. Light will be too strong, it  will look unnatural and in addition, it is uncomfortable for the model. Instead, the good thing to do is pointing with the flash to a surface close to your subject (wall, ceiling…). It is the light that reflects from this surface the one that will add light to your subject. It will be a diffused light, so it won´t be so strong and it will look

flash guide

flash guide


flash guide

If you don´t have any evident surface to bounce in, you can use other things, such as the white clothes of somebody around you, a board, some furniture… or you can use reflectors and difusers .

flash guide

#4 Be respectful when using your flash

Don´t fire your flash directly to the eyes of neither people nor animals. I always like to make sure that people does not mind I use the flash, especially if I am shooting events. The strong light can be quite annoying, so it is good that people agree. Some people get into the situation of wanting you to take nice photos, but they don´t want you to use the flash (or they complain about the light). In that cases, try to explain to them nicely that not using it might affect the quality of the photo. If they decide they don´t want flash anyway, at least you were clear about the consequences.

External flash guide III

#5. Be extremely aware for not flashing  babies.

It is easy remembering not using the flash when you take photos of a baby at home. But when you are in an event or with a big group of people, it is easier to miss it. Flashes are quite aggressive for delicate eyes of a baby, so try to be always aware of the proximity of one of them.


#6. Do wrist workouts.

Do some gym style exercises that will  increase the strength of your wrists. Just kidding!! But if you are going to hold your camera with a external flash for long time (this happens a lot if you are shooting events), you will notice the extra weight. Rest form time to time to avoid soreness (and now I am serious! After shooting a night wedding and carrying the camera with the flash for several hours, I felt my writs sore next day).

I hope you liked this series and that you find it useful. Have a happy flashing

Complete guide to How To Use Flash : Do I need an external flash?

There is a moment in the life of each photographer that the big question arrives: Do I need to get an external flash? The question is not easy to answer, mostly because when you are new to the subject, even the terminology used to describe them sounds confusing. After checking for a couple of flashes it’s easy to feel even more confused, so you can end up not getting an external flash or getting the first one you check. I want to help you to decide if you should get an external flash by putting together a complete guide with everything I learned when I decided to go into the wonderful world of external flashes.

External flash
My first DSLR camera with its built-in flash raised and my first external flash. Both of them I still use today, that’s why I recommend to take the time and check what you need and what the market has to offer before purchasing

In this first article, we will focus on the advantages and disadvantages of both the external and the built-in flash. This will help you to decide if you need to invest in an external flash or not. In the following articles of this guide, I will talk about things you should consider when you choose your external flash, some useful accessories and I will give some tips to start using your brand new flash! Let´s start!

Built-in flash

A built-in flash is an integral unit of the camera that discharges strong, rapid pulses of light when you are taking a photo. It is working in the most basic way possible. It is synchronized with the camera’s other apparatus.

External flash
The built-in flash; compact and available, you can see it is a quite simple apparatus

Advantages of using a built-in flash

#1. Always with you: One of the main advantages of this flash is that it is already in your camera. You don´t need to choose it or make any effort to remember to put it inside your bag. It is always there ready to fire!

#2. Intuitive: Using the flash is something quite intuitive to most starting photographers; you are in the dark, you pop out your camera’s built-in flash, you take the photo- problem solved.

#3. Small and light: The built-in flash does not add extra volume or weight to your camera bag. Depending on the situation, this can be a really good thing.

Disadvantages of the built-in flash

#1 Light always comes from the same spot: The most obvious disadvantage of the built-in flash is marked in its name; you have no control over the light source location or its direction, it will always come from right in front of your subject. And most of the times this means that the light will go straight to his eyes (besides being annoying, it produces a very evident red-eye effect).

#2. Lack of adjustability: Most built-in flashes offer very little in terms of adjustability. Some cameras offer three options: “No flash” in which flash will not be fired, “Auto flash” in which the camera will trigger the flash if the exposure is too low, or “Default flesh” in which the flash will be fired every time you’ll take a photo. That´s all! In cameras with more advanced flash options you might find some more options, but usually, you need to change them from the settings menu and it is quite uncomfortable to do it.

External flash
The built in flash is quite limited in terms of adjustability, and changing its settings is not so easy to get to

#3. It uses your camera battery: The built-in flash is dependent on your camera’s battery, making your battery’s lifetime shorter.

#4. Not good for long distances: Although it could illuminate quite well for short distances of up to three or four meters, it loses its effectiveness at greater distances.

External flash

The external flash is like the built-in flash’s bigger brother. It is an external unit which can be attached to the camera body through a designated port called a horseshoe. The more basic external flashes are merely triggered by the camera while the more advanced ones can get more information from the camera such as the lighting conditions and the settings of the camera (aperture and shutter speed)

Advantages of using an external flash

#1. It saves camera battery because it has its own

#2. Placement flexibility: the fact that the external flash has its own battery means it is also possible to mount it on tripods or on feet of its own and place it wherever you want.

external flash
The external flash can stand and work independently and separately from the camera, here you can see it standing on a foot

#3. Bouncing Head: the light source itself is usually set on a rotating and tilting head which allows you to play a bit more with the lighting’s angle, enabling you to bounce the light off of surfaces (this is good when you want to avoid hard light)

#4. accessories: the external flash can be combined with many gadgets and accessories such as reflectors, tripods, filters, diffusers and more. Using them could be very helpful and fun.

external flash
Here you can see the flash is built with a tilting head (it’s a bit harder to see but it is rotating too). Another thing you can see here is the white velcro I glued on it, I use it to attach many accessories to my flash

#5. You can control the light better: at the most fundamental level, the flash is a lightbulb, its intensity does not change, but the duration of the discharge can change if the flash is lit for a longer time the amount of light captured by the sensor is greater. In the external flash, setting and changing the duration of the discharge is one of the most basic things you can do.

external flash
With just five buttons, you need a little practice but after you get the hang of it, it is quite easy to adjust the flash and change its settings

#6. You can synchronize several flashes: I don’t know if you are thinking about using more than one flash for now, but it is good to know this possibility exists. It is a good way to ensure even lighting in the photo, especially when you have a big group or a complex subject, or if you want to create certain effects.

#7. They can reach further: external flashes have more power than the built-in ones, so you can illuminate subjects that are further from the flash.

Disadvantages of external flashes

Like with everything else in life, there is a trade-off when using an external flash. The more you want to get from the flash, the more planning is required and less spontaneous you can be.

#1. It adds weight to your camera bag: having its own battery means the weight is greater. Think that you usually will carry extra batteries too. So you end up with almost the same weight as if you are traveling with two cameras, and when you take a photo it’s as if you’re holding a camera and a half.

external flash
Several sets of batteries and a charger sure take their space in your bag and you certainly can feel their weight

#2. It might take a lot of places: most external flashes are too big to fit in a standard camera side bag and require you to either have a specific bag or have a much bigger bag and the flash to be detached from the camera while inside.

#3. It is one more thing you need to recharge (and to remember to recharge). Having its own battery means you have another thing that requires a charger and a socket, this could be especially limiting if you are traveling

#4. You need to invest extra money: external flashes are not included with the camera, so you will need to spend some money and depending which type of flash you want, they can get really expensive (the range of prices is wide). In addition, depending on the type of photography you are into, it might be at risk of damage or loss (outdoors, bad weather conditions…) so you might prefer to get two cheaper flashes instead of one that is more expensive.

#5. Not so intuitive: after using them for a while they are not so complicated, but at first they are a bit hard to get used to. It is not just turn on and fire.

#6. Not all the flashes are compatible with all the cameras. This means you should ALWAYS CHECK COMPATIBILITY before purchasing a flash

In summary, built-in flashes are a good option if you don’t want to carry the extra weight that an external flash (and it’s batteries!!) might add to your bag. It will free you from charging batteries all the time and needing to check if they are ok (they don´t last so long when you the flash a lot). However, this freedom comes with a price: the loss of flexibility and control. Usually, the built-in flash is good if your photos aim to document a moment without too much regard to the photo’s technical quality (a good example of this situation will be when you are at a party and you want to commemorate your friends goofing off). However, when you want to have more control over your photos, The built-in flash is quite limited. If this is your case, you will need to consider the option of getting external flashes.

This is my first article in a series of articles about flash I hope you find it useful. If you have any questions, topic suggestions or remark write me a comment. Have a happy shooting!

Activities to improve your photography skills easily

If you are new to photography, you might feel a bit lost. It is easy to get stuck in using auto mode because it is fast, easy, and many times can produce a decent result. However, if you feel like you could improve your photography skills and get more out of the camera it is time to take matters into you own hands.

There are tons of things to learn and it is hard to decide what to do first. You can easily spend days and weeks just reading photography books and articles, watching tutorials or jumping from one website to other and adding more and more into your to-do list. If you want to improve your skills as a photographer at some point you need to put theory aside and start taking photos yourself. However, with our usually busy life, it is easy to let weeks pass without touching your camera and shoot a single image. For that reason I thought it might be useful to make a list of easy photography activities that will help encourage you to grab your camera and start practicing your craft without complicating things so much.

photography skills
If you started photography recently, it is normal that you feel a bit overwhelmed. It feels a little like being lost in a new country.

A theme a day/week

If you don’t know which subject to pick, you can start by choosing one color or a geometric shape. You can even ask somebody to help you decide. They don’t even need to know why you are asking them. It can be something like: Which is your favorite color? Do you prefer squares or circles? Once you know your photography subject, take photos of only this. Focusing on one photography subject might seem restrictive at first, but it will push you to develop your creativity. Extra mile: once you have all your photos, select the best ones and build a composition. Then share it with the person that helped you to pick the subject. He/she will love it!

photography skills
One day I took photos of circles. This forced me to pay attention to objects that I usually don’t even look at! It was a really interesting experience.

Practicing one photography composition element for one day, week or month

Learning composition can be one of the most overwhelming things in photography. Composition is based on the relation that the different elements of your image have between themselves and with the frame. Trying to control all these relations might be overwhelming, even when you have been already taking photos for a while. To make it easy, you can create a list of composition elements (lines, negative space, symmetry, patterns, texture…) and focus on one of them each time. The amount of time you work on each element is up to you. When you finish the list, you will have a nice photo collection which will illustrate how you understand composition. If you repeat this activity over time (every certain months or every year), you will be able to see your how you evolve as a photographer.

photography skills
Man made structures are good for practicing symmetry.

Blurring people

When I started, I was obsessed about sharpness. I wanted everything inside the frame to be clear. No blurriness allowed! However, I changed my mind when I started to see the potential of showing movement in my photos. Don’t misunderstand me. I am not talking about out of focus images. I am talking about movement! A great way to practice is by going somewhere relatively crowded, set your shutter speed on a high value (slow speed, like a quarter of a second) and take photos of the people moving.

photography skills
In this photo I combined the movement of passers by with the stillness of my friend Nita while she is practicing yoga

Try to combine different degrees of blurriness: everybody blurry, just some people blurry and also nobody blurry. For this you need to play with different shutter speeds. You might need a tripod if your shutter speeds are too low. I, for example, need a tripod at any speed slower than 1/60 seconds. Decreasing shutter speed means that light will enter into the sensor for longer. If for that reason you are getting photos with too much light, you can close the aperture and decrease your ISO. If it is still too much light, a Neutral Density filter might help.

Play with the different light angles and look for the shadows

You don’t need any fancy studio light. You can do it with a home lamp or a flashlight. Pick an object you like and shine the light on it. Try different light positions, directions, add light modifiers (color papers, clothes…) and see the affect light has on the shadows of your object. You can also do this exercise outdoors placing your object in different positions regarding to the sun, or taking photos in the same place but at different times of the day.

photography skills
For this activity I took some of my nephew’s toys and a flashlight. I practiced the effect of light on the shadows of these little guys by changing the position of the light and the angle of incidence. In the upper photo I didn’t use the flashlight. The light was really soft, so there are no shadows. In the other two photos I used the flashlight and I changed its position to get 2 different shadow orientation.

Photo sequences

Taking photo sequences is a great way of telling stories with your photos. Photo sequences add a dynamic effect and they are great to give a sense of action and movement. You can do photo sequences of tones of subjects. You can start with friends/family or animals. Take 2 or 3 photos of any activity they are doing: walking, cooking, putting make up, dancing, doing homework… take a lot of photos (shooting in continuous might help) and afterwards choose the 2 or 3 that work better together. You can also do it with objects by placing them in different ways in your frame to build a little story.

sleeklens-42-mosaic_demons
“Correfocs”, which means fire-run, are one of the outstanding traditions of Catalan Festivals. People dressed up as demons run through several streets while holding lighten fireworks. This photo sequence was taken in Vilanova i la Geltru, Catalonia.


Dust buster

Take the photography equipment you are using the least (lens, tripod, external flash, filters etc.) and make it your point to use them for the day. You might realize that you should use them more, or you might realize you should give them away. Either way, it will help you to be more efficient.

Close ups- animals

Try to take photos of animals from as close as you can, this will help you to understand how to approach animals, how close should you try to get, from which direction and how fast you should move.

photography skills
Cats are extremely tricky to approach, mostly because they are unpredictable. However, the more experience you have, the less likely it is that they will surprise you

I hope you like these activities and that you find them useful. Do you like any other activity to practice your skills? Now it is your turn: grab your camera and have fun with it!! Happy shooting!!!

How to Start a Photography Project

A personal photography project is a series of images sequenced to tell a specific story. Usually, a story which the photographer has a great passion or emotion towards. The project can range in the number of images and amount of time. Or from simple subjects (Elias Weiss Friedman aka The Dogist) to complex, global initiatives (Sebastiao Salgado’s Genesis).

20150712-Lisbon July 2015-224

Why Start a Photography Project?

A personal project is a great way to expand beyond a single image into more complex story telling. You’ll learn to plan, shoot and edit a sequence of photos to convey a story. You can experiment with different styles, techniques, and gear. These may be outside of your normal shooting but might be what you enjoy rather than what would pay the bills.

Personal projects aim to be a creative break from your standard paid work. They allow the photographer to expand on a subject which they feel passionate about. Personal projects are also intended to be self-motivated and fun! They interest the photographer first, so shoot only for yourself. You have the ultimate creative control here.

20150712-Lisbon July 2015-172-2

How to Start?

Find a Subject

Start with a passion, whether large or small. You will always have a unique voice and story to tell, and keeping that story close will create a strong body of work. You might be a part-time musician or maybe you volunteer a few hours at a local non-profit. Great! Shoot their stories from an insider’s perspective. Or explore your neighborhood. You can do a story on a local business or business owner – shooting them at home, work, on days off, etc. There are ideas all around us, it is up to you to get out and find them.

20150712-Lisbon July 2015-324-2

Short or Long-Term

Short-term projects are good for starting out in photography projects.  You don’t need to commit long-term, but it will get you thinking about the process. This can span a few hours or days. Even a few months can be short compared with decade-long projects. Bruce Davidson shot his project Circus over 4 months and Brooklyn Gang over a summer. Long-term projects are more popular in photography because complex subject matters need time to develop. Yet, the time commitment and editing of images into a cohesive project can seem daunting. A great example of a long-term photography project is Josef Koudelka’s Gypsies. He spent 9 years traveling with a Roma community and photographing their society. His 9-year immersion in the project created beautiful images. Another great long term project example is Nicholas Nixon’s The Brown Sisters. A yearly portrait of his wife and her sisters, this ongoing project has spanned 40 years of their lives. Studying well-known photographers and their projects is helpful when beginning your own project.

It is important to understand how much time you plan on shooting this project. Whether 1 day or 10 years, it’s important to have a general idea of how long this project will take you. This can change as you go along depending on subject matter, but have a general timeline in place and be aware of it.

20150717-Porto July 2015-120

Equipment

First, you should nail down your subject matter before getting into equipment. You may need different lenses if you plan to shoot indoors  vs. outdoors. Or when shooting something generally close up or far away. Or even your expected lighting conditions when shooting. You may also need more portable equipment if your story takes you out away from civilization or on a long trip. This is for you to determine, there is no right or wrong answer here, only the vision of you the photographer.

Just make sure your equipment stays consistent throughout the duration of the project. It will help the images flow together and achieve a uniform sense. The focus here is the subject, not the variety of lenses you have and techniques you practice. If you want to showcase a specific piece of equipment or skill set, pick one and stick with it. You’ll have other opportunities in future projects to show different skill sets.

20150717-DSCF6651

Editing Your Work

Aside from post-processing, you’ll need to edit and sequence your photos. The goal here is ensuring you don’t present too many or too few images. You’ll want to find the least amount of images required to tell the full story. Most likely, you’ll take way more than necessary, which is fine. It’s better to shoot too many and spend longer sequencing, than realizing you have gaps in your story. Don’t limit yourself to a set number of images, just let that come with the process. Lay out physical prints, and begin arranging them in order, pulling out any excess images. You’ll find this process easier than it sounds.

If you find you have too many images and cannot edit further, walk away. Removing yourself from the process will ensure you come back with fresh eyes. Some photographers swear by this method of letting photos “marinate”.

Also, getting your project critiqued by a trusted photographer friend can also be beneficial. They don’t have the same connection to the project, and can give an unbiased opinion.

20150717-Porto July 2015-338

Publishing

When you’re finally ready to share your images, it’s time to publish your project.

There are many publishing options, and you’ll find one that works best for your project. Some options include printing a book, exhibiting in a gallery or posting to social media. A printed book is a great portfolio piece when meeting with potential clients. You can even send the book to publishers to get a book deal. As long as it is right for you and the project. You can also exhibit in a gallery. It could be challenging to find a gallery willing to showcase your work, but it could be great exposure. Social media is quick, easy and will reach the largest audience. But some may find it does not convey their story the right way. You need to ensure the publishing process you choose is right for the project and your vision.

There are no rules here, just stay true to your vision and tell a story you are passionate about. You have control of what you present to the world, make sure you enjoy the process as much as the final outcome.

Porto July 2015-302-Edit

Suggested Further Reading

Below are just a few of my favorite photography books for further inspiration. Keeping photo books around can help for inspiration and continued motivation.

Bruce Davidson Subway
Robert Frank The Americans
Josef Koudelka Exiles
Willaim Eggleston’s Guide
Trent Parke Minutes to Midnight
Martin Parr The Last Resort