Hi all, today I have a great Tutorial for you Freelancers and amateurs alike out there that will improve your edits to no end.
If you have taken shots that have ended up a little bit blurry or you just want to really improve the quality of your images then this is defiantly the very tutorial you have been looking for.
The great thing about this technique is that if you were to sharpen normally just using the standard old Sharpen filter you will find that it doesn’t just sharpen the intended edge part of the image but it will also sharpen up areas that you probably don’t want to be sharpened such as fine blends and blurs in the background.
Another thing is that it adds quite a bit of noise to your image (Noise is the term used for unwanted pixelation on your image)
So what this does is it takes the edges of images and only targets those so that you end up with a really nice, clean, professional looking image that looks great, exactly what we are after!
And people will think you’re a pro with a camera as well instead of just a master level pro in Photoshop which is absolutely a nice little side effect to have happen for us 🙂
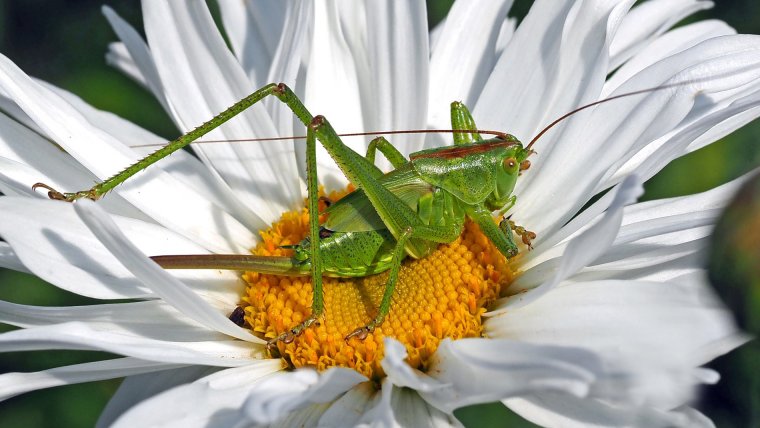
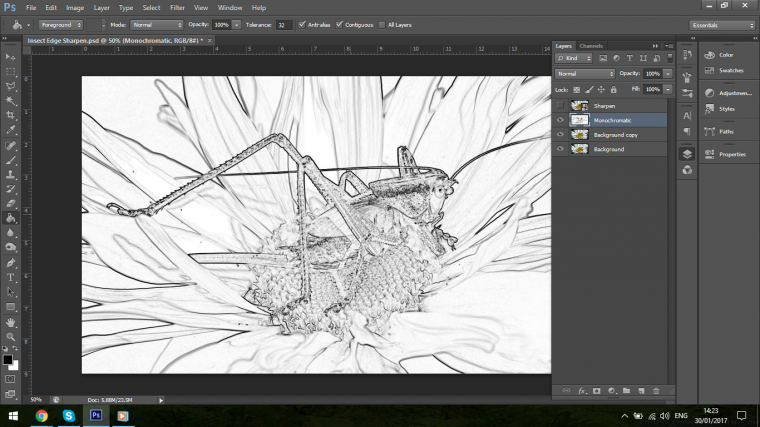
Ok, so lets take a look at the image that I want to use for this Photoshop Tutorial.
What we have today is an image of this cool little bug.
The image itself is really nice, good colours and composition but I’d love to add so edge sharpening to it to really bring out the flower a bit more and off course the edges of the bug would look great too emphasizing it’s exoskeleton and giving or image a little bit of the feeling of 3D if that’s at all possible.
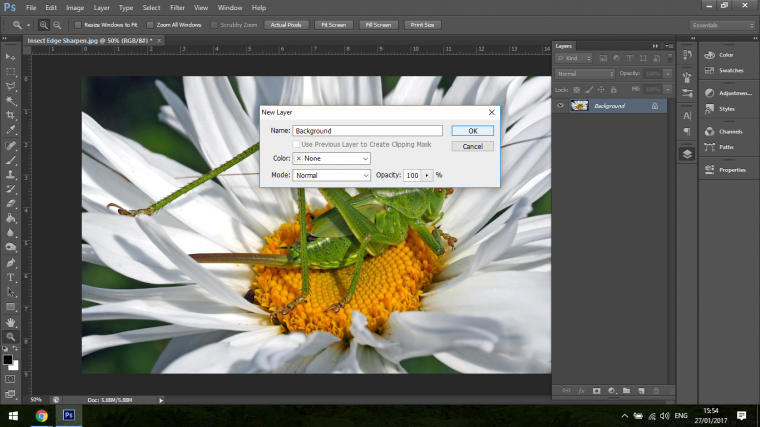
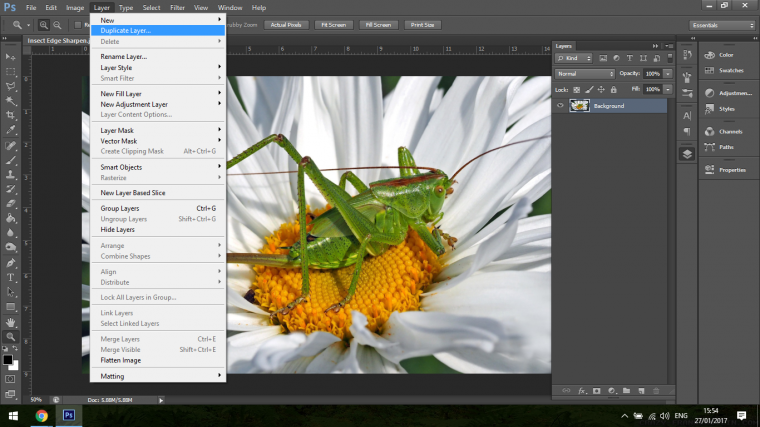
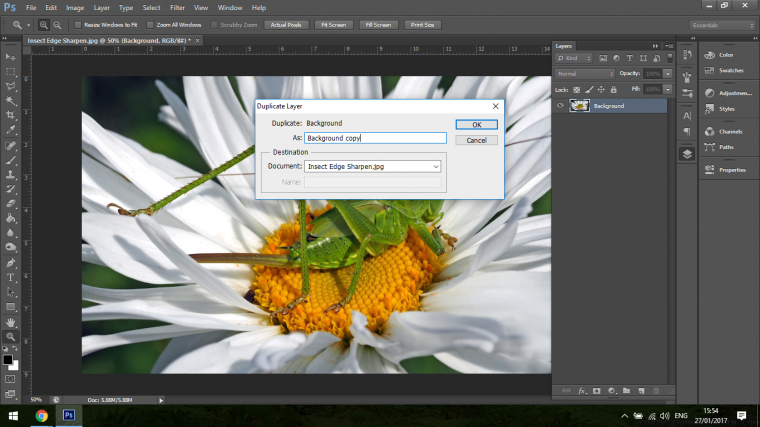
So the first thing we are going to do is open up our image in Photoshop and look over to the right-hand side where you should see the layers panel, there your images layer will have a little padlock, double click that layer and give it a name ‘Background’ so free it up, then go to Layer and click on Duplicate Layer.
The first thing we’re going to look at is our Channels Panel so I can explain a little before hand what we’re going to do.
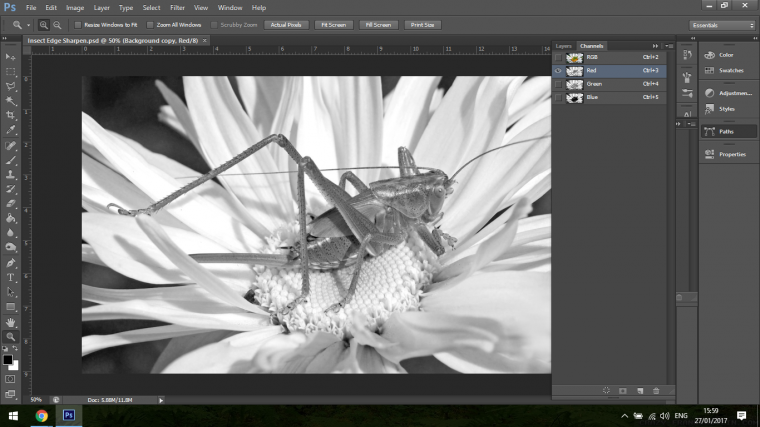
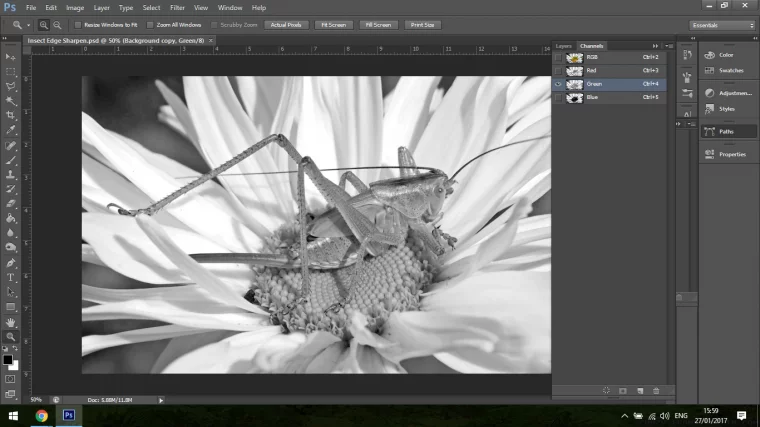
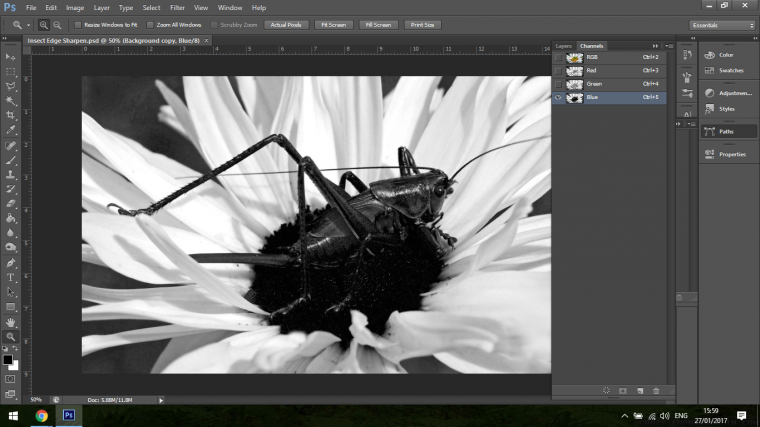
When you click through the individual channels you will notice that they are all slightly different from one another, which means they are representing the different colors in the RGB spectrum (Red Green Blue)
So when you scan through apart from the obvious tone changes you will notice that some have more details than the other in certain areas.
So the reason I wanted you to know this is because the tutorial will consist of combining these channels in a certain way that creates the edge sharpen.
Also, I just wanted to walk you through a few of the insides of Photoshop as it may help you in other areas, the more you learn here the better all round I say!
Ok so click back on the RGB layer and go back to your layers panel that we had open before.
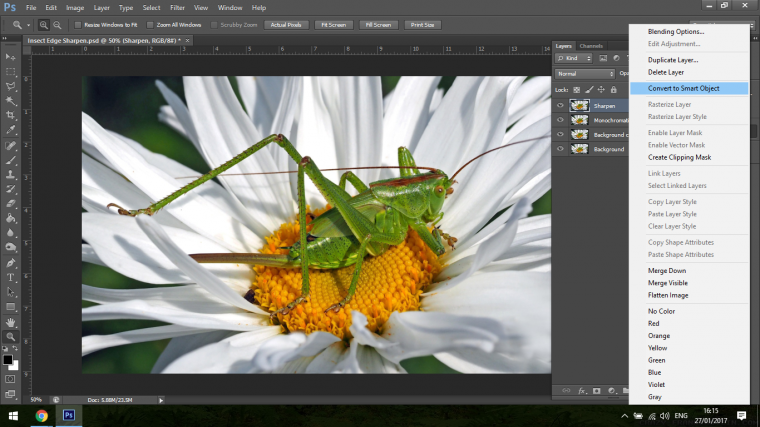
Next up I want you to make another duplicate layer from the already created layer and name that layer ‘Monochromatic’.
Now do the same again only this time I want you to name that layer ‘Sharpen’.
Then change the Sharpen layer to a Smart object, you do this by Right Clicking on the layer and clicking on Convert to Smart Object.
You will understand why we do this later in the Tutorial.
Then click on the Eye in the layer to hide that layer as we are not going to be doing anything with it just right now.
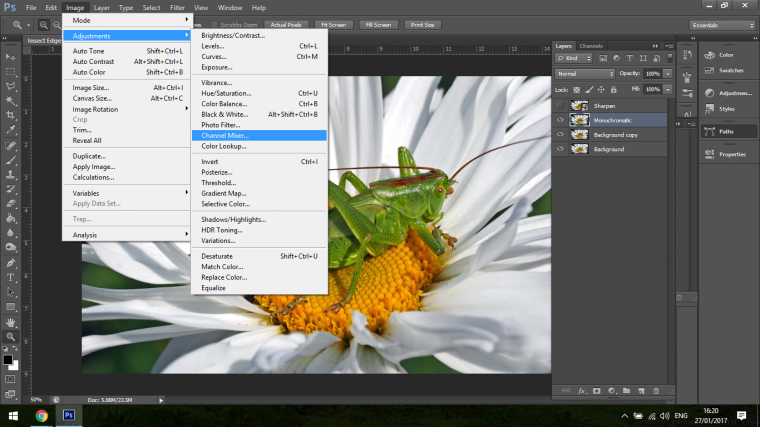
The last bit of this first part of our Tutorial is, I want you to click on the Monochromatic layer to activate it, then go to Image – Adjustments – Channel Mixer
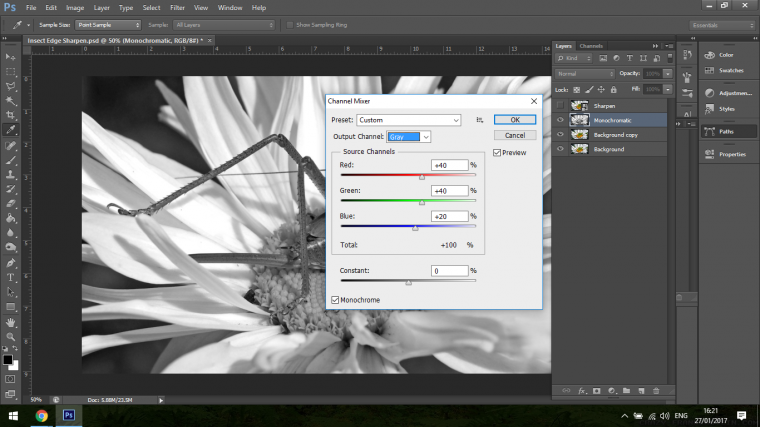
Now a panel will appear, at the bottom of that panel, you will notice a little box to check off saying Monochrome.
Click that and if it’s already checked click it off and then click it again and it should turn your image to Black and White.
Let’s get back to it.
Just on a side note for education purposes, when you move the sliders back and forth you will see below them ‘Total’ written and to the right of that you will see a percentage, so take note of that because when you move your sliders back and forth if you go over 100% it means that your image will be over the recommended levels and will start to get blown out and start to lose details and definition, so be aware of that if you want to try this manually at some stage but for now I’m happy with what we have.
Now you can hit OK and we can continue on.
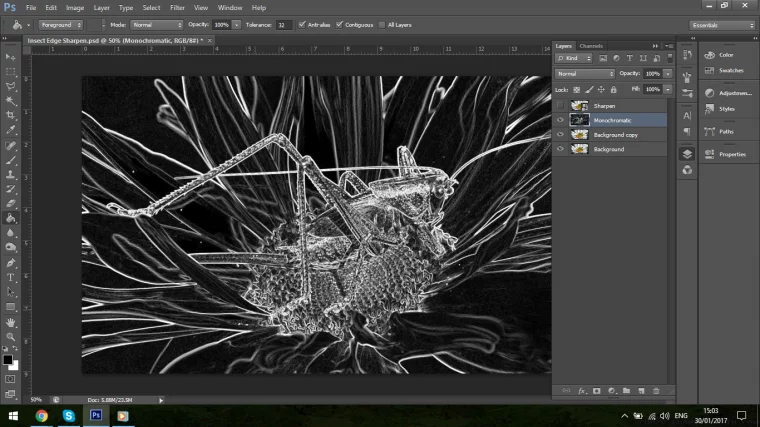
So we now have our image in good detail that we will work with, so the next step is to go to Filter – Stylize – Find Edges
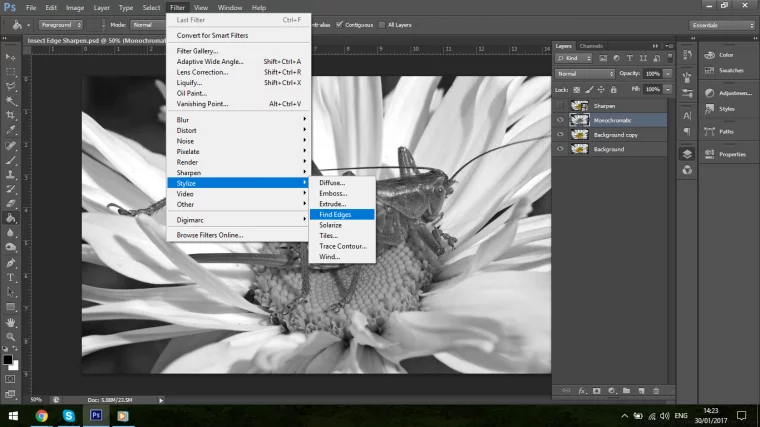
Now the program picks out automatically the edges it deems to be the best based on the image.
You will now have something similar to what I have below using whatever image you have used.
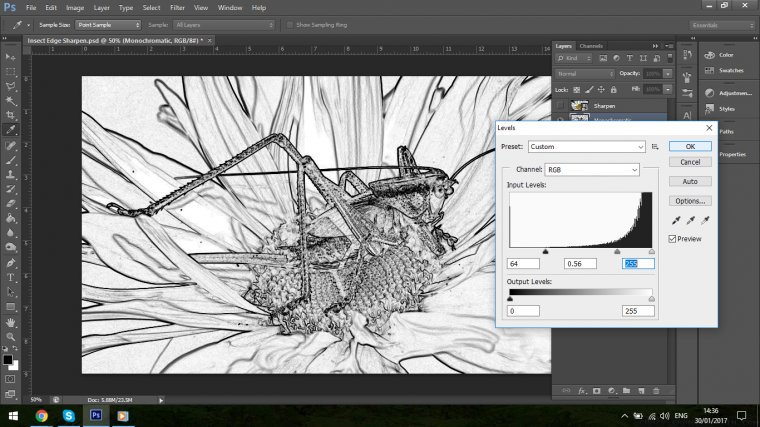
Now go to Image – Adjustments – Levels

Now at this point it really comes down to what image you have chosen to use, but I think the best way explained is if you play around with the sliders a little until you feel you have a pretty cool image with really good detail.
You want to get a good contrast in your image, for this all I have to do to be happy with it was to slide the left slider over to the right to create a contrast that I was more than happy with I thought it worked great, but as images go my image was somewhat of a simple image and yours may be a lot more complicated once you apply the Find Edges Filter so go with your best judgement on the details and what you think you are happy with.
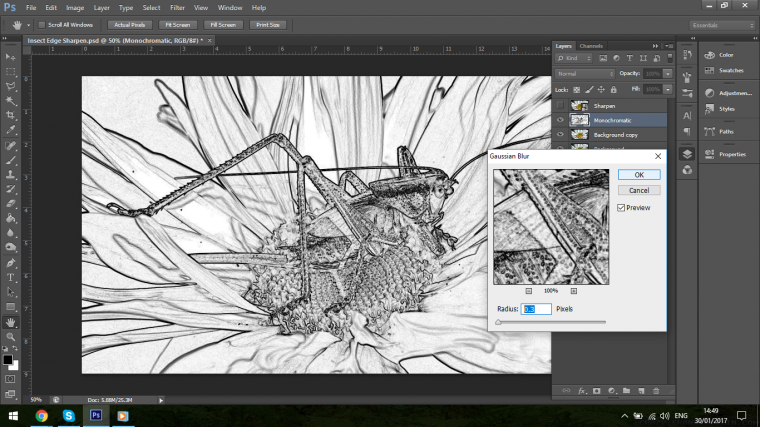
Next up we are going to add a little blur to this layer.
Go to Filter – Blur – Gaussian Blur
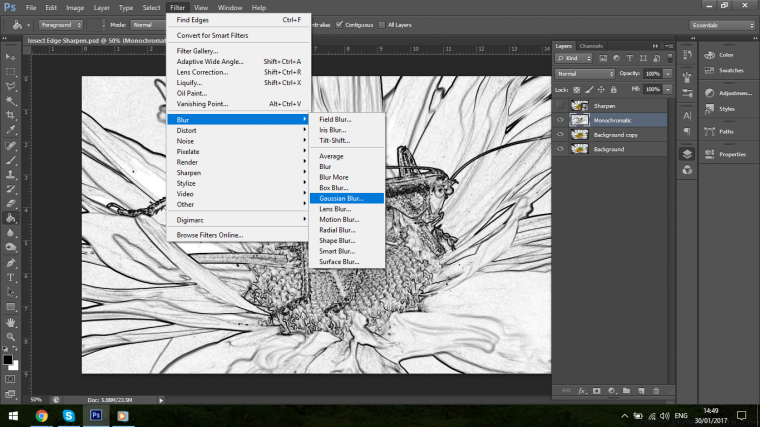
Then you just want to add a very slight Blur to the image so you type in around about 0.3 in the radius.
Then click OK and we will be set.
The Template has now been set for us and we can start to gt into the real meat of this Photoshop Tutorial, up until now this has all been prep for what’s coming up.
The next step we must take is to now invest the image you can do this by holding Ctrl and the pressing I on your keyboard when you have the layer selected.
That means now you will have an image that is the complete polar opposite of what you had, the whites will now be blacks and so forth.
Now we are going to go back into our Channels panel with the RGB, Red, Green and Blue Layer.
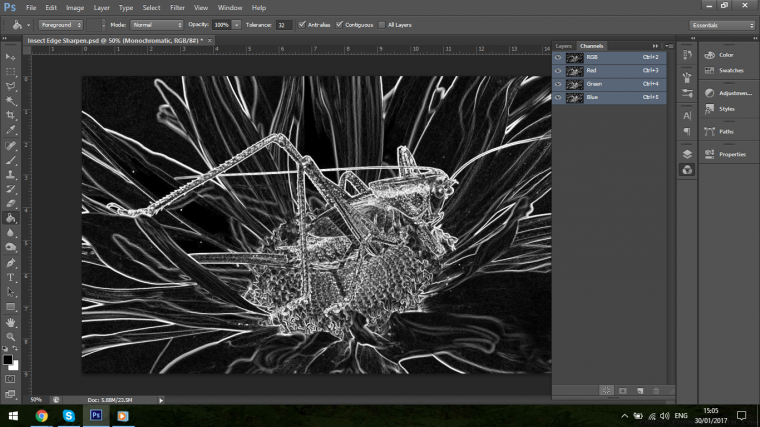
At the bottom of that panel you will see I have highlighted the ‘Load Channel as Selection’ Icon, click on that.
If you are unsure which one it is the first icon at the bottom left that looks like a square selection.
Your image will now have what we call in the business the marching ants all around your image.
Once you have this all done go back to the Layers panel and click on the layer we titled ‘Sharpen’
Then go to Layer – Layer Mask – Reveal Selection
One you have all of the above done you are OK to delete the Monochrome layer as we will no longer be needing it and you don’t want to clutter up your layers panel.
Now click on Sharpening again to activate that layer.
What we are going to do with this layer is we are going to change it to luminosity blending mode.

The reason why we do this is so that only the Light and Dark will be affected when we start to edit here and it will not effect any of the mid tone colors leaving them perfectly intact.
Then you have to drop the opacity of the layer to 50%.
The reason why we drop the layer to 50% is because when you have done sharpening you can now that you are 50% increase of decrease the opacity depending on what you feel you need, so if you feel that you have gone a little bit overboard with the sharpening then what you would do is to drop the opacity down a little to decrease the sharpen and if you wanted to quickly tweak it a bit sharper then you would increase the opacity, so very easy little fixes there if you want to fine tune at a later date or time.
Now we are just about ready to start the sharpening process.
Now make sure that you are on the Sharpen Layer and not clicked on the mask beside it. (i.e. the White Box)
Next, you have to go to Filter – Sharpen – Unsharp Mask

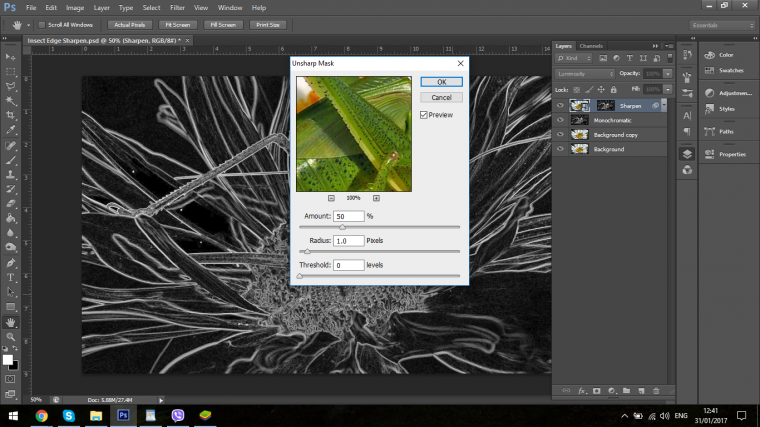
In the amount field you can now change that up to around 450-500, the Radius about 0.3 and the Threshold to zero.
This will give you the best results in my opinion, but feel free to choose for yourself and see if there is another setting in there that you like better.
But on a plus remember that you can adjust your opacity.
Click OK.
So zoom in, and if you now click on the make, then right-click on it and choose Disable Mask you will see it will fill in all the areas that you didn’t want to have sharpened just so you see what the effect actually is.
When you have checked this out you can repeat the right click only this time choose Enable Mask to make the mask reappear.
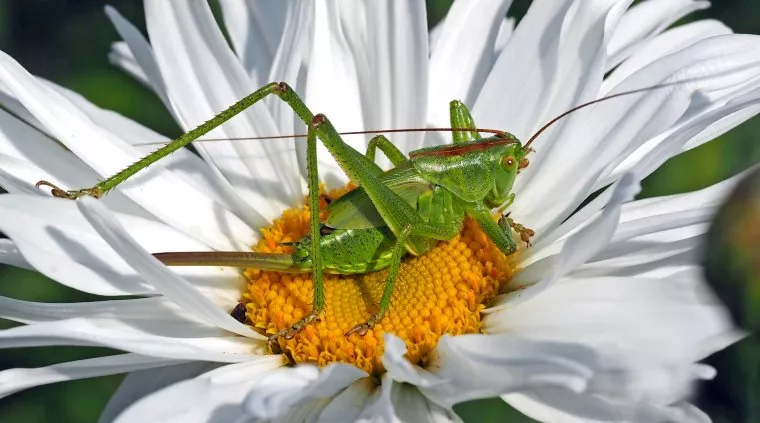
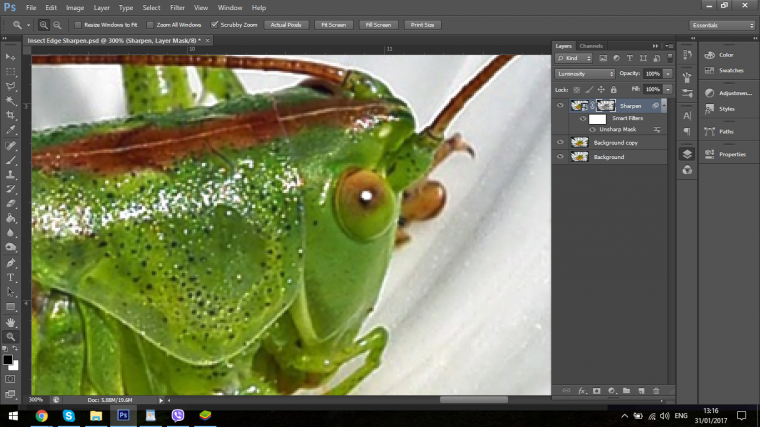
So if you look through the images below you will see the difference the Sharpening makes when you vary back and forth between the settings.
This image below is the actual edit that we want to keep, you can see that the edges have been modified but the parts within have still got the original resolution to it creating a really nice effect.
Then when you disable the Layer Mask like so…
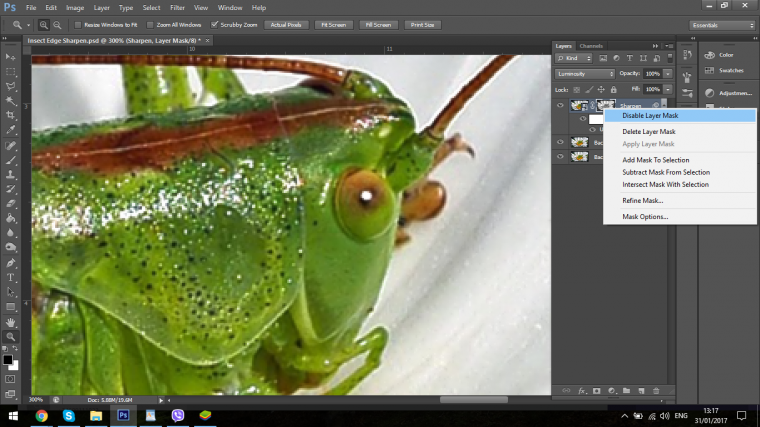
The image changes

This is what the image will look like when you disable your layer mask, as you can see it completely sharpens the entire image which is not what we wanted.

This one is completely minus the Sharpen layer so you will see how blurred the image actually is when you zoom right up.

As you can see the image below is completely enhanced compared to the original but doesn’t look overly sharpened.
So that’s a wrap for this Tutorial, I hope you learned a lot and hope you enjoy the process of Edge Sharpening to make your images look great.

Would you like to learn one more trick? Learn to make someone look sad in photoshop using liquify.


Please verify your software version before proceeding.
 I’ve verified my software version


 Facebook
 Google +
Comments (0)
There are no comments yet.