“You may find that the picture you want to do can only be made from a certain place, and you’re not there, so you have to physically go there. And that participation may spur you on to work harder on the thing, because in the physical change of position you start seeing a whole different relationship.” – Jay Maisel
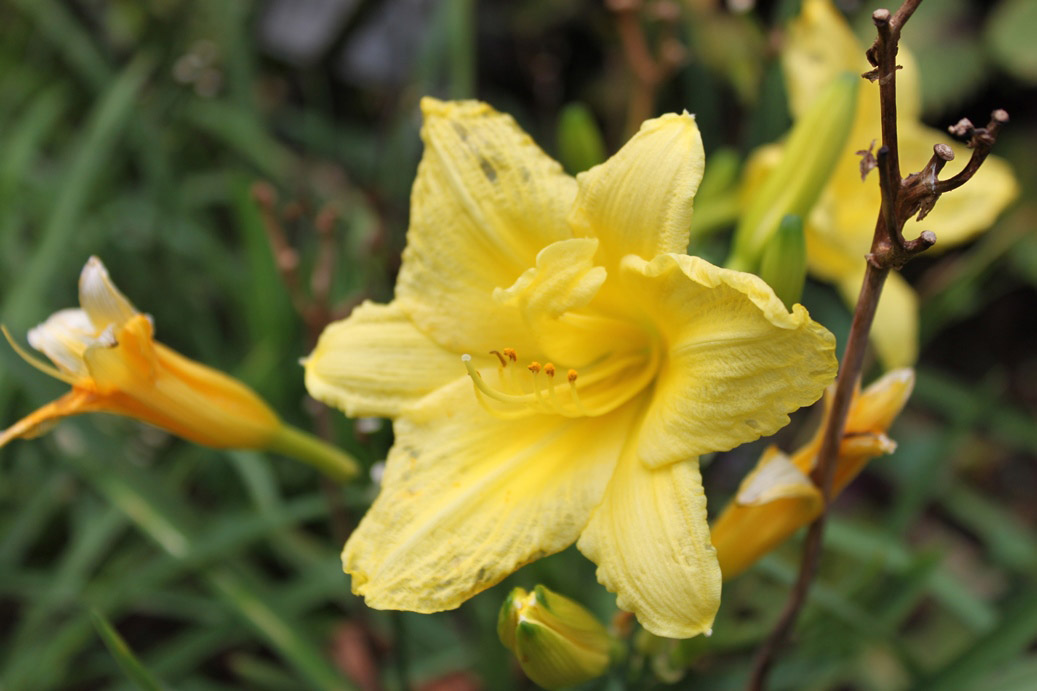
yellow
The quote above by Jay Maisel perfectly expresses how interesting and challenging it can be to capture angles. Through my captures, I have somehow always had the tendency on shooting angles. I can’t recall when it all began but there is just something about it. It could be through looking up at buildings, or an exquisite architecture of a building, or lines and structure, or an alley, or even looking down or just simply whilst capturing macro shots of flowers. Photography is an expression of how we envision moments or things around us. Perspective and angles are a unique way to express the vistas of everything around us creating an impression and imprint in our minds.
It isn’t something that can be planned as it requires observation and experimenting as well. As always, letting it come naturally to you is the best way to capture angles. There may be times when nothing motivates you to do an angled shot and that is completely okay. The moment will instantaneously present itself to you and all you will need to do is “click”.
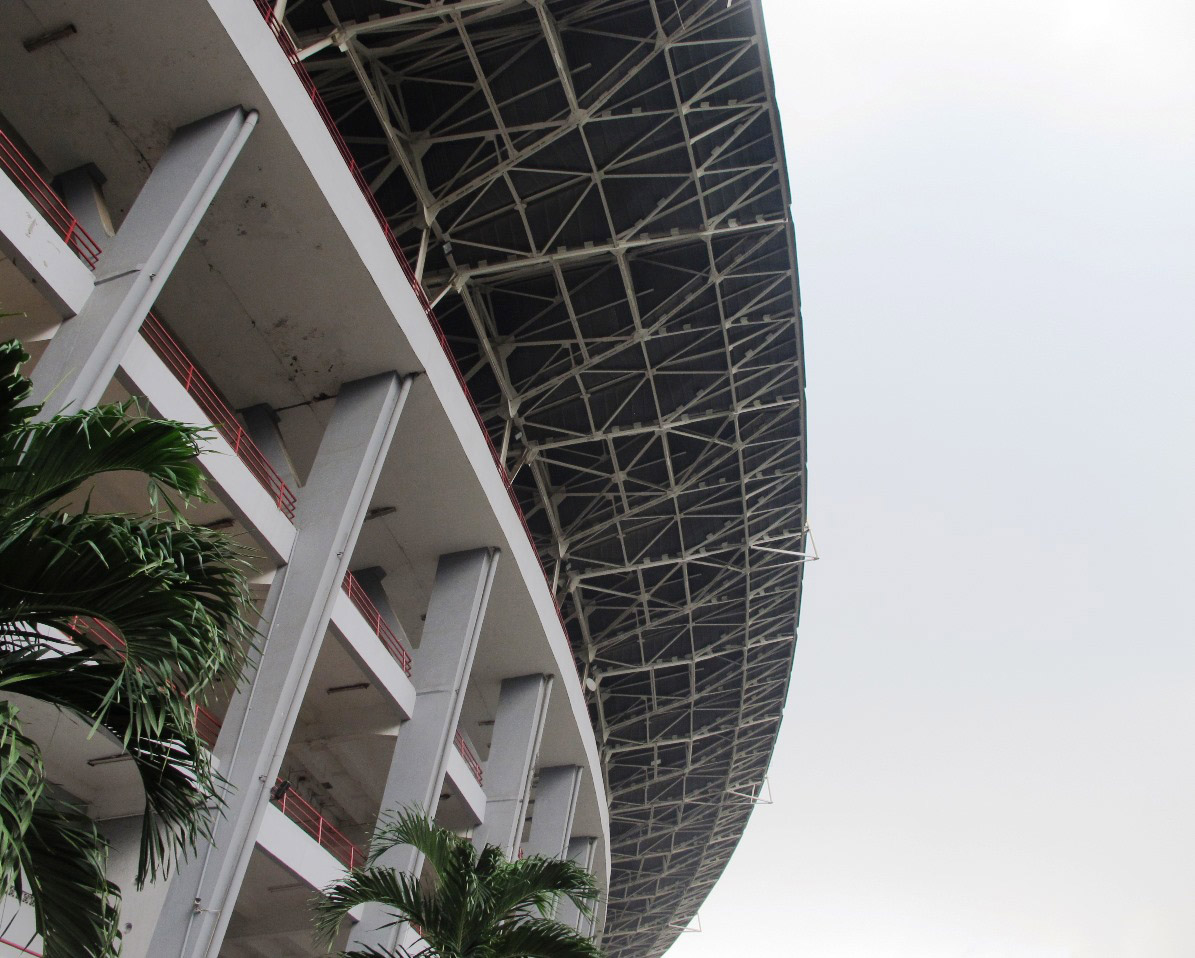
structure
This outward structure of the National Stadium spoke to me. I began by looking up, clicking and experimenting the numerous aspects of the building. Experimenting would be by pointing and shifting your camera in various directions to frame the shot. It took a number of clicks to get the above results. To frame this shot, I wanted it to also have a minimalist touch so as to not completely focus on only the structure but leaving the blank space as well.
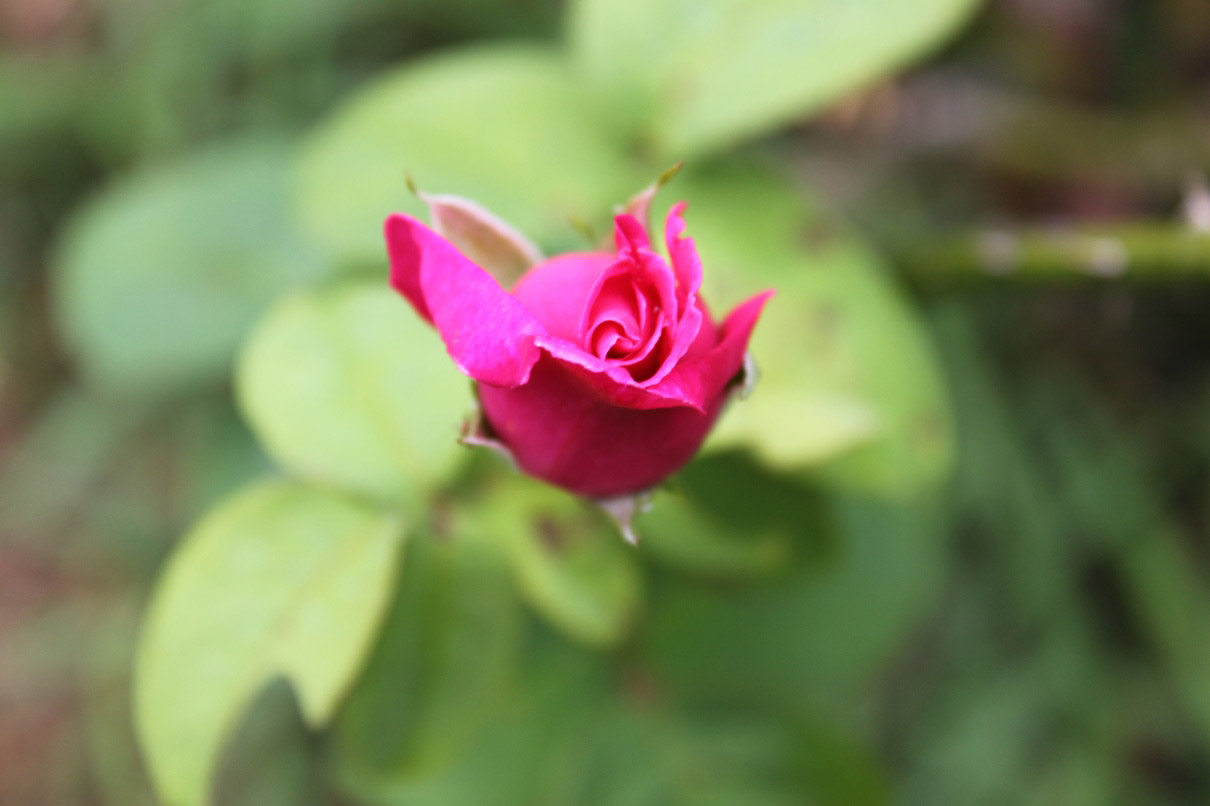
flower macro
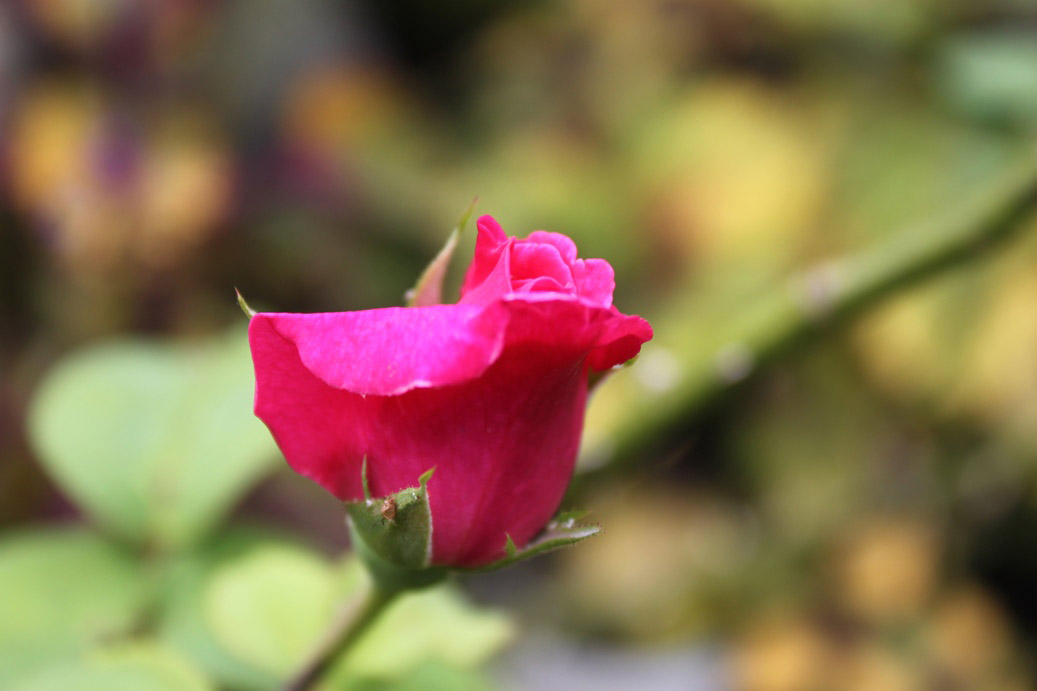
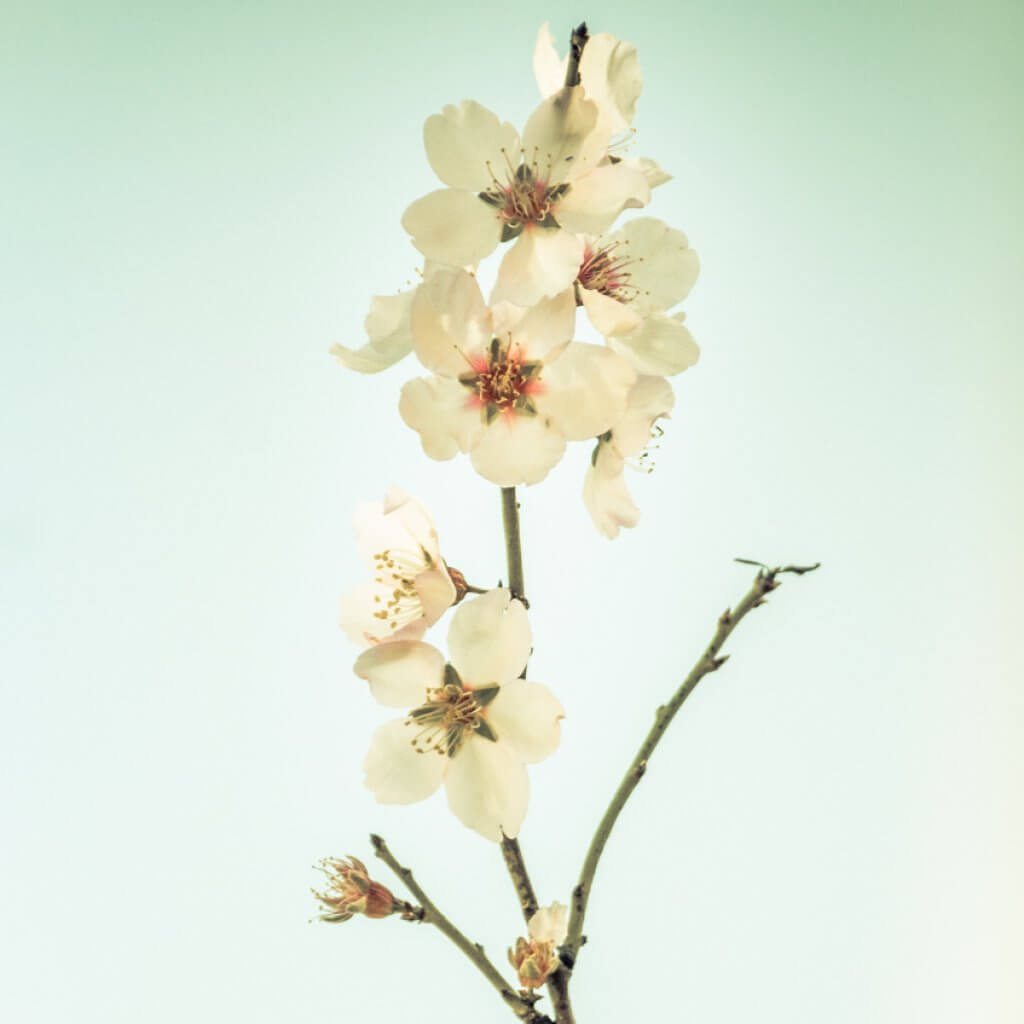
Nature and flowers are one of the easiest ways to try out various angles. This lovely pink half budding rose fascinated me. I wanted to try to get a specific viewpoint to portray as if the rose was looking at you. Balancing between getting close to the rose, composing the image properly and getting the right proportion was as interesting as much as a challenge.
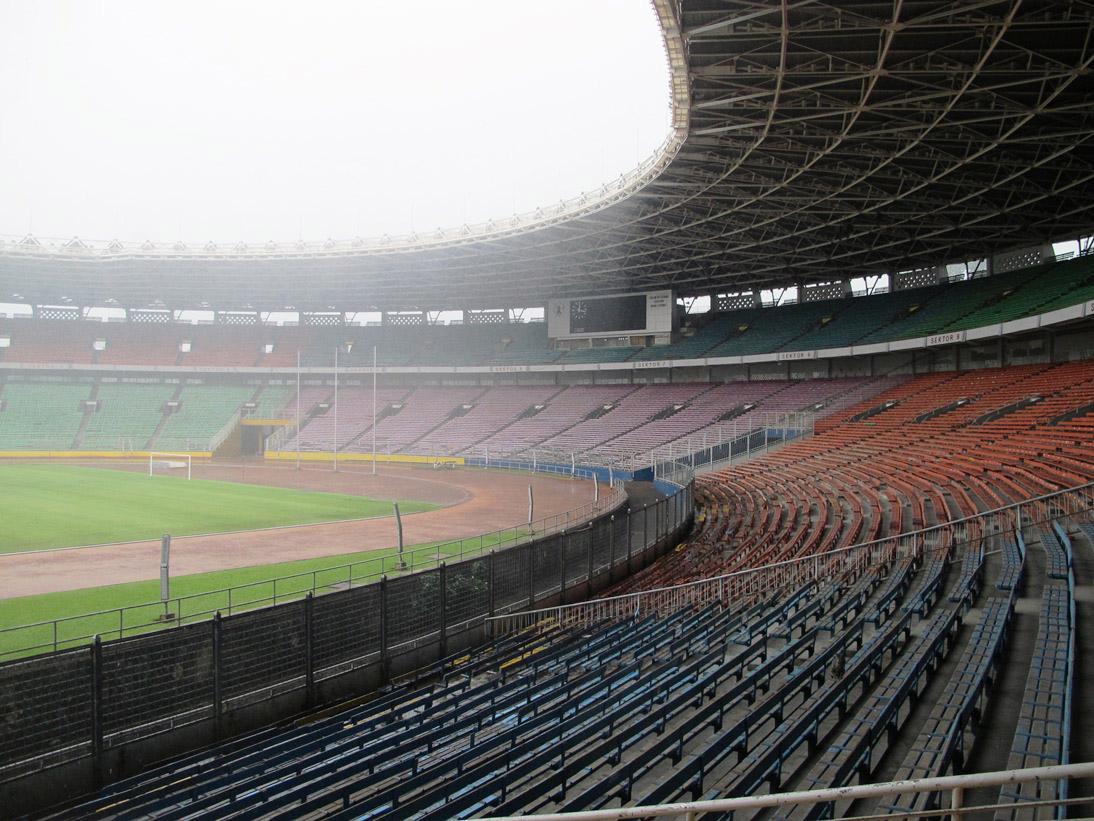
curves of Stadium
“As people, we love pattern. But interrupted pattern is more interesting.” – Jay Maisel
Jay Maisel nailed it again with the above quote to describe the way I felt when capturing the image above. Standing in front of the National Stadium seeing all these patterns, lines, colours and structure was spectacular. It’s like all these elements came together for me to venture and shoot.
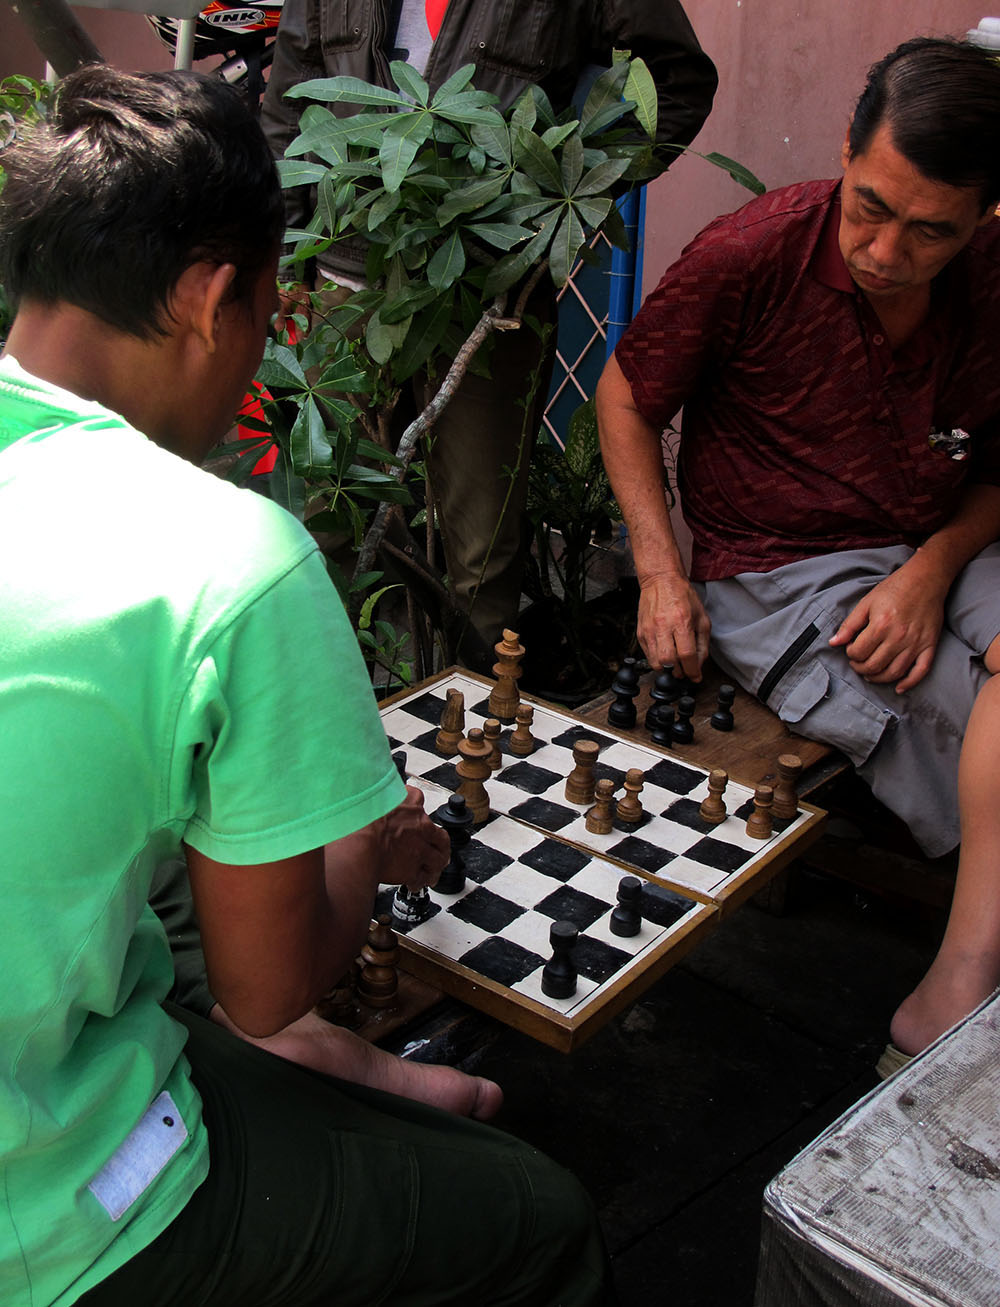
Check – Mate
Street photography can also be a perfect place to try and play out various outlooks. On a walking tour, I found two men playing chess and it intrigued me to explore a particular angle to capture the shot. So, I tried the side way peeking approach for a change, to focus more on the people and the chess board as a whole.
crowd
This particular mall has a unique architecture giving one a nostalgic feeling transporting you back in time. Whilst looking down, I wanted to capture the curved aspect with the lamps and lines in frame. Thus, a combination of colours, people and structure into one framed picture.
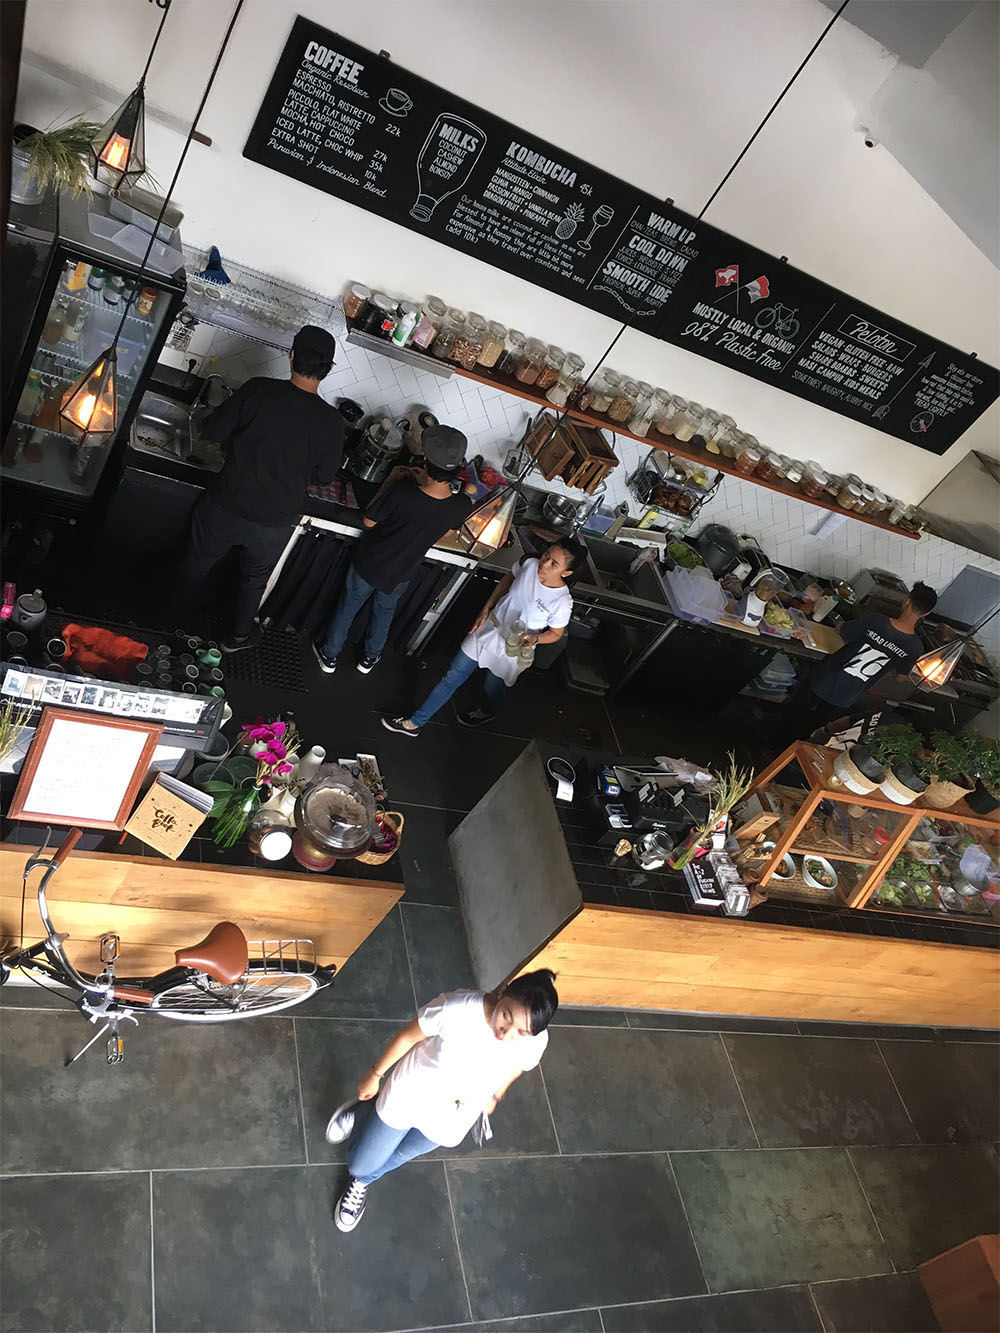
look
And here is the instantaneous moment that nature presents itself to you. Sitting at the restaurant, I randomly looked down, played with my iPhone by framing angles and hit the shutter. The whole scene filled with pretty wood interiors and layout was quite delightful to build into a moment.
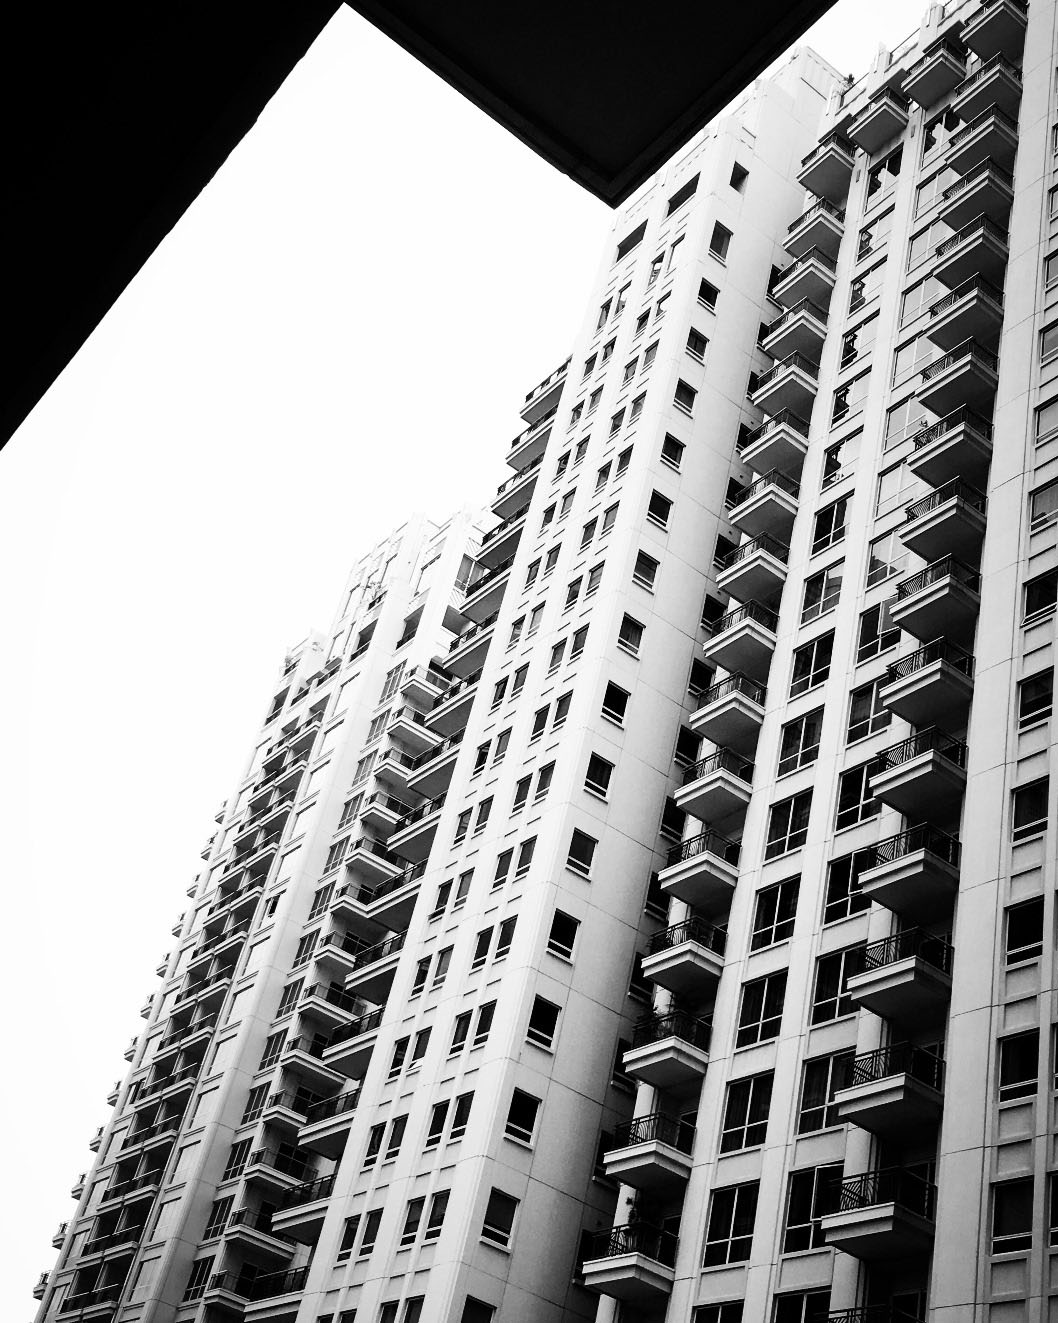
crisp
Looking up through the details of a building has never been more fun if you can capture it in a completely distinct way. The idea behind this capture was to have the symmetrical shape on top, which is part of the top portion of the building I was in, look like it forms a cover of the other building. I tilted my phone so this captured moment directs your eyes upwards.
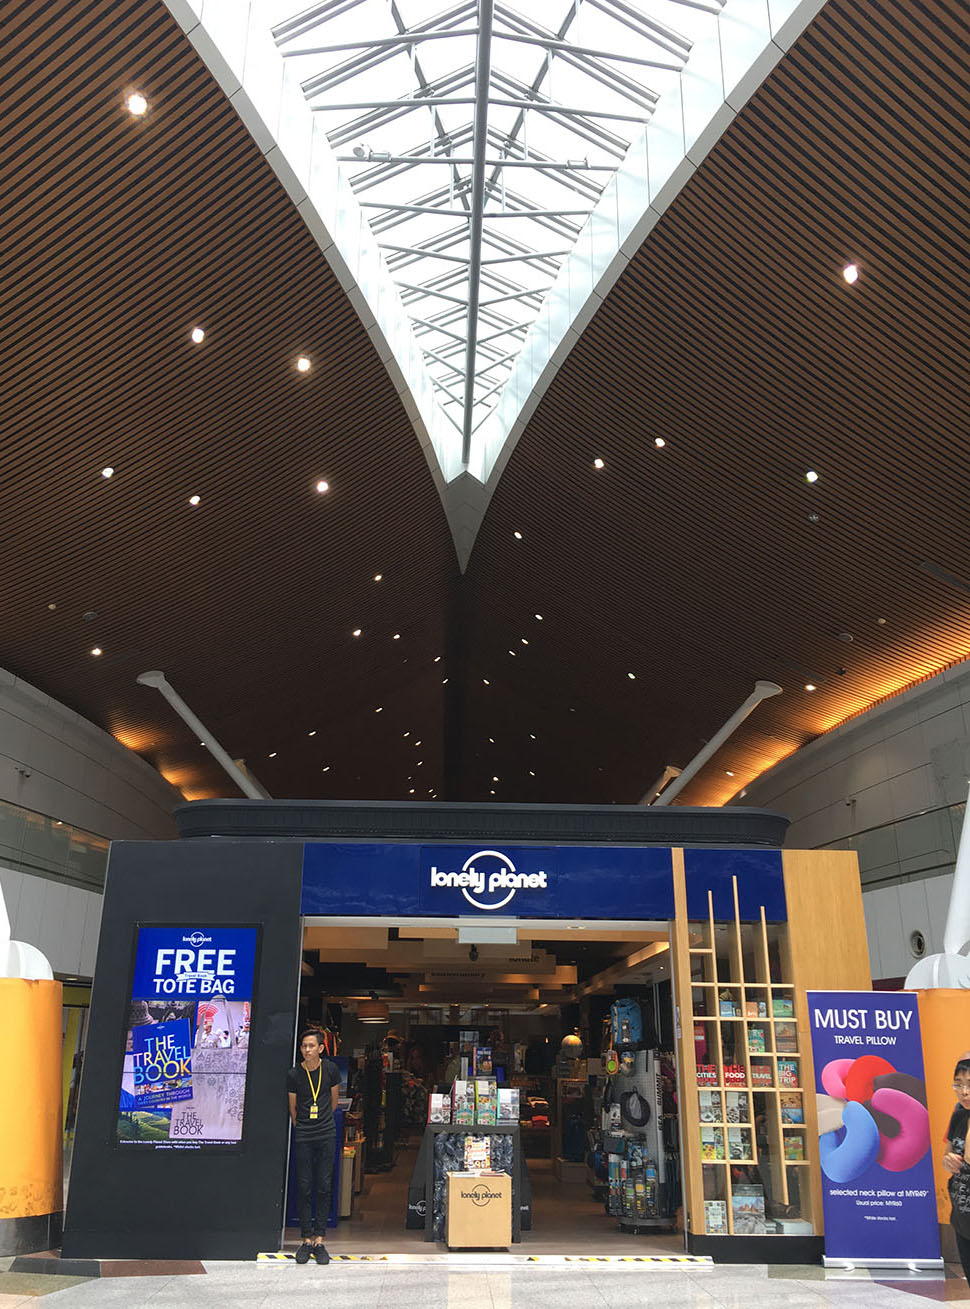
stand tall
Awed by the architecture of this airport in Kuala Lumpur, I wanted to snap this whole scene but focusing more on the lines and architecture. Yet, another spontaneous shot.
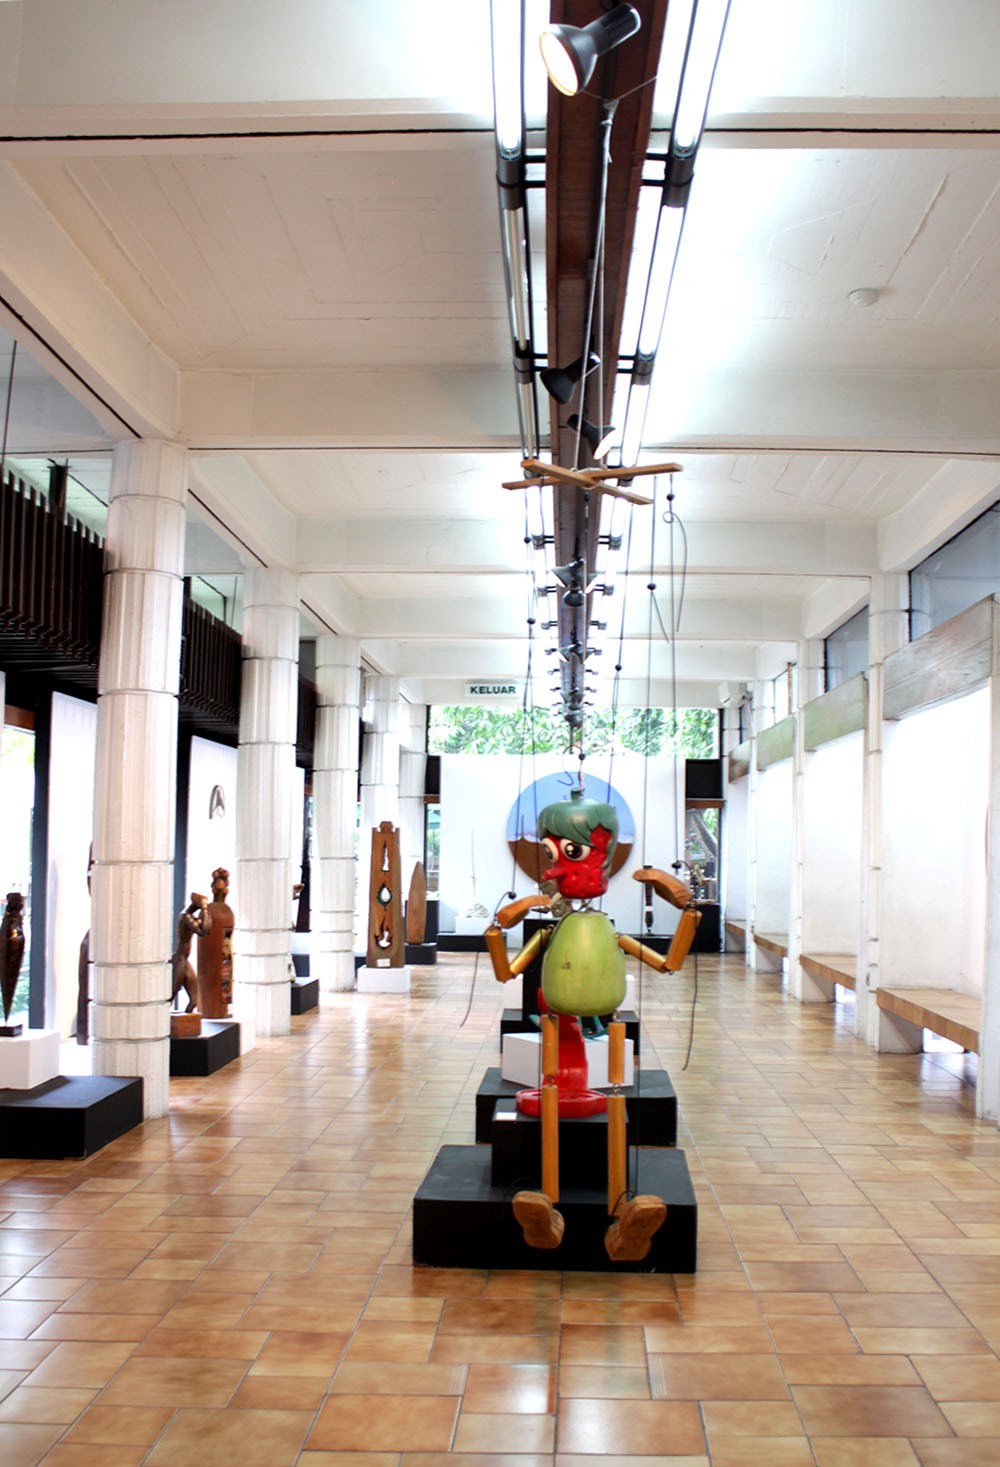
alley
Something about this exhibition and the rows making it seem like an alley, motivated me to point and shoot. Just to have a glimpse of what the exhibition was about and have a sort of symmetry was my main aim when framing the shot.
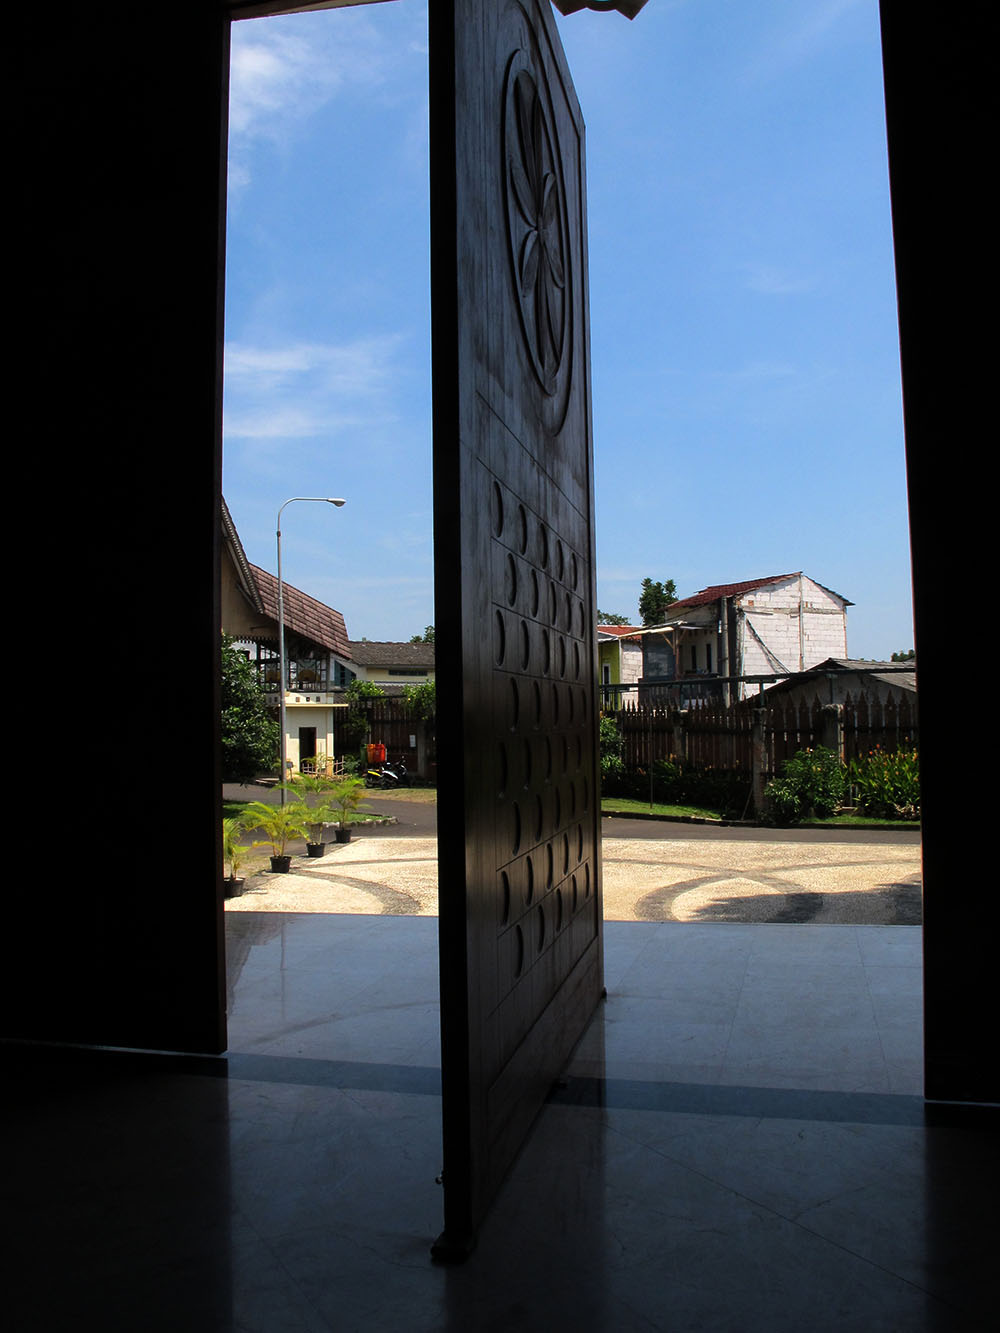
open
Lastly, standing inside the building I casually looked out and noticed the door ajar in the middle and the lovely blue on the outside. It definitely was a moment not to miss capturing. Angling from a few places and with a few clicks, voila this moment was created.
pink bud
Every angled shot makes you think outside the box bringing the image a new flavor. Playing with perspectives has allowed me to explore a new side and style to photography. It is like allowing nature to speak to you and at the same time being creative to make an image stand out. There are no set rules to achieve it but simply being alert and listening to the moment. Let’s continue to enjoy the various points of view and keep clicking!
In a previous article I gave you some tips about flower photography. Today I want to talk about the editing of this type of photos. I always recommend doing your best in the moment of capturing the photo. Invest some time looking for the right perspective, work on the composition of your image, avoid cluttered backgrounds, focus on the right spot and aim for a good exposure. However, there are some simple things you can do in post-processing that can make your flower photo even better.
I will show you some of my general post editing tips in Lightroom. They are general, not universal. These tips will give you a good basis to start with, but they might not work in all the situations you might encounter. You will need to experiment with your flowers a little (this is part of the fun in photography, isn’t it?). The basic idea behind all my editings is to make my main flower/s pop out. So let’s jump to Lightroom Develop module and see how these tips goes!
Do some global adjustments first
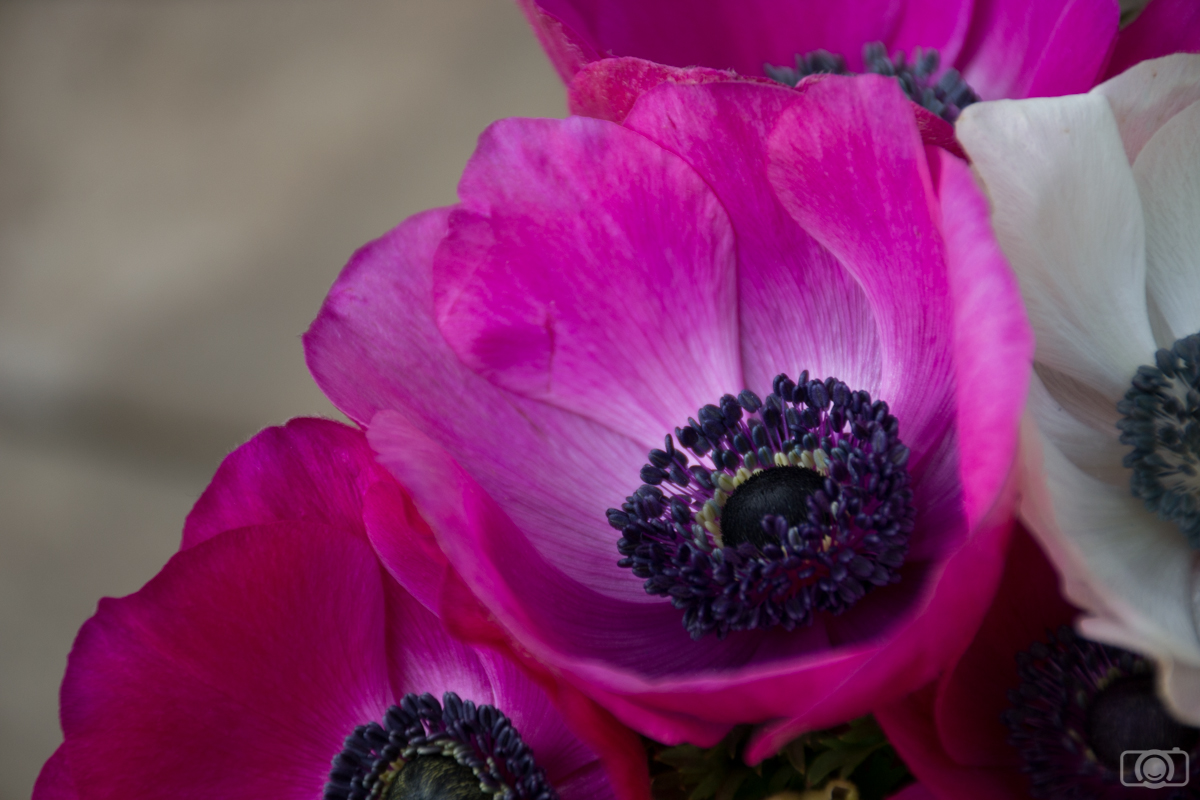
This is a good tip for any kind of photography. First of all do the global adjustments, meaning the ones that affect the whole photo. For this tutorial I am going to use this straight of the camera photo:
Straight of the camera photo
The slides I like to work with are:
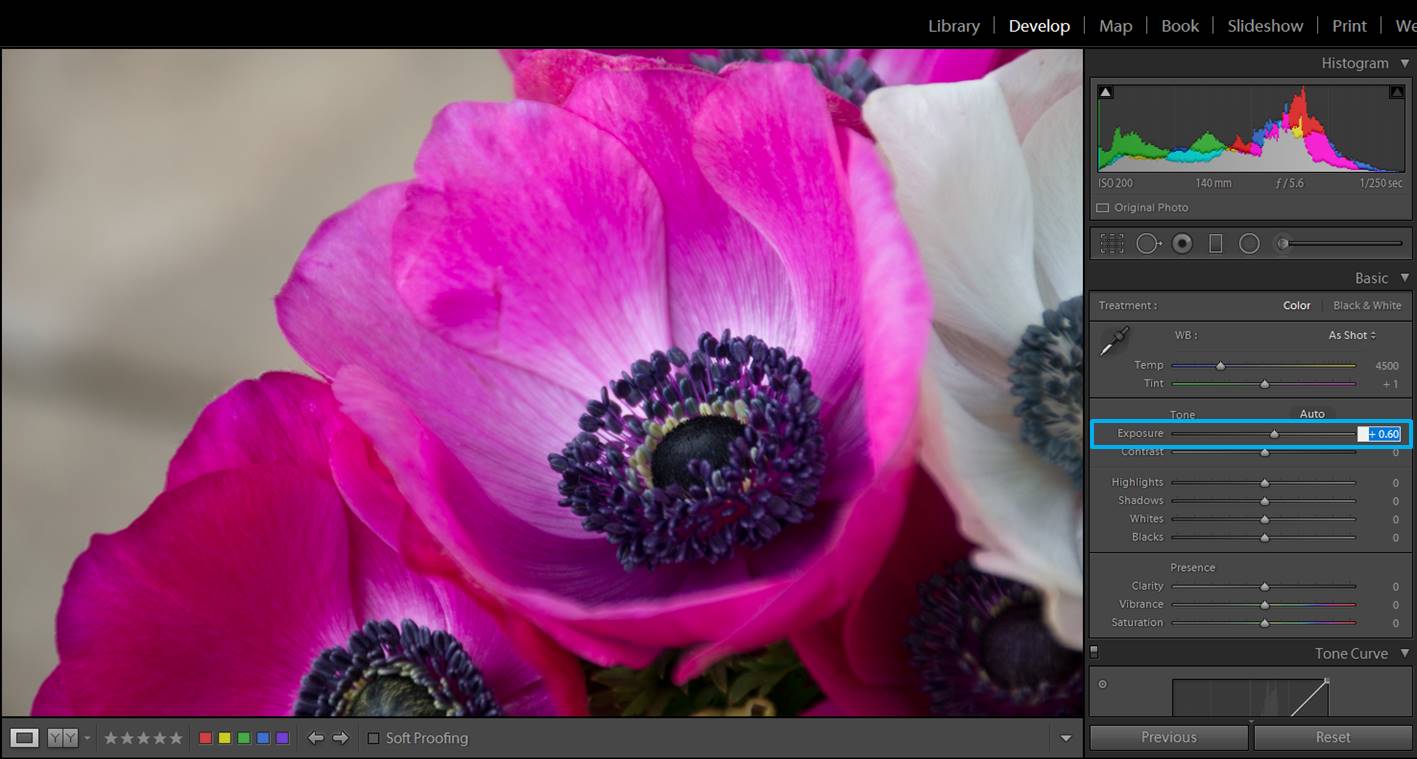
Exposure: You might need to adjust a bit the exposure (or a lot if you didn’t manage to adjust it at the moment of taking the photo). If your photo is overexposed, you need to move the slide to the right and if it is underexposed, to the left.
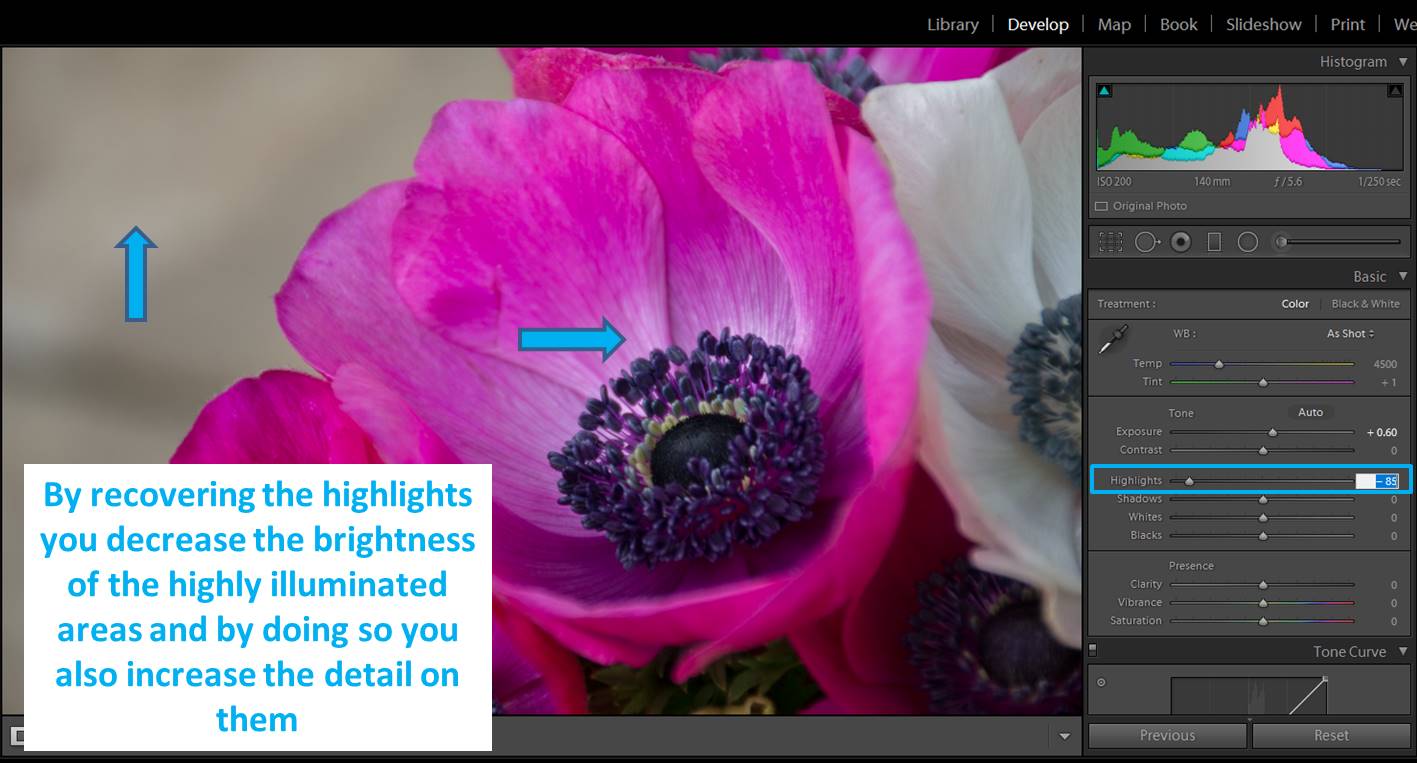
Highlights: I usually try to recover some highlights by moving the Highlight slide to the left. This is especially useful if you have to deal with a background which is too bright because it will bring a bit of detail to the photo. By default, our eyes are drawn to bright things so they tend to focus on the lighter areas of an image. If the background is too bright it will draw our eyes to it and make us ignore the flower, and this is exactly what we don’t what want!! So if you can make the background less bright, it will be better. This doesn’t mean that you always need a dark background. You can use white backgrounds too. What I mean is that they should not be extremely bright.
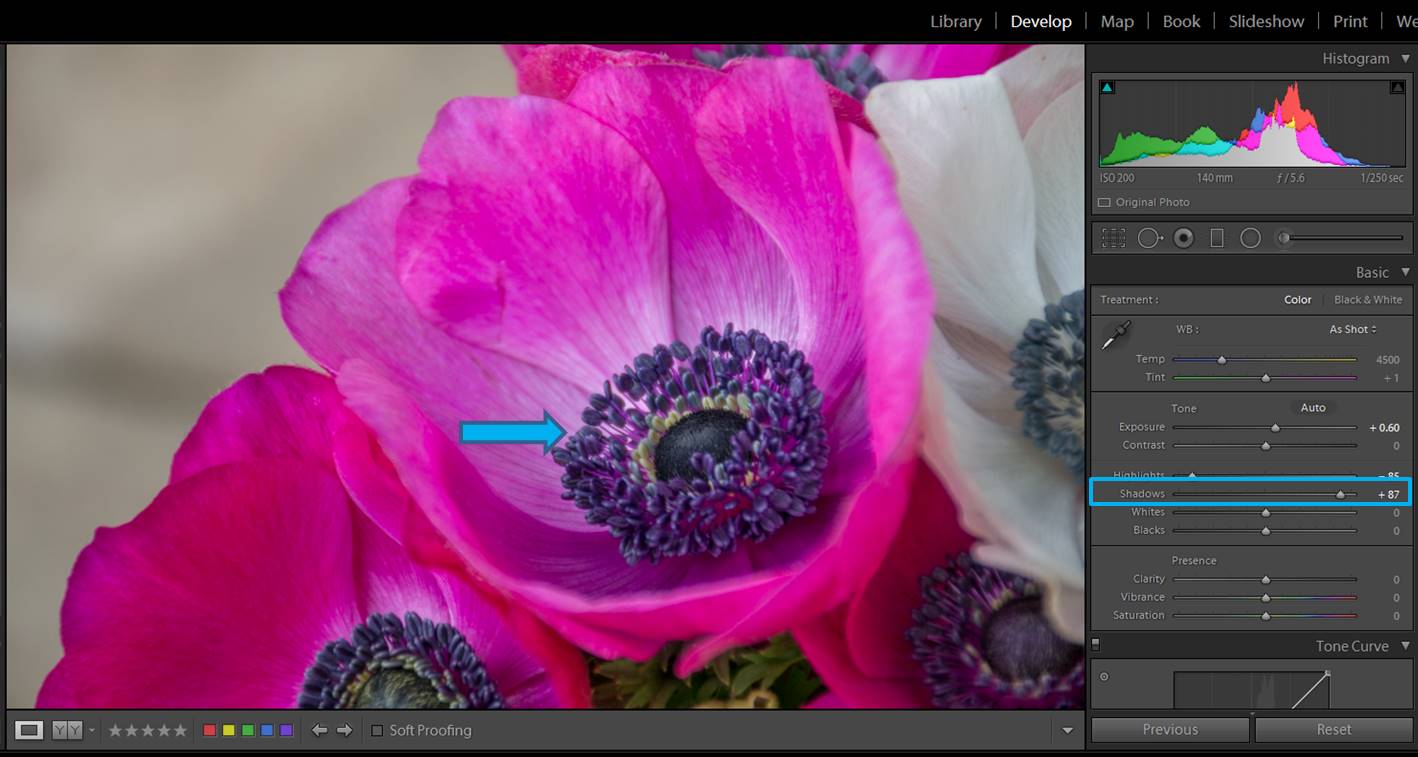
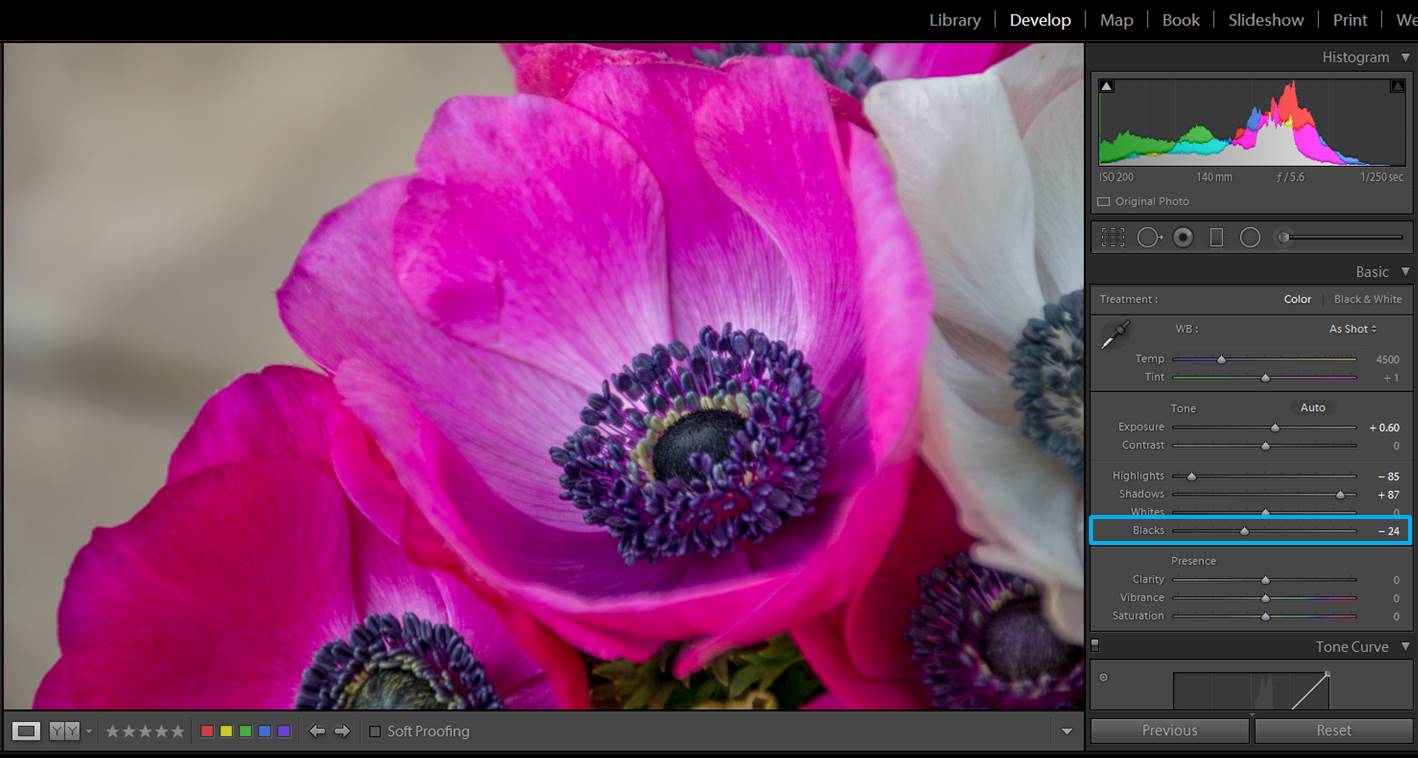
Shadows and blacks: If I see that my main subject has an interesting area too dark, I move the shadow slide to the right. You will see how details will appear in your image.
However, the contrast of the area can get a bit weak. Increase a bit the blacks (moving Blacks slide to the left) and your problem is solved! By decreasing shadows and increasing blacks you give a higher dynamic range to your image.
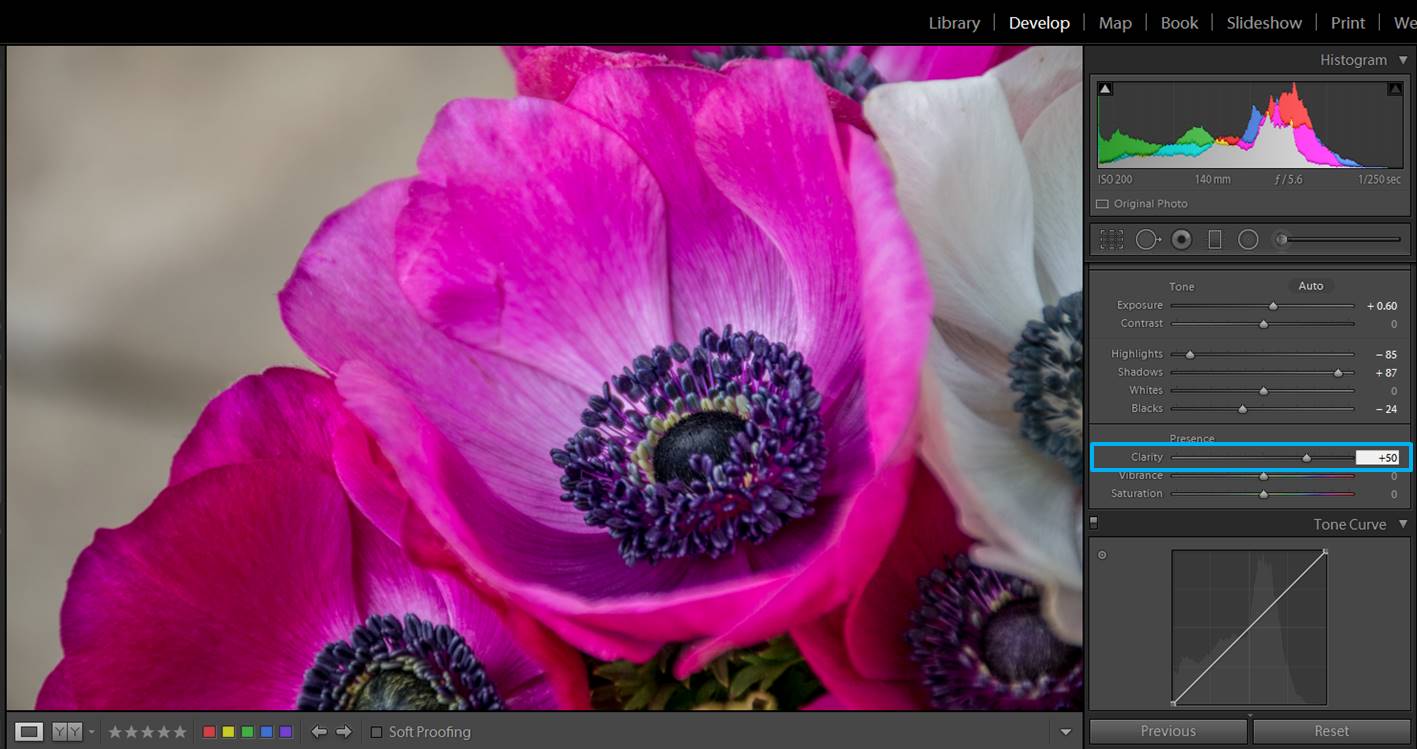
Add your personal touch with the clarity slide
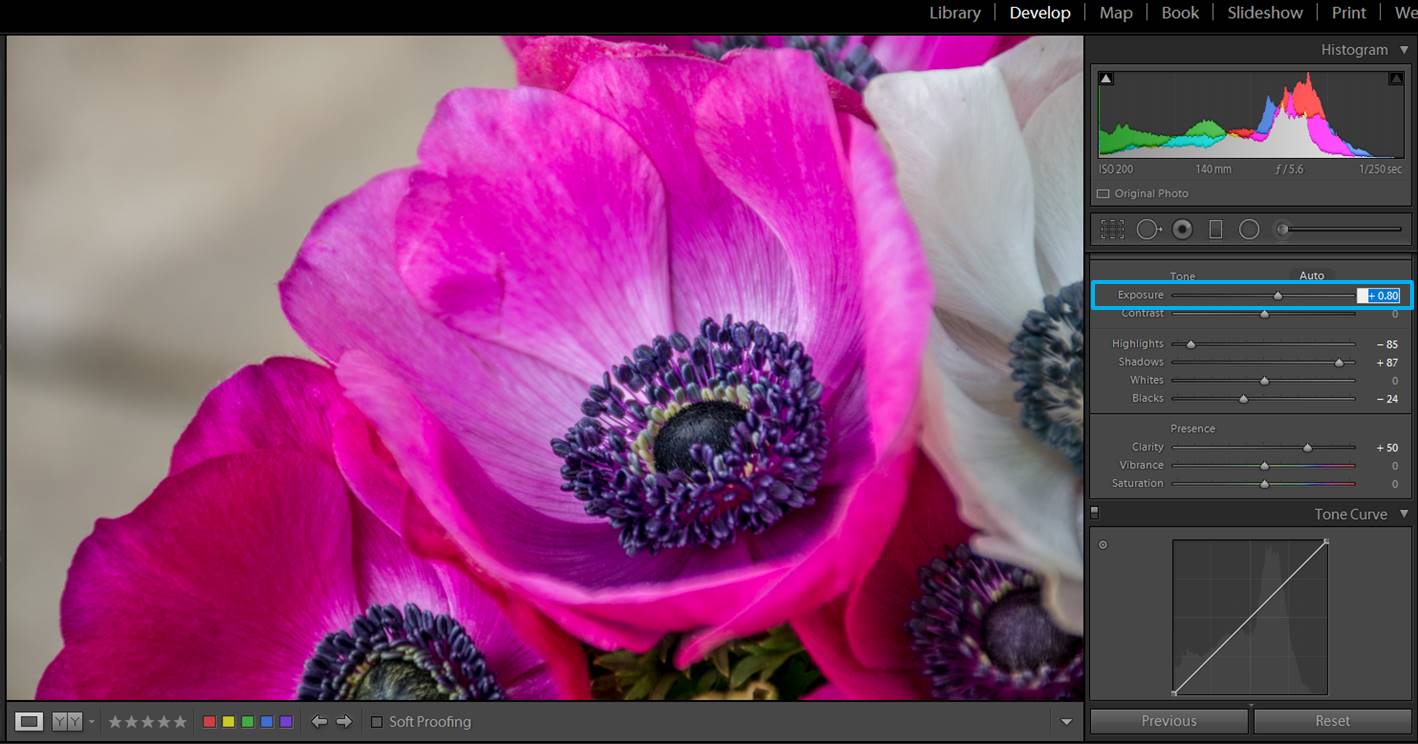
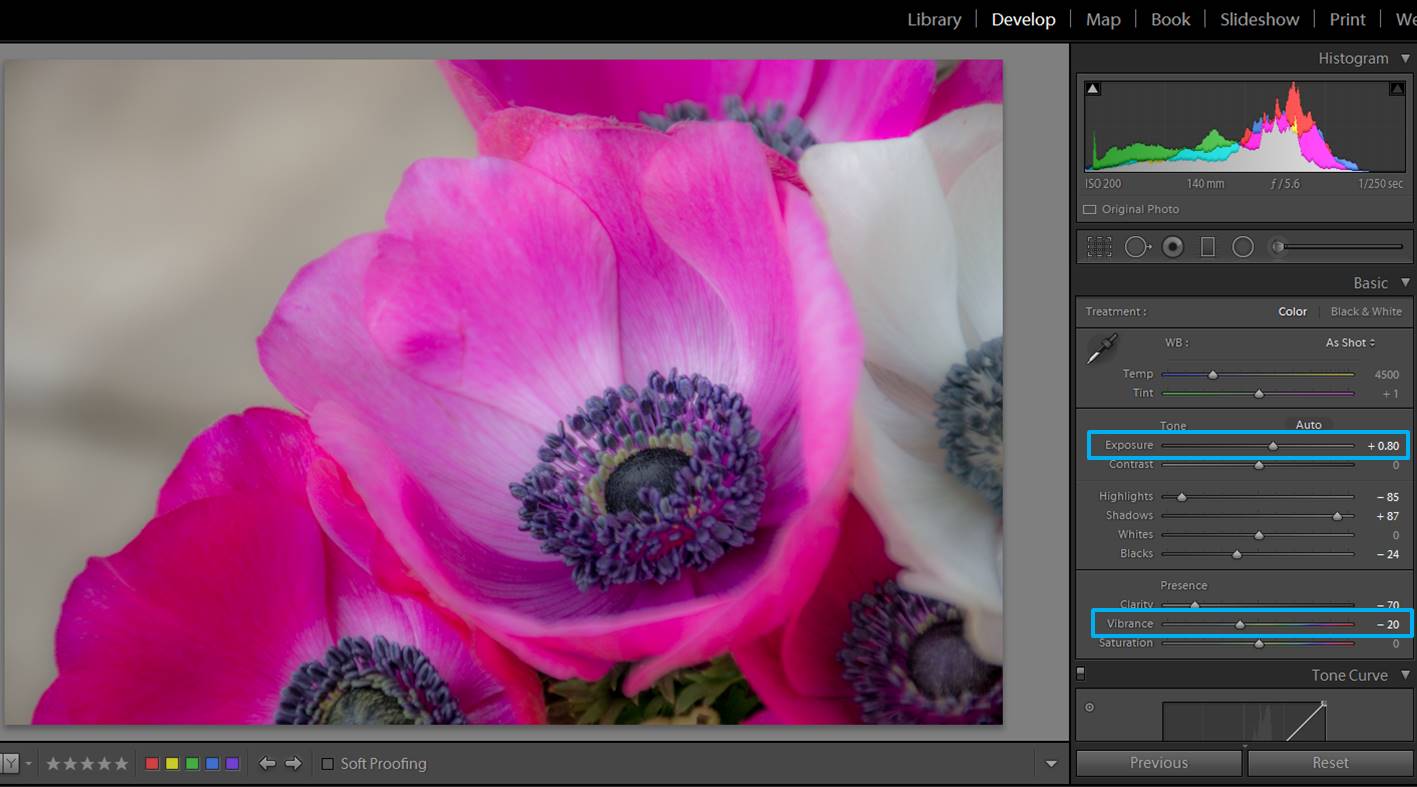
I love the clarity slide! This is the point in the editing when you really need to decide which kind of final look you want for your flowers. Do you want to show all the little details of your flower? Then you should move the clarity slide to the right. This might darken your photo a little, so you might need to adjust the exposure again.
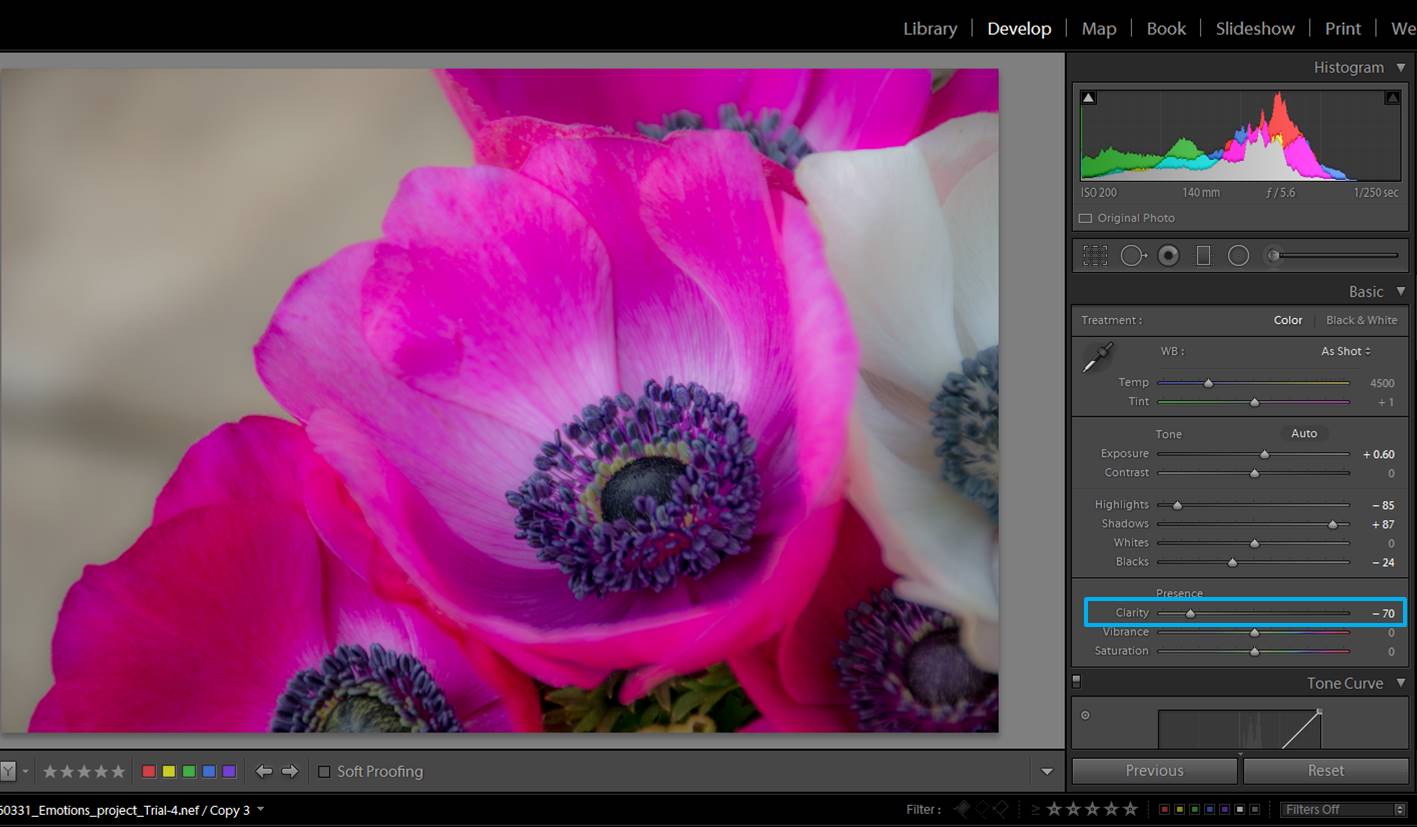
If you prefer a softer look, move the clarity slide to the left.
In this case too, you might need to adjust the exposure. In the example, by changing the clarity I also causes the colors to stand out a bit too much, to counter this side effect, I moved the vibrance slide to the left in order to get a more natural look.
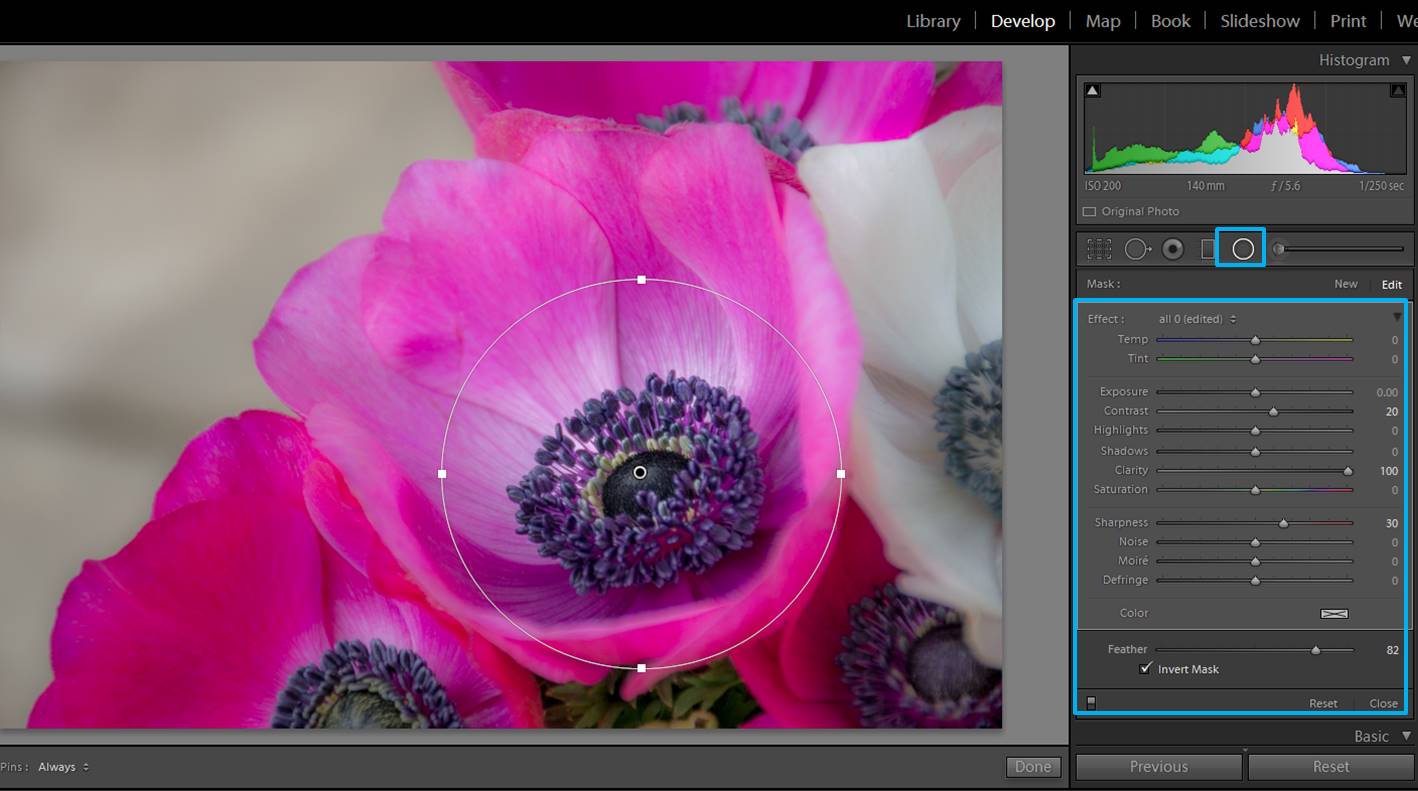
When you decrease the clarity of a photo you get this blurry dreamy effect. However, you might like to keep the details in specific parts of the photos. For this, you can use a circular filter like in the image below.
You can add a circular filter to do local adjustments in your photos. In this case I checked the “Invert Mask” because I wanted the adjustments to be made inside the circle. I wanted the center of the flower to be more defined, so I increased the clarity and the sharpness of the area inside the circle. Note that I feathered the circular filter quite a lot to make the adjustments gradual from the center of the circle to the outside.
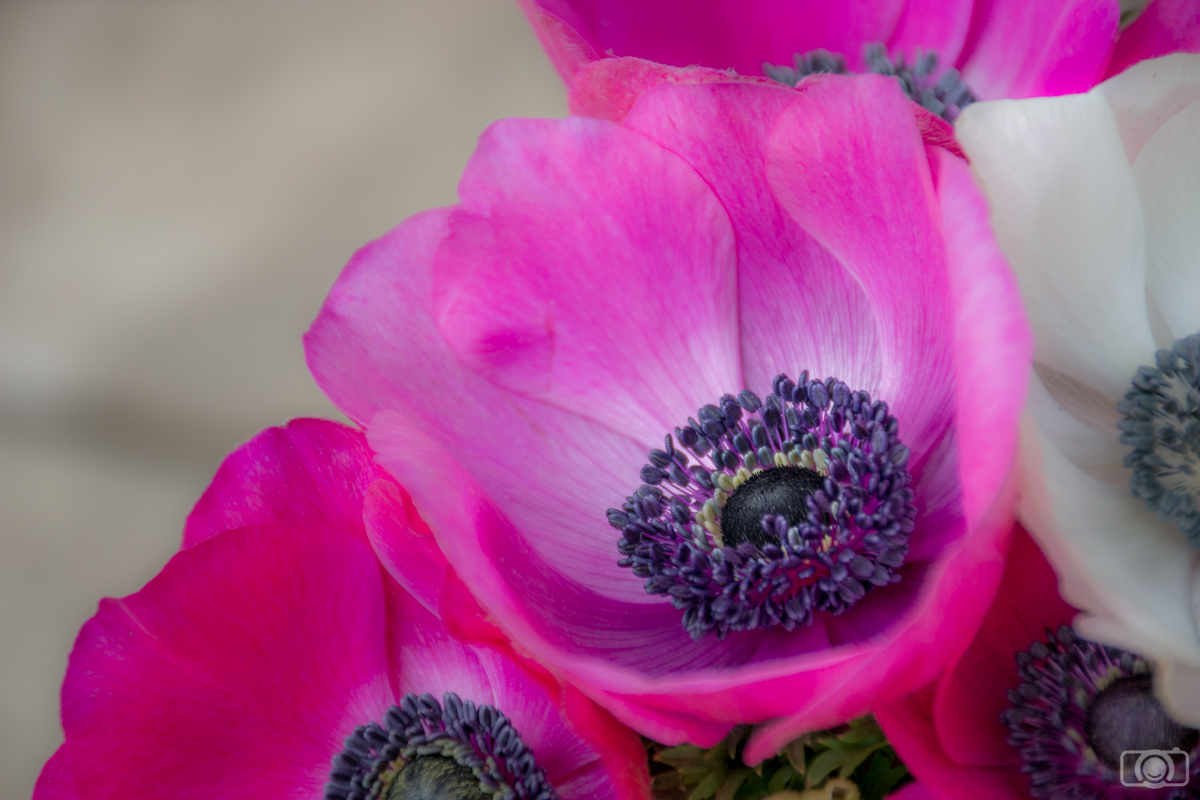
So here you have the 2 versions of the same photo.
This is the final sharper version of the imageThis is the final softer version of the image
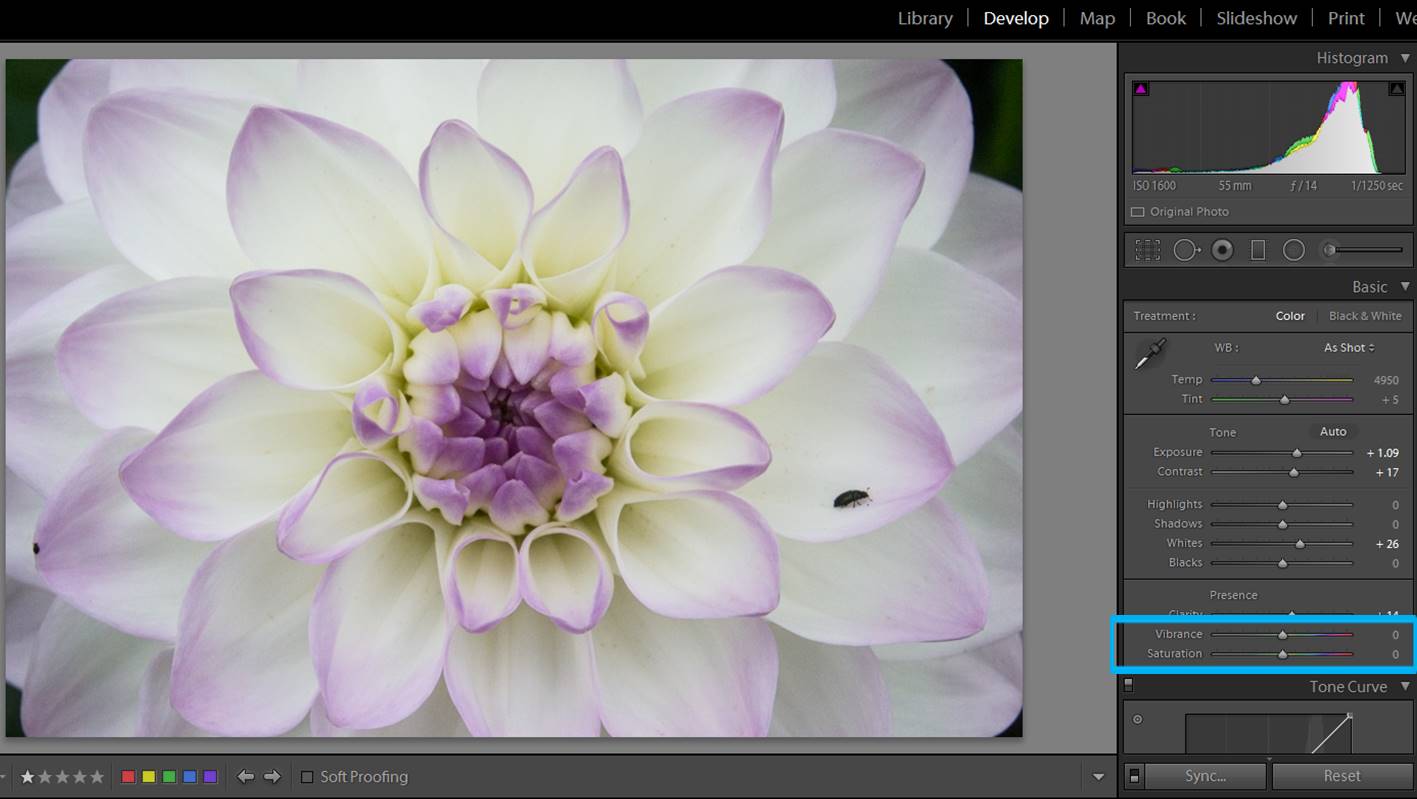
Increase (or not) vibrance/saturation
By increasing the vibrance and/or saturation you can make the colors of your flower pop out. However… if you increase them too much your flower’s color can get to a point it looks unreal. If you are doing some creative post-processing, this might be a good thing. But if you are trying to achieve a natural-looking flower image, too much vibrance and saturation will not be good.
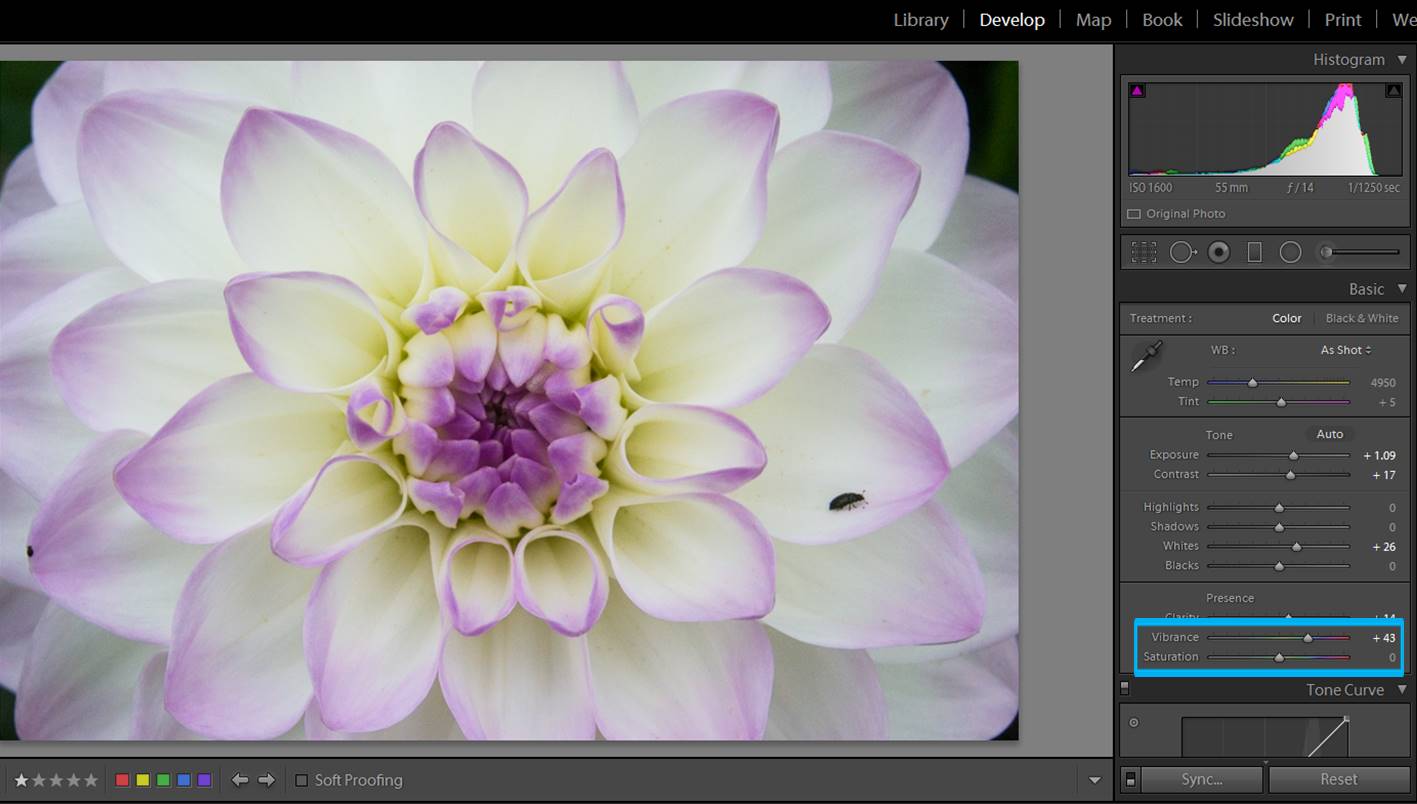
I did some general adjustments to this image, but I didn’t touch the vibrance and saturation slides yet.
I usually increase the vibrance little by little until I reach to a point that I like. Sometimes you won’t need to touch vibrance/saturation at all because your original picture has already beautiful colors.
I usually increase the vibrance little by little so I could find a point where the colors stand out, but the flower still looks real
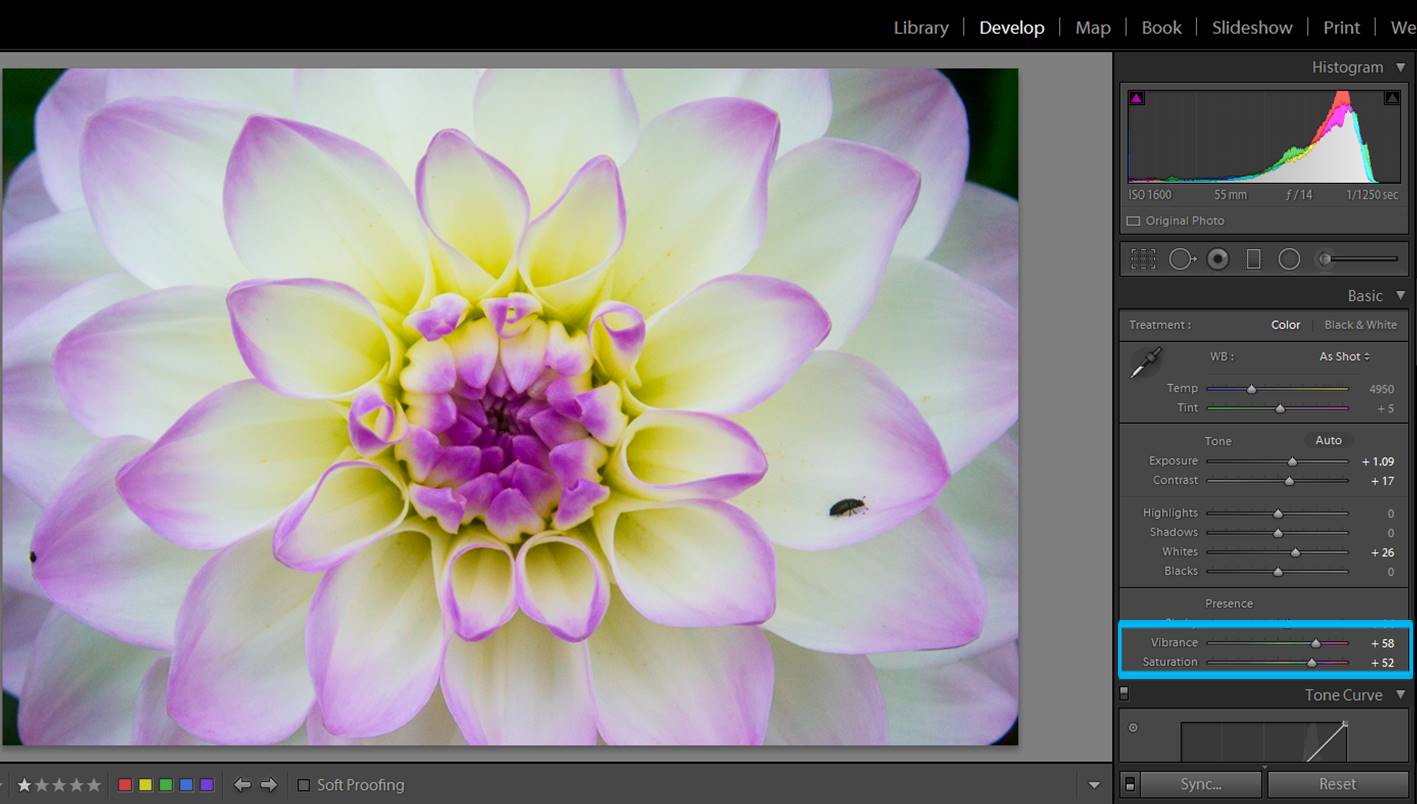
In this image I increased both the vibrance and the saturation too much the so that you can see their effect on the photograph. You should be careful with these slides because you can reach an unnatural look pretty easily.
Highlight your subject
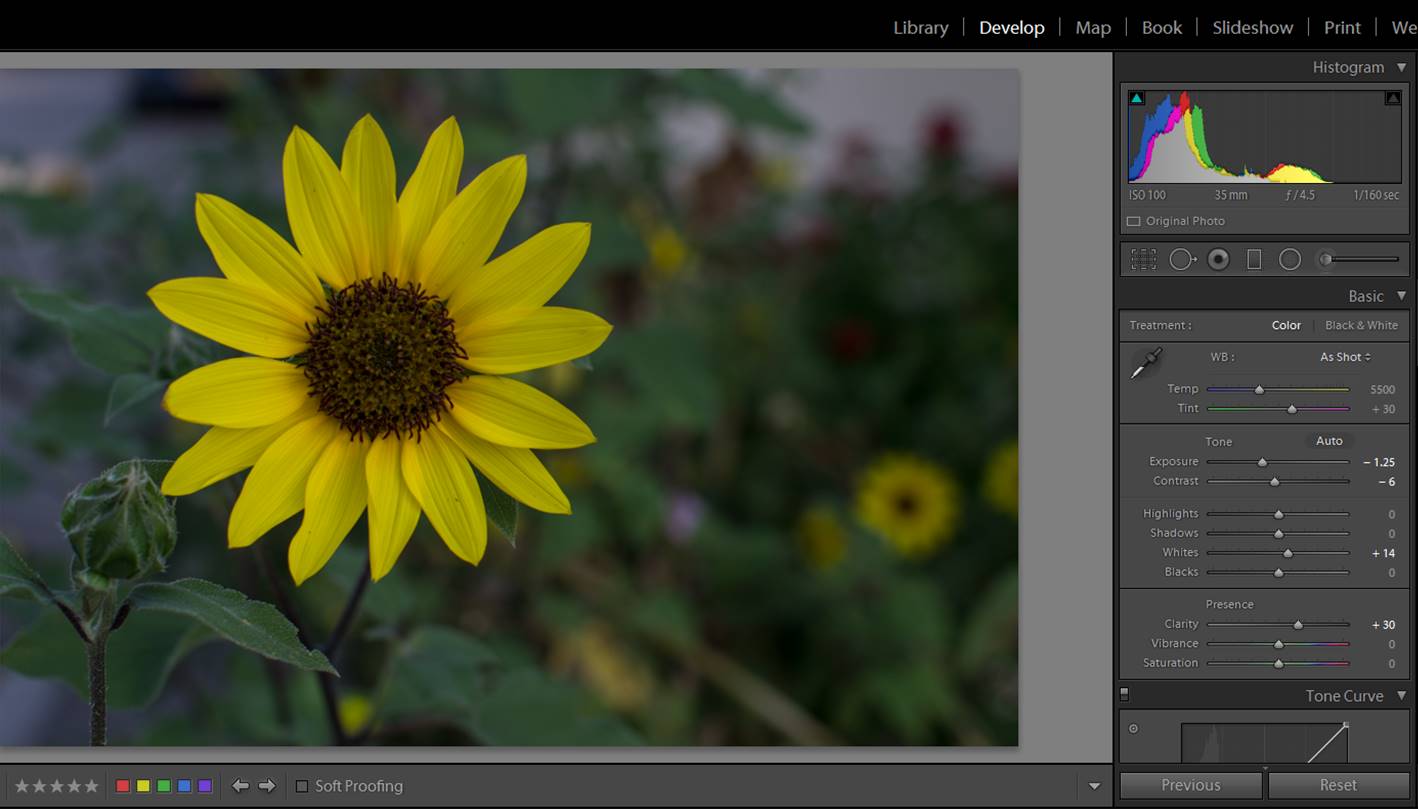
Imagine that you have a photo like the one below. The background is ok because it is quite dark, but your flower does not really stand out.
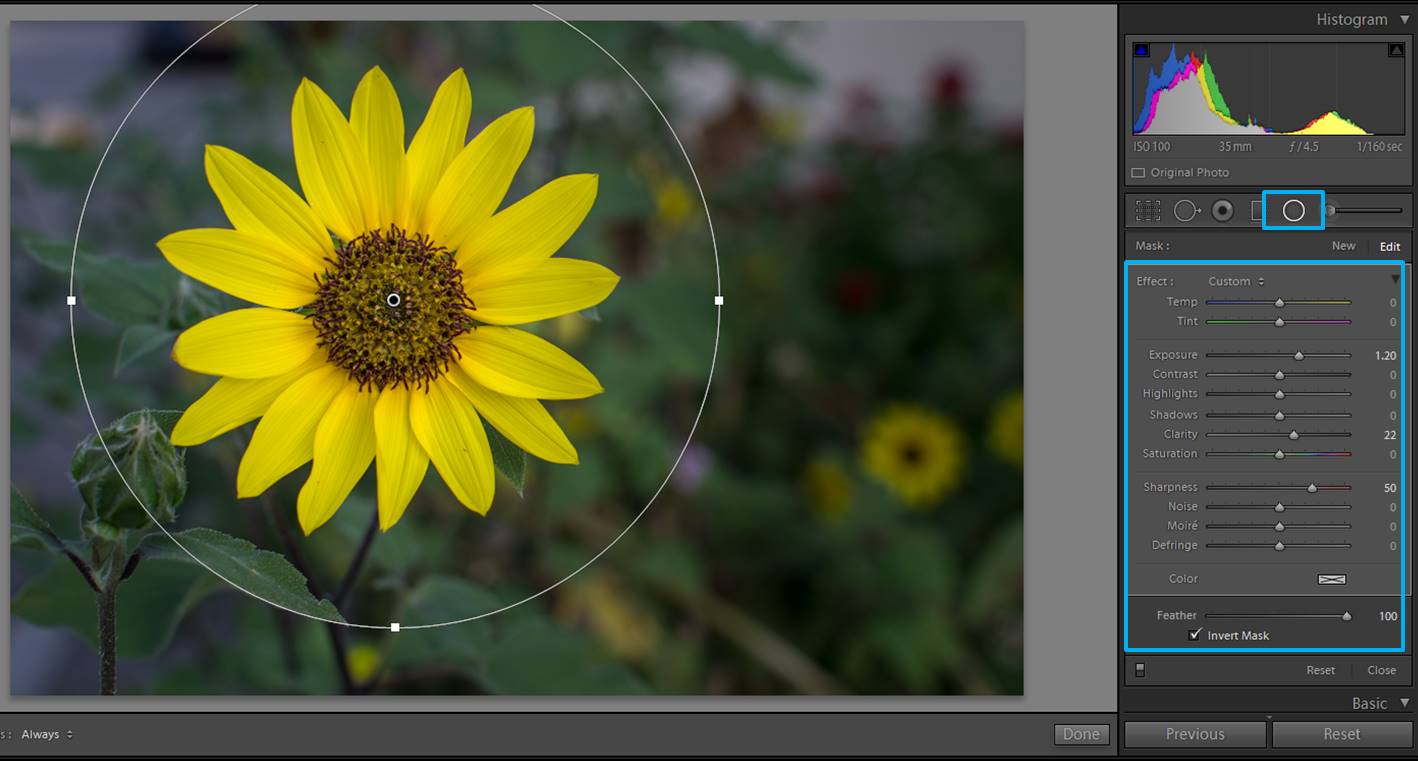
In this situation you can use a circular filter to highlight your flower and make it the focus of your image. I usually add the circle, then I check “Invert Mask” so that all the adjustments will affect the inner part of the circle and I feather it at 100 to make the adjustments look gradual. You might need to play a little with your adjustments, but usually you will need to increase the exposure. I also like to add a bit of sharpness and clarity, but this is up to you!
I use the circular filter to increase the exposure of my main subject/s and make them pop out from the darker background.
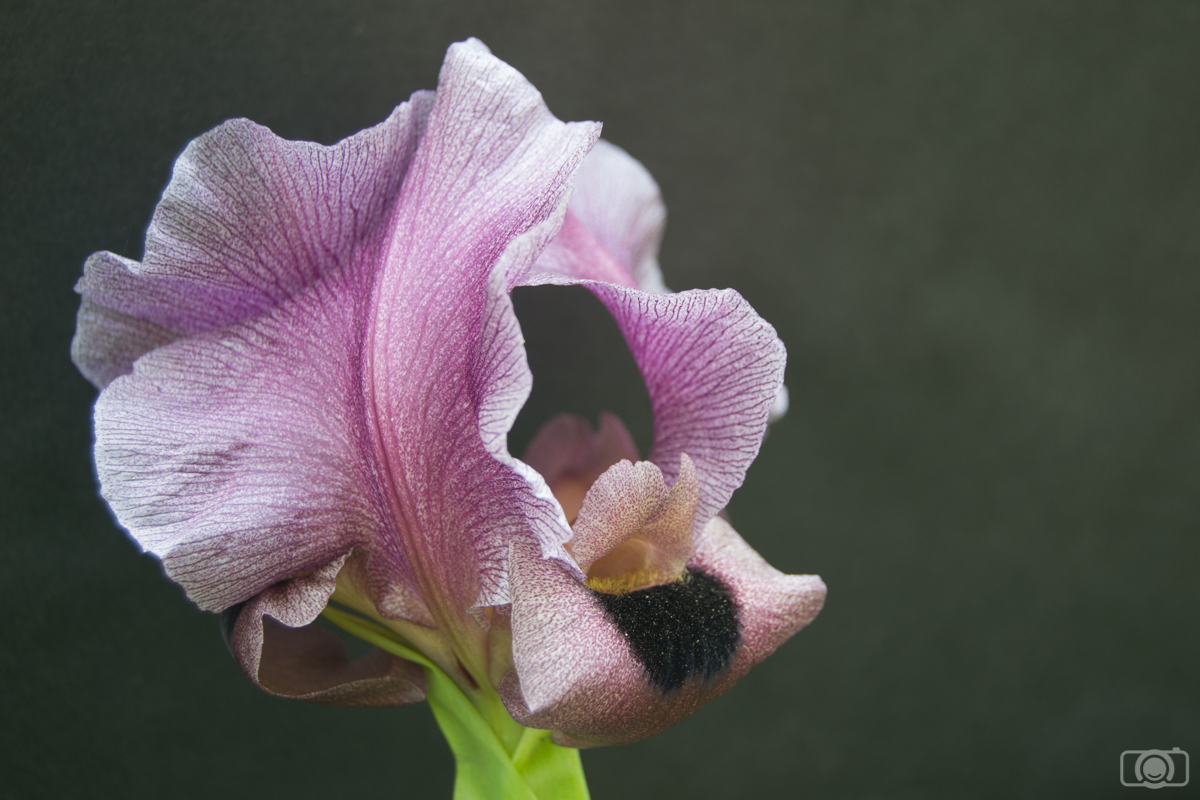
If you are using black backgrounds…make them really black!
If you are using black backgrounds for your flower photography, they might look a bit grey-ish in the original photo.
Straight out of the camera photo
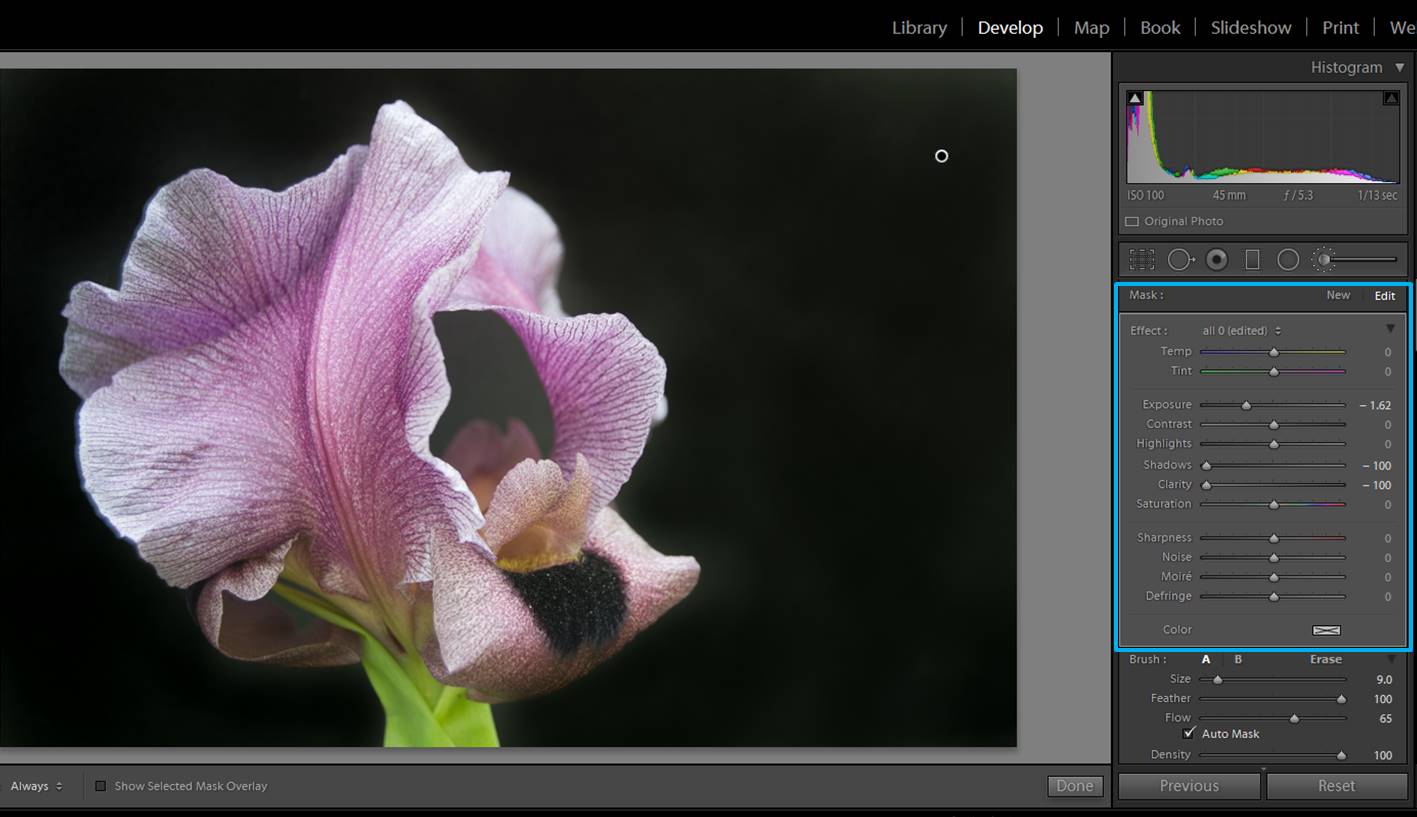
Make them really black by using Lightroom brush tool. You just need to “paint” the background. I like to check the “Show Selected Mask overlay” because then I can see in red the places where I paint. Another tip: check “Auto Mask” and Lightroom will detect the edges and will help you to paint just the background (and not “stray” with the brush onto the flower).
When you have the “Show Selected Mask Overlay” checked, you can see in red the places where you “painted” with your brush. Check also “Auto Mask” to make Lightroom help with not painting outside of the borders.
Once you have painted the background, adjust the brush by decreasing the exposure, making the shadows darker (slide to the left) and make it smooth by moving the Clarity slide to the left too.
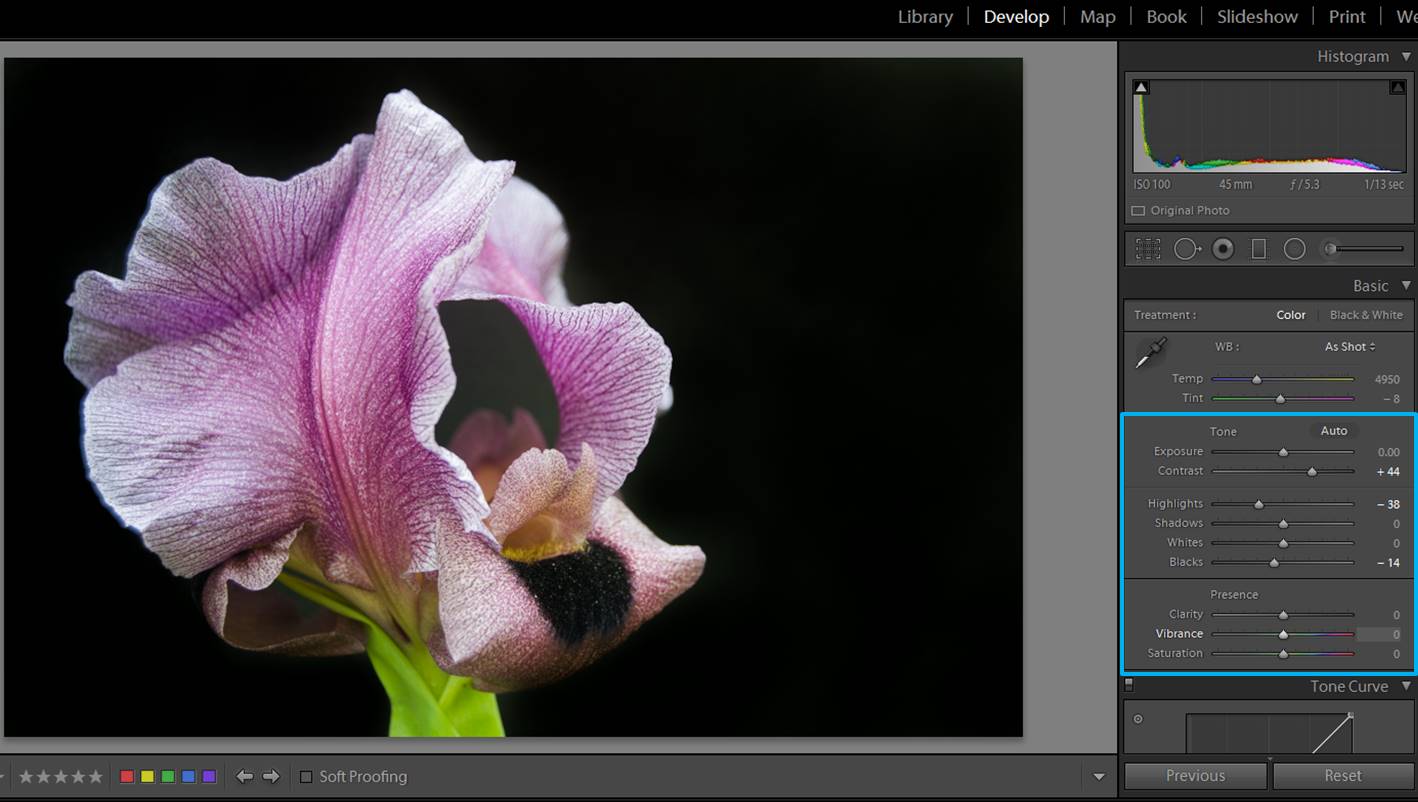
Last thing is doing general adjustments to the photo to make the flower really stand out!
Now it is your turn to practice with your own flower photos and Lightroom! Do you have a tip I have not included here? Tell me about how it goes with your editing! Have a happy post-processing!!
I think that flowers are one of the most photogenic subjects in nature. Do you agree? Their big diversity of colors, shapes, and sizes offers endless possibilities. In addition, there is something attracting about the ephemeral nature of flowers. I always think about the impermanence of things when I am taking photos of flowers. It’s as if they are telling me “Look at us, we are beautiful and we are not going to wait here for much longer, so bring your camera already”. As Frida Khalo said: “I paint flowers, so they will not die”. I am not good at painting, so I take photos of them instead! Today I am sharing with you some of the tips and tricks I learned along the way.
Keep it simple
Flowers are beautiful, so they don’t need much more things in the frame beside themselves. I agree that this might be a matter of aesthetic preferences, but in general the most part of the flower photos that will make you go “Oooooh” have very few elements in the frame, if not just a single flower.
Flowers are beautiful subjects that don’t need much more in the frame in order to show their beauty.
Eliminate distractions
Your main objective in flower photography is to highlight the main flower/s in your photo. This means that you need to eliminate from the frame as many distracting elements as possible. These elements can be other flowers, branches, anything you can find around gardens and parks… there are a lot of them! You can try to crop out distractions by doing a close up of the flower. You can also move the flower so that the distracting elements disappear from the frame. Another option is to move and change the perspective in which you are taking the photo.
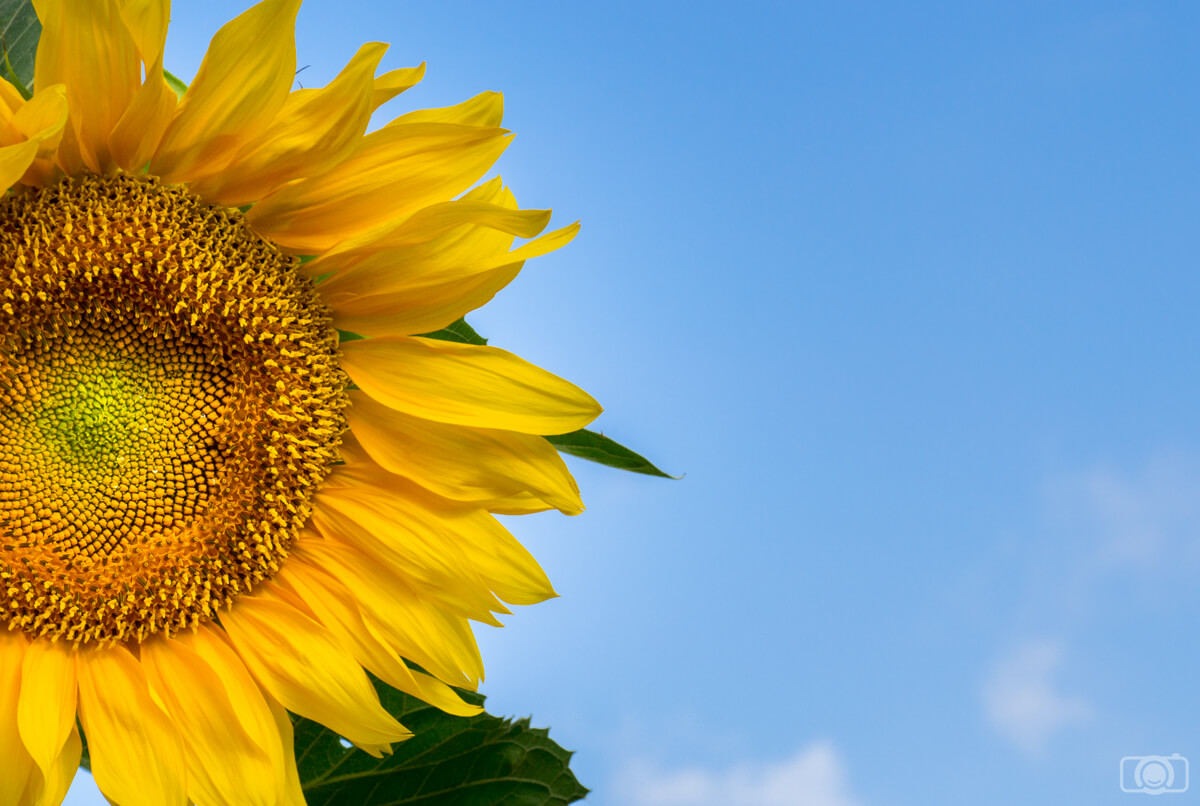
The sunflower field where I took this photo was a bit messy. To avoid distractions I change the perspective and instead of taking a photo with the other sunflowers I decided to use a single sunflower in my composition.
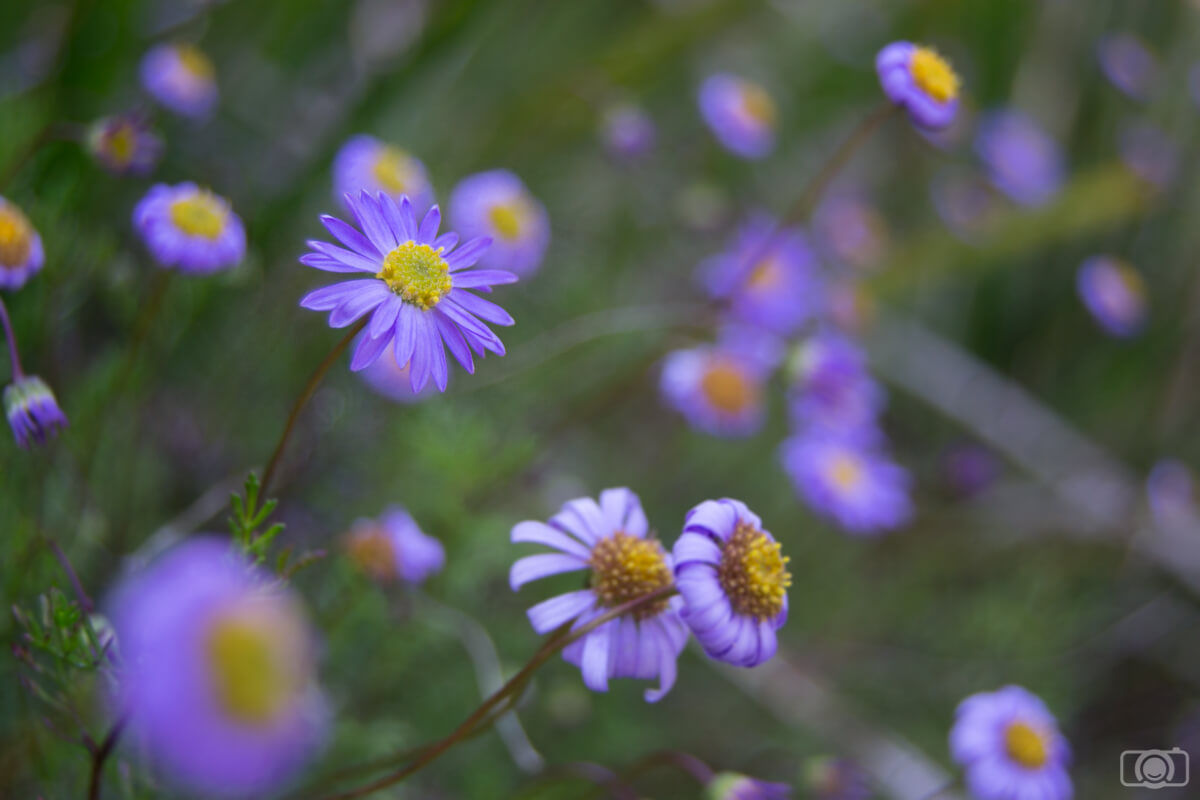
There is another way to make a background look less distracting: make it blurry. You can achieve this effect by using a wide aperture (low aperture number). f/5 or lower can work really well. It is also useful to keep in mind that a longer focal length will make the background blurrier. For example, if you shoot with a 150mm lens, the background will be blurrier than if you use 35mm. In conclusion, a good option (if possible) would be to combine a low aperture number with a long focal length.
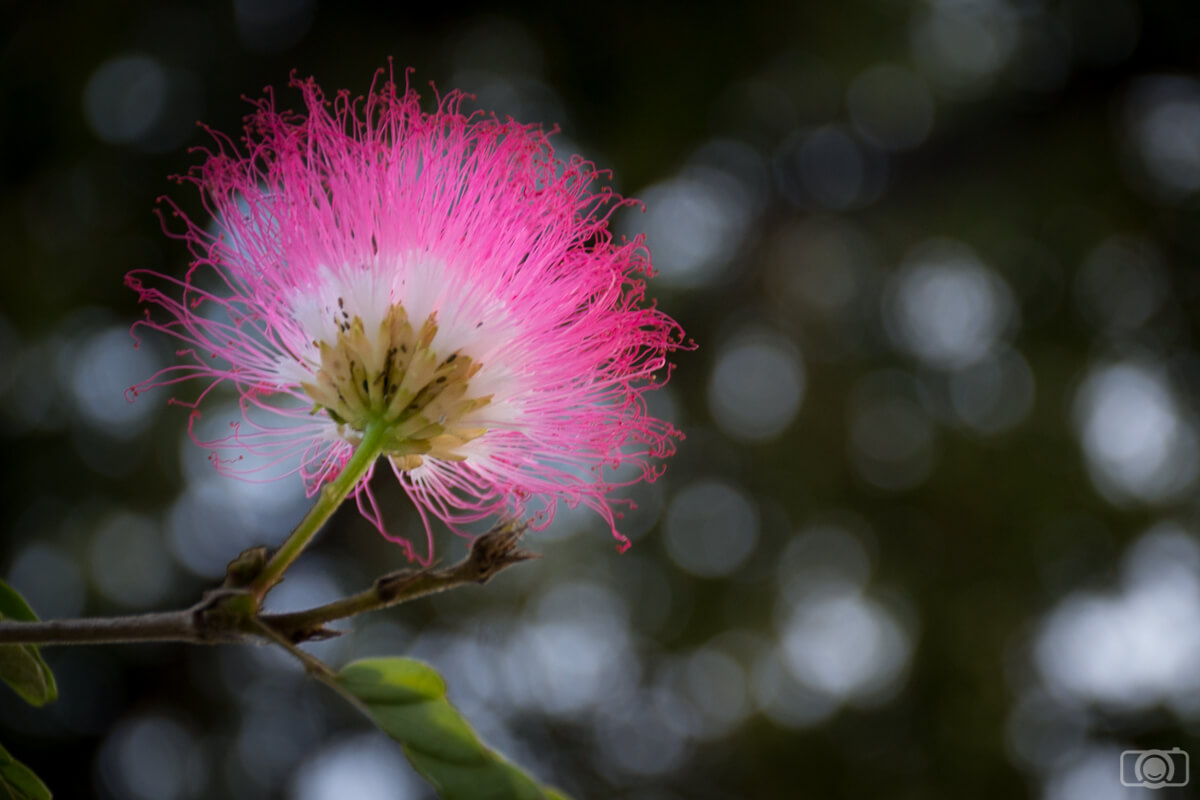
I took this photo with an aperture f/5 and a 70mm focal length. You can see that in this particular situation I managed to blur out the background. You might need to check the aperture and focal length that will work better for your photos. Wide apertures and long focal lengths will give you a good starting point.
Make sure that you are focused on the right place
This is especially important if you are using wide apertures. You might be so focused on getting blurry backgrounds that you might lose a bit of the focus of your camera. Think always which part of the flower must be sharp in your photo. Then, after taking the photos, check that you achieved what you want. A lot of times I realized that I didn’t focus on the right spot only when I was back home uploading the photos to my computer! Oops!!!
Create your own backgrounds
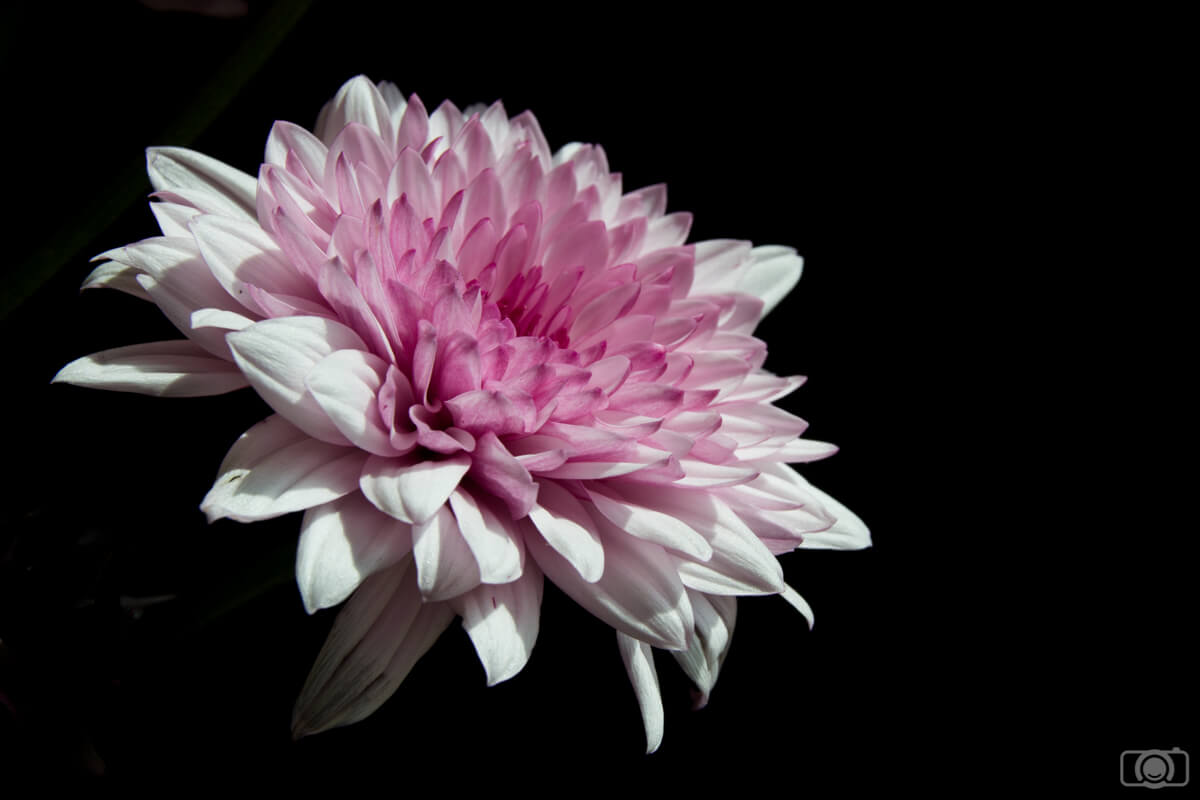
In some occasions, you can create your own distraction-free background. You can use a simple blackboard (or any other color you like) and just place it behind the flower. These photos lose the atmosphere that the surroundings provide them (because just by looking at the photo you can’t really tell where they were taken). But on the other side, by using a background you make sure to have at least some elegant images of your flower.
Black backgrounds make the colors of the flowers pop up.
Be aware of the wind
When you are shooting at low shutter speeds the slightest movement of the flower will make it appear blurry in the photo. Be aware of that! You can try to block the wind or wait patiently to have a moment of calm. You can also increase your ISO and/or use a wider aperture (meaning lower f-number) to be able to use a faster shutter speed. However, this blurry effect can be beautiful too. It can give a unique and creative look to your photo. If you like this blurry style… go for it!!
Try different perspectives
Don’t be shy trying perspectives. Take photos of flowers from the front, the back, from up, from down, just a part of the flower, the whole flower… You might be surprised by your results.
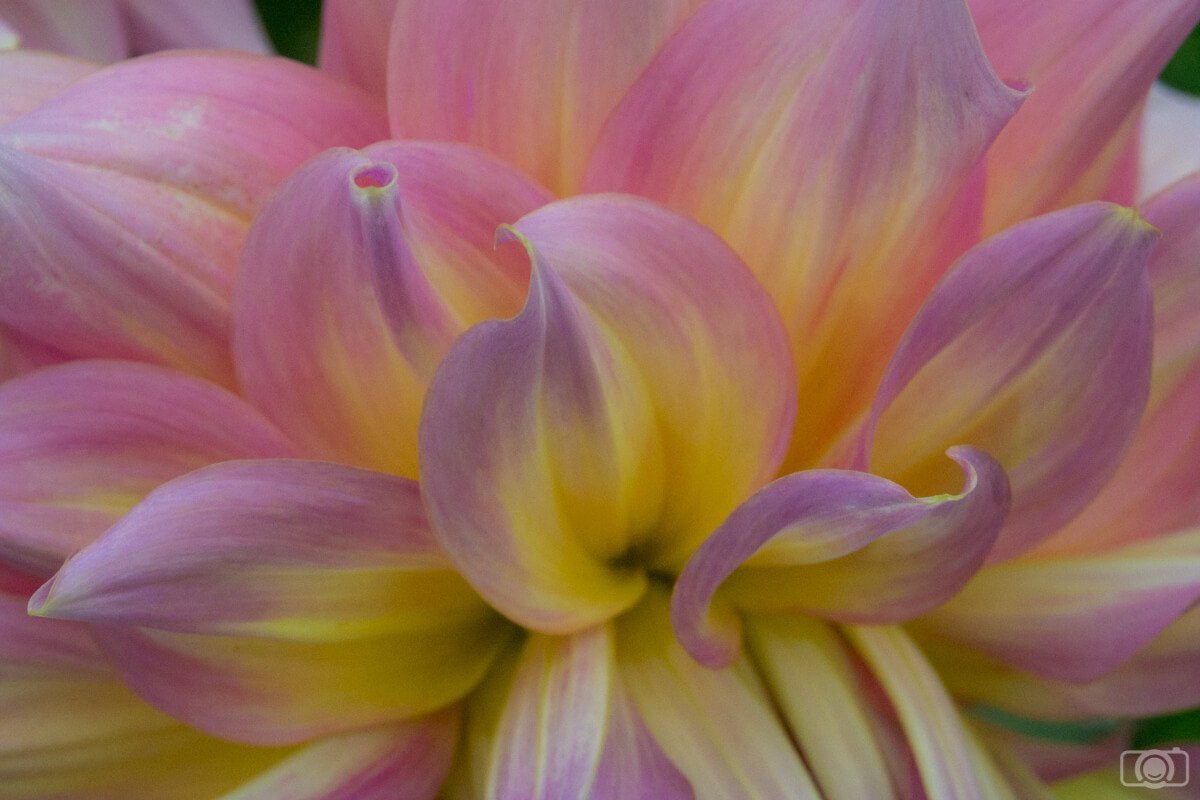
Changing the perspective I managed to get photos with a more abstract look
Allow yourself to be creative in the editing
Flowers are perfect for trying a more creative editing. You can use Photoshop filters to make them look like a painting, you can add a soft effect for a more romantic look… Have fun to experiment!! I will share with you some of my editing tips for flowers in my next article.
Flowers are a great photography subject if you like being creative in your editions
And now you just need to find some flowers and start practicing your flower photography! Do you have a tip I have not included here? Are you crazy about flowers as I do? Tell me about your experience! Have a happy shooting!!


 Facebook
 Google +