“You may find that the picture you want to do can only be made from a certain place, and you’re not there, so you have to physically go there. And that participation may spur you on to work harder on the thing, because in the physical change of position you start seeing a whole different relationship.” – Jay Maisel
yellow
The quote above by Jay Maisel perfectly expresses how interesting and challenging it can be to capture angles. Through my captures, I have somehow always had the tendency on shooting angles. I can’t recall when it all began but there is just something about it. It could be through looking up at buildings, or an exquisite architecture of a building, or lines and structure, or an alley, or even looking down or just simply whilst capturing macro shots of flowers. Photography is an expression of how we envision moments or things around us. Perspective and angles are a unique way to express the vistas of everything around us creating an impression and imprint in our minds.
It isn’t something that can be planned as it requires observation and experimenting as well. As always, letting it come naturally to you is the best way to capture angles. There may be times when nothing motivates you to do an angled shot and that is completely okay. The moment will instantaneously present itself to you and all you will need to do is “click”.
structure
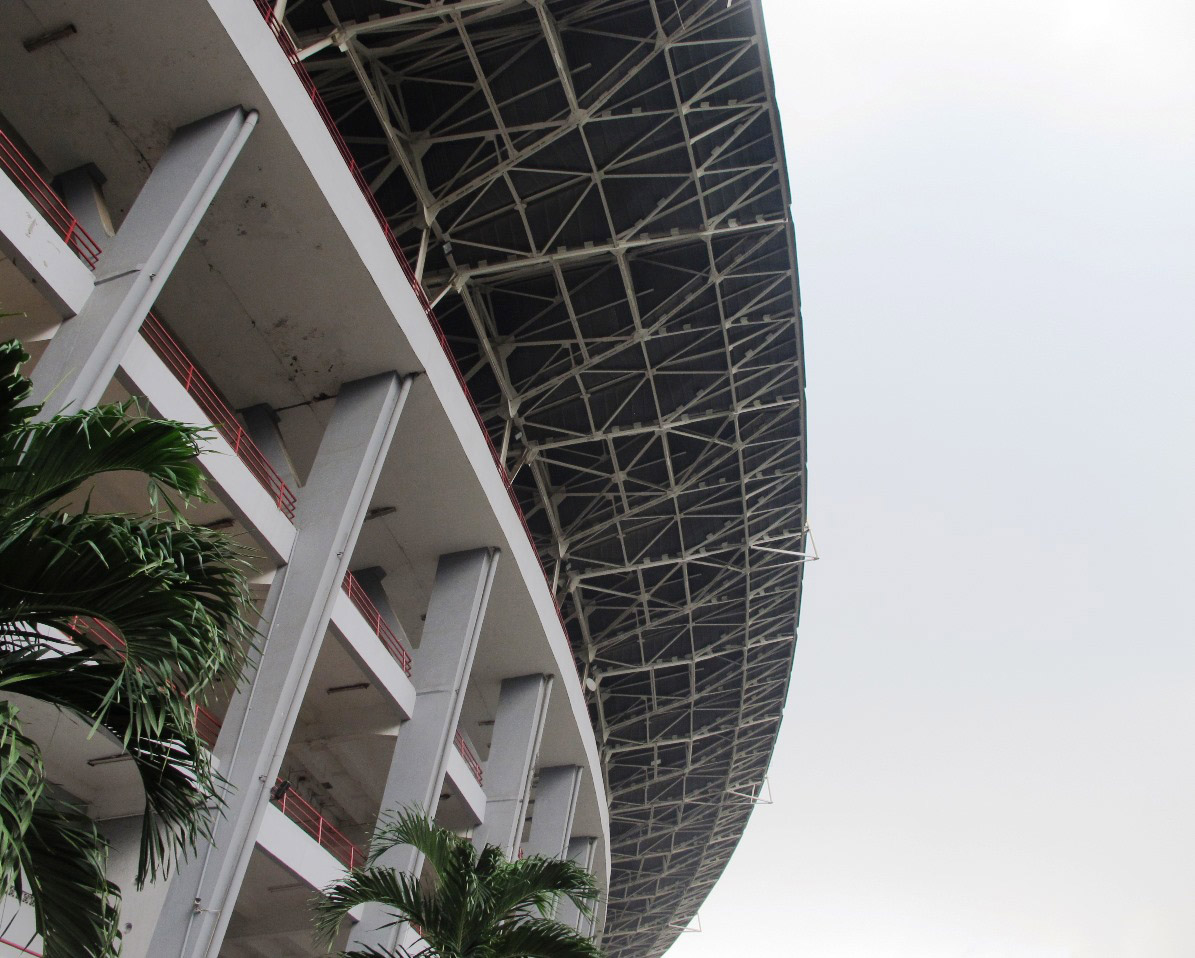
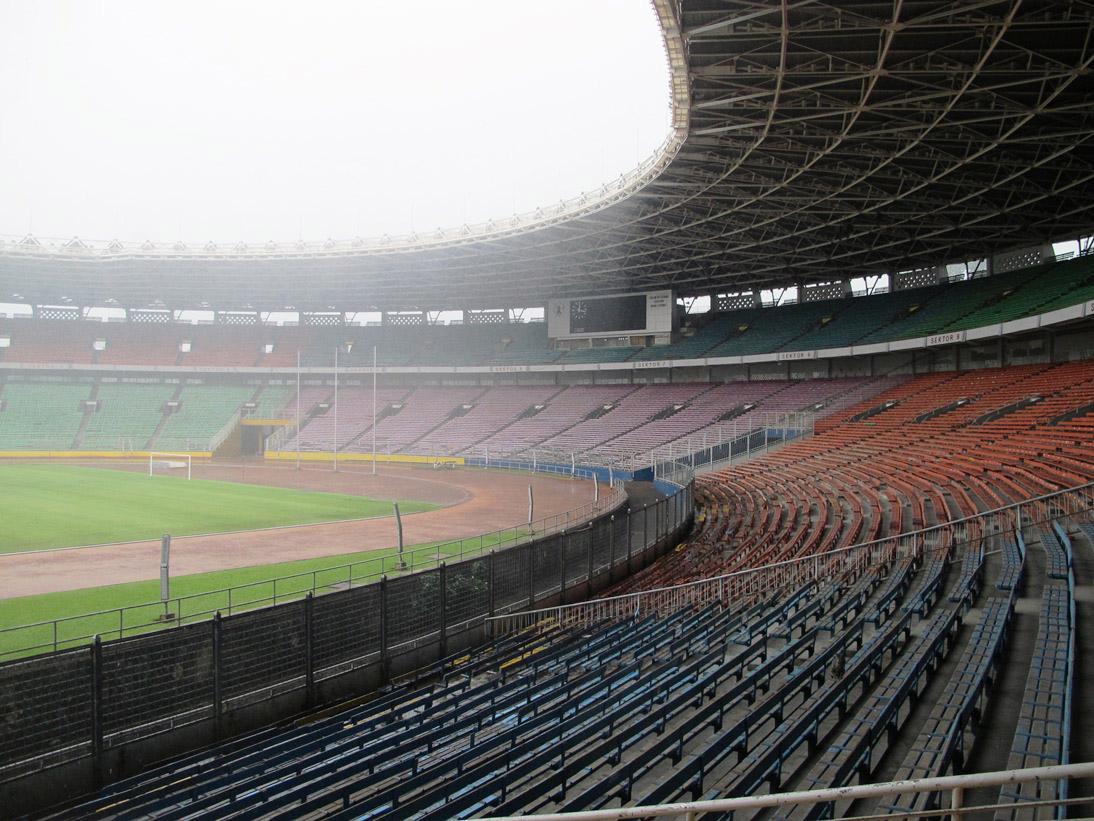
This outward structure of the National Stadium spoke to me. I began by looking up, clicking and experimenting the numerous aspects of the building. Experimenting would be by pointing and shifting your camera in various directions to frame the shot. It took a number of clicks to get the above results. To frame this shot, I wanted it to also have a minimalist touch so as to not completely focus on only the structure but leaving the blank space as well.
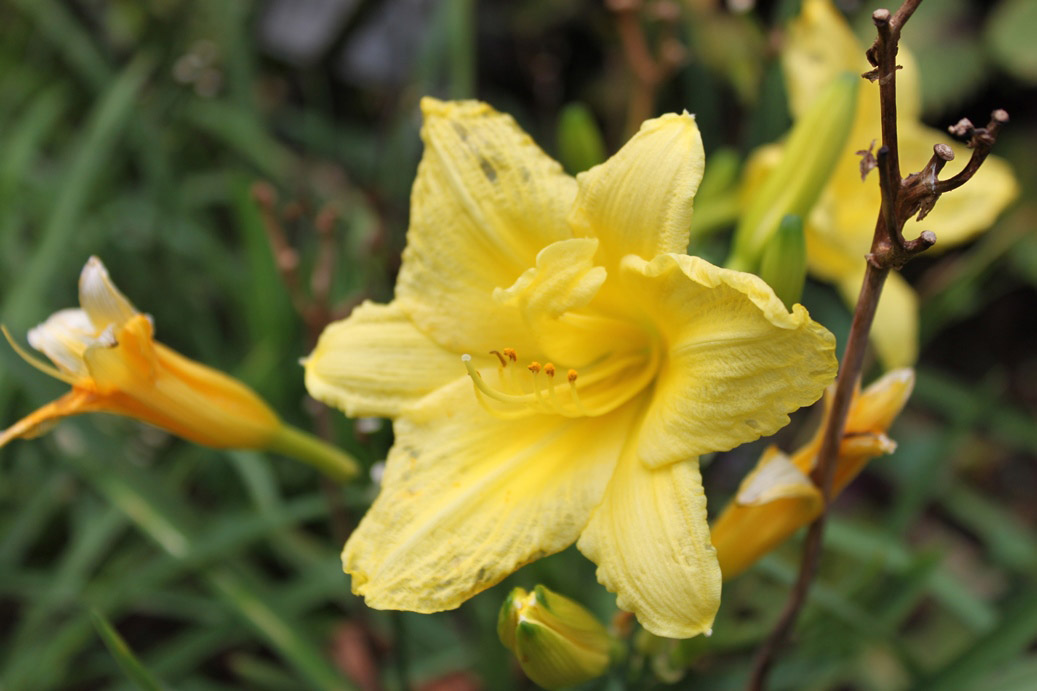
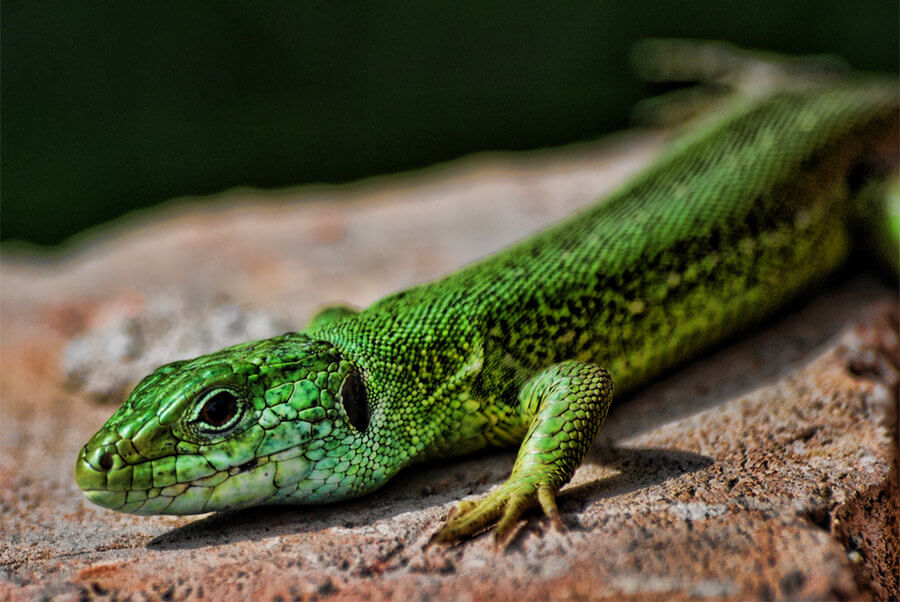
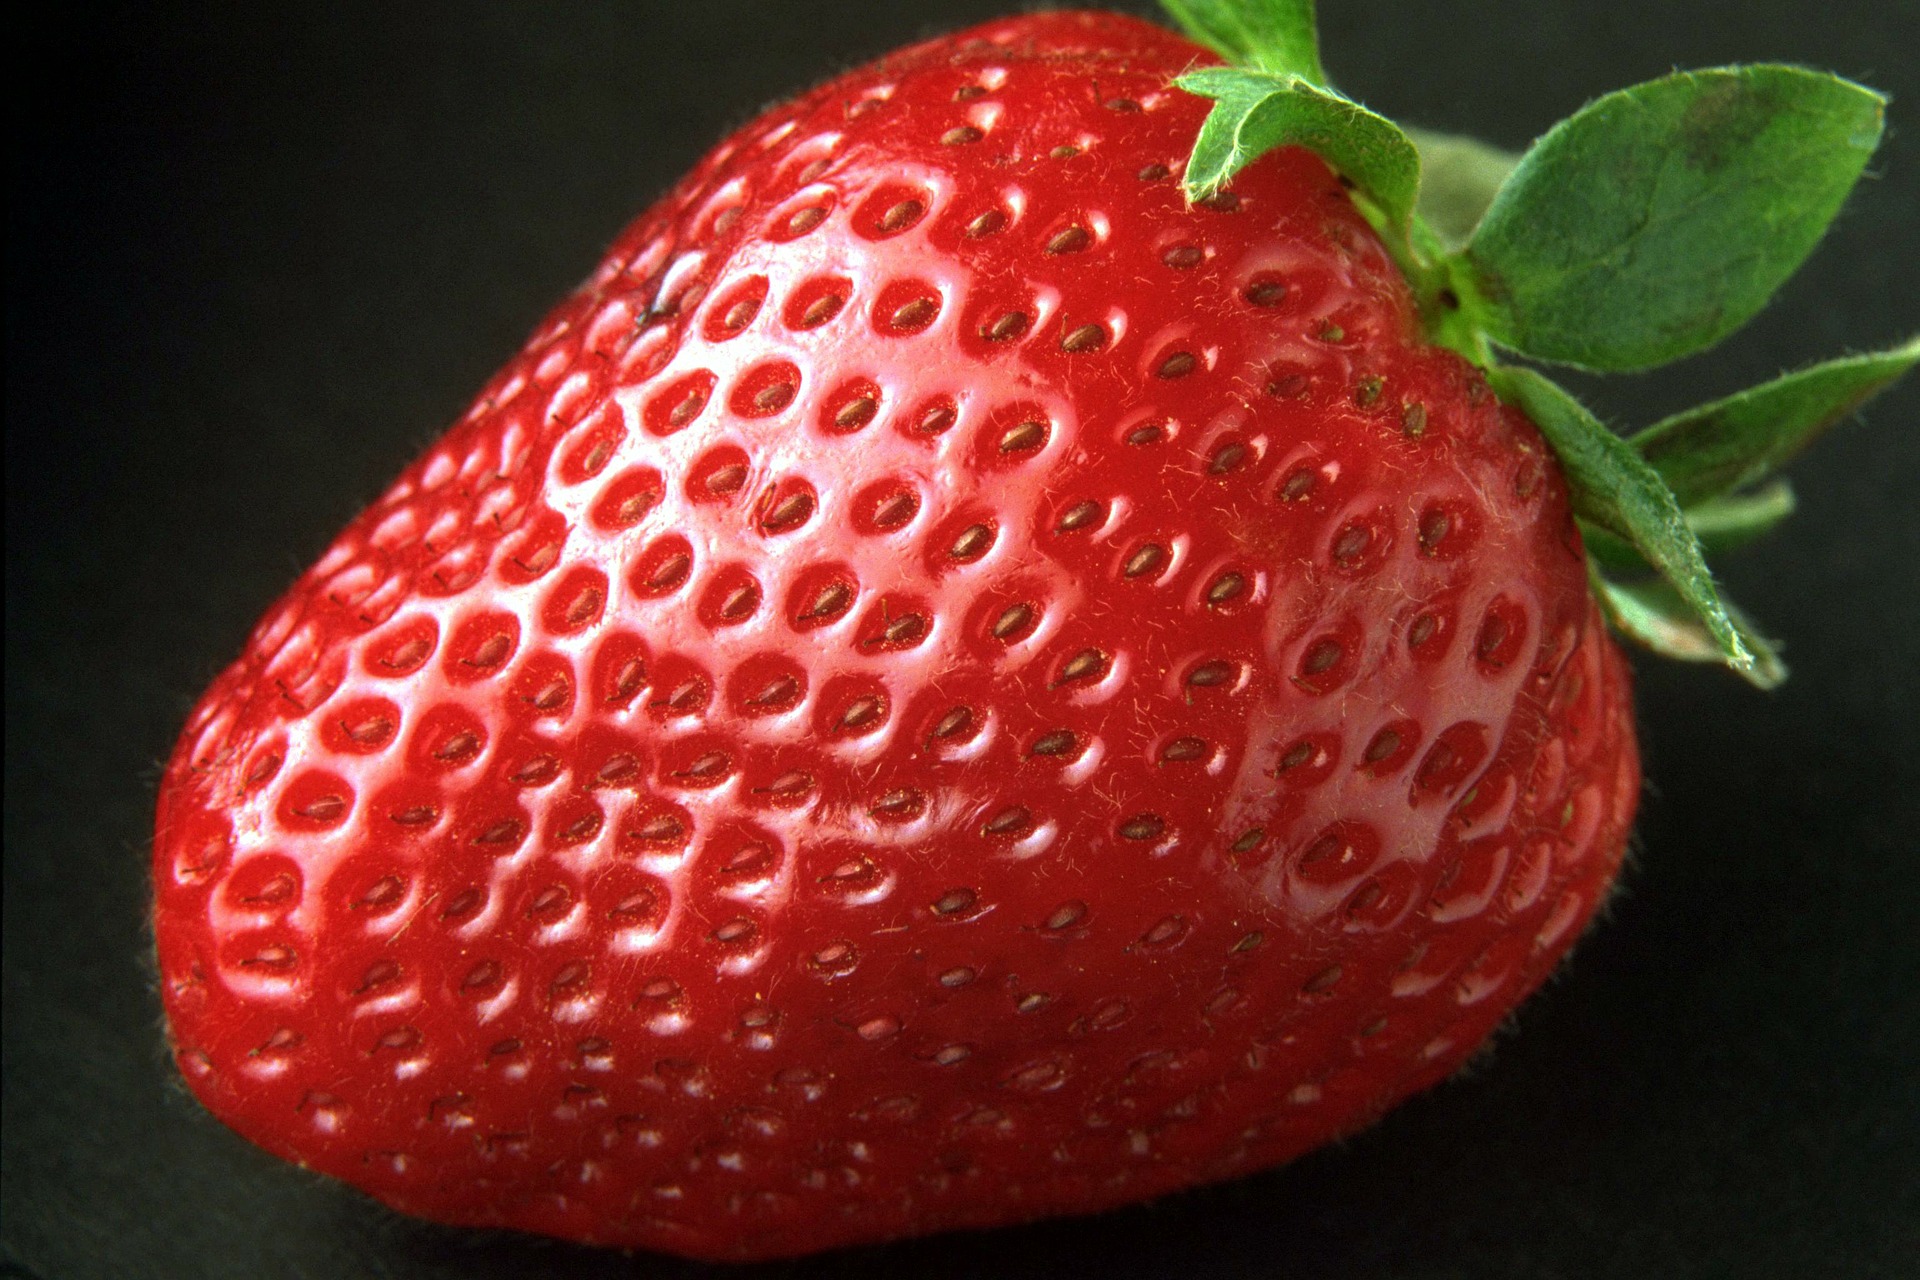
flower macro
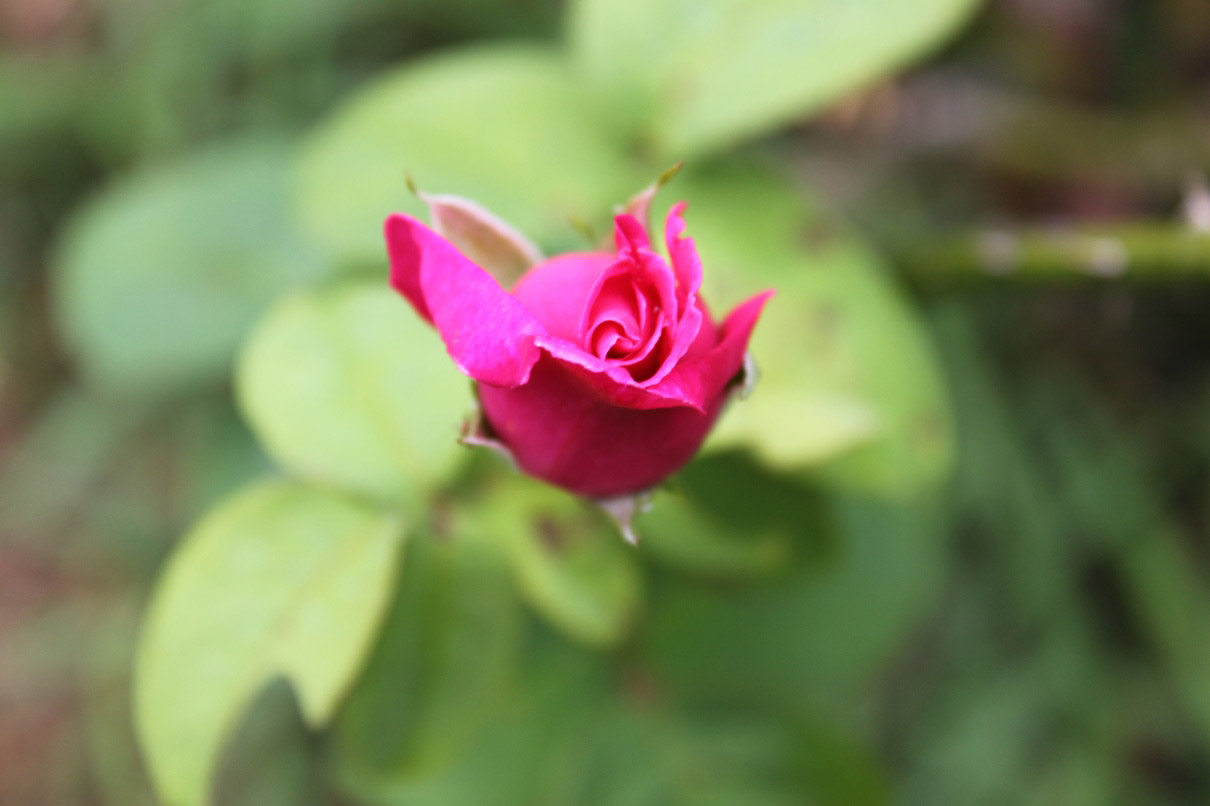
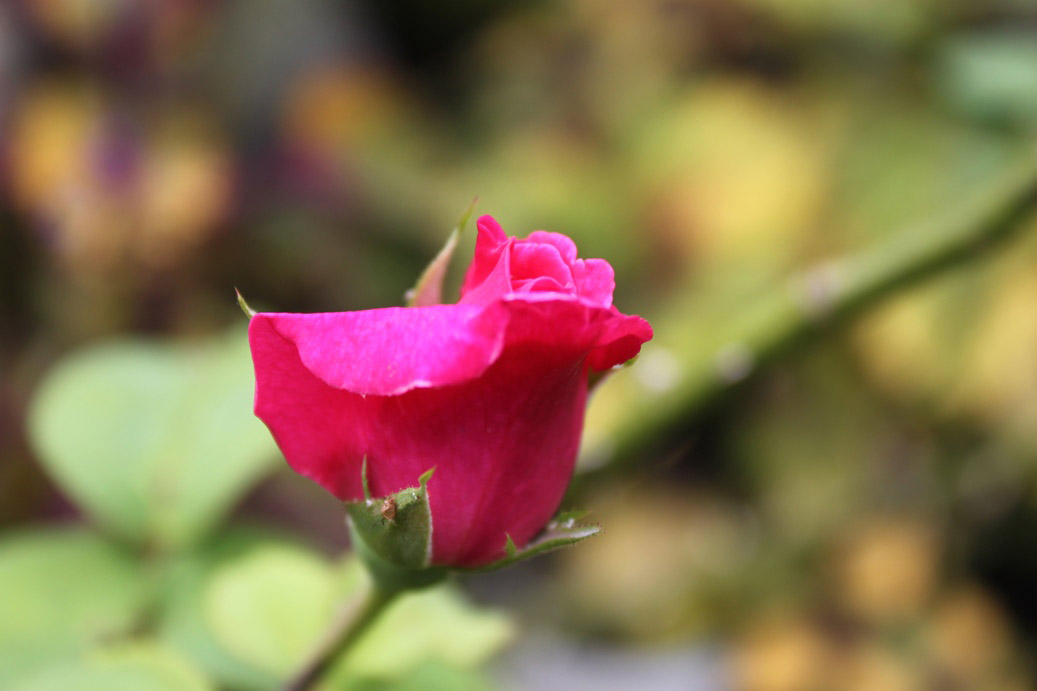
Nature and flowers are one of the easiest ways to try out various angles. This lovely pink half budding rose fascinated me. I wanted to try to get a specific viewpoint to portray as if the rose was looking at you. Balancing between getting close to the rose, composing the image properly and getting the right proportion was as interesting as much as a challenge.
curves of Stadium
“As people, we love pattern. But interrupted pattern is more interesting.” – Jay Maisel
Jay Maisel nailed it again with the above quote to describe the way I felt when capturing the image above. Standing in front of the National Stadium seeing all these patterns, lines, colours and structure was spectacular. It’s like all these elements came together for me to venture and shoot.
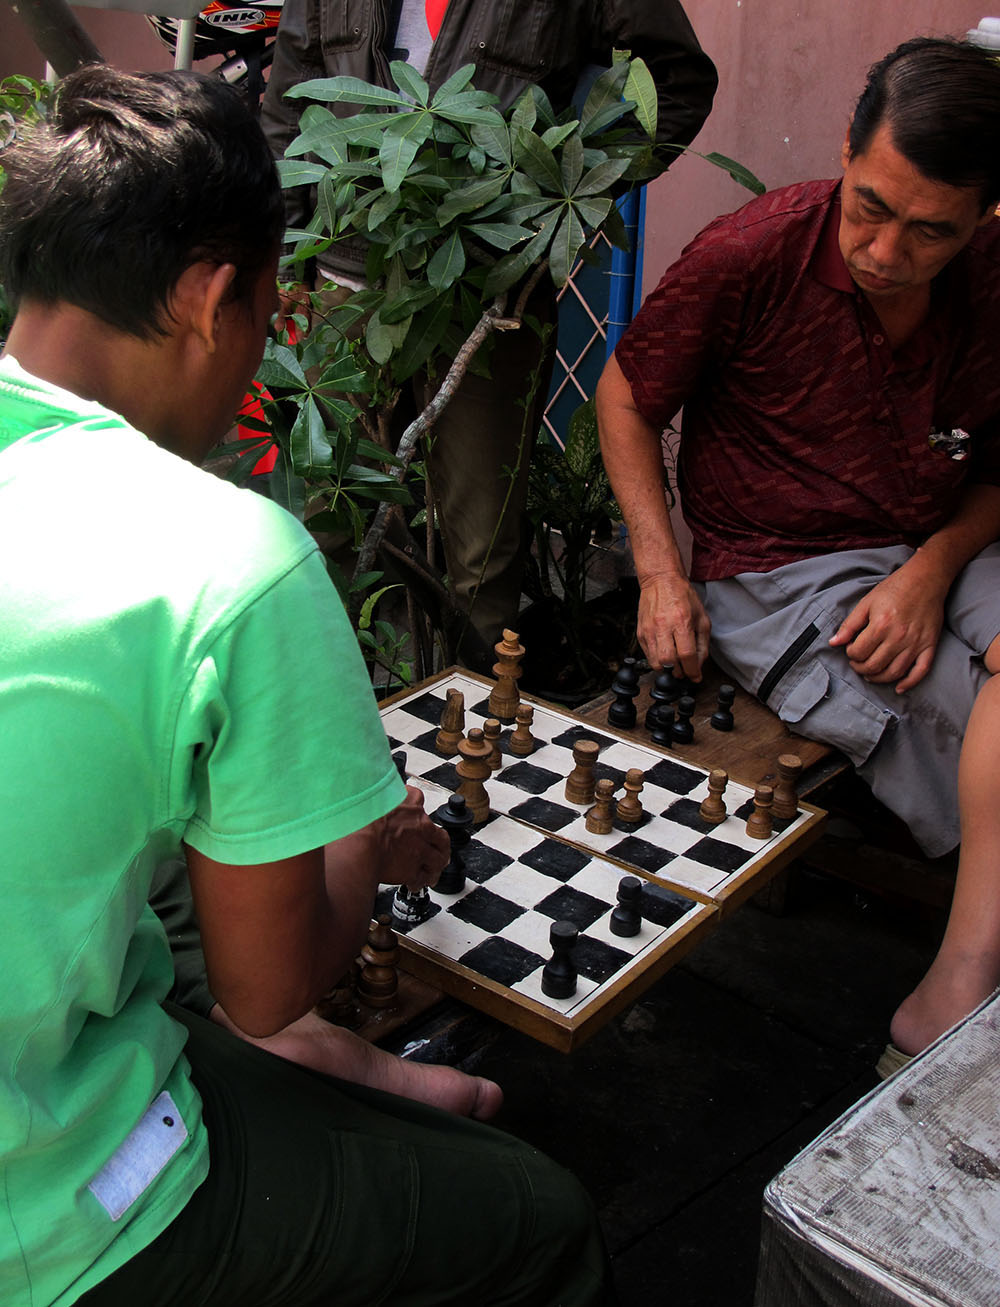
Check – Mate
Street photography can also be a perfect place to try and play out various outlooks. On a walking tour, I found two men playing chess and it intrigued me to explore a particular angle to capture the shot. So, I tried the side way peeking approach for a change, to focus more on the people and the chess board as a whole.
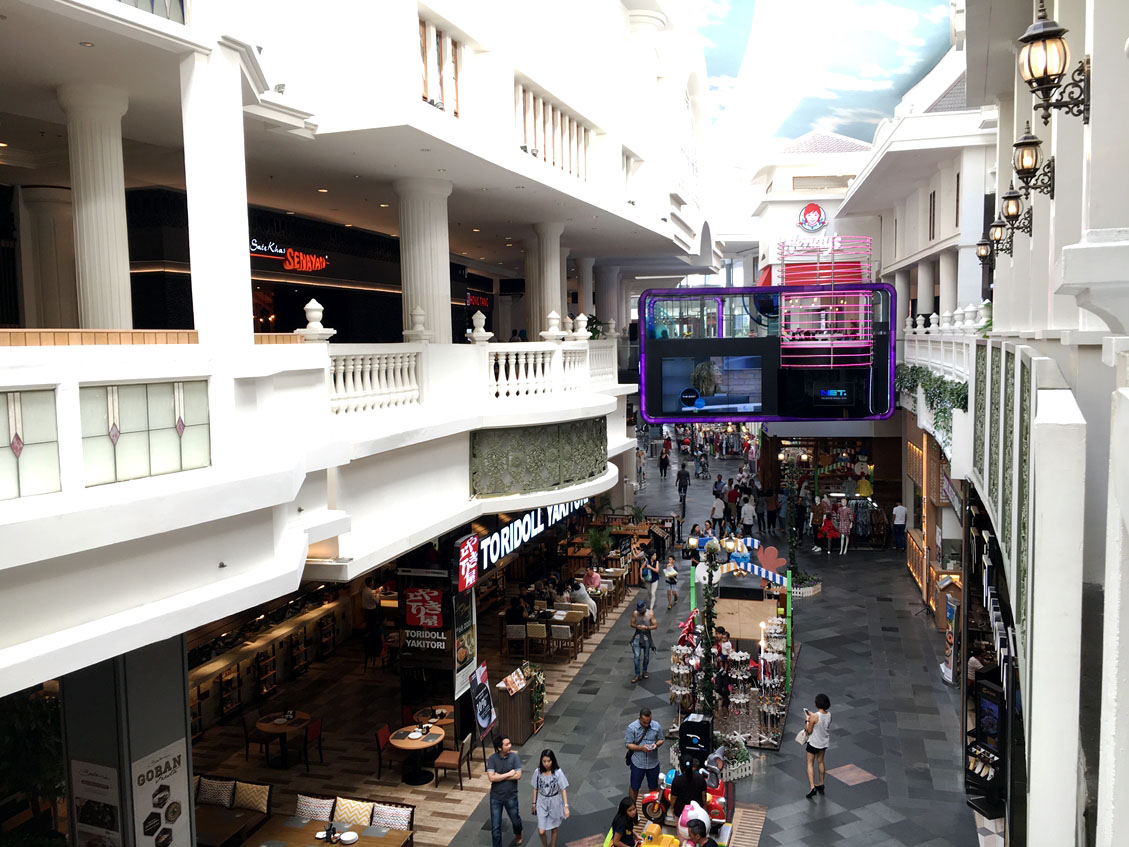
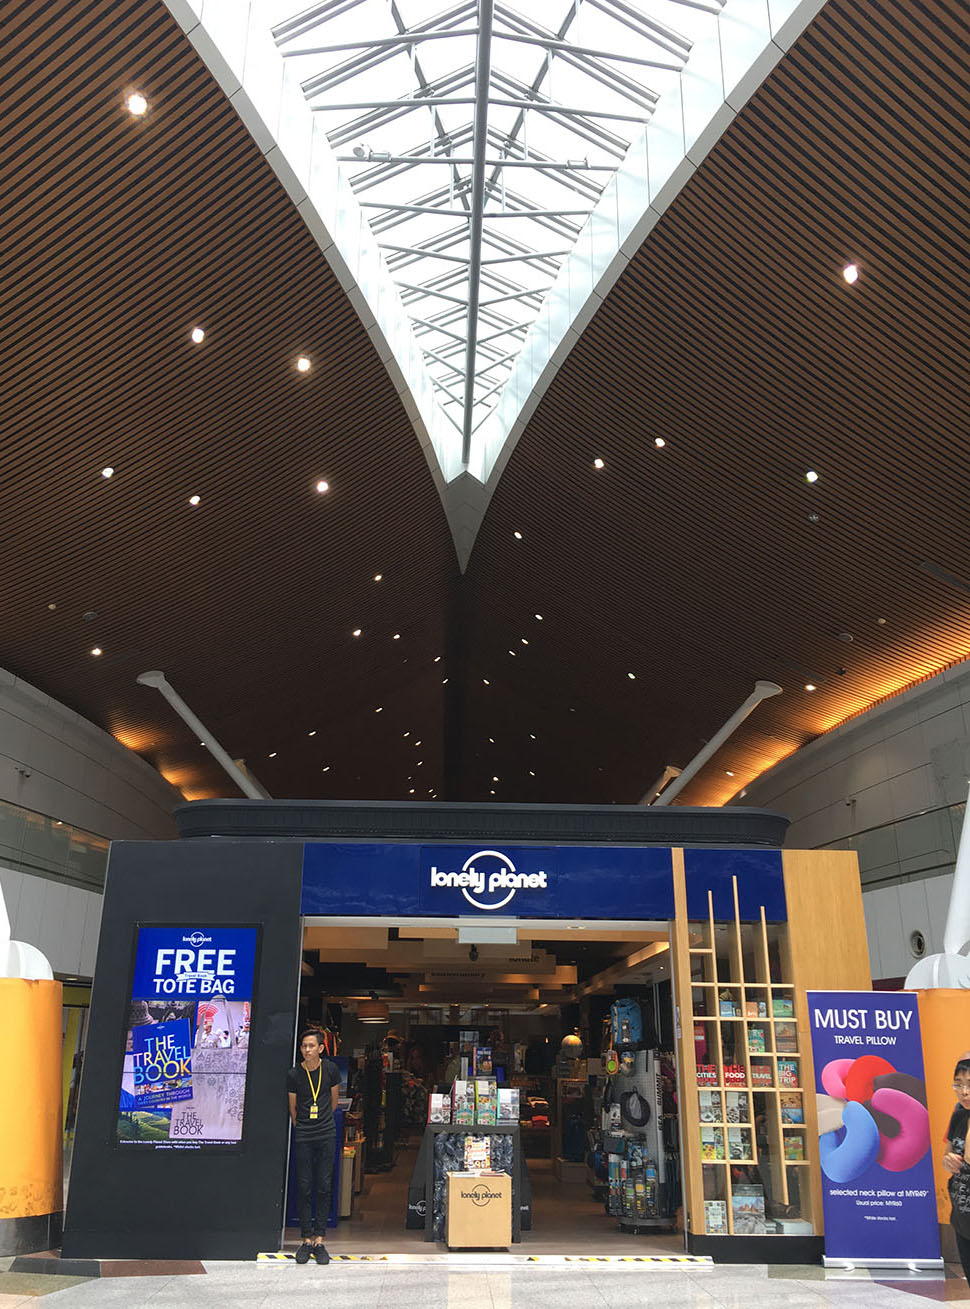
crowd
This particular mall has a unique architecture giving one a nostalgic feeling transporting you back in time. Whilst looking down, I wanted to capture the curved aspect with the lamps and lines in frame. Thus, a combination of colours, people and structure into one framed picture.
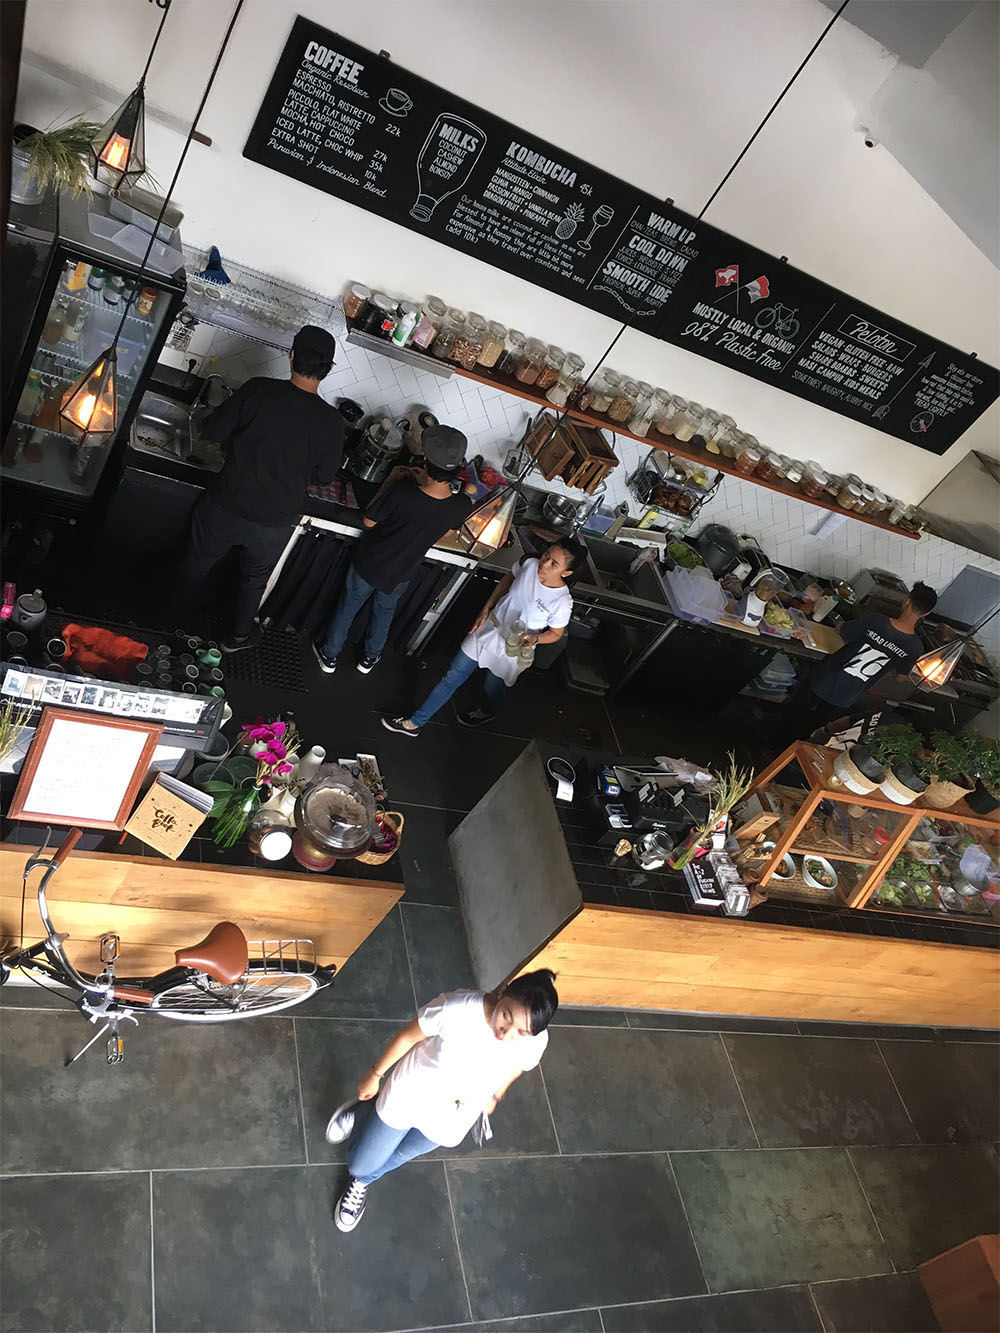
look
And here is the instantaneous moment that nature presents itself to you. Sitting at the restaurant, I randomly looked down, played with my iPhone by framing angles and hit the shutter. The whole scene filled with pretty wood interiors and layout was quite delightful to build into a moment.
crisp
Looking up through the details of a building has never been more fun if you can capture it in a completely distinct way. The idea behind this capture was to have the symmetrical shape on top, which is part of the top portion of the building I was in, look like it forms a cover of the other building. I tilted my phone so this captured moment directs your eyes upwards.
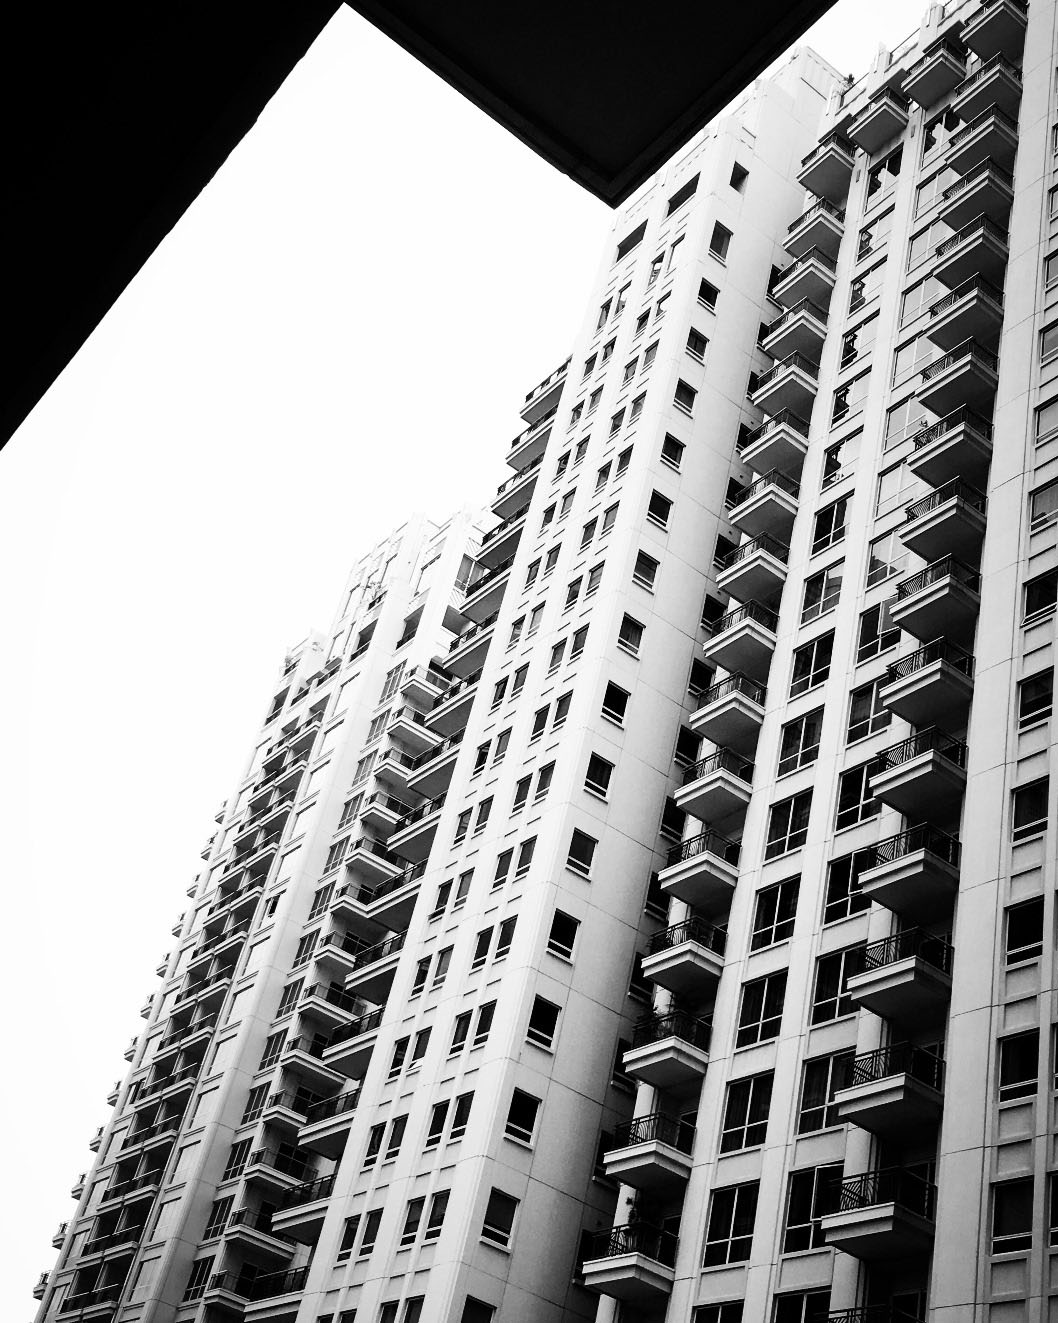
stand tall
Awed by the architecture of this airport in Kuala Lumpur, I wanted to snap this whole scene but focusing more on the lines and architecture. Yet, another spontaneous shot.
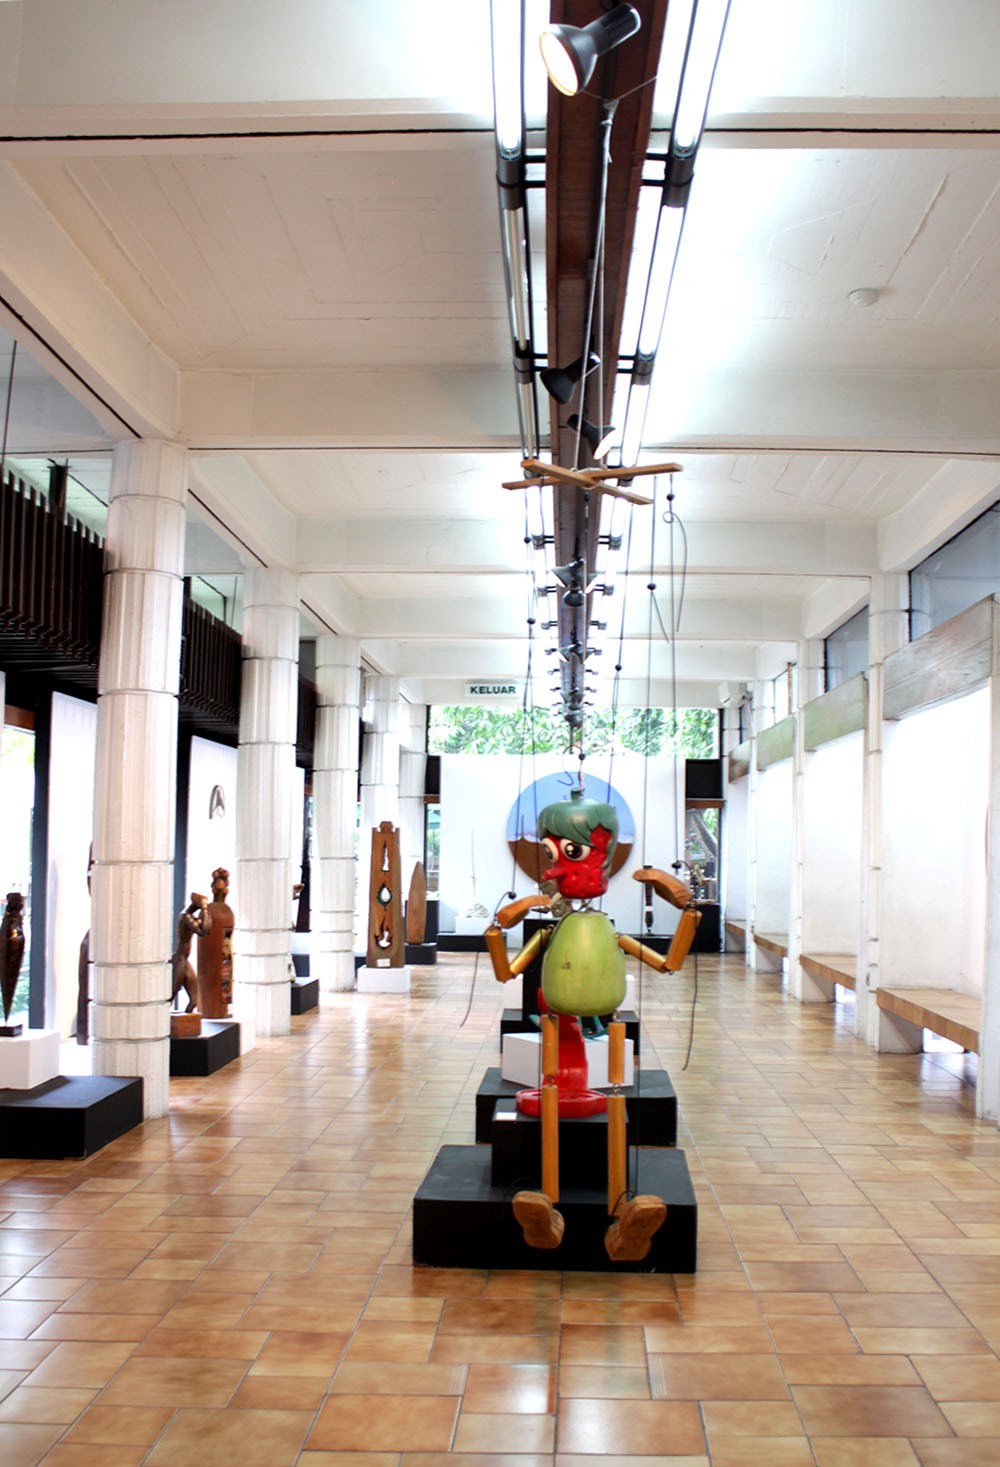
alley
Something about this exhibition and the rows making it seem like an alley, motivated me to point and shoot. Just to have a glimpse of what the exhibition was about and have a sort of symmetry was my main aim when framing the shot.
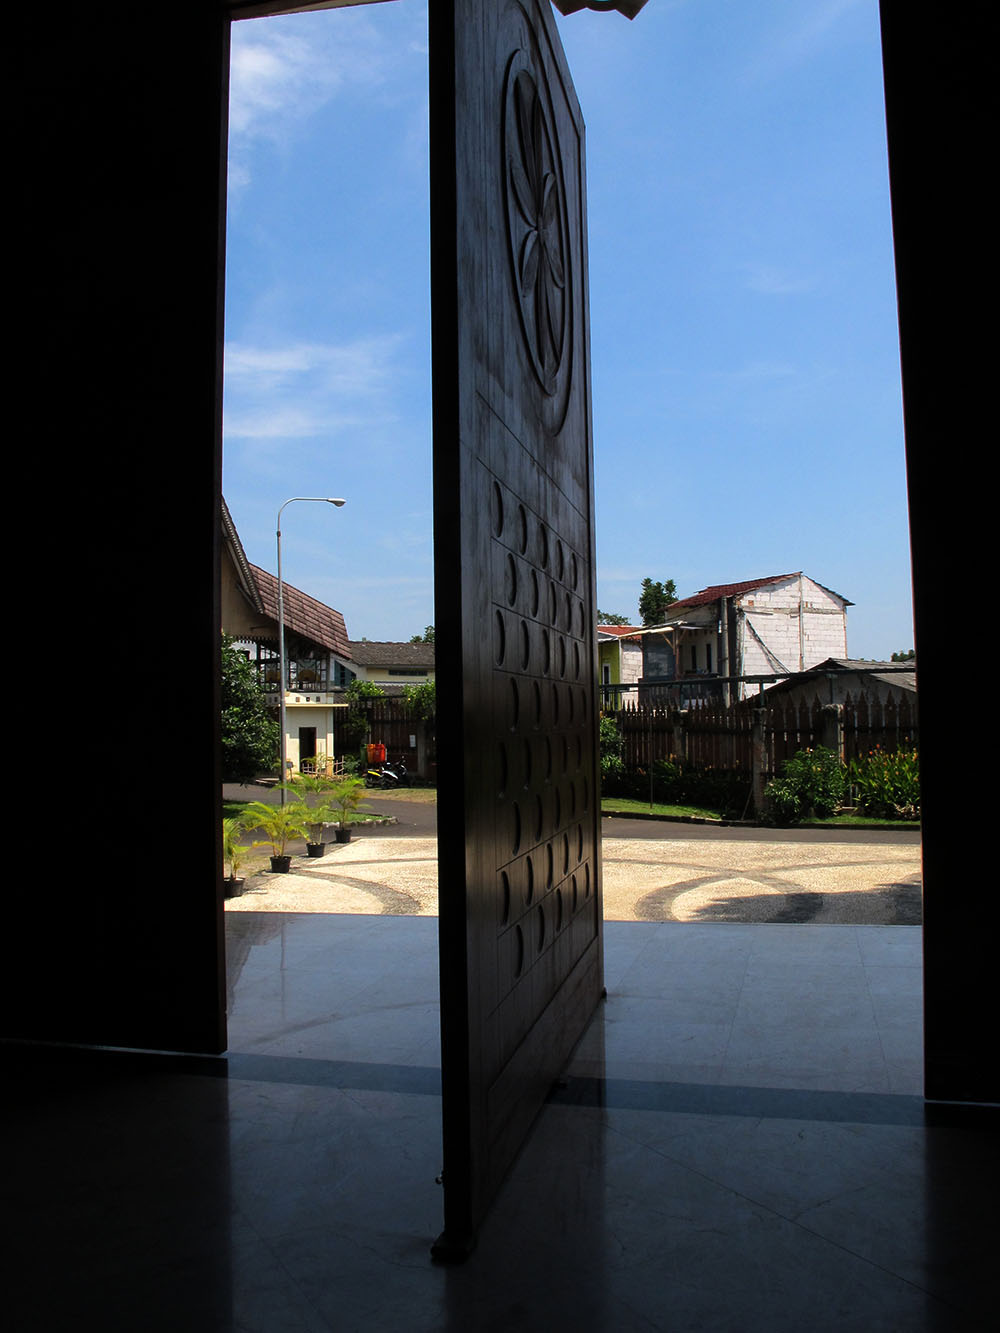
open
Lastly, standing inside the building I casually looked out and noticed the door ajar in the middle and the lovely blue on the outside. It definitely was a moment not to miss capturing. Angling from a few places and with a few clicks, voila this moment was created.
pink bud
Every angled shot makes you think outside the box bringing the image a new flavor. Playing with perspectives has allowed me to explore a new side and style to photography. It is like allowing nature to speak to you and at the same time being creative to make an image stand out. There are no set rules to achieve it but simply being alert and listening to the moment. Let’s continue to enjoy the various points of view and keep clicking!
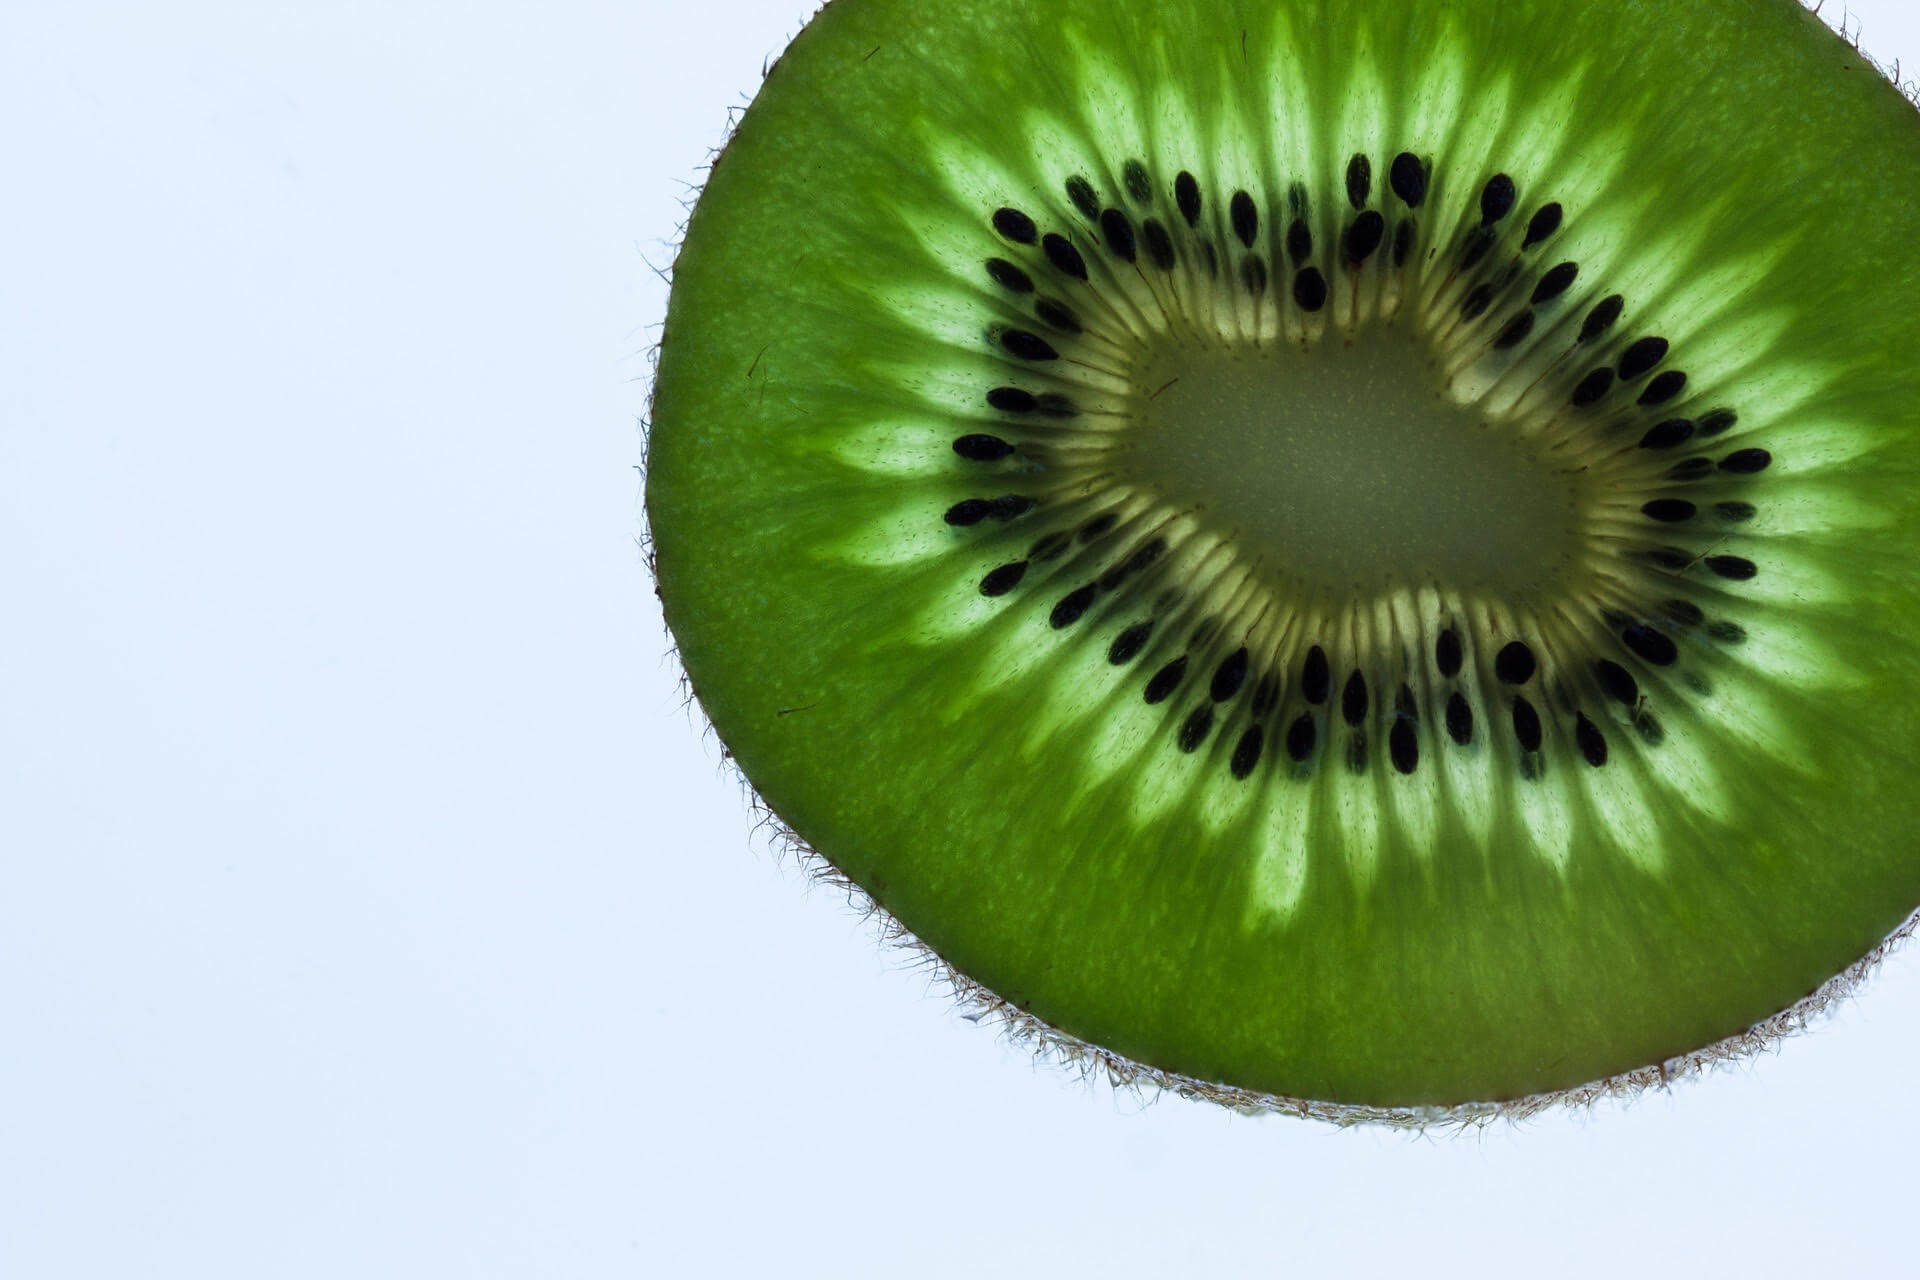
When we are talking about macro, we mean a super close up photo. In another word, it refers to a photographic setup which is capable of reproducing something on the sensor at or larger than its original size. For example, if you are shooting pictures of the object which is 2 cm. long, your lens should project a focused image that is equal or bigger than 2 cm. on the camera sensor.
Now after we are clear about the definition of macro we are going to focus on the settings and techniques.
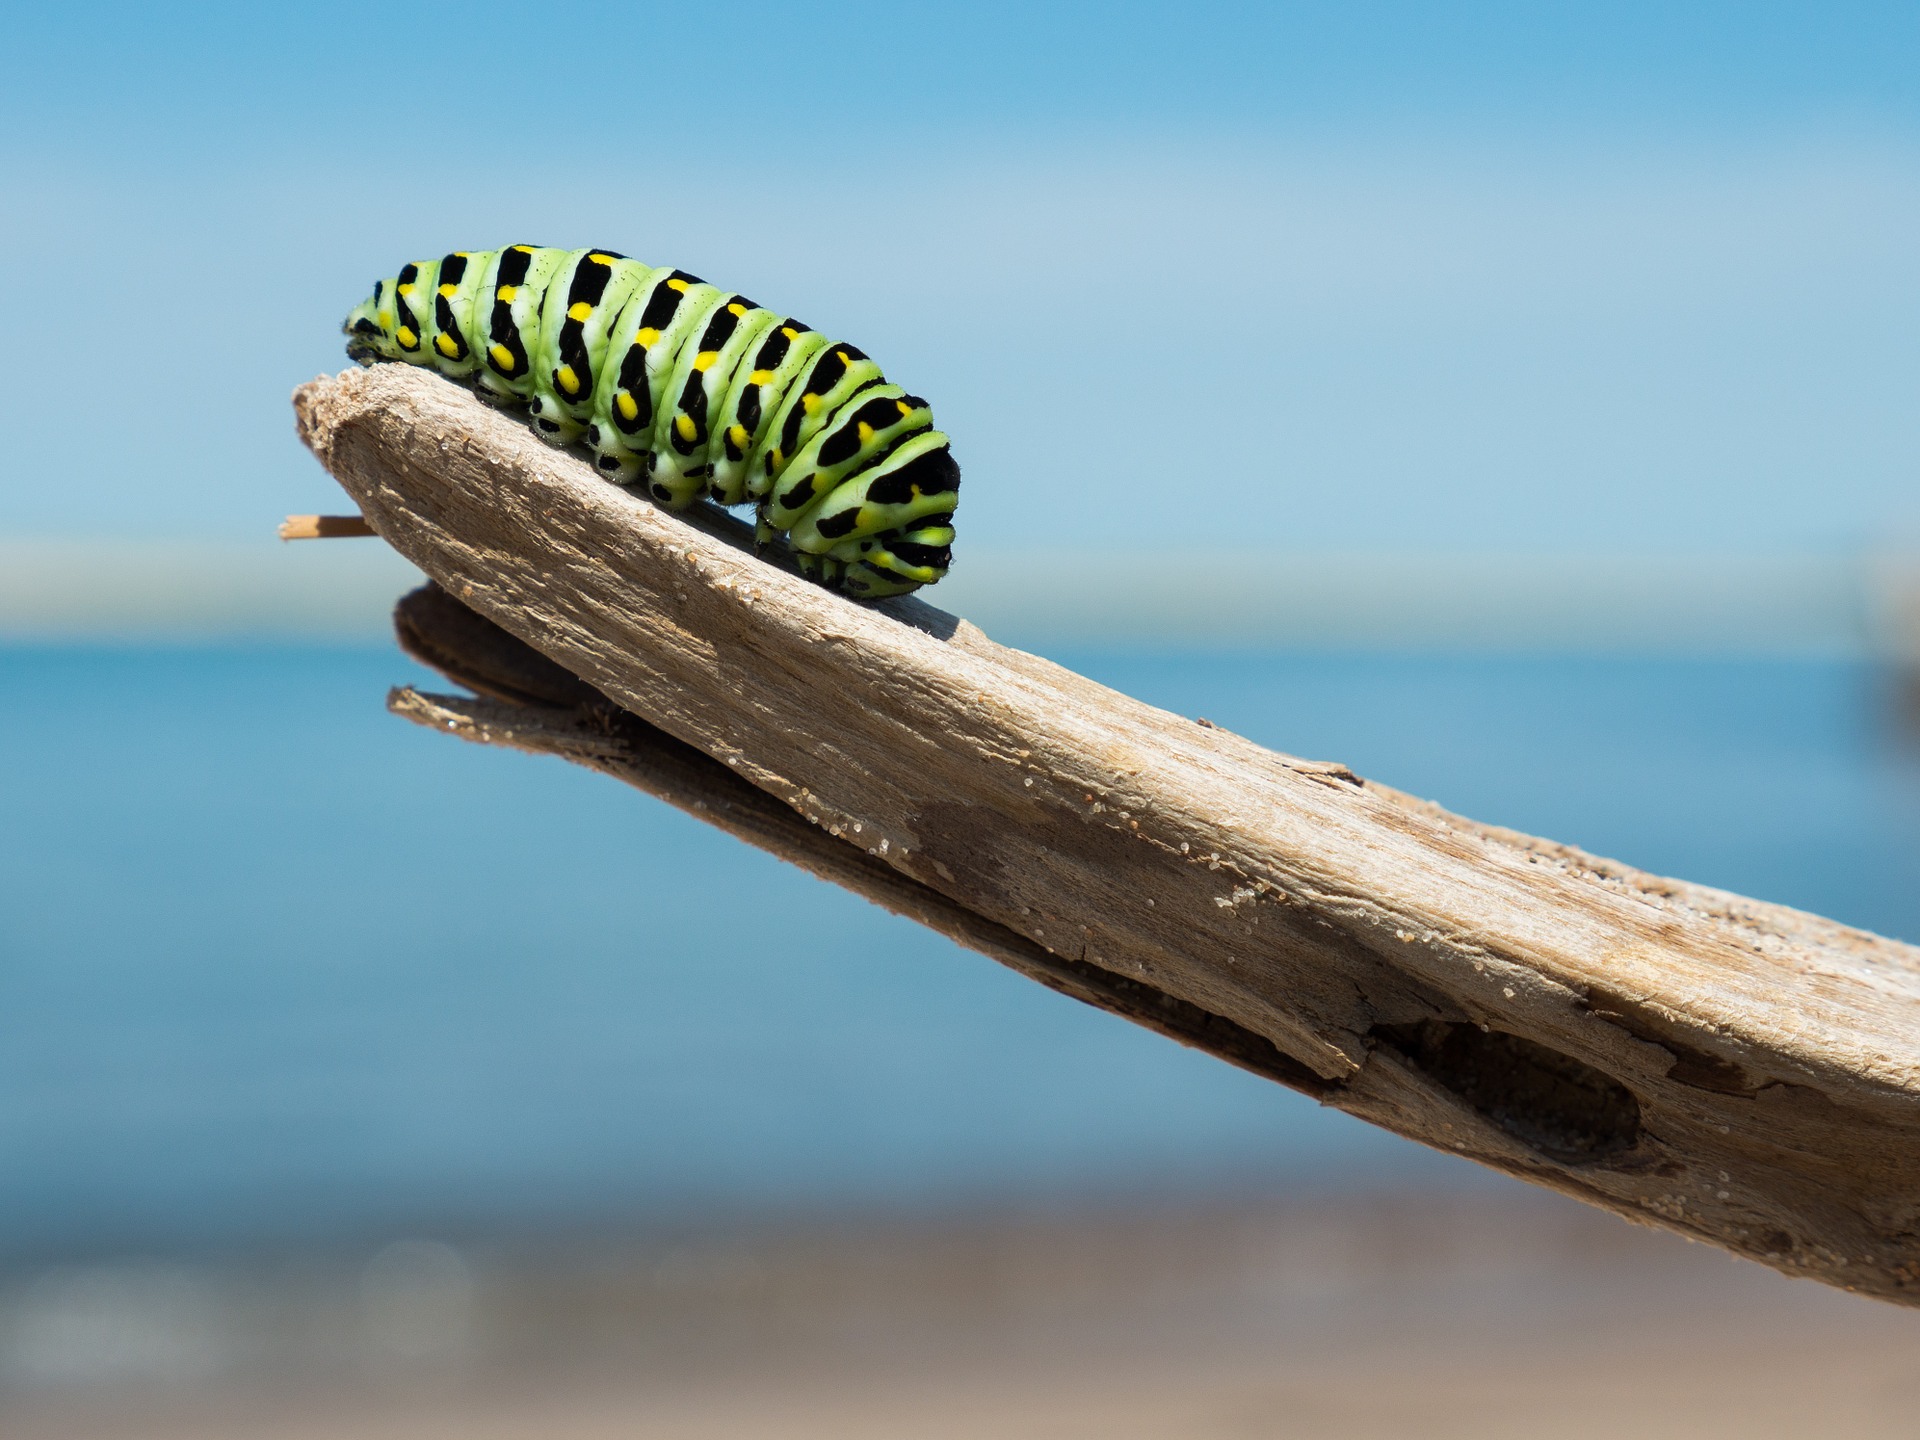
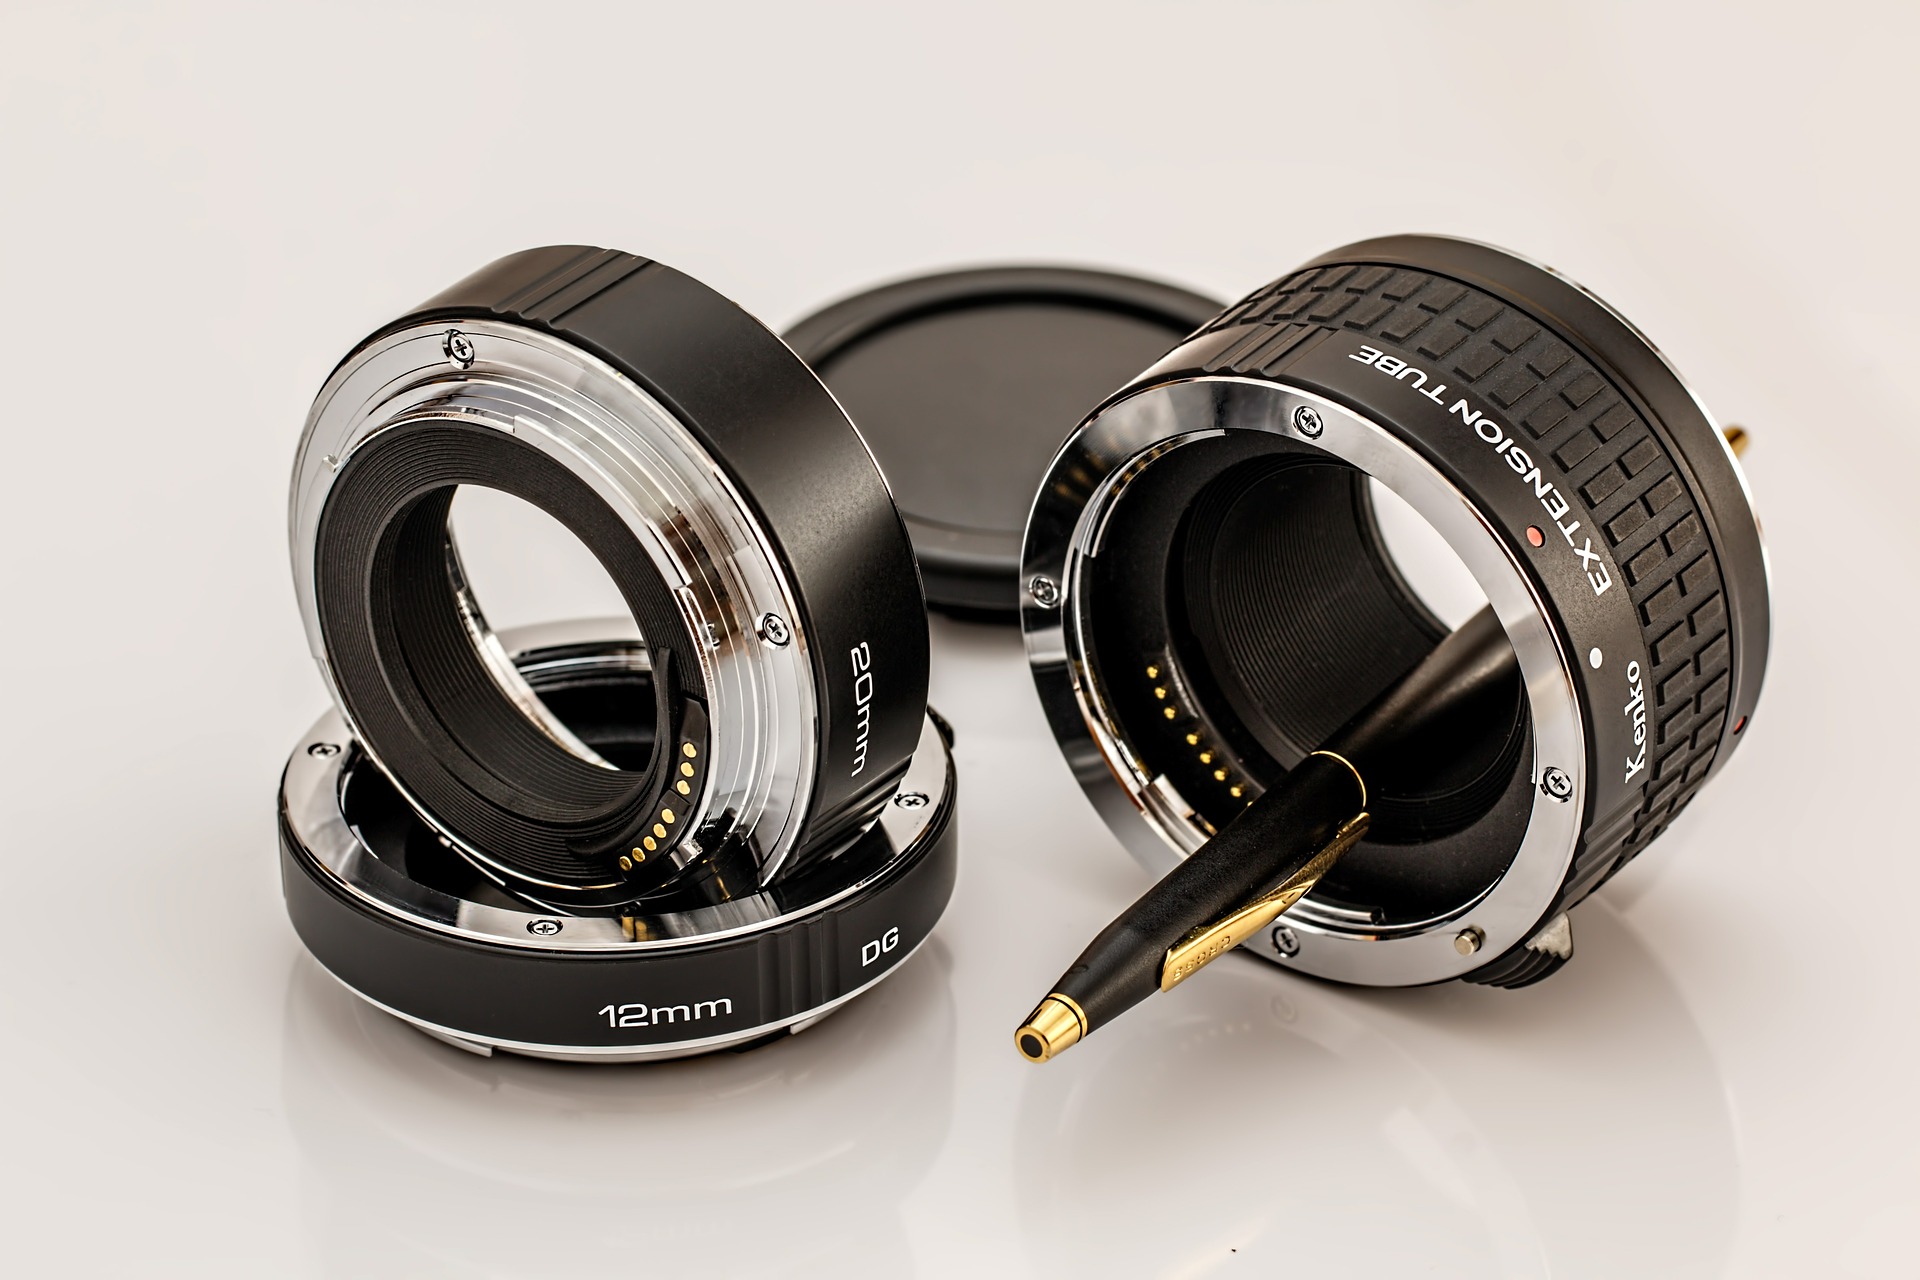
The first problem is to get so close to the subject to fill the frame something as small as a bug. If you are using a standard 18-55 lens, you will face the first problem, and that would be the focusing. This kind of lens may only be able to focus on objects further away. If you observe your camera you will find a setting for macro. Usually, it looks like a Tulip and often sits next to an icon that looks like a mountain range. Choose the tulip, and you will find you can focus a lot closer to the subject than normal. Next thing will be to have a special macro lens. If this is not enough for your taste end needs, you should consider buying an extension tube. Extension tubes are hollow cylinders which fit between your lens and the camera body, moving the lens away from the body and allowing you to focus a lot closer than you would be able to without the tube in place. The downside of adding the extension is that you are now unable to focus to infinity but, for macro, that’s not a problem. Tubes are typically sold in a set of three offering different extensions (in my case, 12mm, 20mm and 36mm).
The biggest problem I typically have to deal with when shooting macro is the depth of field. When you are a matter of a few centimeters away or even 1 meter away with a longer lens, the depth of field drops off dramatically, and you normally find that it is extremely difficult to get your whole subject in focus. Normally the solution to increasing the depth of field is to decrease your aperture (pick a larger f-number), but this means that you have to decrease your shutter speed to compensate and you soon get into a situation where the shutter is too slow to give you an image without camera shake or movement blur. The resolution would be to pick as small an aperture (as large an f-number) as you can while still keeping your shutter speed in the safe zone. You have another variable thing that you can play with to help around the shutter speed problem, and that will be the ISO, but you should be careful and aware of the noise.
Even though you have come up with a suitable combination to get the correct exposure you will have the problem of keeping the whole subject in focus. Here are two tips:
Try to keep everything you need to be in focus in the same plane to the lens axis. If you focus on something in that lane, everything else in the lane will also be in focus.
If you can’t get everything in focus, make sure that you focus on the eye of whatever you are shooting. Viewers will forgive just about anything being out of focus as long as the eye of your subject is clear and sharp.
So now that we are clear about the focusing and the equipment, I’m going to stay a little bit about lighting.
The light is not so good when you are shooting with a single direct flash. If I do have all-around access or helpers willing to hold flashes take the flash off the camera and either put it on a stand close to the object but to one side of the shooting position, then fire it using the on-camera flash as a CLS commander. Also if you are shooting, let’s say food or small objects such as toys, or if you are in the stock photography business, you should consider buying or making a small lightbox. This will give your photos special touch. If you search the web, you will find plenty of tutorials how to make one, and it would not cost much.
People often think that taking a picture is about pointing and shooting. That is part of it, but there is so much more. For example, do you know what a 2:1 ratio or 1:1 ratio is? If someone asks you about that, do you know what to say?
It comes all down to magnification ratios, and while you don’t need to know everything about them, having a basic understanding can make you a better photographer and make your pictures that much better.
Understanding macro photography is easy once you understand the ratios. Essentially, a magnification ratio is the size of the object on the camera sensor to the actual size of the object that you are taking a picture of.
The 1:1 ratio means that the image is the same size as the real size of the object. If it is a 1:2 ratio, that means that the image you have on your sensor is going to be half the size of the actual thing you are photographing. This ratio makes sense because the sensor image is half the size of the real object, or ½, and if you take the / and change it to a : you get 1:2.
Macro Lenses and Ratios
When you are choosing a lens, you need to understand magnification ratios. A macro lens will go to 1:1 magnification, but there are times when a manufacturer will attempt to make you think that their lens is a macro lens, but that doesn’t mean it actually is a macro lens.
If a manufacturer says that a lens is 70-300 with macro, it doesn’t mean much beyond the fact that the lens will focus closer than another typical lens. It is important to remember that the lens is not actually a true macro lens. A macro lens will not have any zoom, remember that.
If you have a 50mm lens on your camera, and you shoot normally, you have a ratio of 1:10. If you put a 50mm extension on that lens, then you are shooting 1:1. This may seem odd, but when you focus on infinity, or straight out into the distance, with your 50mm, the glass is 50mm away from the film plane. If you attach a 100mm lens on, and focus on the distance, your glass is now 100mm away.
If you put two extension tubes onto your 50mm, then you get, for example, 68mm extension and that will give you some magnification. If you put that 68mm onto a 70-200mm that is at 70mm, you don’t get as much extension because you are only at 2mm extra.
We know, it is a bit odd how this works but understanding macro photography better will make your photography that much better.
Focus the Lens Closer
If you want to get that extra bit of magnification, there are several ways to do it, including:
Close-up filters: Essentially when you put on one of these close-up filters, you are putting a magnifying glass on the lens. These are great because they don’t cost much and they are very light. The trade-off is the fact that the pictures are not always high quality because of the glass over the lens. That being said, if you focus everything properly, the picture can be sharp in the center, but blurry on the edges. If you want more magnification, you need to put more filters on, which means more glass, which means a further degradation of the image itself.
Macro lenses: We have talked about these already but they are the best choice for macro shots. You will get amazing quality, and the convenience of having the lens on hand whenever you need it. That being said, it is also more expensive than any other type of magnification.
Extension tubes: These are barrels that extend the magnification. They are lightweight, but more expensive than the close-up filters. You get a better focus than with the filters, but more time consuming. Extension tubes also take a bit of work to get right as you try and focus on the image. You also get a bit of a curvature with your images, so the edges are not as sharp as the center.
When you are dealing with macro and magnification, sometimes it is best to go the extra mile and get a specific macro lens. It is quick and easy to change out with another lens, you can easily focus and be on your way. You don’t have to fine tune anything, or attempt to focus out of the blurriness like you would with a close-up filter.

 Facebook
 Google +