Whether you are hired by the performer or event organizers, tackling concert photography is not an easy job. But if photography was an easy job, everybody would be a professional photographer.
Most concerts have a few things in common, including low light, lots of motion, little to no access, and a quick timeframe. So how does one manage all of that?
13 Concert Photography Tips
Do Your Homework
In order to get access, you’ll need to do your homework. Find out whether the performers allow concert photographers inside in the first place. What are their policies? Can the music photographer shoot the whole concert or just the first few songs? Do the performers allow photographers to shoot backstage? Do they require photographers to have a photo pass? How do they move on stage? Do they have some prominent habits on stage that would look cool in a photo? Will there be guest performers? These all are questions that you’ll need to be answered before you enter the venue.
![Саф и Легијата [24.04.2015]](https://c4.staticflickr.com/8/7710/17056134547_3cf066701c_c.jpg) Photo by Dzvonko Petrovski.
Photo by Dzvonko Petrovski.
Get Access
There are two types of access needed to photograph a concert successfully. Mainly, you need to be able to get into the concert as a press photographer or get a photo pass. In other words, you need access to be able to get backstage, in between the stage, and into the photo pit.
Secondly, you’ll need access in terms of angles. If the stage is too high, and you are just in front of it, you won’t see a thing. Therefore you’ll need access to the areas from which can actually shoot the performers properly.
Manage The Light
Since 99% of the time you’ll have a strong light hitting your camera directly (since the stage lights will actually be in the background), make sure that you aren’t using a lens that is prone to flaring, since you’ll end up with a bunch of images with lens flares. Those stage lights will create atmospheric light and rim light on your subjects (the performers in this case), so your job is to provide the fill light in order to avoid silhouettes. I usually use the on camera flash modified with a 20x30cm softbox.
![Саф и Легијата [24.04.2015]](https://c5.staticflickr.com/8/7642/16641084964_a335469cc6_c.jpg) Photo by Dzvonko Petrovski
Photo by Dzvonko Petrovski
Focusing
Direct light could pose problems for the focusing system on some cameras, and the best way to manage that is to set the camera to center point focusing. Then block the lights with your hand, focus, and recompose. Do all that without releasing the focus button—using a back button focus for this might be easier.
ISO
![Саф и Легијата [24.04.2015]](https://c4.staticflickr.com/8/7621/17263536155_701d295160_c.jpg)
Photo by Dzvonko Petrovski.
Usually, the first thing people do in scenarios like this is bump up the ISO camera settings in order to gain more detail in the shadows of the image. In most scenarios, that would be the smartest thing to do. However, in this case, you are using flash, and have very bright stage lights. You don’t need a high ISO because you can let the flash take care of the fill light while the stage lights take care of the highlights. This way you end up with cleaner shots.
For the purpose of proving this, all of the shots that you see in this article have been taken with a Canon 1000D (a camera that has a maximum of 1600 ISO, and most of them are shot on 800), with 18-35mm f/1.8 Sigma Art lens.
Don’t Forget To Move
I see many photographers anchoring themselves to one spot and staying there for the whole concert. That is a huge mistake to make. Performers move around, they dance, they jump, they do stuff. Standing in one place will result in you missing most of the shots.
One rule of thumb that I have when shooting concerts, especially rockers and rappers (since they hug the microphone in a specific manner), is that I move to the opposite direction of the microphone. That way the microphone and the hand holding it isn’t covering the whole face of the performer, and it provides a good photographic element, in addition to the portrait and light.
Have Your Equipment Ready
Concerts are demanding on your equipment, especially in regards to battery life and storage. Be prepared for around 2,000 shots, sometimes more. That means that you’ll need to provide enough juice to the flash batteries (since they are the first ones to die) to get around 2,500 shots, then enough storage space in cards for that amount as well.
Keep in mind that while at the concert there is usually no way to charge batteries, dump SD/CF card content on a laptop or other things that you would be able to do in other types of settings. You’ll need to be prepared to shoot continuously for the whole concert. So, if you don’t already have them, get yourself some spare batteries and memory cards—you’ll definitely need them.
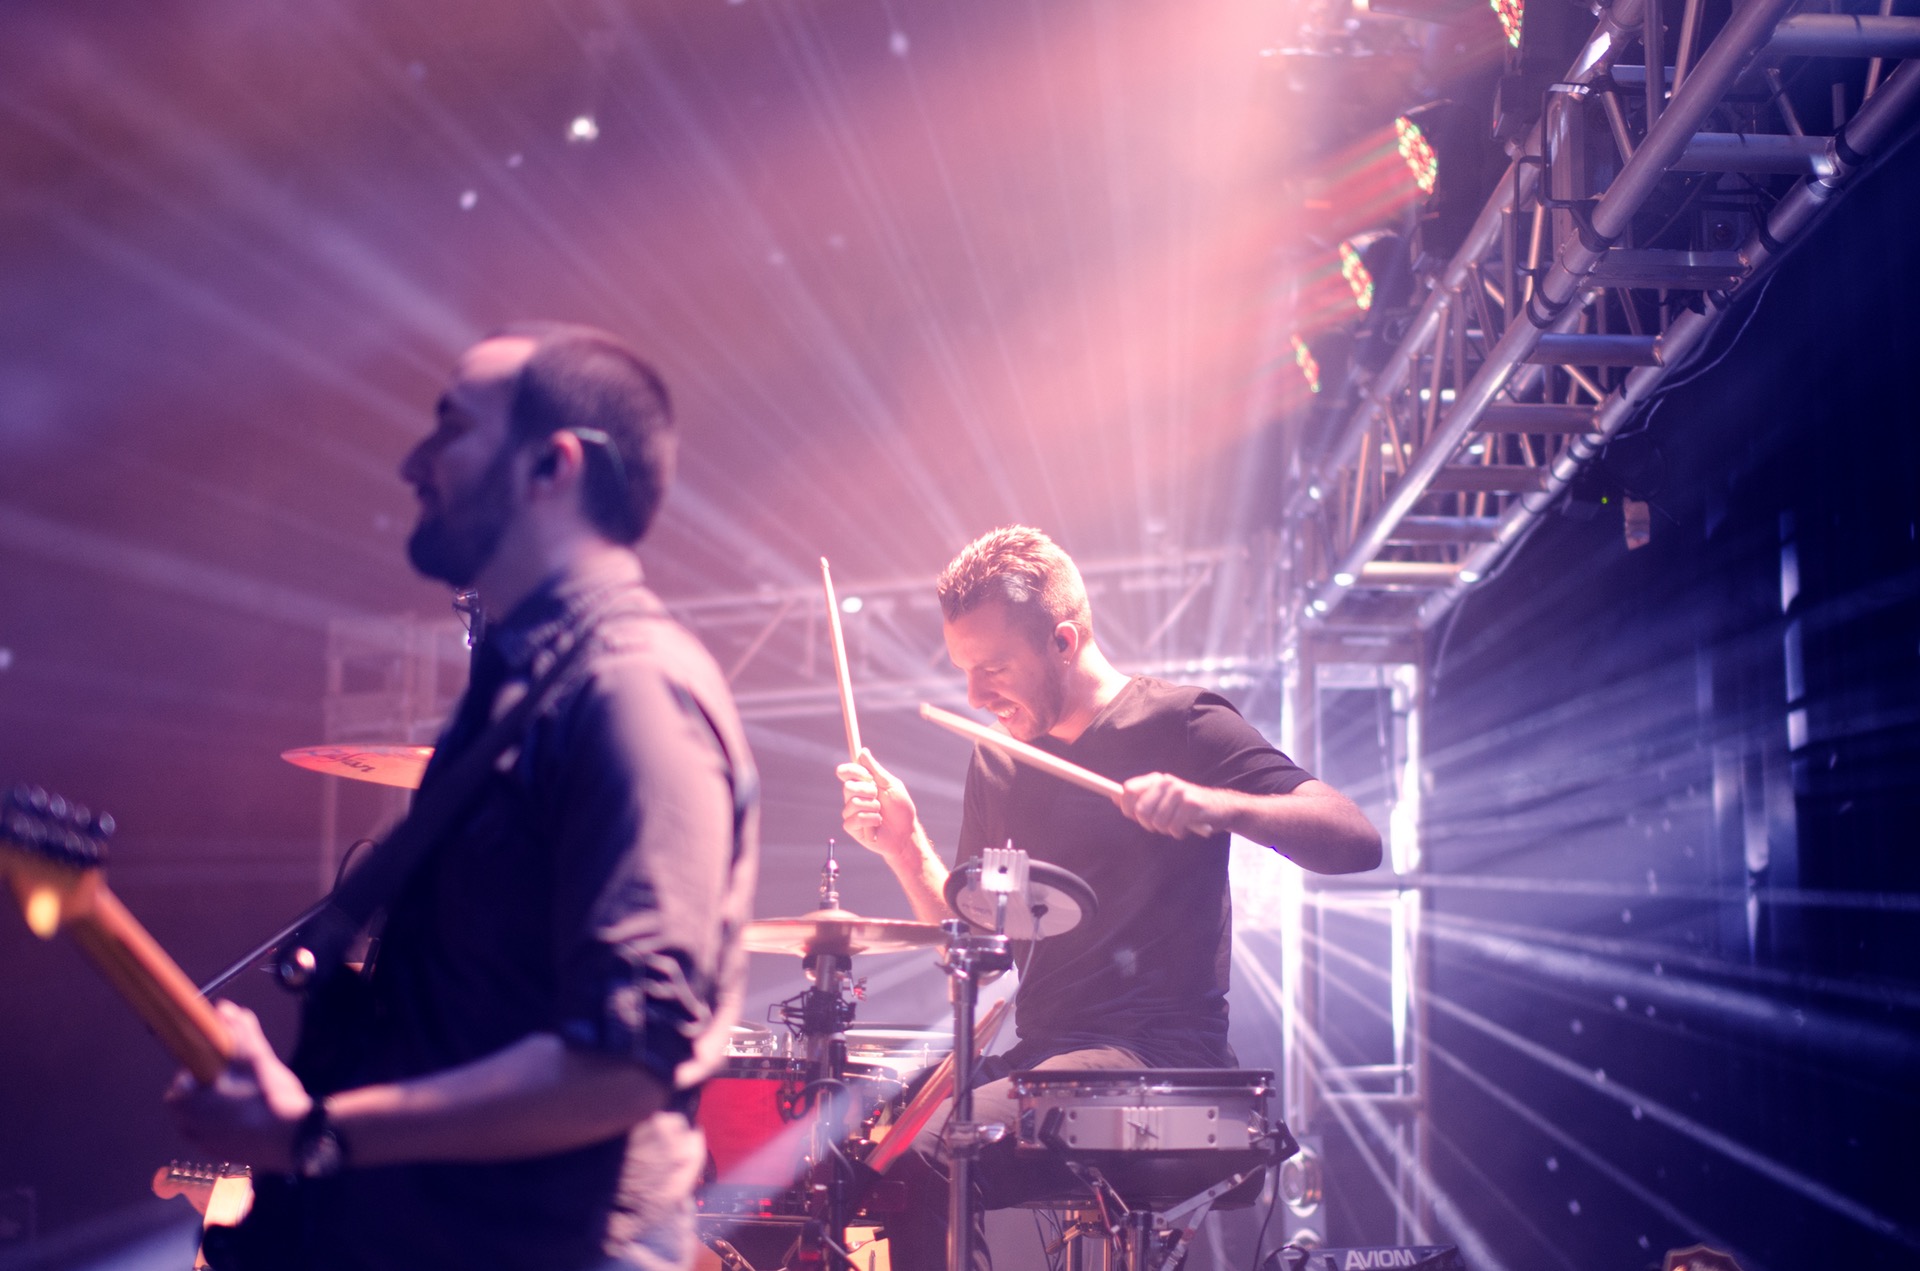
Isolate the Subject

One of the best reason to get into live music photography is to see your favorite bands and artists in person! Needless to say, many of us are in love with artists like Taylor Swift, Bruno Mars, Justin Timberlake, Elton John, etc. Being a concert photographer means you’ll be coming home with amazing photos of these musical artists!
As seen in the photo above, one great composition in concert photography is using a long telephoto lens or zoom lens to isolate the band member. This separates the subject from all other surrounding elements and highlights the artist along with their instrument.
Pro Tip: if you generally buy general admission tickets, ARRIVE EARLY in order to get as close as possible to the subject. The limiting factor in concert photography is oftentimes not being close enough to the subject to isolate them when framing your photo.

Another option when isolating the subject is to choose an instrument to be the subject. An artist’s instrument is an extension of themselves. It’s how they to express themselves. Bonus points if you can include some background context in the photo—either the audience or other important elements of the stage.
Include Background Context
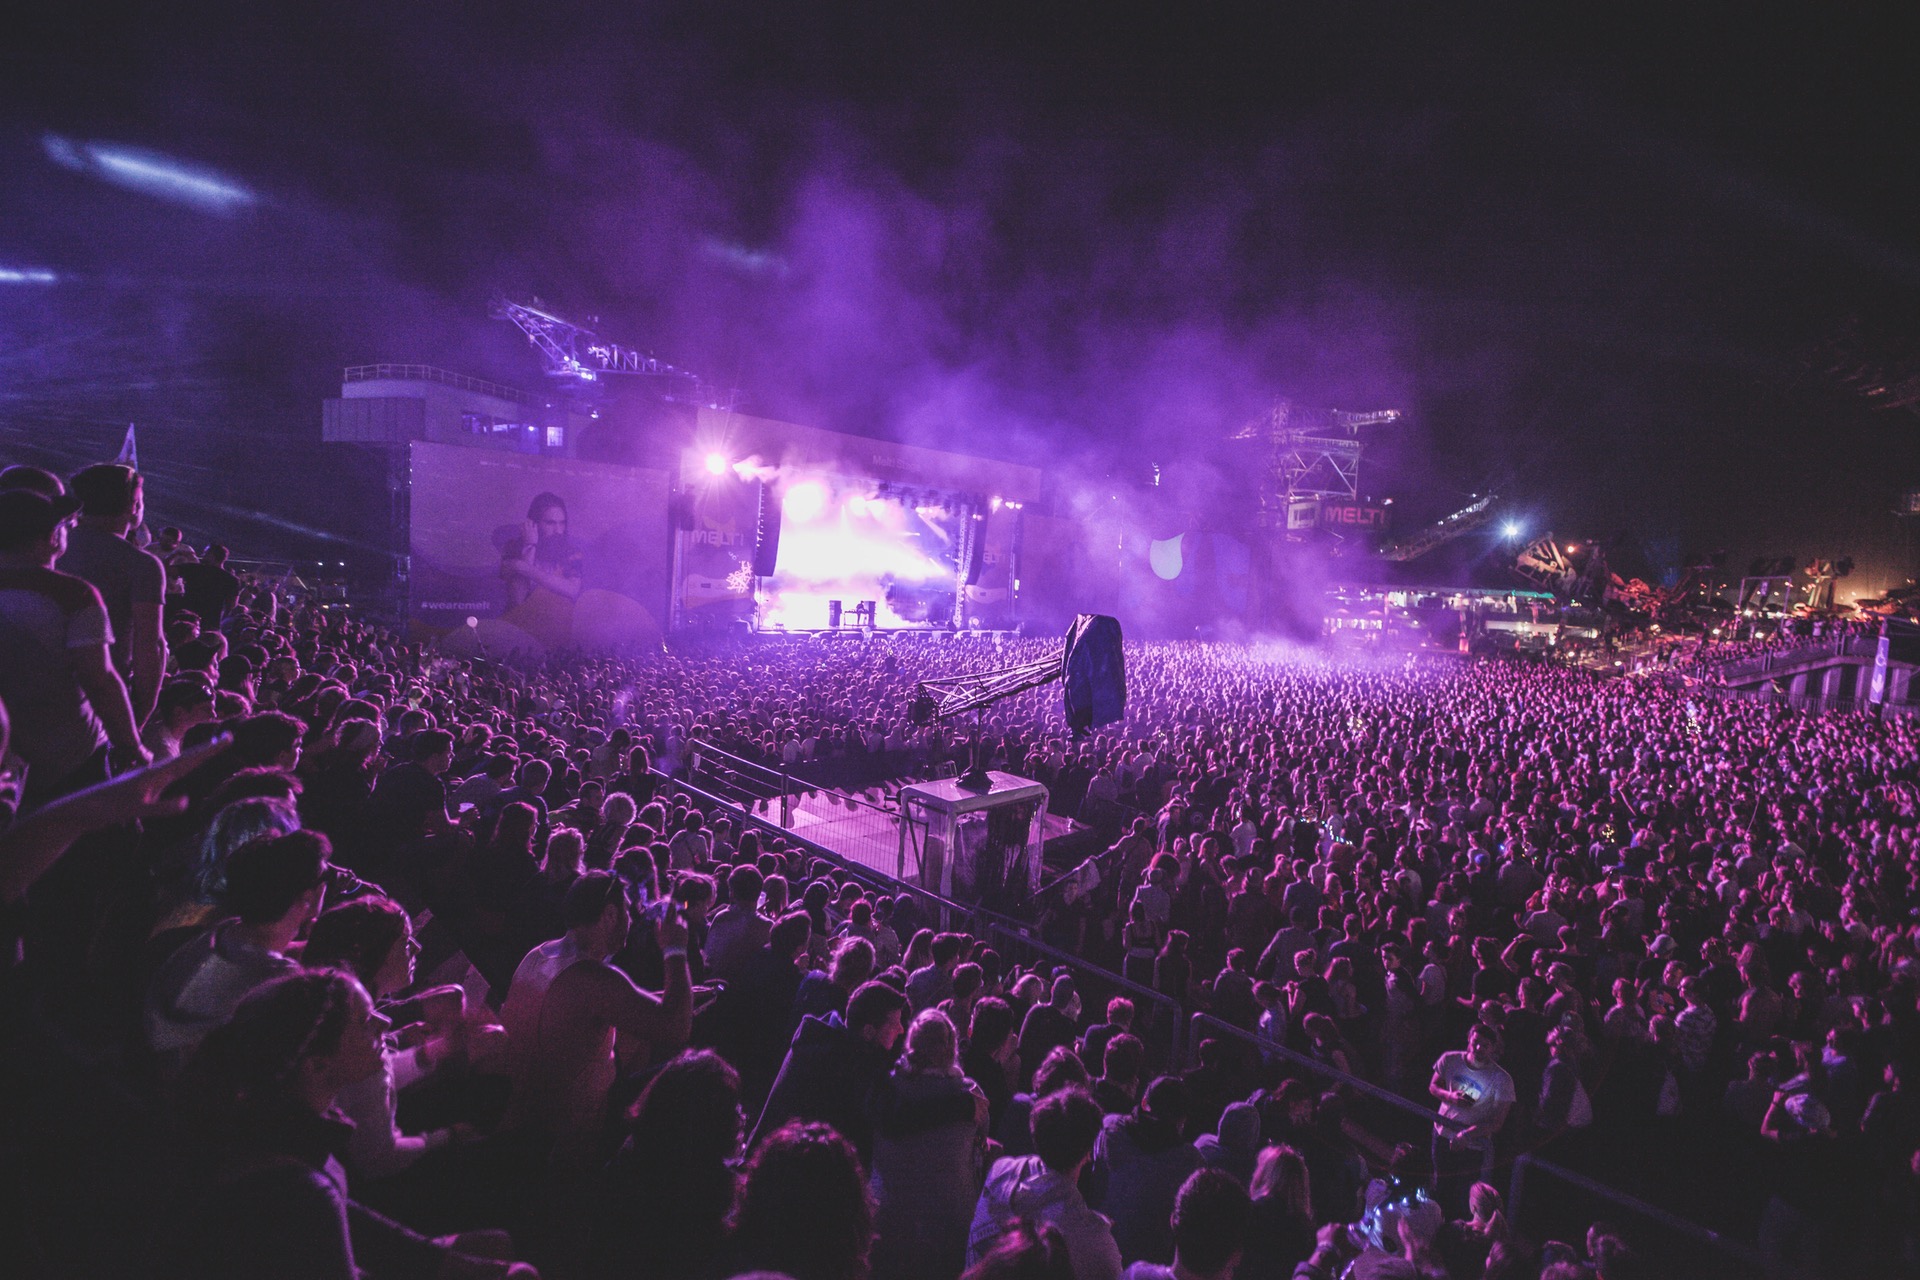
On the other side of the spectrum, bringing a wide-angle lens in order to capture the audience along with the stage can also result in an awe-inspiring photo. By providing background context to the photo, the photographer helps the viewer understand how large the audience is and get a feel for the atmosphere.
Not to be overlooked is the significance of the lights, smoke, and other decorations that are part of the visual elements at a large concert.
Isolate the Subject & Include Background Context
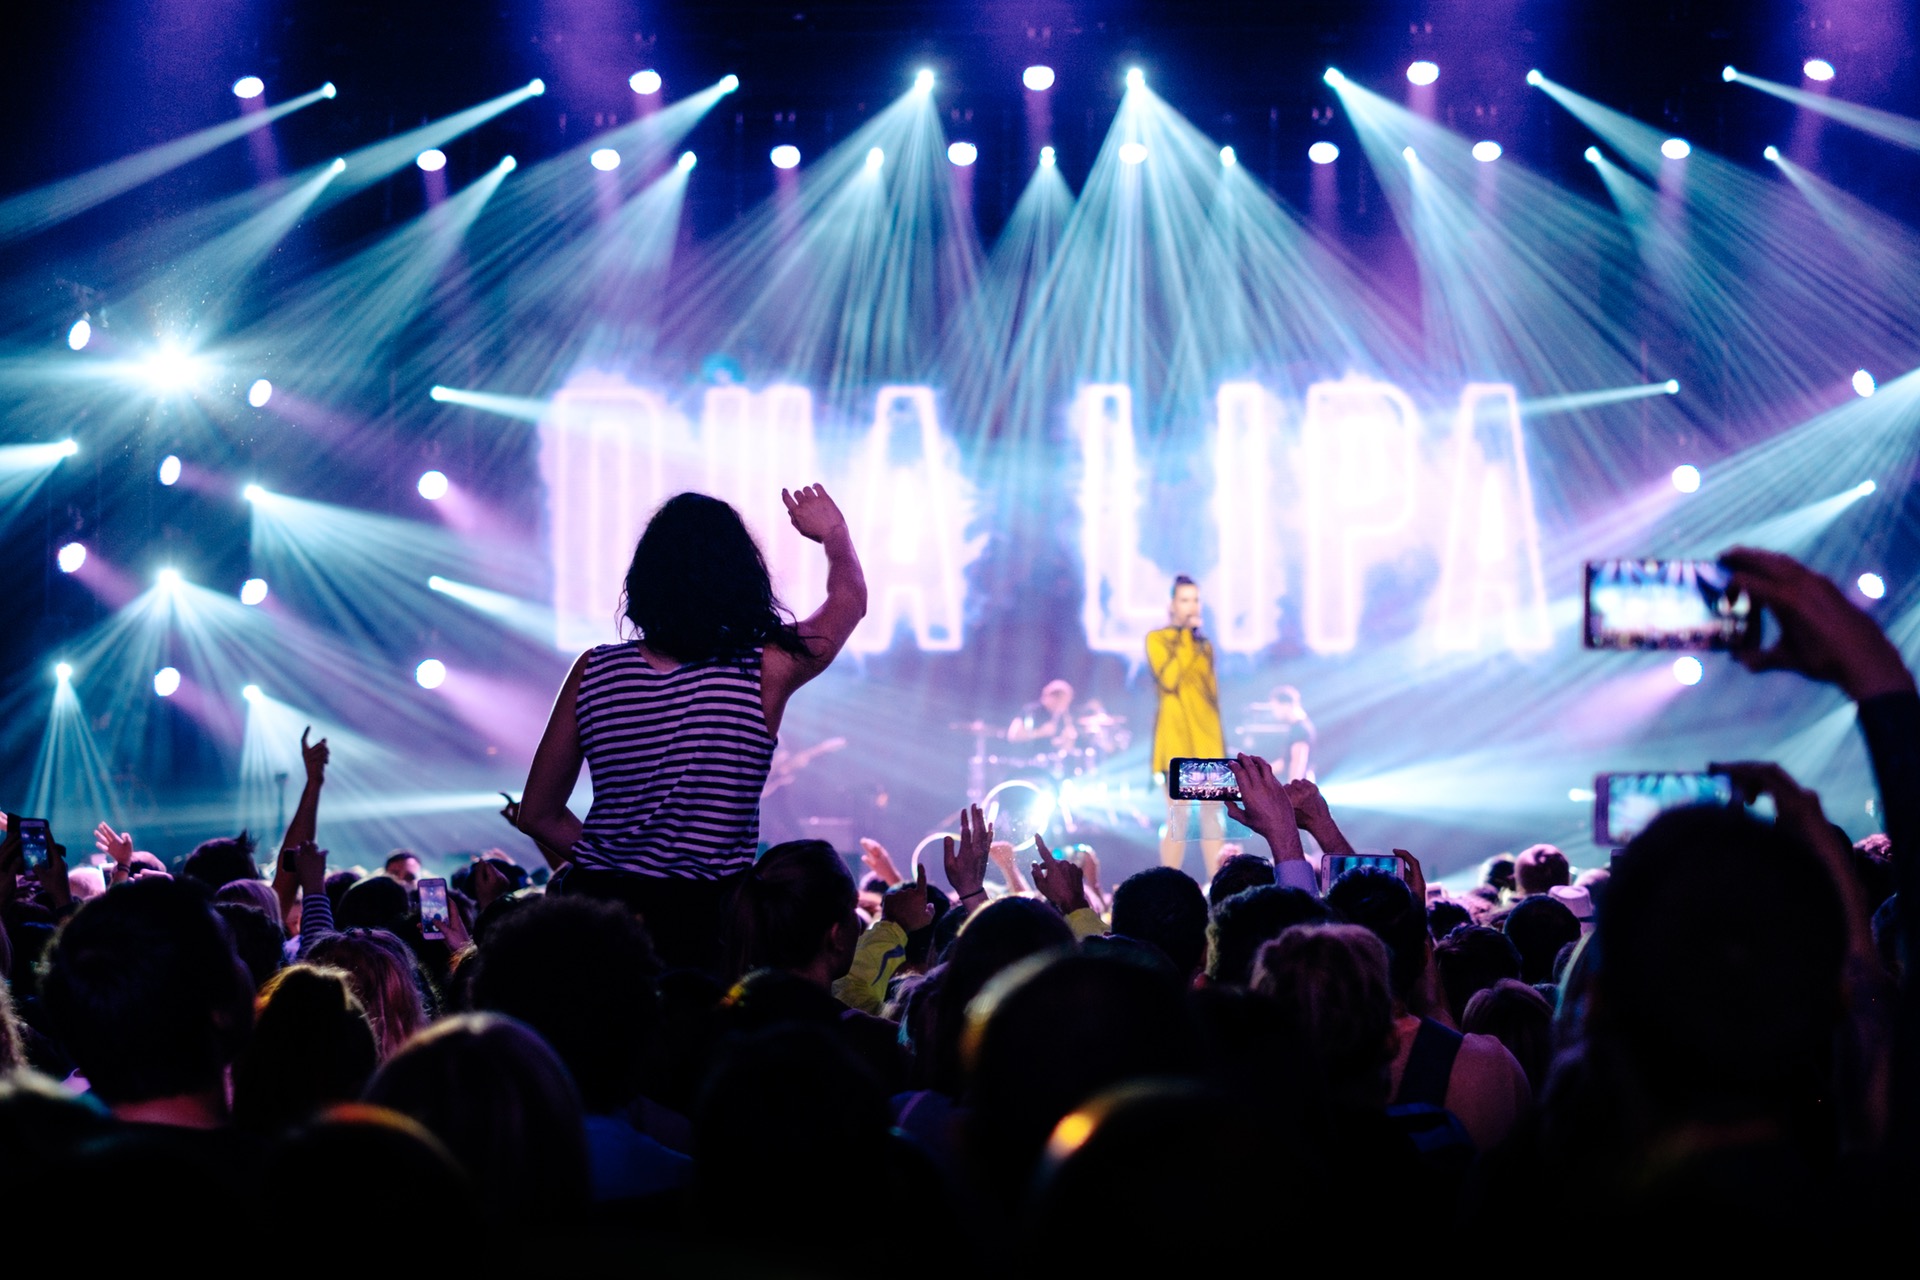
A mixture of the two compositional techniques above, this photo has two main subjects. The crowd-surfing girl on the left, along with the musical artist on the right. By including the crowd-surfer, this helps guide the viewer to look between her and the main musical artist on stage. The viewer’s eyes do not have to roam to through the audience because there is someone that already stands out from the rest.
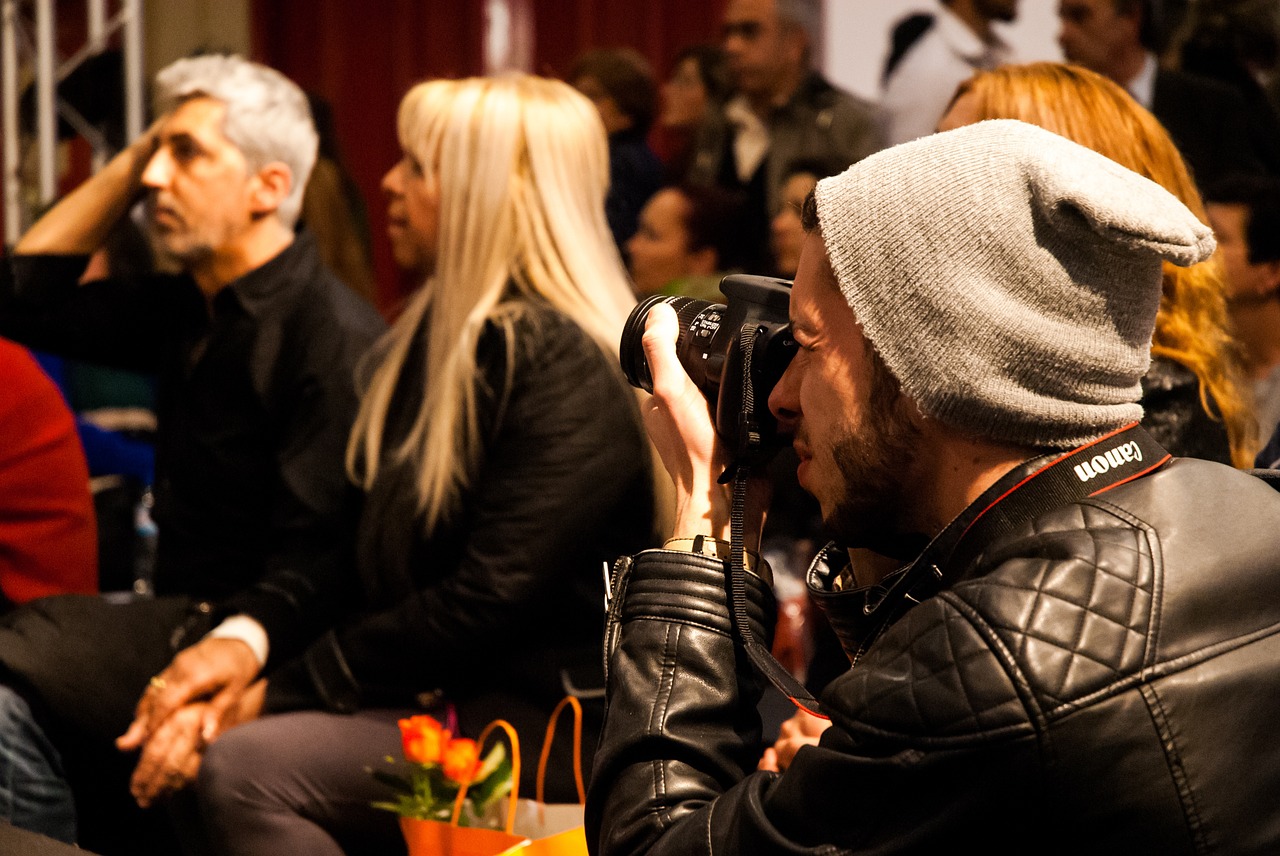
Take a Picture of the Captivated Audience
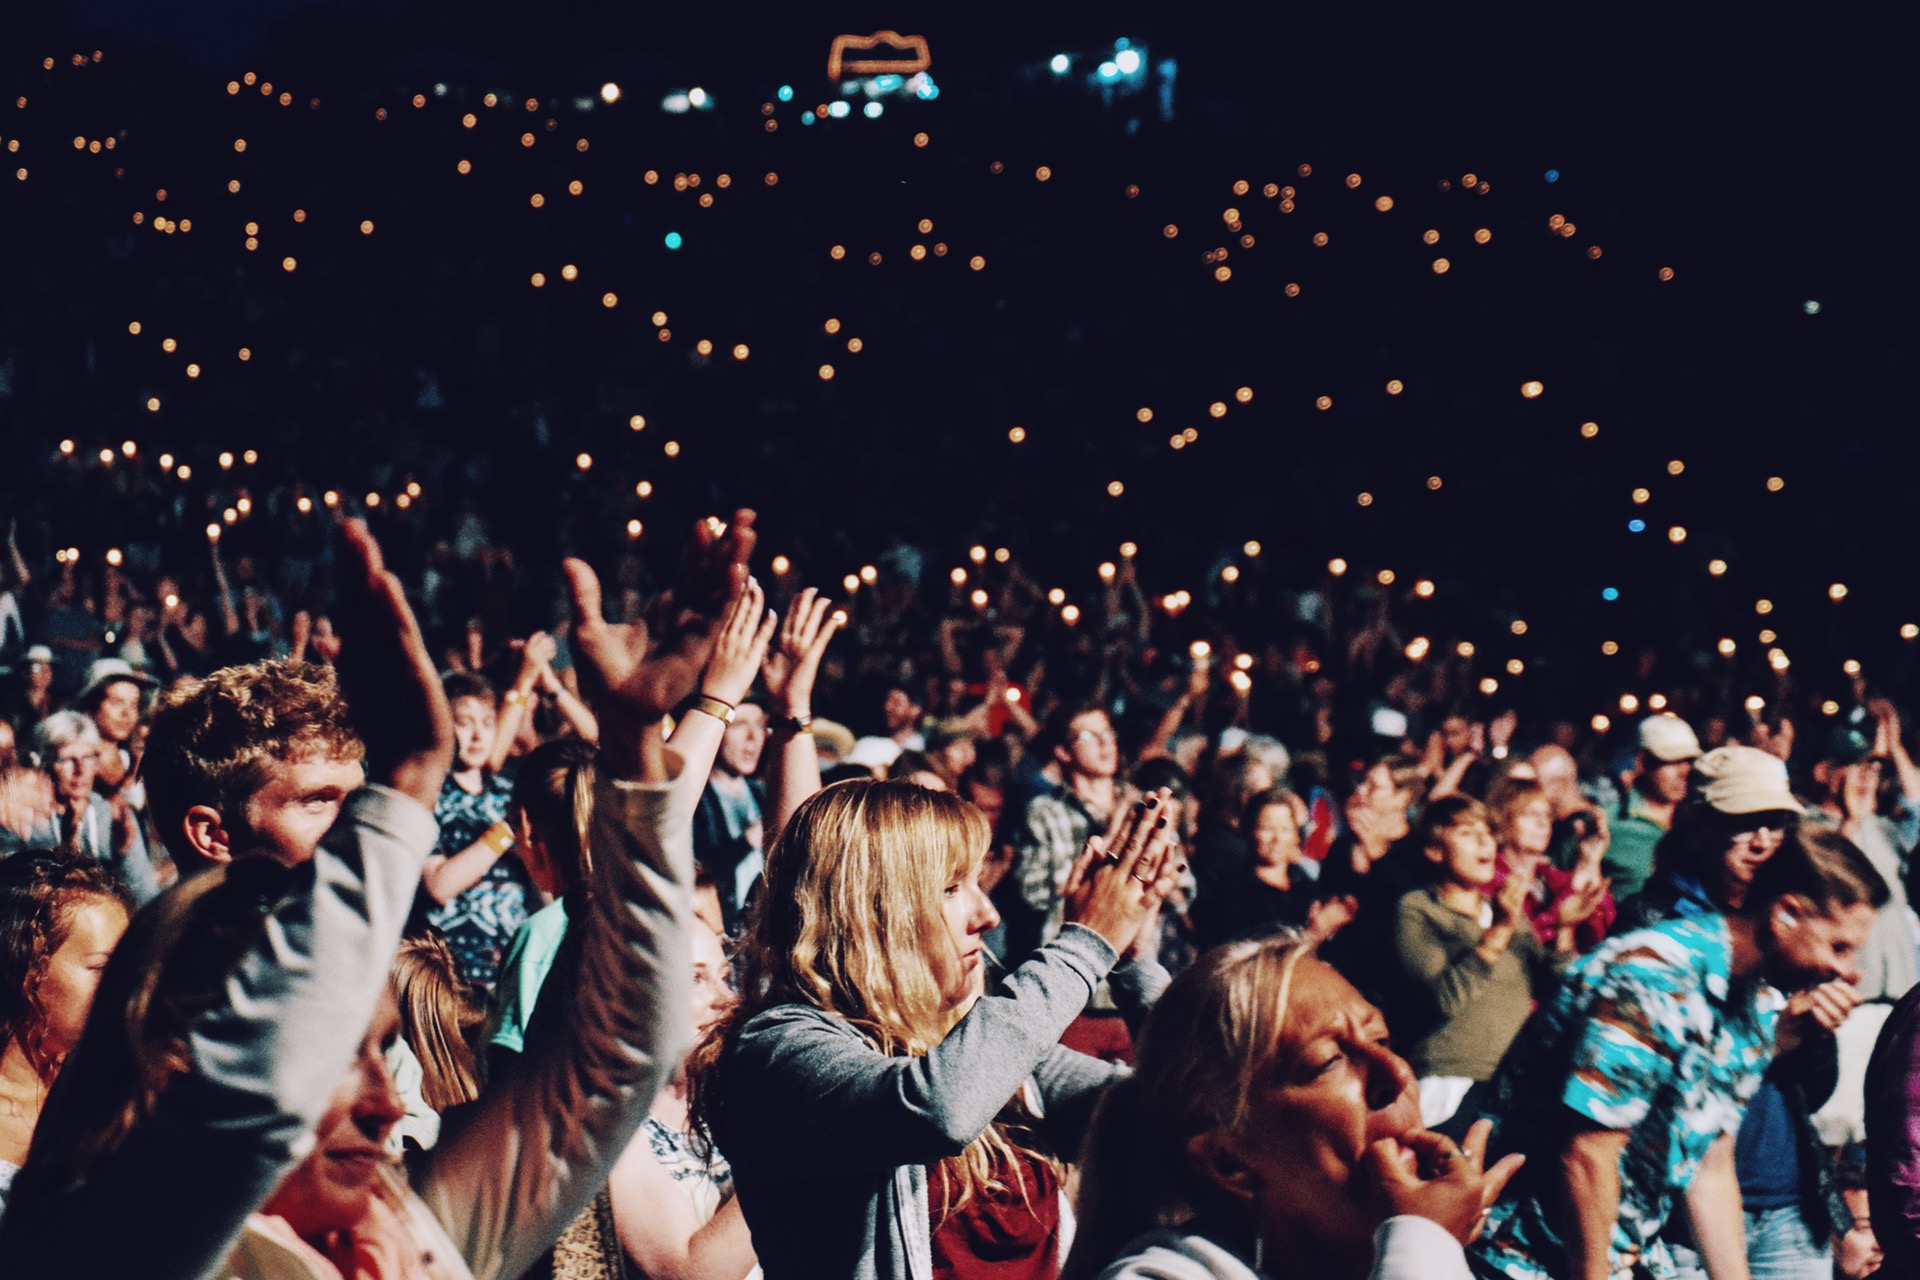
Being at a concert is a magical feeling. This is especially true when it is close to the climax of the event, as the musical artists ramp up toward their biggest hits and popular songs. During this special period, it’s a good idea to turn around and take a picture of the audience behind you.
A great signal that you should turn around is when the artist(s) ask the audience to clap along with them, or when the audience is waving their phones in harmony with the live music.
Take Lots of Pictures
Snap, snap, and snap away! Concert photography has a tough learning curve, especially for beginner photographers. Understanding the low light condition, moving subjects, a limited time to take pictures, and constantly changing stage lighting are all very tough for any photographer to deal with. The result is that the number of “keepers” from any music photography session will likely be lower than what you are used to.
But don’t give up! The “keepers” that you do end up with are one-of-a-kind, and usually very unique. Timing plays a big role in whether you capture an image. This means that the more photos you take, the more “keepers” you’ll end up with.
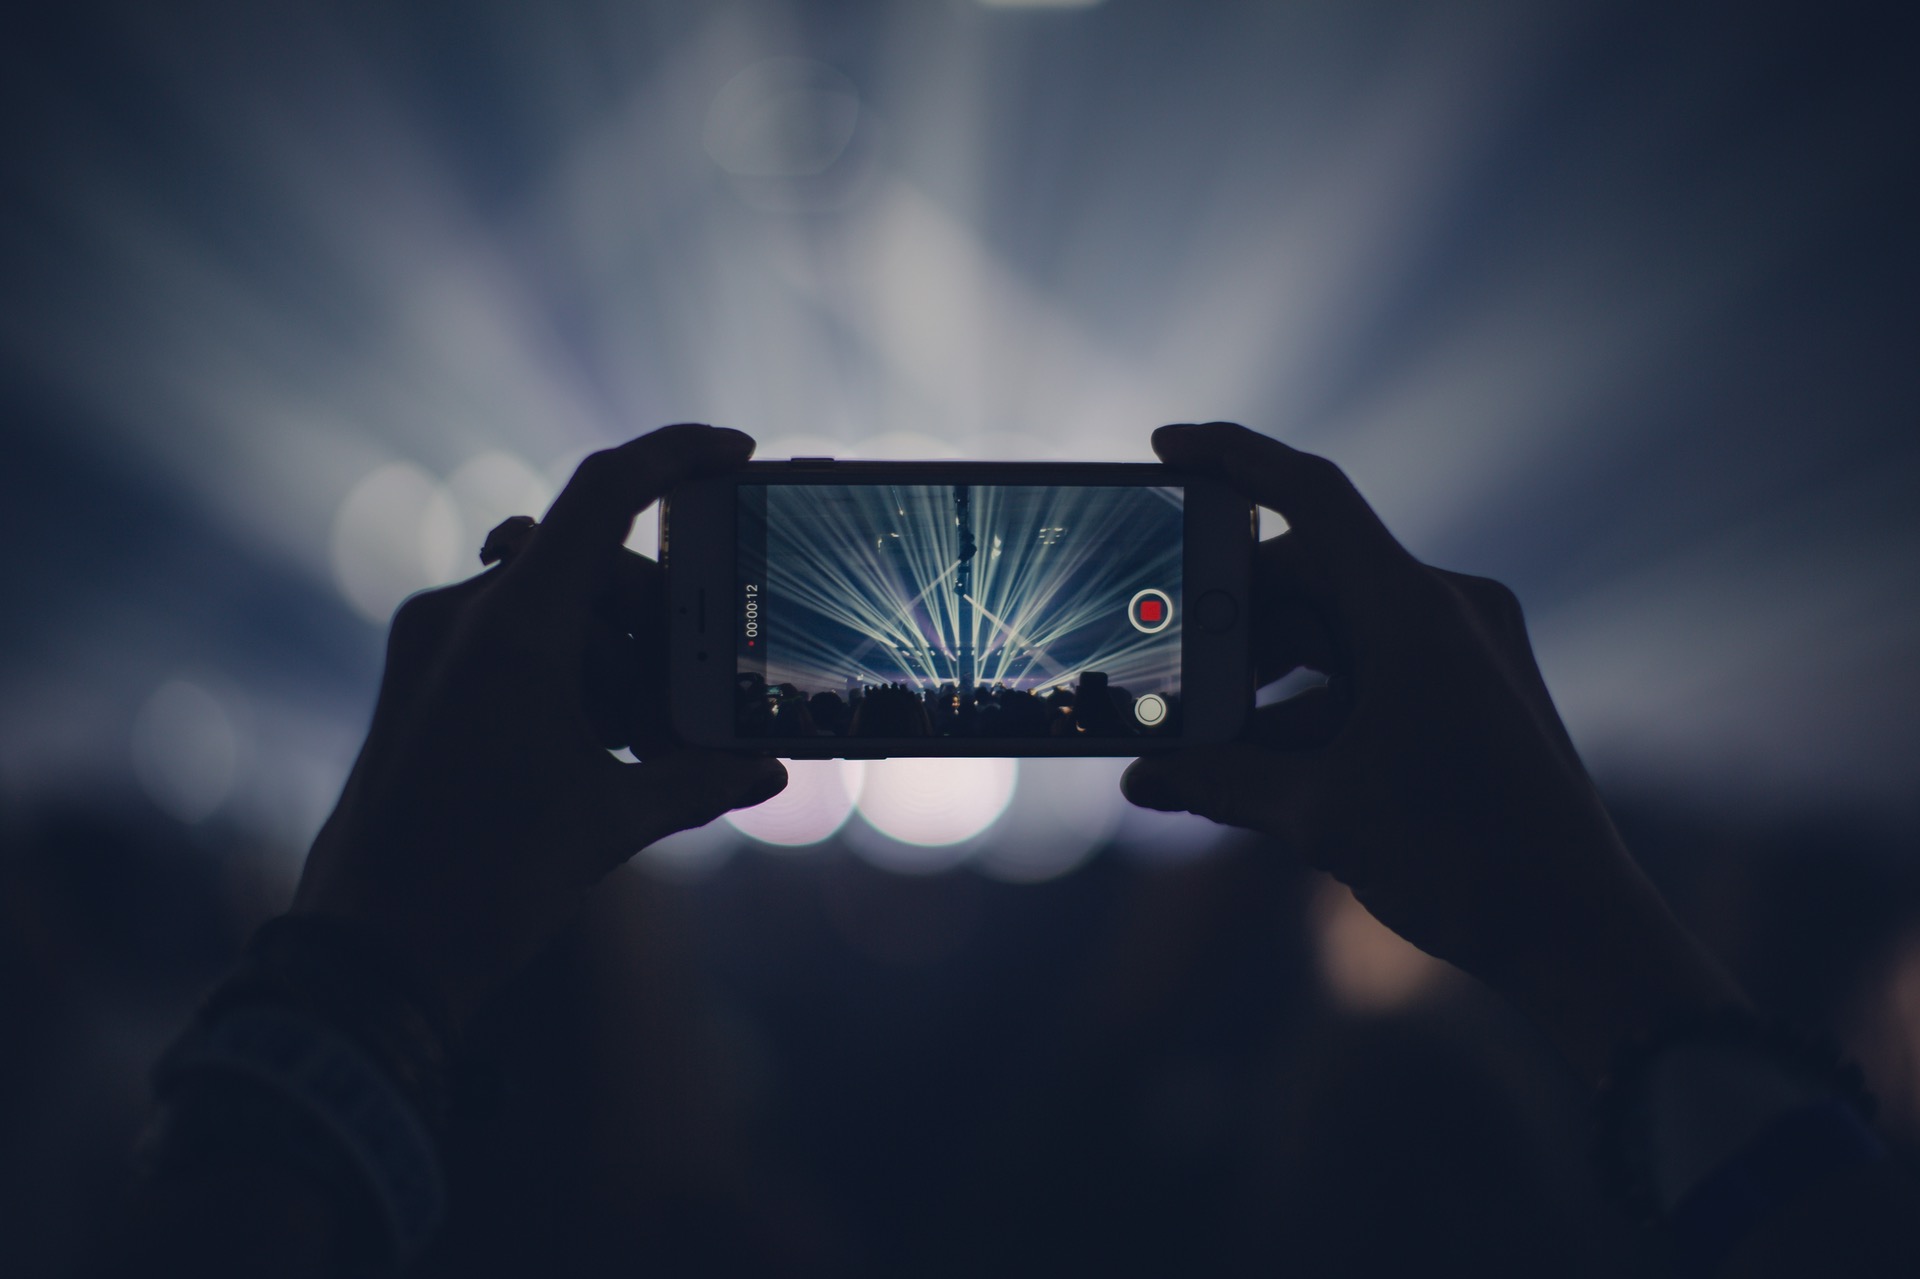
Don’t Be Afraid to Use Your Phone
Remember that you do not have to have an SLR in order to take pictures! If you have a decent camera lens on your phone, that can also be a great way to document your experience at a concert. The concert venue may request that you do not bring professional cameras, but they will usually allow cell phones!
How to Edit Concert Photography in Adobe Lightroom
We all know the challenges of concert photography: the low light, the fast movement, the crowd, your distance from the stage—and so much more. Just getting the camera settings right to get a properly exposed, focused image is challenging enough, but once you have that, what do you do? Is your image washed in blue light? Or worse, the dreaded red light?
Getting the image is only the first part of nailing killer concert photography. Now you need to edit the image and balance the colors to your liking.
Below are some great steps for editing concert photographs in Adobe Lightroom. A couple requirements: the image must be in the RAW format, and the color wash needs to be somewhat minimal. In essence, if the red wash is too extreme, you can’t do much. The white balance dropper just won’t be able to find the appropriate blues and greens.
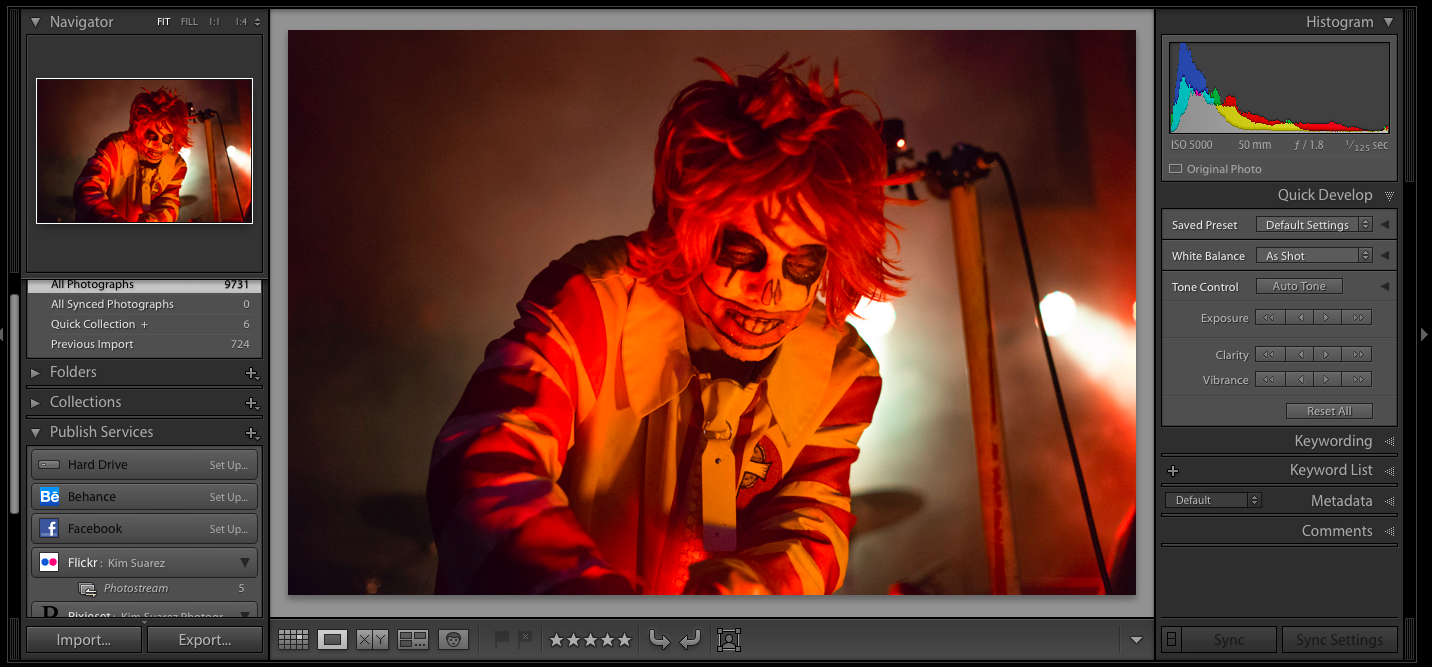
For this tutorial, we’ll be using this concert photo as our starting image:
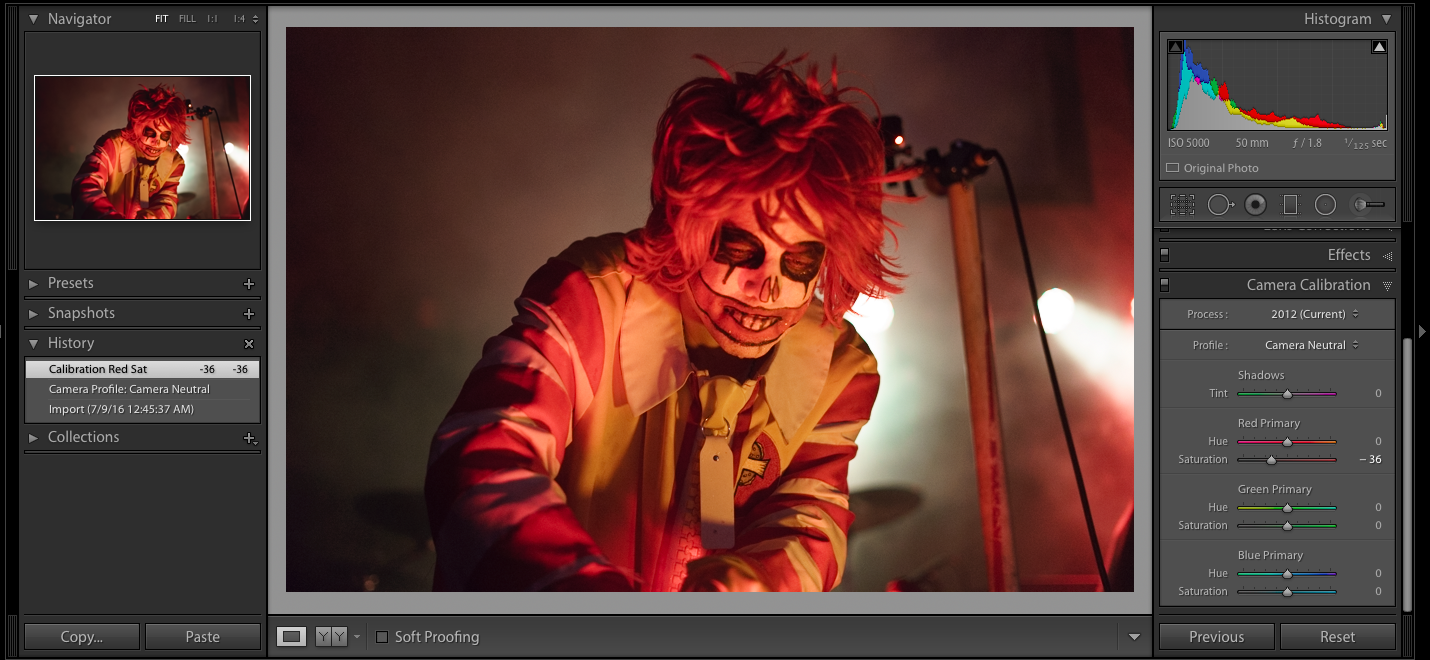
Camera Calibration
When you bring your RAW image into Adobe Lightroom, you’ll want to first adjust the camera calibration. Play around with settings, because it will depend on the image. From experience, I’ve found camera neutral works best for me. Play with the sliders once you’ve found an option that works.
You may also want to adjust lens corrections here as well. Go to the lens corrections tabs and check the first two boxes in the basic subgroup. These are enable profile corrections and remove chromatic aberration. This will fix any lens distortion you may experience. I recommend always checking them because it can be surprising how much of a difference this makes.
White Balance
Next, head to the basics panel and find the white balance dropper tool. Click onto an area of the photo that should be white. This can be the eyes, teeth, clothing, etc. Here is where you’ll likely be able to tell if this option will work for your image. Sometimes it just won’t. But if it does, it is amazing how much the tones will balance out. You can also play with temp and tint, but I usually leave them as is.

Basic Settings
Here is where I’ll do my basic setting adjustments. This would be exposure, contrast, whites and blacks. I usually find my images tend to be on the darker, more contrasted side, so I’ll adjust to that style.
In this image, I wanted to convey a dark, moody feeling because that is the band’s image. The band being the McDonald’s-themed Black Sabbath cover band, Mac Sabbath. If you haven’t heard of them (as I hadn’t until this night), check them out or go to a show. They are amazing performers, and you can’t get a bad photo of them.
Back to settings. Play around and see what works for the image and your style. It’s important to maintain a style when editing photographs. You want people to immediately recognize that they are your photos, if possible.

Color Saturation
If you still find lingering color tones you don’t like, go to the HSL tab. You’ll want to desaturate any colors you don’t want and then adjust luminance. See what I’ve done below and played around with the sliders. There is a chance you may not need this step, but experiment and see how your image can change.

If you want to salvage less-than-ideal concert photographs, you may need to convert to black and white. Some might consider this a cop out method, but if the image is strong and well captured, it is worth the edit. Experiment with your settings and see what works for your image. To me, converting to black and white is a no-brainer, but there is no formula here for perfect editing. Each image is different, and should be representative of your style—not someone else’s opinion (unless it is a respected music photographer offering valid advice).
A final word on editing concert photography—just go with the flow. If there is an extreme red or blue wash, but otherwise the photo is strong, leave it as is. Adjust what you can, but this type of lighting is somewhat expected. Also, most venues are good about flowing through different stage lighting during shows. So, you’ll likely see red, blue, neutral, and other types of lighting. Because you are using burst mode when shooting concerts, you’ll have tons of options at the end of the night. You may not even need any of those images shot during the red lighting.
Concert Photography is a Worthwhile Endeavor for Any Live Music Lover
Concerts are challenging, since they are a type of scenario where you don’t have any control over the scene, you have limited angles, and you’ll need to shoot more than a thousand photos, just to have 10-20 keepers. It is an utterly dynamic scenario where there is no “one setting does it all” solution. You’ll have to continuously adapt to the changing lights and formations.
However, concerts are the perfect place to practice photography too. They put every photographer to the test, pushing them to their absolute limits. We hope this tutorial gave you a few ideas on how to improve your concert photography skills, and we can’t wait to see what pictures you capture!


 Facebook
 Google +