There are many different reasons why you might want to change the color of your photos. Colorizing the whole photo (like giving a sepia tone to a grayscale image) is a rather straightforward process, changing the color of specific parts of an image can be a bit more tricky. However, Photoshop has a couple of tools that can make this process a relatively easy one. One of the things that make Photoshop such a powerful software is that there are many different ways to achieve a final result, and different photographers have different workflows so it is possible that you can find alternative ways to do this, which is perfectly fine.
Apart from simple photographic interest (like changing the color of a model’s clothes to better match a background or enhancing a specific aspect such as the redness of a sunset), colorizing a subject can be very useful for everyday interests such as visualizing how a house, or a part of it, would look like with a different painting before actually even buying a paint bucket.
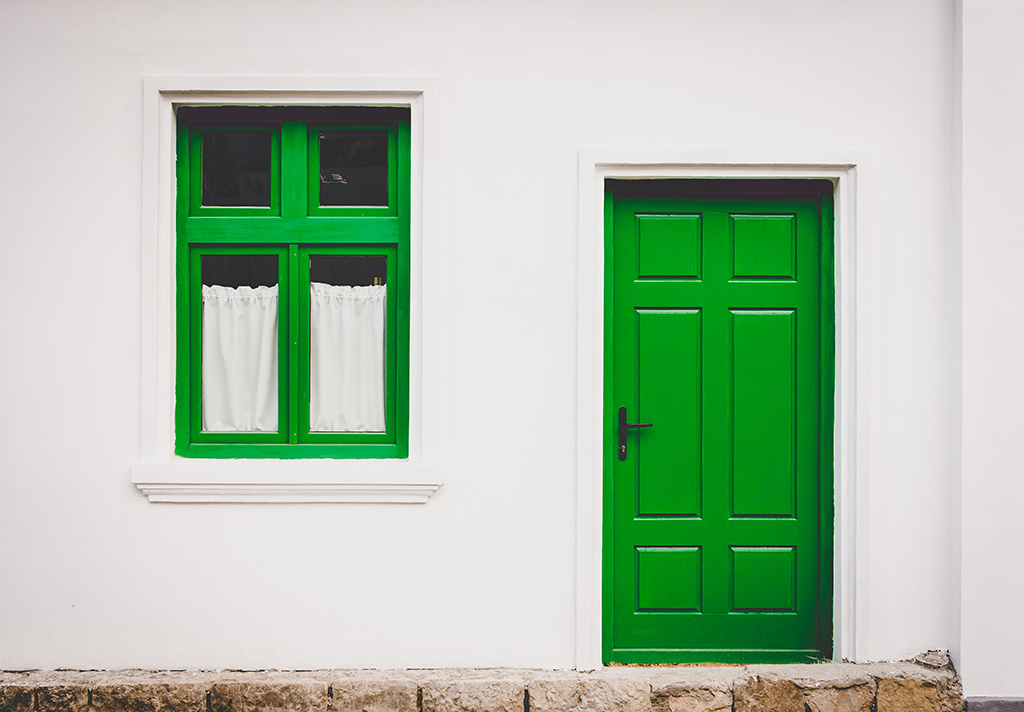
Take, for instance, the following photo of a house, downloaded from Pexels, a free stock photography website.
Let’s take action and try to change the color of the door. What allows us to actually change the color of objects without having to worry about each individual pixel is the description of a color not in terms of the RGB channels (the amount of red, green and blue) but in terms of HSI (hue, saturation and intensity). By changing these three factors of a given color, all the Photoshop Textures of the surface we are colorizing will remain intact.
Adjustment layer
The first method I want to show you here is the use of the Hue/Saturation adjustment layer. Start by duplicating your base layer to make sure that you always have your original image untouched. You can do this by pressing Ctrl+J (in Windows) or by going to the ‘Layer’ menu and clicking on ‘Duplicate Layer…’. Then create the Hue/Saturation adjustment layer by using the menu at the bottom of the Layers panel or by going to ‘Layer’ -> ‘New Adjustment Layer’ -> ‘Hue/Saturation…’.

The next step is to select the color you want to change. While to door is clearly green, by simply selecting the green color in the dropdown menu of the Hue/Saturation panel will do a decent job, but not perfect. This is because the range of colors that Photoshop calls green does not cover the whole range of our photo due to the shadows and differences in lighting. To fix this, use the eyedropper tool with the plus sign located at the bottom of the panel and click at different areas of the door, specially at the corners, where the shadows make the green look darker.
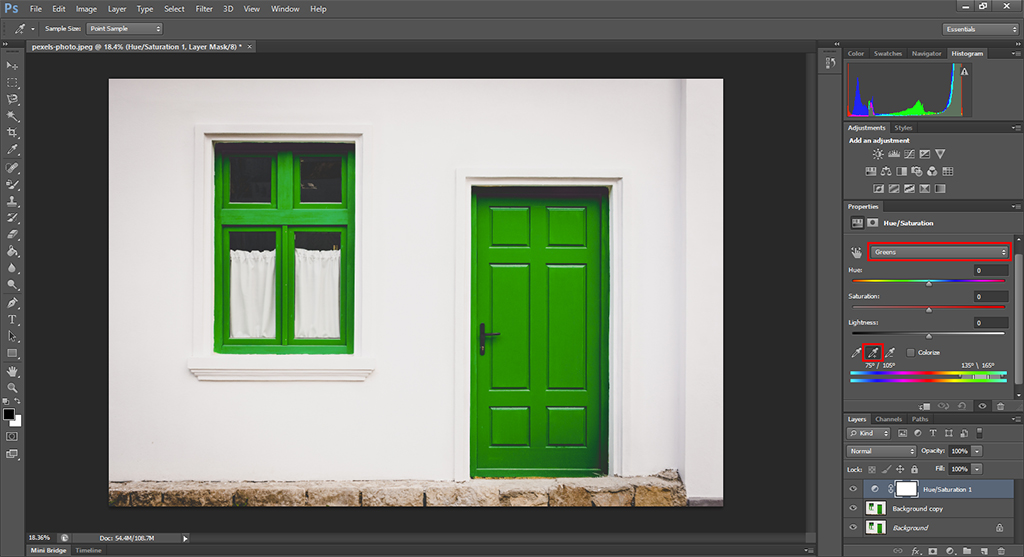
After doing this, if you move the ‘Hue’ slider, you will see how the color of both the door and the window change. You will see that the overall result is quite good, although not perfect. The following image is obtained after increasing the hue to +71.

First of all, some things that we did not want to change actually changed, most notably the window, but also the rock border at the bottom of the house. This is because while selecting the color in the Hue/Saturation panel we also selected colors contained in these two parts of our image (this is quite obvious for the window, but not so for the border). Fixing this is quite simple: you just need to paint with a black brush over those areas in the layer mask (white canvas on the right hand side of the Hue/Saturation layer) that is automatically created with the adjustment layer.
The other problem is on the dark areas of the door, mostly on the top and the bottom right corners and the unevenness of the paint in general. You can almost see the green paint below the blue one. To correct this can become quite complicated and involve a lot of work at a small scale. In general, the Hue/Saturation adjustment layer is a great choice when you have either a relatively flat surface or when you have large variations in contrast that you actually want to keep, like for instance when coloring hair.
Color Replacement Tool
For our case, the second option I want to present here makes it possible to get clean result without having to make too many small adjustments. The ‘Color Replacement Tool’ is located together with the ‘Brush Tool’ on the left-hand panel. This tool allows you to sample a color in your photo with a given tolerance and replace it by a pre-selected color, once again preserving the shadows and structure of the area you want to colorize. You can either select the color from the color palette of Photoshop, or hold the alt key with the tool selected and click in any area of your image (or some other image).
The cursor will be now a circle (similar to the brush tool one) but with a small mark at the center. Wherever the mark is, that specific color will be replaced with our pre-selected color, covering all the area marked by the circle surrounding it. This means that if we select a rather large circle, we can put the cursor over any part of the green door without even being careful for the circle not to go outside the door, since Photoshop will make sure that the only colors replaced are those that fall within the color we want to change plus a given tolerance that can be selected by the user.
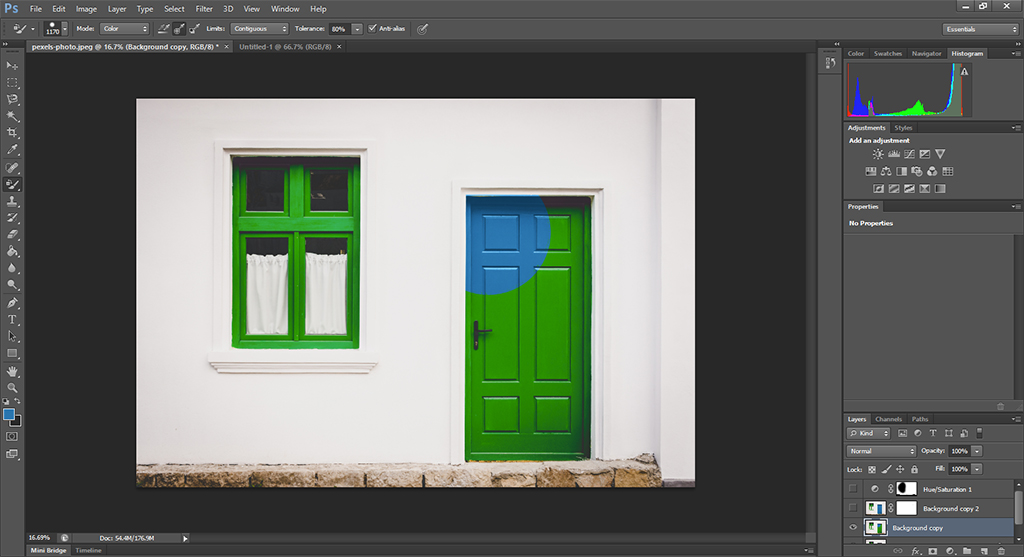
Notice how, even when selecting a large radius (1170 px) and tolerance (80%), Photoshop is able to cleanly select the pixels that do correspond to the door. While painting over the handle, it makes sense to lower the tolerance a bit and, of course, if you are dealing with a low contrast image (our original image has a high color contrast, which makes the whole process much easier!) you will have to play a bit with this value while going through different areas.
If you look closely, some white areas on the top of the door are also painted in blue. This can be improved, once again, by changing the tolerance or by simply masking out the effect by creating a layer mask and painting over the affected areas with a small brush. The final result after using the color replacement tool over the whole door is shown below.
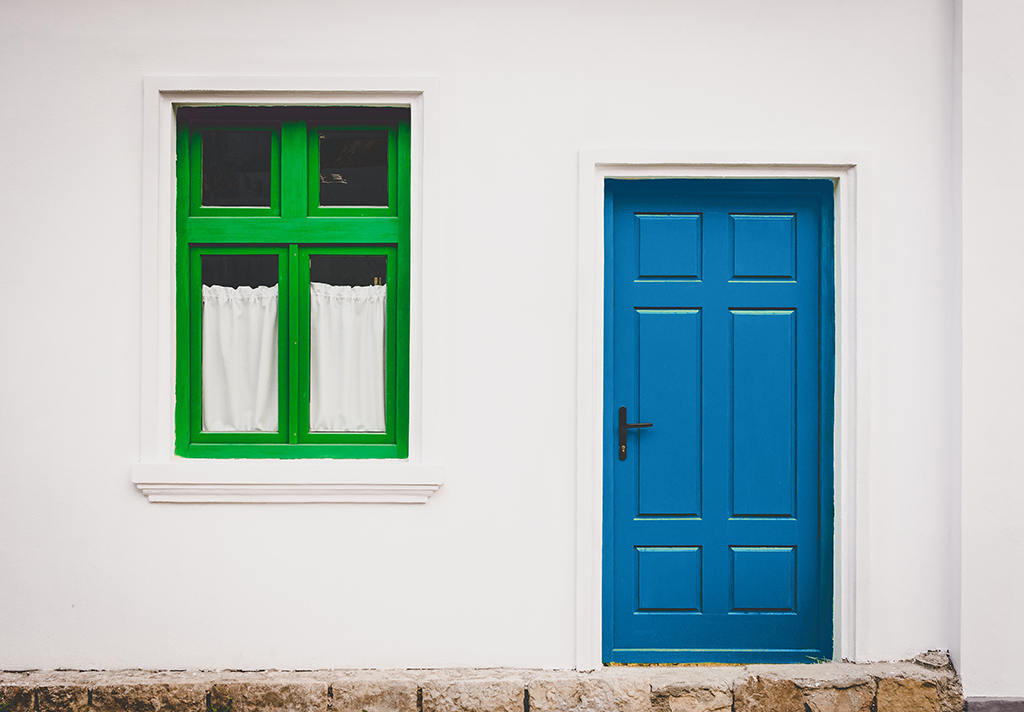
As you can see, the result is consistent over the shadowed areas as well and in general is much flatter than when using the Hue/Saturation method, something that was desired in this case, although not always. As I mentioned earlier, if you are trying to change the color of areas with a lot of contrast that you want to keep in the end (like for instance hair), the Hue/Saturation method will work better, so whatever your situation is, give both methods a try to find the one that suits you best!
Do you want to know how to resize an image in photoshop?
Frequently Asked Questions
Learning how to change color in Photoshop is an important skill to master to level up your photo editing capabilities. You may be able to accomplish some color changes by using Photoshop Actions, which are similar to Lightroom Presets.
Whether you’re new to the Adobe Photoshop color change process or want a refresher, here are some frequent questions users have about how to replace color during editing.
What is hue in photography?
You probably think of hue as a synonym for color, but experienced artists and photographers don’t use the two terms interchangeably. It’s critical to know the difference between color and hue:
- Color is a general term describing every hue, shade, tone, tint, or shade the human eye can perceive. This includes shades of gray, black, and white.
- Hue refers exclusively to the pure colors you’ll find on the color wheel. Specifically, only red, orange, yellow, green, blue, and violet are hues.
In essence, all colors have a dominant hue. For example, lavender has the dominant hue of violet, while sage green has the dominant hue of green.
It’s also helpful to understand a few other terms:
- Shades are created by adding black to a hue to create a darker color. Navy blue, for example, is a darker shade of blue.
- Tones occur when you add gray to a hue. They are less vibrant versions of the original hue.
- Tints arise from adding white to a hue. For example, adding white to red creates a pink tint.
What does the Hue Slider do?
Adobe Photoshop allows you to adjust the hue, saturation, and lightness of any image. Within the Hue/Saturation command, you’ll find the Hue Slider that specifically allows you to adjust the hue to change color in your image.
How do you use the Hue Slider in Photoshop? Start by selecting Enhance, then Adjust Color, then Adjust Hue/Saturation. You’ll now see the Hue/Saturation dialog box. It’s a good idea to check “preview” to see the results of the changes you make.
Next, you can select “Master” to adjust all the colors of a specific hue in your image. For example, you can choose green to change all the instances of green. If you drag the slider right, you’ll adjust the color clockwise around the color wheel. Dragging to the left lets you move counterclockwise around the color wheel.
You can also adjust a specific color, such as a single shade of green. If you opt to adjust a single solid color, you’ll see sliders between the color bar that allow you to define the color range to change. You can use the Eyedropper tool to select, add, or subtract colors from the image.
Another way to make image adjustments in Photoshop CC or Photoshop Elements is to select the Colorize option. This approach lets you change all colors by colorizing gray pixels while leaving black and white pixels untouched.
What does the Eyedropper Tool do?
The Eyedropper tool is one of the most valuable assets in Photoshop. As a color picker tool, the Eyedropper empowers you to select colors from anywhere and add them to your swatches for later use. For some users, the Eyedropper tool is the easiest color replacement tool to master.
You can also use the Eyedropper tools while making hue and saturation adjustments. If you want to adjust a specific color range selection, click or drag within the image using the Eyedropper tool. You can use the Add to Sample Eyedropper tool, which looks like the standard Eyedropper with a small “+” next to it, to expand your color range. Want to subtract from the color range? You’ll employ the Subtract from Sample Eyedropper tool, which looks like the standard tool with a small “-” beside it.
You can also use keyboard shortcuts to add to and subtract from the range when using the Eyedropper tool. On both Windows and Mac, clicking shift will add to the range. To subtract from the range, click Alt for Windows or Option for Mac.
What is a layer mask?
A layer mask lets you hide part of a layer. Since layer masks are easy to reverse, they provide significant editing flexibility compared to deleting or erasing part of a layer.
You can use layer masks to complete a color replacement for part of your image without changing colors in your image as a whole. After opening your image, create a duplicate layer in Photoshop. Next, using the layers panel, hide the background layer and add a layer mask to the new layer you created. Select the layer mask and click on the brush tool.
Choose black for the foreground color. Use the brush to draw over the parts of your image that you do not want to change. Next, select the layer (not the layer mask), then choose Image > Adjustments > Hue/Saturation to select the new color. Turn your background color back on to reveal your edited image.
What is the difference between hue and saturation?
You’ll often see the terms hue and saturation discussed together in photography, but it’s important to know the difference between the two. Hue refers to each different color of the color wheel – red, orange, yellow, green, blue, and violet. Saturation is color intensity.
You can adjust hue and saturation, along with lightness, using the hue/saturation command. Select Enhance > Adjust Color > Adjust Hue/Saturation to get started. This step will display a dialog box with three sliders: the Hue Slider, Saturation Slider, and Lightness Slider.
Adjusting the Hue Slider will adjust the color on the color wheel. With the Saturation Slider, dragging left will decrease the richness of the colors, while dragging right increases saturation. You can use the lightness slider to change Photoshop lighting effects. To make an image darker, drag the Lightness Slider left to add more black. Dragging to the right will increase brightness by adding white.

 Facebook
 Google +