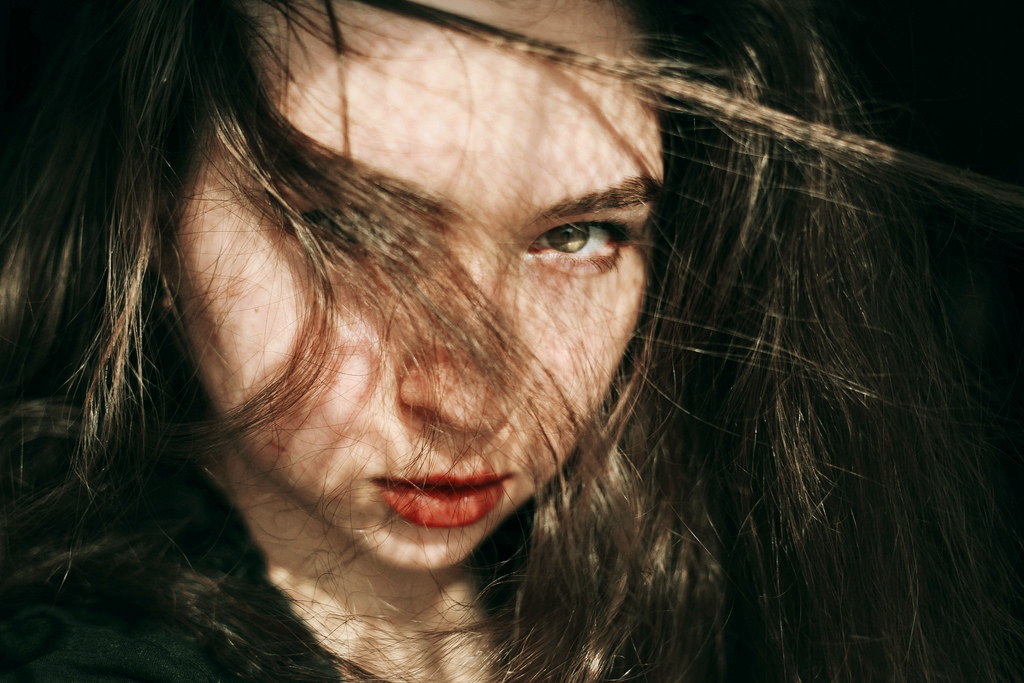
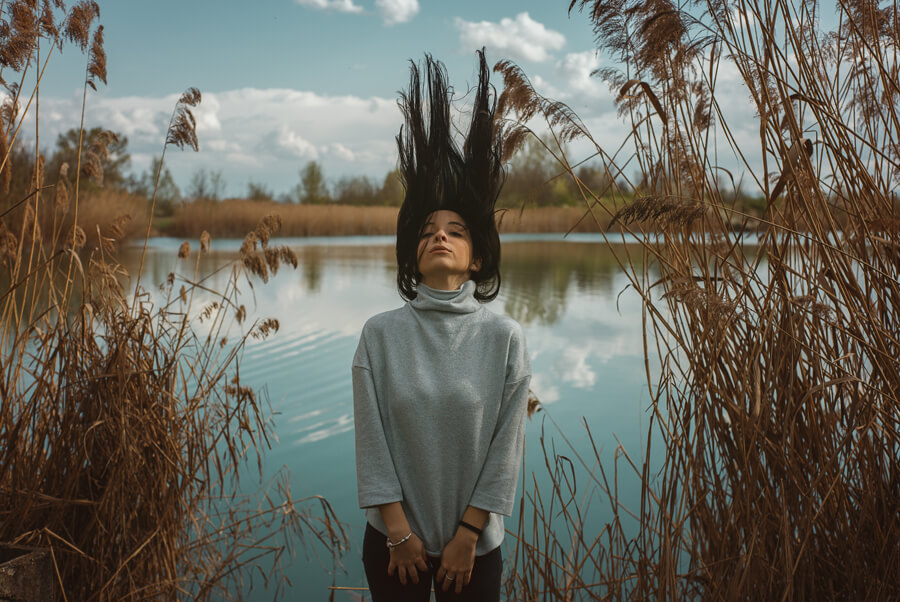
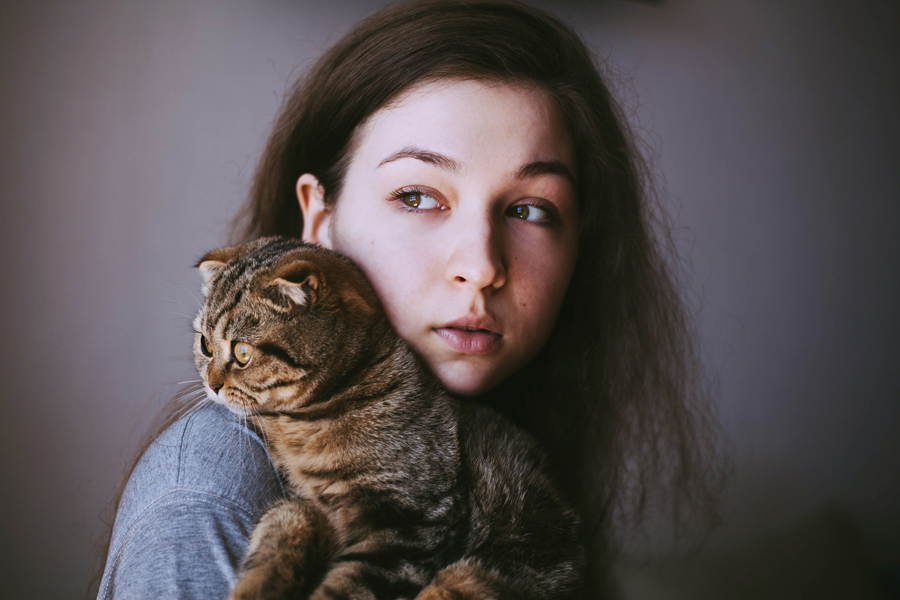
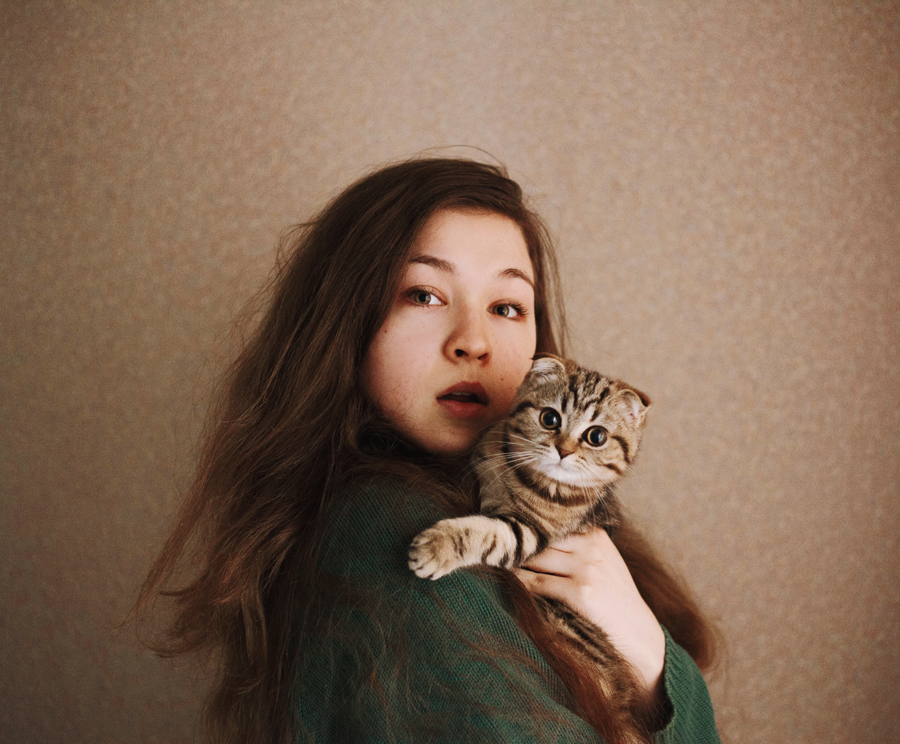
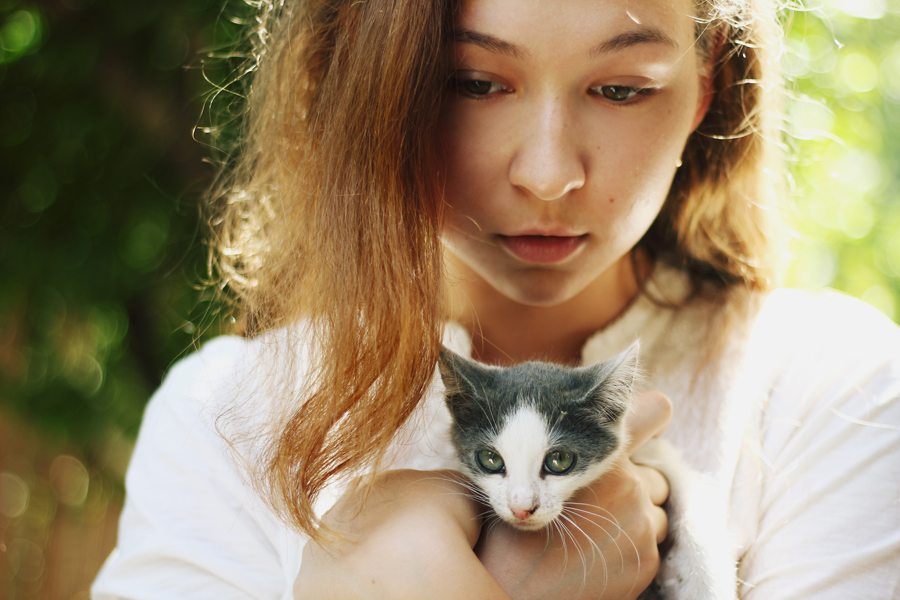
In today’s technologically advanced world, selfies exist everywhere. With the desire to take a photo of oneself comes the desire to look visually appealing. Subconsciously, many of us seek to look acceptable because we wish to feel accepted and welcome. I myself can relate to this desire, one that has often turned into an obstacle in my creative endeavors. Though this need, which is often desperate, makes many people feel like outcasts because of their insecurities, it mustn’t be chastised. A need for acceptance through photos of yourself doesn’t mean you should ditch the mirrors in your home, abandon the art of self-portraiture, and never look at yourself again. Rather than neglecting your appearance, embrace it in an honest way, finding inspiration in the things you often avoid thinking about. Self-portraiture, in its rawest form, is both honest and gentle, revealing the photographer’s strengths and weaknesses simultaneously. Here’s are tips on how to add more emotions and depth to your self-portraits:
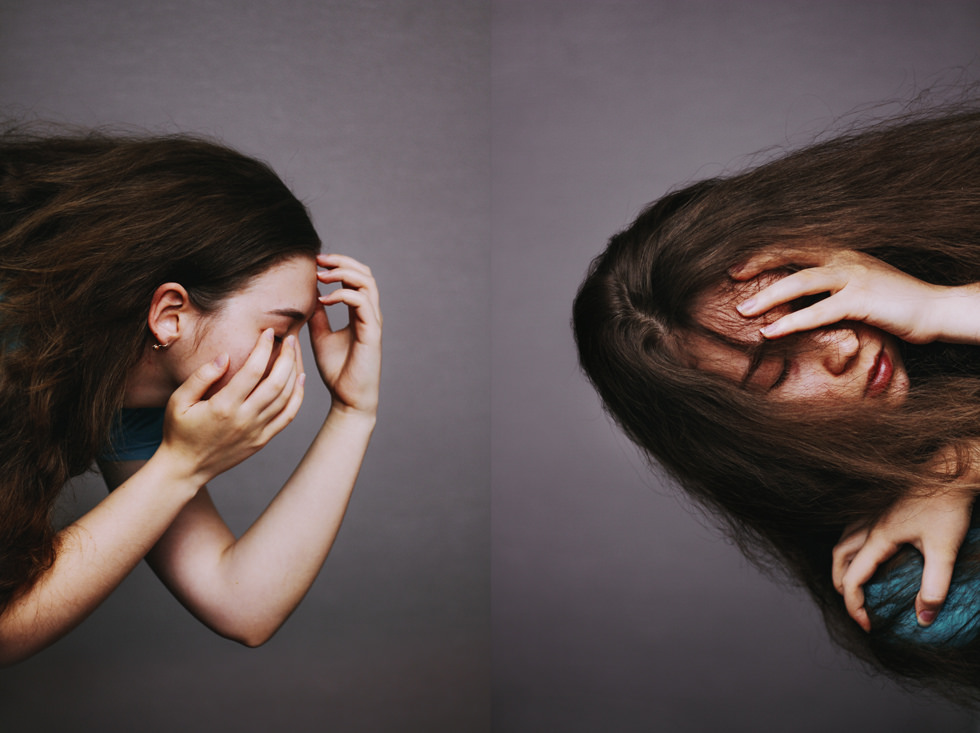
Understand and embrace yourself
It can be very challenging to pick out an emotion and label it accurately. Instead of trying to chase and organize your feelings, remember a movie that really touched you. The movie may not have directly explained the actors’ troubles or joys, but what it did was present you with scenes which flipped a switch in your heart. Photography, like any meaningful film, possesses a similar kind of power. Use this to your creative advantage. Read books, watch films, and listen to stories. As you do these things, your mind will get filled with fascinating ideas and the knowledge that you’re not alone, no matter strange your emotions might seem to you. Storytelling will give you the necessary confidence to take self-portraits, and the heart of a creature belonging to someone else will fill you with inspiration. Watching an incredible film right before a shoot will be especially helpful, as your inspiration will eagerly wait to be used by you.
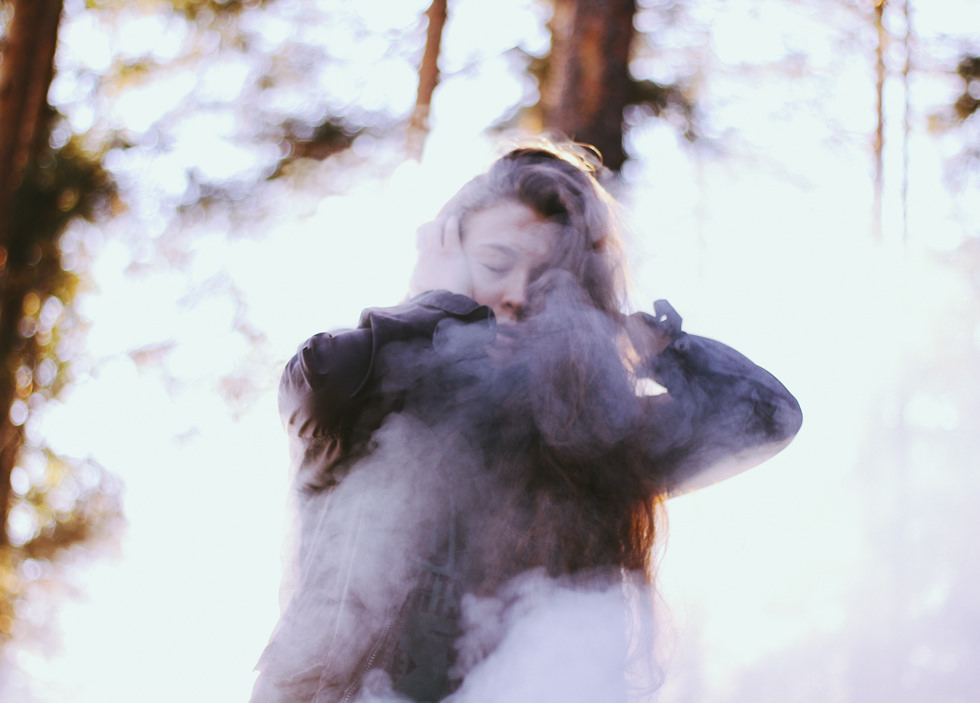
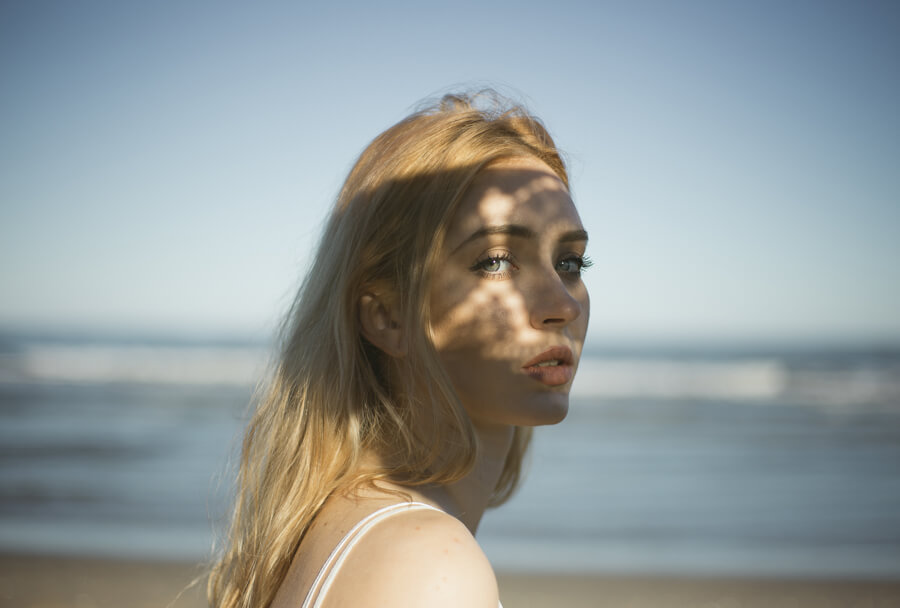
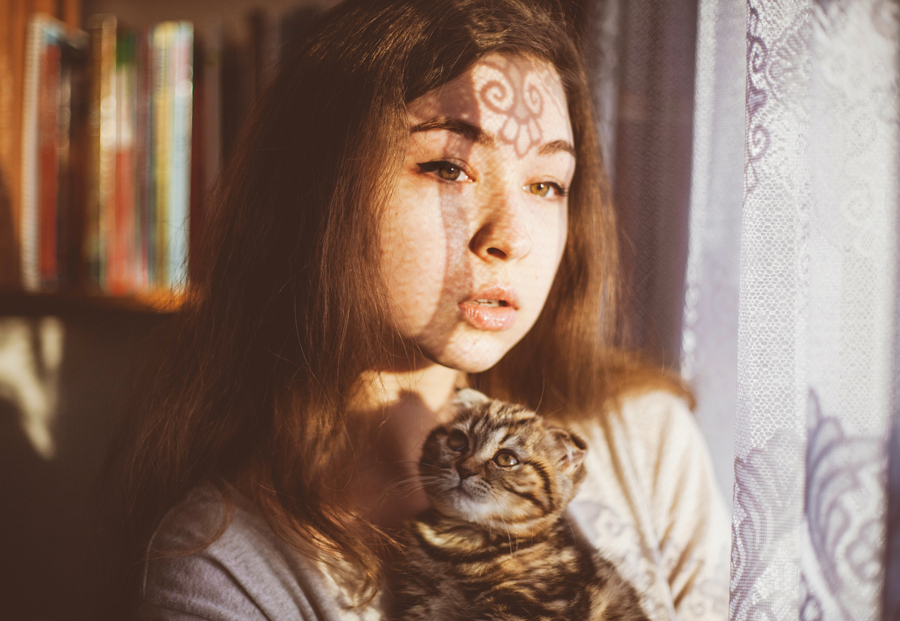
Use nature and objects to intensify your emotions
Weather, colors, movements, and light will all help you reflect your emotions better.
Though facial expressions can often speak for themselves, their effect can be enhanced using things in your home or out in nature. Weather, for instance, can be used either as a dramatic contrast or a direct reflection of the emotion you wish to convey. A self-portrait of a dancing silhouette against a daunting, stormy background has the power to express passion, perseverance, or an inner struggle. No matter how moody or sunny it is in your area, use it to your advantage – if the weather doesn’t match your desired mood, challenge yourself by finding ways to use the current conditions to your artistic advantage.
Other elements that can further highlight an emotion are colors, movements, and light. Colors are especially useful in the editing process, where they can be altered even more to perfectly elevate the image’s atmosphere. Movement can be used to express things like haste, impatience, longing, and fear; a portrait of a person looking frightened in a room filled with falling feathers could express the subject’s fear of moving forward in life. To complement all of these elements, light must be used wisely. Experiment with it as much as you can, even on a daily basis – soon enough you’ll naturally understand what kinds of shadows and highlights would look good in a certain composition. Once you befriend light, things like colors and movements will be bonuses, instead of hindrances, in your work.
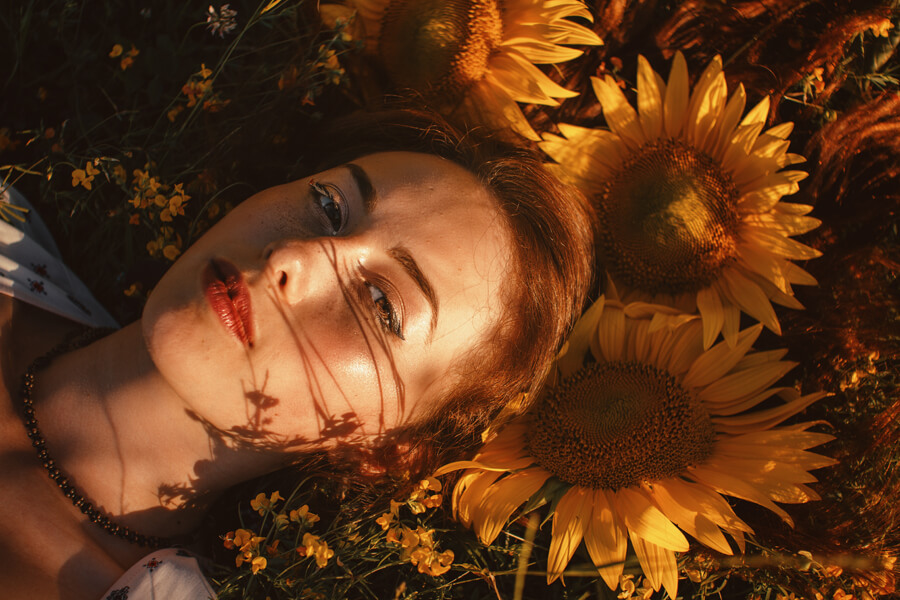
Find yourself in other people
Oftentimes, the people and things we photograph are a direct reflection of ourselves. The famous portrait photographer Richard Avedon once stated, “Sometimes I think all my pictures are just pictures of me.” When we photograph others, we usually capture them in moments we ourselves can relate to. The angles and poses we prefer are often very much our own; even the editing process is a quietly personal one.
Since self-portraiture isn’t all about human faces, take photographs of the people or things you cherish most. If you do want to include yourself in the image, place a mirror next to your subject(s) to get an interesting reflection of yourself. Whatever you do, find details, objects, and colors which speak to you and use them during your shoot. Though the results may not necessarily feature you, they’ll contain the very heart of who you are, and that can certainly be considered a self-portrait.
There are countless ways to take photographs of yourself without prioritizing perfection; photography of all types can be celebrated no matter who or what the subject is. Accepting yourself in spite of your insecurities and worries through art will make you an endlessly empathetic individual. Again, this doesn’t mean that your entire portfolio must consist of very raw photographs; what it means is that when you do feel insecure, dare to embrace it, not conceal it.
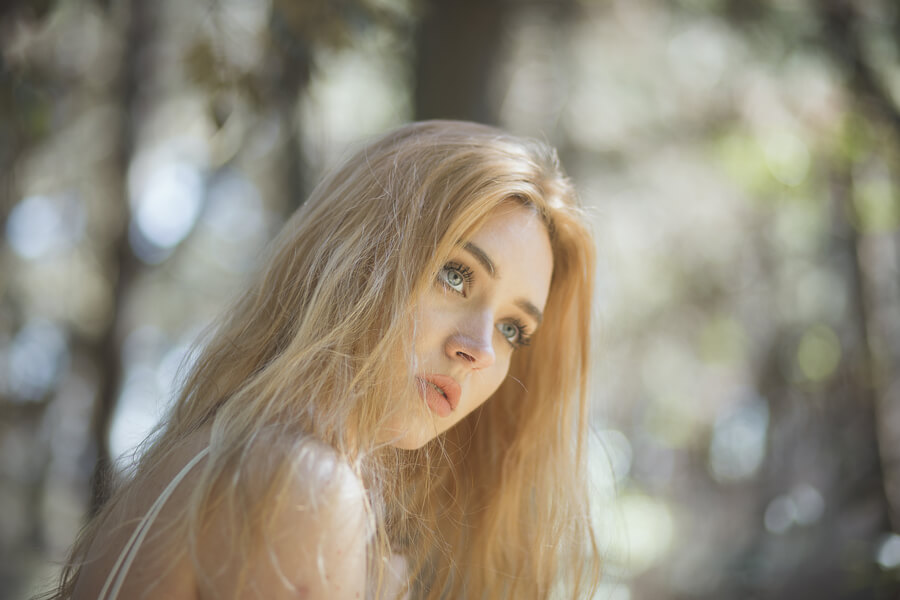
Martina Bertacchi is a talented photographer from Italy who photographs people in worlds unlike our own. Her portraits are charming and striking, focusing on the subject’s raw beauty and their surroundings. In this interview, Martina talks about her inspiration, ambitions, and the tips she’d give to aspiring portrait photographers. I hope you enjoy this eye-opening conversation!
What inspired you to start taking photographs?
I started taking pictures by chance about 6/7 years ago when I was still at school, and photography became a sort of safety valve on the days of full study. I took inspiration from the smallest things, also in the house, but mostly when I went out I really liked to capture nature, leaves, and flowers. My main source of inspiration was the Internet, sites like Flickr and Facebook have helped me a lot. I saw some photographs and I remained amazed by their beauty, so much that I wanted to start playing around with my camera and make it my own. Only much later I began to get interested in portraits.
You have many stunning photos of people. What do you look for in a model?
I love spontaneity in people. I think that in every single person there is a beauty. I consider it very important to constantly look into it, details even in the face. Sometimes the imperfection can become perfection. I prefer delicate, dreamy faces that tell something.
The subjects in your photographs are always very sharp and well-lit. What advice would you give to aspiring portrait photographers?
The advice I would give to a young aspiring portrait photographer is to not be fooled by the desire to have super expensive equipment but to also start experimenting with a simple camera, play with the lights and natural shadows. I think good post production is more important, as that is what gives meaning and feeling to your photo. Lightroom helped me a lot in the beginning.
What does your editing process consist of?
First I shoot in RAW. I find it essential to recover the lights in the background, and it’s more appropriate for the white balance. To develop the raw format I use Lightroom – as I said before, I modify the lights, use Photoshop to work on the skin, and then I play with colors, curves, tones, and contrast.
Who are your favorite artists and why?
I do not have a favorite artist. There are so many that I admire and I esteem. I prefer to quote emerging photographers that inspired me a lot, like Marta Bevacqua, Alessio Albi, Laura Zalenga, Alexandra Sophie. They represent fully the emotions, through their stories – almost fairy-tale atmospheres that fascinate me a lot.
Is there anything photography-related you wish you could tell your younger self?
I would say to always be themselves, to never give up, and never stop to create and experiment new things and to be inspired by anything that surrounds them.
Your models look very graceful and natural in your images. How do you make them feel comfortable in front of your camera?
I’m actually very shy. It happened several times to turn on the music and let myself and my models be carried by it. I always try to make them express themselves without forcing anything.
Is there a photography genre you’d like to experiment more with?
I’d like to experiment more with taking pictures indoors, with natural light, and why not also self-portraits. I find them very intimate and full of emotions.
What do you find most challenging about portrait photography?
Surely to capture the perfect moment, whatever fills my heart with joy and creates something magical and beautiful.
If a photographer approached you and asked for 3 tips, what would you tell them?
Yes, I have three pieces of advice for people who love making photography: Let yourself be guided by your feelings and inspirations and most importantly, take the time to observe the environment in which you take pictures and always give a close look to your subject’s details in order to give value to your portraits.
You can find more of Martina’s work on her Flickr and Instagram.
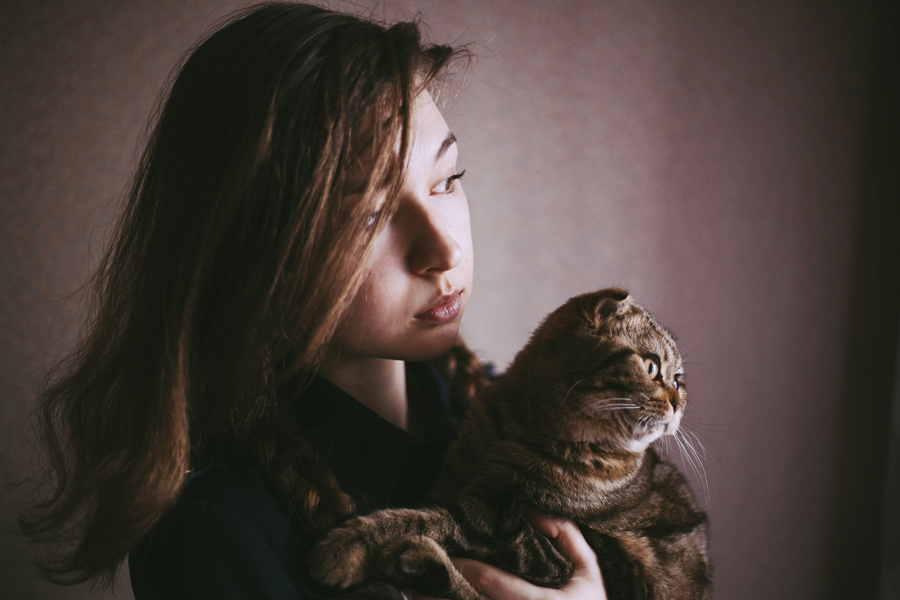
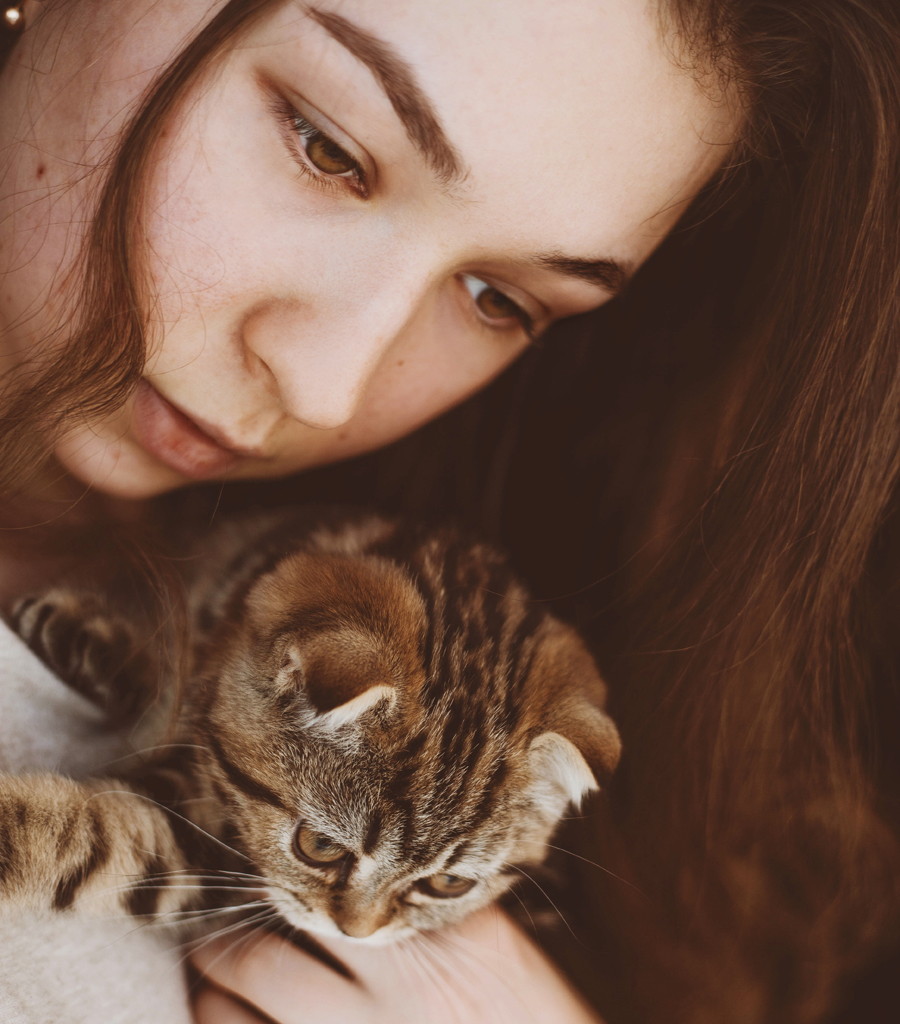
We’ve all attempted to take a sweet photo with our pet at one point or another. Such attempts are often fruitless, especially when cats are involved. Taking photos of them, let alone with them, is akin to running a marathon on an unpleasantly humid day (covered in scratches). The secret to taking interesting photos with your cat involves patience, observation, and creativity. The tips below will help you understand your cat and your camera better. With this knowledge, you’ll be able to take unique and heartwarming photos with your beloved pet.
Prepare your camera beforehand
It’s important to understand your own camera before you attempt to capture your cat’s personality. Plan your shoot at least a day before you have it. Consider the following:
Time of day
Unless you’re planning to use a studio, the time of day is of extreme importance during the shooting process. The darker it is, the higher your ISO number should be. The best lighting conditions are during golden hour (if you’re photographing outdoors) or at noon (if you’re indoors).
Focus
Are you going to be close to the camera or quite a distance away from it? Knowing where you’ll stand with your cat (so that both of you fit into the frame) will prevent you from having a confusing, unsuccessful shoot. Make sure your camera’s aperture is small enough to avoid blurring important parts of your composition. (A large aperture might create photos in which only your cat’s nose is in focus, for example.)
Prepare a distraction
Collect a few of your cat’s favourite toys and treats. Attaching its favourite possessions next to your camera will allow it to feel more comfortable and will encourage it to pay more attention to your camera. You could also ask someone your cat is familiar wih to help you distract it. Some cameras have a blinking timer light perfect for capturing a cat’s attention. If you feel like experimenting, see what your cat finds interesting and look in the same directions; this will add a great touch of spontaneity to your images.
Know where you’re going to shoot
Is your cat familiar with the spot where you’re planning to take photos? Taking it to a place which it doesn’t know well might result in panic, scratches, and a failed shoot. Consider your cat’s favourite places and take photos there. Even if they might not be the most picturesque locations, you’ll get a great experience which won’t stress anyone out. With time, your cat will be comfortable enough in your arms (and in front of your camera) to explore other locations.
Make sure your cat is comfortable and happy
If you own rambunctious kittens, play with them a few minutes before your shoot to avoid restlessness. If you have older cats, make sure they’re content and full. Photographing cats soon after they’ve woken up will prevent them from getting too excited and allow them to be calm enough for your shoot. Unlike us humans, cats look photogenic even after a long nap, so makeup or skin (fur) retouching shouldn’t be a worry at all. Furthermore, remember to have some food nearby so your cat knows that its hard work will pay off. Reward it with a small treats every few minutes to encourage its enthusiasm. In addition to treats, keep toys and a bed nearby to make your cat feel safe.
Experiment
If posed photos don’t interest you, embrace spontaneity instead. As mentioned previously, you should familiarize yourself with the settings in your camera before your shoot. Make sure the focus, aperture, and shutter speed are perfect for the lighting conditions you’ll be working with. Once you’re happy with the settings, position your camera and interact with your cat. Play with it, reward it, and accept its unpredictable nature. The results will be unique and perfect for memory-keeping.
The more you shoot, the more your cat will enjoy the photo-taking process. When it feels more comfortable in your camera’s presence, feel free to experiment with different times of day, light patterns, etc. Here are a few ideas: a silhouette of you holding your cat at night, a double exposure, a simple casual photo in the kitchen with backlight illuminating the room.
If a shoot doesn’t go the way you expect it to, try again later. Don’t allow yourself to give up easily. Photographs of any kind, especially ones with your pet, are worth the hard work and determination because of the wonderful memories they keep for us.
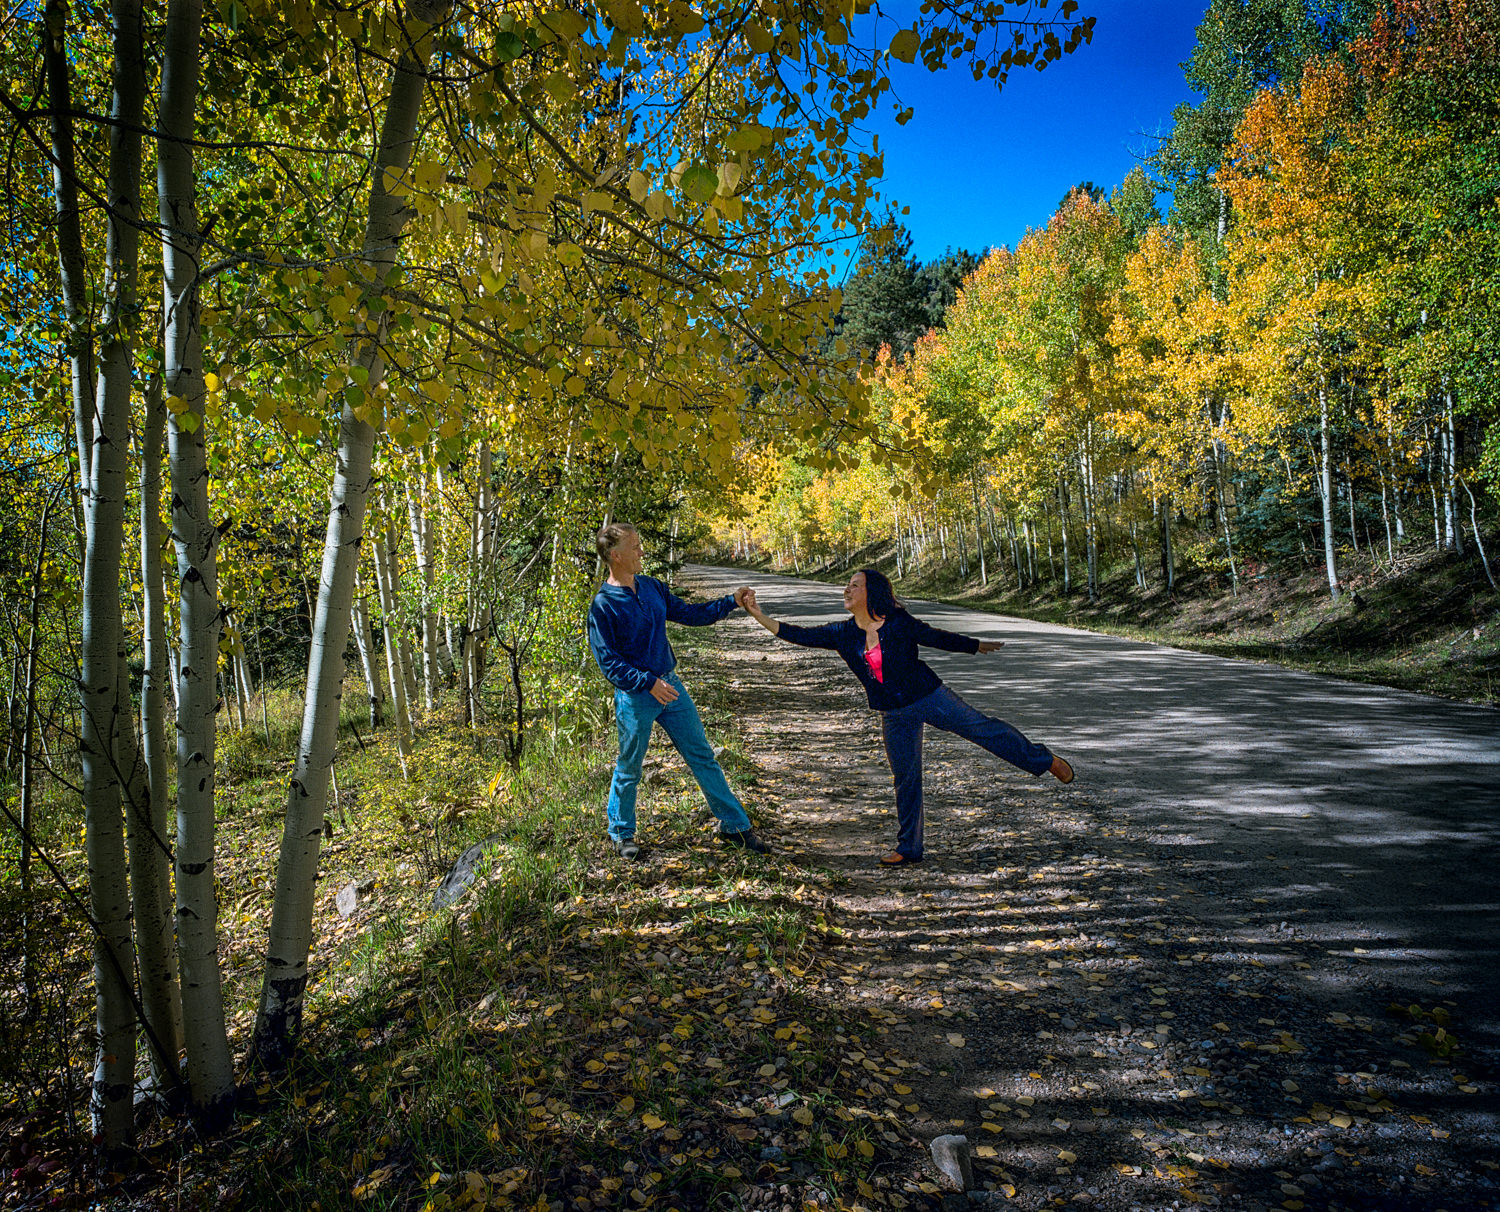
Do you have any romantic photographs of you and your significant other? Well, besides those increasingly boring selfies taken with a cell phone. You call those romantic? Come on, now. You’re a photographer! Devote a little time to getting some pictures of the two of you. It’s at least as important as nailing a great sunset-lit landscape.It’s what I call a canoodling selfie. Let’s break that apart: canoodling means interacting with each other and not mugging the camera. Selfie means you took the picture yourself, which in this case requires a little strategy and forethought. Pretty much what you do as a photographer anyway, but in this case it’s a picture of you hugging your romantic partner or otherwise ignoring the fact there’s a camera pointed at you. I’ll have a suggestion for what you can do with these pictures in relation to Valentine’s Day at the end of this post.
Santa Barbara Canyon, New Mexico. The best romantic selfies are those that look entirely spontaneous, such as this moment among the autumn foliage.
Gear Talk
I’m not saying these pictures are necessarily spontaneous, they just have to look that way. And the means to do that is with the right equipment. This will allow you to get in front of the lens and pose for the picture without the need of a 20-foot long arm (or selfie stick).Camera—Kind of obvious. Learn how to operate the 10-second self-timer. Some cameras have more flexibility in the menu for longer times which helps if you need more time to run from the camera to where you’re posing. While the next piece of equipment on this list eliminates the need for the self-timer, it doesn’t hurt to have this as an option.Wireless Remote—I use the Vello ShutterBoss II. It has a claimed range of 250‘—I’ve gone as far as about a 100 feet and it worked like a champ—and allows me to take multiple pictures at whatever interval suits me. It comes in two pieces. There’s the receiver that attaches to the camera’s hotshoe with a cord for my Canon three-pin connection (it’s also compatible with several other brands). The other half is a transmitter I take with me to activate the camera. (Some cameras allow you to remotely take pictures with an app and smart phone, so check your options.)Tripod—Oh, I know. You hate carrying a tripod. But by having it, you’re afforded all the flexibility you need to get a great shot of you and your sweetie. So what’s more important?
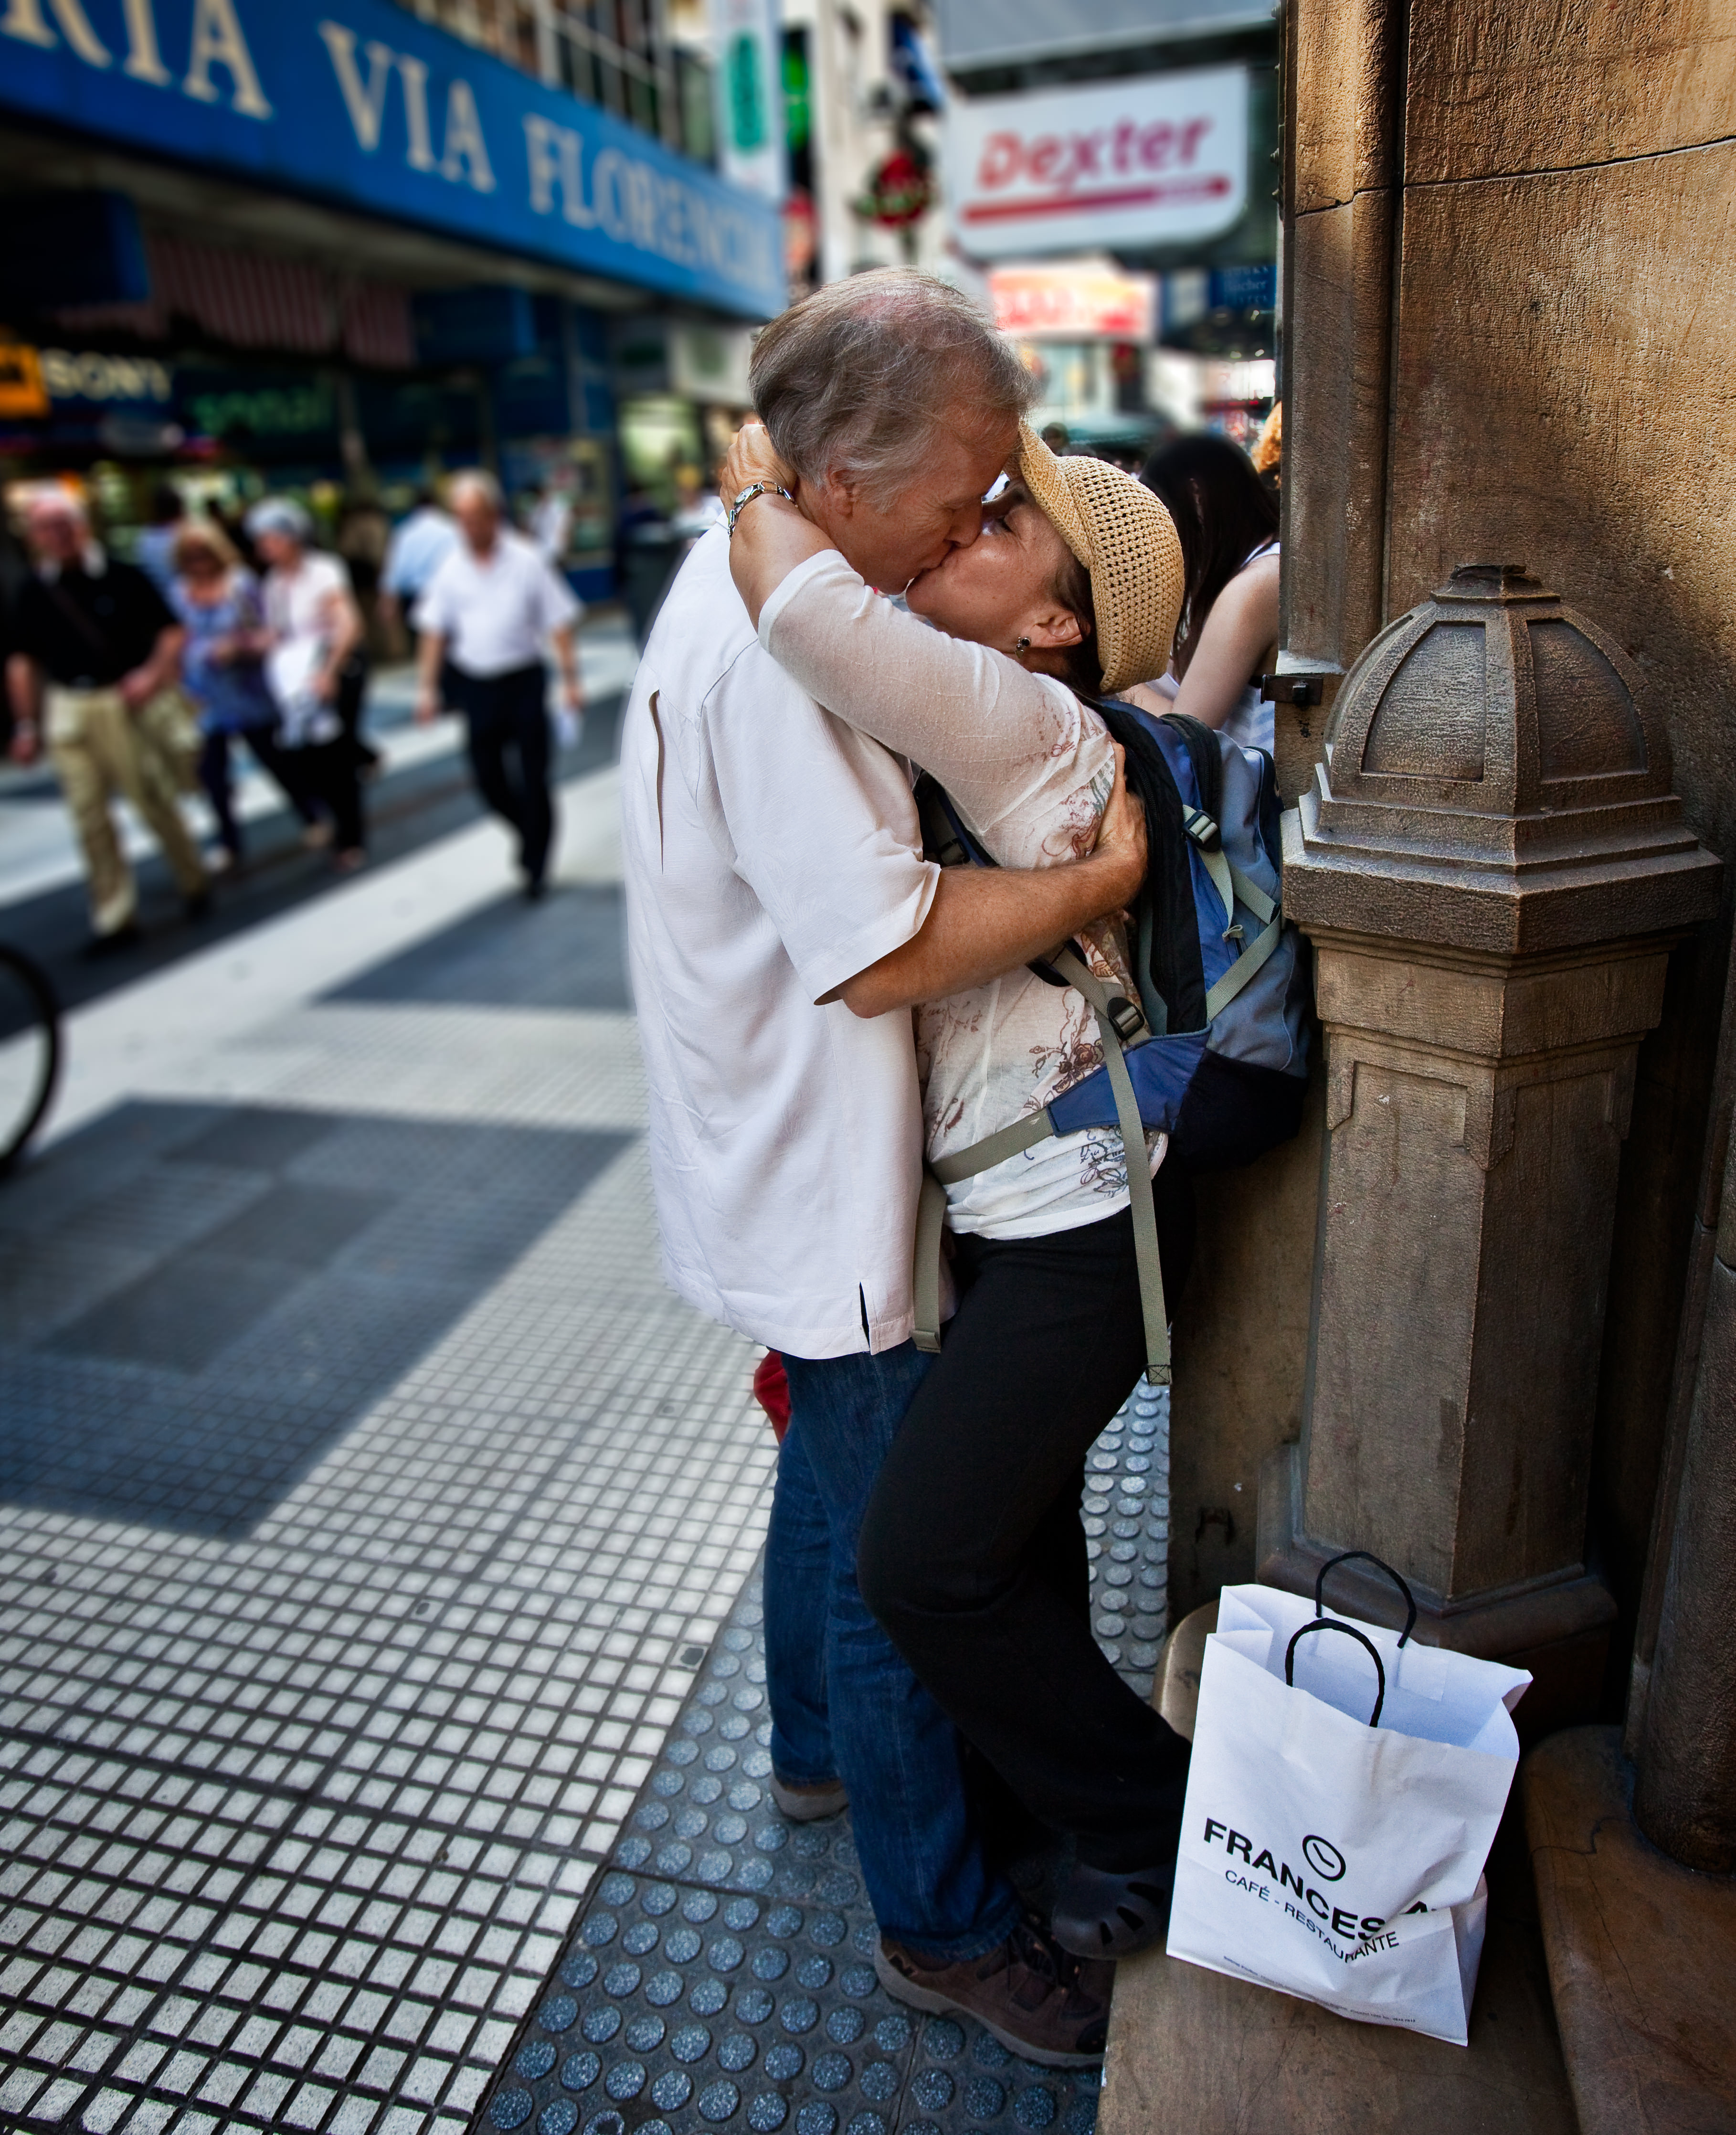
Calle Florida, Buenos Aires, Argentina. Sometimes you just have to lock lips and forget about the crowds around you.
Posing
Here are a few things to think about:Take a moment to think about the composition. Do you want to tell a story about the place in which you’re canoodling? Look around for an element that helps you with that. Maybe it’s just the background, or a prop. I have more than few shots of my wife and I hiking down a trail, our loaded backpacks making it clear what we’re doing. It’s simple and it tells a little of our story. Pose the other person first. Set the focus on them.Decide where you’ll be in the shot and try to make it within the same plane of focus as the other person. If necessary, stop down the aperture for greater depth of field so you’ll both be in focus.
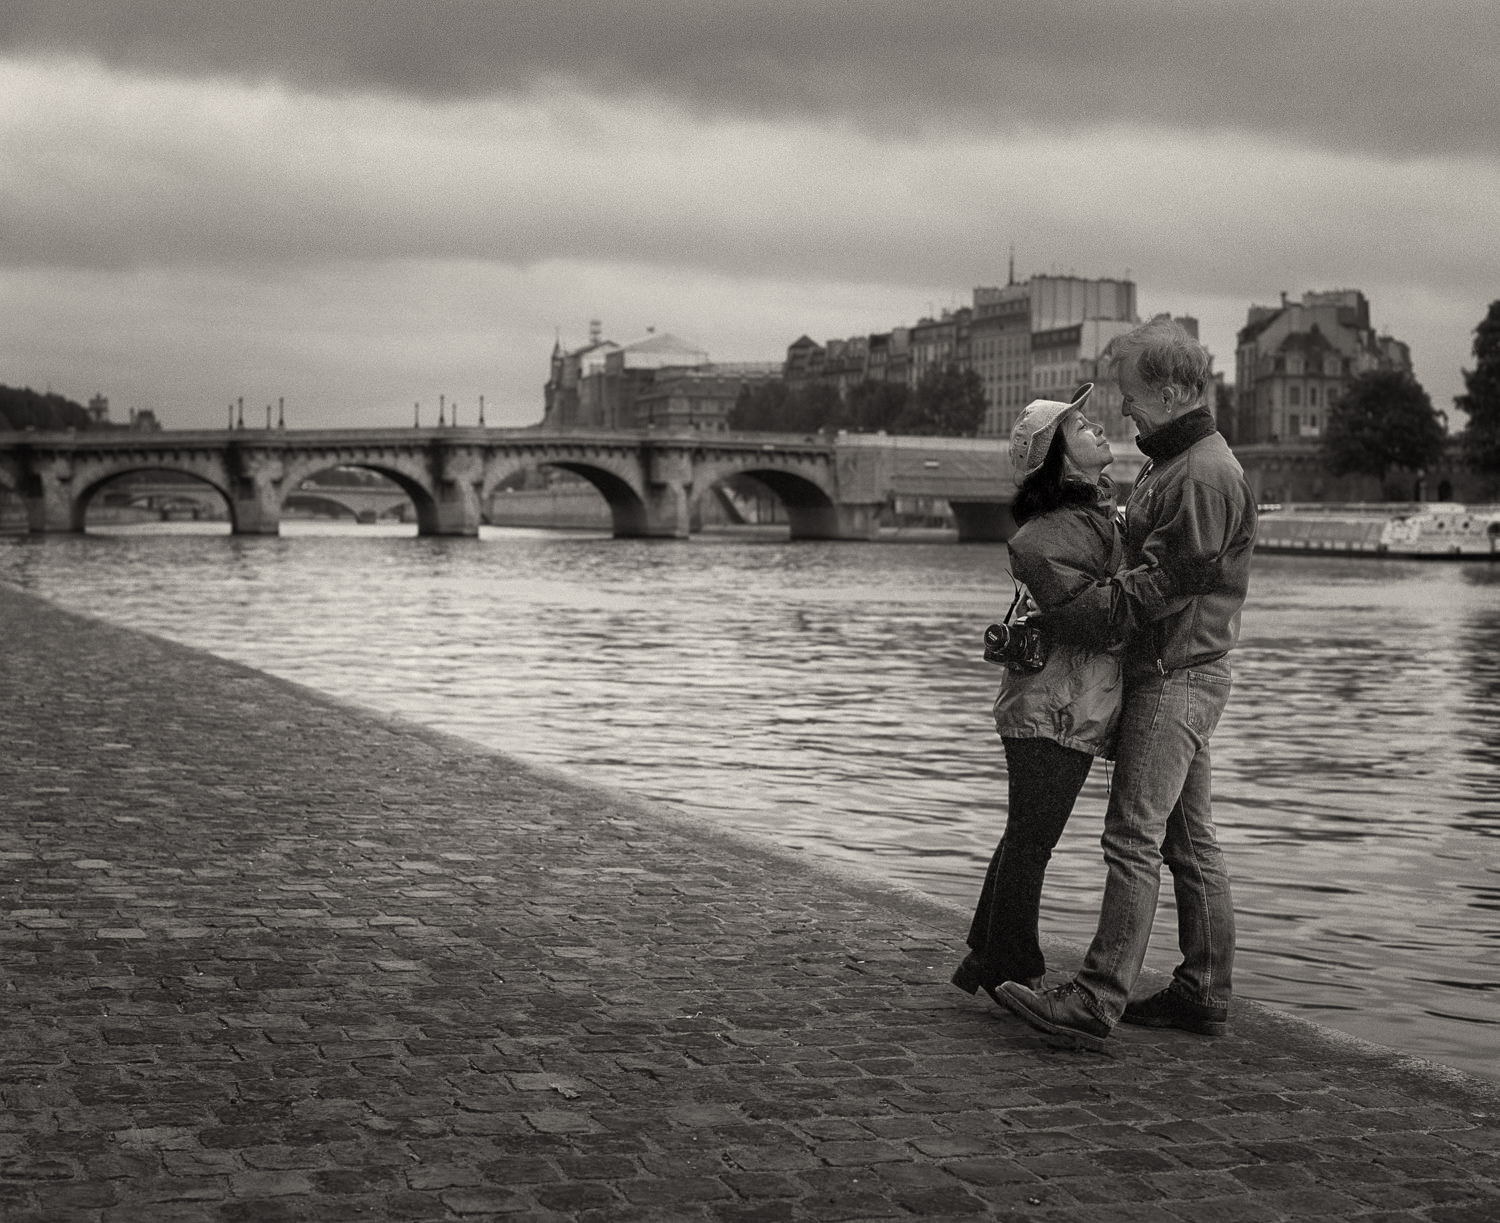
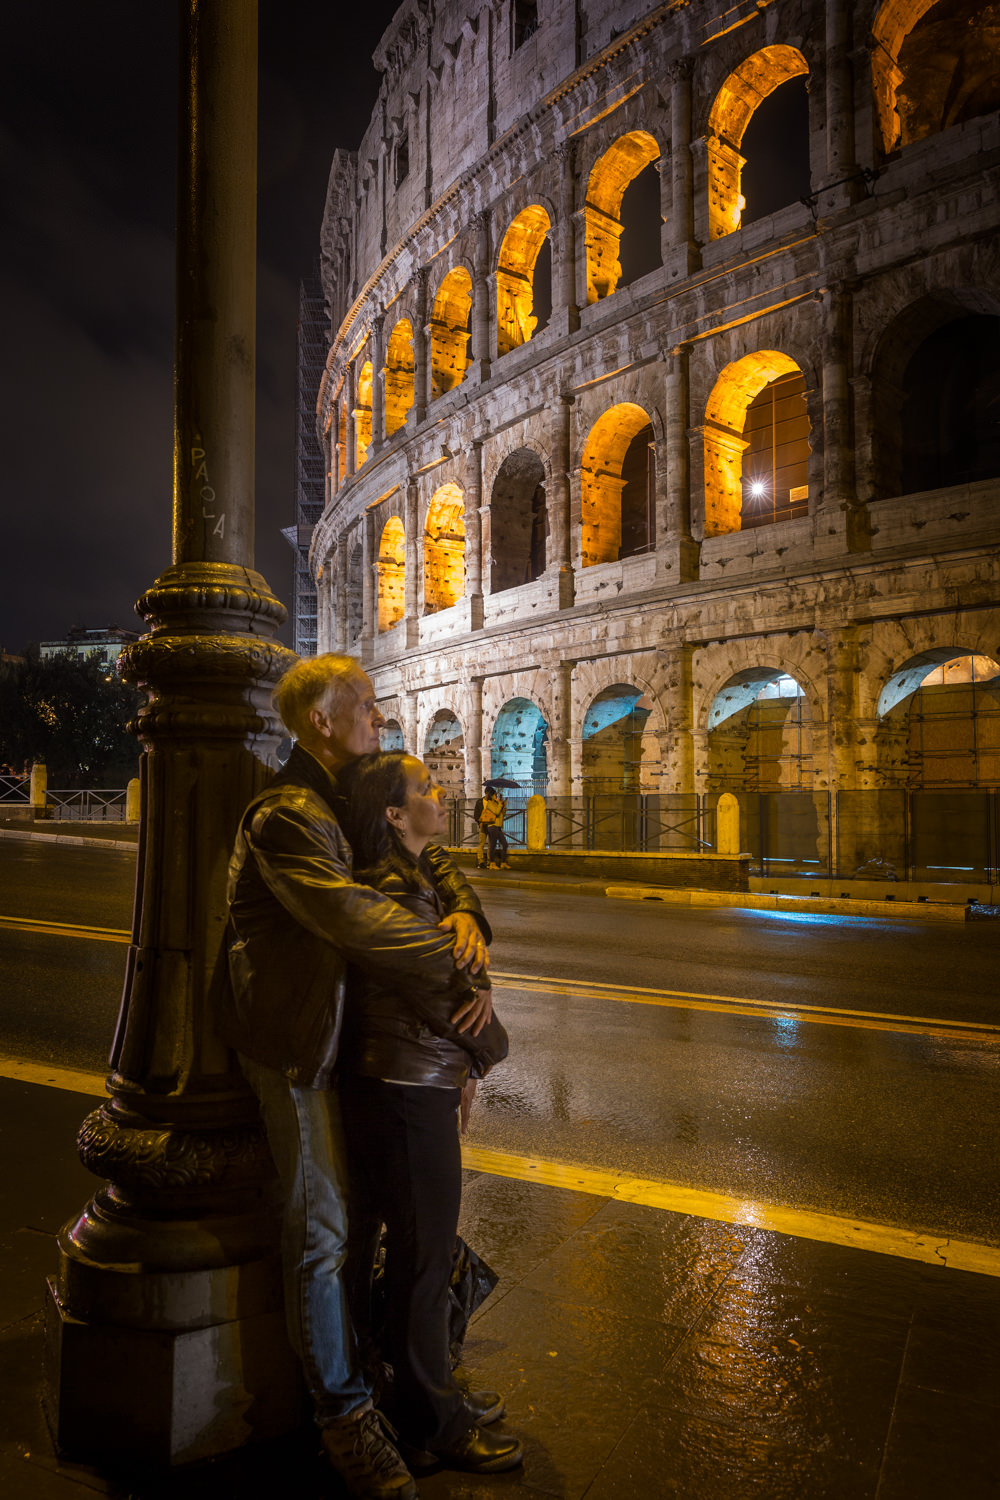
Coliseum, Rome, Italy. It was raining but so what? We got lucky here because headlights from a bus lit our faces while we cuddled in the cold.River Seine, Paris, France.
Ask your partner to “act naturally.” The nice thing about a wireless remote is you can always pop off pictures without getting up to reset the camera, which is distracting and ruins whatever mood you’re trying to create in pixels.
Make sure neither of you will be casting a shadow on the other’s face.
Always check the picture after it’s taken to be sure it worked as you envisioned it.
Leadfield, Death Valley National Park, California. We were exploring this ghost town and came upon a shack with a wide doorway. The perfect framing device.
The Ultimate Valentine’s Day Gift
Okay, so you’ve devoted months, maybe years to collecting all these canoodling selfies. You’ve probably shared a few on Facebook or Instagram and gotten the requisite pile of likes. Wonderful. What’s next?I compiled mine into a book and gave it to my wife as a gift. (Check out my post on producing photography books for more.) There’s something quite renewing about seeing all those shots of us, one after another, that made me realize just how much in love we are. I also discovered the inestimable value in taking a few minutes to canoodle in front of the camera and record the memory for life.
Sometime in the previous century, I was finishing up a 270-mile backpacking trip along a section of the Pacific Crest Trail in California. I was dirty, a little skinny and definitely ready for my close-up. Just as I was traversing along a mountain slope with the morning light in the perfect position to highlight what a greasy mess 15 days on the trail will do to one, I met some day hikers. I asked them to take a picture of me and though they seemed to not understand why I would want such a thing, they obliged.
Given this was the semi-crude days of film, I didn’t see the portrait in grime until the roll had been processed. The person who took the photo had placed my head dead center in the shot. There was nothing but sky behind me instead of the mountain scene. My grungy jeans were cropped off as was the trail itself. A potentially wonderful, story-telling moment—at least to me—was lost.
From then on, I decided I would be responsible for my own self-portraits as they were known back then. Or, so as not to take myself too seriously, I now call them selfies like everyone else.
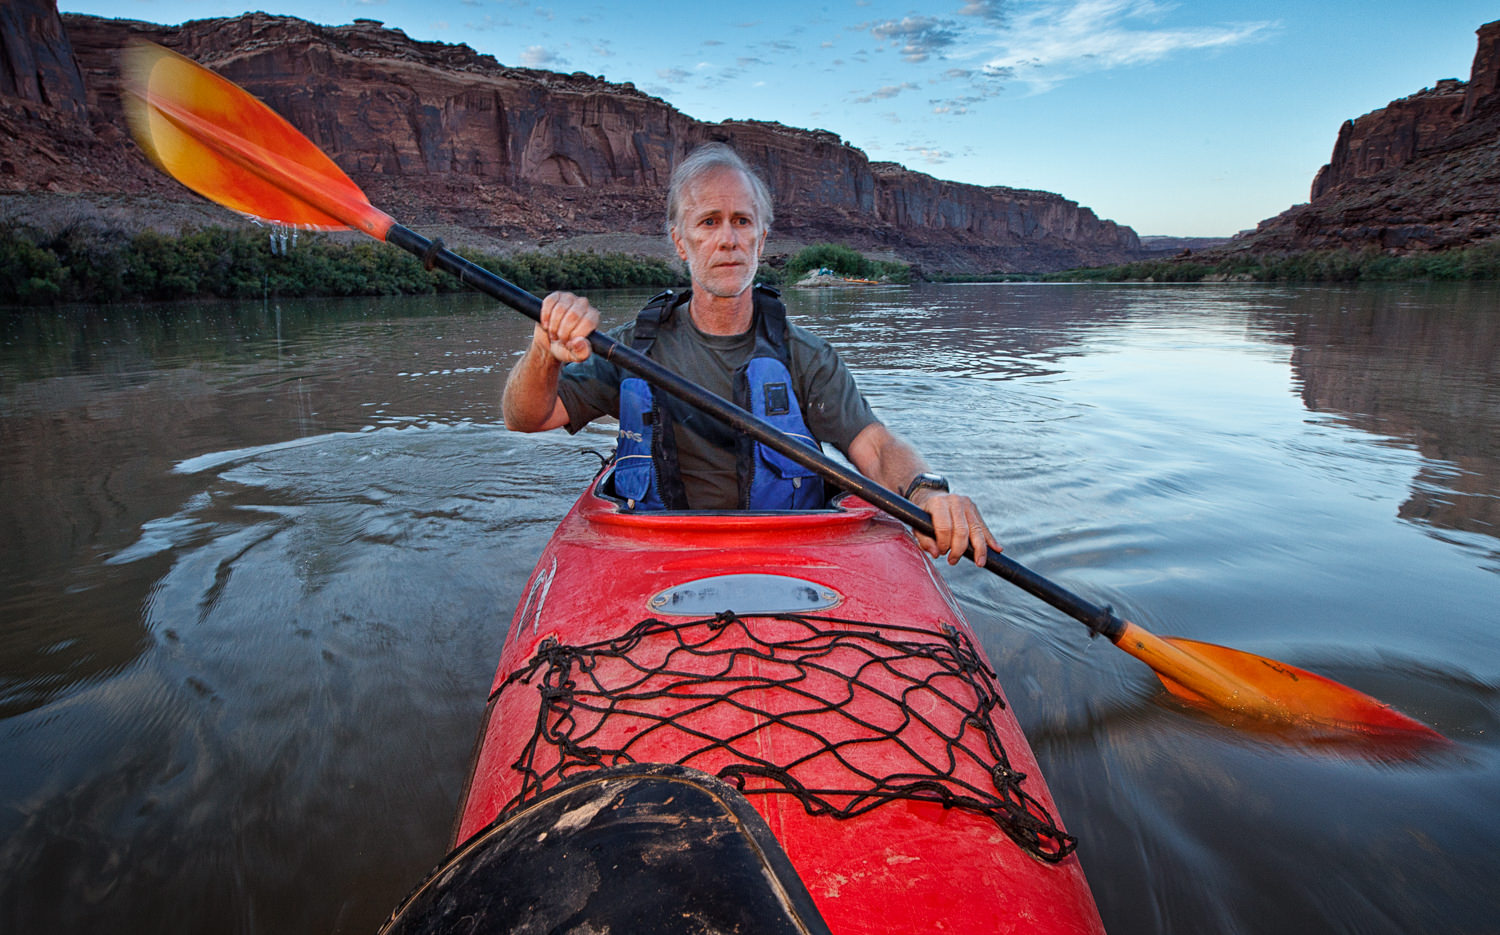
I clamped a Canon 5DMII with a flash and warming filter to the front of my kayak and then went paddling on the Green River in Colorado at sunset. I purposely used a slower shutter speed to get a little blur in the paddles.
However, my idea of a selfie isn’t mugging the camera with a maniacal grin. We can do better than that.
For me, a selfie is a sometimes artful record of somewhere I’ve been or something I’ve done. It includes some context or maybe even shows a little action. I might be alone in the shot or with someone, often my wife. My kind of selfie has a candid quality to it that doesn’t even look in most cases like I took it myself. Very often, it only takes a few minutes to do.
Solo Selfies
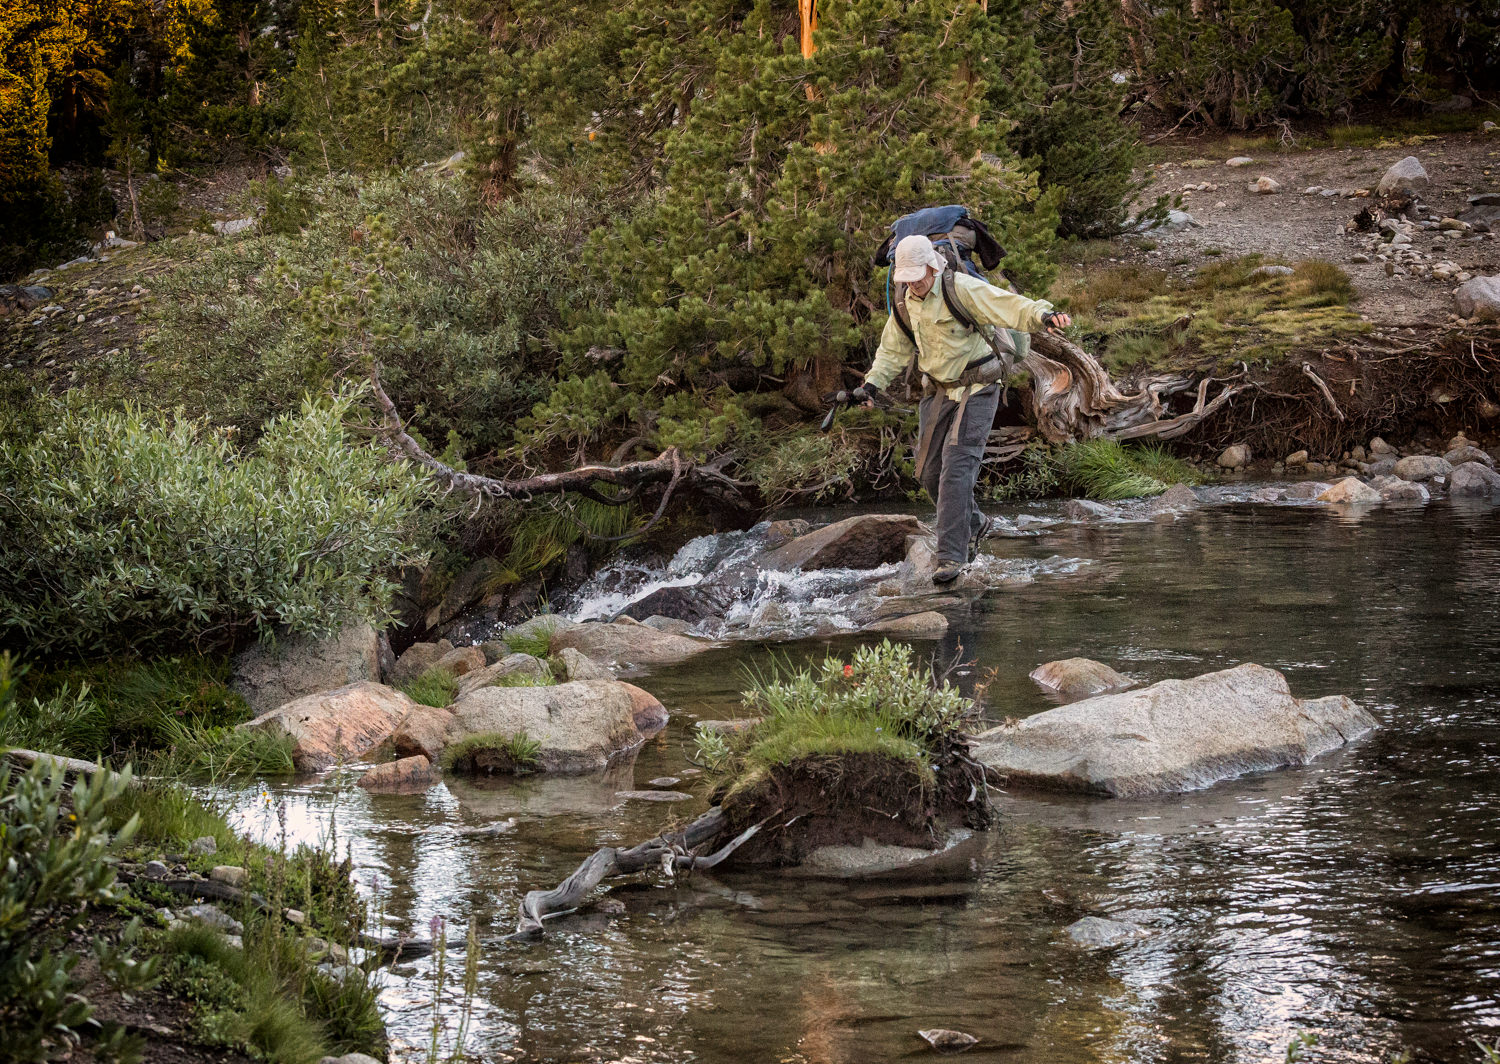
Yosemite National Park. This hiking shot took a little time. I first crossed the creek without my pack and set up the camera. Then I went back, put on my backpack and crossed. I set the wireless remote to take 10 pictures, one second apart so I would have enough different variations to choose from.
So let’s start with a common situation for me. I’m hiking alone in the mountains and come across a beautiful view from atop a ridge. This shot has potential, but it’s missing something, a storytelling element. It needs a model and I happen to have one: me! So I shrug off my pack and pull out a tripod. A small one, mind you. Just hefty enough to hold my camera.
I know, I know. A lot of people hate tripods, especially if they have to carry them any distance. But having those legs are absolutely necessary to precisely compose the shot. After all, have you ever tried to balance a camera on, say, a rock or fence? Too often, you’re composing based on the shape of whatever you’re using for support instead of getting the picture you really want.
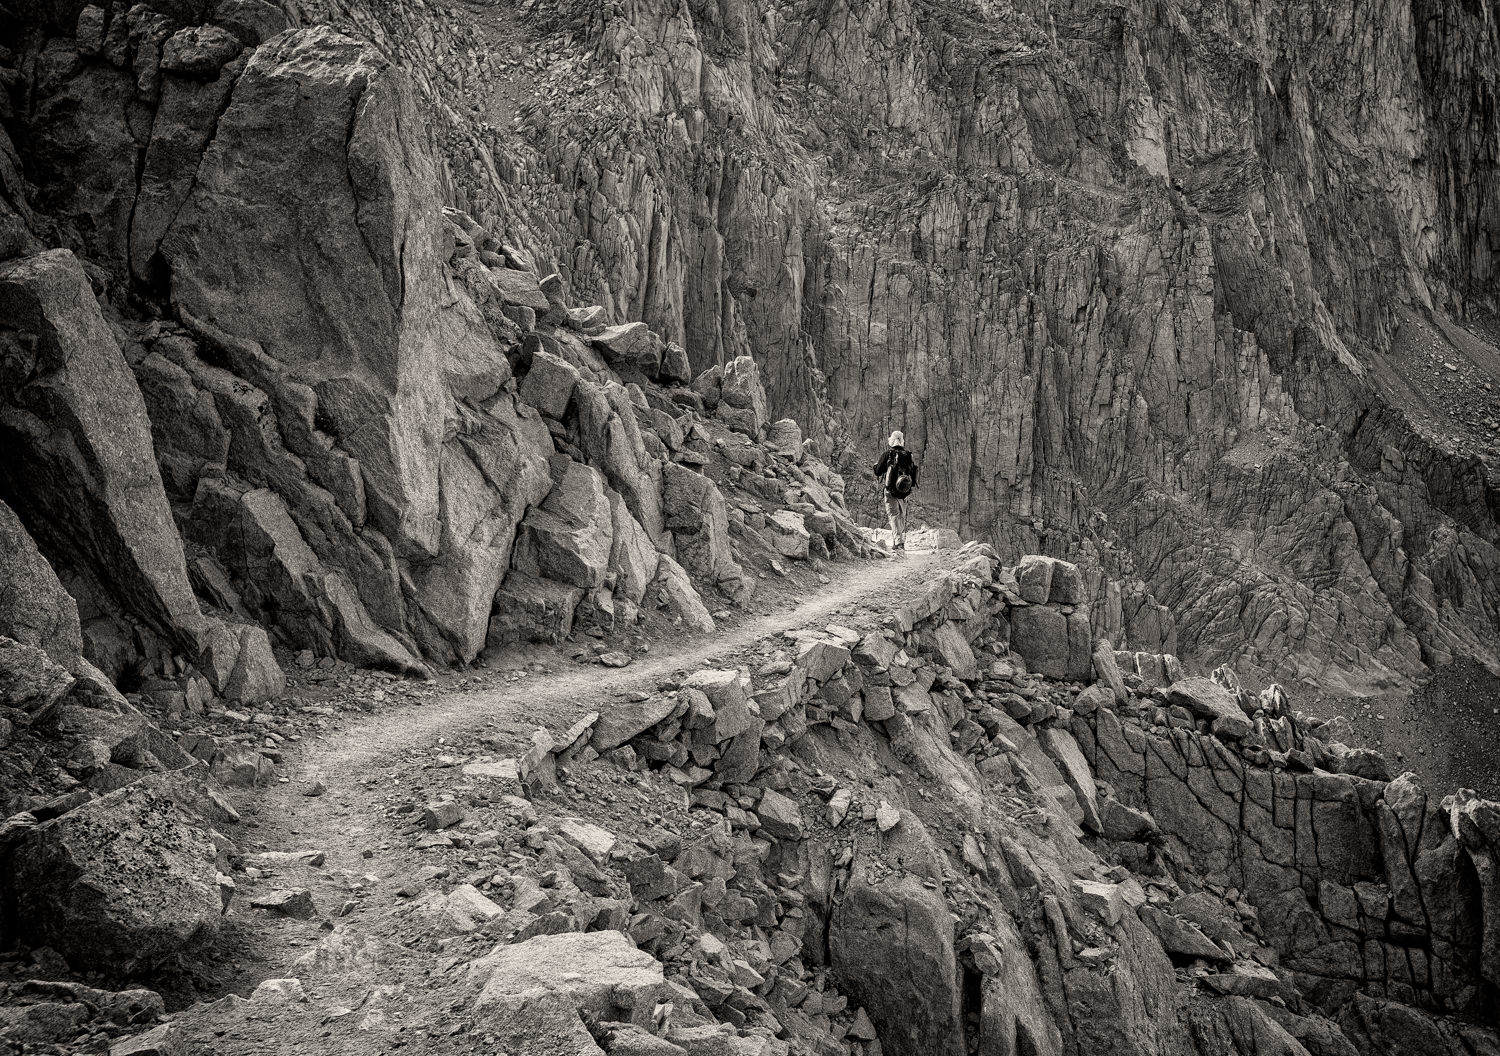
This was more about adding a human element to the scene (Mt. Whitney trail) than showing my face.
So after I whine to myself about having to take the time to extend the tripod legs and attach the camera—true confession: I hate carrying tripods, too—I connect to the camera the second most important selfie tool, a wireless remote. True, just about all cameras include a self-timer but I really detest having to set it and then rush to get into position before the time is up. So I use the Vello ShutterBoss II. It has a claimed range of 250’—I’ve gone as far as about a 100 feet and it worked like a champ—and allows me to take multiple pictures at whatever interval suits me.
It comes in two pieces. There’s the receiver that attaches to the camera’s hotshoe with a cord for my Canon three-pin connection (it’s also compatible with several other brands). The other half is a transmitter I take with me to activate the camera. (Some cameras allow you to remotely take pictures with an app and smart camera, so check your options.)
In this particular scenario, I compose the picture to highlight the story I want to tell. I try to keep it simple. In this case, I just want to be hiking through the foreground with the wilderness scene behind me. Other times, my role as the model might be more static where I just supply a human element for the scene. However, I find just standing there often makes for a boring shot so I prefer to be doing something.
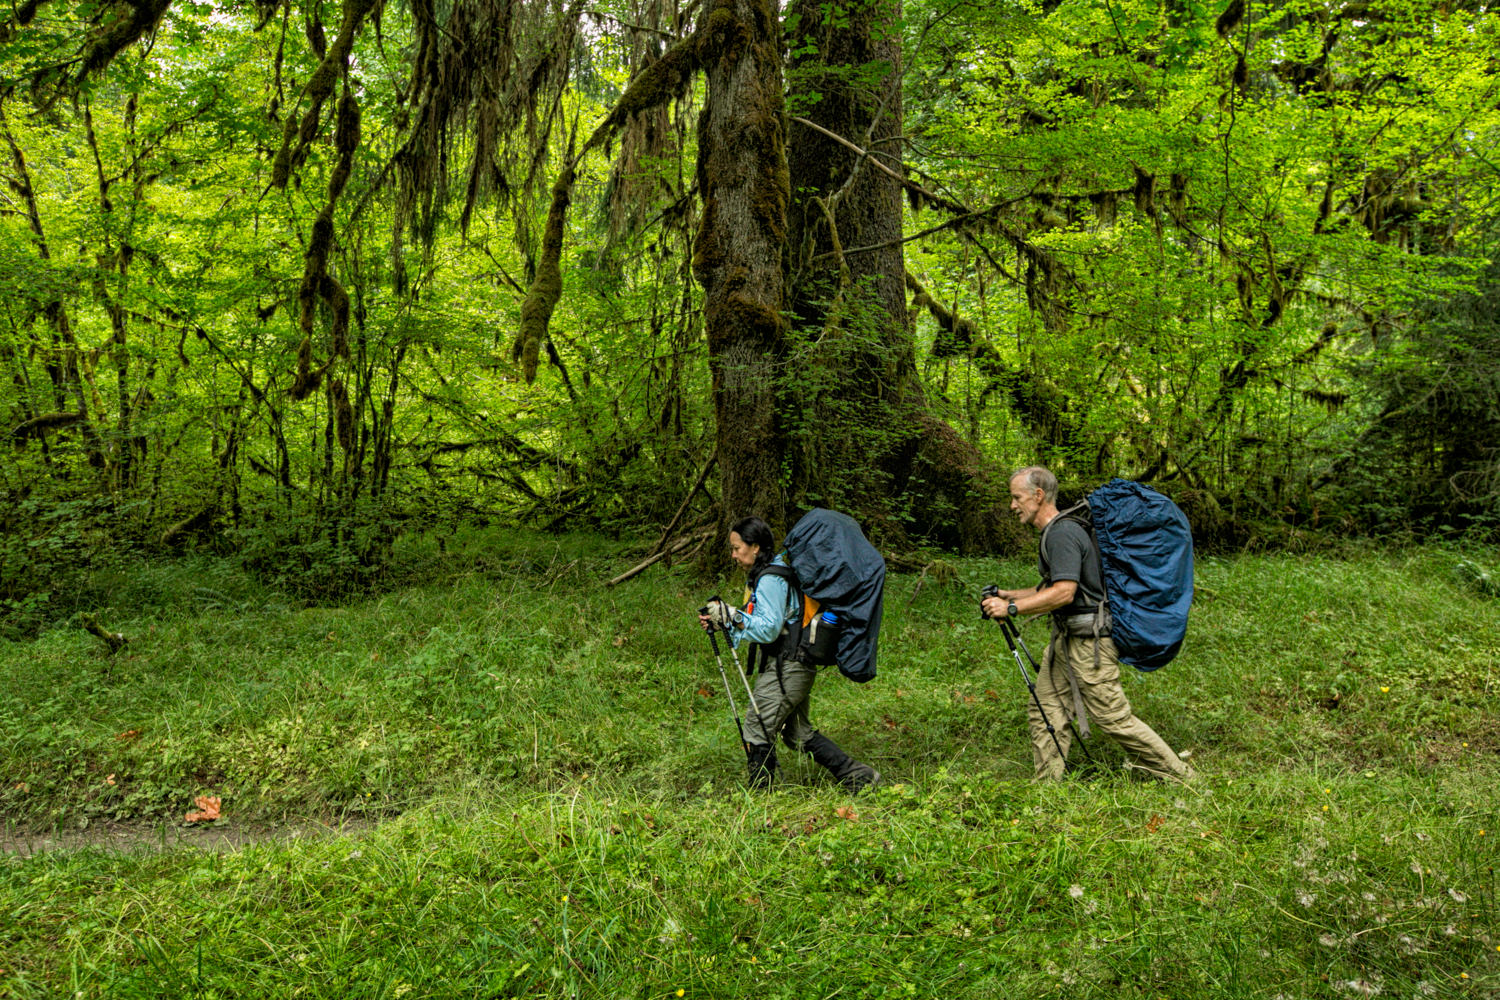
My wife, Gloria, and I hiking the Hoh River rain forest trail in Olympic National Park. This shot served the usual selfie purpose of simply showing us on our backpacking trip, but it also lent a human element to the scene.
There are many issues to consider as I go about this. Here they are:
Where do you want to be in the frame? I usually fall back on the law of thirds to keep it easy and put myself in a lower corner with the scene behind me. If I’m walking, I want to be entering the scene. If I’m standing still, I want to be facing the main part of the scene from the side of the frame.
What’s in the background? You don’t want to block an important element. Also, look for such pitfalls as trees or poles that potentially could spring out of the top of your head.
What’s the direction of the light? Generally speaking, you want the light source on your face. Make sure you’re not standing in a shadow when the rest of the scene is brightly lit.
What are you going to do in the shot? Moving? Standing still? Fiddling with something? Or just smiling at the camera? Plan ahead so you don’t come away with an indecisive look on your face. Know the story you want to tell, no matter how simple it might be.
Know where you want to be in the actual scene. That sounds obvious, right? But everything looks a little different from where the camera is opposed to when you place yourself in the scene. Look for some object in the viewfinder that’s close to the position you want to be in. Maybe it’s a distinctive rock, lamppost or crack on the pavement.
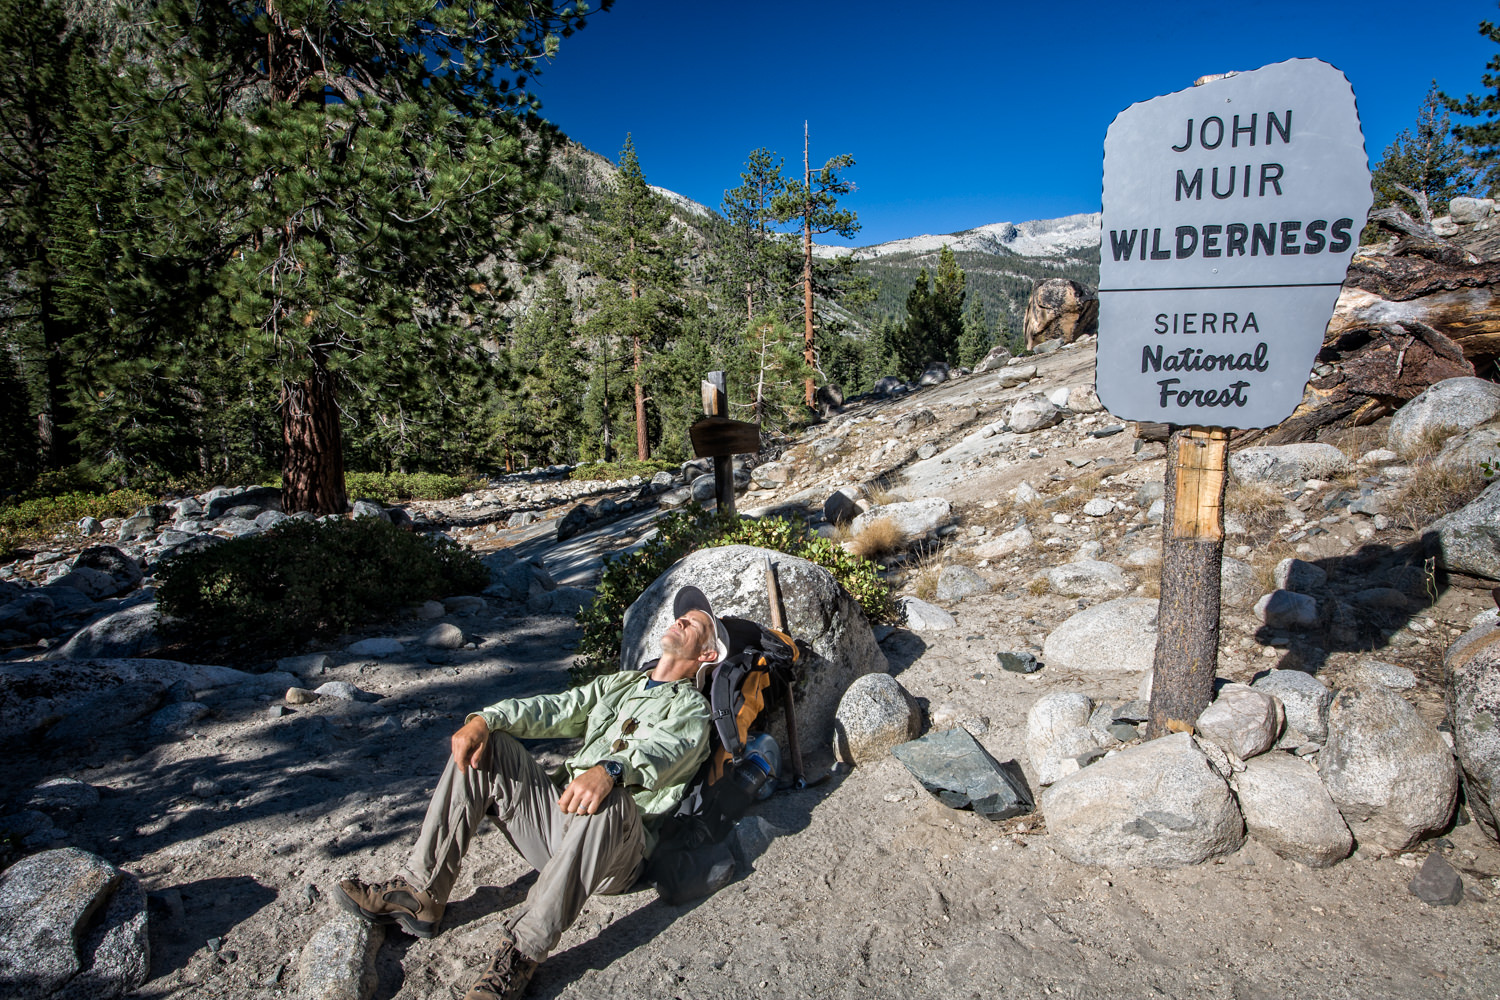
This is really the simplest of all super selfies, but it does tell a brief story about my solo trip on the Pacific Crest Trail through the High Sierras.
Take a moment to visualize yourself in the picture and how your presence contributes to the overall composition. Be prepared to reshoot if your imagination isn’t accurate.
I like to set the remote so it shoots after a three or four-second delay. That gives me time to stash away the transmitter in a pocket so I’m not pointing it at the camera when it starts taking pictures. This also adds to the impression of the shot being totally candid or unposed.
How many shots do you want to take? Sounds odd, but say you’re walking through the scene. Set the remote to pop off 10 frames at one-second interval. You’ll have a lot more variations to choose from. Even if it’s a more static shot, take several pictures at a time, varying your pose slightly for each frame.
Pre-focus and then set the lens to manual focus. This prevents the camera from re-focusing on the wrong thing when you hit the remote. Choose something as near as possible to where you’ll be standing and focus on that. If you’re a little unsure, set a smaller aperture for greater depth of field so you’re more likely to be in focus.
Manually set the exposure. Again, this prevents the camera from making decisions you might not agree with once you’ve walked away from it. For added insurance, take a shot while you’re still at the camera and examine the LCD version for proper exposure and focus.
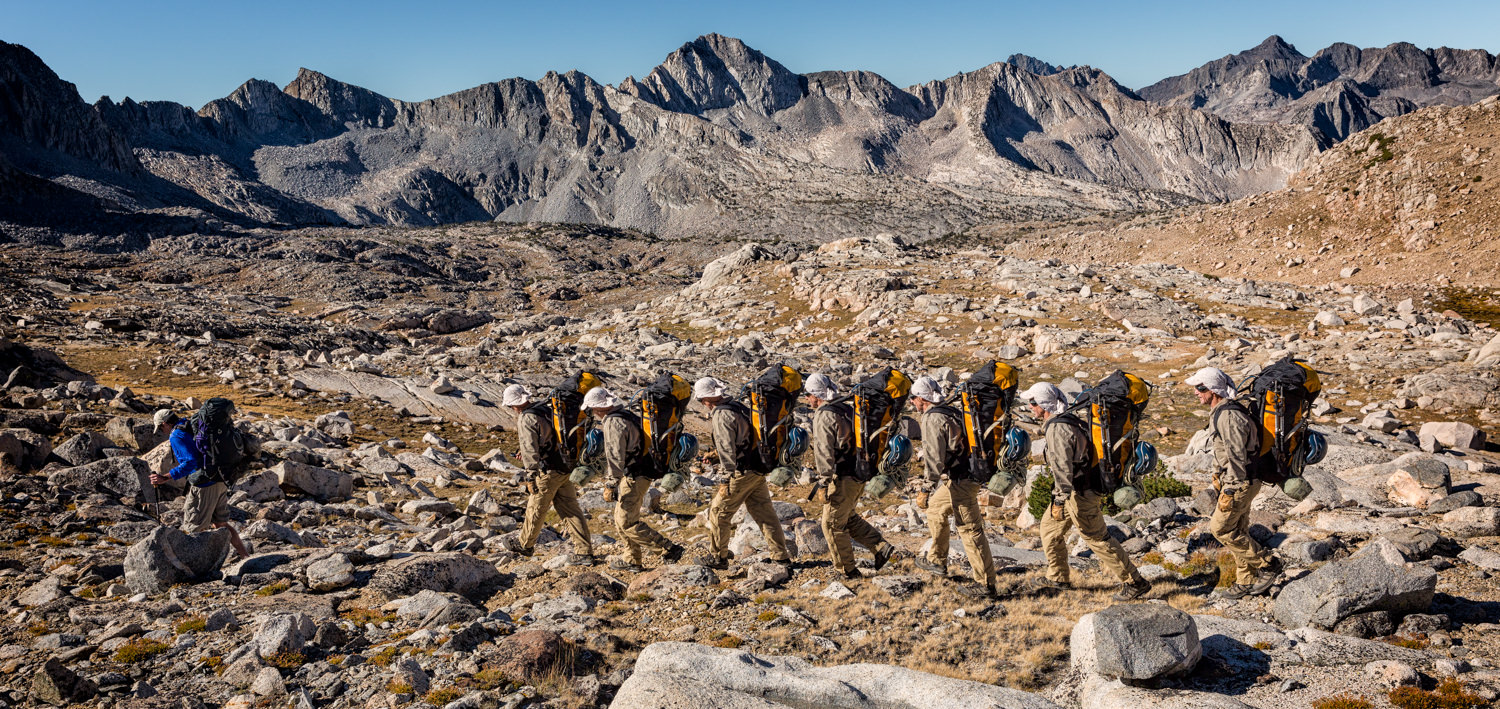
As my friend and I were cross-country hiking to Thunderbolt Pass in the Sierra Mountains, the high altitude, and rugged terrain made feel like I was carrying a pack for a whole group. So I set up the wireless remote to pop off 10 pictures and then I combined the seven best ones in Photoshop using layers and masks.
Consider your shutter speed. If it’s too slow, you might be blurred. Of course, you might want that to suggest movement, but if you’re just standing there you’ll usually want to be sharp. Increase the ISO for a faster shutter setting if necessary. For walking shots, aim for at least 1/250, for more static poses, at least 1/30.
Be careful where you place the tripod. It should be on solid ground. Trust me, you don’t want to helplessly watch your camera topple over when it’s 20 feet away. If it’s windy, hang a weighted bag from the tripod hook on the center post, or lower the legs so the entire assembly is a bit more stable. Also, when you walk away from the camera on your way to pose, be careful not to knock into it. (I’ve done that, too.)
If you’re doing this where there are people passing by, be sure no one can trip over the tripod.
Always check the pictures you’ve taken to make sure they are what you intended. Reshoot if necessary. If you have time, try different compositions.
Canoodling at the Roman Coliseum. We got lucky because it was a rainy night which shined up the road. And then the headlights from a bus down the street illuminated our faces.
Canoodling Selfies
More often than not, I’m traveling with my wife and we like to do what we call canoodling pictures. We’re not mugging the camera. We’re interacting with each other one way or another, seemingly oblivious to the fact we’re being photographed. For my money, they make for far better travel pictures because, again, they tell a story about our trip. Also, instead of only getting a limited shot of the surrounding scene, dependent on how long my arm is for holding the camera, I can compose so there’s greater context. That shot of us in front of the Eiffel Tower actually has the entire icon in the picture.
And, oh, one more thing: our faces aren’t distorted like you see in a typical selfie. If the composition requires it, I can use a long lens with us off in the distance.
Half Dome, Yosemite National Park. Shot with the camera’s built-in self-timer
Here are a few things to think about when doing a self-portrait with one or more others:
Pose the other person first. Set the focus on them.
Imagine yourself in the shot and determine if you’ll be in the same plane of focus as they are. If necessary, stop down the aperture for greater depth of field so you’ll both be in focus.
Beg, if necessary, for your selfie partner to ignore the camera and “act naturally.” Find something for them to do or have them interact with you. The nice thing about a wireless remote is you can always pop off pictures without getting up to reset the camera, which is distracting to the other person.
Make sure neither of you will be casting a shadow on the other’s face.
Always check the picture after it’s taken to be sure it worked as you envisioned it. My attitude is, we’ve traveled all this way, we might as well get great shots of ourselves, so take the extra time to do it right.
I was about to descend into LeConte Canyon on the Pacific Crest Trail when I realized I needed a really wide shot to get it all in. So I shot the first several segments of this pano, going left to right. I then shot several in a row of me hiking through the shot, and then one last picture for the end. The picture was stitched using Photoshop.
Pano Selfies
One variation of all of the above is do the selfie as a panoramic. This involves setting the camera in a vertical orientation on the tripod and taking all the pictures as you would normally do for a pano, overlapping each one by about a third, using manual exposure, focus and color temperature settings. Leave the last frame for you to be in the scene. Later, stitch the shots together with whatever software you prefer, choosing the best of the frames with you in it.
I have to admit that doing “super selfies” is a bit more challenging than simply extending a smartphone camera at arm’s length and firing away, but I’m convinced my selfies do more to record a special moment or scene.
Hope you guys liked this tutorial and before you ask, the header image happens to be a quick set up “super selfie” of my wife and me in a doorway on Avenue Junot in Paris during an early morning walk. I used a mechanical timer attached to a Bronica SQ-A medium format camera. See you next time!


 Facebook
 Google +