Hi
In these tutorials I’m going to be going over a lot of different little tips and tricks that I use or have used to make Lightroom life more easier all round.
Today we’ll be looking at the following.
So lets begin with Cropping,
The Cropping Tool is the first Tool on the Tool Panel.
Table of Contents
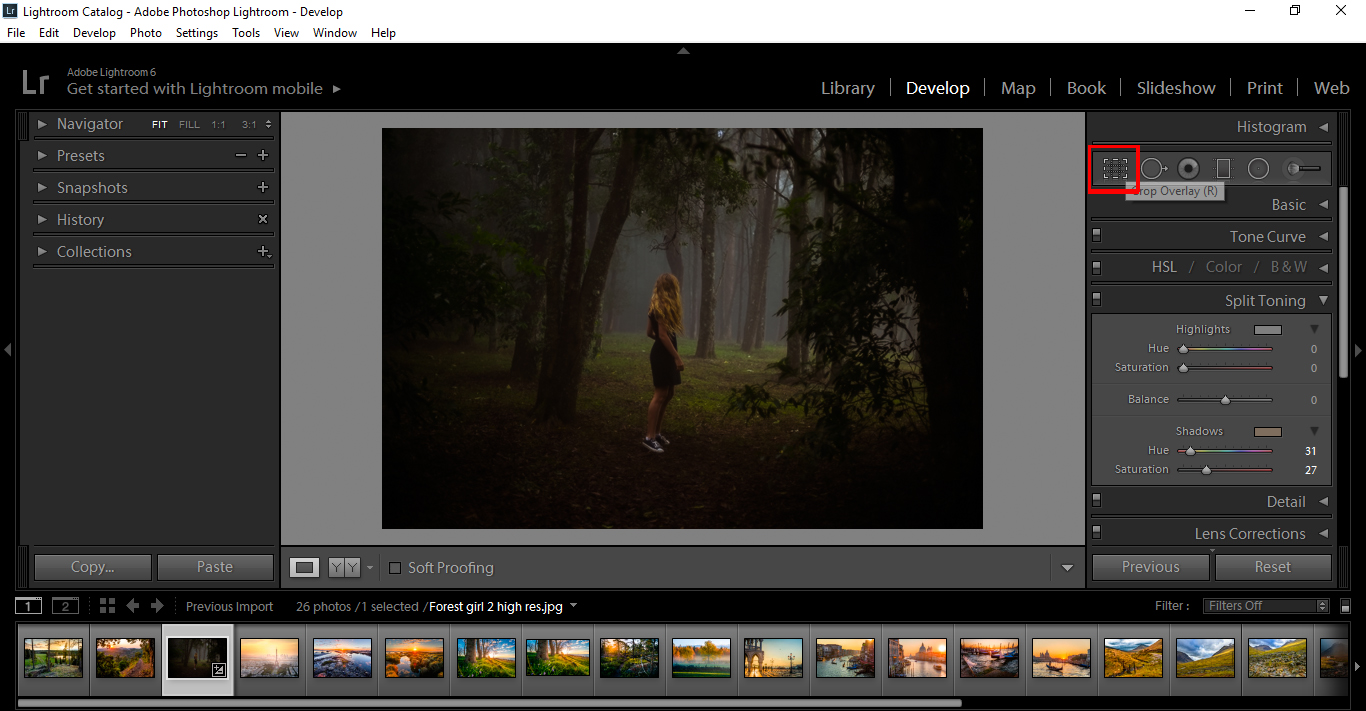
You can also use (R) as the Keyboard Shortcut.
Once you have clicked on that you will the have access to the Grid, where you can drag the picture from the corners or top, resizing back and forth as you see fit.
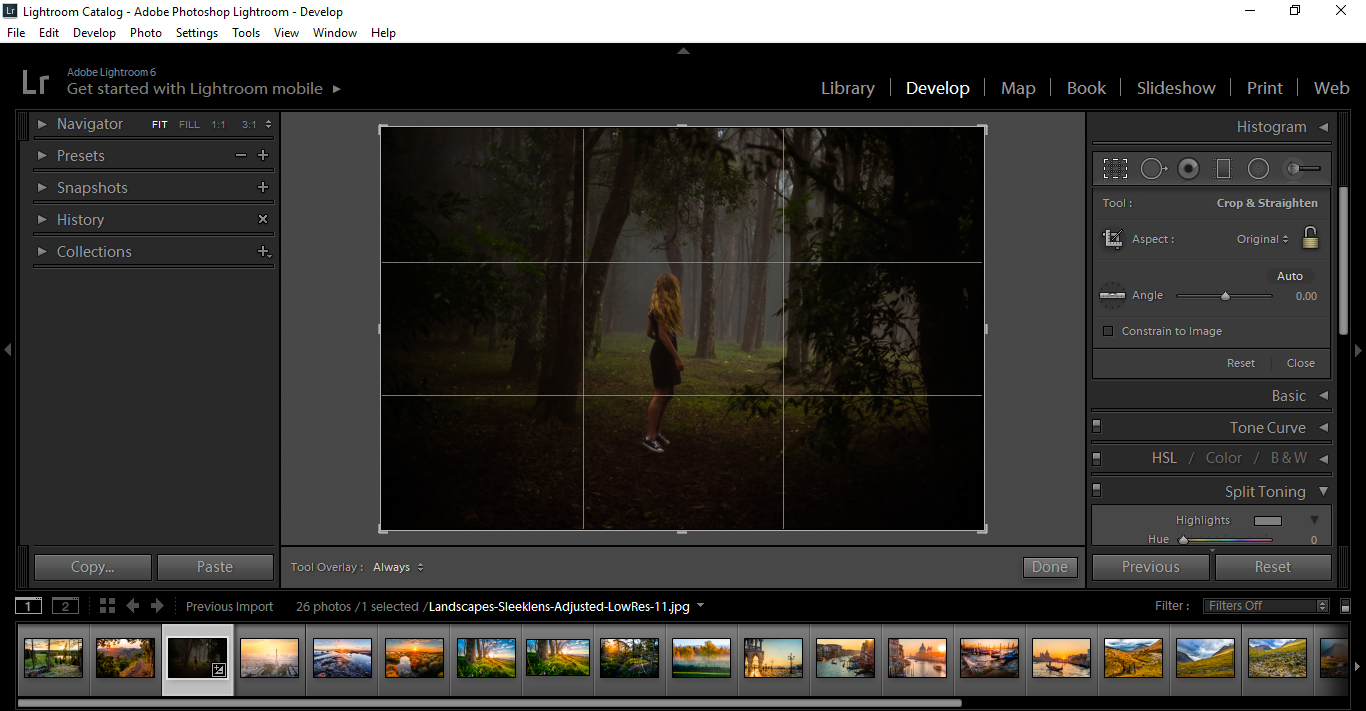
Dragging around manually is all good for unprofessional work when you just want to do something for yourself quickly, but if you are working on professional pieces you will want to use exact measurements.
You will see in the Tool setting module, the drop down containing the word “Original” beside the padlock.
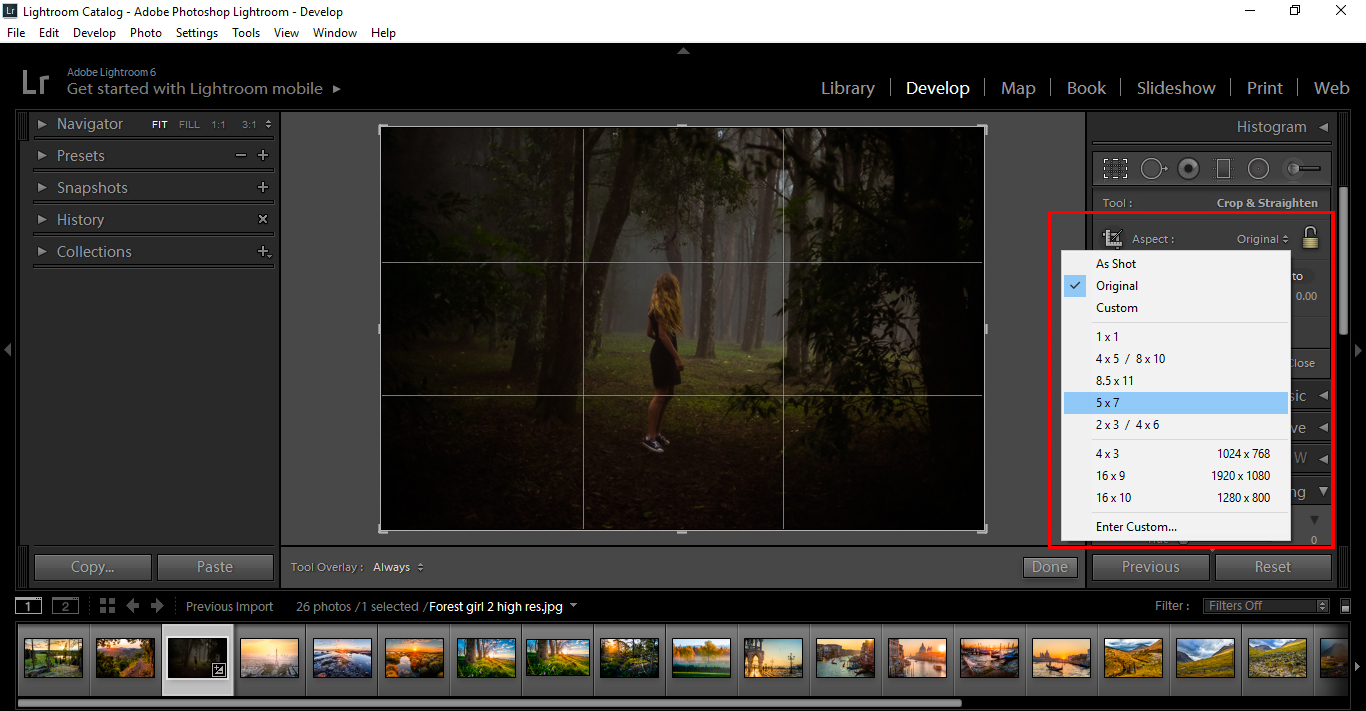
Once you click on that you will see the drop down box containing the different settings, the first lot 1 x 1, etc. are your Image settings, and the options below 4 x 3 (10124 x 768) are your video size settings if you happen to ever use those.
When you choose that you are going to use, you will see the grid fix to that size, then you can click and drag your image to center or align it.
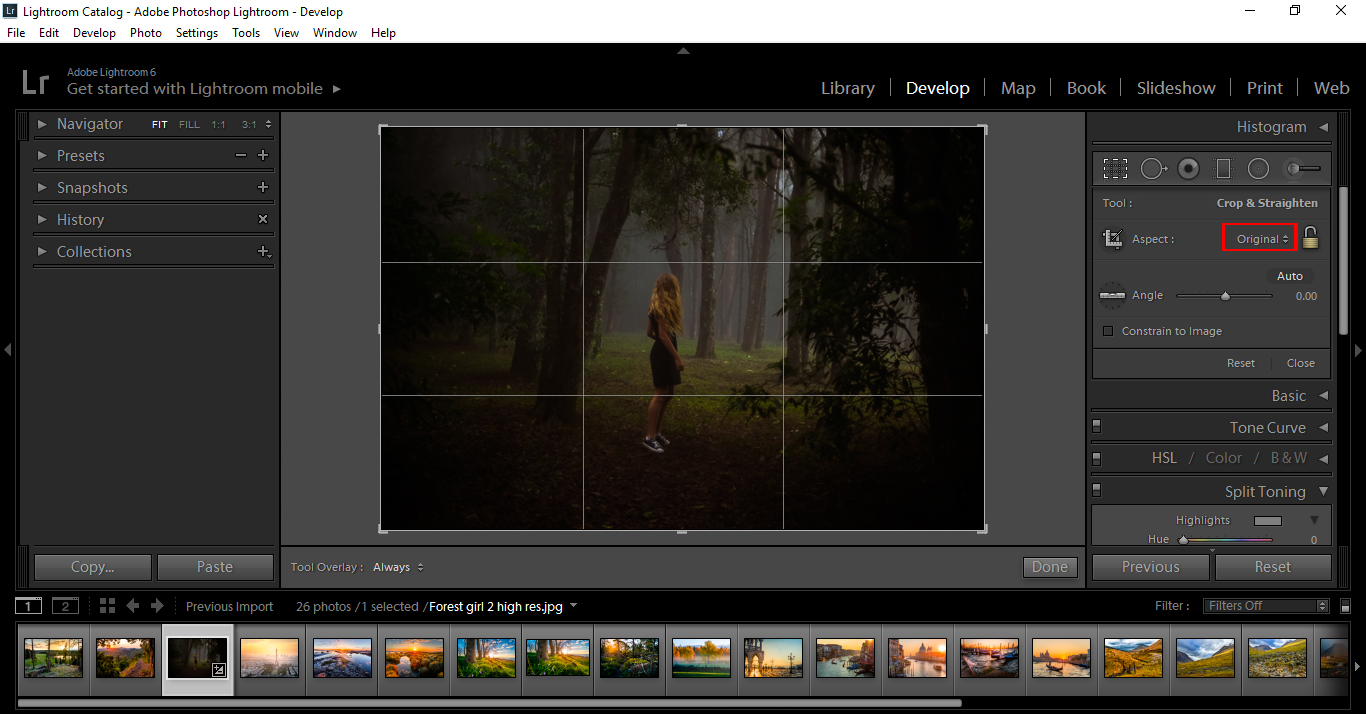
But what I want to show you is, if you haven’t noticed already those settings are set to landscape, so what if I want to use a Portrait format?
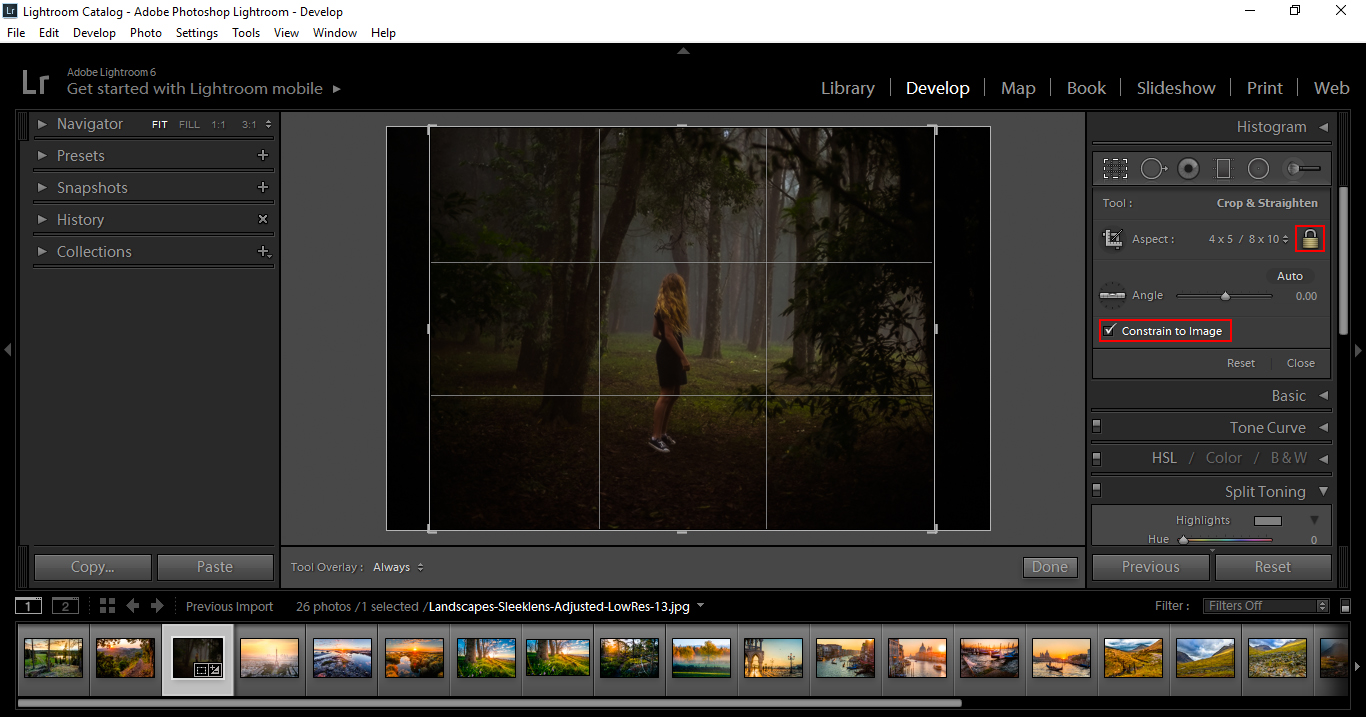
Well, first mission, make sure the Padlock is closed (just like a real padlock), then check the box Constrain to Image.
Next, you have got to click on the edge of the image and drag it towards the top center.
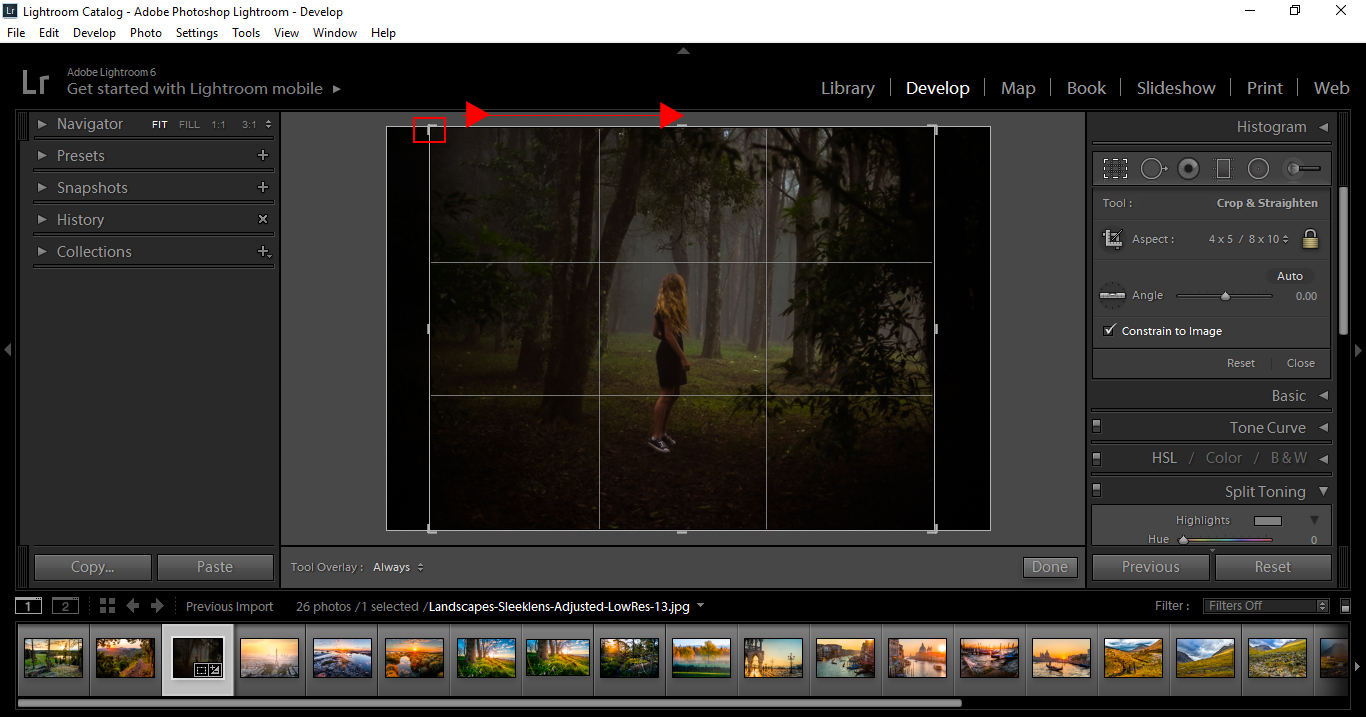
The Grid will then snap to Portrait mode.
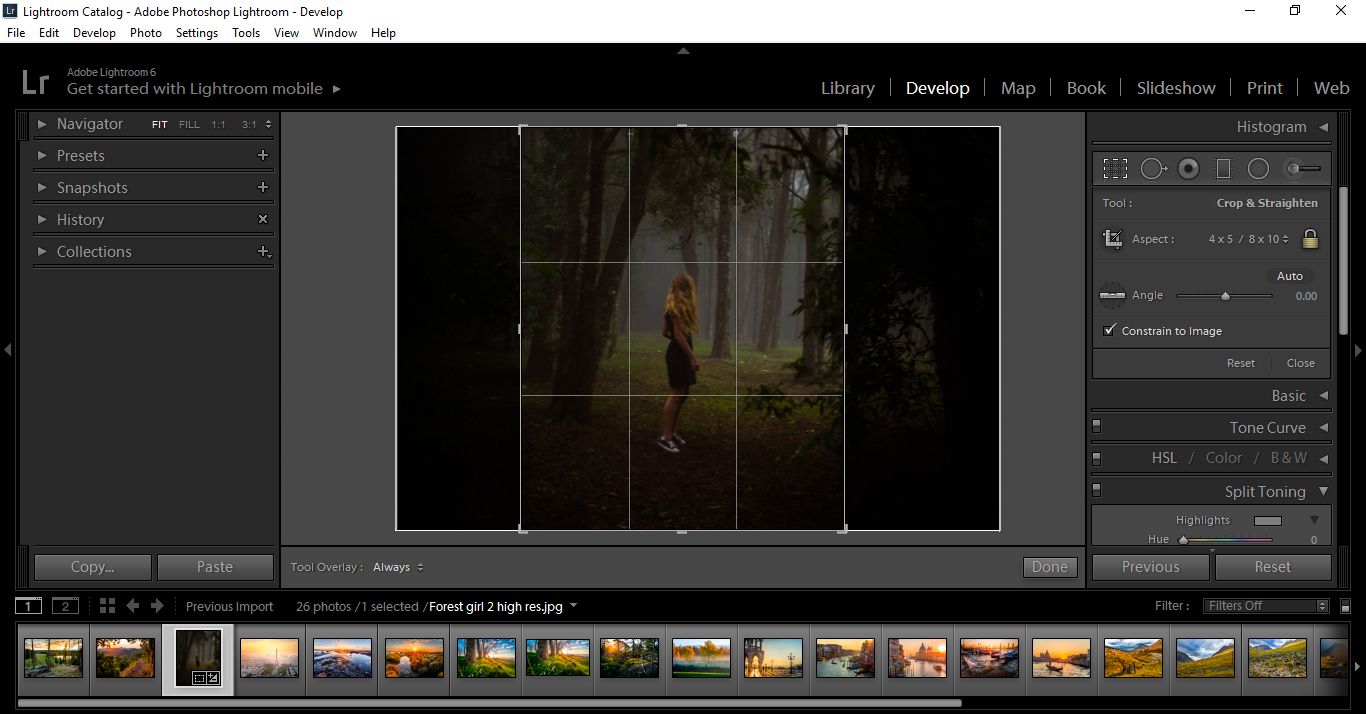
Then, drag your image into place or resize your grid to the proportions you wish to have and hit enter, your image will be sorted and we can continue to edit using our Sleeklens Presets to further enhance our images.
The Radial Filter is the second Tool on the Panel from the right hand side, take a sec to play around with it, open it up and then go to your image, click and drag and familiarize your self with how it works quickly, then you can undo.
You can also open it using the shortcut (Shift + M)
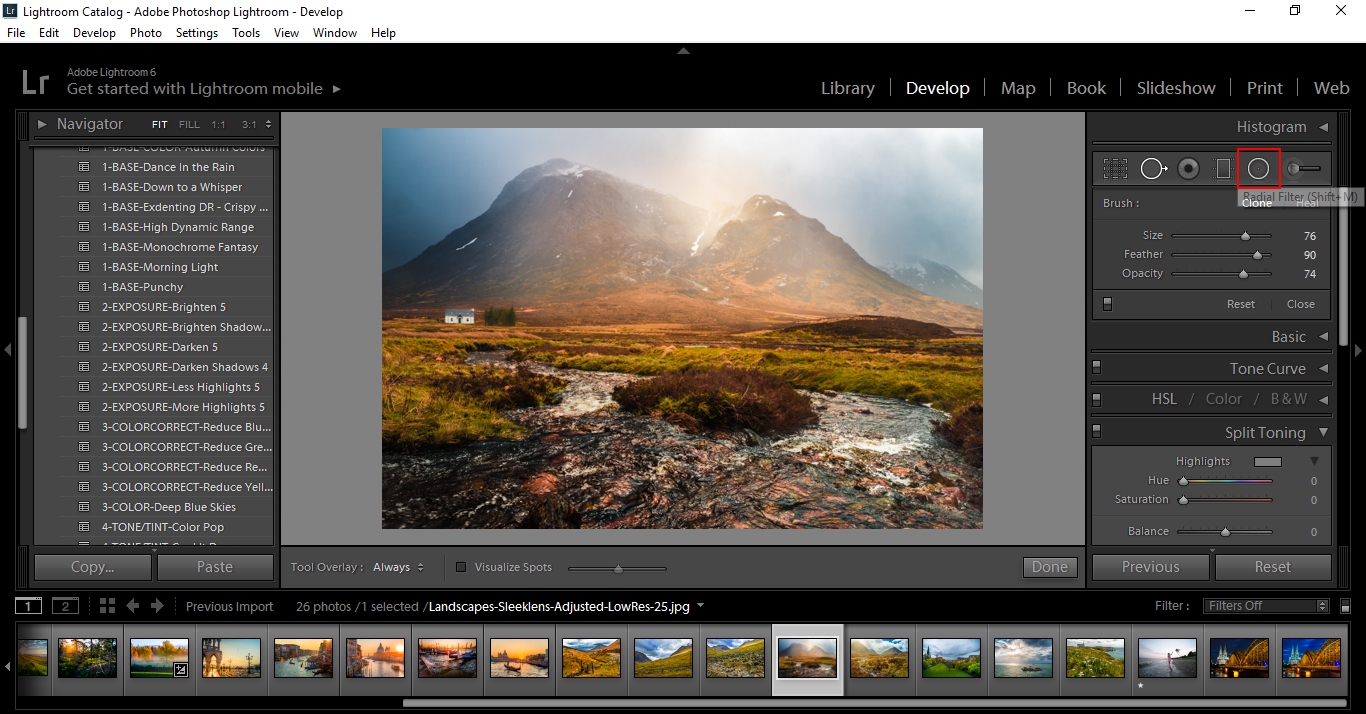
So you’re back, and now you’re a little more versed with the Radial Filter.
Good, we can move along.
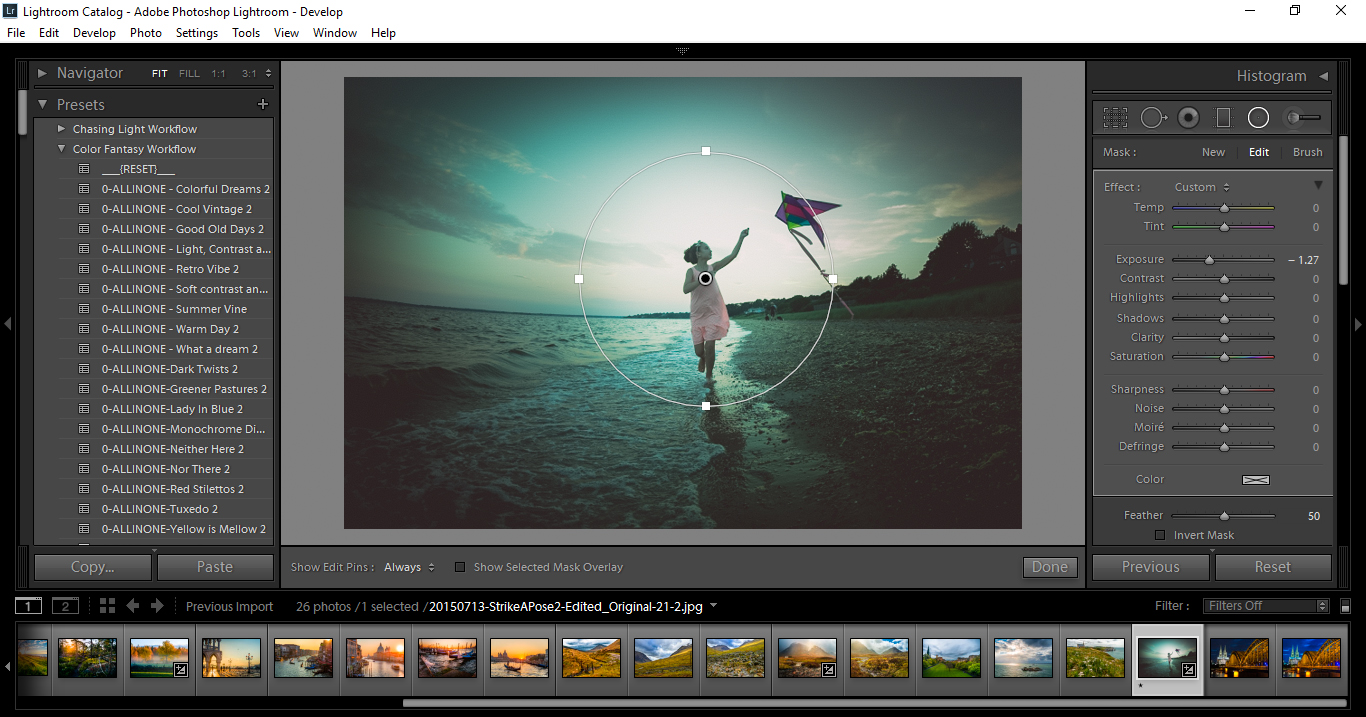
The first little Tip I want to bring to the table is, if you hold Ctrl (Command on the Mac) and you double click on your image, it will constrain a perfect oval over your image.
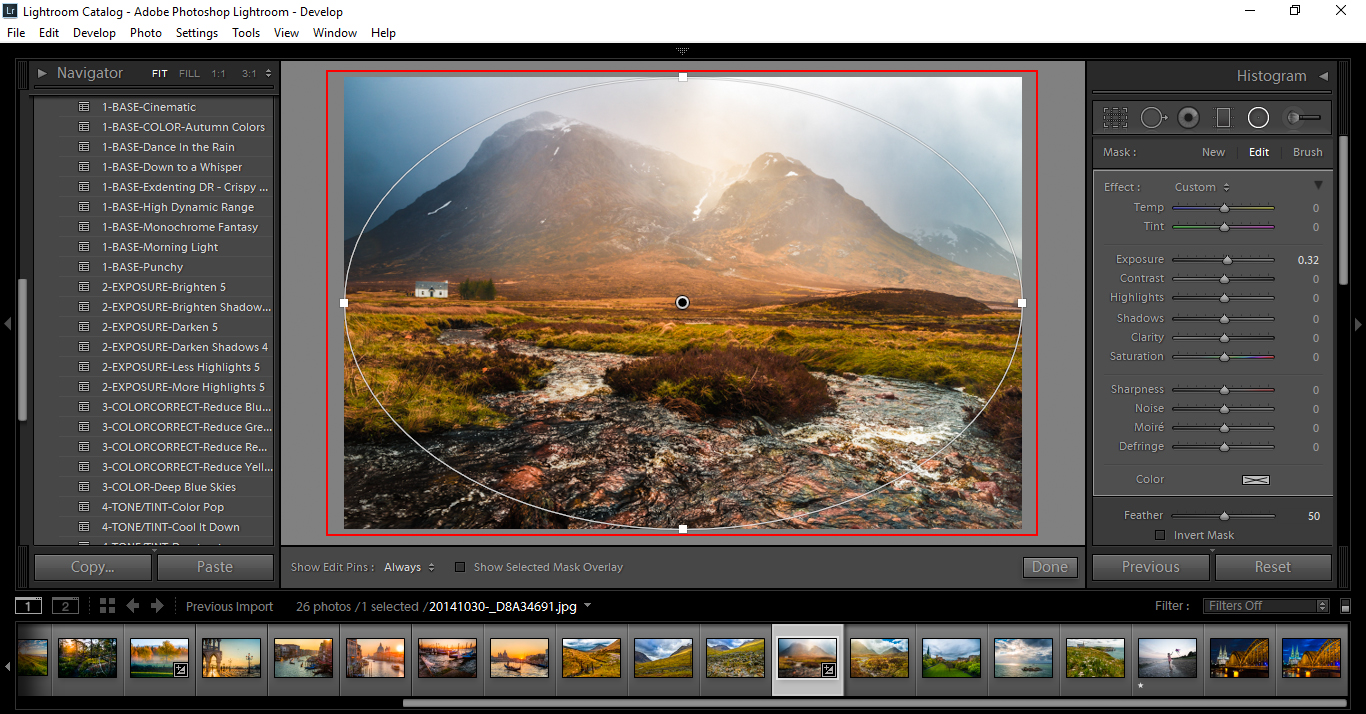
From there, you can play around with your settings to create some pretty cool Vignettes using the Temp and Exposure bars.
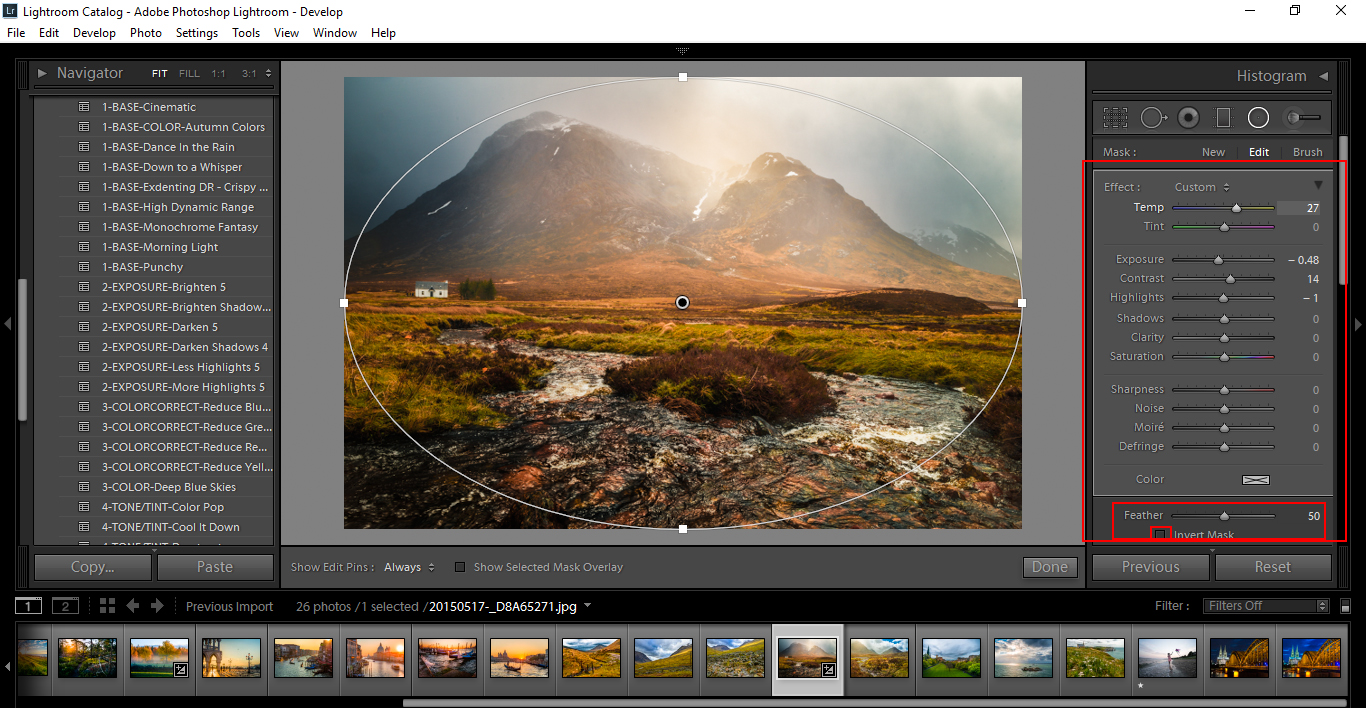
You will also notice at the bottom, Invert Mask and the Feather Slider.
Invert will flip the effects, within the filter or on the outside, and Feather will increase or reduce the gradients on the edge of the Sliders.
If you want to draw a perfect circle, hold the Shift Key while you click and drag.
This can be useful if you wanted to add over a portrait just on the Head to bring out the features a little more, or to pin point a specific action happening in the image.
Then you can Right Click and hit Duplicate to create an exact copy of the current Filter.
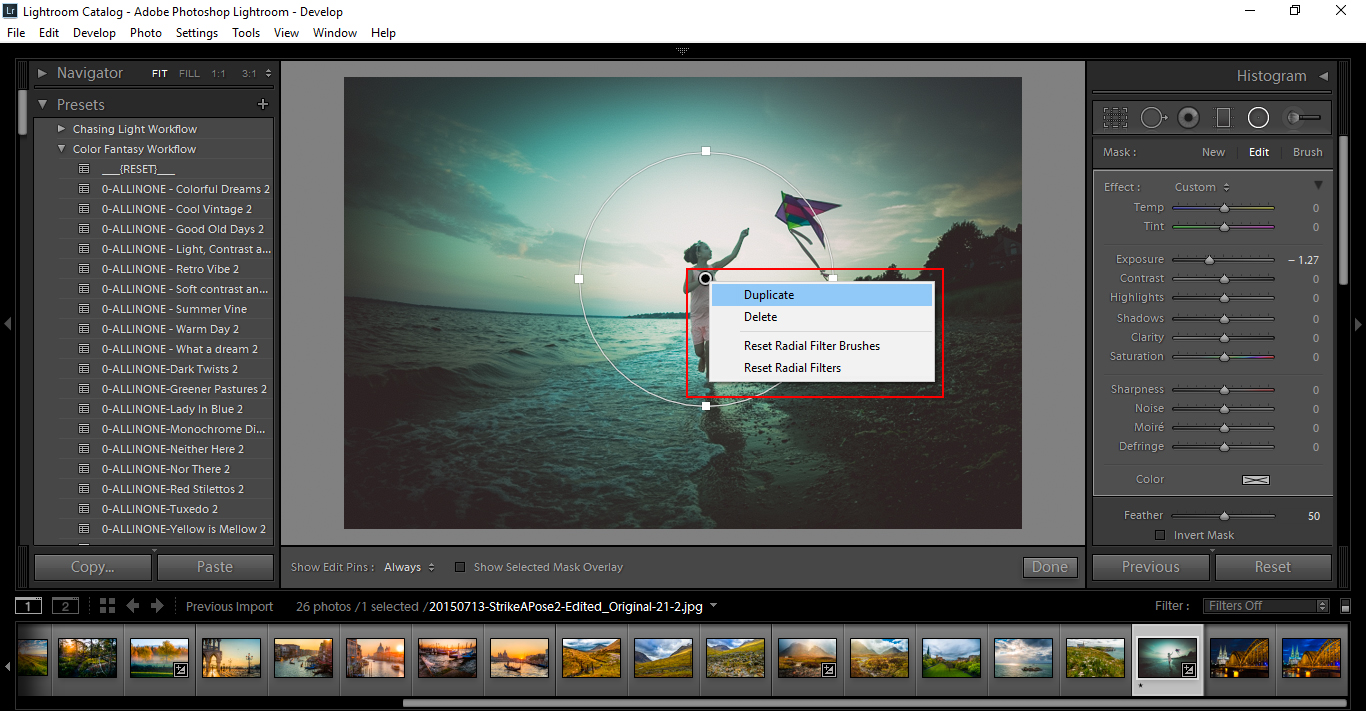
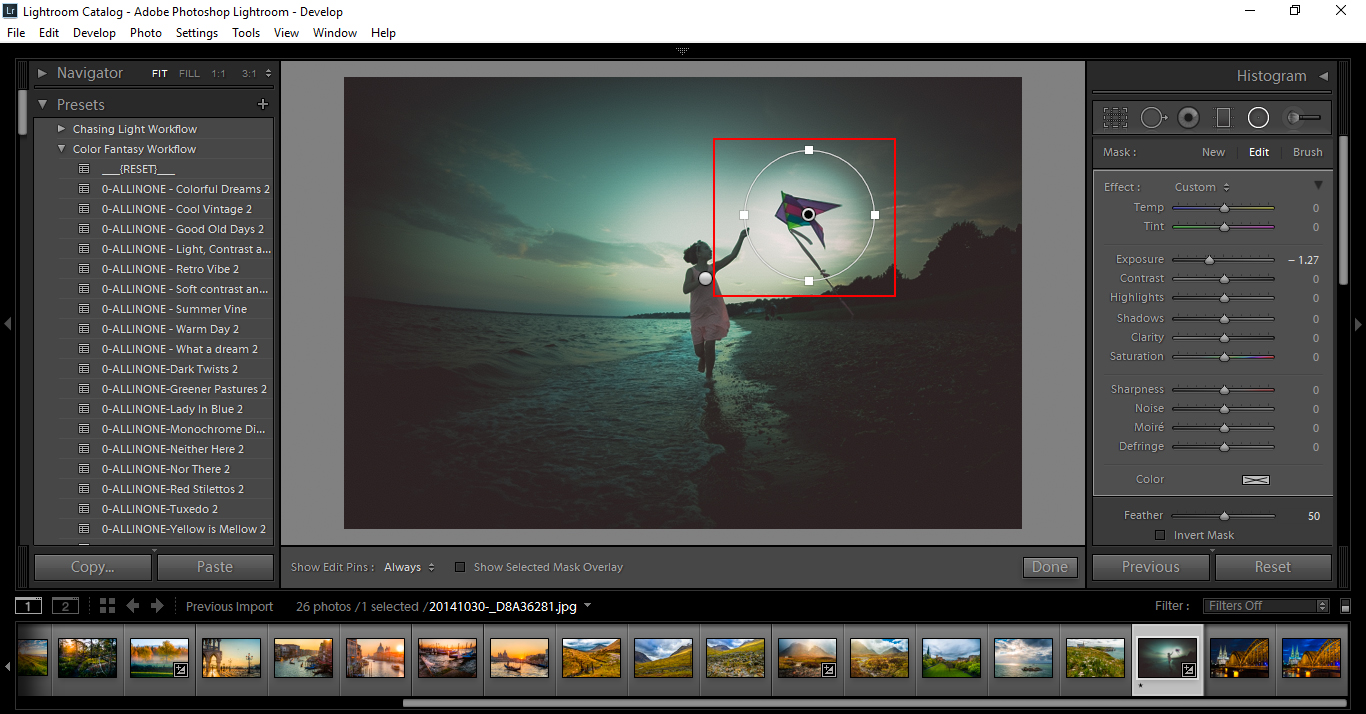
Once you have done that, click in the center of the Filter and drag it to the area you wish to place it over and resize as you please.
With the image that we are going to use for this, you will see that it was exposed for the sky so that it wouldn’t loose any details on the Highlights in the Clouds, this is called Exposing for the Highlights.
But in doing that you can see that the image is dark all over, especially in and around the Shadow areas.
The first thing I want you to do is to go to the Basic Panel and decrease your Highlights to -100 and increase your Shadows to +100.
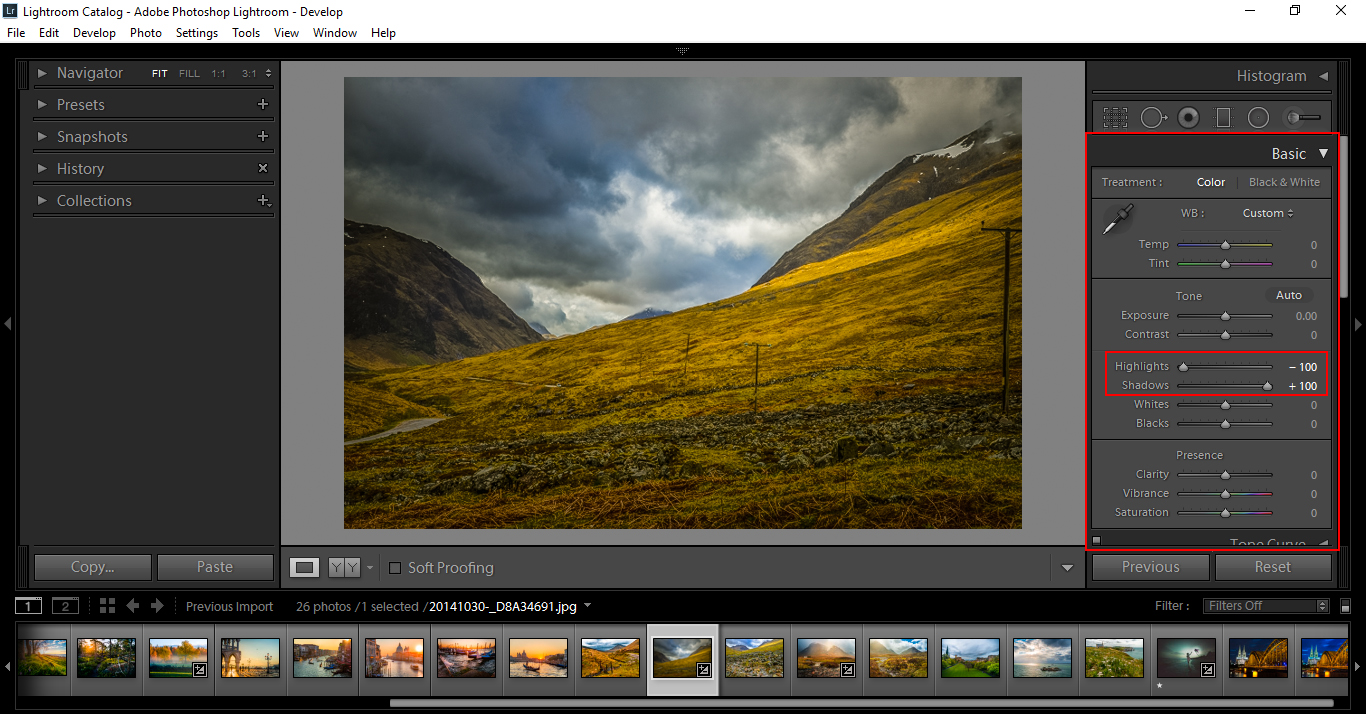
I also did a few other adjustments that we won’t go into at this moment, as I want to get into the main subject, but you can find Tutorials on Adjustments here.
Now in exposing for the Highlights, you would think that lightening the image would be as simple as just adjusting the Exposure.
But, in doing that you will increase the Highlights far to much and you will unfortunately lose what you started out to get in the first place.
Instead, we’re going to use our Filter.
You will find it in the Tools panel, third from the right.
(M) is also the shortcut.
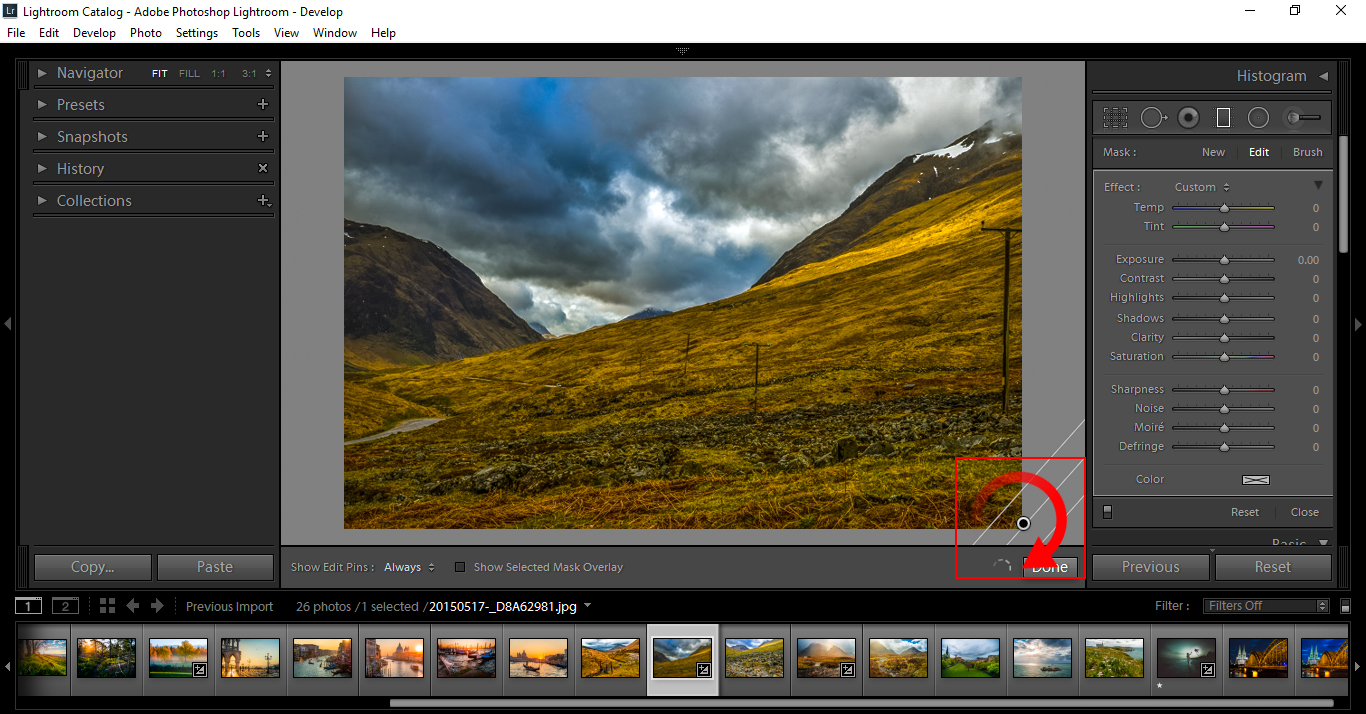
Right, so what you would normally do is click on the top of your image and drag down to the bottom to apply the Graduated Filter.
But instead this time you want to start at the bottom corner, click and drag out slightly as you would normally but rotate the filter 180 degrees, so that the top of the Filter is now the bottom, but facing outward.
From there you will be able to adjust your settings using our other Tutorials like the one included in the link above to work out what you’re best settings are, I used a combination of the settings in the Graduated Filter + Tone Curve Tutorial found Here.
This works the same with images that have been over exposed also, this Graduated Filter technique is a great alternative to using the Exposure slider, as it will give you a much greater range to work with.
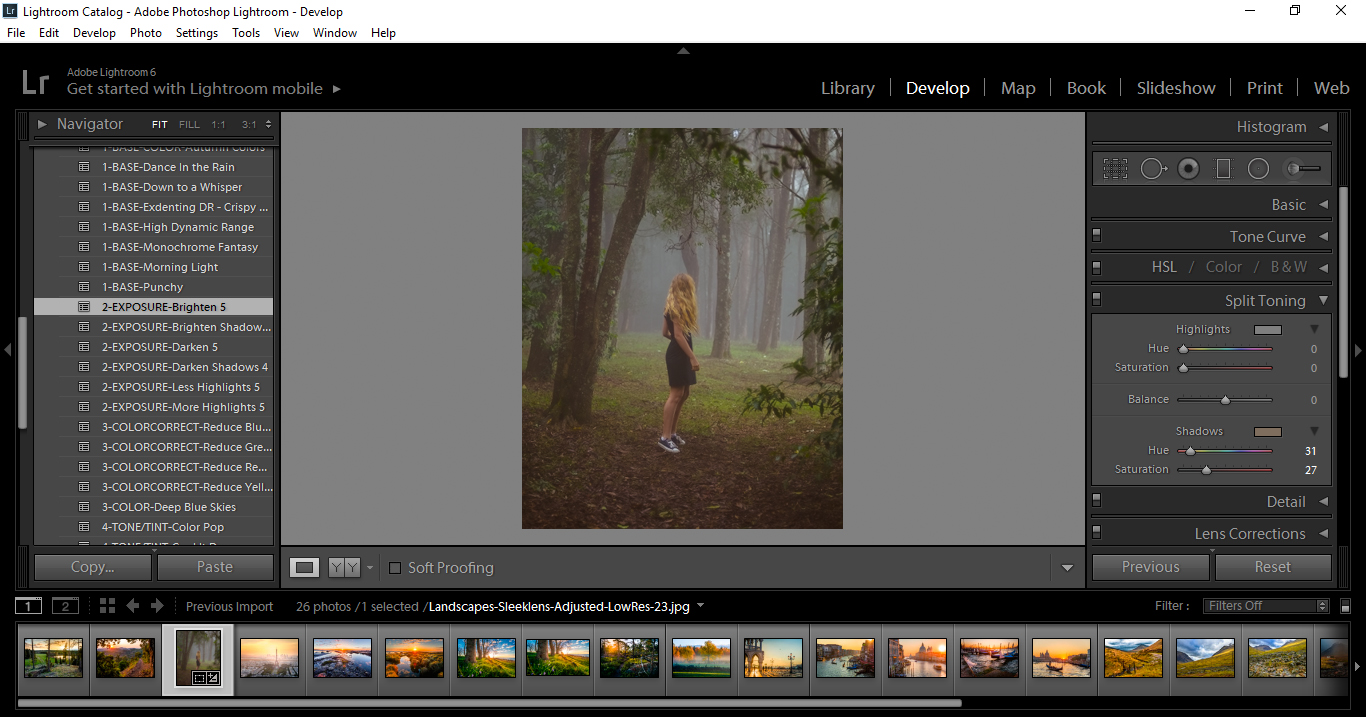
In General you can not create a coloured Vignette by using common Lightroom tools, you are unfortunately stuck with just white and Black, but there is a way around this using the Radial Filter.
So open up your Radial Filter which is the second Tool in the Tool Panel, which can also be accessed by pressing (Shift + M) on your keyboard.
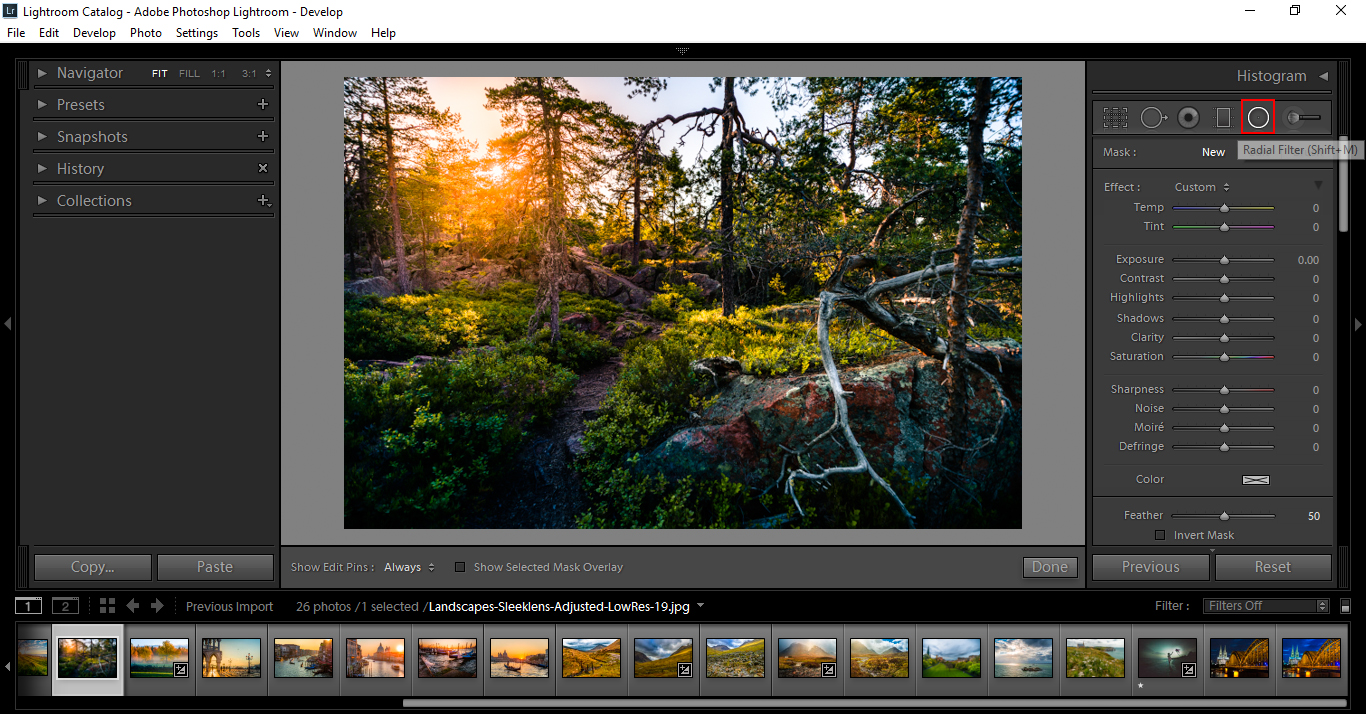
If you would like to take a closer look at the Radial Filter, you will find it in this Tutorial Click Here
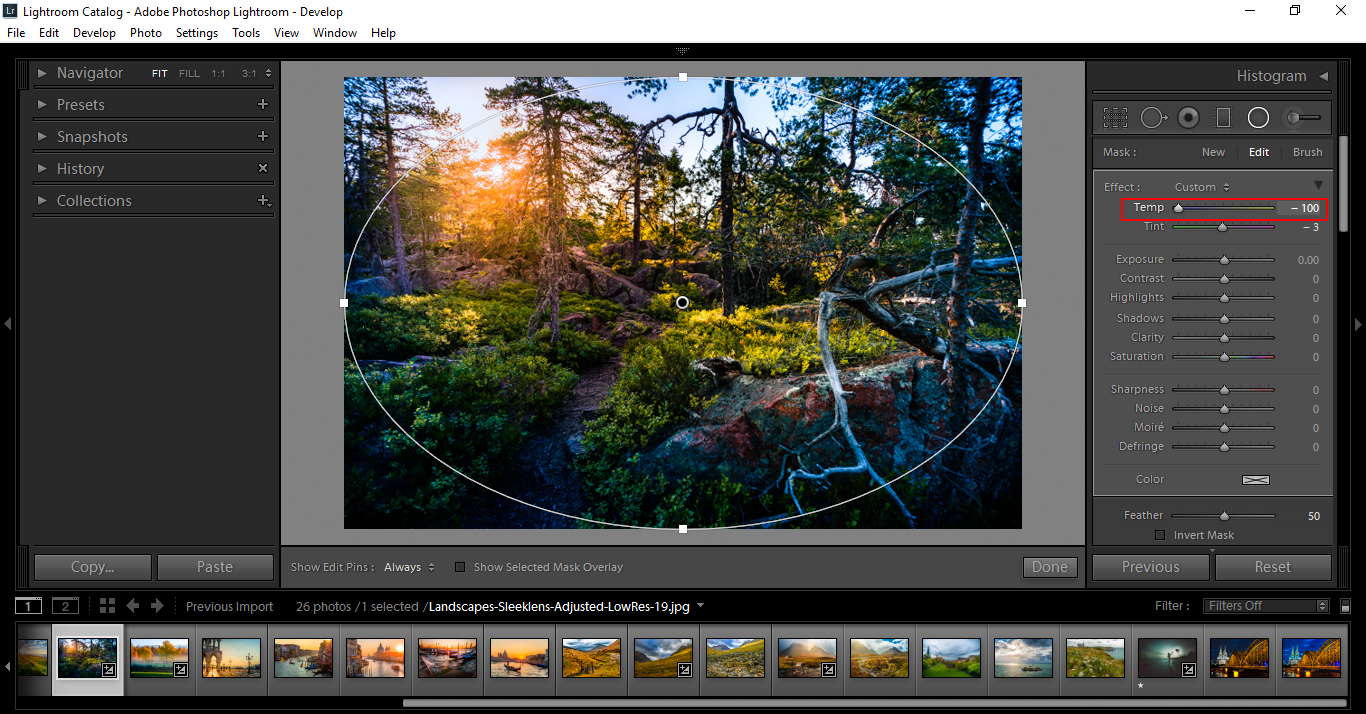
To start, press Ctrl and Double click on your image, a radial filter will appear over the image.

So if you want just a cool colour, you can adjust the Temp Slider either left of right, but that is pretty limited as far a range.
The better way to do this is at the bottom of the Panel, just above Feather you will see Color and a Box off to the right hand side with an X crossing through it.
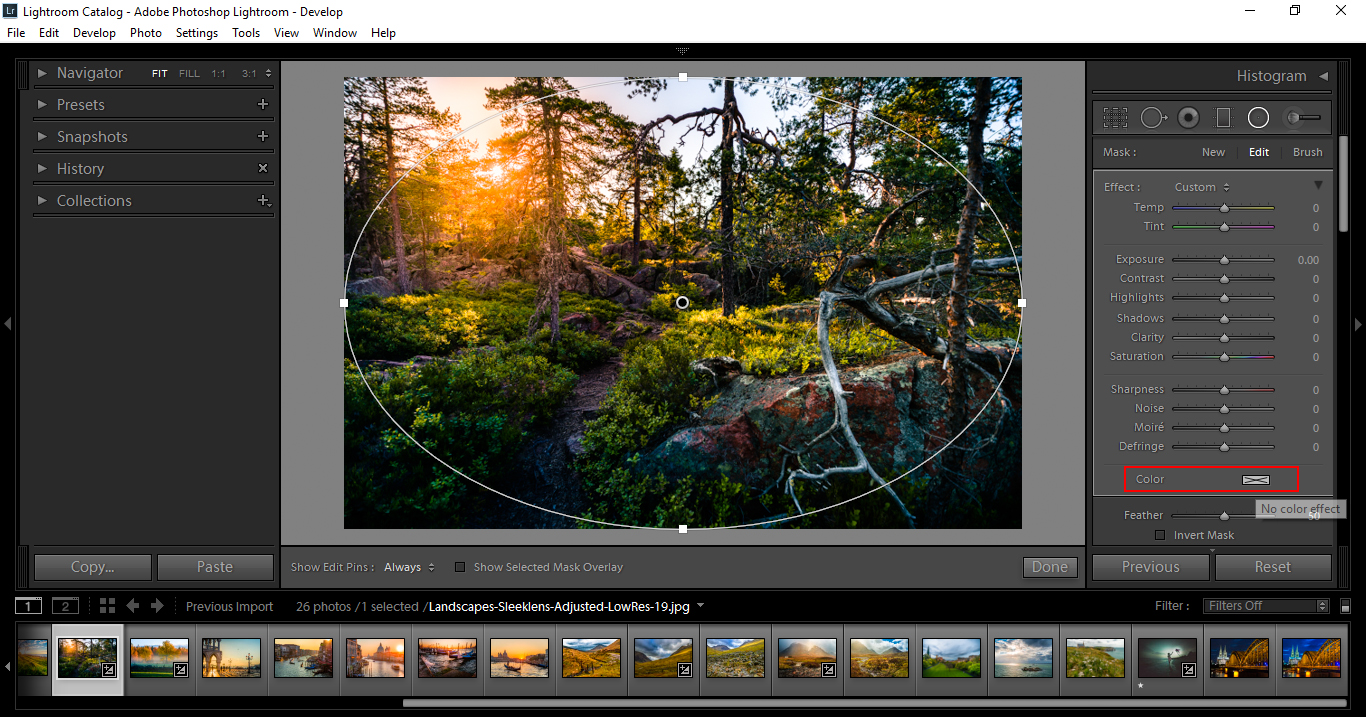
Click on the Box and the Colour Option panel will appear.
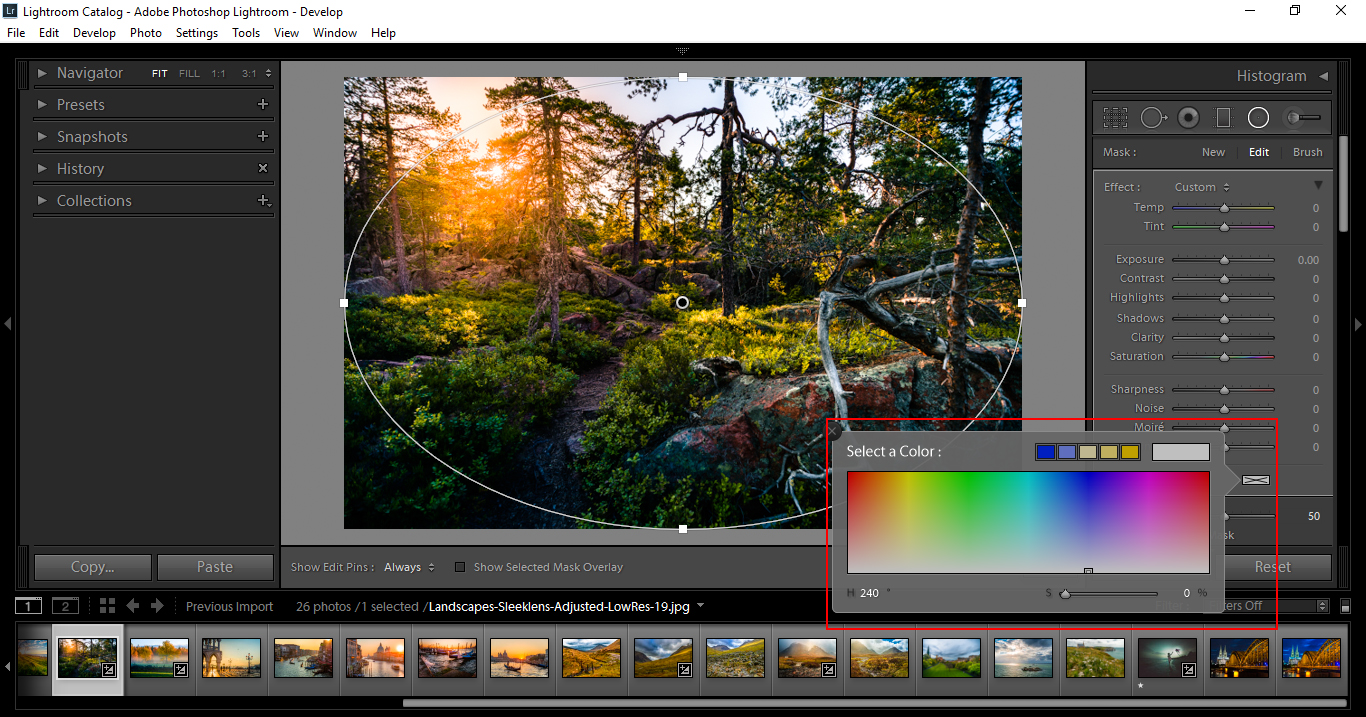
You will now be able to pick a Colour using the Eye dropper.
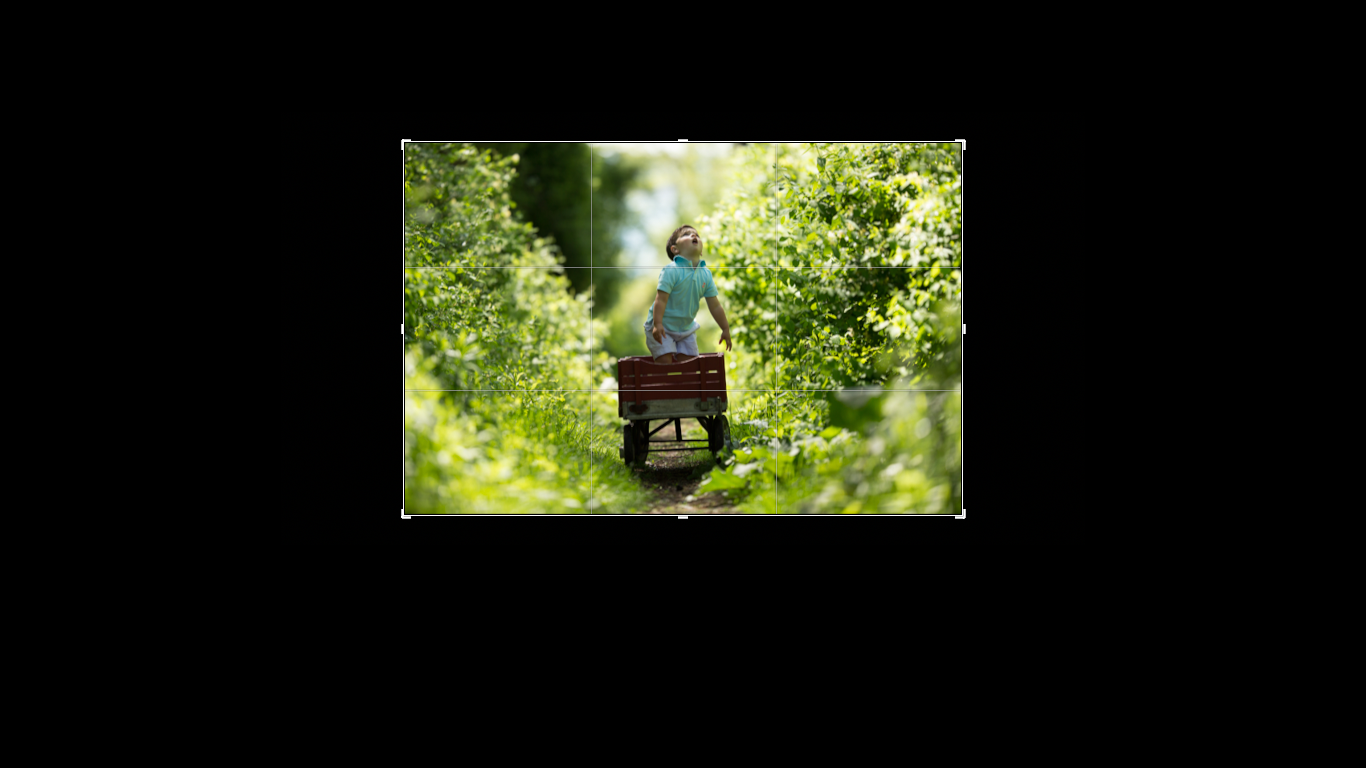
What I’m going to go for with this, is I want the Sunlight to be very prominent, blasting through the Trees and the rest of the image to be cold, like it’s Just Morning/Dusk.
I can play with the settings using Exposure or any of the others really, I don’t want to get to technical and rigid here as I think the best way for you to learn is to play around with the sliders and start to get a feel for what’s good and what’s not, in regards to how much you want to add.
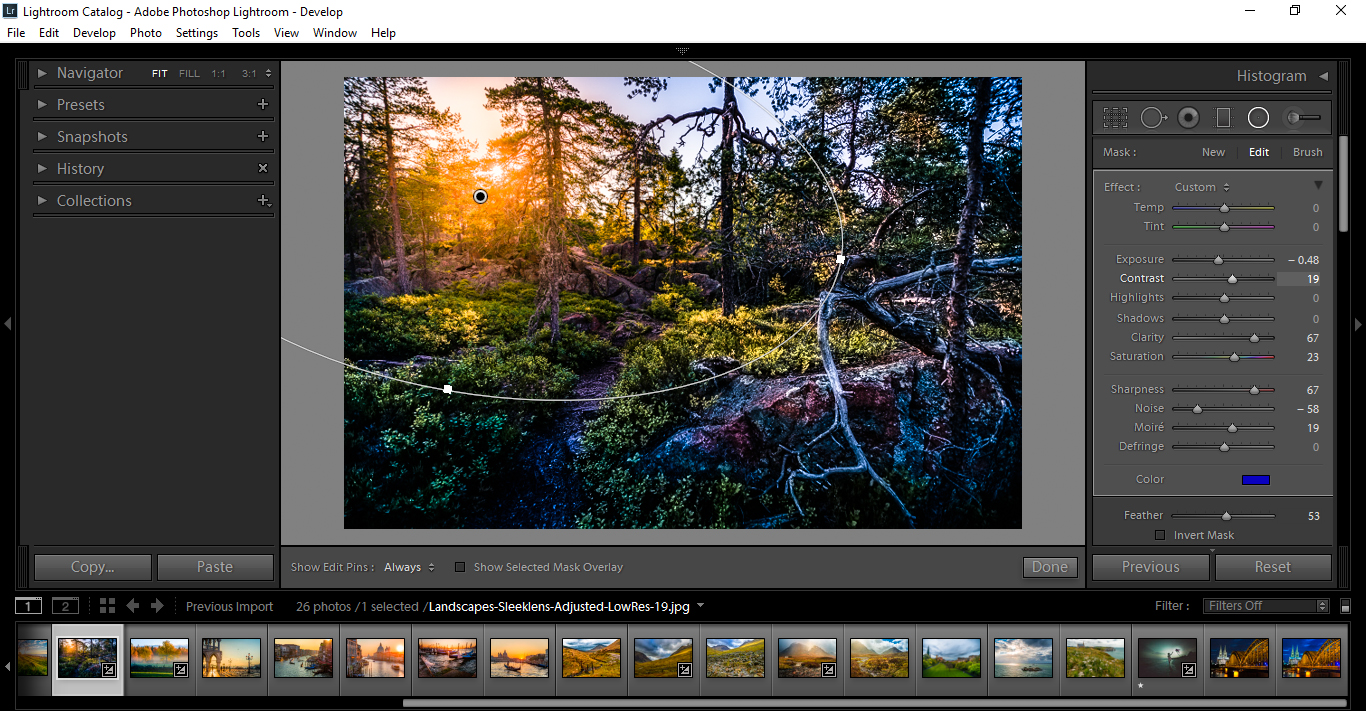
And that wraps it up, you can see that by just using this very simple technique, you can apply a pretty cool/fast effect and enhance your image greatly.
Don’t forget to check out some of our Presets for more amazing effects like this.
Sometimes when I’m working in Lightroom I find myself getting distracted with all the panels opened and it can even get annoying at times, especially if you have a small screen on you Computer.
(Note the Images will cover both Apple and Microsoft)
Hit (Shift + Tab)
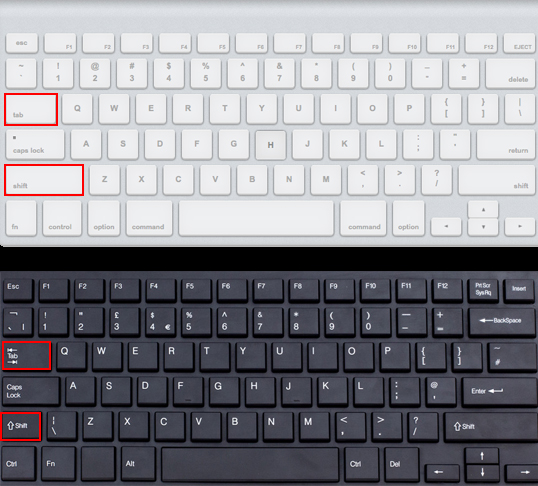
As you can see, this will completely remove all panels from your screen.

Once you hit (Shift + Tab) then everything will reappear as they were previously.
Let’s say this is not what you are after, say you just want to quickly zoom in on the image in full screen mode, ok well just hit (F) I guess that stands for FULL Screen, so pretty easy to remember.
And off course to go back, just hit the (F) key again.
There is another one that I find pretty handy, if you hit (L) it darkens out everything else minus your image which is pretty cool, if you hit (L) again then it completely blacks out the background and then by hitting it a third time, you’re back to normal.
What I find handy with hitting the (L) key is when you are, for example Cropping images, you can remove the other distractions behind it and it makes it far easier to see.
Pretty cool function to help you concentrate, if you ask me!
Ok, so lets move on.
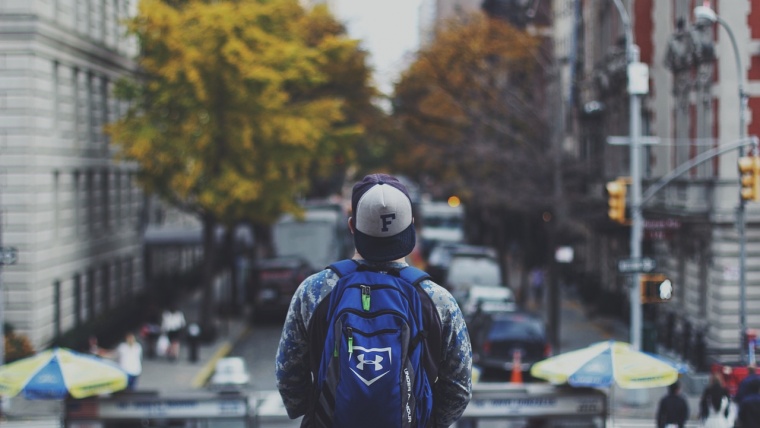
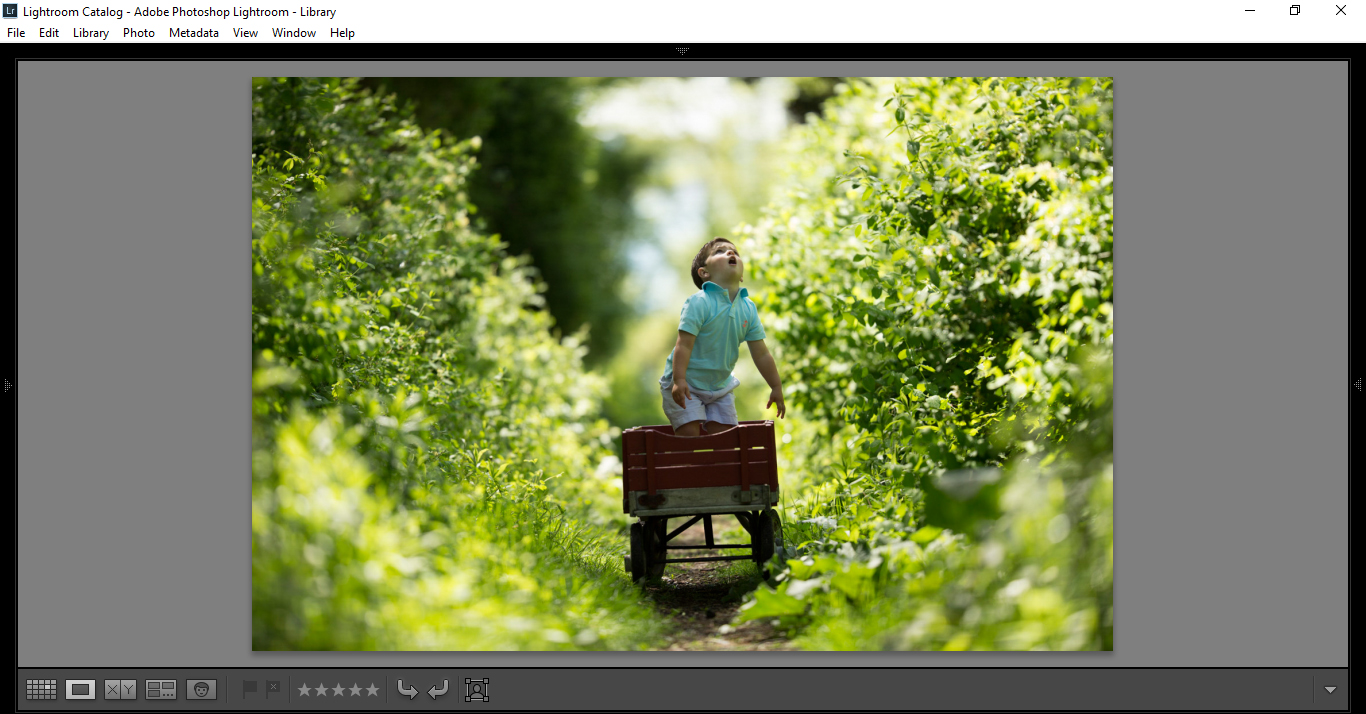
This next little Trick is handy for Lifestyle Shots, to give them that extra little boost to make them really pop, you’ll like this one!
So unfortunately, my image below is just a little bit too washed out! I’m not really happy with it and I want to give it a bit more life.
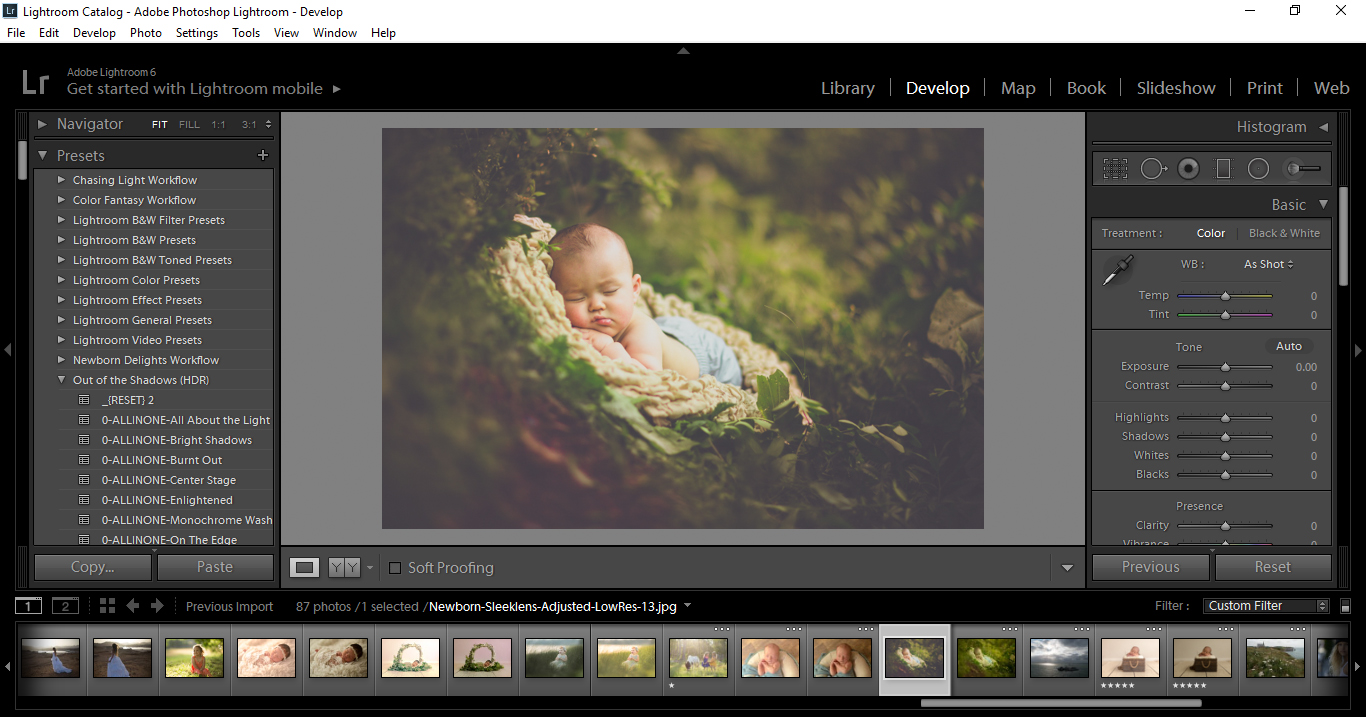 Open your Develop Module.
Then, open Camera Calibration.
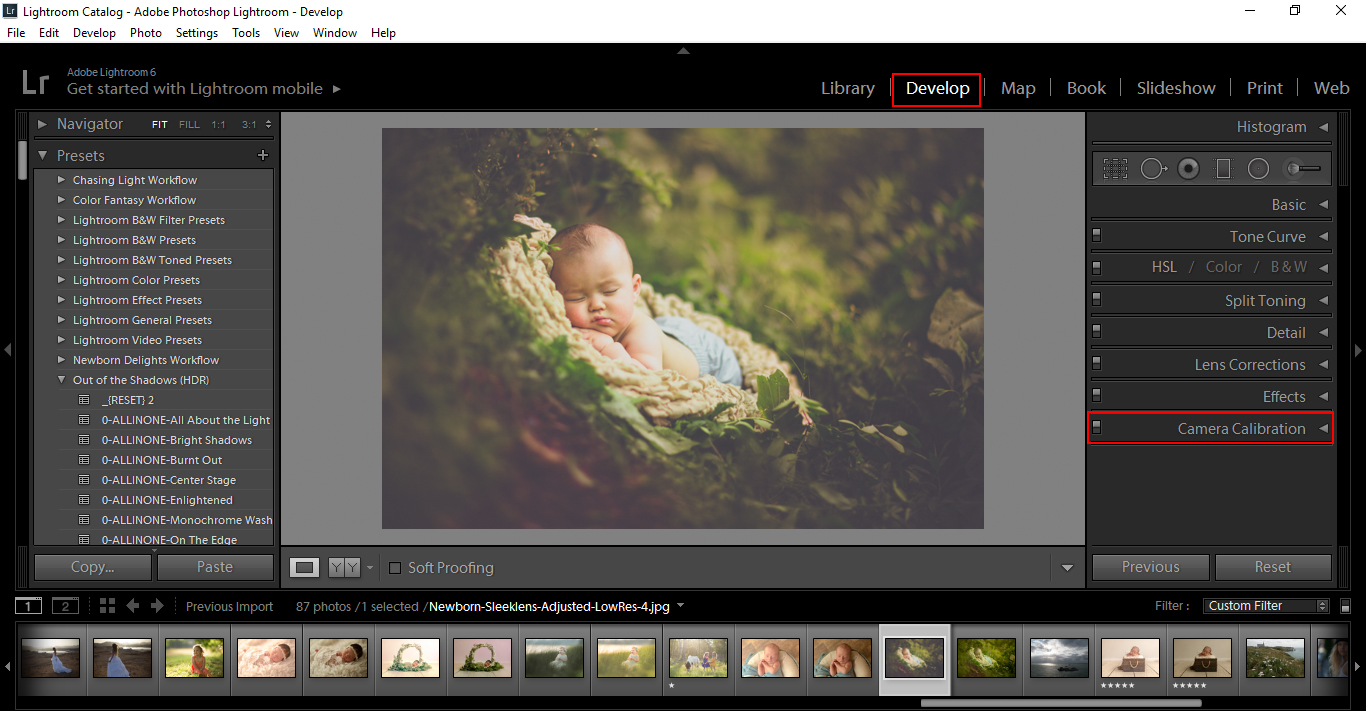
At the very bottom of the drop down you will see Blue Primary.
Slide the Saturation Bar all the way to the right, and you will see an overall subtle improvement in your image.
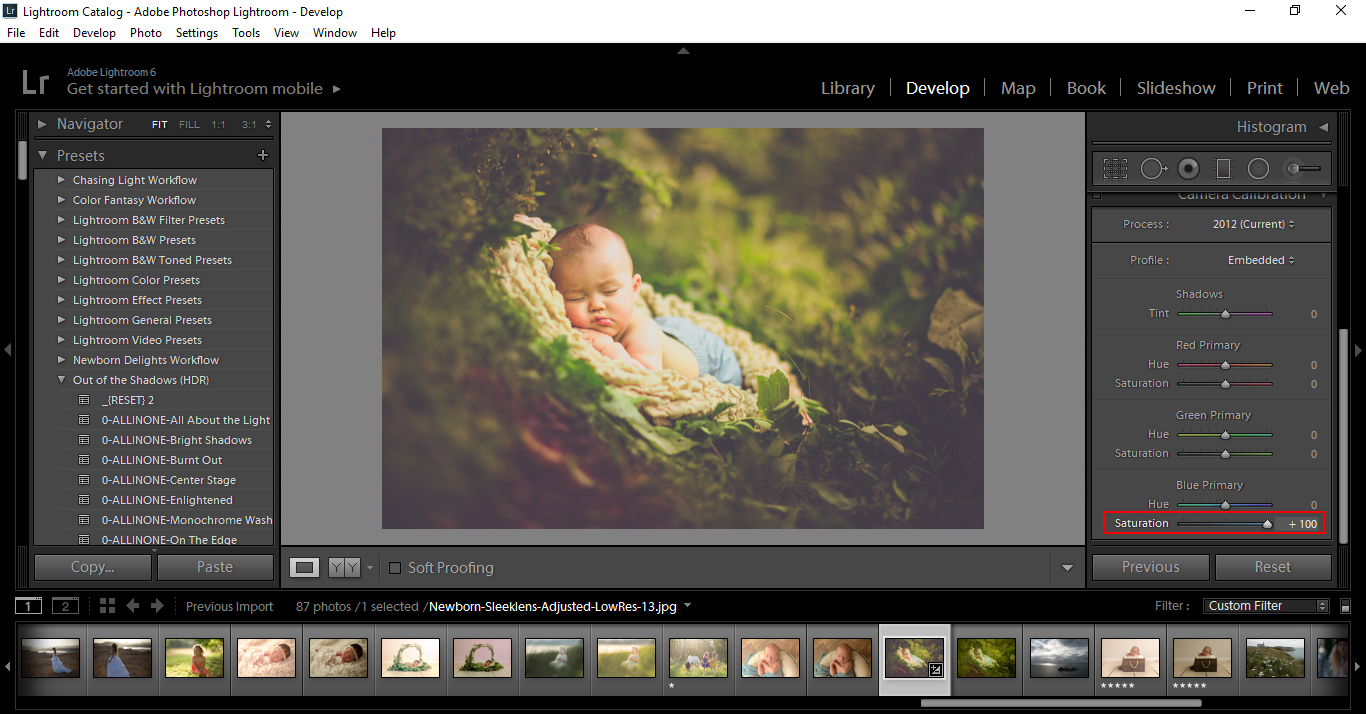
That’s it, it’s a very simple and quick technique that can yield some great results for very little work, so keep that in mind when you have some colour correction work to do, as this could very well save you quite a lot of time!!
So the last one for today, let’s look at Shortcuts.
Shortcuts are extremely handy, they only problem is there are a lot to remember, so it’s more of an as you go along process.
Now I’d be lying if I said I use them all the time which I don’t, I’m sort of an in between guy, I go back and forth mixing it up, depending on how focused I am. I’ll usually use shortcuts when I’m not super focused, to be perfectly honest, but that is just me. You may have a different way to do things and that’s alright, each to his own 🙂
So with that being said, I’m going to show you how to look up the short cut list for you to view and get to know them a bit better if that’s your goal, to be a Shortcut master, unlike myself 🙁
If you press the Ctrl Key + Forward Slash / your Shortcut list will appear onscreen. (Command + Forward Slash for the Mac)
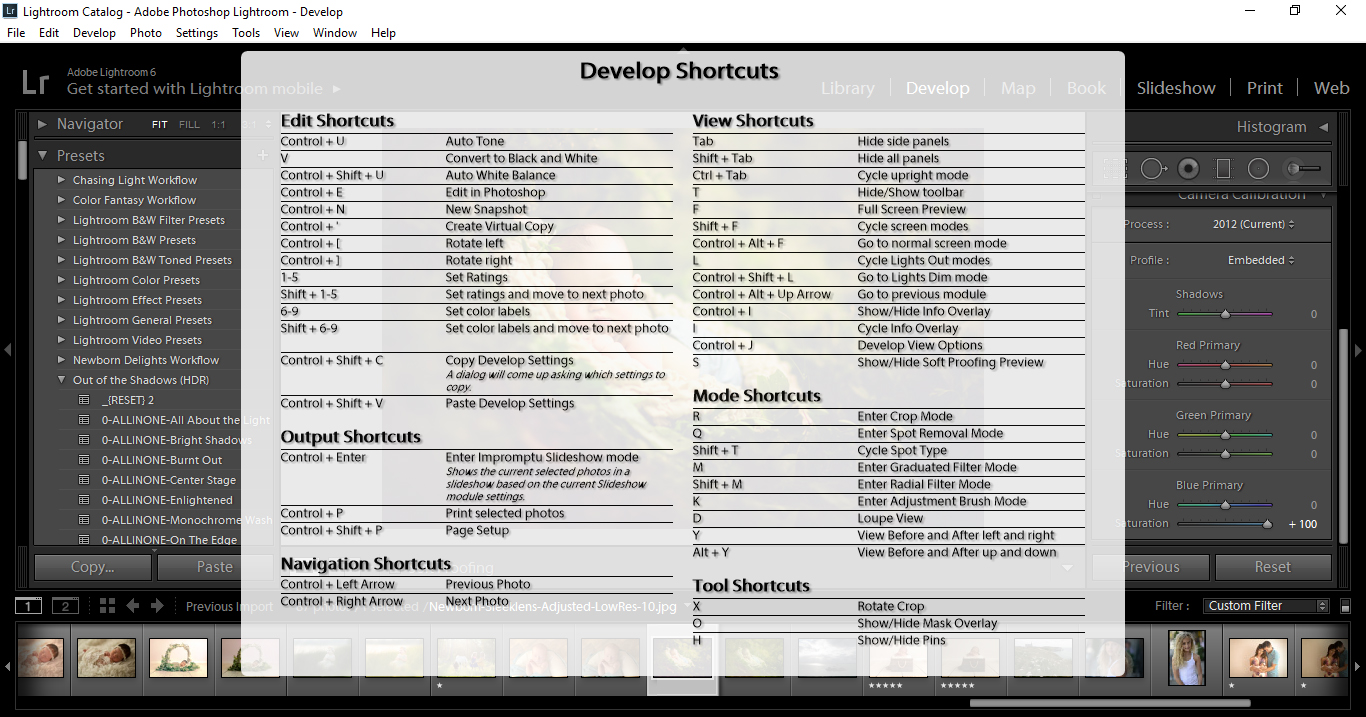
So there you have it, that’s how you get the full list of Shortcuts in Lightroom. Now in saying that, please be aware that in the different modules there will be a different list of Shortcuts, catering to that specific module.
So, the shortcuts in the Library will be different to your Develop module.
There’s quite a few to go over so like I said it’s and as you go along the process, learn as you play if you will, I think that’s the best way.
For today we’ll be having a little look at the Sliders in Lightroom and I’m going to give you some Tips on how to use them better, so you can become more effective over all.
First Tip is, when you want to return the Slider back to it’s original Position, double click on the actual slider or on the name of the slider “Temp” for example, this is handy when you have a lot going on and you need to reset and go back to where you started.
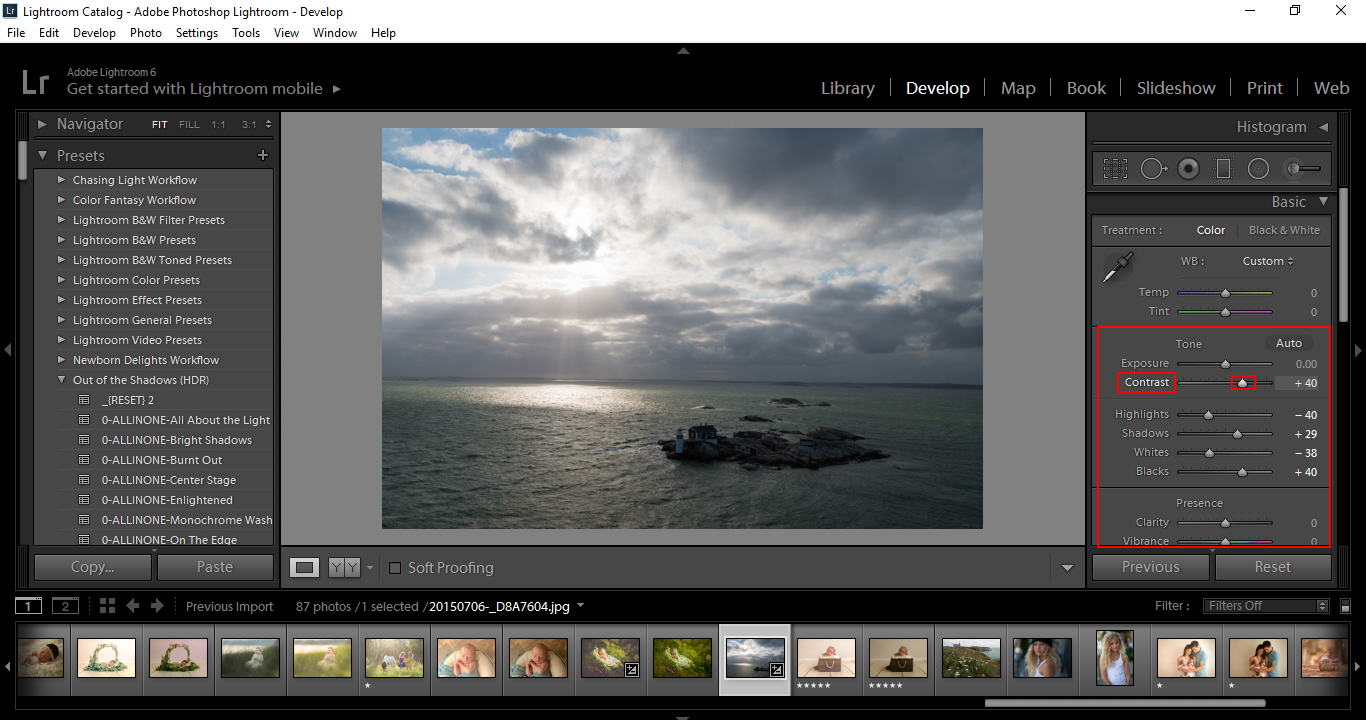
Sometimes depending on how sensitive your mouse is, it can be hard to get the exact spot on the slider were you want to stop, there are a few different ways to fine tune. The one I use consistently, and really only use is with the up and down arrow keys on your keyboard, to do that click on the number at the end of the slider, then use your arrow keys to fine tune.
There are other ways were the slider will go up in groups of 5, 10 and 20, but the arrow keys are so fast I don’t believe these are really necessary. You can do it just as fast holding down/up on your arrow keys.
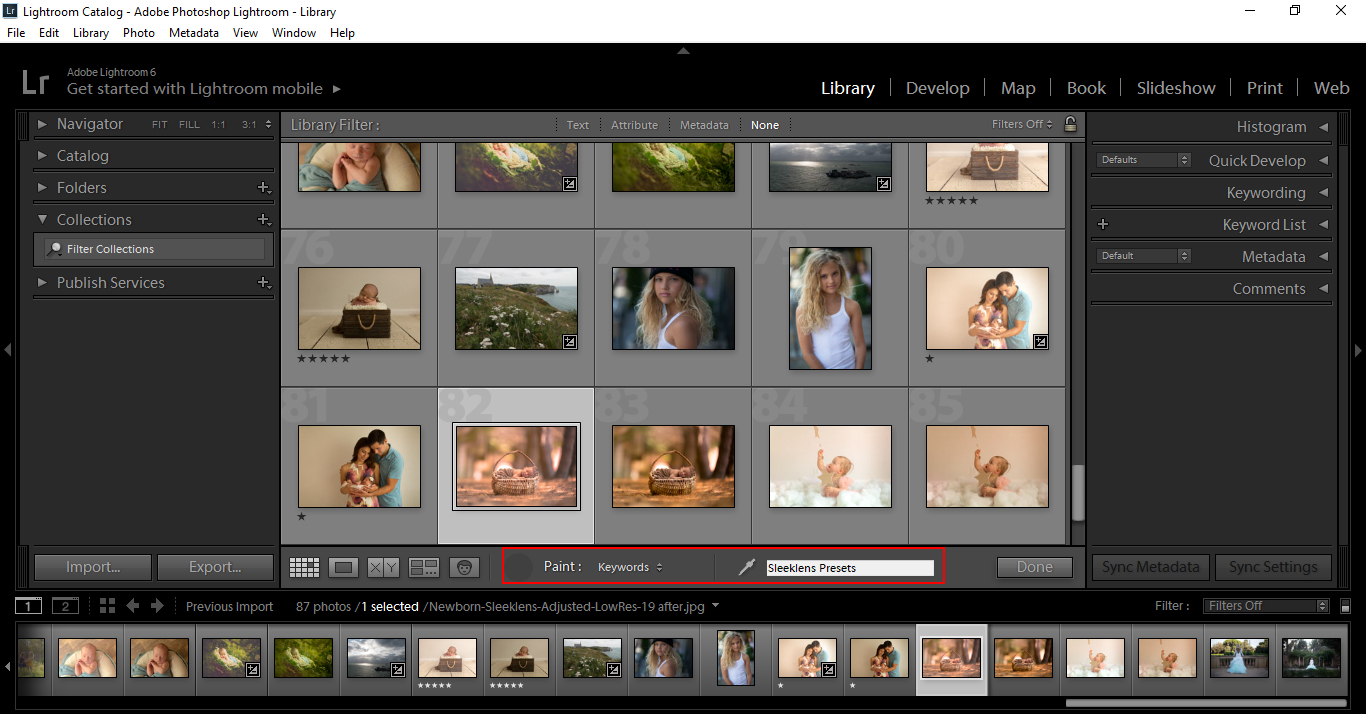
Next up, lets look at the Painter, you are probably not aware of the Painter Tool, as it is a very very under used element within Lightroom.
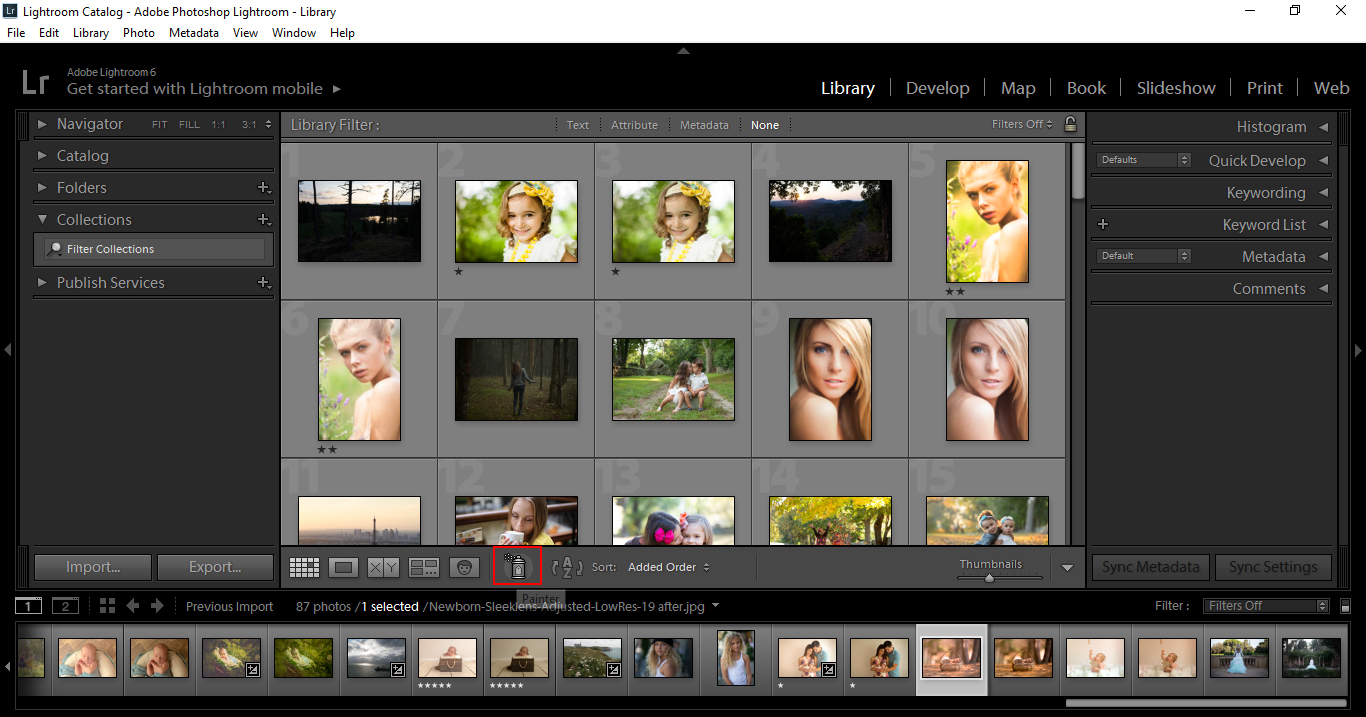
If you are not seeing this Tool in your Library, hit (T) and you should be seeing it now.
The purpose of the Painter is so you can add Key words to it, or whatever other information you need to add, then spray across your images to embed that information.
To add those key words, you’ll need to Click on the Painter, off to the right hand side of it you will see a drop down selection beside where it says Paint.
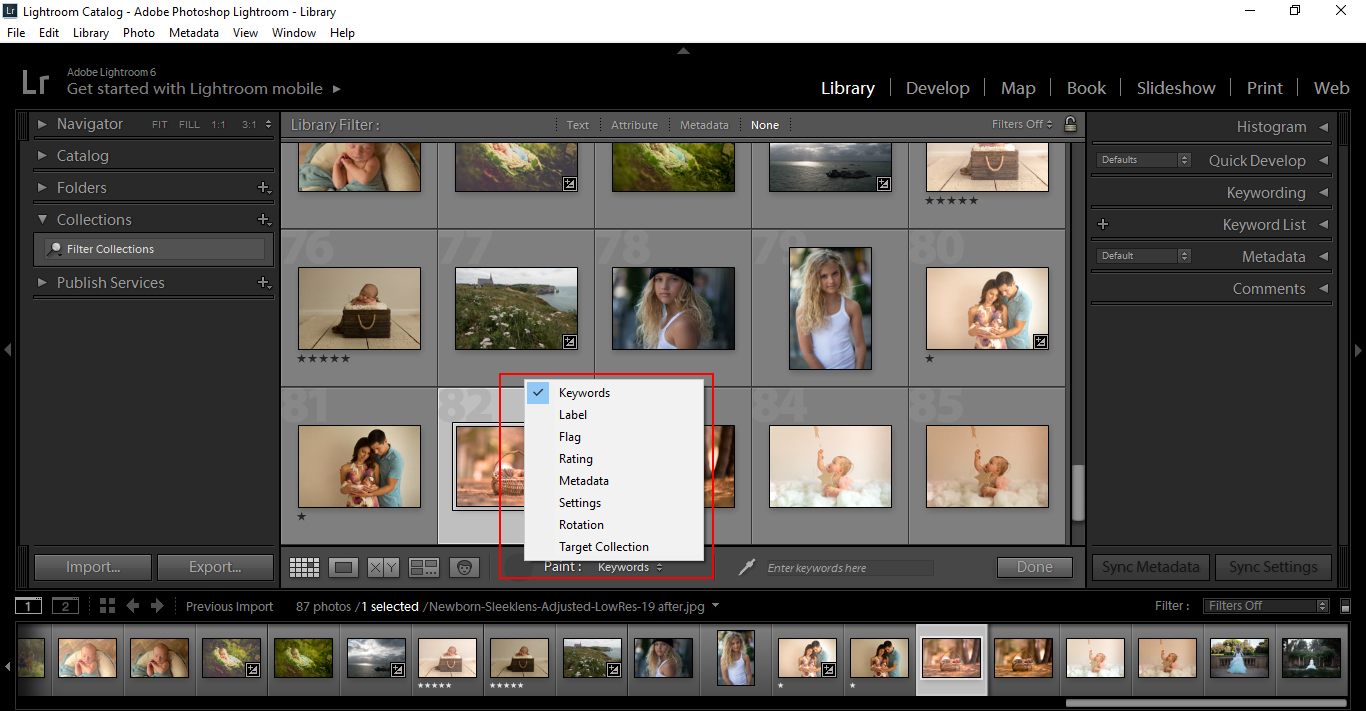
As you can see there are a few selections to choose from.
We’ll stick to Keywords for now as an example.
Where you see Enter Keywords here click and add the information you need to add, as these are part of our Preset products I will add Sleeklens Presets to identify them.
Hit Done.
Once you have your Keywords ready and loaded, it’s time to spray them on, so to make this easier for you hit Shift & Tab to enter into the full menu mode.
Select your Painter, then Click & and Drag across the pictures you have chosen.
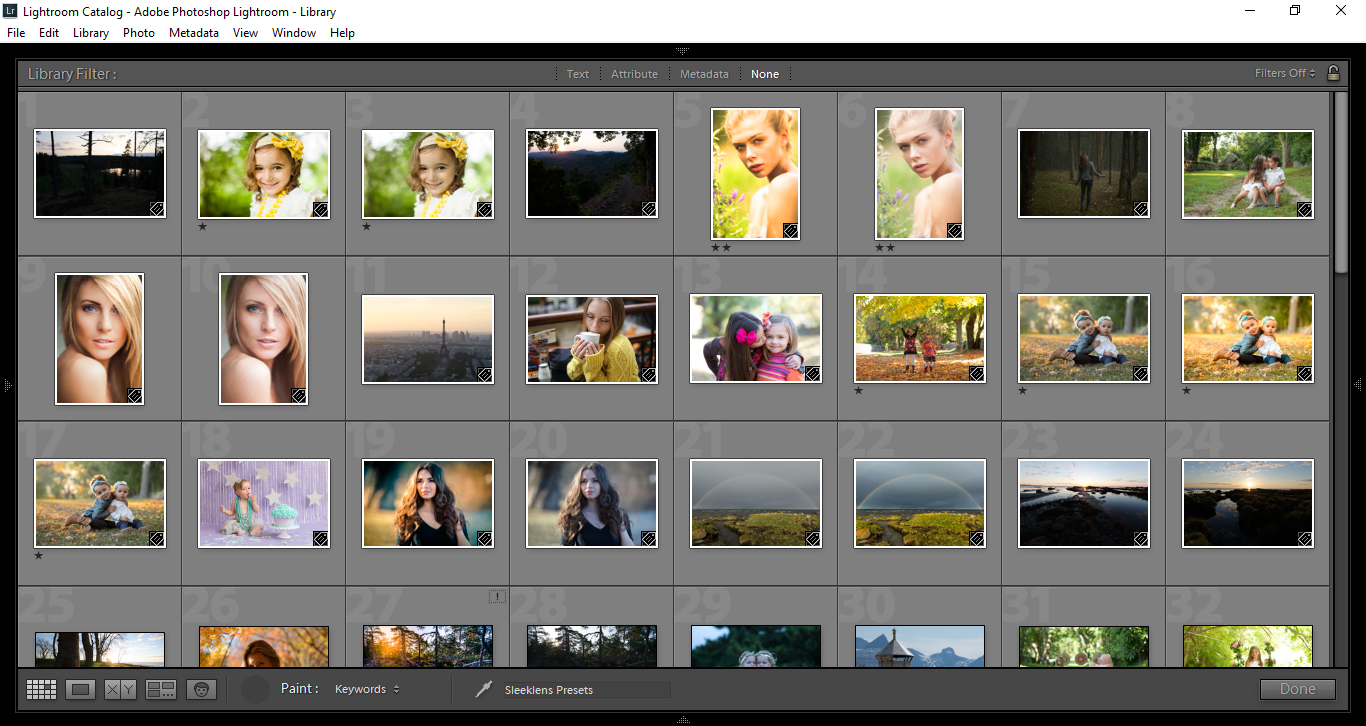
The selected files will then be indicated with a White Border around them.
Once you have added everything you want with your images, hit Shift & Tab again to enter back to the normal viewing mode and click the Painter to put it back where you originally got it from.
If you click on Keywording to the right, you will now see the Keywords that has been added.
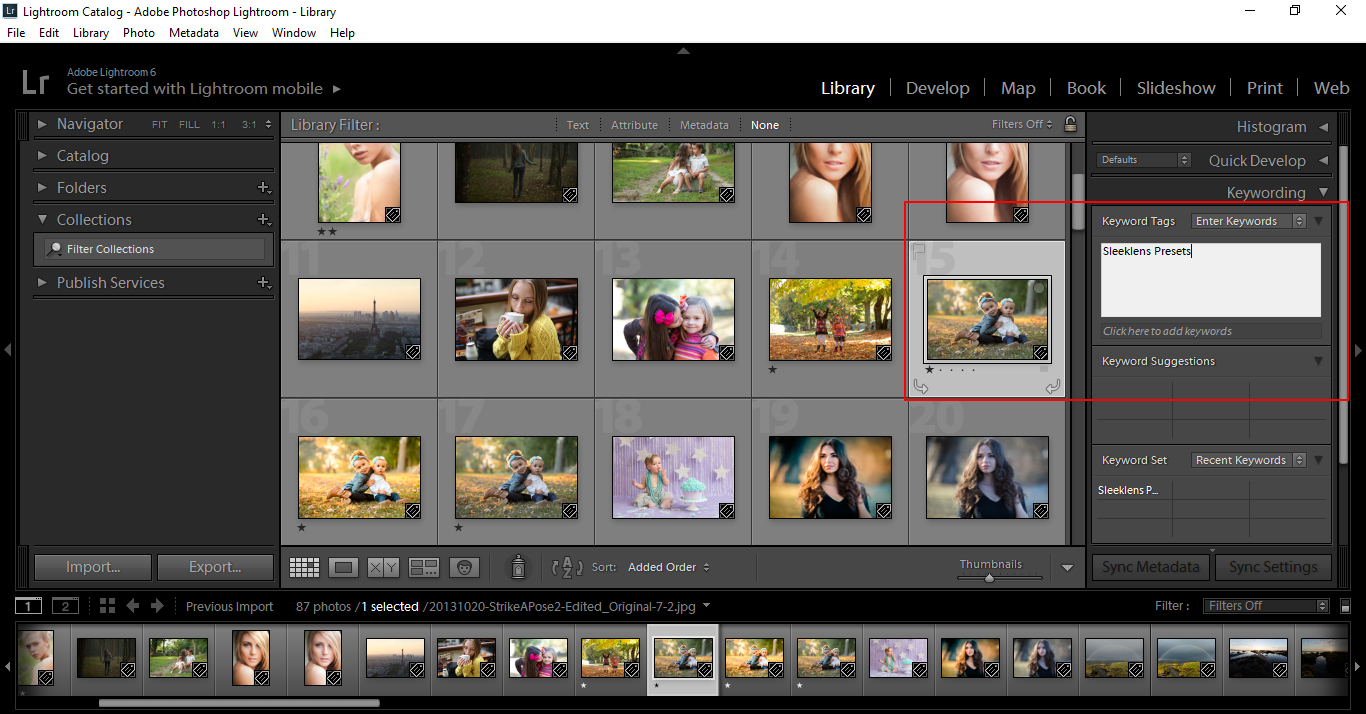
That’s how you can add Keywords to loads of images very quickly.
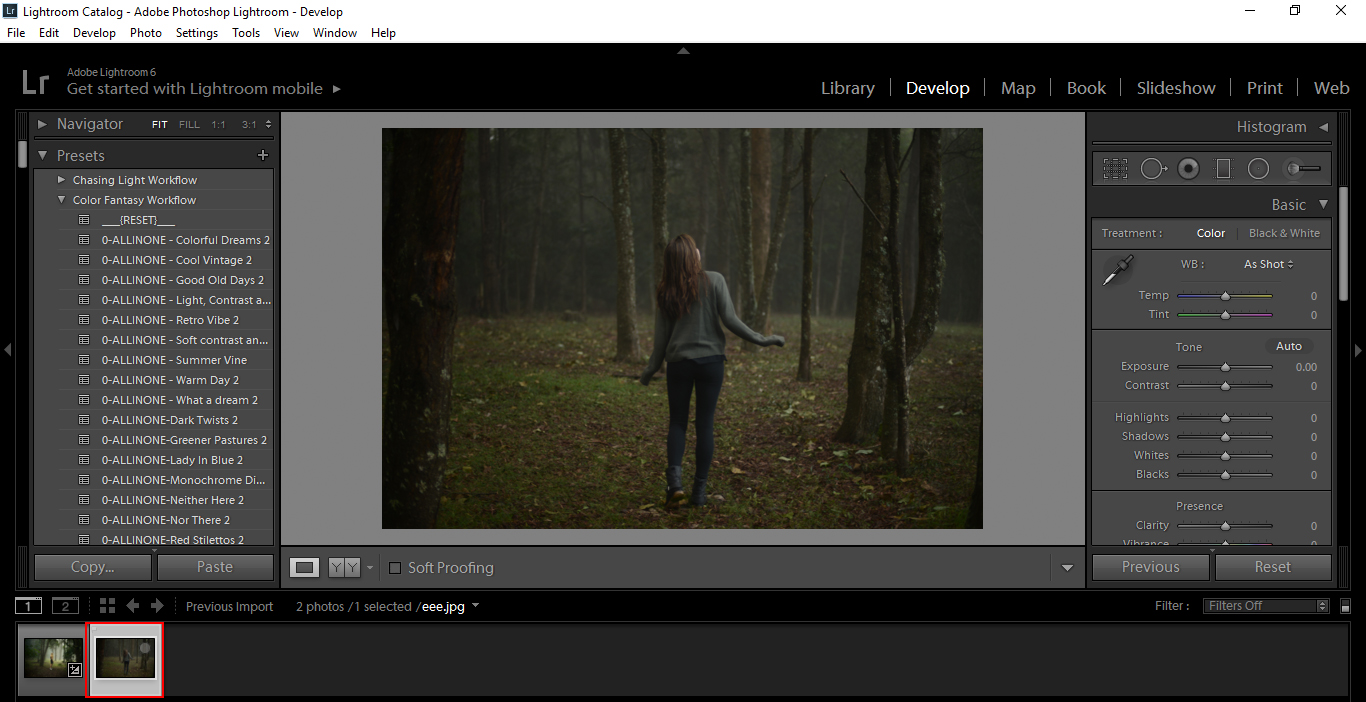
Next little Tip is pretty cool and I use it all the time, I use it when I have images of similar exposure and surroundings.
So for example, if I have two images that are very similar as the images below.
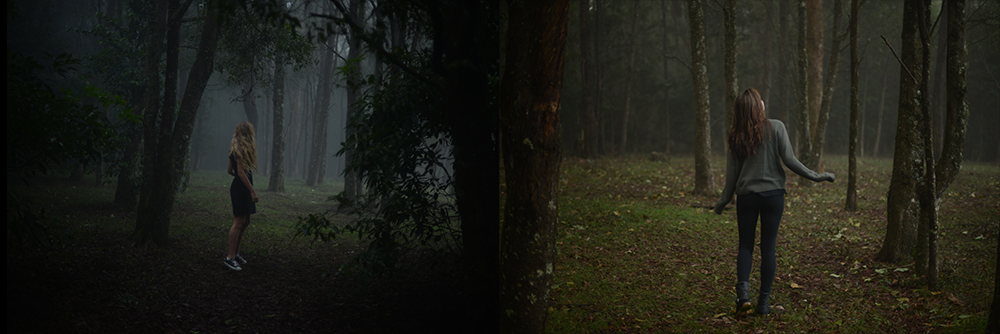
This technique will apply very nicely here.
I would suggest grouping images like these that are similar together to get the most out of this Tip, you can find tutorials on how to do that here under Workflow.
So once you have your images grouped together, lets start by Developing our image First, we have loads of Tutorials in our Blog on how to do this so if you don’t know how then you are probably best checking those out first, we have tonnes of of great information on our Blog, not to be missed.
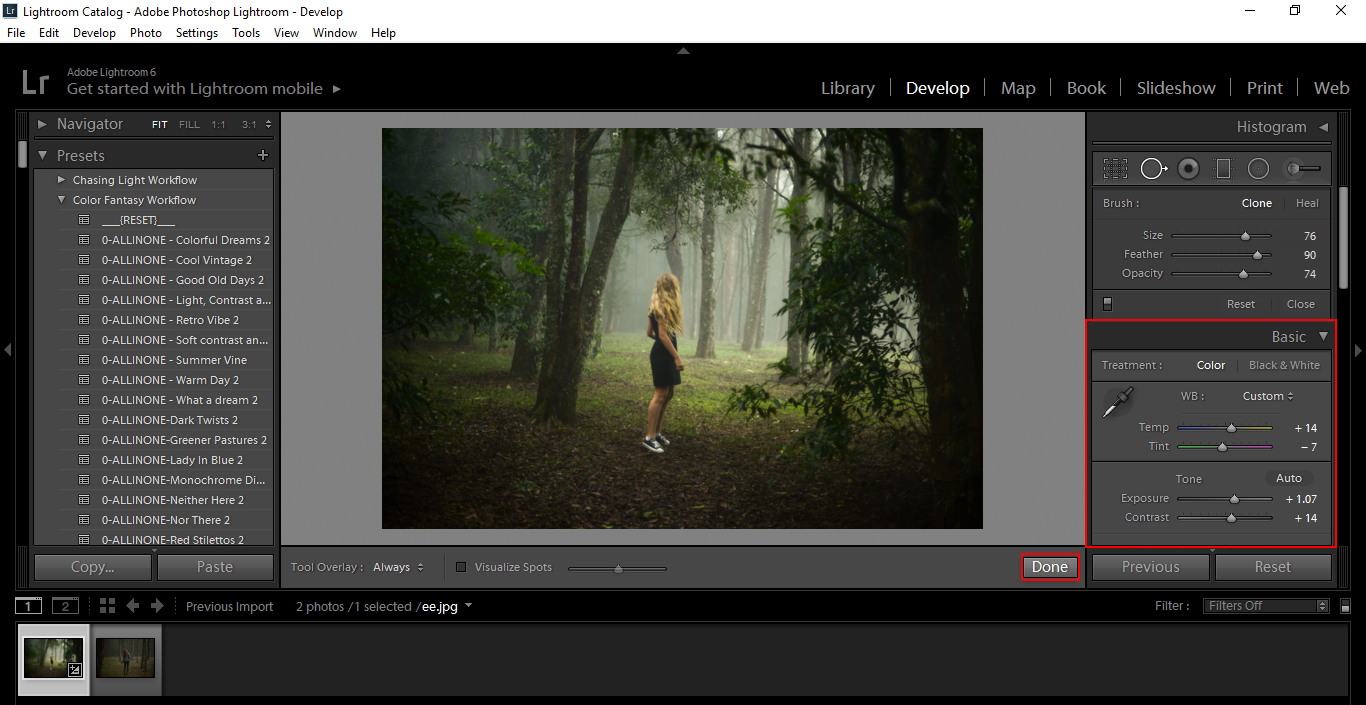
Once you have developed to the point where you are happy and you have hit Done.
Move on to the next picture,
And you look at it and say to yourself “you know what, this is basically the same set up as my last shot, and the same setting would look great, but I can’t be bothered going through that how slider business again!”
What do you do?
Well, there is an EASY ways to apply the same settings and I’m sure you’ve guessed it from the Title.
You click on the Previous Button 🙂
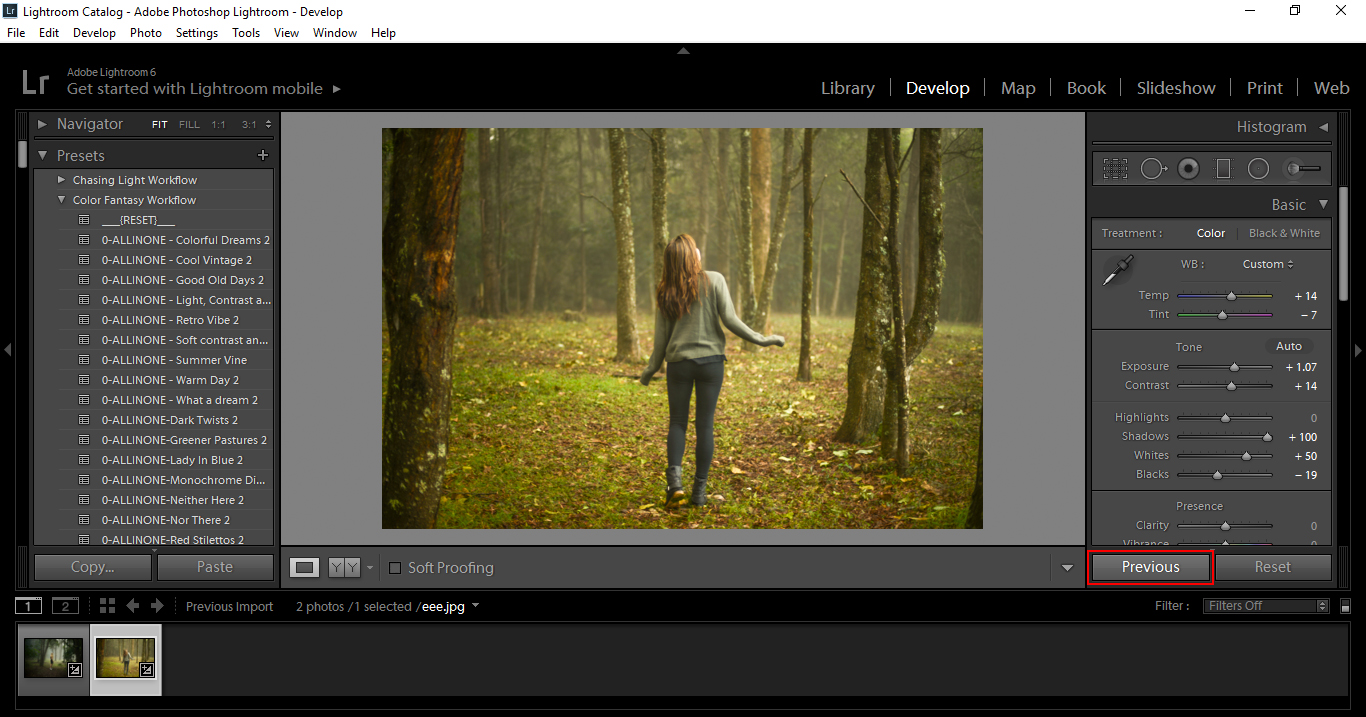
And just like that those same settings have been applied to your image.
There is one catch to this though, if you have done any Cropping or Brush work it will also apply that so be aware of that.
It also does not have to be the next image over it can be any image you choose.
In this tutorial we’ll be checking out the Density while using the Brush Tool, compared to using Flow with the Brush Tool.
First you need to think about Flow in terms of how much paint is on the Brush, so if you have a high number on flow, you have a fully loaded brush.
Density is Similar, the Higher the number the thicker it gets applied.
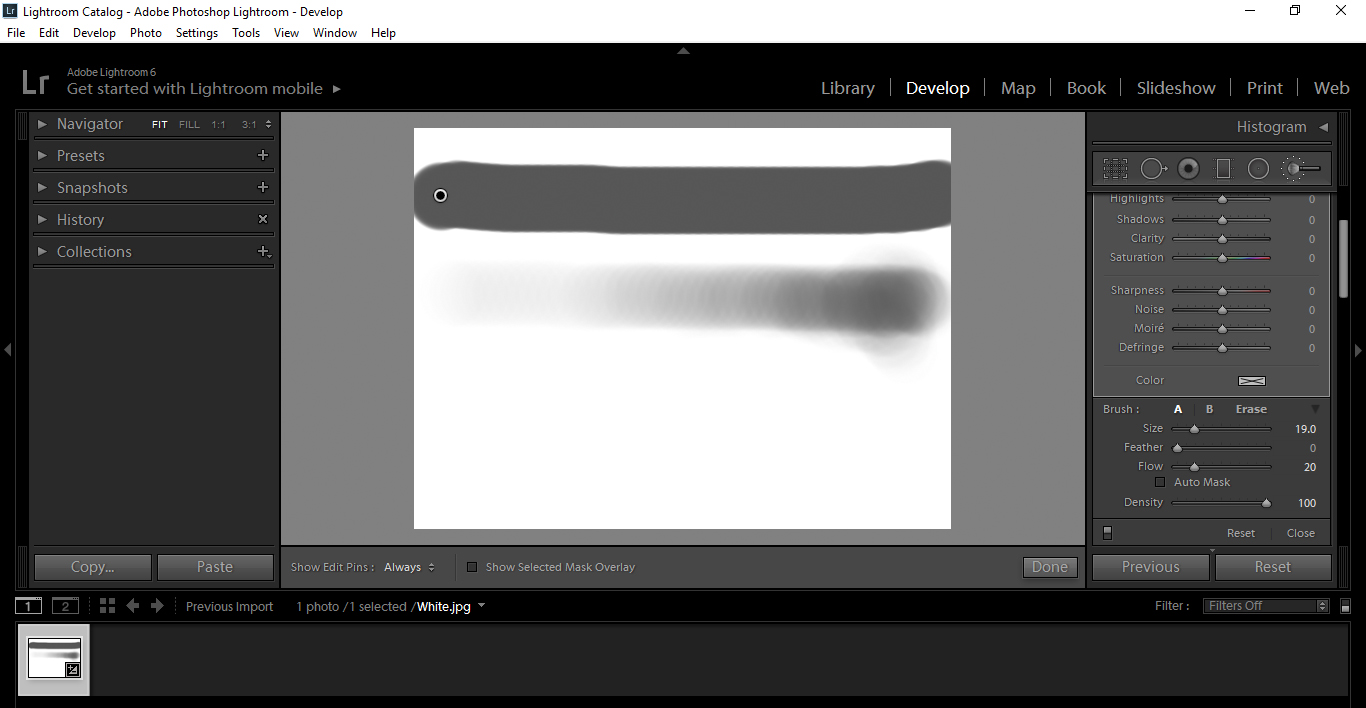
So to show you how it all works I’ve loaded up a plain white JPEG, I’m going to go to my Develop and click on my Brush Tool, or press the keyboard shortcut (K), dropping my Exposure down to -4.00 (or in other words slide it all the way to the Left)
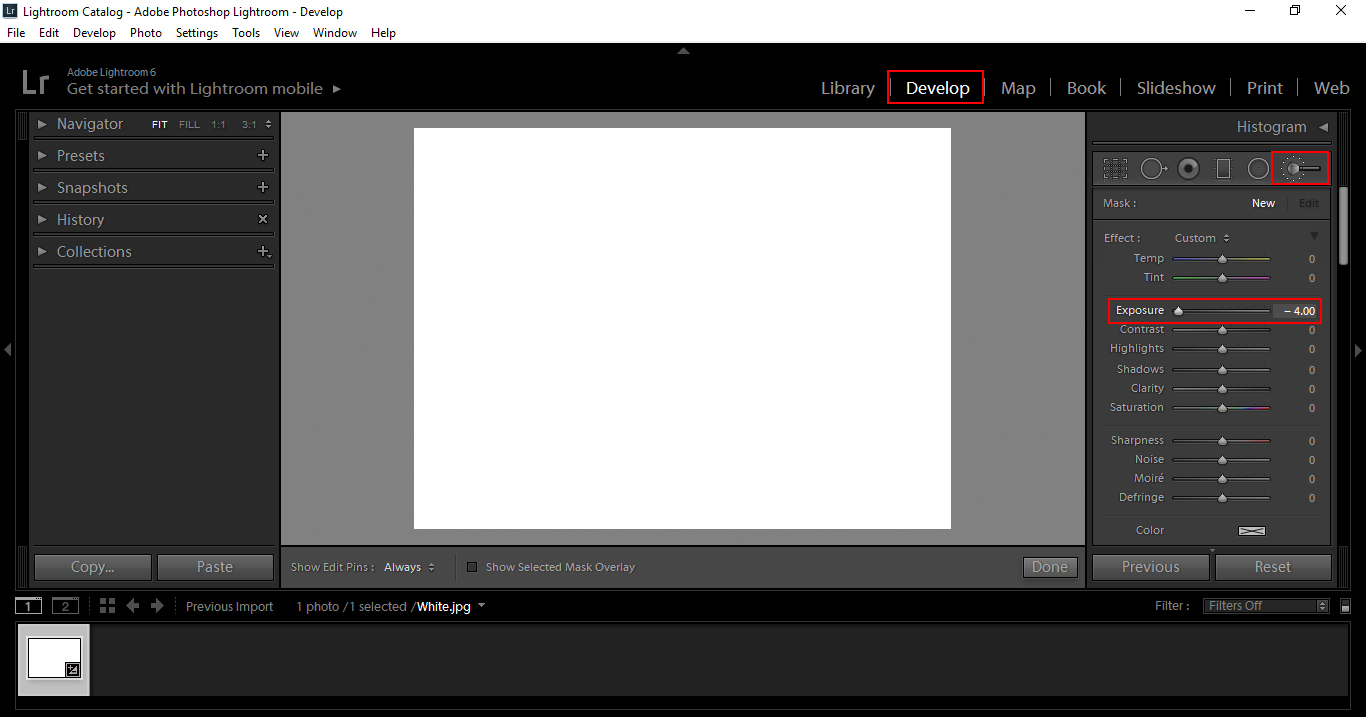
Ok, so then scroll down to the bottom until you see Density and Flow at the bottom of that panel.
Slide Feather all the way to the Left.
Slide the Flow and Density all the way to the Right to +100.
and uncheck Automask.
Now we’re ready to go, so click on the White JPEG and draw a line across, similar to mine.

Then do the same thing again, only this time drop your Flow down to about 20 and you will see a huge difference in what the brush has applied.
It’s now more like a Dry Brush effect at this present time, then the more you paint over, the stronger the Stroke becomes, just like if you where to do it in real life with a real brush.
Return the Flow to 100 and change the Density to around 20/30, then do the same as you just did previously.
You will now see that the Stroke has kept it’s shape, but is now much, much lighter.
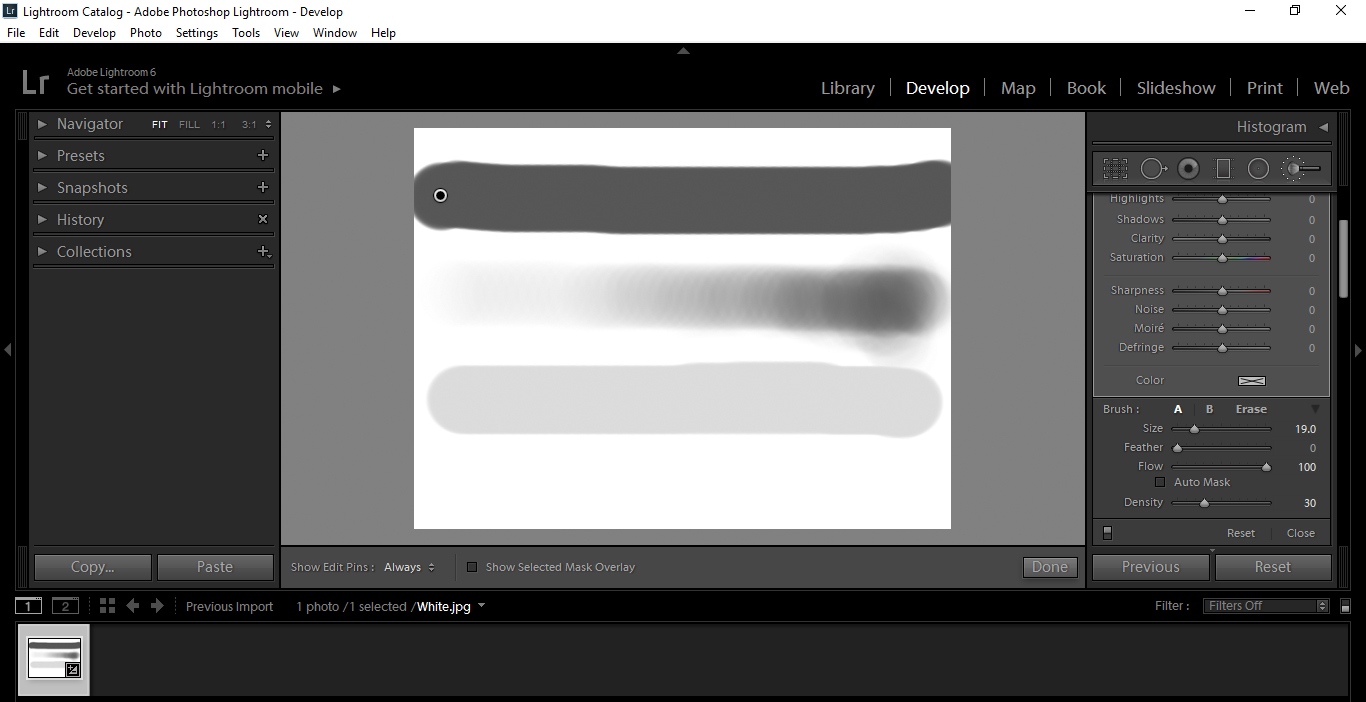
Also this time if you repaint over the stroke again, it will not over paint and increase in darkness.
Where would you apply this?
Well, say you were looking to increase a light source, but you don’t want to increase the Density. Or you want to increase the Light Source and give it a broader range, you would decrease Density and increase Flow. So, think about Density as a Solid that can be made Lighter, and Flow is more like a dry brush that can be added to and increased in strength, the more you paint over it.
There are two ways to remove Pet eye, one is using the Tool which you may or may not have, depending on what version of Lightroom you have. The other is a Manual way, both are very easy todo..
So what is Pet Eye? well it’s like Red Eye, and what that is, is the light reflecting back out from the eyes, which gives it a spooky glow and makes people look insane in some photos, haha.
We’ve all been there 🙂
Below is an example of Pet Eye.
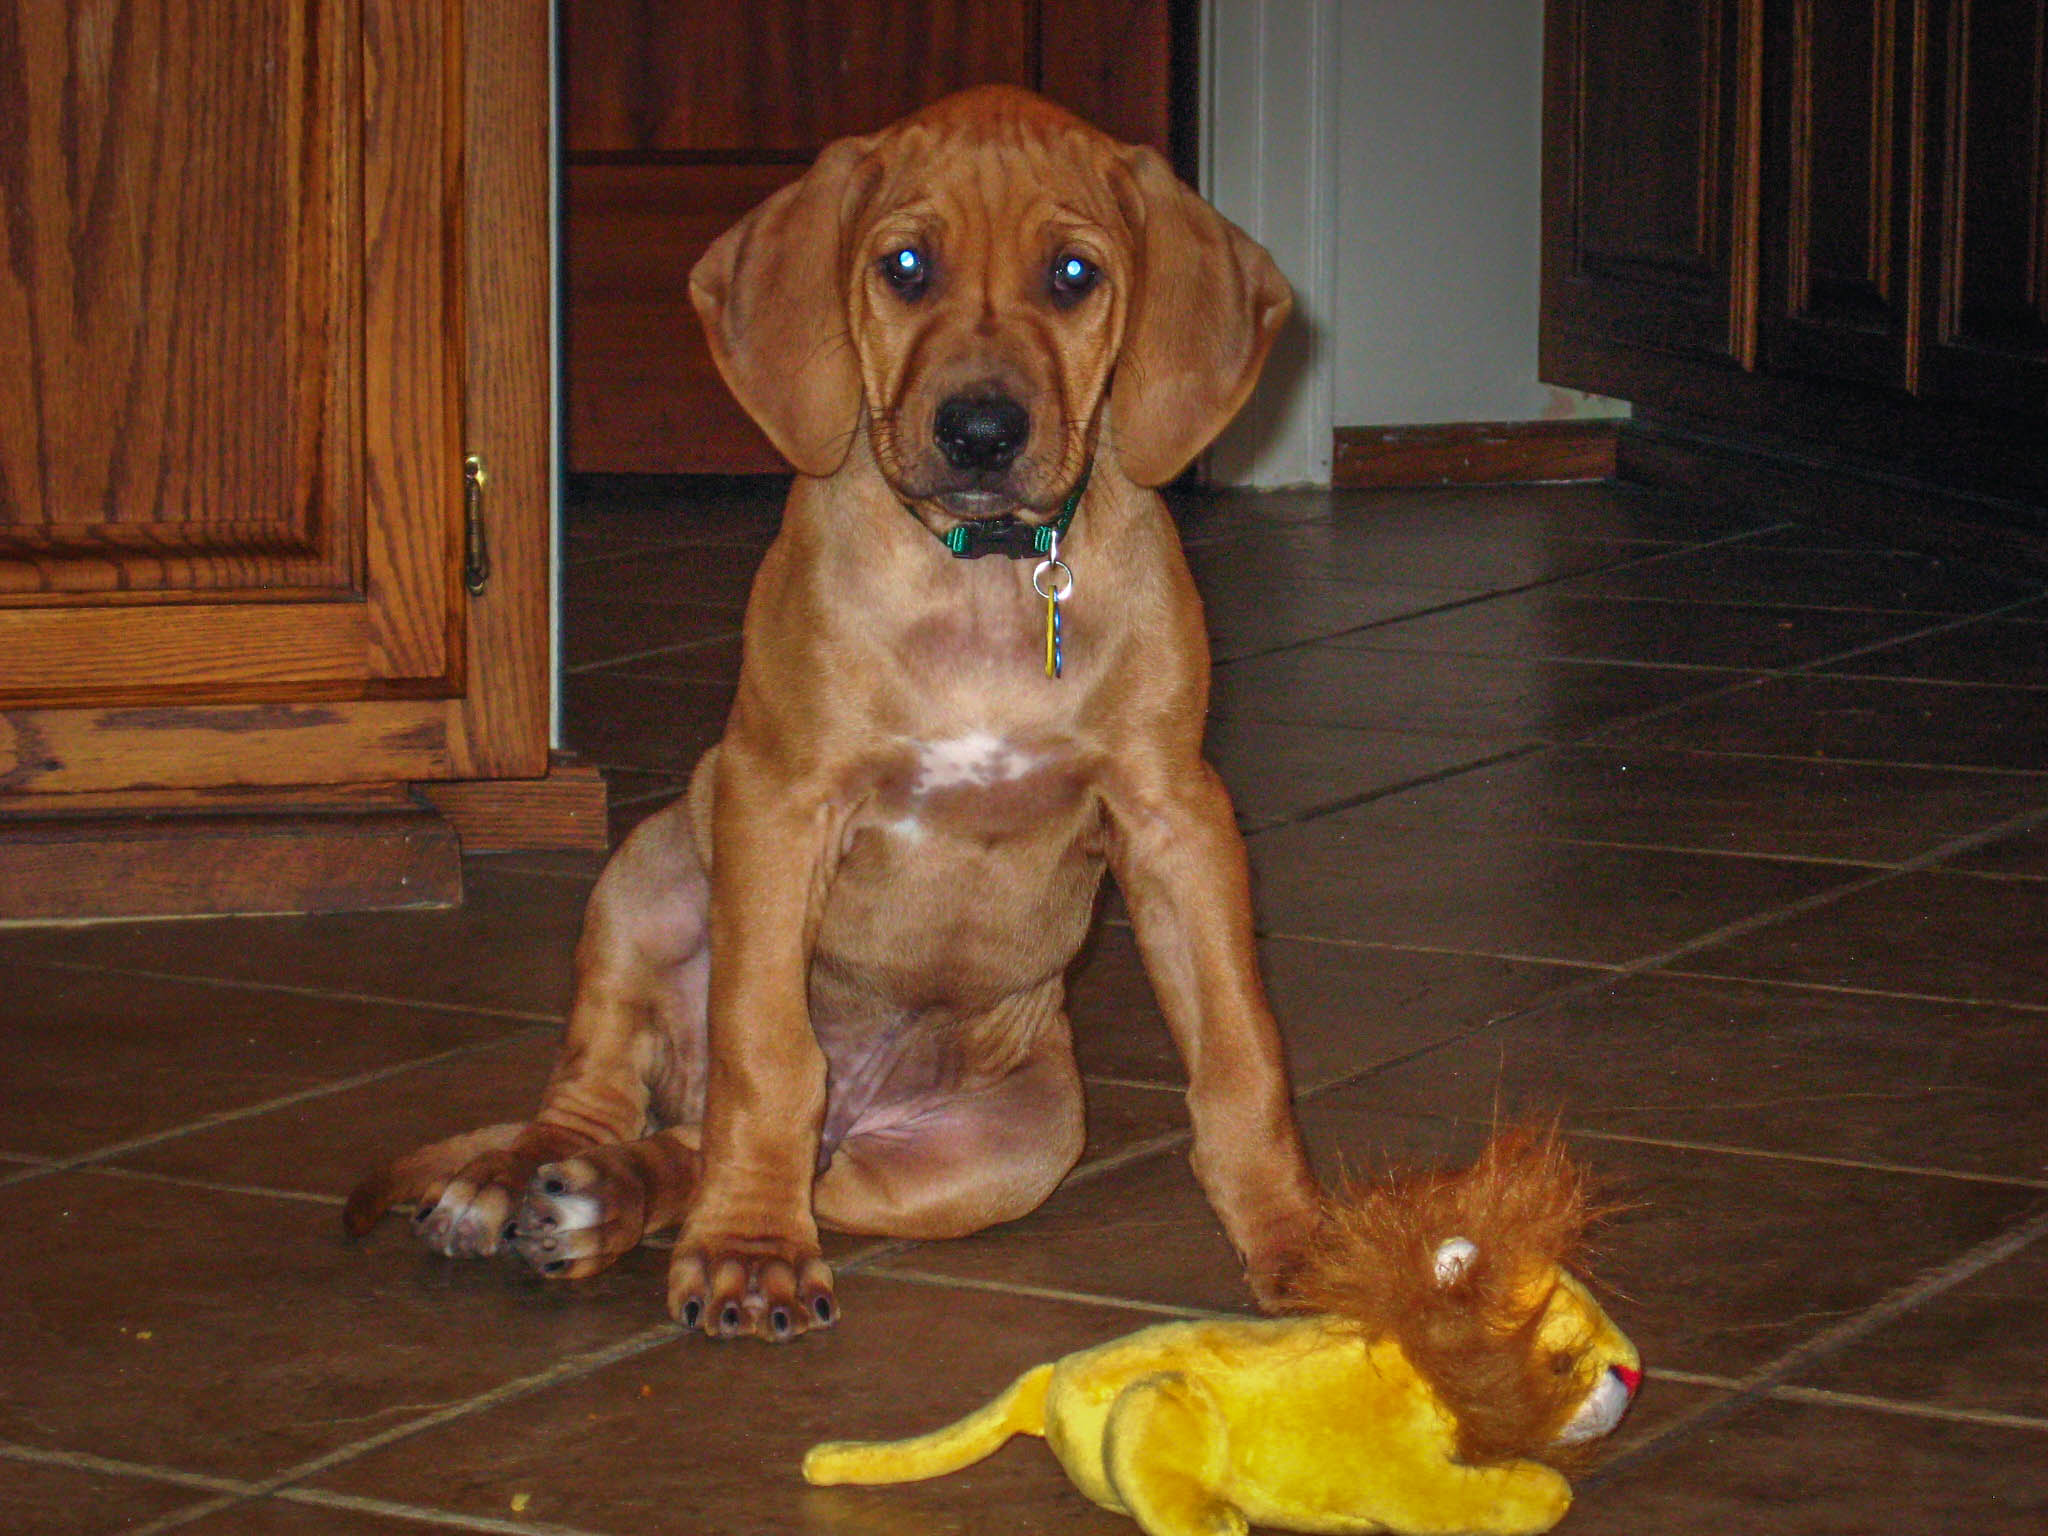
As you can see the eyes a glowing quite significantly.
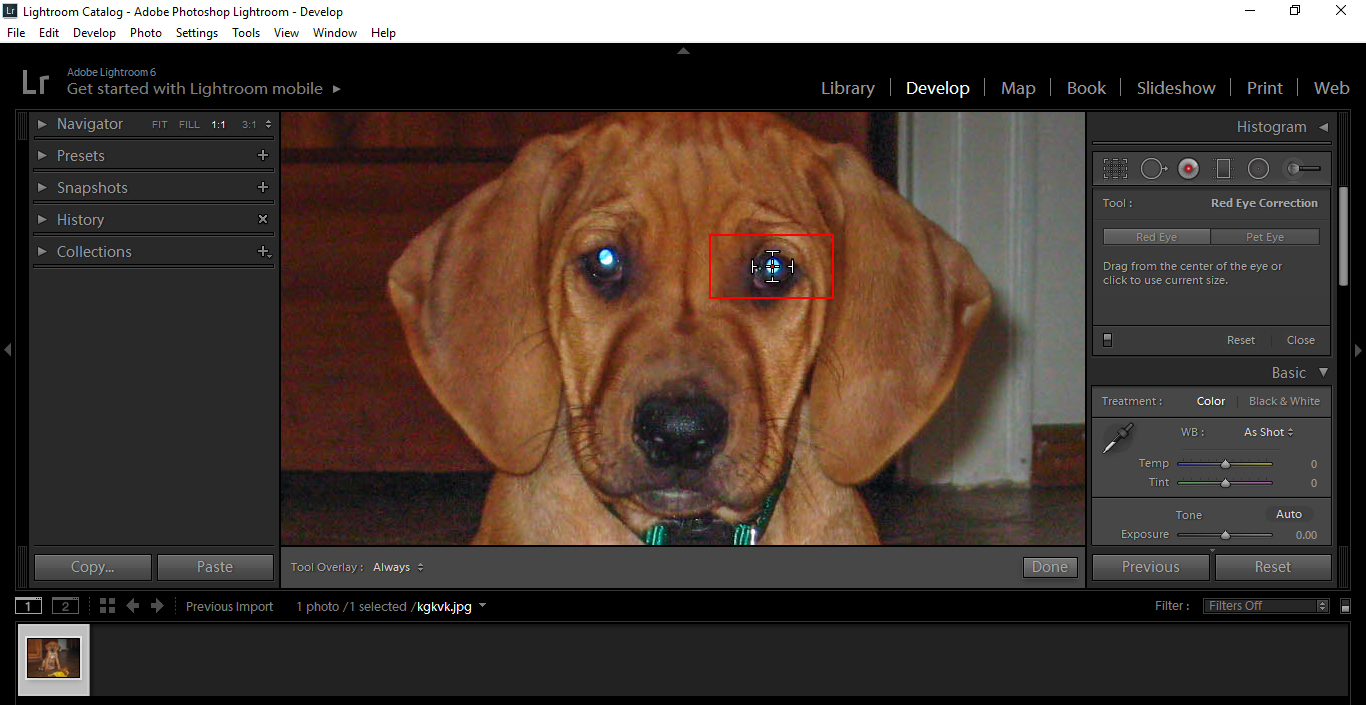
1st option to get rid of this is, in Develop, go to the third tool over and click on it, then choose the Pet Eye option.
Also, you may need to zoom in on your image before you do this step.
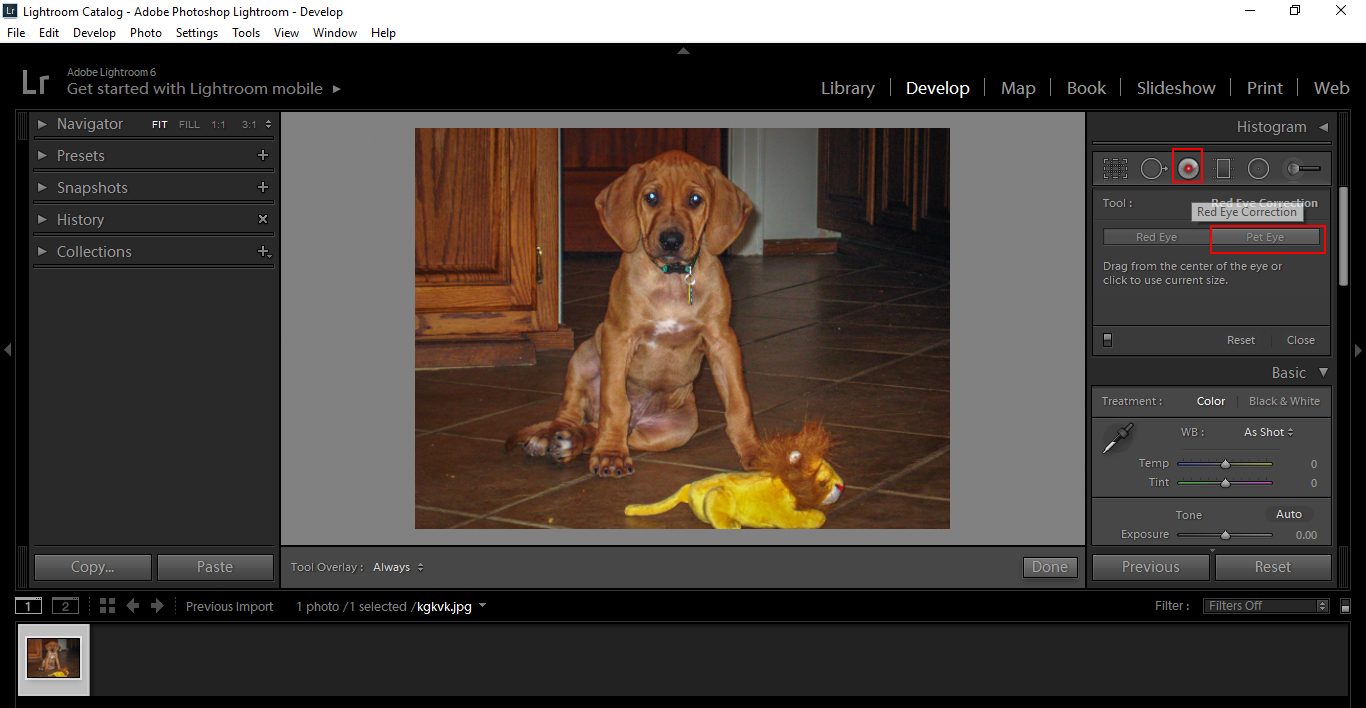
Once you have selected that, then you click over the area of the eye which has the glow.
You can change the size using the Bracket Keys [ or ], I prefer to Click and Drag until I fill the size of the pupil.
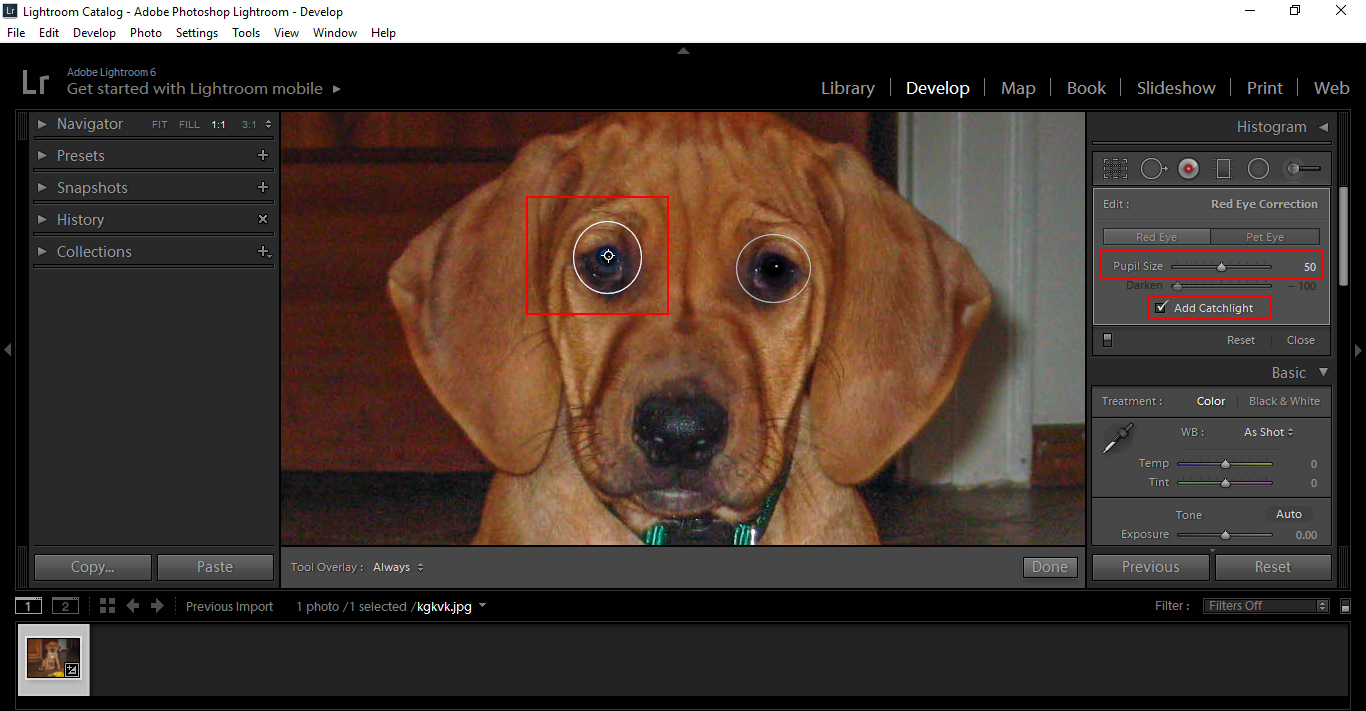
Click and Drag the indicator over the Glow and it will cover it, you can then increase the size of the pupil as you see fit. You can also check “Add Catch Light” to give a little bit more realism to the image.
The next way to do this, is to use the Brush Tool (Shortcut *K).
You will want your settings as so, and make sure that Auto mask is not checked.
So decrease your exposure and little, saturation all the way down and give it a little bit of Feathering.
And also make sure Density and Flow is at max 100, if you want to know more about this click here for the tutorial on that.
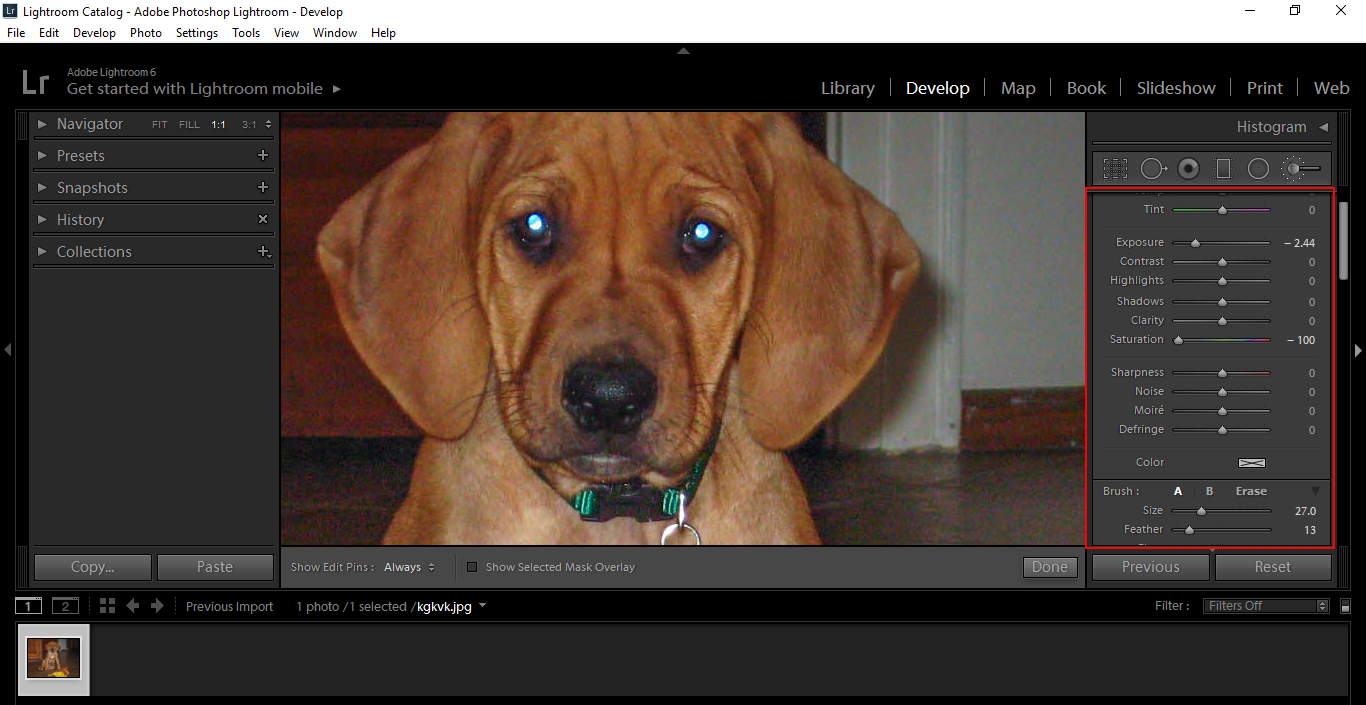
Then you simply paint over the Glow.
Now you will notice, it hasn’t completely covered it.
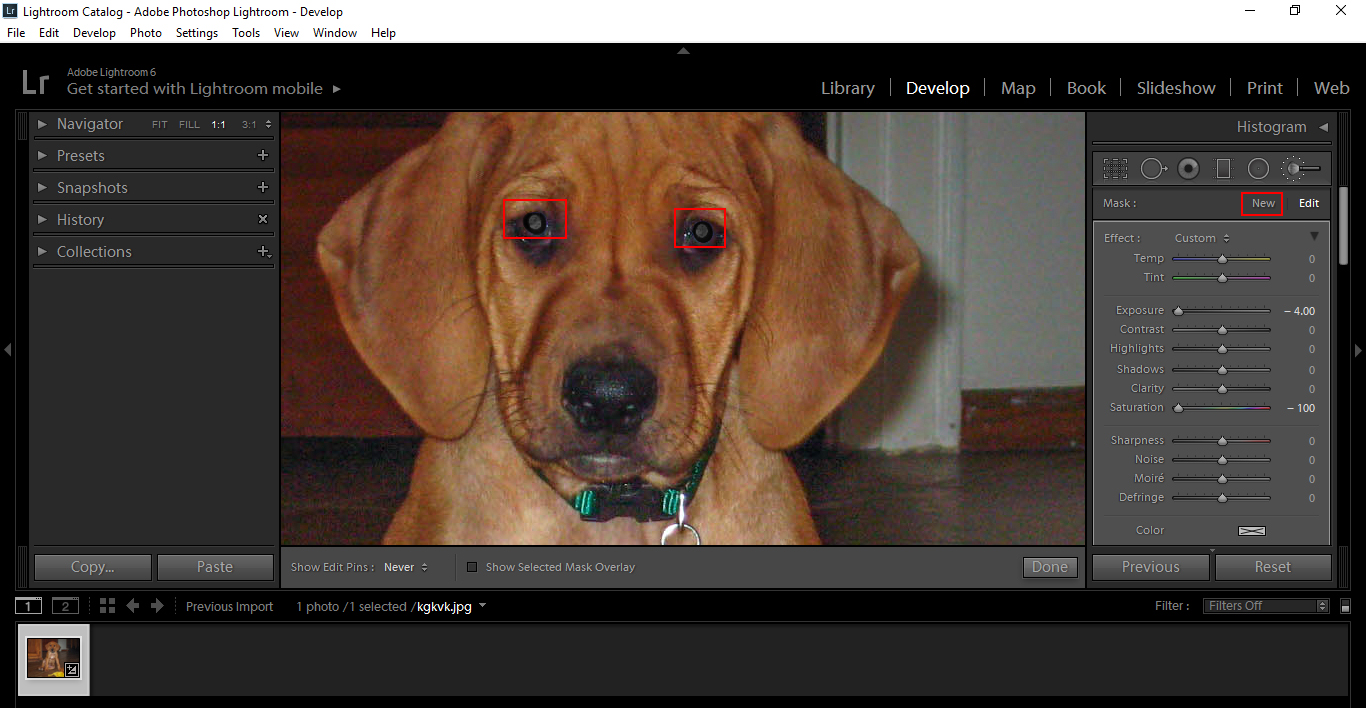
So click on NEW on the right and go again. That should be enough to sort it out, but if not, just click NEW again and repeat until it is fixed.
Now you may have to play around with this a little to get it perfect, so don’t be afraid to keep trying until you are happy.
Until Next Time 🙂


Please verify your software version before proceeding.
 I’ve verified my software version


 Facebook
 Google +
Comments (0)
There are no comments yet.