Over the years I have experimented a lot with light and shadows and developed a fascination for silhouette photographs because taking images of silhouettes can be a great way to add a dramatic or dreamy atmosphere to a scene. Taking images of silhouettes isn’t as hard as you might think because you just have to follow some rules in order to create those photographic silhouettes.
When you are taking images of silhouettes you probably will lose all the details of your subject, but you will win an absolute eye-catching photograph.
But which settings should you use? Which subjects work best for silhouette photography? How should you position your subject to get a silhouette image? When is the best time to shoot a silhouette? Let me answer all these questions and let me tell you all the details you should know about silhouette photography to help you to get breathtaking silhouette images.
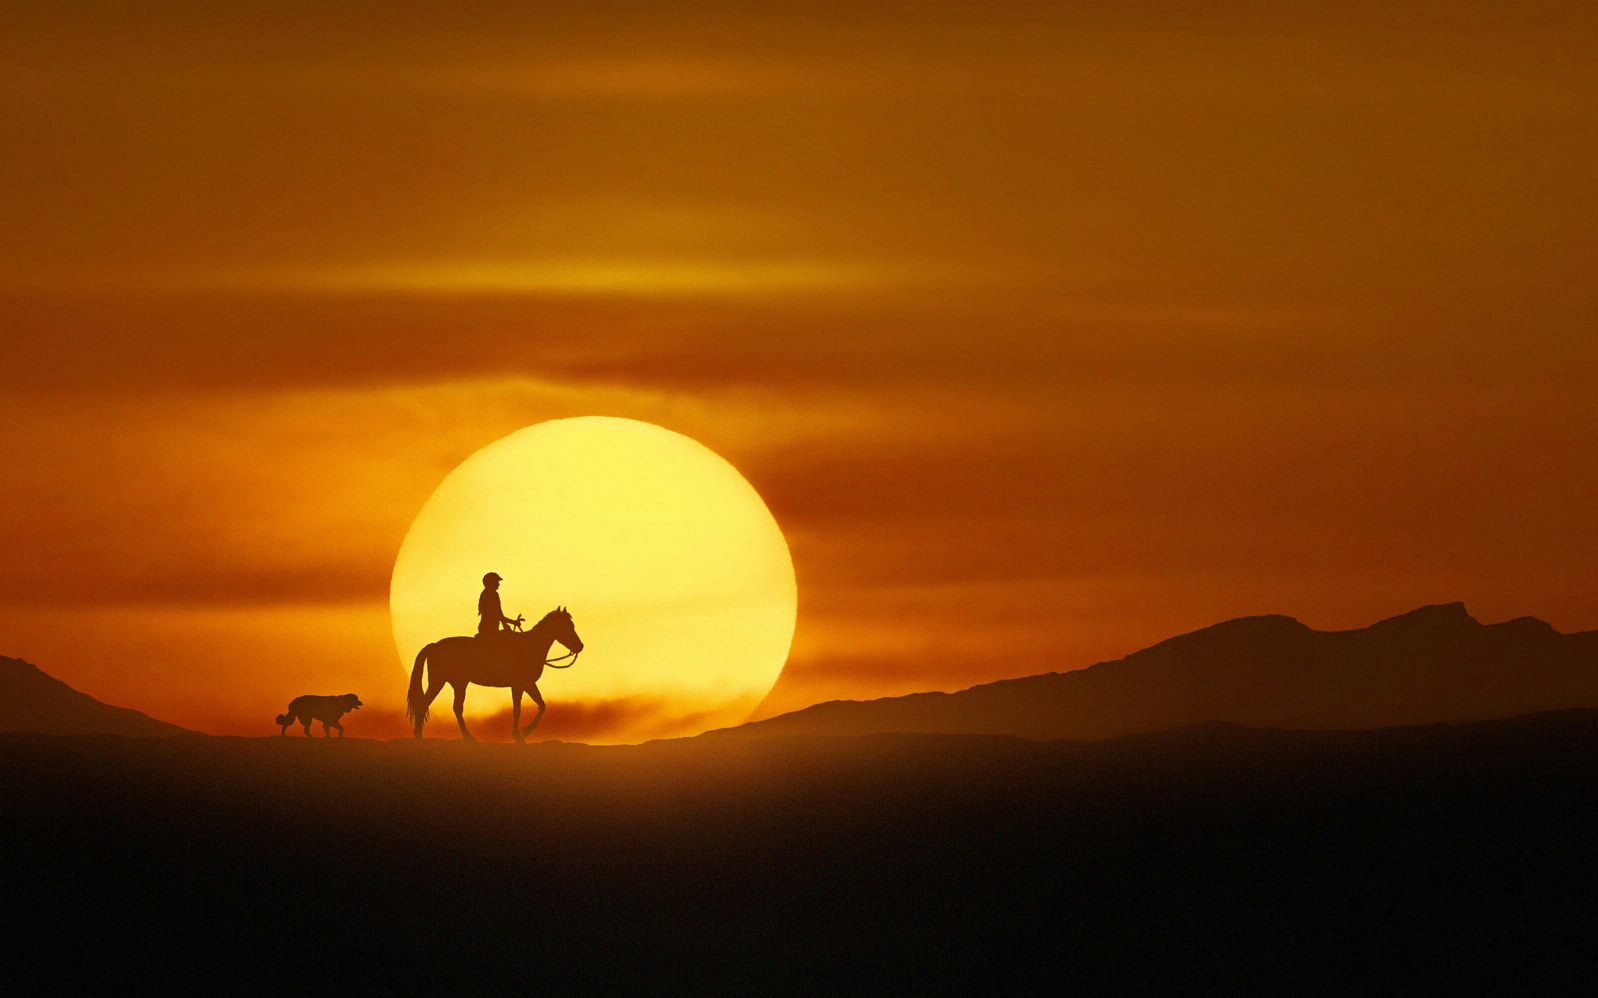 Image by Anna Ovatta: Facebook 500px
Table of Contents
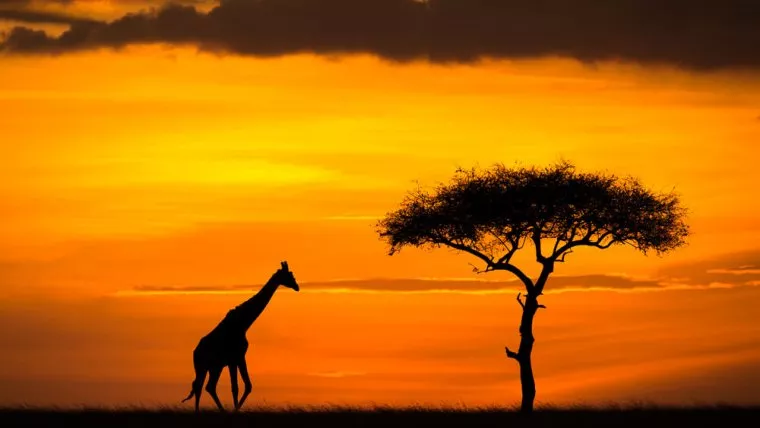
A silhouette is basically the contour/shape of a subject which appears to be totally black. This effect can be achieved if the subject you photograph is directly in front of a very bright light source. People are probably the most popular subject for silhouette photography, but also landscape silhouettes or animal silhouettes are great subjects to work with.
But before you grab your camera to start taking images of silhouettes, make sure to read all the tips in this article about the camera settings and necessary items you will need for a successful silhouette shooting. It takes a bit of time to understand how silhouette photography works. Photography is a learning-by-doing process, the more time you spend and invest the more you will learn and the wider your horizon will get.

Image by Mario Moreno: Facebook Homepage
So first of all here are a few items you should bring along which are necessary before you go outside to take breathtaking silhouette images:
A regular DSLR camera will work for silhouette photography and it will be a huge advantage if your camera body supports the live view function, which allows you to preview the image you are about to take and to see how your image will look like as a result of applying different settings. Furthermore, live view will help you to get more control over focus because you can easily zoom in to test your image sharpness and to see where your focus point is. In the live view modes you are able to adjust your focus point precisely while using the manual focus ring of the lens.
Many photographers think that expensive DSLR’s automatically make stunning images and let you be a great photographer. That’s not right, the only function of your camera is to capture a special moment, a fascinating scene, to capture the image you have in your mind. There are many photographers with non-professional equipment who take brilliant and well-composed images, who have their photos on magazine covers. You easily can create a masterpiece with cheap photo-equipment. So remember it’s not the camera which takes good images, it’s the photographer. Your camera is just a tool that will help you realize your ideas.
 Image by Wilfredo Lumagbas: Facebook 500px
 Image by Mario Moreno: Facebook Homepage
There are various filters, such as the simple protection filter, which function is to only protect your lens of course. For sunny conditions I would recommend using ultra-violet reducing filters, the function of the UV filters is to block UV light and to remove the blue cast from the images.
Which type of lens you have to mount on your camera always depend on the distance between you and your subject, in some situations you will need a wide angle lens and in other situations a telephoto lens will suit better. In my experience, a wide aperture lenses will be the best choise, because wide aperture lenses are able to collect a lot of of light,
which make them the perfect match for low light conditions. But be aware, the larger the aperture is, the thinner the depth of field will be and the more difficult it will become to get a sharp and crisp silhouette image.
Image by Wilfredo Lumagbas: Facebook 500px
How many times have you experienced the frustrating fact that once you found the perfect scene to frame, your camera’s battery says “game over” – definitely no photographer would be happy with that.
So always make sure to bring along a fully charged extra battery for your camera body. Another great way to increase battery live is to use a battery grip, it will automatically also makes cameras easier to hold.
will help you to boost the quality of your image, especially if you take images under bad light conditions where you are forced to set a slow shutter speed. It will avoid camera shake and when using slow shutter speed values, even the slightest camera movement will result in an uneven, blurred picture. Be sure to use a steady and robust tripod, there are some really great tripods under $100. I personally use and would definitely recommend the “Traveller Compact Pro” which has many extras such as a built-in spirit level or a ball head.
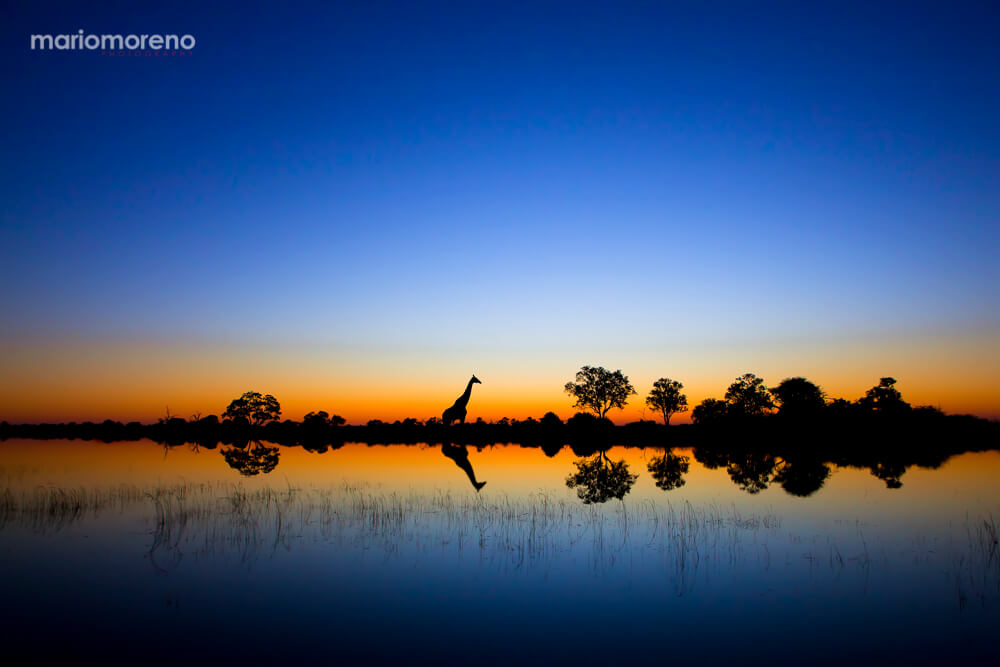
Image by Mario Moreno: Facebook Homepage
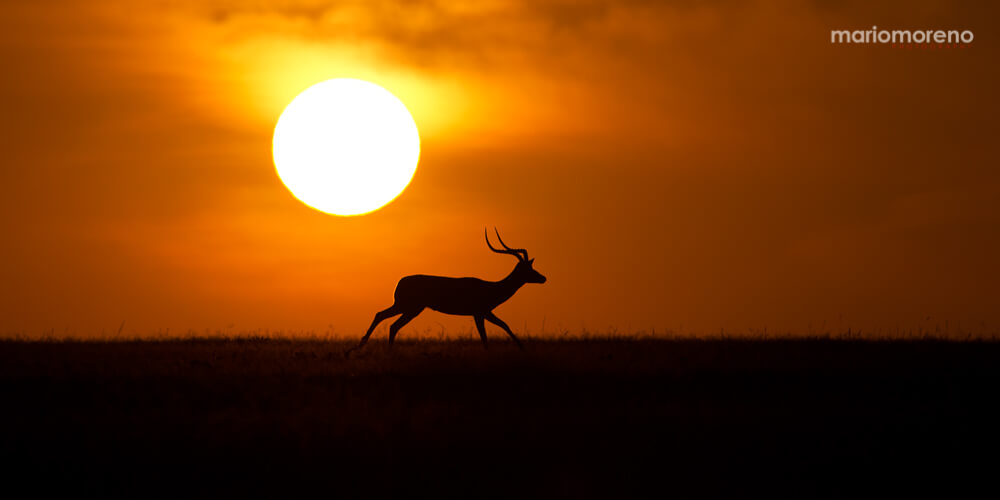
Most silhouette images are taken during sunet or sunrise, because when the sun is about to rise or fall you exactly have the light you need to capture a silhouette image. Just make sure to position your subject directly in front of the sun.
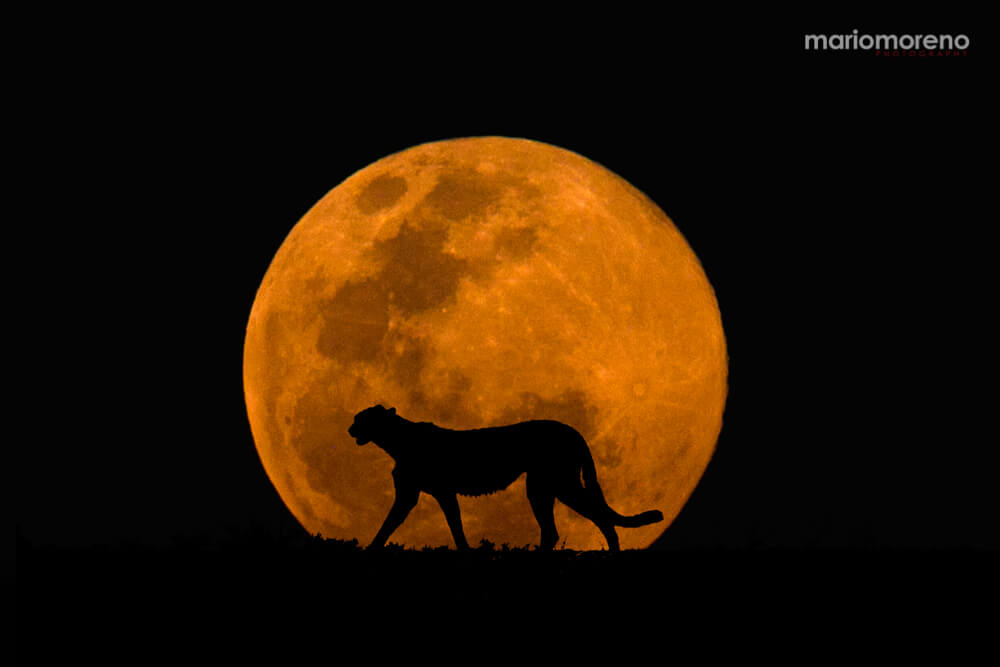
But silhouettes can be taken with any kind of light source, if the light source is bright enough, also other light sources can be used to create a silhouette, such as external camera flashes, streetlights, torches, fire, moonlight or anything else you can think of. Using the sun as the backlight might give the whole shot a more natural look, but if you have your own studio, then you have the possibility to experiment with different light sources. Another gread advantage of shooting in the studio is that you don’t depend on the light, which means that you can spend the whole day in your studio.
Image by Mario Moreno: Facebook Homepage
Make sure to follow the steps below, if you have the sun as your backlight:
1. Find a good location and know exactly where the sun will rise or fall
2. Be patient, but also be ready when the sun is about to fall/rise
3. Make sure to position your subject directly in front of the sun
4. Set the right settings to receive the perfect silhouette image
5. Take the image, but also experiment with different angles
First of all, it is really important to be familiar and to understand all your cameras settings, such as ISO, shutter speed, aperture and white balance. Because it’s the combination of the settings which makes your silhouette pictures look perfect.
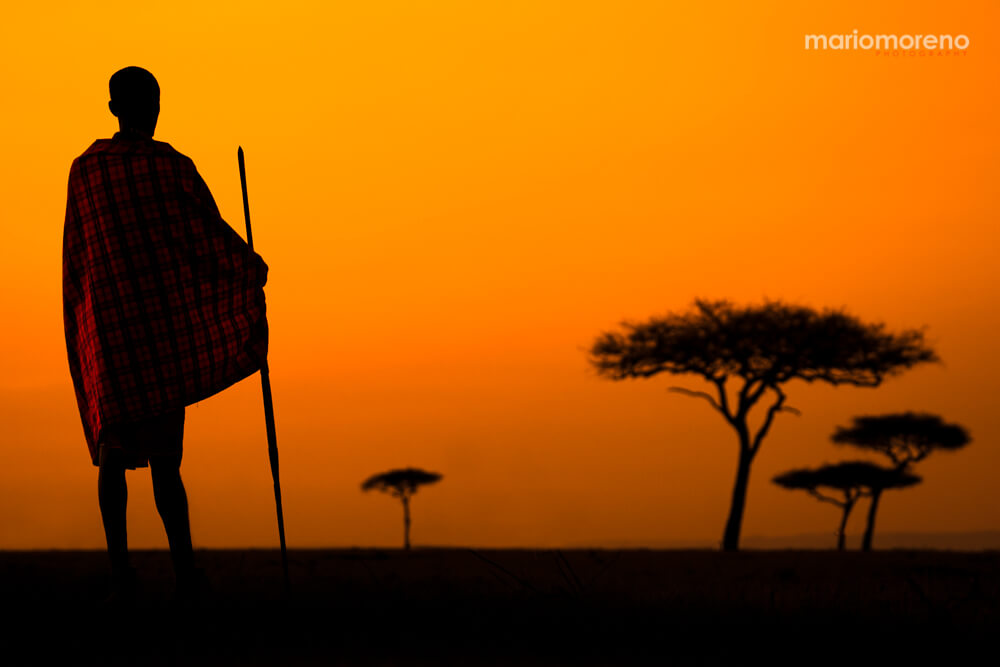
For example, this sun silhouette showing an elephant in the foreground was captured with a Canon EOS 5D MARK III while using following settings: Shutter-Speed: 1/1250, Aperture: f/8, Focal Length: 400 mm, ISO Speed: 250
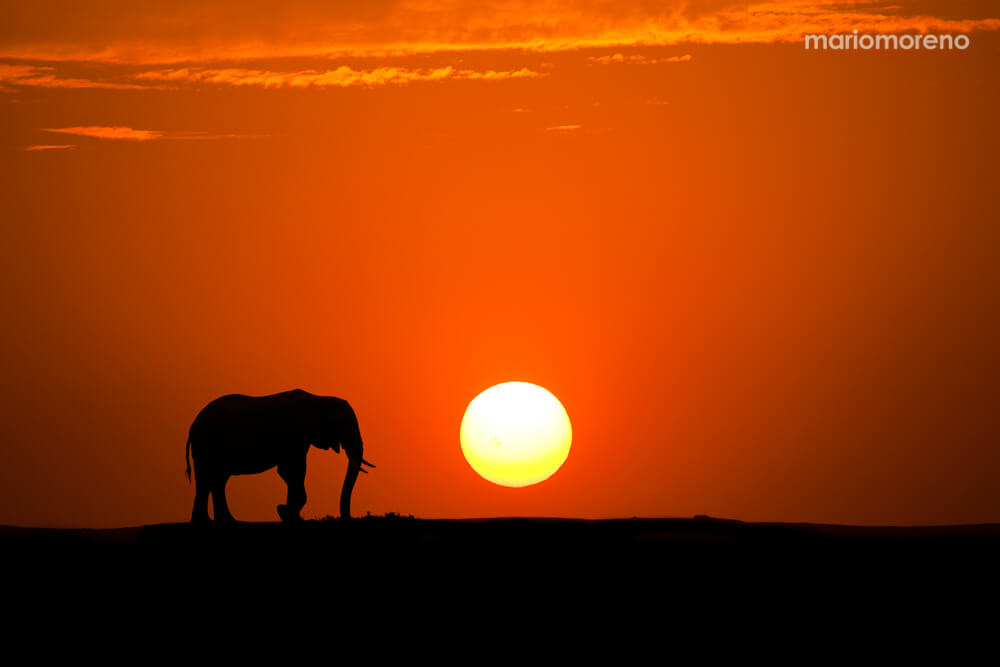
Image by Mario Moreno: Facebook Homepage
This image showing silhouettes of people was taken with a Nikon D3100 while using following settings: Shutter-Speed: 1/160, Aperture: f/4.8, Focal Length: 125 mm, ISO Speed: 100
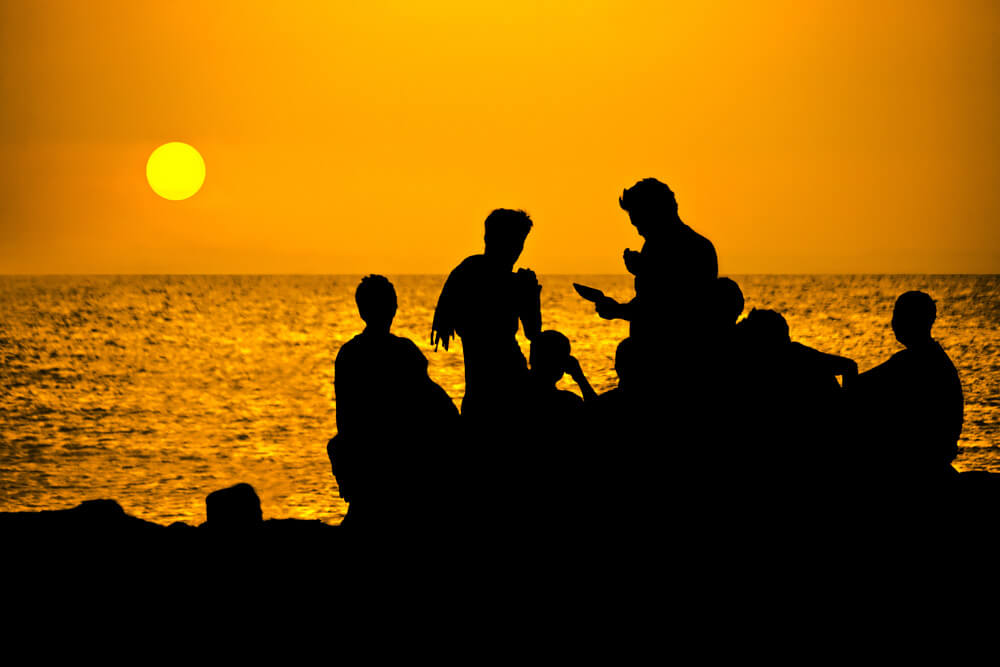
Image by Wilfredo Lumagbas: Facebook 500px
Taking images while using the automatic mode is not always the best choice, because sometimes your image will not be exposed correctly, as the camera sometimes
may have problems finding the right shutter speed in extreme lighting situations.
So when you are about to take an image of a silhouette make sure to set your camera to manual mode to make sure that your image is exposed correctly.
So it’s really important to learn how to operate your camera by using your camera in fully manual mode.Manual mode allows you to set your aperture, ISO and shutter speed separately to any value you want, this means you have full control of all your camera’s settings. The great advantage of using manual mode is that you can decide by yourself which aperture, ISO or shutter speed you want to set, having full control of your camera settings is just necessary to achieve great silhouette images. Trust me, no professional photographer normally uses the automatic mode.
Camera: Canon EOS 1D X, Exposure: 1/125, Aperture: f/6.3, Focal Length: 190 mm, ISO Speed: 500
Image by Mario Moreno: Facebook Homepage
Setting a high ISO automatically will cause grain and noise in your images, so always be sure to set your ISO to a low value while you still will be able to have a fast shutter speed to avoid blurriness.
Being a photographer is not easy nowadays, because on the one hand you want to keep your ISO as low as possible for sharp & grain-free images and on the other hand you also have to set a fast shutter speed to receive sharp and high qualitative images.
The idea behind setting your ISO high is to get a faster shutter speed and therefore to get more qualitative and sharper images. Nowadays most DSLRs are able to provide good quality images at ISOs up to 1600. If you don’t have the option to decrease your ISO there is always the possibility to remove the ISO noise afterward, within few steps you are able to remove the noise in Photoshop, but nevertheless always keep in mind to set your ISO value as low as possible to avoid unnecessary ISO noise.
Camera: Canon EOS 1D IV, Exposure: 1/8000, Aperture: f/8, Focal Length: 420 mm, ISO Speed: 160
Image by Mario Moreno: Facebook Homepage
By reducing the interval in which the shutter of your camera is open, you are limiting the chances for action to happen, thus less image movement is prone to be displayed. Always set the fastest shutter value possible to get really sharp image, especially if you are about to take action shots, a fast shutter speed will be indispensable to capture the action.

Camera: Nikon D3100, Exposure: 1/640, Aperture: f/13, Focal Length: 18 mm, ISO Speed: 100
Image by Wilfredo Lumagbas: Facebook 500px
For silhouette photography I would definitely recommend to set an aperture value between 2.8 – 9
To avoid grain due to high ISO values, always be sure to set an open aperture. The only way to be sure that your countour of your subject is fully in focus is to set a smaller aperture and having a small aperture will be absolutely no problem if there’s enough light.
As a reminder: The smaller the aperture the greater the depth of field.
Camera: Canon EOS 5D III, Exposure: 1/4000, Aperture: f/8, Focal Length: 600 mm, ISO Speed: 250
Image by Mario Moreno: Facebook Homepage
Don’t worry too much about white balance, as you can fine-tune the white balance and colours afterwars in Lightroom, just be sure to shoot in RAW!.
If you are not sure which white balance mode you should set, it will work if you just choose the automatic white balance.
Shooting in RAW will not save your silhouette images from being unsharp, out of focus or from being boring, but for example, if you accidentally set the wrong white balance or set your camera on a wrong preset you can easily correct colors and white balance afterward in Lightroom.
The idea behind shooting in raw is that all the information captured by the sensor will be retained, that means that your raw files will be lossless and uncompressed files. Jpeg’s often shown posterization and with every step of compressing the image quality will be decreased. So, if your camera supports shooting in RAW, then you should definitely turn it on!
Shooting in Raw will open up new possibilities for you later while processing your silhouette photograph.
The only disadvantage of shooting RAW is that the image files will be really large, they will be 4-5 times larger than JPEGs and furthermore shooting in RAW will fill your camera’s memory buffer up much faster (this only counts for continuous shooting). Fortunately, there are tons of fast and large memory cards on the market, if you mainly use continuous burst shooting mode, you will need a memory card with a fast writing speed. So get yourself a suitable memory card to get out the most of your silhouette image.
Image by Wilfredo Lumagbas: Facebook 500px

Image by Wilfredo Lumagbas: Facebook 500px
There are a few different composition rules, for example, the golden section which is one of the most common composition rules. Or the rule of thirds which is another well-known composition rule. It always depends on the situation which image composition applies better and also on the message you want to convey. Make sure you get familiar with those two composition rules in order to show eye-catching silhouette images.
Rule of Thirds
For example, if you are about to take an image of a beach silhouette, the rule of thirds will just apply perfectly. The idea behind the rule of thirds is to divide your image up while using 2 horizontal lines and 2 vertical lines where you position all important elements along those lines. Try to fill two-thirds of the frame with the sky to create an interesting point of view. Most modern cameras can display the usual rule of thirds grid while using live view, this will help you a lot when you are taking silhouette images.
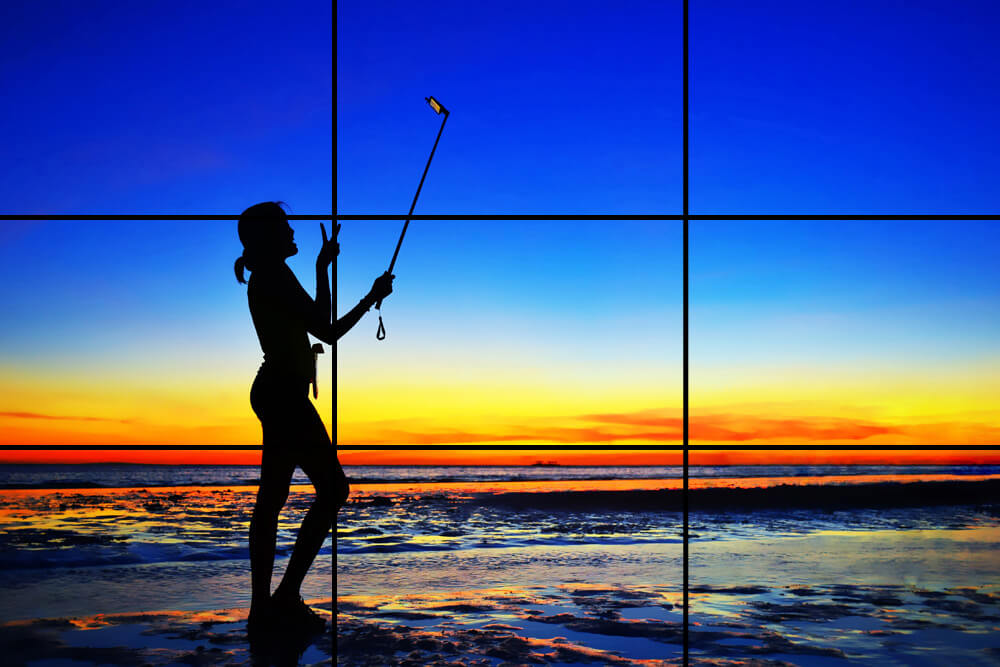
Image by Wilfredo Lumagbas: Facebook 500px
Golden Ratio
The golden ratio is probably the most common composition tool. It’s used by so many artists all around the world and will always be the main tool to attract viewers to the important elements of your photo.
Look at following sunset silhouette image, where the golden ratio was used to compose the picture.
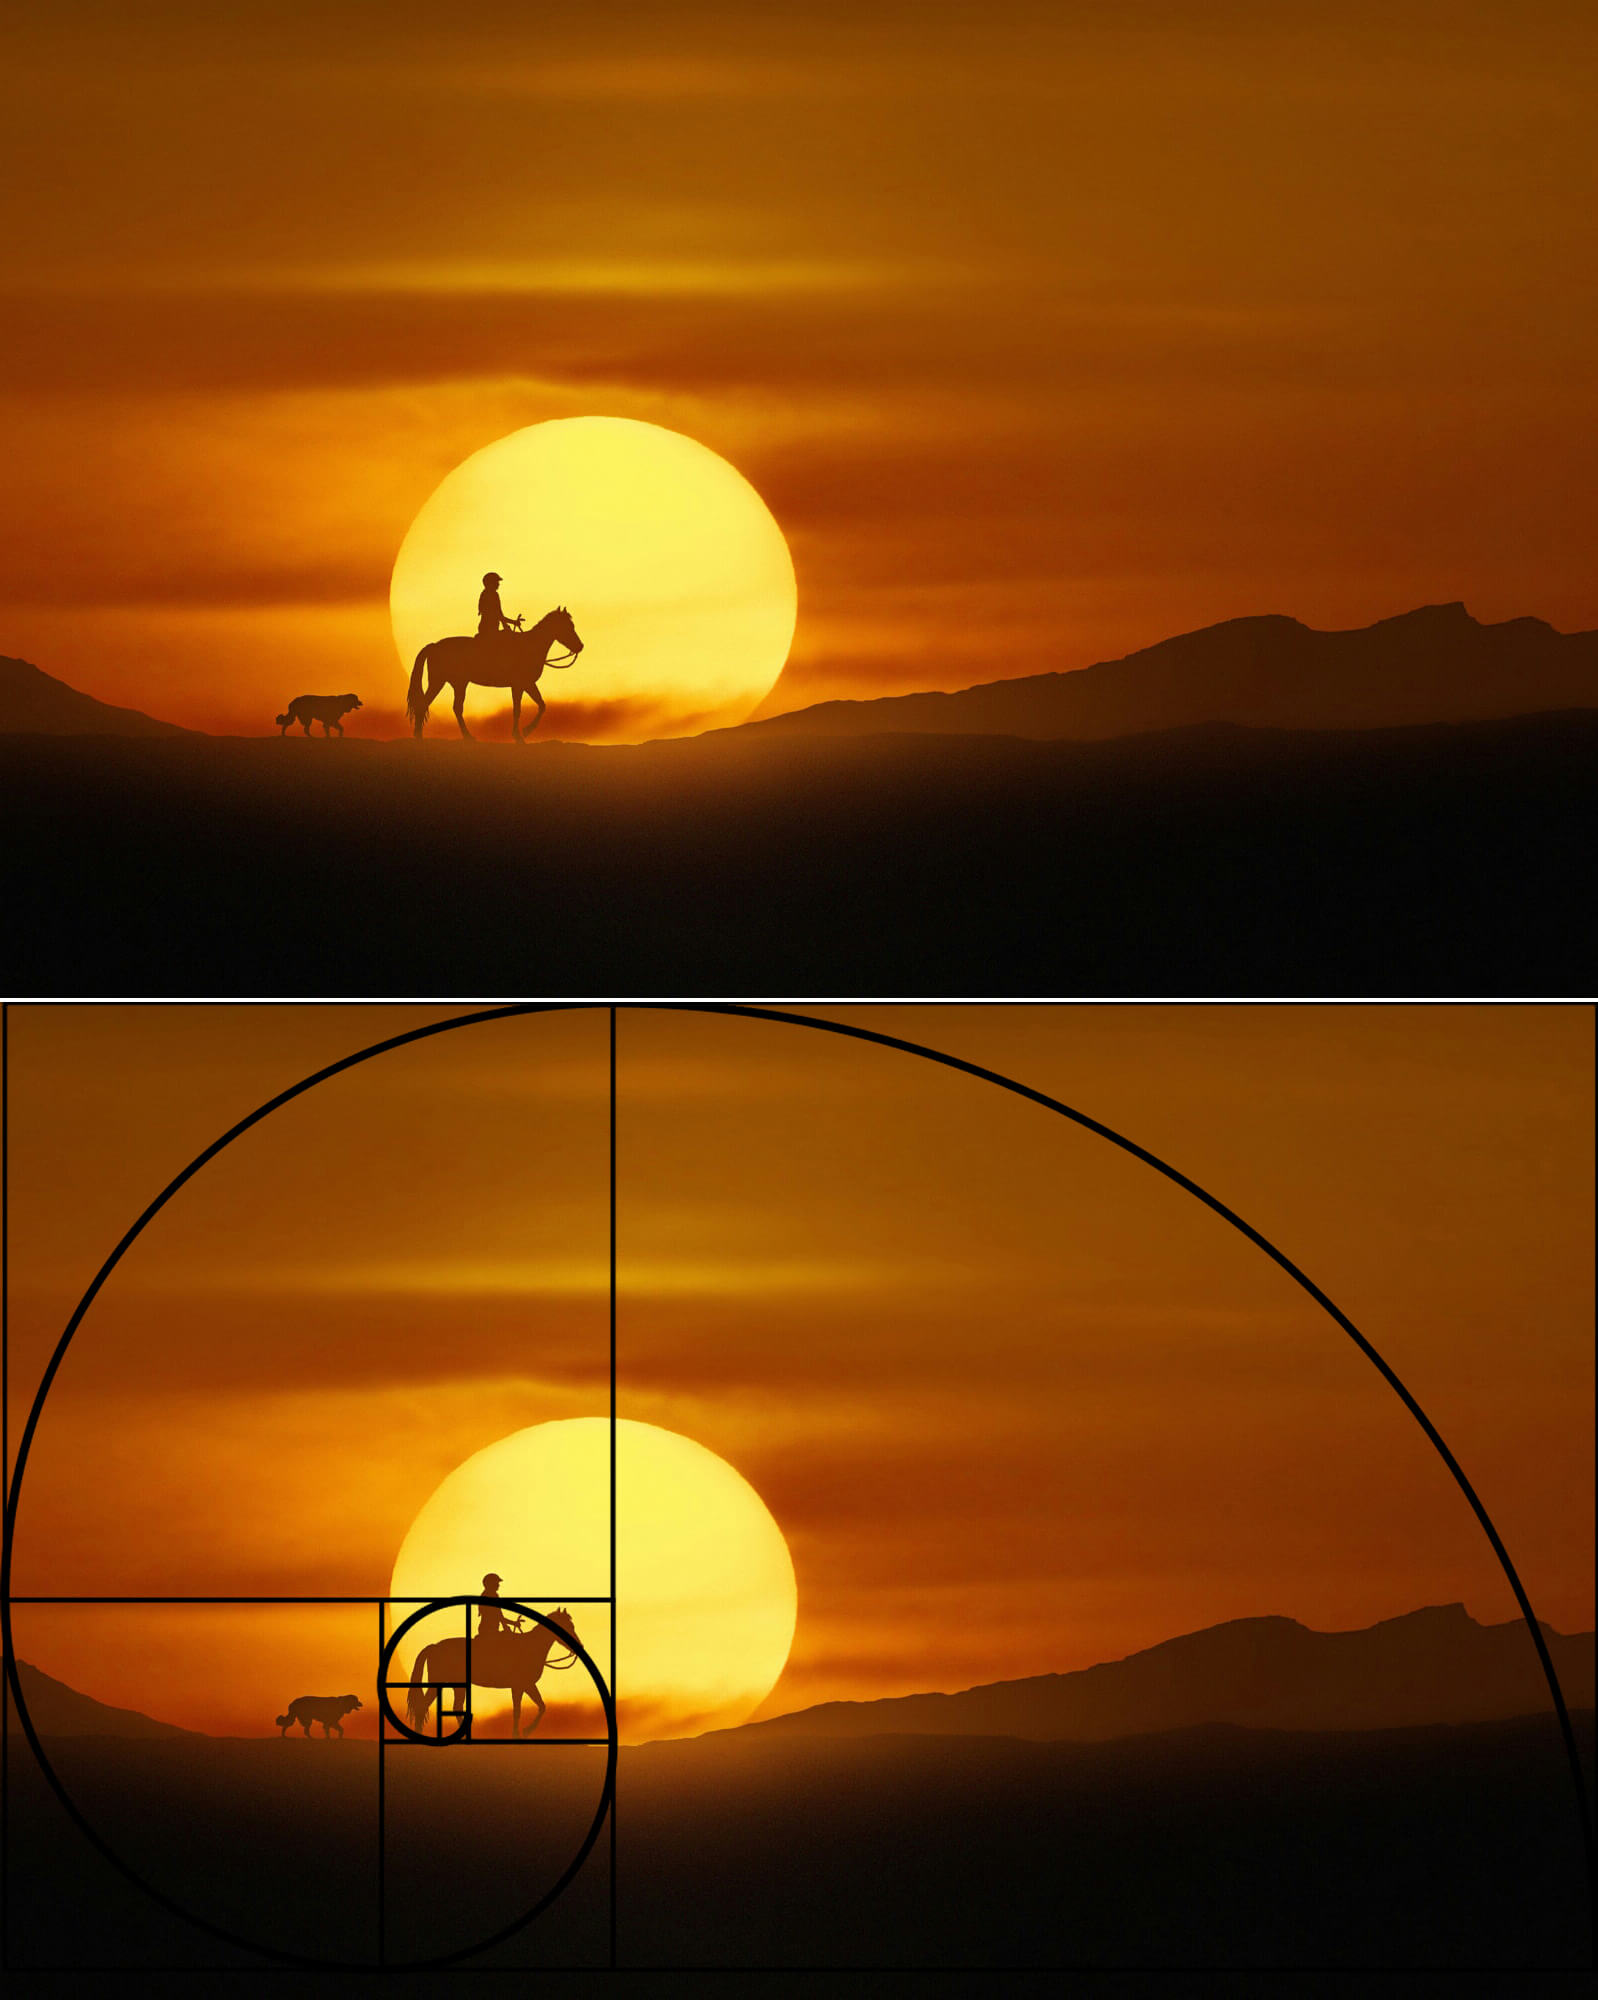 Image by Anna Ovatta: Facebook 500px
You absolutely will not need a flash while taking an image of a silhouette, because the idea behind creating a silhouette image is to take a photograph of a completely dark subject without any details and light on it. If you shoot in automatic mode, it might happen that your built-in build flash suddenly will pop up and tries to lighten the dark areas on your subject. Your camera doesn’t know that you want to have your subject totally black on purpose, so just make sure your built-in flash is turned off.
Colored silhouette images will always look strong, dramatic and powerful, but black and white silhouette pictures also have something which will immediately attract our attention, because if you blend out all the colors you will minimize everything to the subject.
Turning your silhouette image in black and white will give your images a certain dreamy, melancholic or even creepy feel.
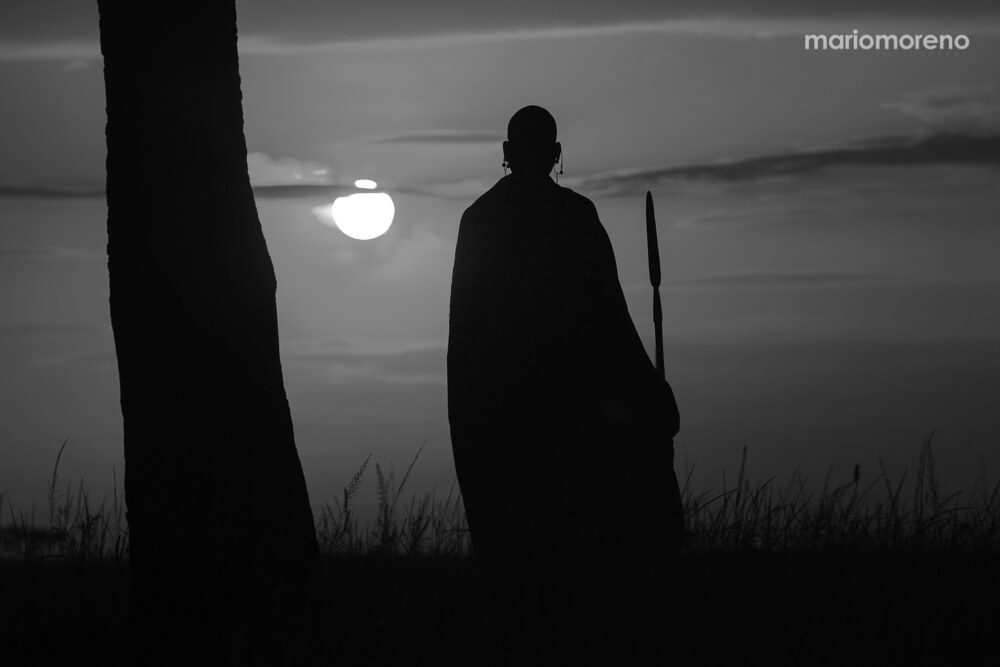
Image by Mario Moreno: Facebook Homepage
Don’t (ever) stare directly at the sun without sunglasses, because looking directly at the sun can damage your eyes and furthermore the sunlight can also damage your camera’s sensor and the autofocus sensor of your lens. So wait till sunset or sunrise when the sunlight gets softer to avoid any unnecessary eye injuries or camera damages.
Now it’s time to grab your camera and to find a nice spot with a great backlight.
Always keep in mind to set the right settings and to try out different perspectives. With some practice, experimentation, the techniques described above and with a little luck, you should be able to take spectacular silhouette images.
I really hope you have found the tips and ideas in this article useful. Good luck & thanks for reading


Please verify your software version before proceeding.
 I’ve verified my software version


 Facebook
 Google +
Comments (0)
There are no comments yet.