Archives: Podcasts

Back to Basics: The Exposure Triangle

Hey everyone, this is Jordan from Sleeklens.com and welcome to this episode that’s going to be all about the basics when it comes to photography. Now I covered an episode like this a long time ago where I basically talked about, kinda, what the shutter speed was because it was really a needed question that came from a listener of this podcast who was just getting started with photography.

DSLR’s are amazing inventions. As their quality gets higher, their popularity continues to grow. Most consumers will purchase one for their kids’ soccer photos, or birthday parties, etc. Because of this, most, if not all, DSLR’s include several photo modes on their digital camera. Most casual shooters will leave it set to the ‘P’ (Program Mode) and shoot away, getting great snapshots all day long.

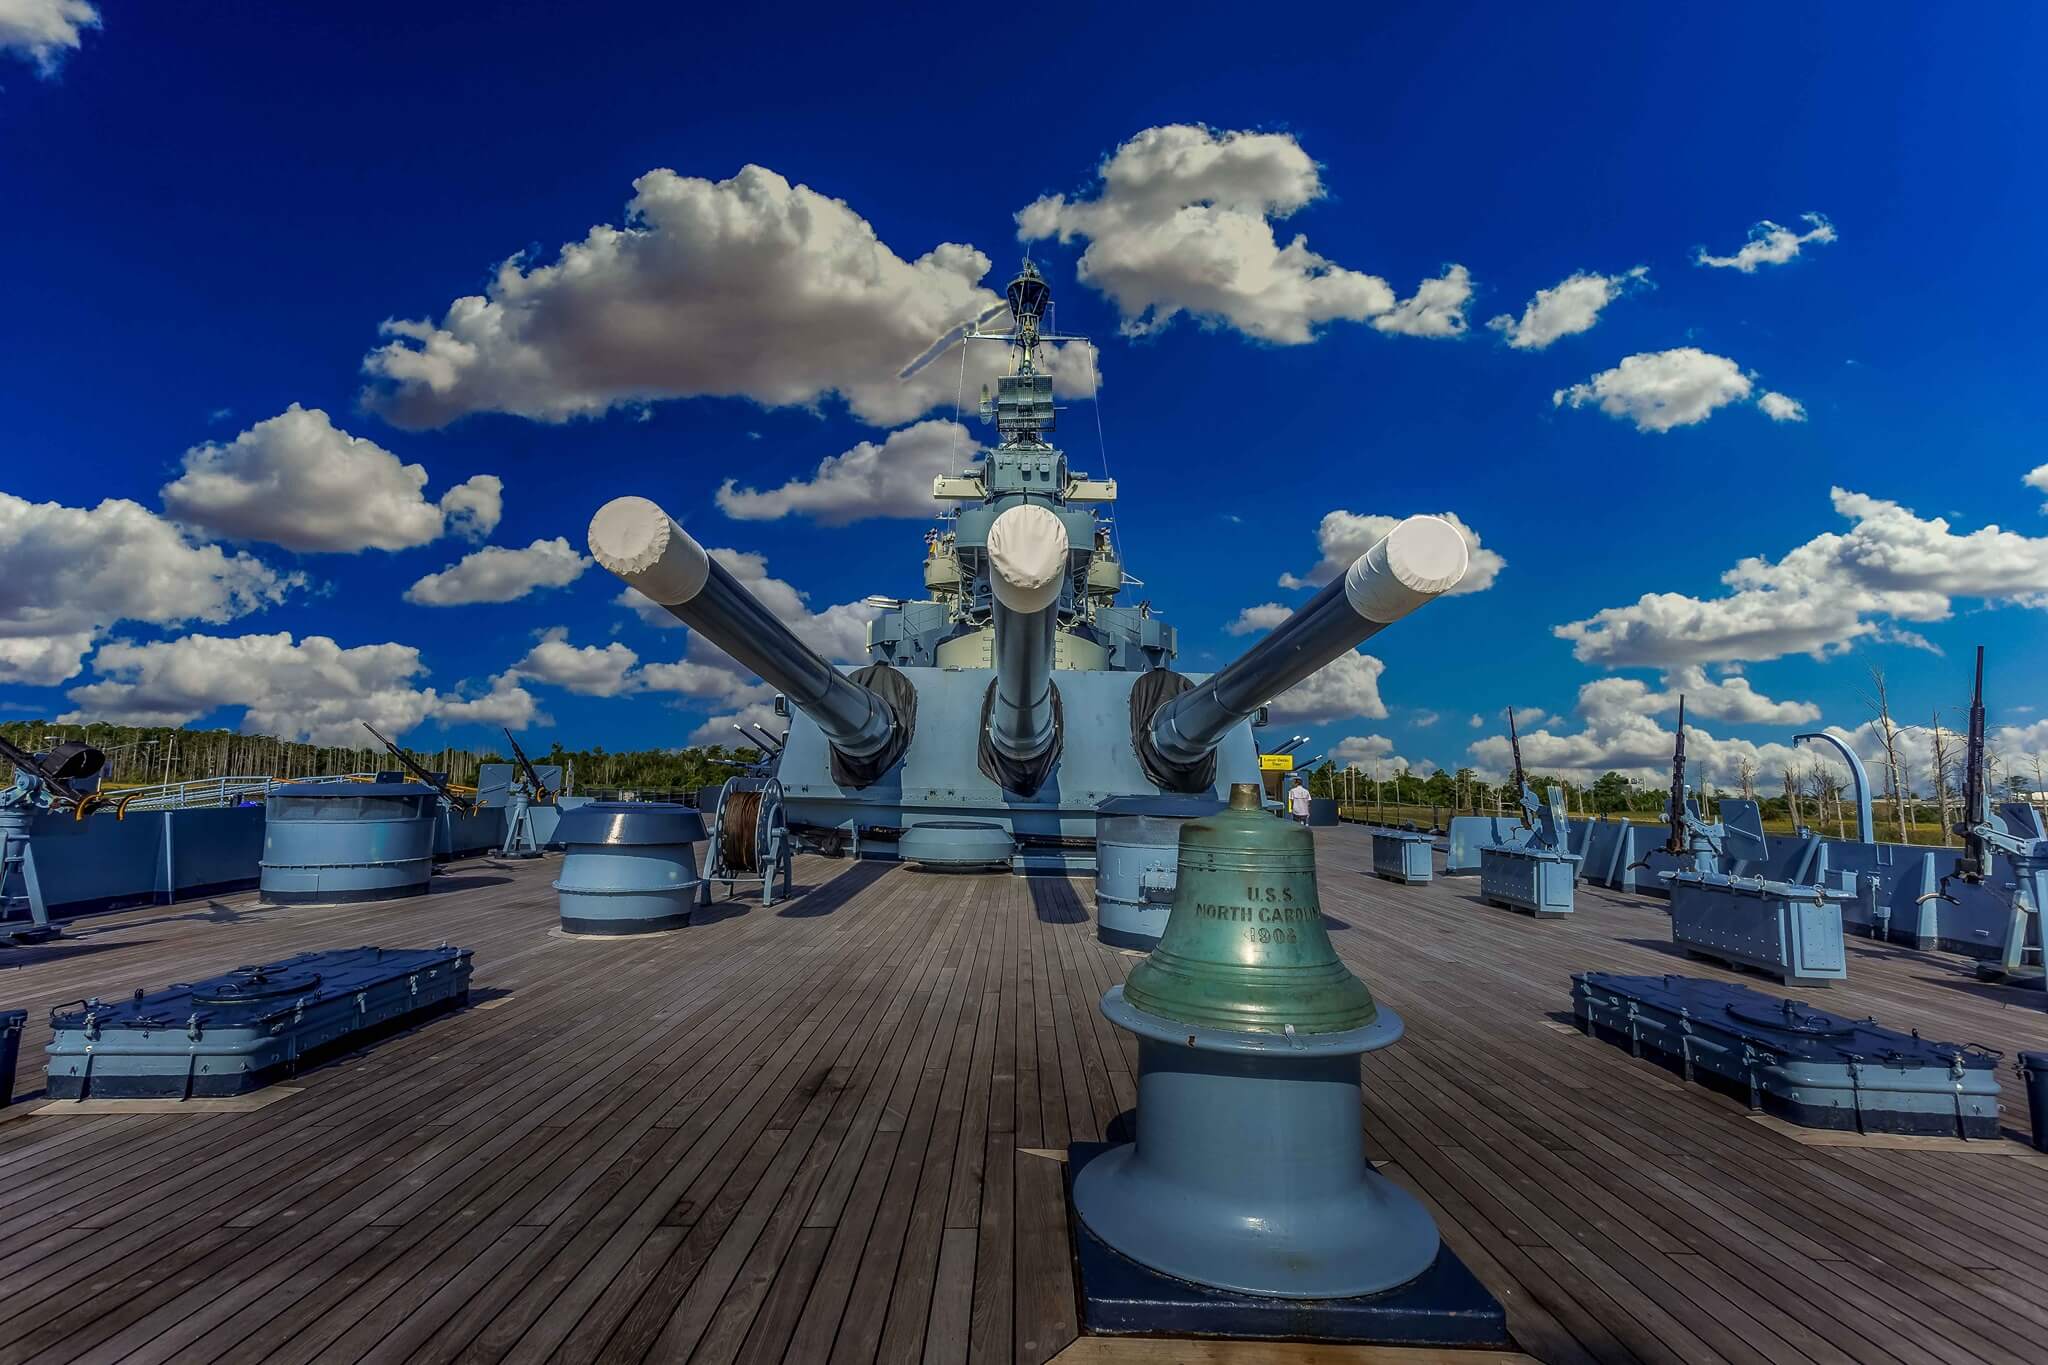
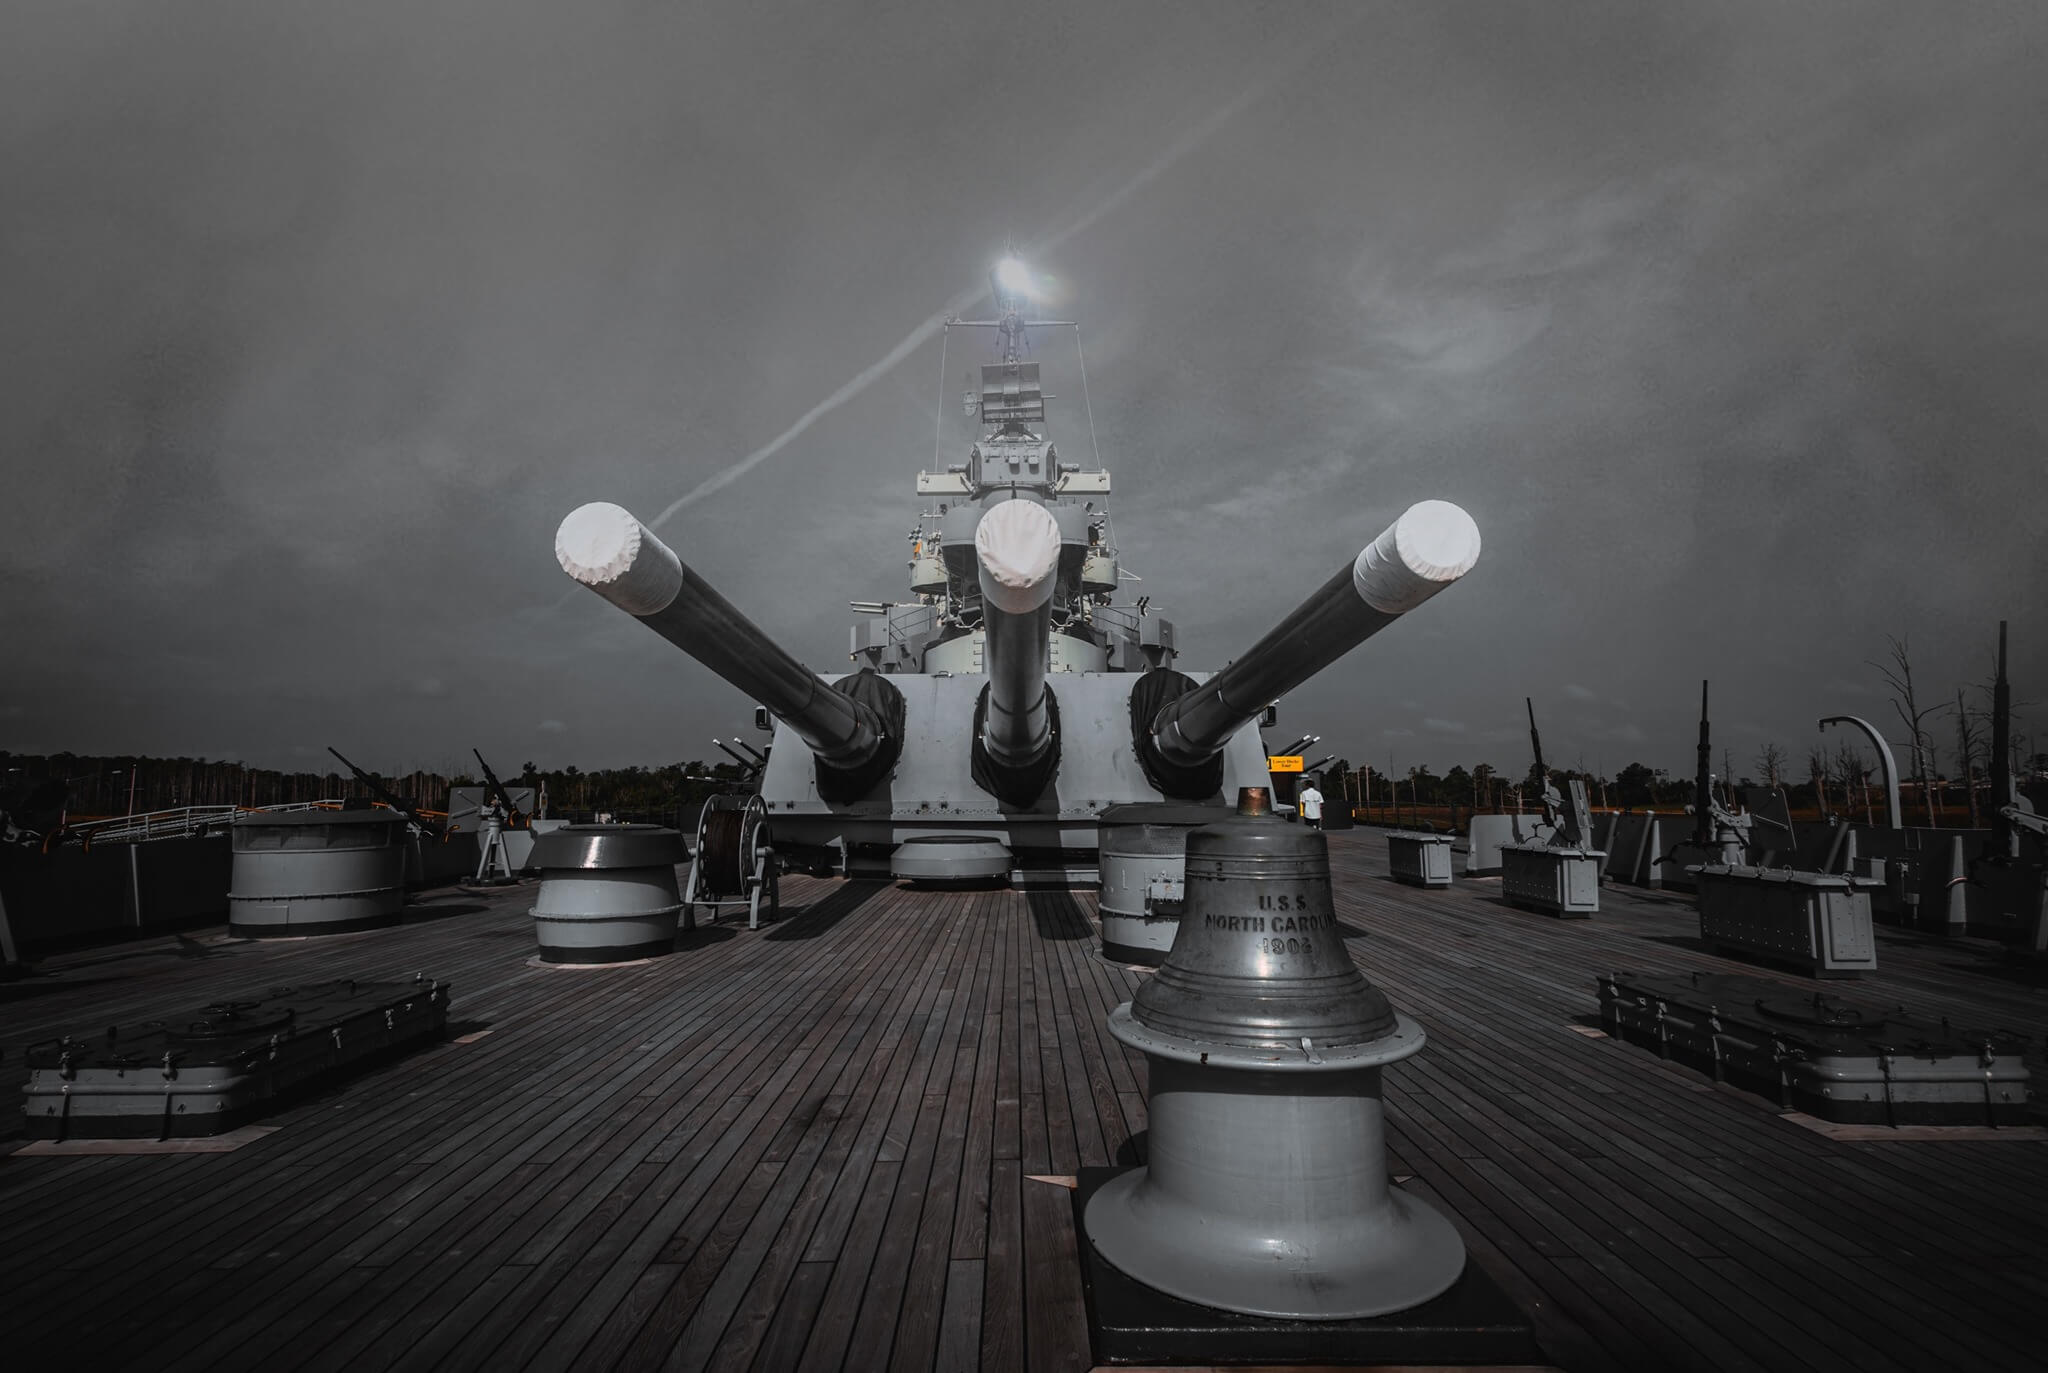
Program Mode is great. It meters your available light and automatically adjusts the camera settings to fit your needs. But what happens when your needs don’t meet the camera’s adjustments? What if you want that sky to be a little bit darker? Or that dark background to be a little bit brighter? Well, my friend, it’s time to abandon P Mode and turn that dial to the dreaded ‘M.’

So, actually over the past week or so I’ve got a lot of questions on how to move into manual mode on a camera. And so, I thought about there are easy ways to do that, but the easiest way is to understand the Exposure Triangle. I’m quickly going to cover the ISO, the Aperture and the Shutter Speed, exactly what those mean and how do they affect your photos.

The Exposure Triangle

One of the most important steps an amateur photographer will make is when they decide to no longer let the camera call the shots. ‘M’ stands for Manual Mode, and it’s the setting that tells the camera you are the boss, and you decide exactly what your photo will look like. Because you are just that awesome.

What’s that? You have no idea what your settings should be? Well, that’s something that changes from scene to scene, and in order to determine those settings, there are three main components you need to be aware of in order to take a photo with the correct exposure.

Shutter Speed

Alright, so let’s talk about the easiest one first. The easiest one to understand, in my opinion, is Shutter Speed. So, obviously, the first thought that comes when you hear shutter speed it means how fast something is moving.

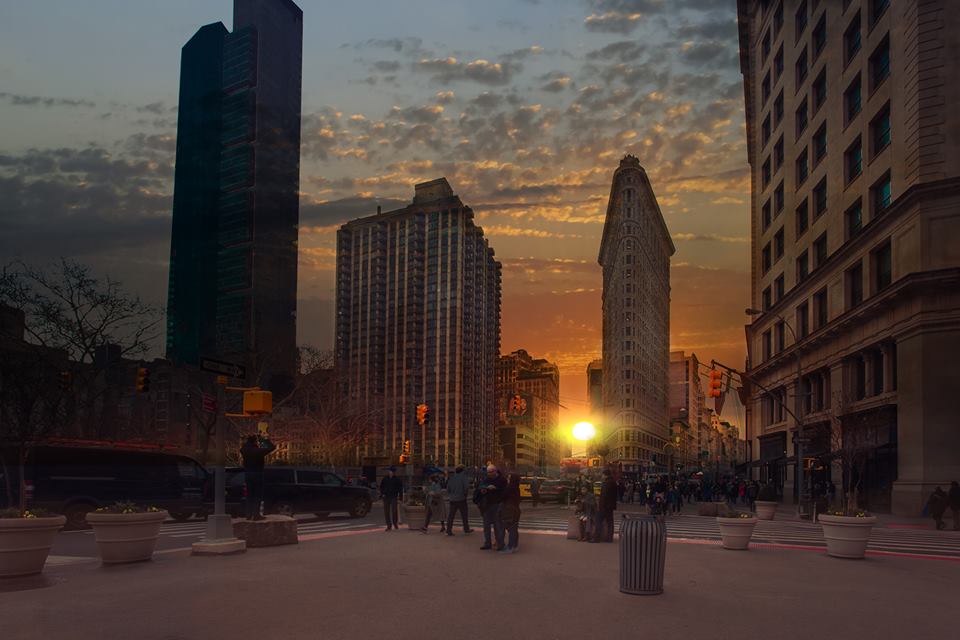
Shutter speed is measured in seconds. Most of the time it’s represented as a fraction, which represents the amount of time the shutter is open and exposing the image sensor (or film) to light. For example, a shutter speed of 1/100th of a second would be fast, but not as fast as 1/250th. On the other end, a shutter speed that is one second or longer is represented with a quotation. After that, the higher the number, the longer the shutter stays open.

In your camera, in most cameras, there’s what’s called a curtain. A curtain basically reveals the scene to the image sensor that’s in your camera; the cameras sensor is actually a piece of equipment in your camera that captures the data, captures the scene that you’re looking at. And so, it will reveal the scene like a door that opens and closes.

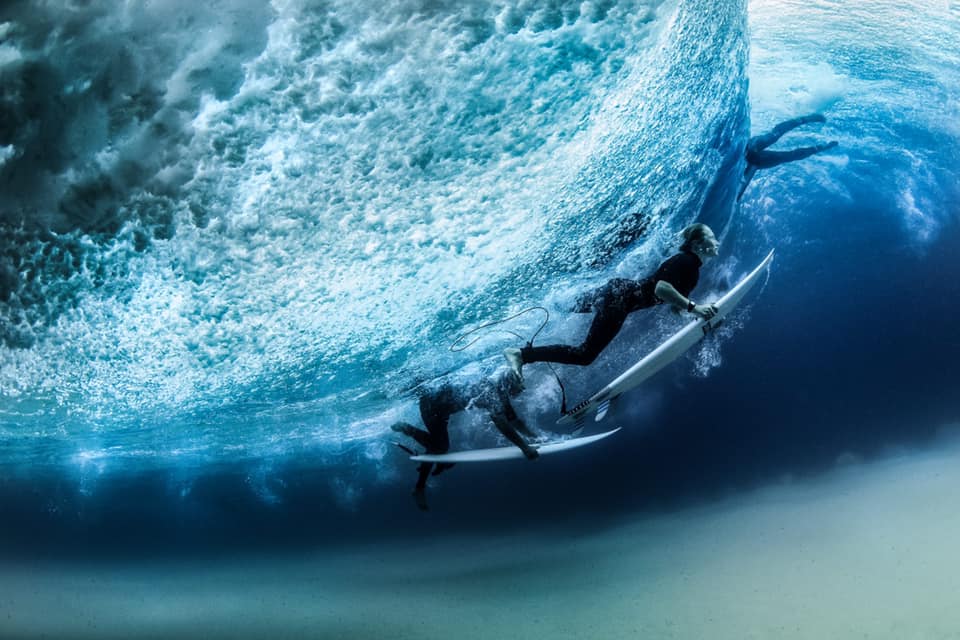
Now, if you were to open the door and reveal, let’s say somebody running down a field, if you’re going to open that door and you really want to freeze them you have to make that door open and close very, very fast. That means you’re freezing the motion of somebody, which also applies to a car wheezing by very fast—that’s how you freeze somebody in action. Fast shutter speeds are represented by a fraction number on the back of your camera. So, if you see 1/100 that means it’s 1/100s the timespan that the door is opened and closed, revealing the scene. That fast shutter speed will let in a lot less light

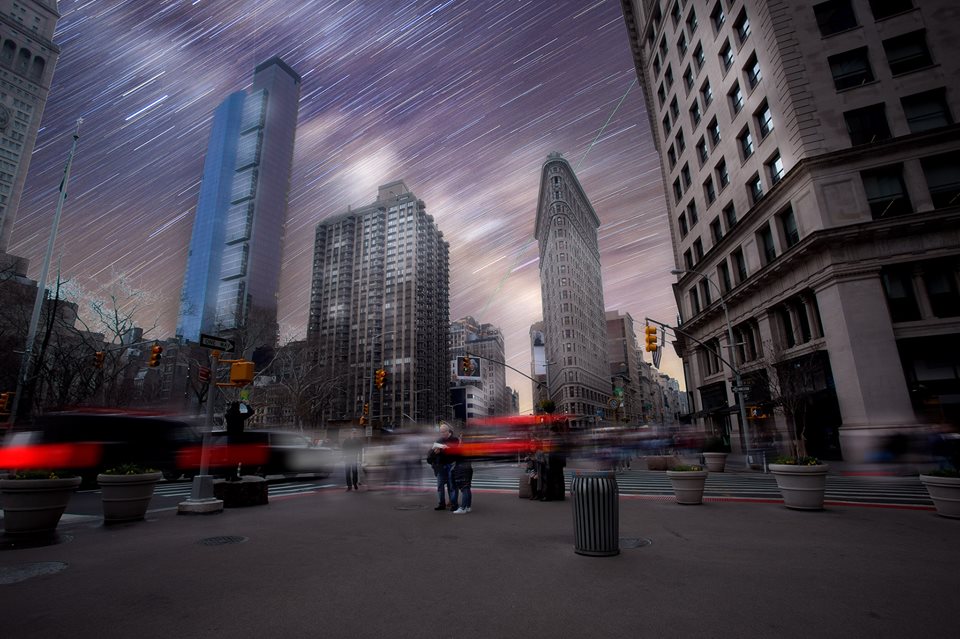
That’s a quick way to freeze somebody. So, if you want to freeze fast-moving subjects, you’ll have to use shutter speed values around 1/500s. If you use a slower shutter speed on something that’s in action, that when you’ll experience what’s known as motion blur. But a fast shutter speed can sometimes limit the amount of light that hits the cameras sensor. So, let’s go into that part as well.

Photography is all about light. You need light to see a scene. So, if we take the example of that person running down the field and use 1/500s as shutter speed, we need to make sure we have a lot of light. If you’re doing this during the day, you’ll most likely  be fine because the sun is really bright outside. But let’s say you’re inside—in the living room or something like that. You can technically set your camera to that a shutter speed lets in more light, but it might be a bit blurry. Unless your other settings were made accordingly, you’re not going to be able to get enough light to come into your camera. Your picture will probably look just black, no data is going to be recorded from that scene.

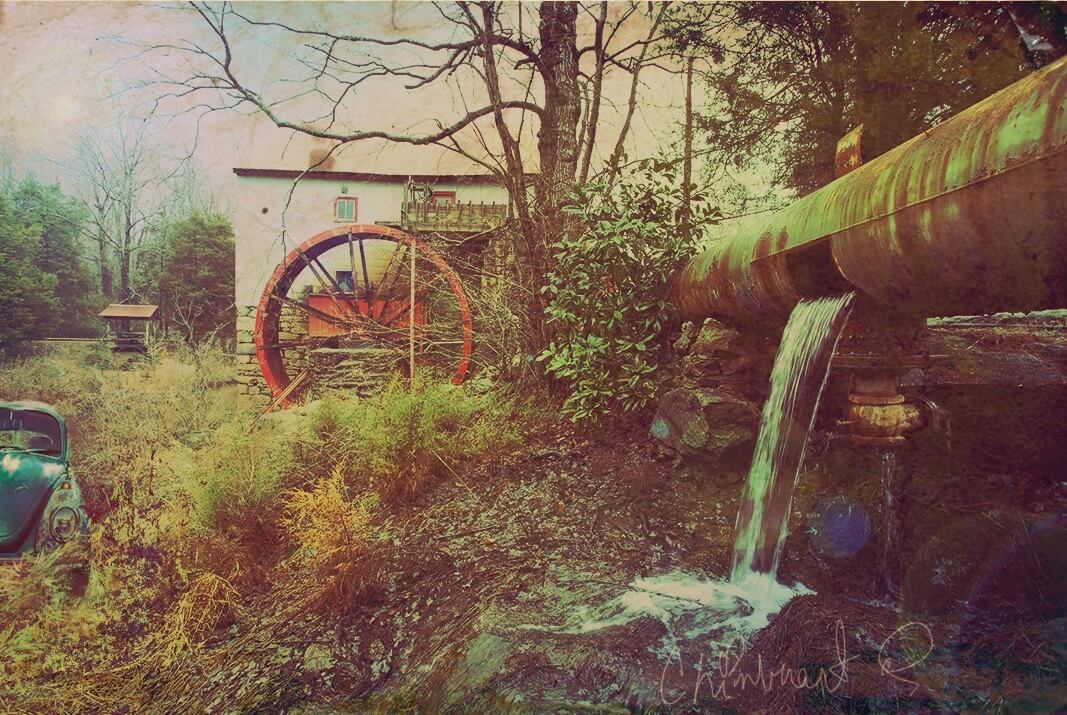
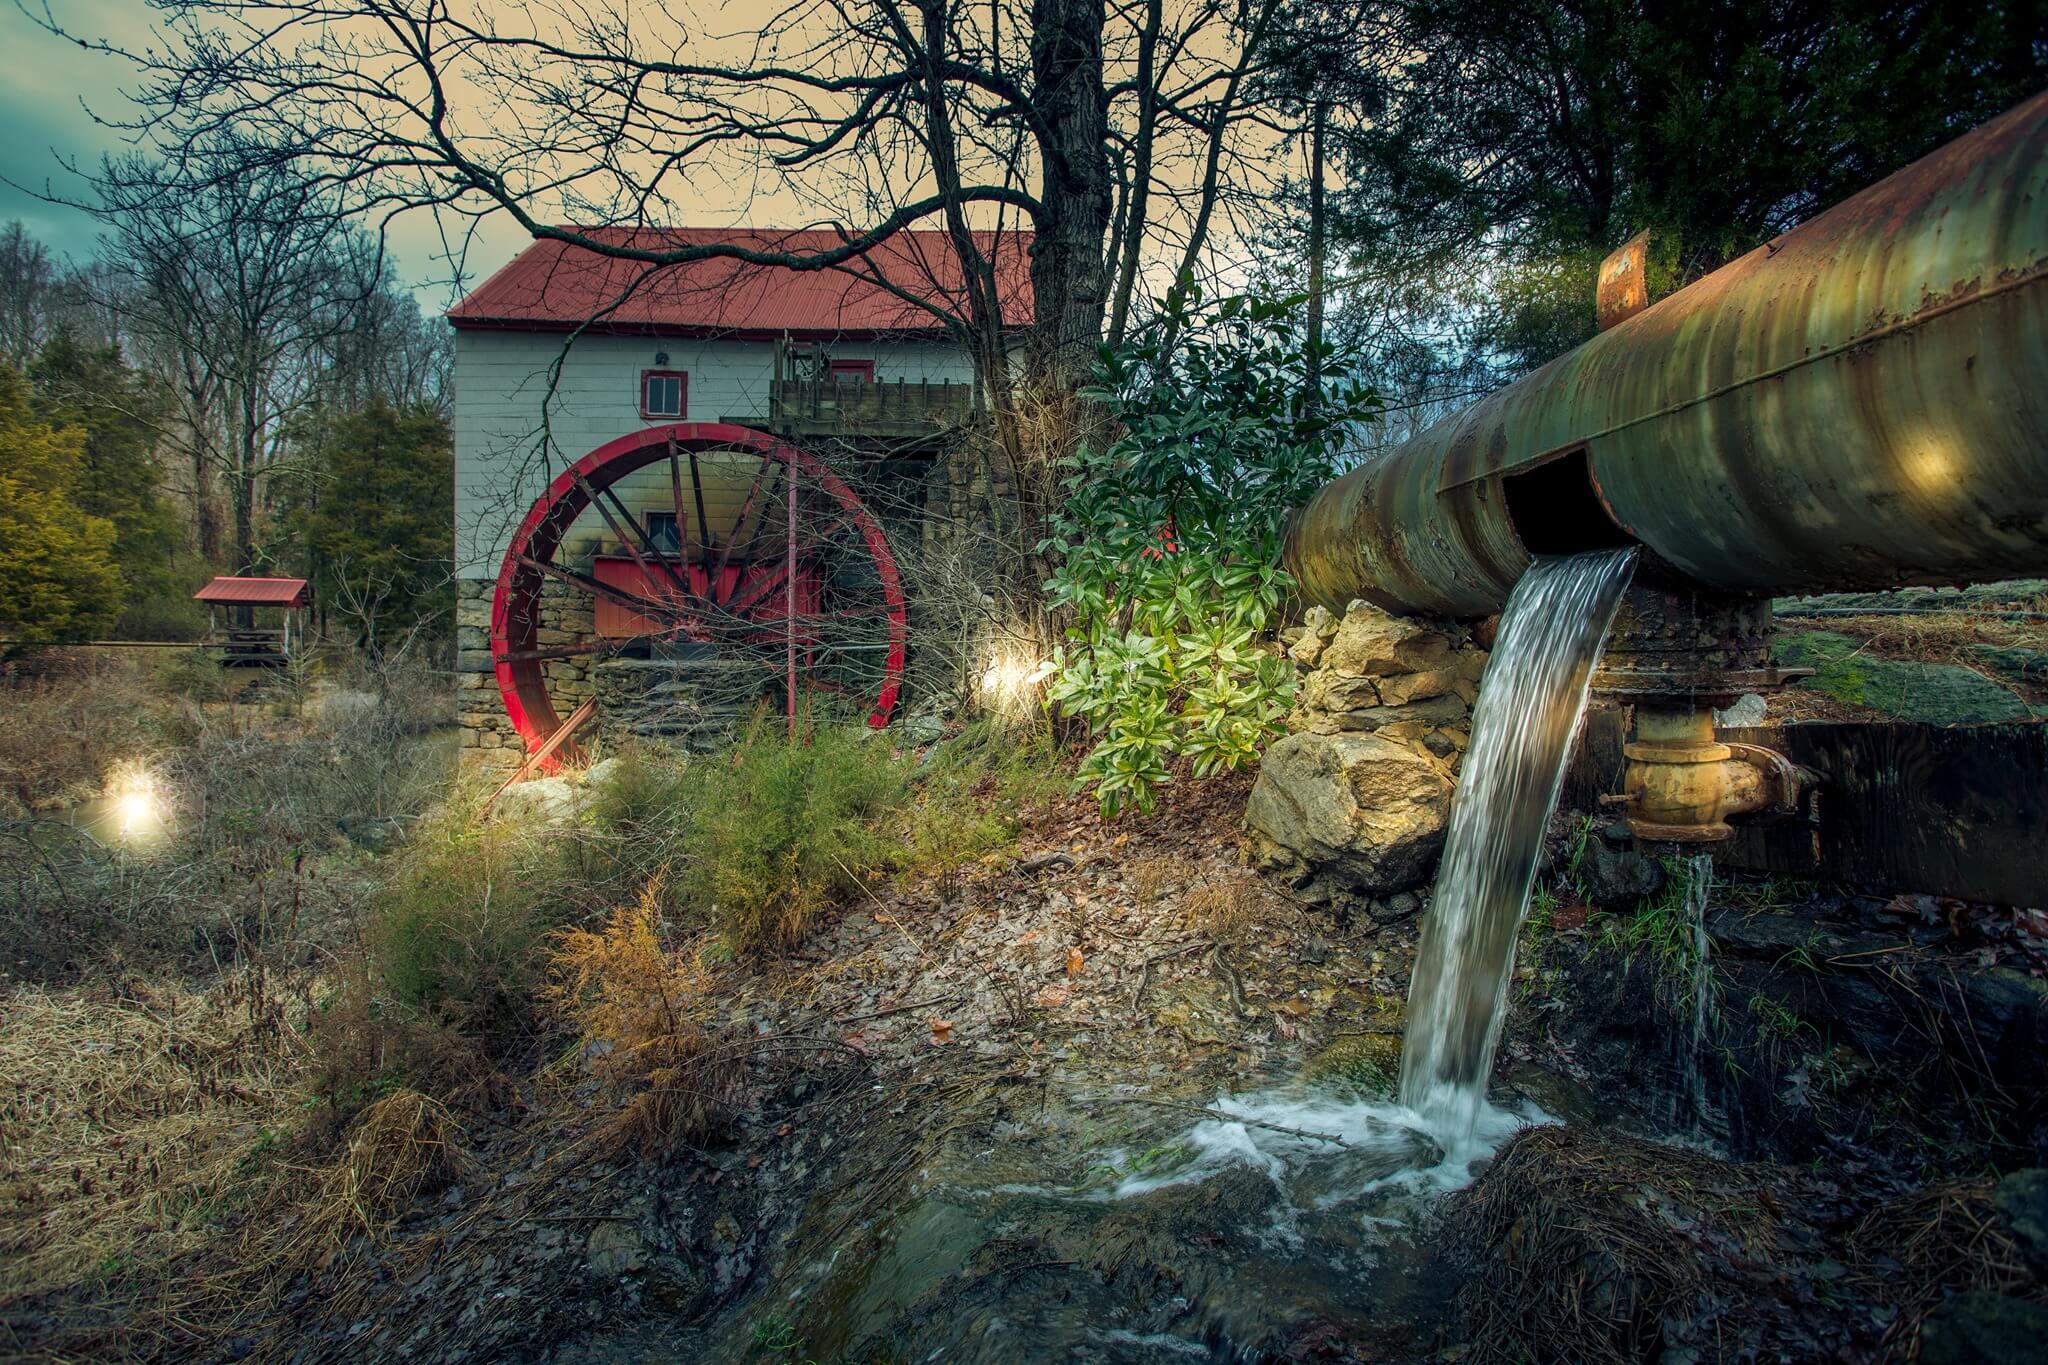
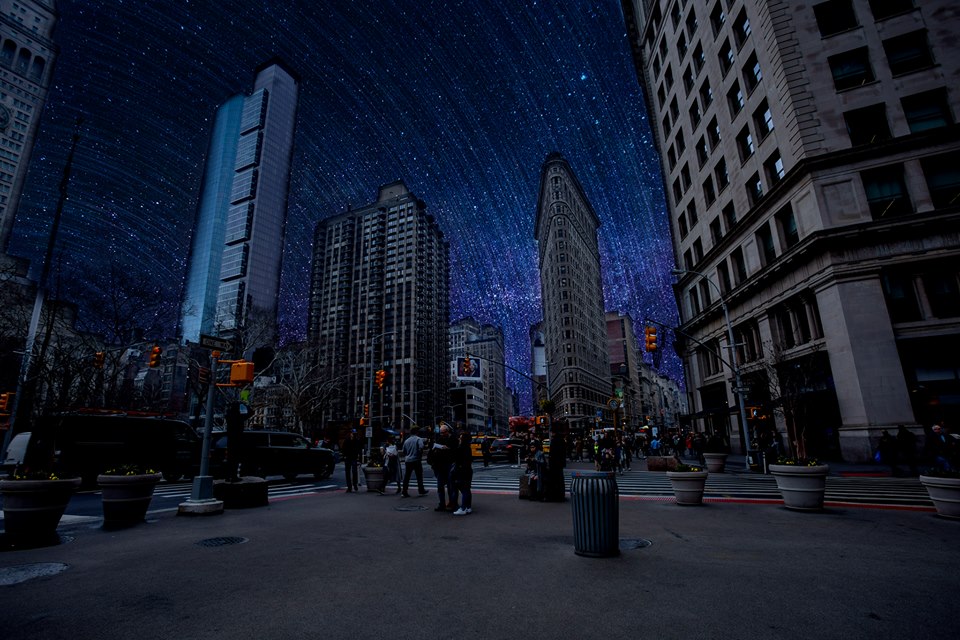
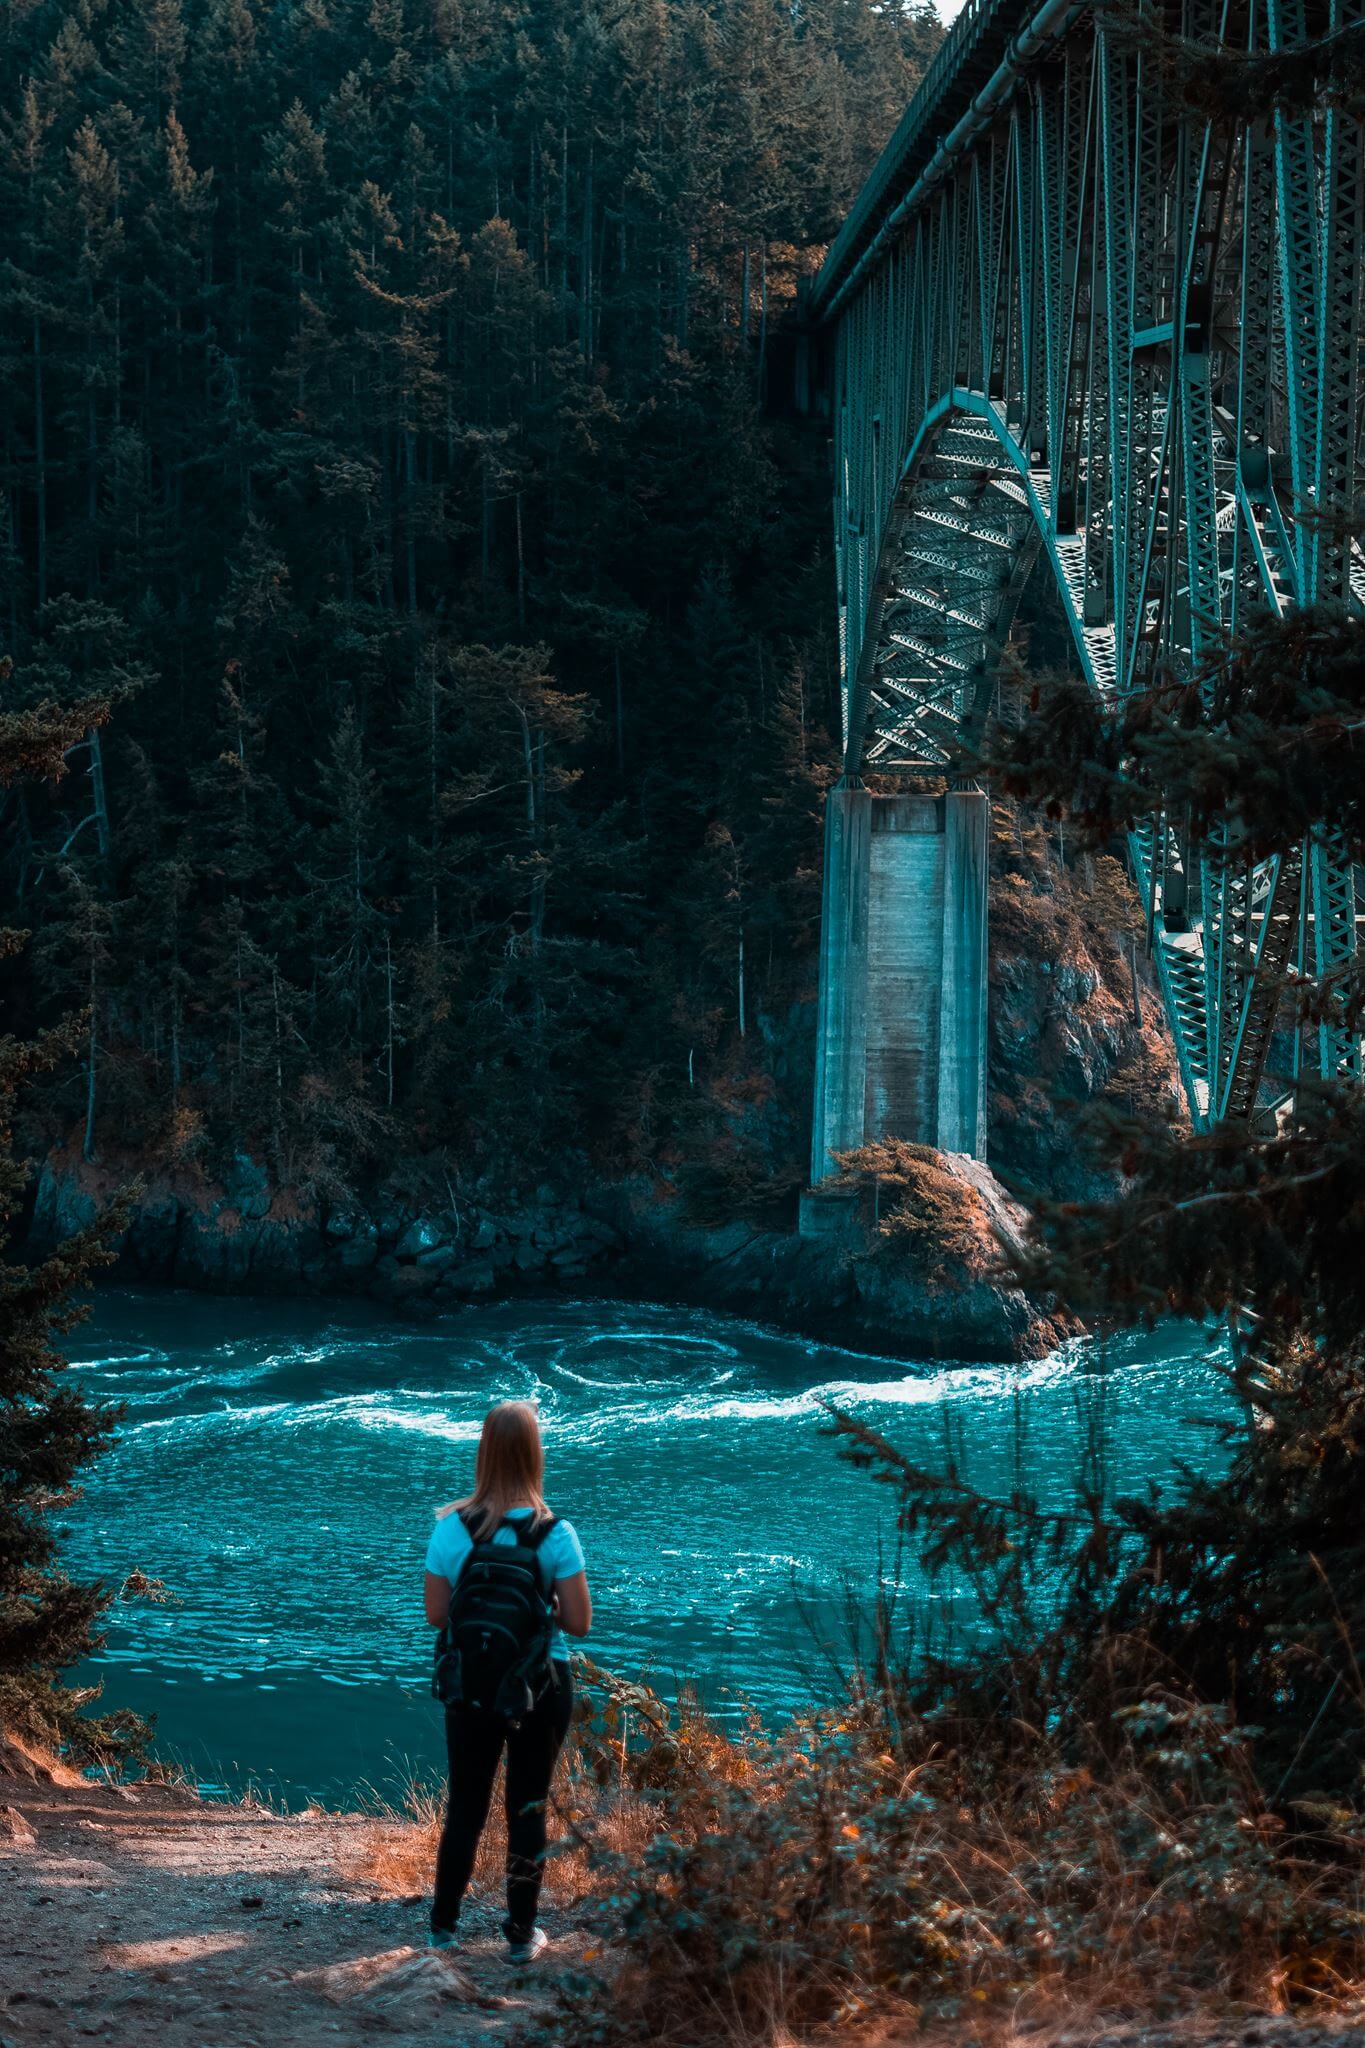
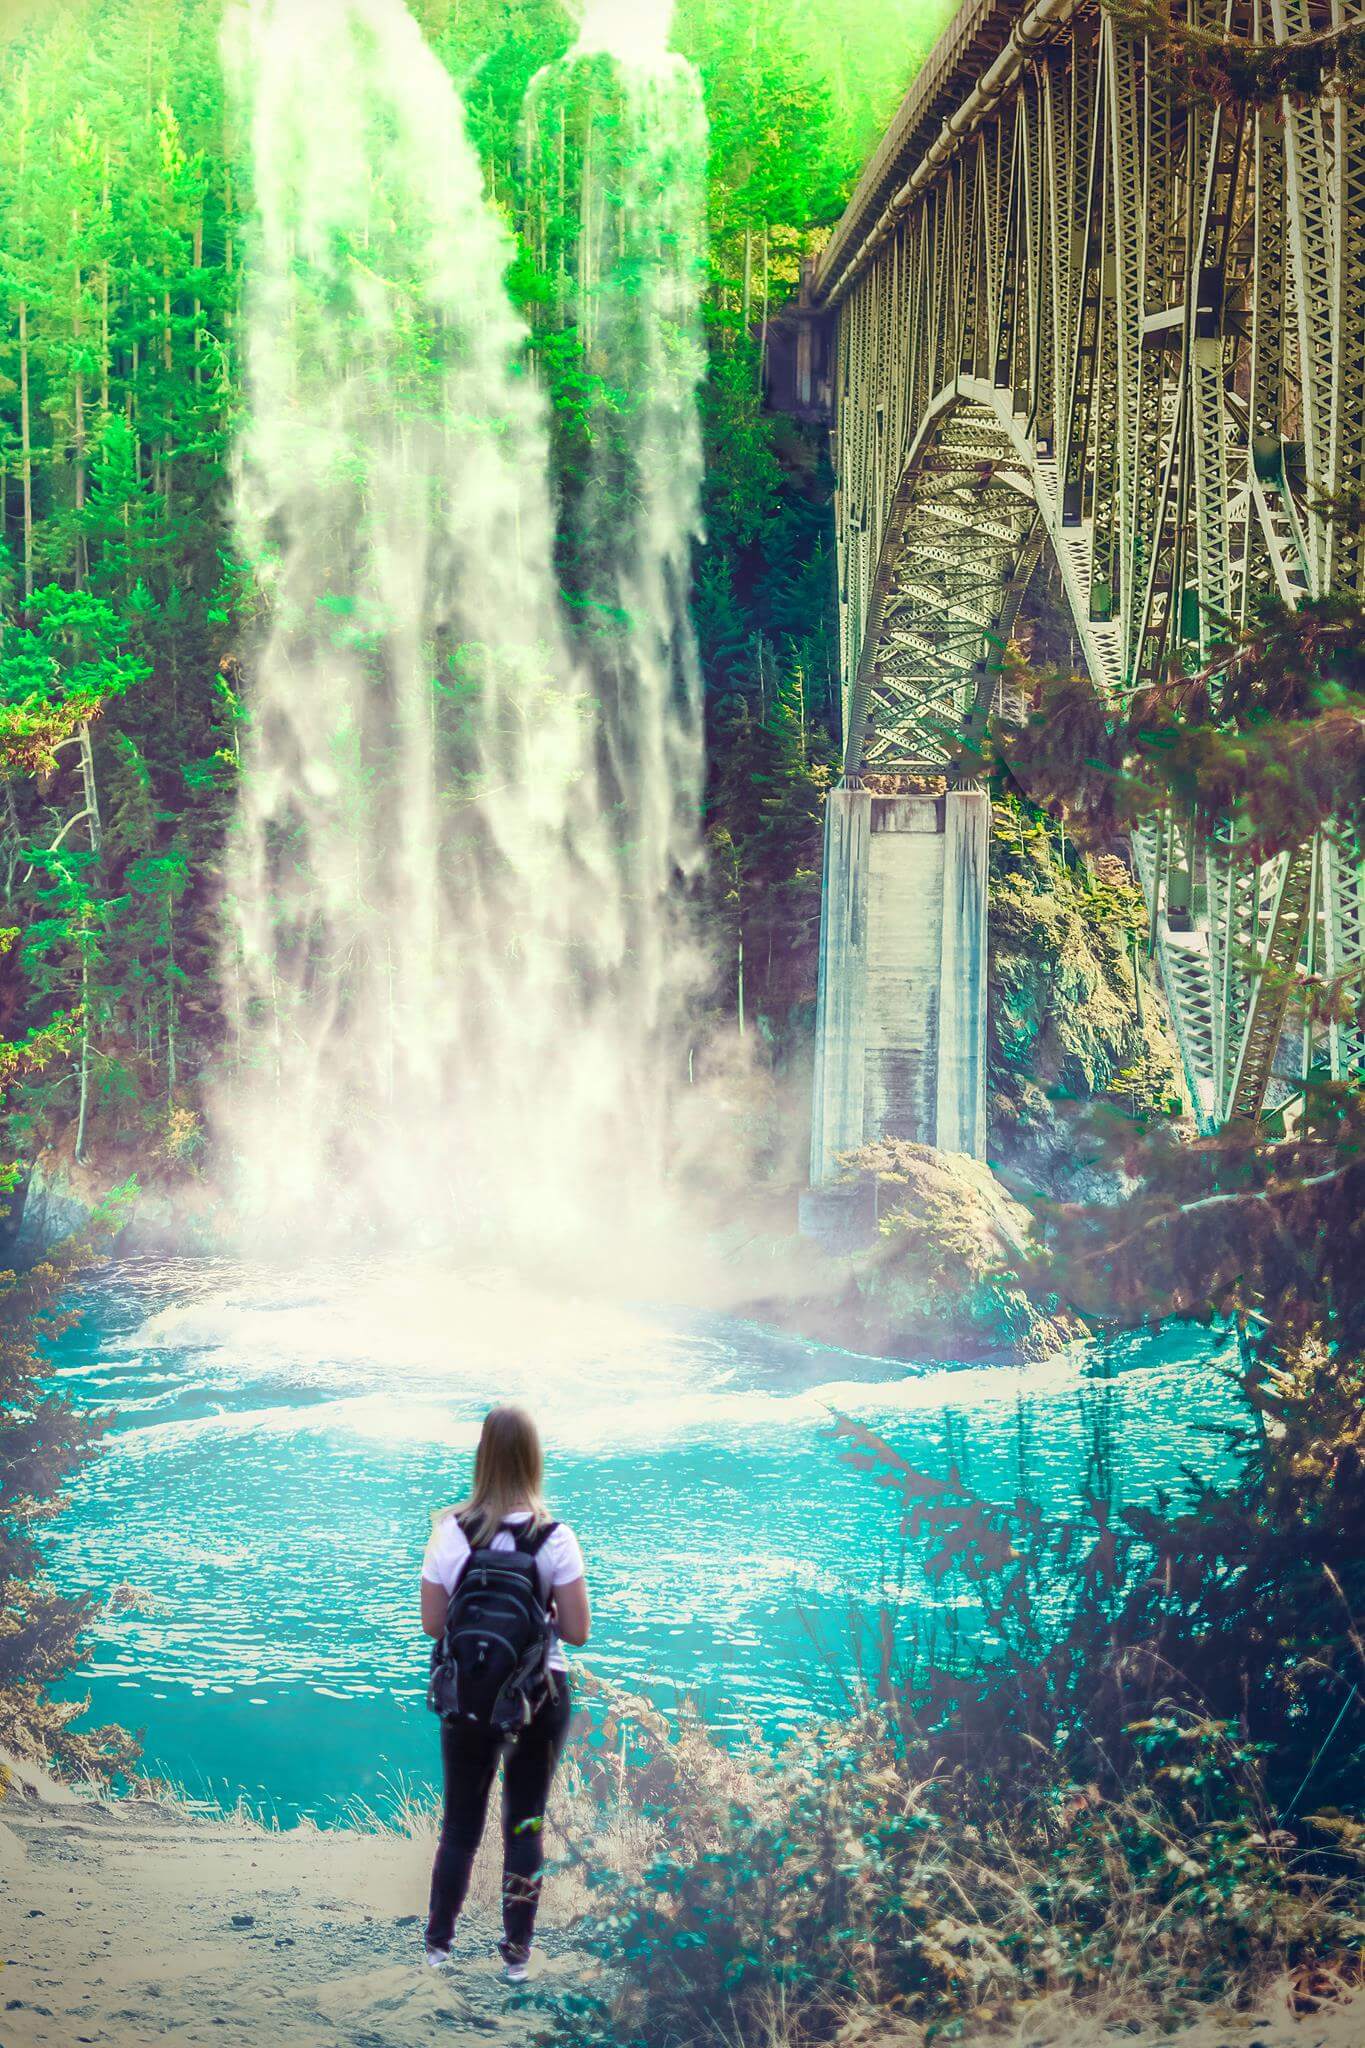
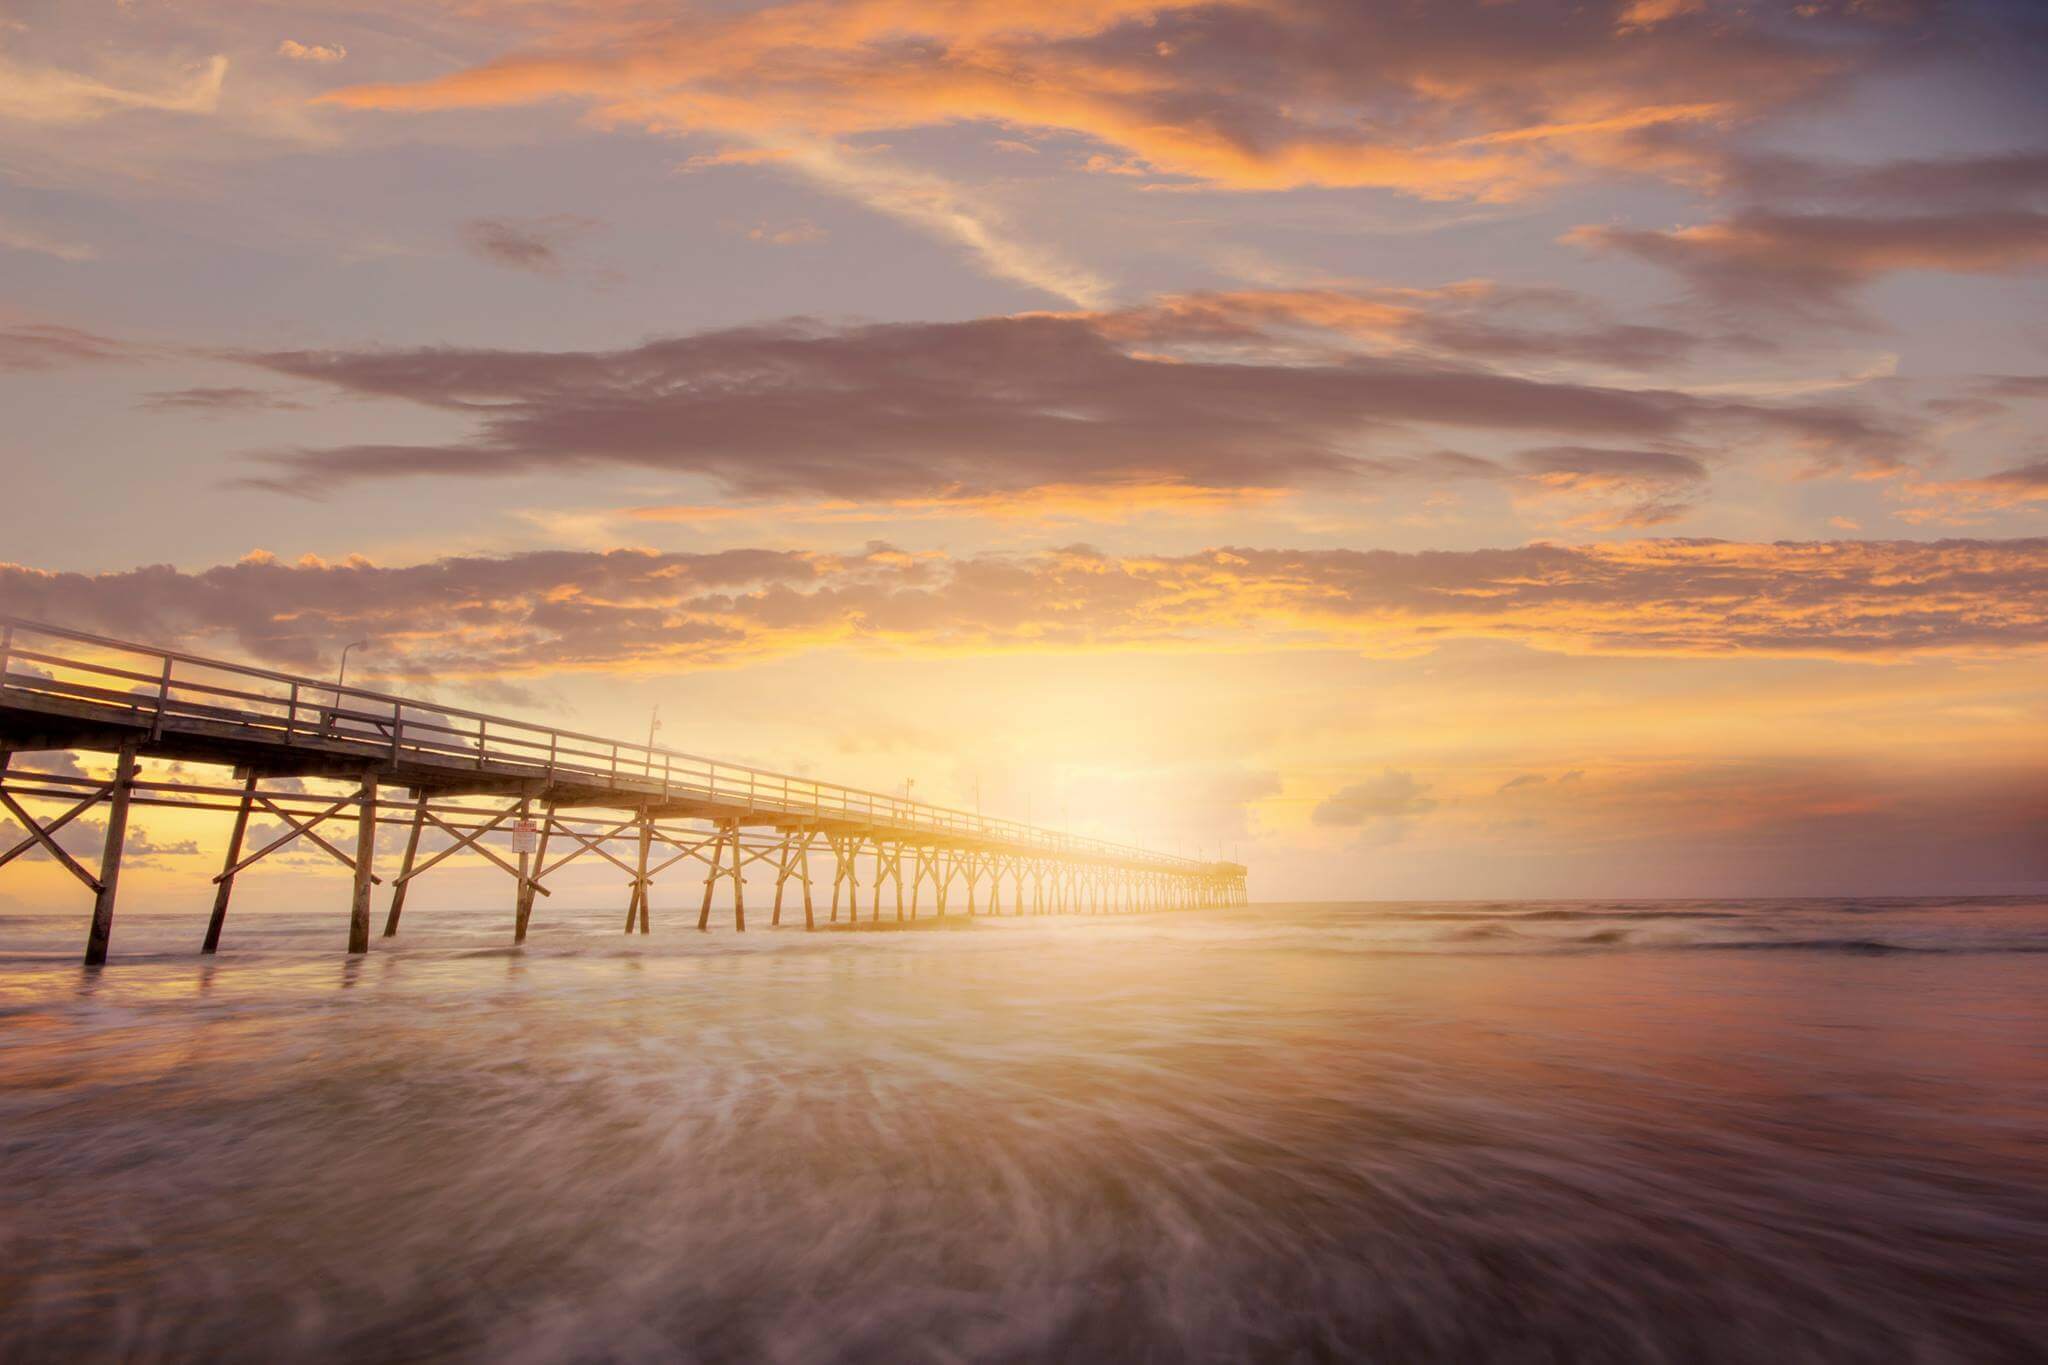
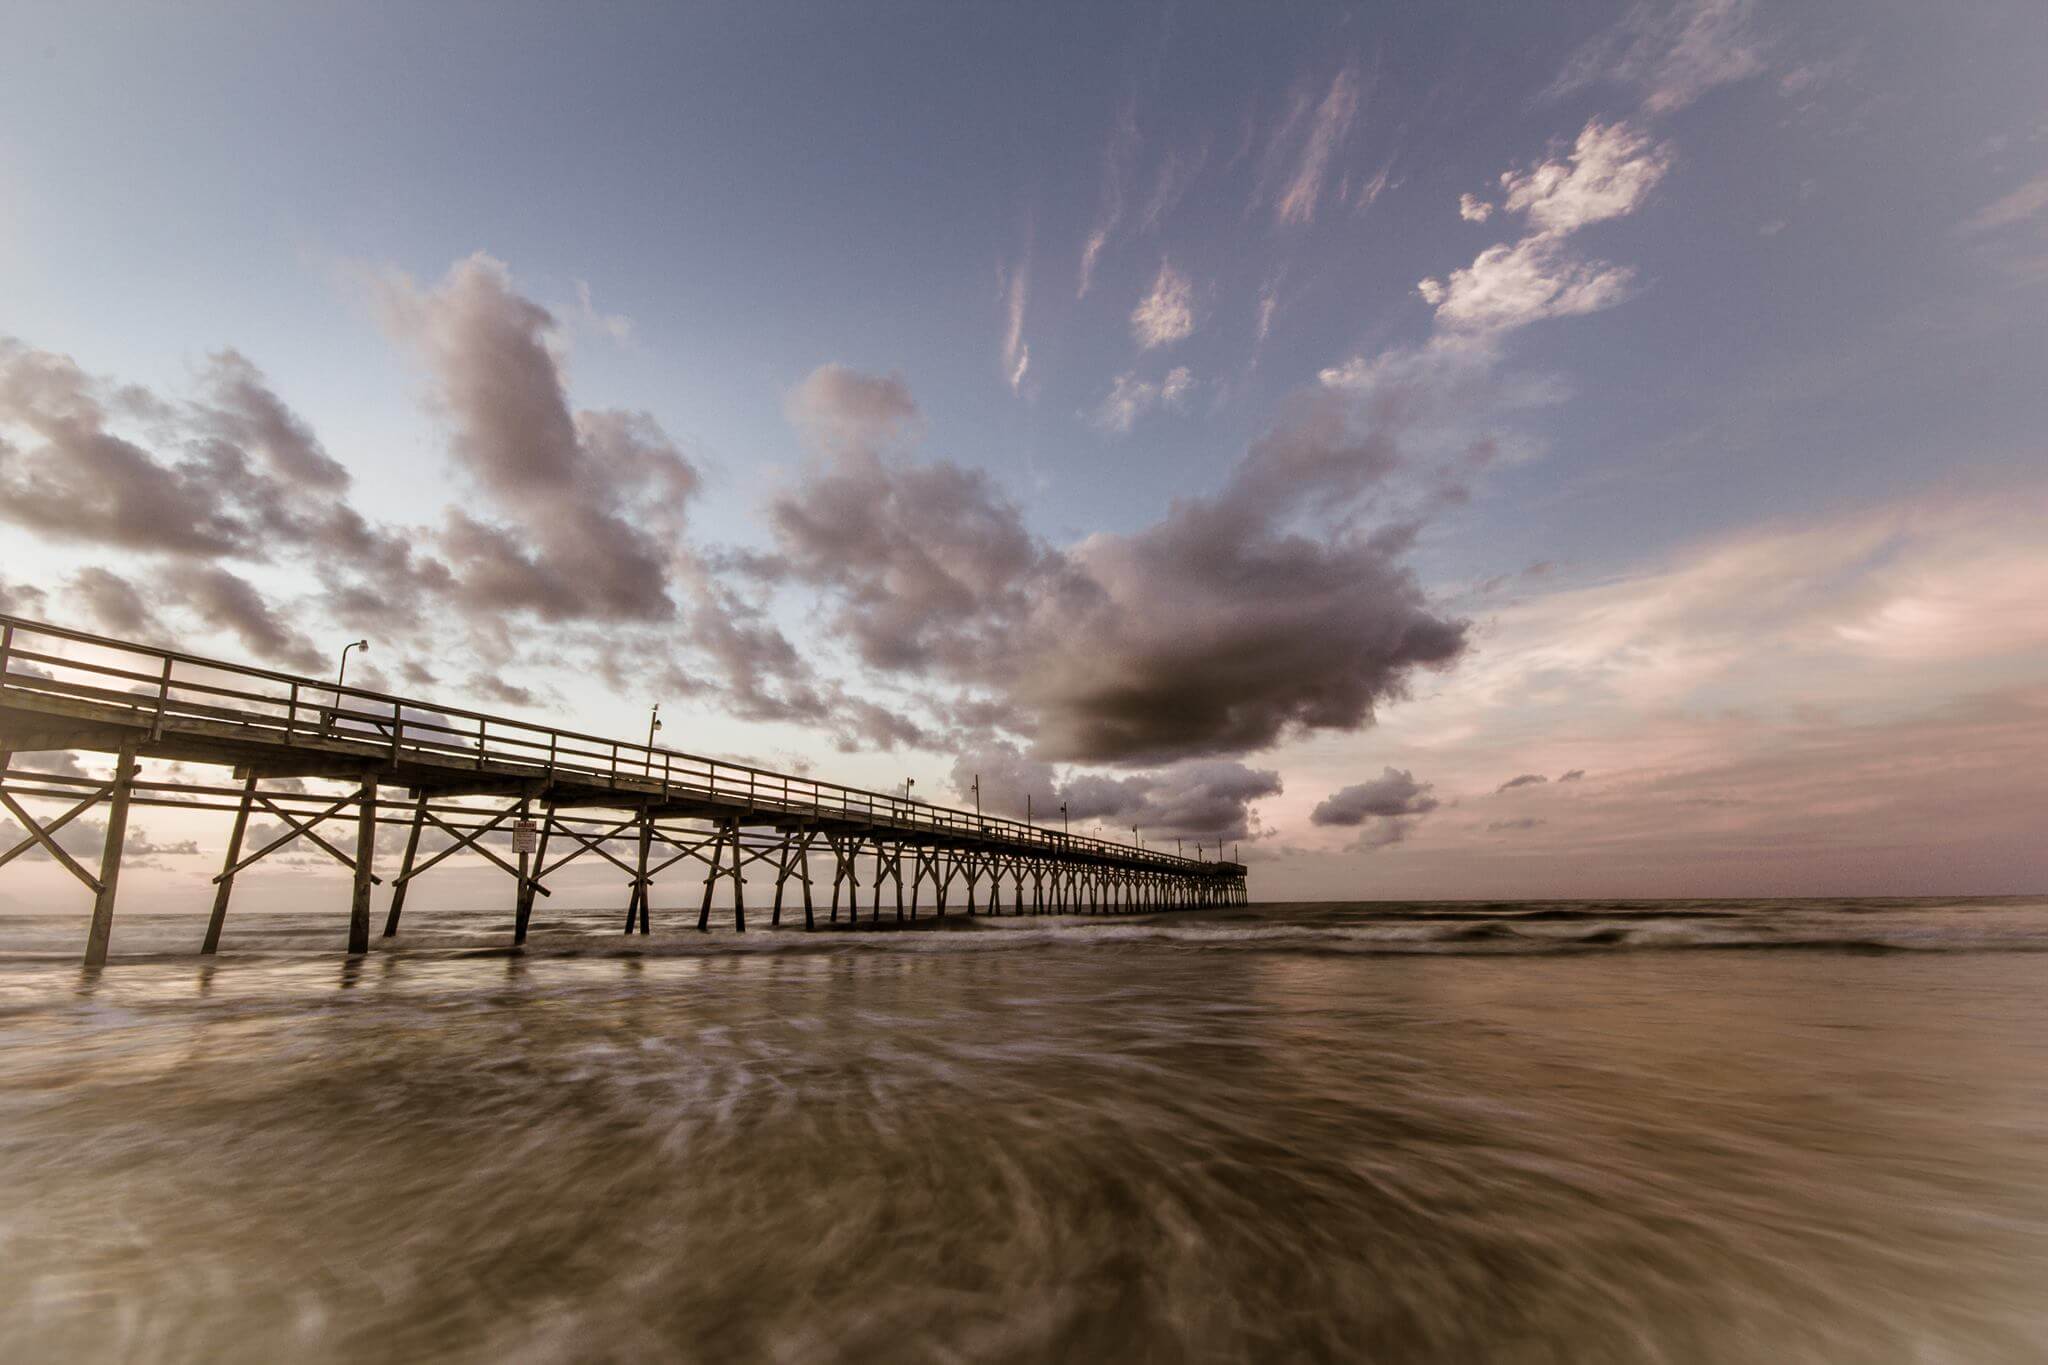
That’s the very long explanation of what shutter speed is but, basically, if you were to have a very fast shutter speed and you want to freeze motion, freeze somebody jumping in the air, and you have a shutter speed of 1/30s or 1/5s you’re actually going to show motion. If you want to have the waterfall or water running that we always see in landscape photography you’re going to need a longer shutter speed.

ISO

Now let’s jump into another section of the exposure triangle which is ISO. This is probably going to be another easy one as well.

So, ISO is an acronym for International Standards Organization, and what that means is basically an organization that sets the sensitivity of things – which is kind of a boring job if you ask me 🙂 – but the ISO in the camera sense is actually the measurement of how sensitive your sensor is.

ISO  has existed long before digital cameras, but the concept is still the same. Back in the film days, it referred to the light sensitivity of the film you were using. A higher ISO number meant it was very sensitive to light, and thus did not need to be exposed for as long. As such, a high ISO meant a faster shutter speed and was ideal for sports, where the action needed to be frozen in time, with minimal blur. The higher the ISO number, the more light-sensitive the photo will be.

You’re going to see in the ISO settings that the value is probably set to, let’s say, 100. That’s probably going to be on the lower end of the spectrum, which means that your camera is not going to be as sensitive to light as it would be if you set it to higher values.

The values for ISO are usually set to double that value—it goes like 100, 200, 400, 800, 1600, 3200, 6400, and so on. Usually, in an entry-level DSLR, you’ll see the ISO double with each step up, and as you double that amount, your camera is more and more sensitive to light.

ISO 100 is not very sensitive to light at all, so it is useful for scenes that are very bright. In that scene of the person running down the field, the value is helpful if we talk about daylight conditions. You don’t need your camera to be sensitive to light as you already have a lot of light around.

On the other hand, if you are in an indoors situation, you’re going to need to bring more light in your camera, so, you want to bump the ISO up. Maybe bump it to 800 or 1600, or higher. What that’s doing is making your camera sensor more sensitive to light so you can properly expose your scene.

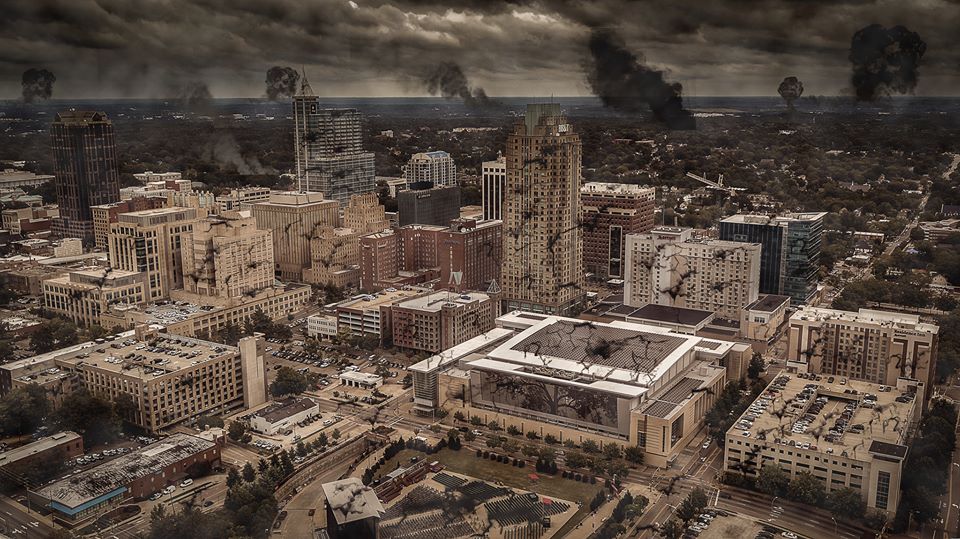
A lot of people actually ask why they can’t keep their digital camera at a high ISO all the time? Well, there are drawbacks when it comes to setting your ISO up fairly high. The main thing is that you actually introduce noise into the scene. Noise is something a lot of people see, and it’s actually a grain. It’s kinda like pixelization. We all know what digital noise is—some people say their images are too noisy, and they are not talking about audio noise, but a digital noise where you can see a lot of grain in the images.

Now, one way to have this explained to a lot of beginners—this is a way I heard it when I was learning about the exposure triangle a long time ago—is to envision the noise in your camera like the noise you would hear from the microphone . So, right now I’m talking at a fairly nice distance away from the microphone—maybe 6 inches away—and my voice is fairly clear. This would be considered ISO 100: a very clean image, like the very clean sound that’s coming from my voice.

But if I were to go closer to the microphone—like this (shows in audio)—it’s a lot noisier. Obviously, it’s not going to sound really well when I get close to the microphone, and that would be considered a higher noise. It’s moving the audio distortion in this file you’re listening to, but when it comes to an image it looks pretty grainy.

That’s the reason why you don’t want to set your ISO to a higher ISO all the time, because you don’t want to introduce that noise in your image if you don’t have to. You can always use Adobe Photoshop or Adobe Lightroom (or similar) to reduce the amount of noise that the higher ISO value creates, but obviously higher amounts of noise cannot be completely removed.

Aperture

Finally, let’s talk about Aperture. Aperture is the setting that a lot of people struggle with because they know the effect they want to achieve but they don’t know how to achieve it with the aperture while also compensating for all the other elements out there. So, let’s talk about aperture really quick.

The aperture, commonly referred to as the f-stop, is the size of the opening in which the light will pass through when exposing the “film.” Depending on your lens, this aperture could range anywhere from f1.2 to f22. An important thing to note is that apertures are written as a ratio to the actual size of the lens. The lower the f-stop number, the larger the opening (because it is closer to a 1:1 ratio to the lens.) Likewise, f22 would be a tiny pinpoint, since 1:22 would be a very small ratio. Setting your lens to a wider aperture will obviously let lighter than a smaller one, and will directly affect your shutter speed.

So, aperture is, basically, the opening and closing of the inside of the lens, which allows more or less light into your camera. And this is usually represented by an f-number on the back of your camera. So, you might see f/8, f/4, f/2.8, f/22—something like that. Those are all values of how open and closed the blades inside your camera are, to let in more or less light.

One of the trickiest elements when it comes to this is what does this number represent. So, let’s say you have your camera set to f/22. It’s a very, very high aperture, and what that means is that the opening, when you take a picture, when you snap a picture, is a very, very tiny hole. And this is going to let, hardly, any amount of light into your camera. This means that you have to be in a very bright situation—again, a very bright day—to shoot between f/18 – f/22 because it creates a very small hole and let’s less light into your camera.

Now, if you were in that same sunny scene and you change your aperture to, let’s say f/4—all the way to the other end—when you snap the picture, the aperture will hardly close. It’s going to be a very large, wide opening. So, basically the smaller the number, the larger the hole that’s in your camera when you take the photo; the larger the number the smaller the hole it’s going to be. It’s a little tricky, but you kinda get used to it when you start taking photos.

So, f/4 or a small f-number let more light into your camera, this is good again for those dim situations—low light indoor settings or night situations. It will let in more light to your camera, and again, photography is all about light. To get as much light in your camera to expose your scene properly. But aperture also affects your photos in another way: this is the hardest part for people to wrap their mind about—Depth of Field (DOF)

Depth of Field

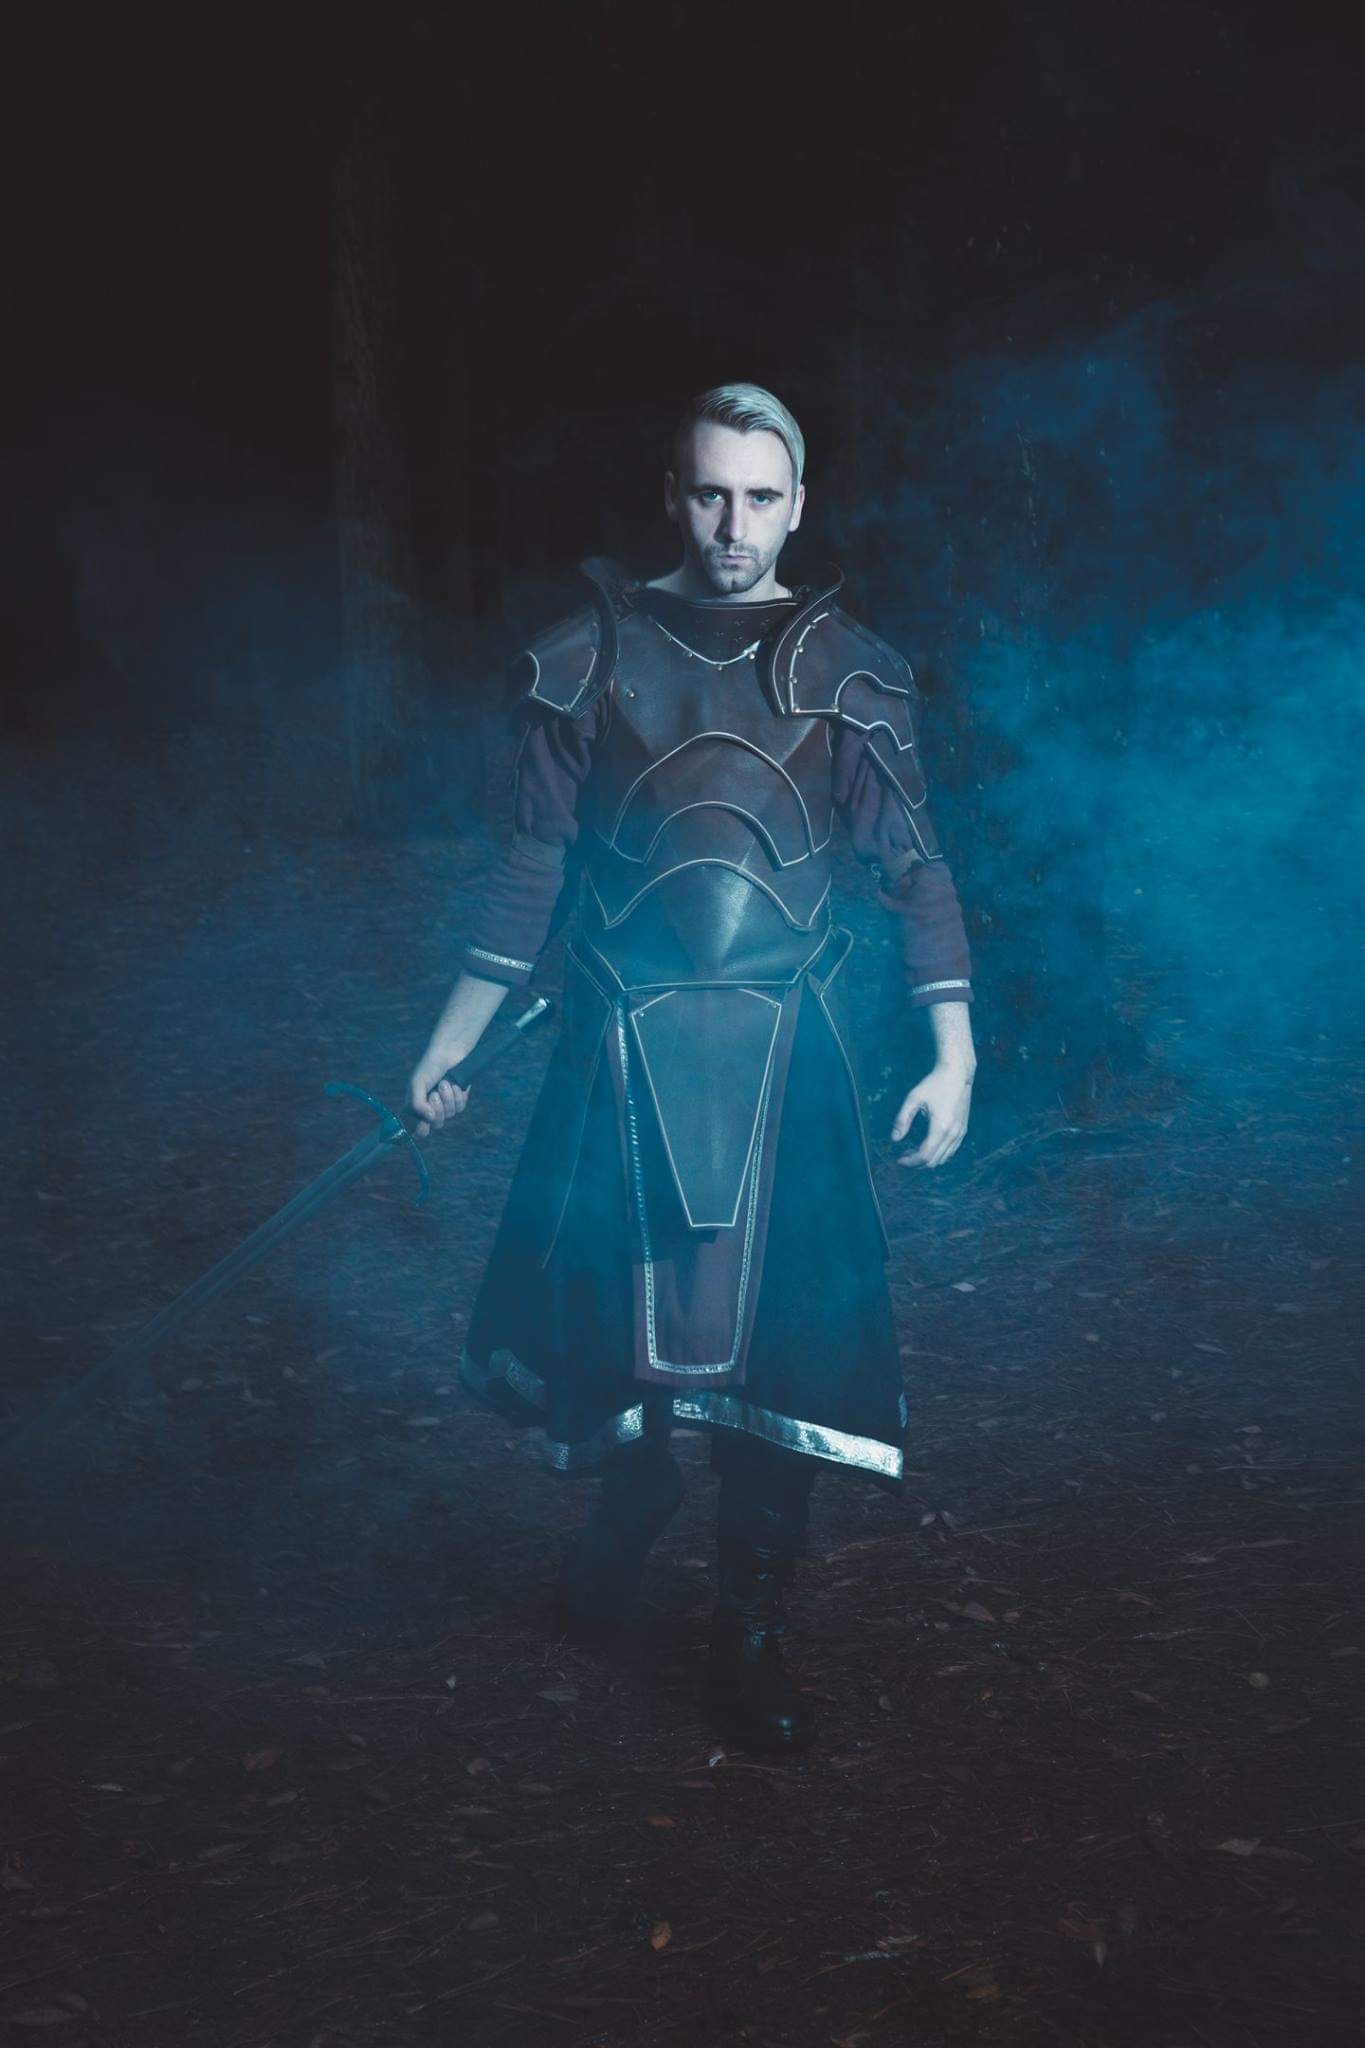
Depth of Field is how much of your scene is in focus, either behind or in front of your subject. So, let’s say you’re taking a portrait of somebody, and you really want to have a blurry background that you see in a lot of those professional photos.

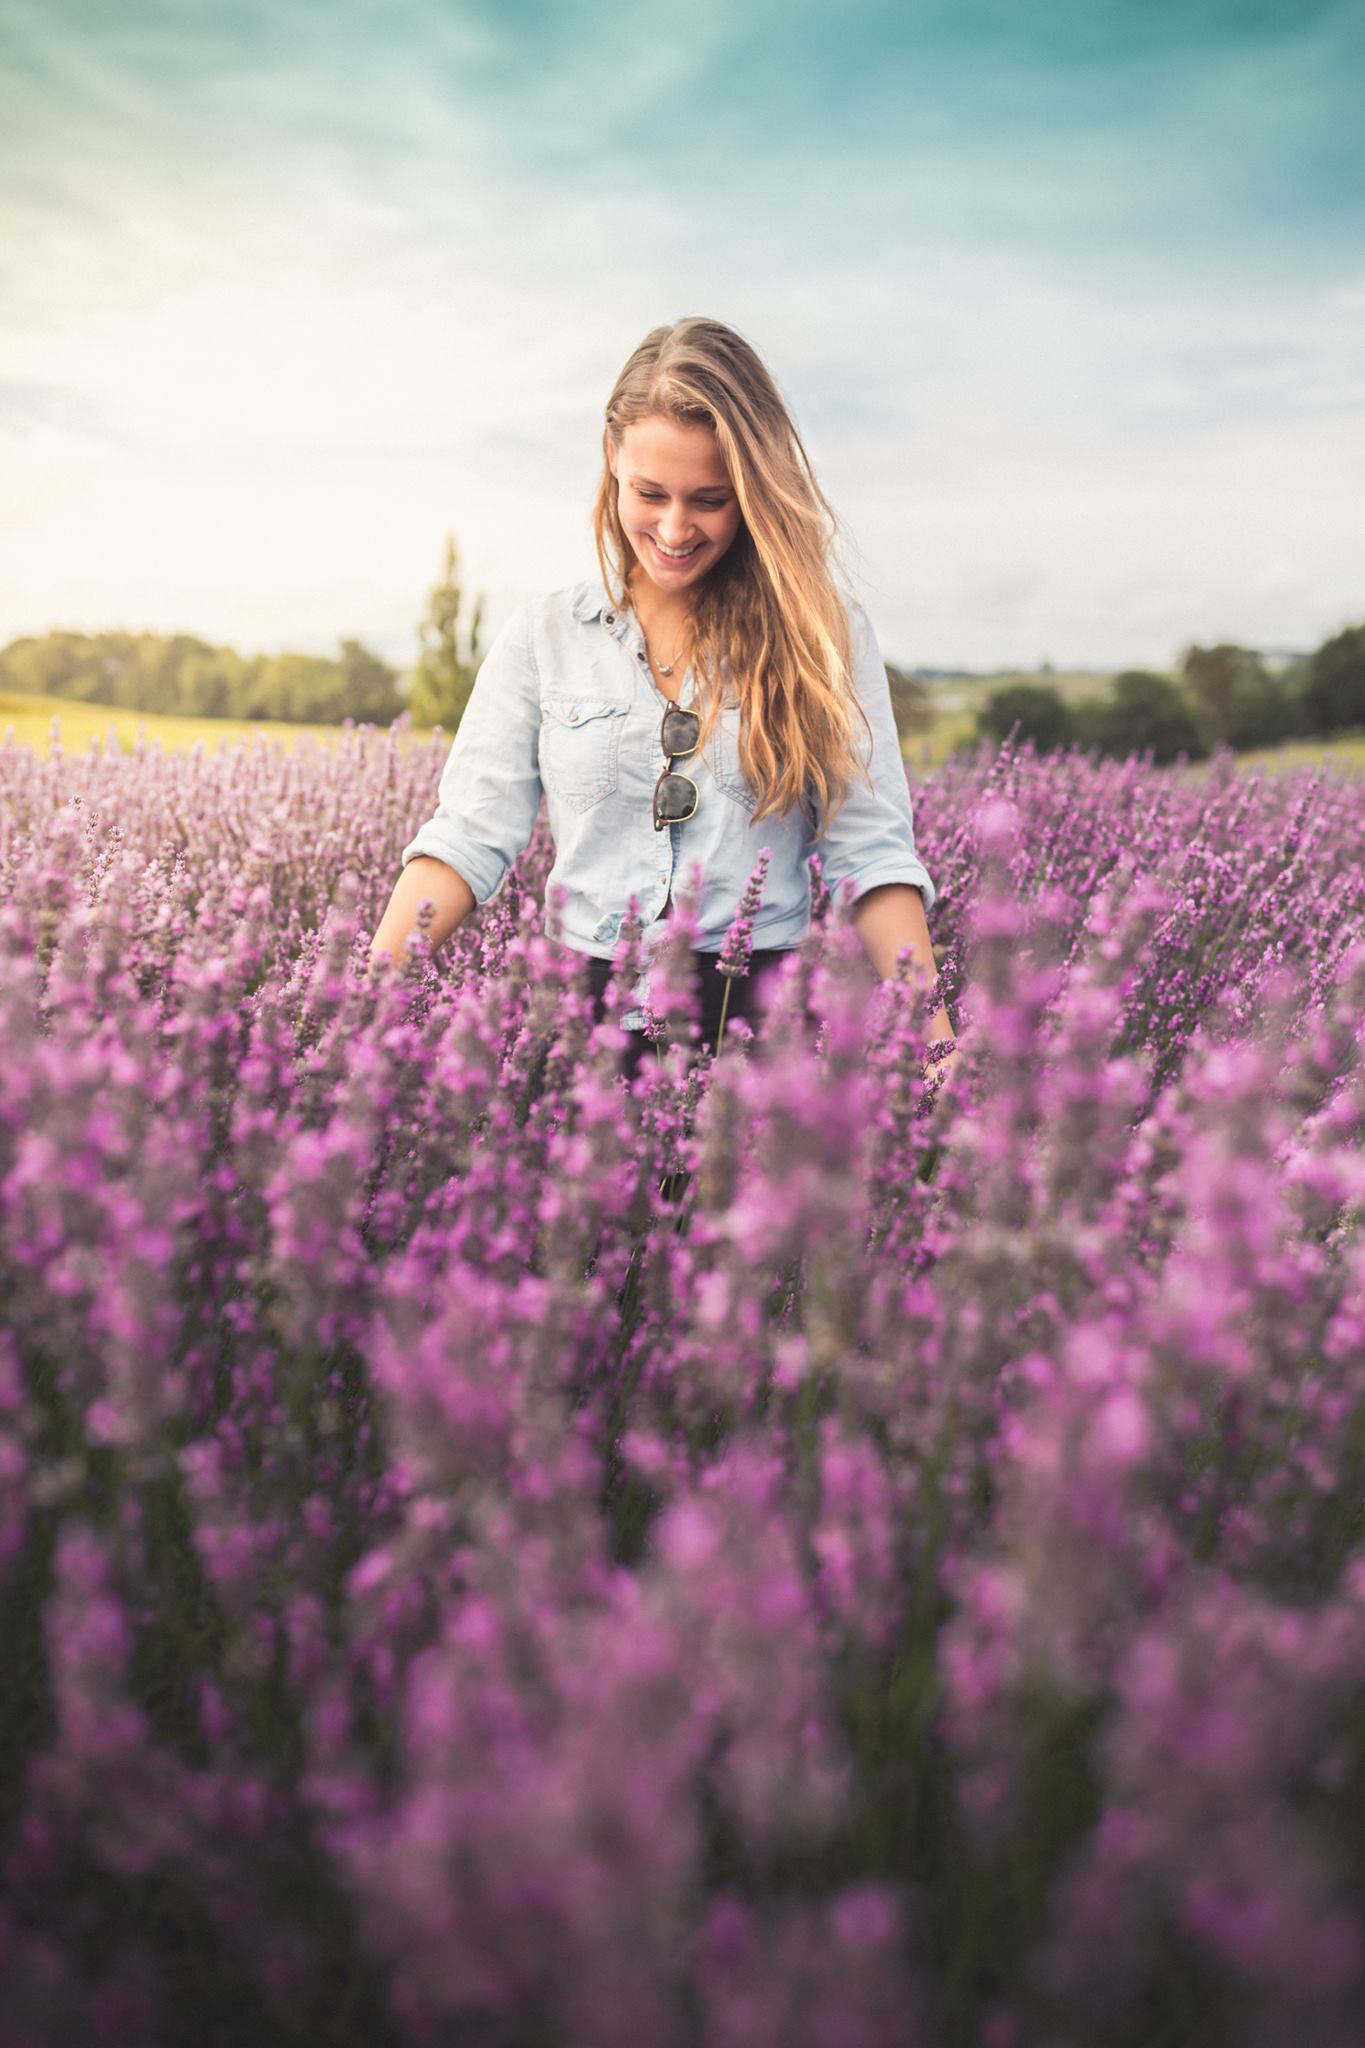
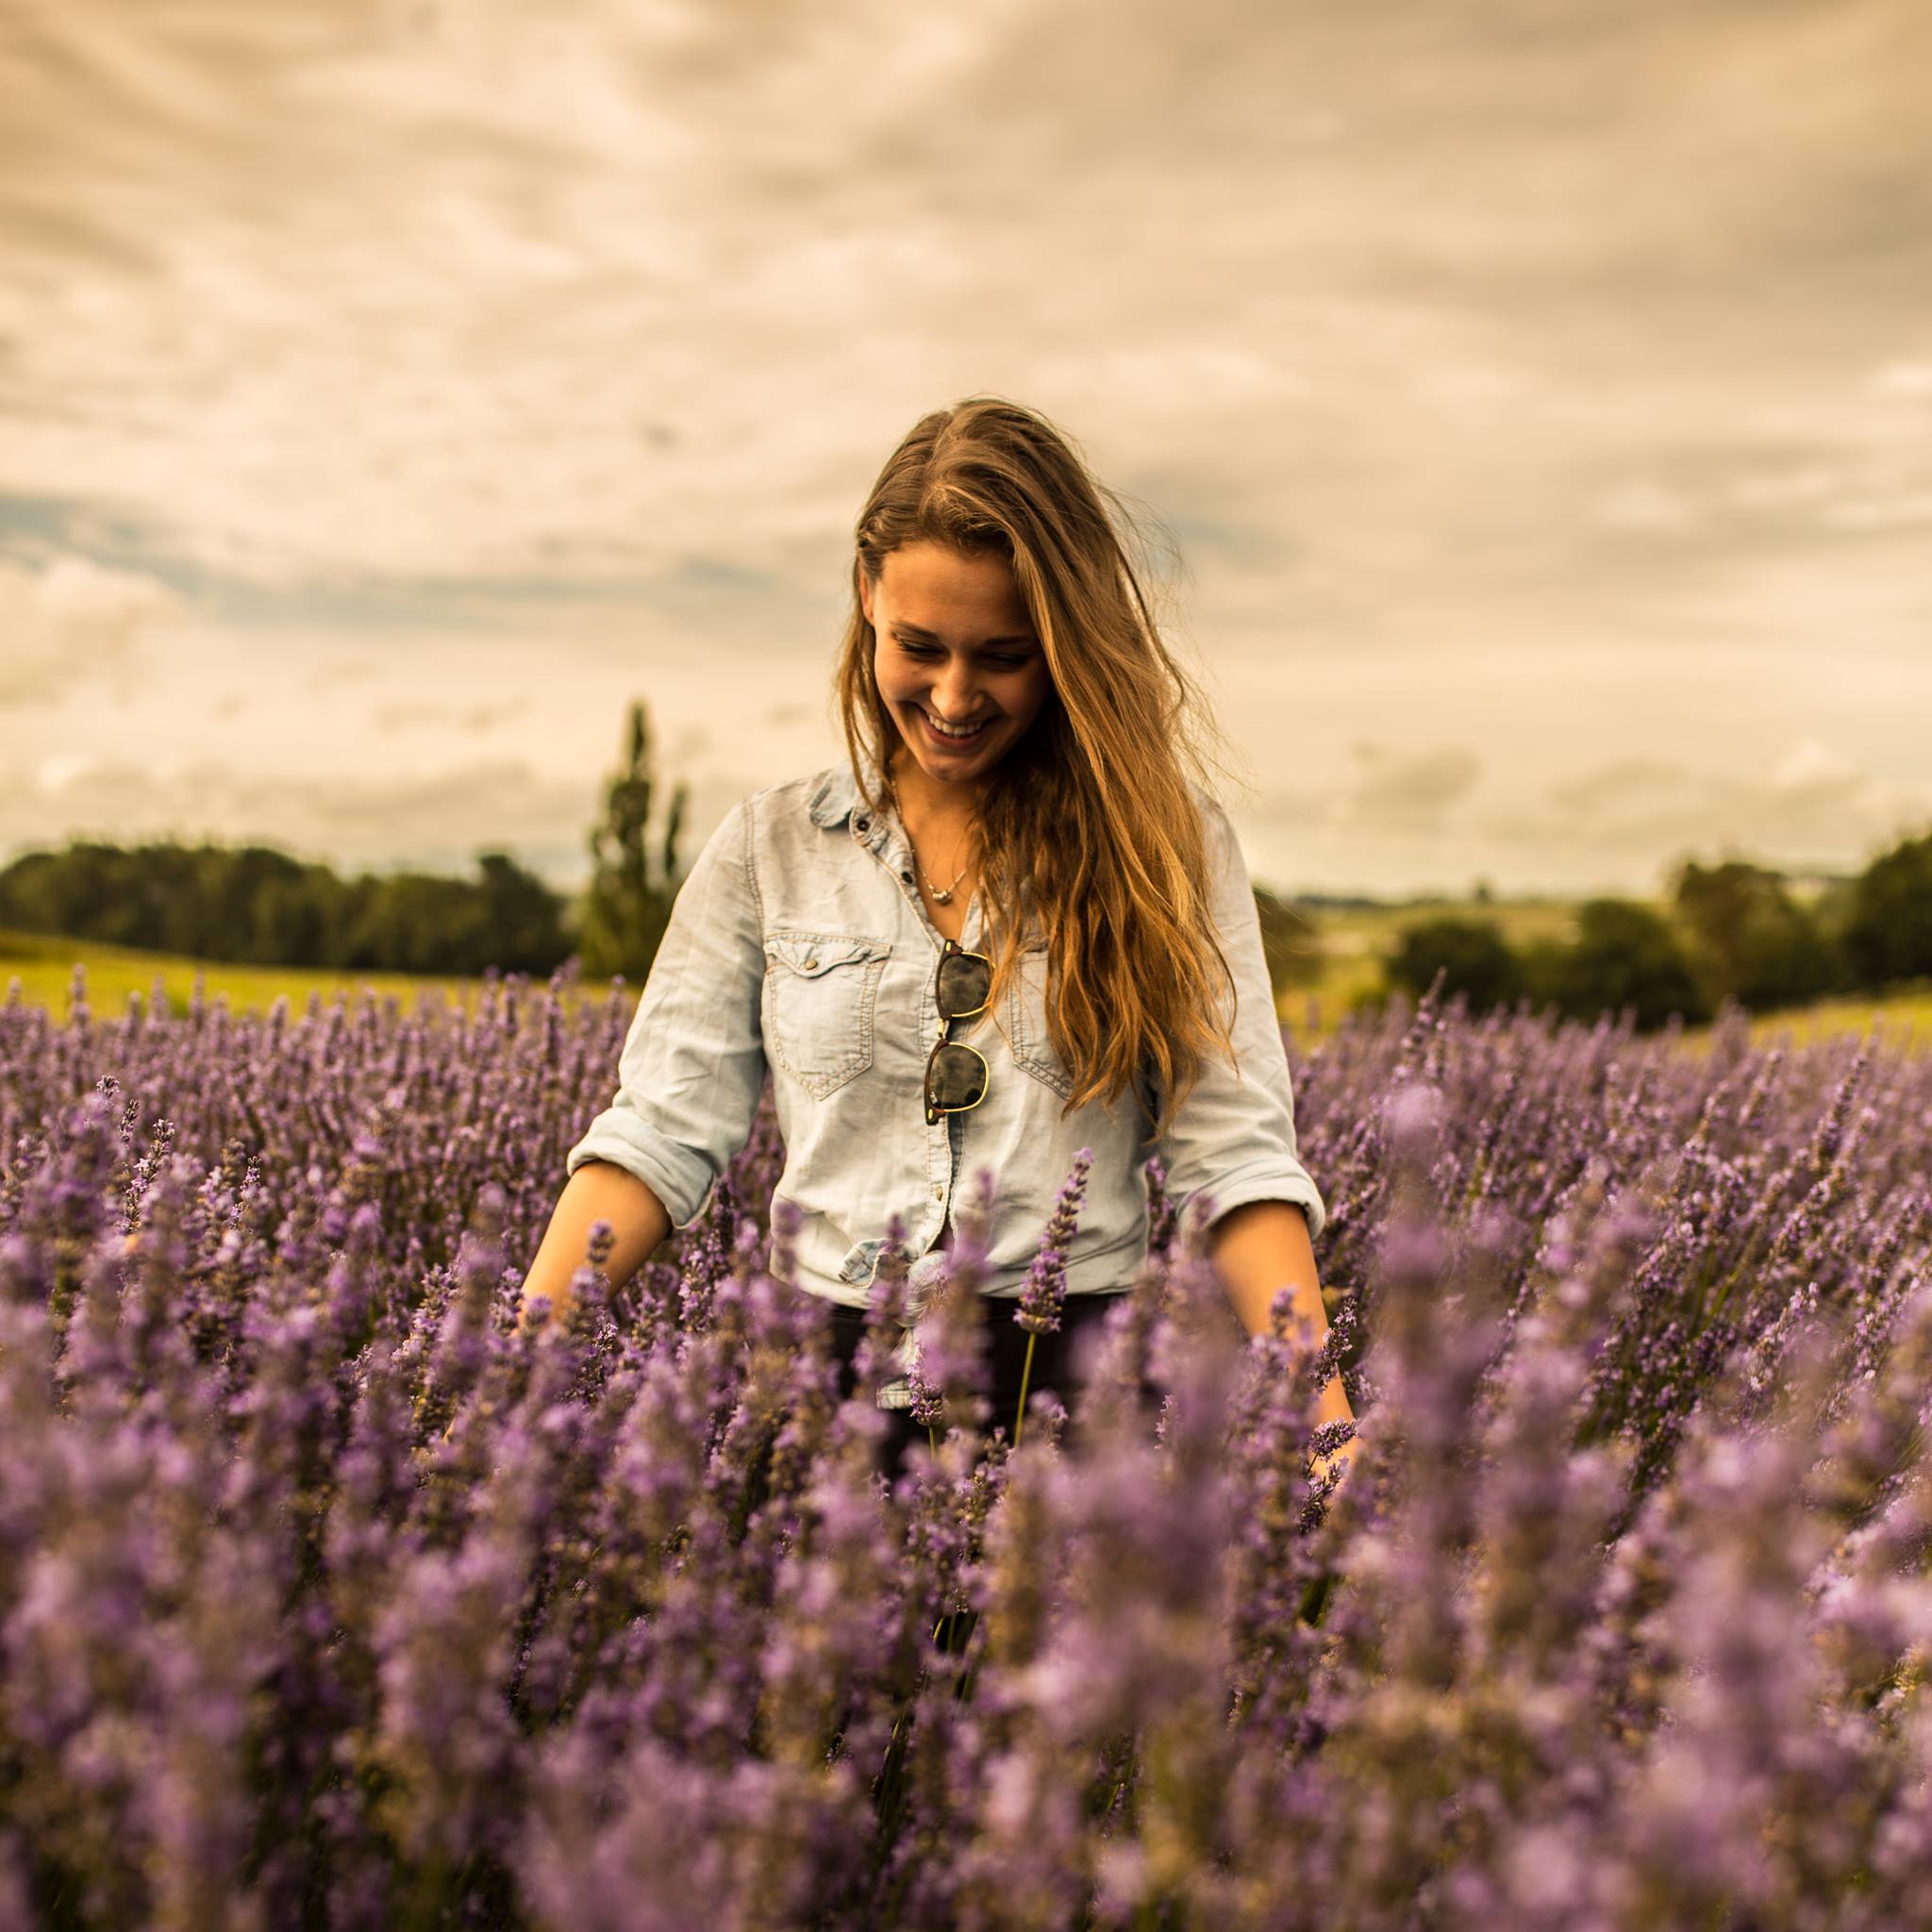
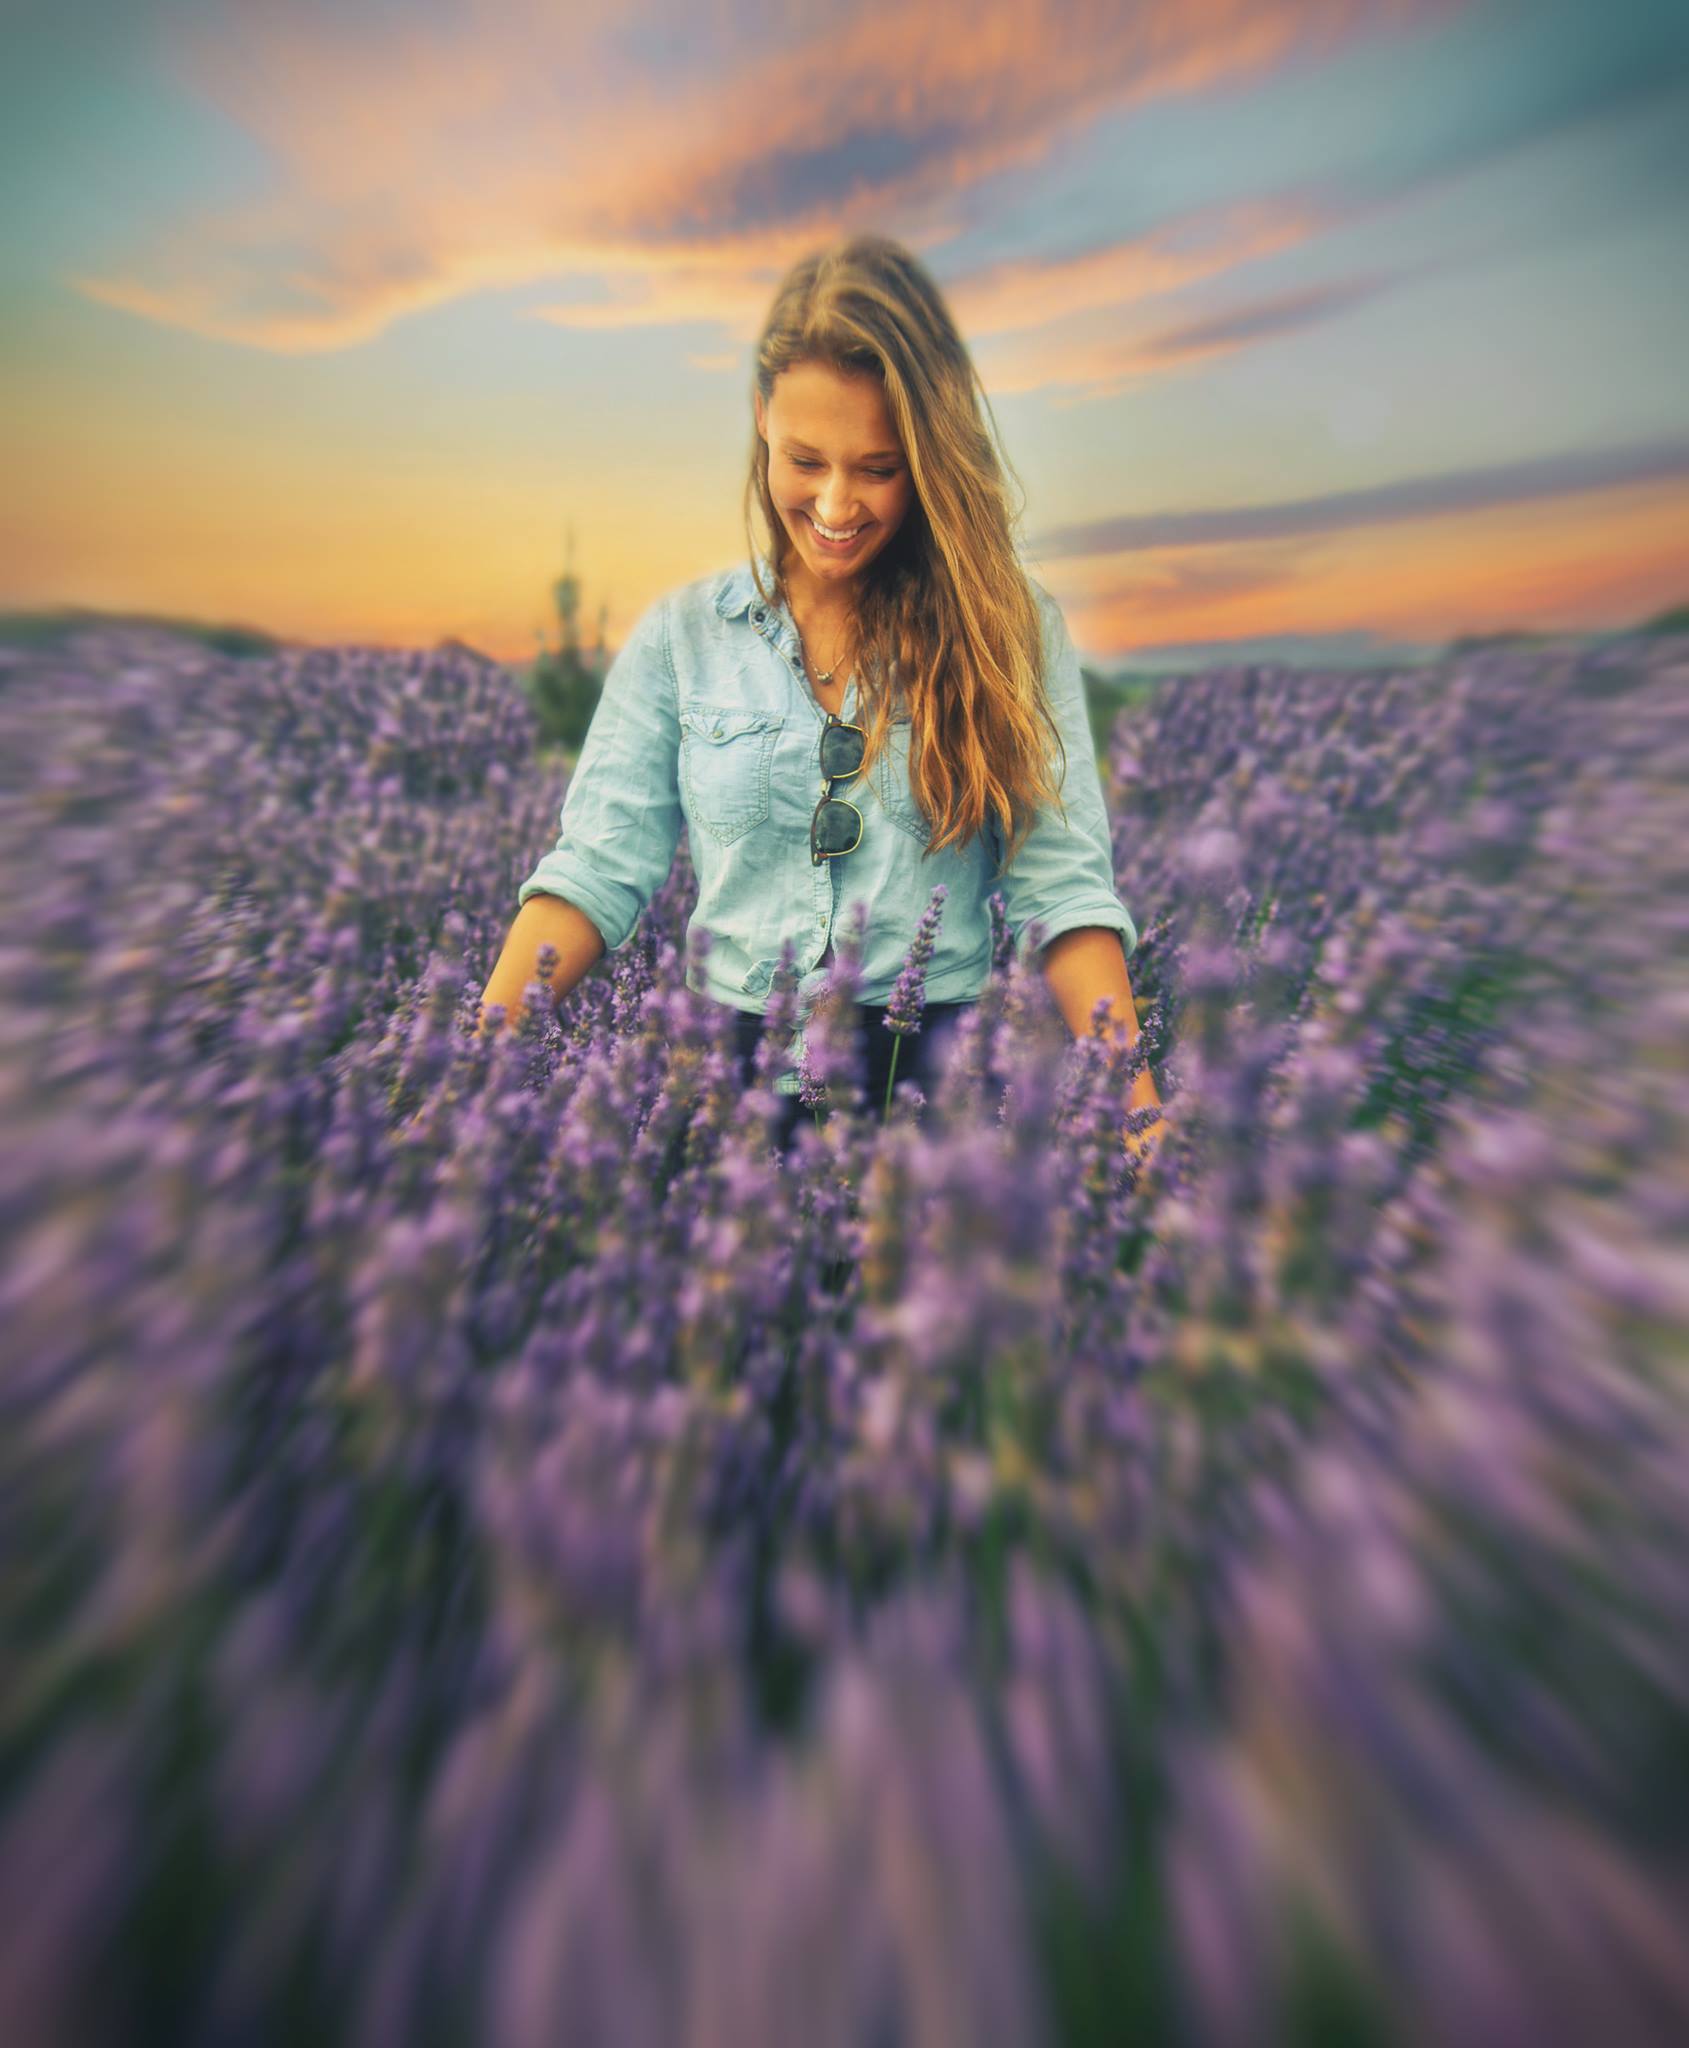
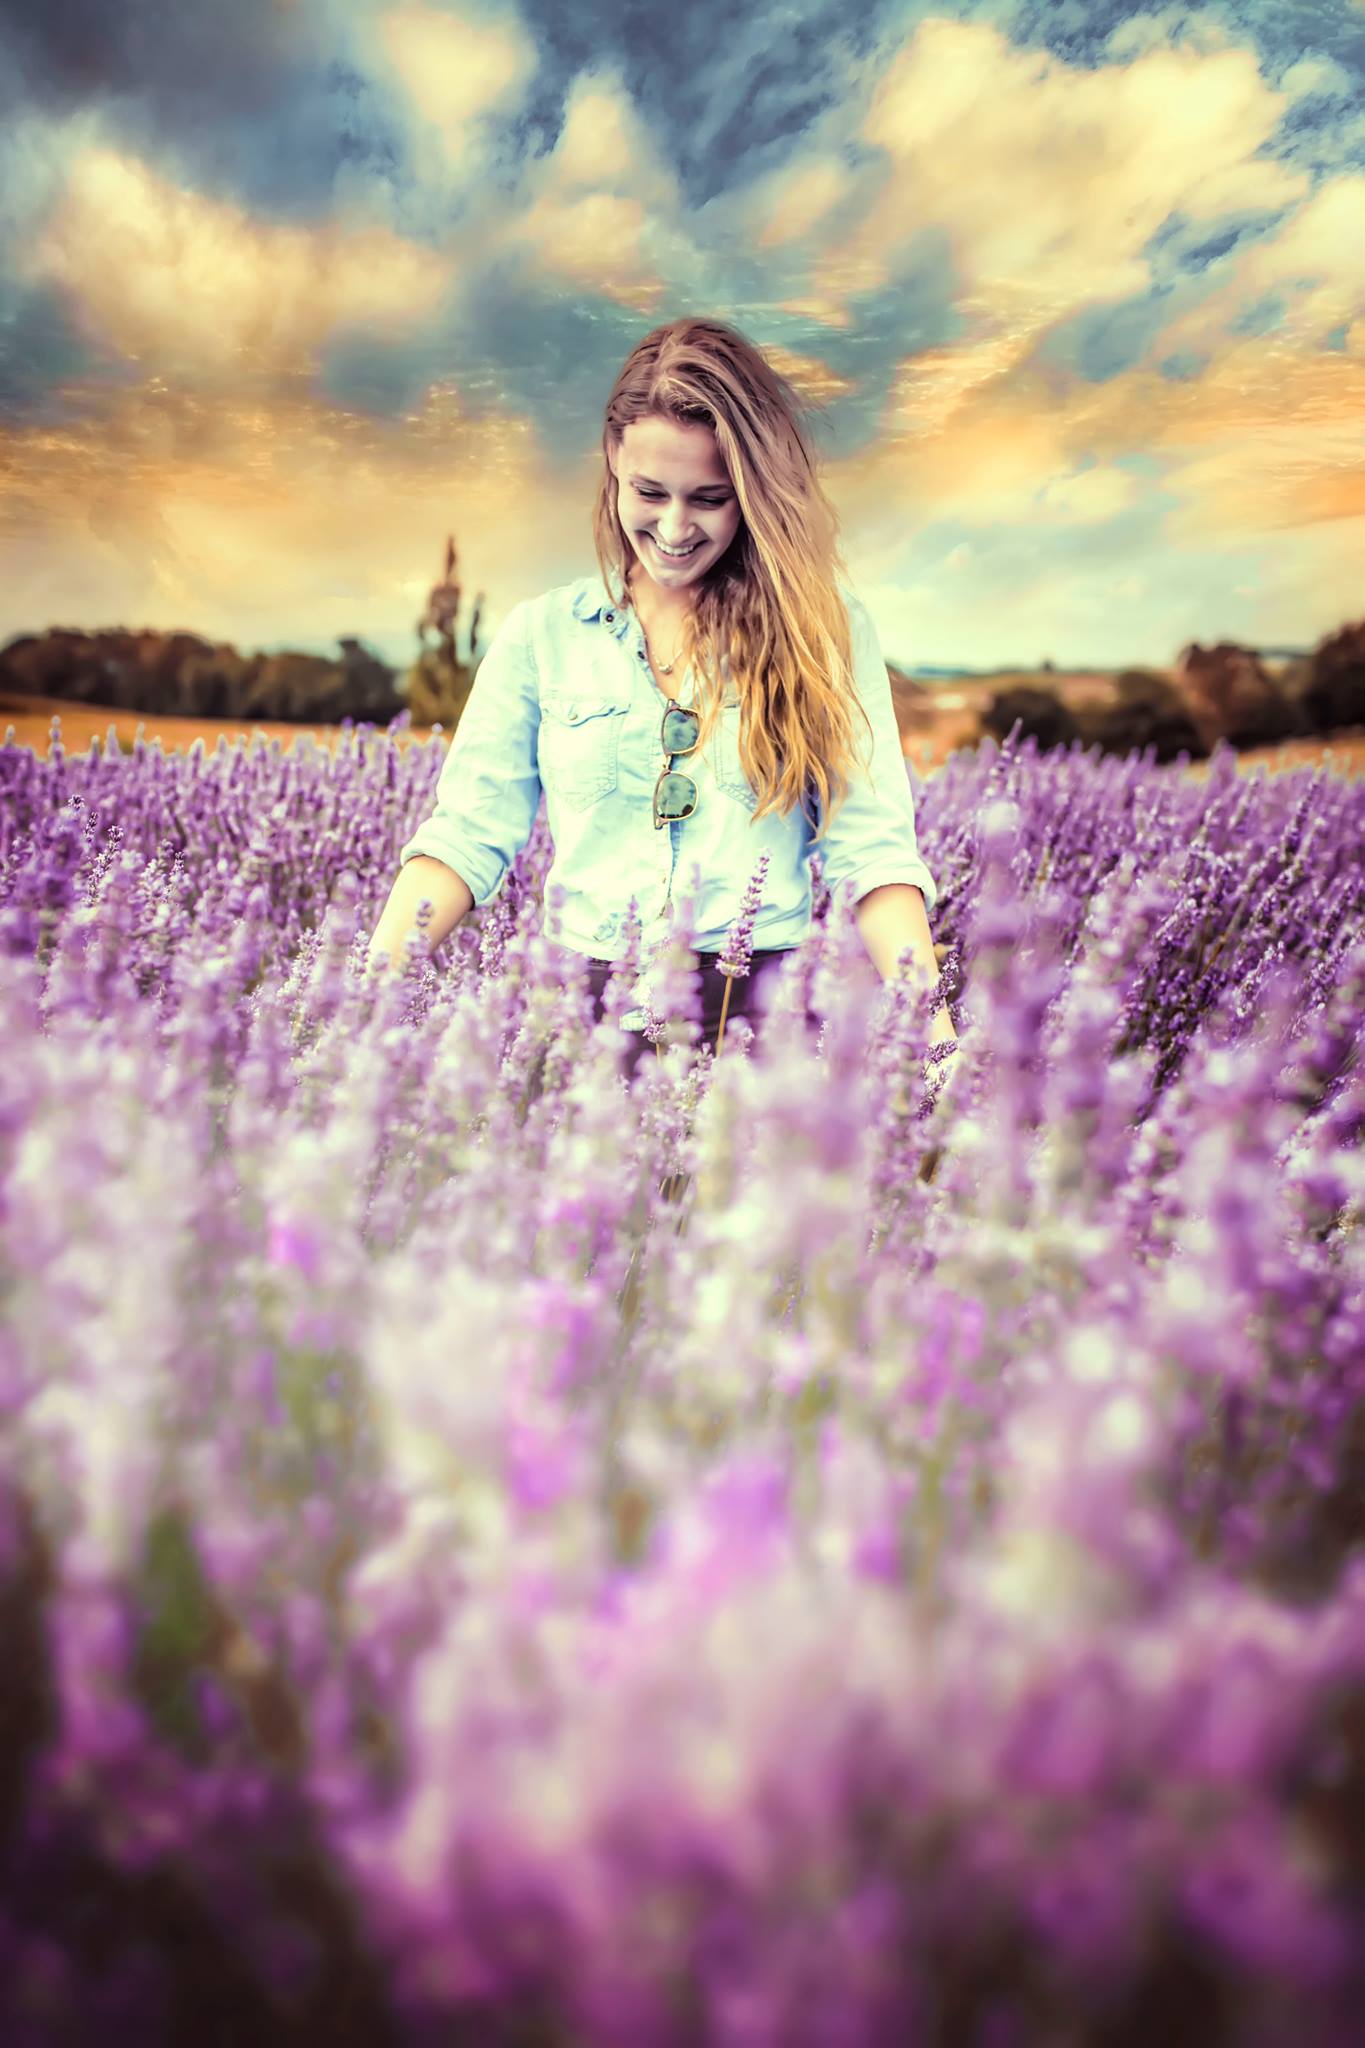
You can achieve this look by setting your aperture to a lower f-number. Maybe do an f/4 – f/5.6, something around there—and what you’ll do is focus on your subject and  the background is get blurry. It’s known as a soft bokeh effect that many people desire. In front of your subject is going to be blurry as well if you use that setting, so, this is useful if you are shooting a subject and the background is blurry—maybe have some flowers in front of the subject or something like that.

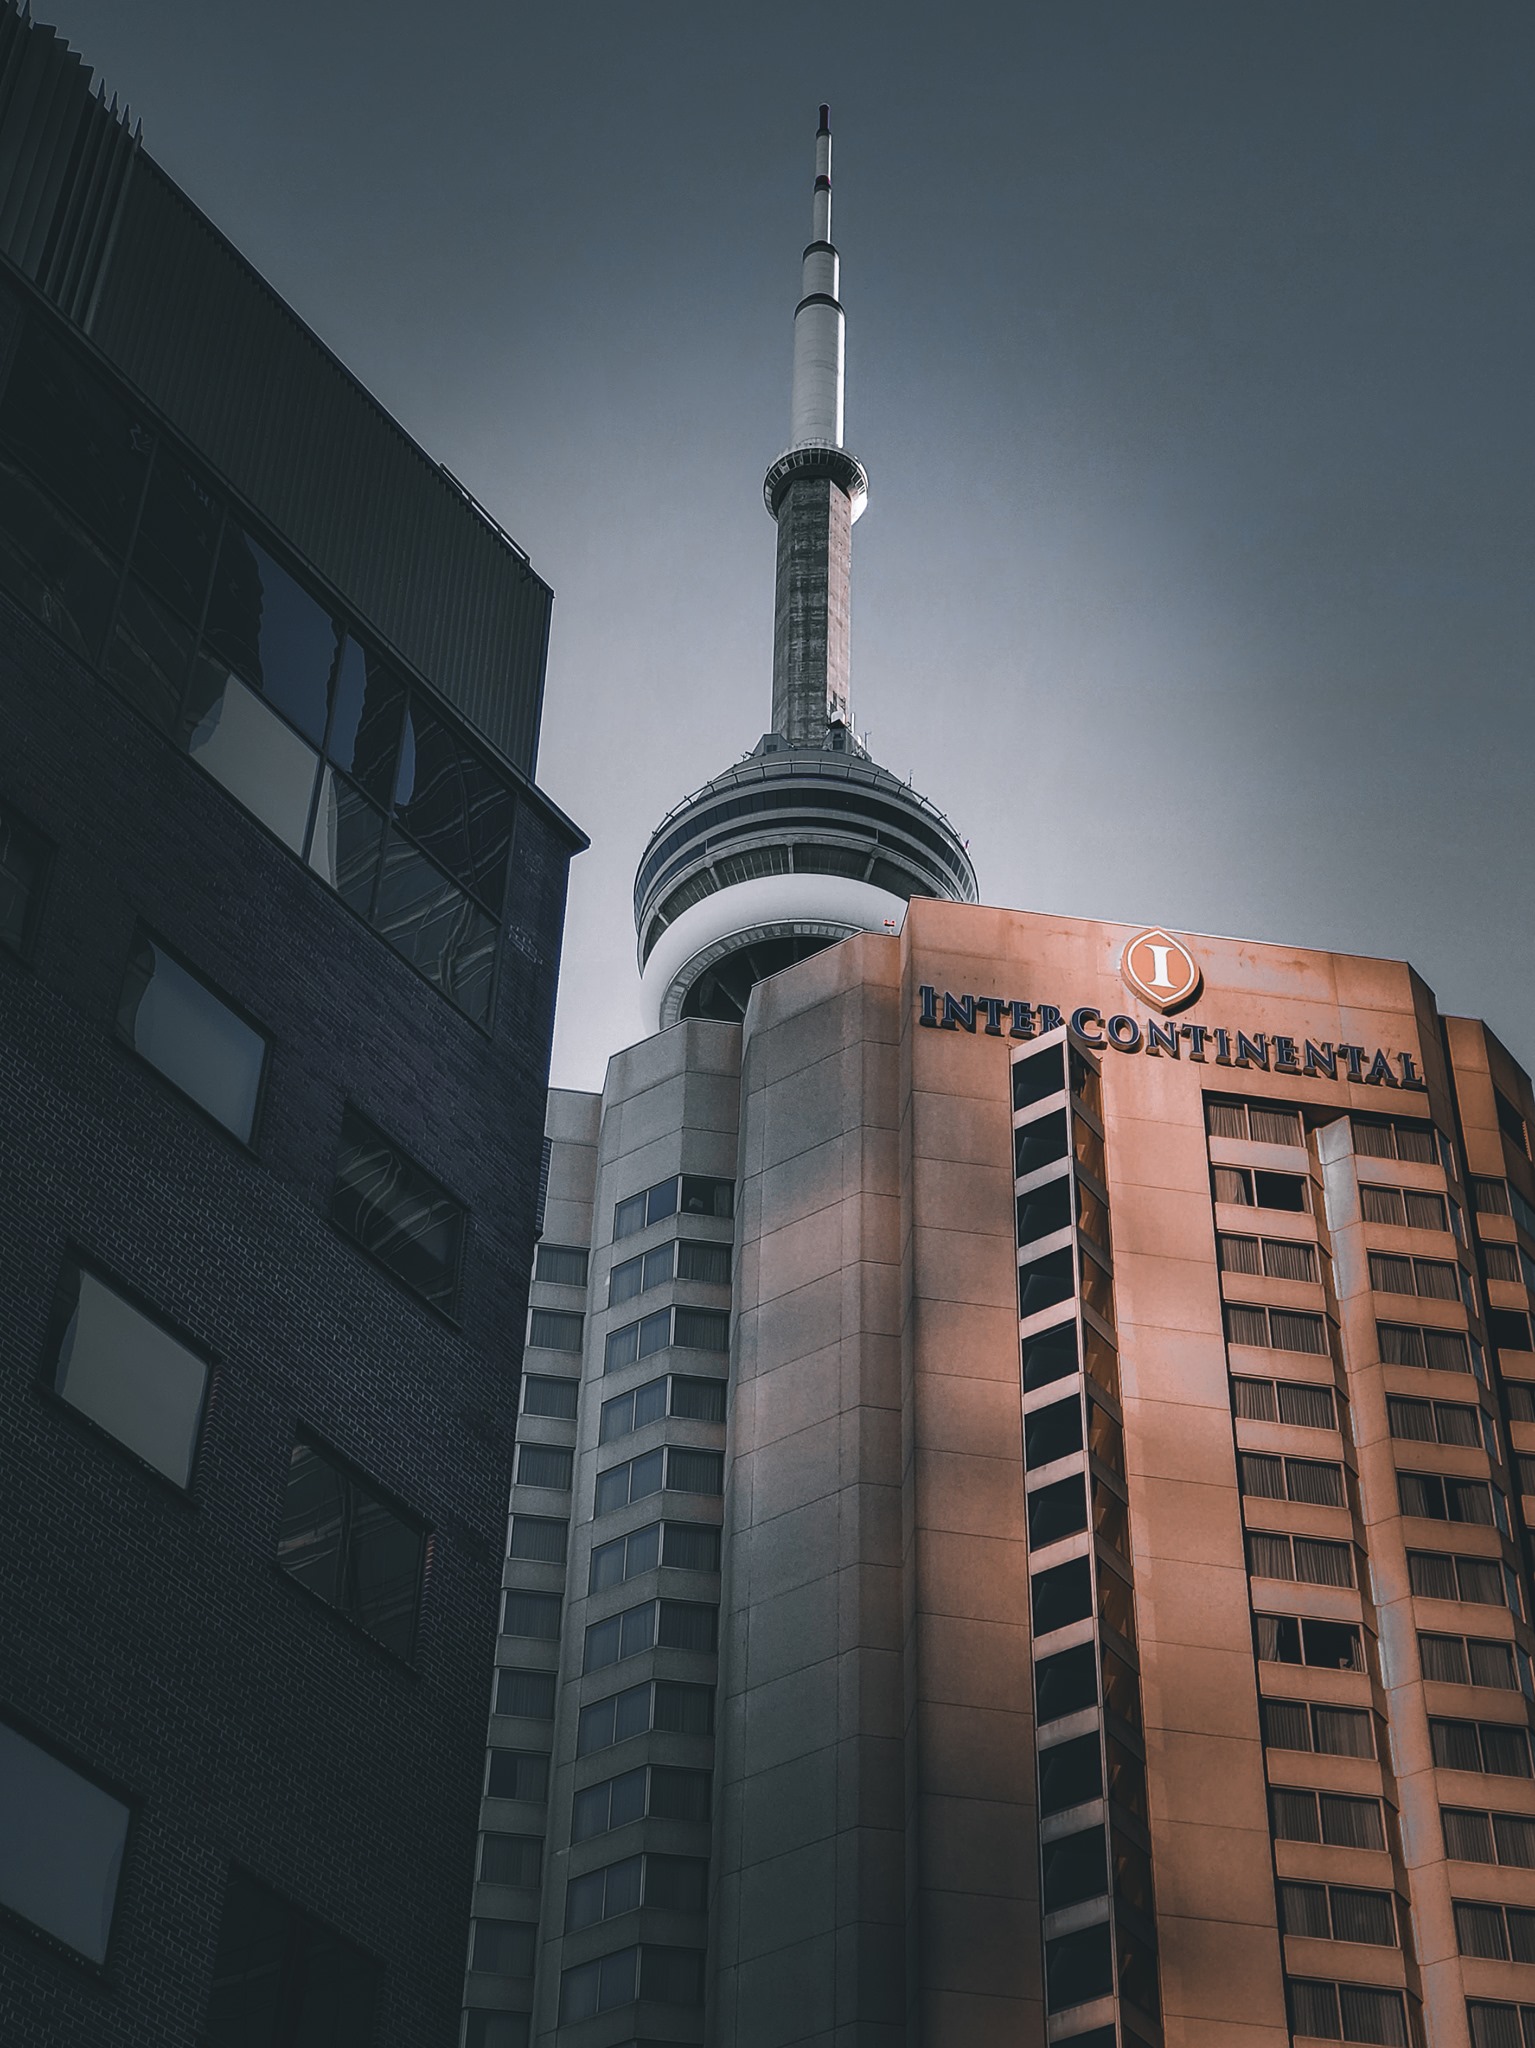
If you were to set your aperture to a higher number, let’s jump up to f/22 again, if you have those flowers in the foreground, your model, and background are not going to be blurry, you’re not going to get the same effect. The background may look a tad blurry, but nowhere near when using low aperture values.

If you’re working with portraits and desire a blurry background, you really have to stick to low f-numbers. If you’re shooting something like real estate—maybe landscapes or something like that, you’ll want to use a higher f-number, depending on what you’re shooting. With a higher f-number you take, the more of the scene is in focus.

How Do You Determine Which Exposure Settings Are Which?

Now that you have a basic understanding of what the three main settings on your camera do, it’s time to ask yourself the same question I get asked repeatedly. How do you know which settings to use to achieve a perfect exposure? Take a look at your light meter in your camera’s viewfinder. The trick is to get the small arrow as close to the center ‘0’ as possible. Too far towards the + will make your photo too bright (overexposed), and likewise, too far to the – will be too dark (underexposed).

Try to think of them in this order:

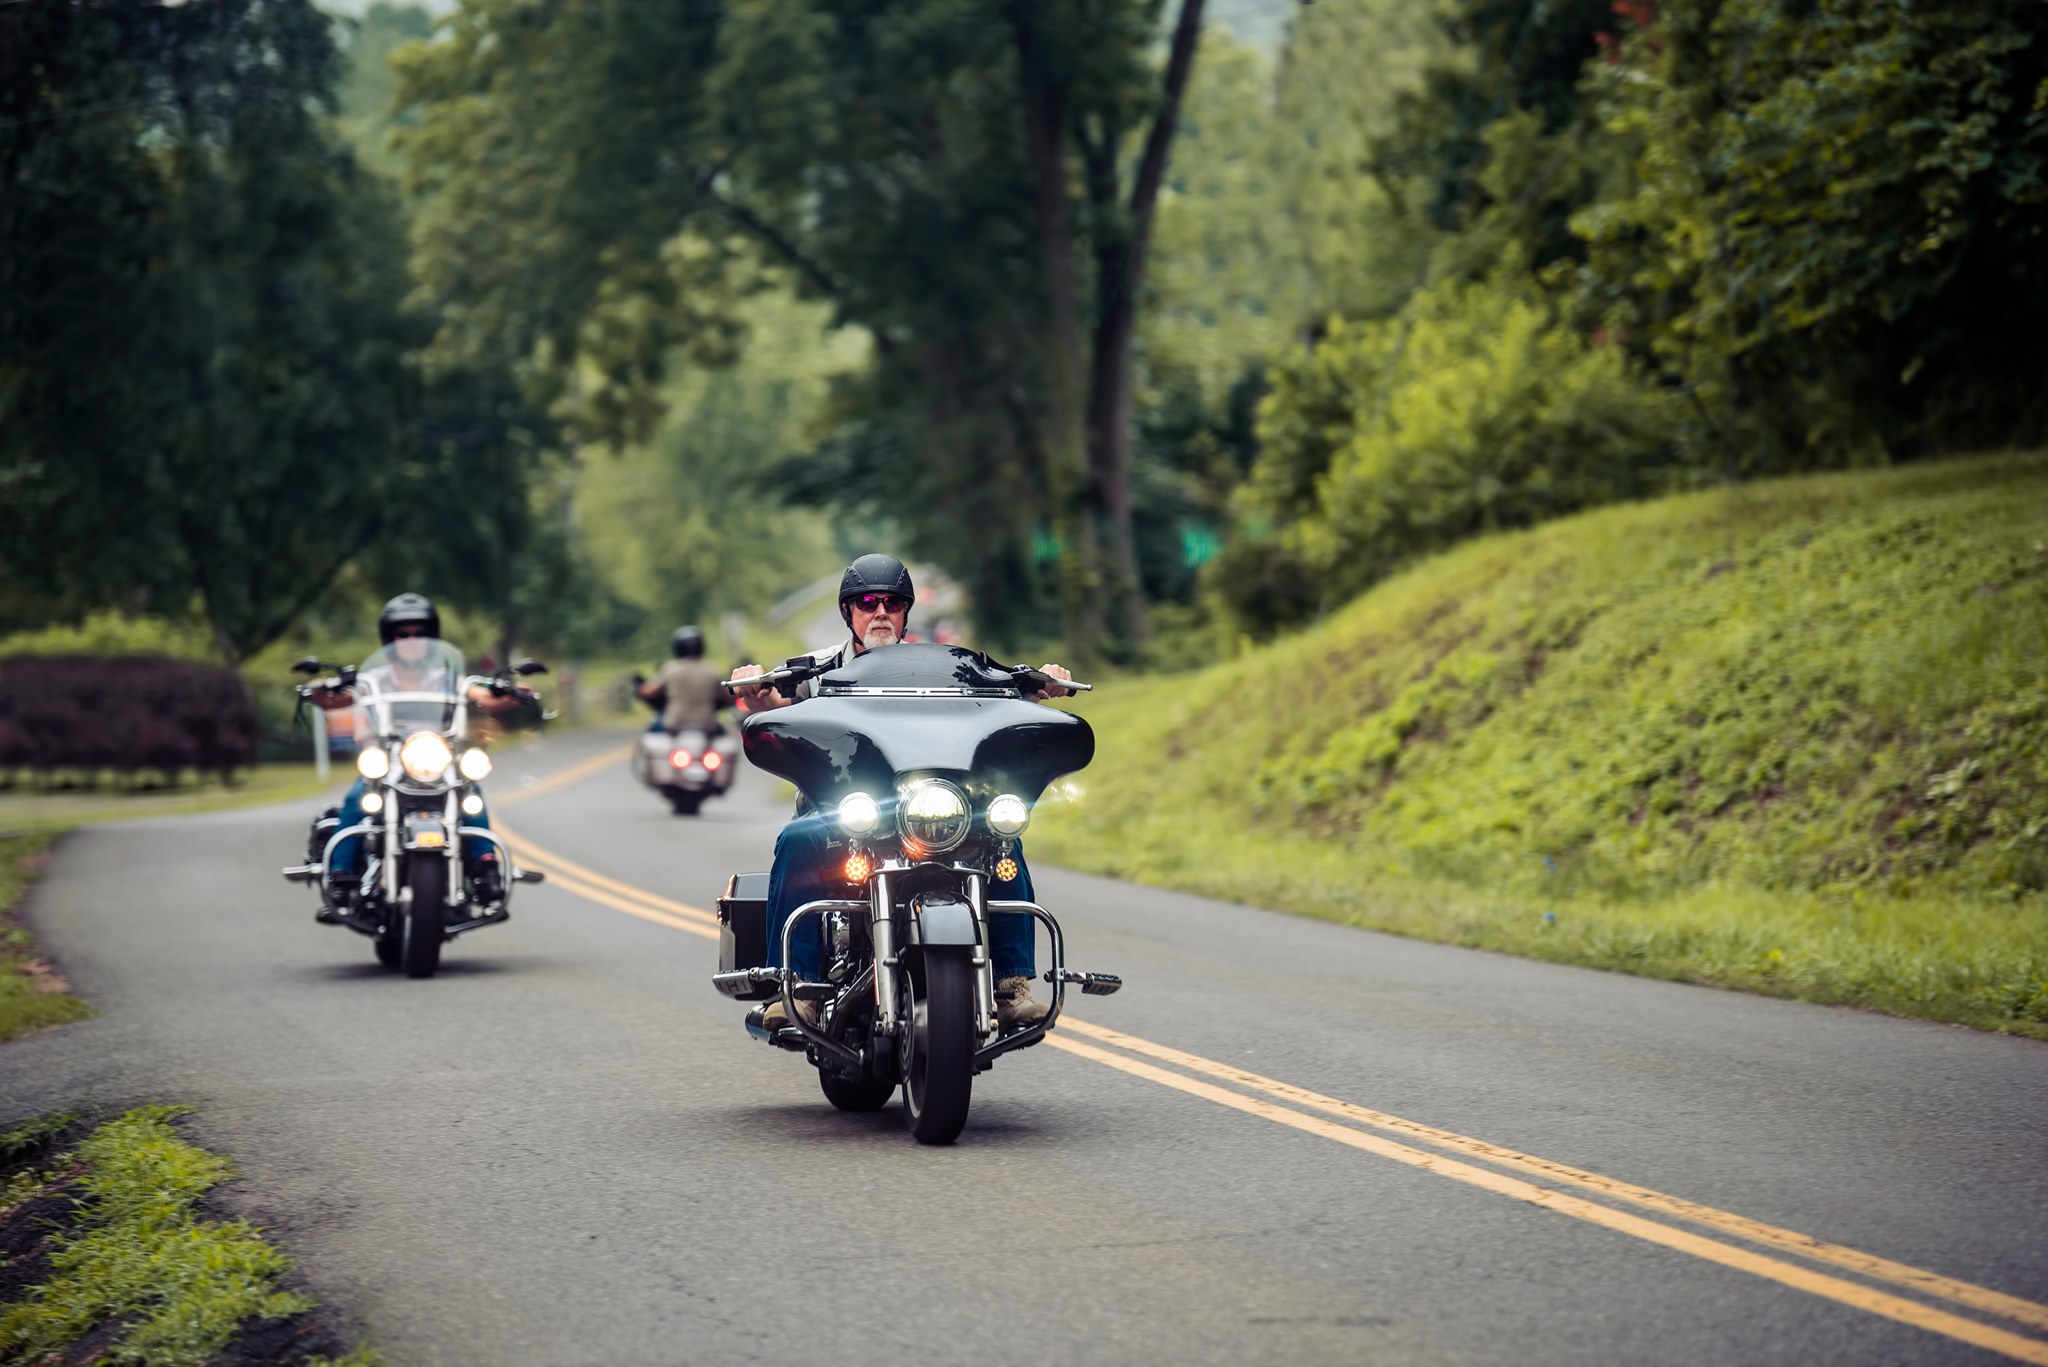
Shutter speed: How fast is the subject I am shooting? If it is fast, like a sports game, you’ll need a faster shutter speed, like 1/400th of a second. If it’s a still portrait, you could go slower like 1/200th.

Aperture: How much light do you have available? Is it a bright sunny day or are you indoors? Once you know how fast your shutter needs to be, you will know how much light you’ll need to get through the lens to make your photo possible. That could mean opening it up to let in more light or using a narrow aperture to restrict light.

ISO: ISO should usually be the last thing you think about. This will be adjusted to allow your desired settings to be possible. For example, if you’re shooting that Friday night football game, and you need a fast shutter speed, and you have a very wide aperture, and the photo is still too dark, then it’s time to raise your ISO. Keep in mind that “film grain” and colors will get worse the higher an ISO setting goes, but the quality in today’s camera sensors is pretty dang good, so it shouldn’t be too much of an issue unless you are literally pushing the sensor to its limits.

Exposure Triangle Photography Exercise

So, going back to the original question, how to move from auto mode to manual , the easiest way to hack this little thing is if you go out on a bright day—pick a really bright sunny day—and try using these settings:

ISO: 200

Shutter Speed: 1/200s

Aperture: f/6 – f/7.1

Now, go outside and take some photos. Now it’s time to dial in on that image.

Let’s say you take a picture with those values and the image is very, very bright. There are a couple of things you can do.

If you want to take an image and give it a little less brightness you can do three things:

  • Bump the ISO down to ISO 100. That’s going to make your camera less sensitive to light—it will basically cut your lighting conditions in half.
  • Take the Aperture value up to something like  f/11. You’re going to see that your image looks a bit darker if you take another shot.
  • You can increase your Shutter Speed, which will let in less light through the camera.

If  the image turns out  too dark, here’s what you can do:

  • Try ISO 400. You’ll get more light, but depending on how dark it is you may need to increase the value more.
  • You can also decrease the f-stop number. Say f/4, some lenses even go down to f/2.8. By doing so you’re allowing more light to come into the sensor.
  • You can take the Shutter Speed and decrease it by half, to 1/100s, that will let in more light.

It’s all about compensating for the amount of light in the scene. Some people may stick to Auto Mode and say that Auto is great, but when you get to do all these settings, you’re going to be able to experiment more with your scenes.

It will take practice, but once you understand the role that each feature plays in a photo’s exposure, you will quickly be able to determine the basic settings quickly enough, then after that, it’s just a bit of tweaking to get just the look you want.

If you want to learn more about the basics of photography we actually have a course on Photography for Beginners, where we talk about the exposure triangle in more detail. We guarantee it will help you migrate from auto mode to manual mode and increase the quality of your shots.

October 2020 RAW Edit Contest

The Winner for October 2020 is…

Roy Ibrahim 1
Roy Ibrahim


Bruce Russell 1
Bruce Russell


Sandi Roberts 1
Sandi Roberts


Honorable Mentions…

Alvin Herron 1
Alvin Herron


September 2020 RAW Edit Contest

The Winner for September 2020 is…

Jose Matutina 1
Jose Matutina


Odz Harris 1
Odz Harris


Bruce Russell 1
Bruce Russell


Honorable Mentions…

Matt Xeniox 1
Matt Xeniox


John Rogers 1
John Rogers


Al Hall 1
Al Hall


August 2020 RAW Edit Contest

The Winner for August 2020 is…

Ken Martin 1
Ken Martin


Alvin Herron 1
Alvin Herron

Pat Cortez 1
Pat Cortez

Honorable Mentions…


Bruce Russell 1
Bruce Russell


Al Hall 1
Al Hall


July 2020 RAW Edit Contest

The Winner for July 2020 is…

The Delusional Gallery 1
The Delusional Gallery


Alvin Herron 1
Alvin Herron


Pat Cortez 1
Pat Cortez

Honorable Mentions…


Bruce Russell 1
Bruce Russell


Ken Martin 1
Ken Martin


June 2020 RAW Edit Contest

The Winner for June 2020 is…

Jarrod Jarvis 1
Jarrod Jarvis


Pat Cortez 1
Pat Cortez


Alvin Herron 1
Alvin Herron

Honorable Mentions…

Mark Mcelwain 1
Mark Mcelwain


Kroozer Dunk 1
Kroozer Dunk


Bruce Russell 1
Bruce Russell


May 2020 Photo Contest Announcement!

The Winner for May 2020 is…

Bruce Russell 1
Bruce Russell


Jarrod Jarvis 1
Jarrod Jarvis


Sandi Roberts 1
Sandi Roberts

Honorable Mentions…


Alvin Herron 1
Alvin Herron


Eileen Crawford 1
Eileen Crawford


Rob Jemmett 1
Rob Jemmett


April 2020 Photo Contest Announcement!

The Winner for April 2020 is…

Matt Xeniox 1
Photo by Matt Xeniox


Sandi Roberts 1
Photo by Sandi Roberts


Ryan Lambert 1
Photo by Ryan Lambert


Honorable Mentions…

Ken Martin 1
Photo by Ken Martin


Bruce Russell 1
Photo by Bruce Russell


January 2020 Photo Contest Announcement!

 The Winner for January 2020 is…

Peter Luscombe 1
Photo by Peter Luscombe


Jessica Lerche 1
Photo by Jessica Lerche


Rodrigo Diaz 1
Photo by Rodrigo Diaz


Honorable Mentions…

Eileen Crawford 1
Photo by Eileen Crawford


Alvin Herron 1
Photo by Alvin Herron

A Message For Beginners

Hey everyone! This is Jordan from Sleeklens.com, welcome to another episode of the Sleeklens Photography Podcast. This one is going to be a little bit different from the ones that we’ve done in the past. This is all based on about 15 to 20 emails and messages that I’ve read on our various boards and comment sections about people, more or less photographers, struggling to learn the basics of photography, learning the basics of editing, getting fed up with not being able to understand certain things; and there’s been a few emails that came in about that, particularly where a lot of people are just fed up. They’re very frustrated because they learn a new technique, maybe watching a YouTube video or something like that, and they go out and try to produce something using that technique and they can’t figure out. It doesn’t come out the way that they thought it would, that was displayed on whatever they were learning, so they’re very frustrated.

So, obviously, I’m not able to help everyone with everyone specific situation what’s going on, but I do want to go over three things that happened in the beginning of my photography career, to show you how ridiculous and stupid you can be when it comes to trying to learn new things, especially some of the beginnings of when I had my first camera and I was trying to figure out certain settings and I found out that there was a setting, the turn of the aperture. I didn’t know what it was, but I thought it, though it did something that really didn’t do. That I thought I want to look at the photos like ‘oh wow, that actually worked’ and I’ll get into that in just second, but actually I’m going to share three of the mishaps, or three of the things that I’ve done – not necessarily wrong – but things that I’ve learned from starting my photography career.

This is just meant to help the beginners out there understand that everyone starts as a beginner. I don’t care if they’re the most famous photographer out there now; putting photography and you noted in this aspect. It’s photography but is not even photography as a specific situation, but you know any artist any, any person out there who started something they always were beginners in the very beginning. That’s what the moral meaning of it. They were beginners; the famous painters out there, they were beginners at some point they painted probably weird stick figures and now they can do photorealism.

It’s all kinds of fun stuff like that, that really gets people in into the mindset of hate. They should be doing more than they should be now, but will get into that just second so I want to go over three the things that happen in my photography career, that I looking back now, that was really, really ridiculous.

Experience #1

Okay so the first one is actually going to be the situation that is kinda mentioned and that is aperture. I had my first camera. It was a Sony 8200. So a very old entry-level DSLR camera and it was a great camera, actually, wish I had one right now decide I can have like a souvenir in a way, but it was really a great camera and I started to learn manual. I started to play with manual settings and figuring out what, you know, what certain things did.

I knew what ISO was sort of. I didn’t know necessarily had understood aperture, but I thought; shutter speed was sort of easy to understand. And so, going down the road I was actually traveling with my father and we were going on like a little photo trip together, and I remember this distinctly where I was riding in the passenger seat and I took my camera out in manual mode and I started playing with the settings. And so, I noticed that the settings I had; currently I was taking a picture in the sky was blown out. It was completely blown out, and I was like ‘how do you get a photo where you can get the sky not blown out’, and I was playing around with settings and it turned out what I did is I had a lower aperture number so always leave the scene was brighter for what the other settings that I had, and so was like ‘let me change this, this, this 00 number, zero Aperture number’ – whatever was – let me change is aperture number to a higher number to see what happened. So, I changed it to I think f/18 or /f22 – to one of the highest of ago on the lens – and when I took a photo I was like ‘whoa! there’s the sky, it’s not blown out anymore’. That’s awesome; so what I didn’t realize everything else was completely dark, but I exposed basically for the sky, changing my aperture darkening the whole scene.

And so, when I went out to take a couple of photos after that, I kept the settings the way it was. When I wanted to go take photos, I put the camera on top of my tripod and I took a photo, and everything else was completely, completely black; or the whole foreground is black, but the sky was what I wanted. So then, I’d figure out ‘okay, what does that all mean’, and I did never figured out from what I remember that trip. I still was very confused on that trip. Wondering why I couldn’t get one thing exposed right and the others exposed right.

So I end up learning, obviously, what that was, but that was kind of a funny little thing that now looking back was a kind of a learning curve I guess.

Experience #2

So, obviously you can tell that I was really stupid when it came to the learning the manual settings on my camera; but nouns can talk about another one that happened, and this one was, not necessarily a learning experience but it did make me think about my future purchases when looking at gear so this one was. I had had a cheap kit lens that came with my camera. It was actually my Canon T2i, which I bought after my Sony and I had the kit lens, the 18-55 kit lens, and it was a version 2 but still is a very cheap kit lens, and honestly those kit lenses is pretty decent when I was actually really, really nice images starting out using that, and I always preach to people who who are thinking about upgrading gear, get super comfortable with your kit gear first because that will that’ll get you learning many different things; and then once you get your nice gear, your nicer lenses and all, I can you get all kinds of fun gear you’re able to really appreciate that much more.

But so, I have my kit lens on my camera and I don’t, I don’t remember exactly what happened but, somehow, I think I either had a Manfrotto tripod and I think I twisted the plate on the bottom. It said for the lens to point forward; my mount plate was actually reversed. So, when I went to put on my tripod it fell forward, and my lens just smacks the floor. It broke my lens, and I was actually planning on going to take some photos of the wedding that I was quote-unquote hired to do and, I didn’t have a kit lens, a variable aperture or variable zoom kit lens – I think I just had a prime at that point. Hence, I had to figure out what I needed.

I went on eBay and ordered the cheapest 18-55 Canon lens, because of the time I didn’t really know exist exactly what gear I needed, so I went with the cheapest kit lens. I think it was like the very first 18-55 that they ever made, and that was a very, very bad decision because I looked at the cheapest price found lens got shipped to me and it was garbage. No matter what I could do. The lens, it just was not sharp; and think I did have to apply so much sharpening in Lightroom that it almost ruined the images just to get some sort of sharpness there. And I felt really bad about using that lens for the wedding that I had to go to, but that was really all I had on a setting to pay that much for the wedding so it really affects me that much, but so that was that. That was a fun little learning experience of even if you’re in a crunch time just to pay attention to the gear. Just because it’s the lowest price and in it, you can get it in time and all I can stuff doesn’t mean that you know obviously it’ll probably be one of the lenses. One of the pieces of gear that you keep for the longest time.

Experience #3

Alright, so this last scenario is kind of a funny one. I was actually hired when it comes to doing jobs that I tried to take in the very beginning; I was actually trying to take whatever job I can get to make a couple of bucks here and there using my photography skills. And I majorly quote-unquote say photography skills that I didn’t have a lot at that point. But it was hard to do; I guess would be cool called a knitting show knitting I got they would. They knit sweaters and all that kind of stuff. They hired me to do two days of work; and what that was basically walking around a convention and getting candid photos of people shopping at vendor booths and stuff like that.

That was the first day that was maybe about two hours or three hours of work, and then the next night, actually, was when they had this kind of like runway show – the kind of fashion show, showing off these cool knitted things. I never even knew this world existed but I told him I would be able to take the runway shots. And so, what I did was I showed up that night, and I knew that it was can be very dark in the room – that was given – and I knew that I


would probably need some sort of shallow depth of field because there’s a lot of people in the background and I just wanted to concentrate on the model.

So, I think the only lens that I brought was my 50 prime – my nifty-50 – so that obviously I wasn’t thinking, but it encountered a couple of things when I got to the place because the seat that I had was very close to the stage, and it was 50mm – that zoomed in a little bit, so I need to be farther back.

That was one issue, but also the other issue that I had was that I needed light. I need more light, and even though I was maybe shooting at f/1.8 because that’s the lowest that the nifty-50 could go I still needed more light; and plus I didn’t really want to shoot at the average f/1.8 because I knew that if I missed focus, the person was gonna be a focus very, very easily. So I used a flash; I used not pop-up flash, but I used the external Speedlight that I had, that I just put on my hot shoe, and I tried not knowing – again this is all beginner mistakes. I was trying to balance the flash off of maybe a 25-foot ceiling that was not white. I think it was like a gold – maybe a gray and gold color mix are something like that. If I remember correctly it wasn’t a pure white ceiling. So anytime I bounce the light off there, if it didn’t make it to the model when it bounced off the ceiling, it fell down to that to the stage. It was, it barely covered the person and it was also weird colors, all weird color cast.  So, I do make the decision of not using my flash at all; and that really, really hurt because I had to be spot on with my focus, and also I had to underexpose my images in my camera little bit to get a fast enough shutter speed.

And so, it was a lot of hoping and praying that I got some images right. When I got back the next day, I think I had maybe 200 images of these different people walking on the stage. Thankfully, that in use, I think the only used one image at both days of coverage that I had for first small little magazine part that was put in there. They did give me credit, which was nice, but they only use one image and it wasn’t any of the runway. So now I’m thinking of that was my fault, or if that was just because they didn’t want to use those for that purpose but; that was a very good learning experience of, you know, being prepared for any situation as best as possible. I obviously was not prepared for that. I did not have the right gear for that. I don’t have the right skills for that, and thankfully I was able to make a few bucks here and there to kind of get me going in that direction, but I still need a lot more training and learning to go when it came to all that.

Conclusion

So there you go. Those are some of its three different scenarios where that when I was beginning to learn photography. I had something weird, weird situations that I put myself in; thankfully they worked out okay but I wanted to share this with you for those beginners out there who are struggling to learn any kind of editing technique using your camera in certain ways, new gear, I mean I’m still learning flash photography. Now there’s a lot of different techniques that I’m learning, especially with new gear than trying to get in and play with and see how that works compared to old gear; and you know, there’s a lot of learning. I mean, even the masters out there I think are still learning. So that’s just a little, a little inspiration for you out there if you’re trying to get in there and learn as much you can.

Take your time; there’s a lot to learn, there’s a lot to understand. But once you get there, it’s almost like a click – here, that instant, a click in your mind and you’re really ready to go to again.

Thank you join me in this fun little podcast assuring these weird stories and kind of embarrassing myself. This is Jordan from Sleeklens, and see you next time!

March 2019 Photo Contest Announcement!

 The Winner for March 2019 is…

Shlomo Eshet - Sleeklens
Shlomo Eshet


Yer Out - Sleeklens
Yer Out


Regina Melo - Sleeklens
Regina Melo


Honorable Mentions…

Jessica Lerche - Sleeklens
Jessica Lerche


Dean Vinson - Sleeklens
Dean Vinson


Sebastien Guenette-Descoutieras - Sleeklens
Sebastien Guenette-Descoutieras


Your Questions Answered

Hey everyone! This is Jordan from Sleeklens.com. Welcome to the first episode of the Sleeklens Photography Podcast in 2019. It’s been over two months and it has been a pressure to get back because there’s now a lot of people that actually really enjoy hearing these tips when it comes to photography.

So, there’s going to be a lot of stuff coming this year in the podcast, there’s going to be a selection of different topics to talk about, and also, we’re going to bring back the RAW Edit Contest that we do in our Sleeklens Members Club page. If you’re not yet a member of the Sleeklens Members Club page, make sure you do that as you can download a lot of free resources, like RAW photos, edit however you want to, with Photoshop, Lightroom, etc. whatever you want to do, and then post it to our Members Club. At the end of the month, we’ll vote on who’s the winner. So that’s what’s coming up; we have a lot of cool RAW files for you guys to play with, and so I wanted to give an update on that one.

For this show, we’re covering 5 of the most common questions, the ones that I thought would be really valuable to a lot of the photographers out there.

Let’s start with the first question! This question from Wyatt is: “I see some videos on YouTube of people using custom Lightroom Presets on their phone. How do I use presets on my phone?”

So, this is a common question, especially with the later versions of Lightroom CC and Lightroom Classic CC. A lot of people actually think that you can take the Classic CC presets and use them with your smartphone, but basically, basically there are two – I’d say three – different versions of the Lightroom software now (even though they are not really classified as that), but there’s the Lightroom Classic CC – which is the one we all know and use – and there’s the Lightroom CC version, and then you have a Lightroom CC that’s more or less of a mobile app. Technically it’s still labelled the same but it’s a separate piece of software. So, kinda think of it this way: Lightroom CC version – not the Classic – that one kinda works hand-in-hand in a way with your iPhone/Android app.

If you were to import the presets into that app, into the Desktop app, the Lightroom CC, you can actually sync those files, those presets, over your phone. And it’ll be over there. It syncs through the CC Account, but once it’s in there, they’ll sync into your phone and you’ll see it in your presets menu in your phone. Please refer to the show’s notes so you can check a video walkthrough of that procedure, but basically yes, you just take the files in your Lightroom CC and you put them over to your mobile app. Much like if you were to put a photo, if you do a lot of editing, in Lightroom CC – not Classic CC – and you’ll see those photos through your phone, they sync back and forth.

So that’s how you put them in your phone, and there are a couple of caveats when it comes to that, as there are some presets that don’t have the same functionality in Lightroom CC than they do in Classic – some tools may be missing or something like that. So, there are going to be some small features that you won’t notice but there may be some features that won’t look correct when editing with your phone. Here at Sleeklens we’re working on the release of a selection of presets specifically designed for Lightroom CC Mobile, so please keep in touch for an upcoming release on that. Thank you, Wyatt, for that question!

The next question from Jesse is: “I want to start using flash in my photos. What would be the best way to start?”

There’s a lot of different ways to use flash in photos (laughs). I particularly do Real Estate Photography, so flash for me it’s going to be different from flash for a portrait photographer standpoint. For me, basically, the key is I’d stick to a manual flash. Don’t get a TTL flash or something like that, stick to a manual flash as you dial in the power, the camera is not trying to balance any sort of metering when analysing the scene, it’s not metering and trying to compensate for it.

Also, I’d start playing with either bouncing flash – putting a strobe or something like that, a flash unit – and bouncing flash off the ceiling, off the walls, see where the shadows fall, play around with that. And then also, get the flash off your camera as it’s a major thing, you can open a whole new world when it comes to flash photography with the flash unit off the camera. Get a pair of cheap triggers – I’ll put some that I like to use in the show’s notes as well. They are really cheap triggers but exactly what you need.

It’s going to open a whole new world for either landscape, portrait photography, or whatever. I’d first of all play with the manual flash, and you can actually get a cheapo flash and set it to slave mode (as they have a master and slave mode). When you have slave mode flash what’s doing it’s basically looking for another flash popping in the room or something like that. So, you can actually work if you have a camera that comes with a pop-up flash unit. You can take that flash and take a picture of something, a portrait of somebody, and that flash is going to be a fill flash and fill the areas of the face, but the slave flash, the cheapo flash, it will see that flash and go off as well. You can put that flash, maybe, behind the person and make like a cool spotlight or headlight. There’s a lot to play with, and if you don’t know exactly what I’m talking about, once you get a flash and you start seeing the modes, you see the power – you can work like with 1/64 power or something like that – there are a lot of differences you can notice.

Don’t get a TTL flash, get a manual flash and start playing around with bouncing stuff all over the place. You’re not going to hurt anything, and see what kind of shadows, what kind of dramatic lighting you can create. Thank you, Jesse, for that question!

Another question here from the Todd Brothers: “Here’s a fun question for some of the listeners of your podcast. If you only had 3 accessories that you can put in your camera bag to take to any shoot, what it would be?”

Um, this one is kinda a tough one for me! Whether you are… it kinda depends on the photography you like to do. I know the kind of accessories I not like but most likely need in my camera bag, but they may differ for portrait photography or landscape photography, or food photography… whatever.

So, I’m going to say that the accessories I like in my camera bag, because they are definitely needed and I just thought about two of them basically in this question. Number 1 is a flash, a Speedlight. Definitely need a Speedlight in my camera bag. Obviously, I like bigger flash units in some jobs but a Speedlight is a definite must. Flash triggers again, I just talked about them in the previous question. Big, big thing to get the flash off the camera, so you can play with it, do some light panning.

Next, I’d say the accessory I’d really have in my camera bag is a hotshoe microphone. And I know it sounds kinda weird because I talk about photography and I’m putting a microphone on my camera bag, but basically what I want to do is to be ready for any situation that might pop up. And again, this is the stuff I would like on my camera bag – and actually have on my camera bag. A nice little hotshoe microphone, cheapo, entry-level one. The reason I have it in there is if I’m going to a job in my field of photography, I might need to do video. It’s not going to be ideal as I’m not using a gimbal and all that kind of stuff, but I’ll put on a tripod and do static video, and I’d need to have better audio. So, the audio would be ideal to do the interview or something like that, and I’d really need that external mic. I always keep that mic on my camera bag; if I ever have to use it in the office or anything like that I make sure to put it back on my camera bag, that way I can say “Hey, can I shoot a quick video, maybe a testimonial or something like that. Can I have that videoclip? Do you mind?” I would have way better audio than if I stick to the on-camera audio.

That’s the three items I’d select but, again, I’m different than other photographers so they might have other things.

Okay, so the next question is from Vanessa: “I know you use hashtags in Instagram to promote posts and get them better seen, but what is the best way to come up with good hashtags?”

This is kind like a two-fold question. When it comes to doing hashtags on Instagram – I mean, that’s the main way for people to see your images, unless they follow you and see them – you can use up to 30 hashtags to promote your posts. So, the best way I’ve found to do hashtags is – if you’re not doing many hashtags and you don’t know what to put on there – basically just look at your images and see what’s there.

You can use a hashtag generator, and that would give you the right spot. The one I like to use is a smartphone app and it’s called LEETAGS. Basically, you type in what your photos are about on top and it will search for the most popular hashtags for that. So, if I were to type “beach photography” then it will give me relevant hashtags for beach photography. And you can just click ‘copy’ and then paste it to your post and you’re good to go.

You don’t want to do that every time as the Instagram algorithm likes to see diversity, so you want to start developing your own hashtags. See those hashtags, see the ones that are relevant to your photos, that go with that, and start developing your own list. For example, if you do portrait photography you can go with some from the hashtag generator and mix it with some of your own making.

I have a note on my iPhone’s Notes app that’s called ‘Instagram Hashtags’. And so, every time I develop a new hashtag list, I type it in there, so when I go to post a photo on Instagram I can go into that note and copy those hashtags into Instagram. Keep it fresh, do not use the same hashtags over and over as Instagram doesn’t like that.

So, the last question comes from Ross: “Recently I’ve been getting more into Photoshop, and I want to know what would be the best way to start, what tools do I need to learn?”

Um… if you’re just getting in there, you are going to know that once you open Photoshop is a whole new world. There’s a lot of different stuff, a lot of different tools, so you can do anything to any photo. But one of the tools that a lot of people use and not a lot of people talk about because it’s so common is Layer Masks. You can do almost anything, there’s a lot of stuff you can do just by using Layer Masks. And that’s what a lot of people do.

If you want to remove something from an image, or composite an image together you can use Layer Masks to do that. So, what I mean by Layer Masks is like picture two pieces of paper, and they are on top of each other. One piece of paper is all black, the bottom one, and the other is all white. If you want to reveal the black, instead of just erasing the paper you’re ‘masking’ or hiding the paper via the Layer Mask. You’re painting away from the white piece that covers the black piece underneath. The benefit of that is that if you work with the eraser tool and erase those parts you are not going to be able to get them back. It’s gone, it’s erased and out of there. If you missed some parts or made a mistake, with the Layer Mask you just paint it back in.

You’re basically hiding pieces of paper, and that’s how compositing is built upon. It’s compositing all those things together and hiding, and revealing certain things. So, Layer Mask is a big, big thing to kinda wrap your head around and understand.

The next thing would be to know how to remove unwanted elements from your photos, like people, and the tools for that would be Clone Stamp and Healing Brush. Different ways of doing that. That can give you a basic background and then you can look at all the other tools in Photoshop like Liquify, Lens Correction, different sorts of filters. Thank you, Ross, for this question!

All right, that’s it for this first podcast of 2019. It’s been a while but please look on the next week or so as we’ll be doing the RAW Editing Contest again via the Facebook Members Club page.

November Contest and Giveaway Winner!

 The Winner for November 2018 is…


Paulo Paim - Sleeklens
Paulo Paim


Duncan Wildman - Sleeklens
Duncan Wildman


Josh Osborne- Sleeklens
Josh Osborne


Honorable Mentions…

Paul Reed - Sleeklens
Paul Reed


Nathan Fleming- Sleeklens
Nathan Fleming


Mike Murphy - Sleeklens
Mike Murphy


Jessica Lerche - Sleeklens
Jessica Lerche


Drew Bryden - Sleeklens
Drew Bryden


October 2018 Photo Contest Announcement!

 HUGE BenQ SW320 4K Monitor GIVEAWAY

BenQSW320-Giveaway-sleeklens


Just in time for the holiday season, we are giving away a BenQ 32″ 4K Photographer Monitor (SW320)! This is


almost a $1,400 value! For a chance to enter, you must do the following:

1. Follow @sleeklens on Instagram

2. Repost our giveaway image on Instagram and use the hashtag #sleeklensbenq

3. Finally, you must tag two (2) friends in the Instagram repost.

⚡️The giveaway will end on Friday, November 30th and the winner will be announced on December 3rd!

? The Winner will be chosen completely at random.

GOOD LUCK!!


The Winner for October 2018 is…

Jessica Lerche - Sleeklens
Jessica Lerche


Paulo Paim - Sleeklens
Paulo Paim


Anya Fisekovic - Sleeklens
Anya Fisekovic


Honorable Mentions…

Carrie Studstrup - Sleeklens
Carrie Studstrup


Ramma Bentar - Sleeklens
Ramma Bentar


Kamal Borana - Sleeklens
Kamal Borana


My Cung - Sleeklens
My Cung


September 2018 Photo Contest Announcement!

The Winner for September 2018 is…

Anya Fisekovic - Sleeklens
Anya Fisekovic


2nd Place Winner…

Mamen Pachon - Sleeklens
Mamen Pachon

3rd Place Winner…

Dima Fadeev - Sleeklens
Dima Fadeev

Honorable Mentions…

Hollie Crocker - Sleeklens
Hollie Crocker


Duncan Wildman - Sleeklens
Duncan Wildman


José Sánchez - Sleeklens
José Sánchez


Drew Bryden - Sleeklens
Drew Bryden


Kamal Borana - Sleeklens
Kamal Borana


Back to Basics: Camera Lenses

Hey everyone! This is Jordan from Sleeklens.com and welcome to this week’s episode of the Sleeklens Photography Podcast and before we move on with the topic of this podcast what I was doing earlier before I recorded, was actually looking through a couple of emails and a couple of stats about the podcast. And one thing that really came through was the “Back to Basics” episode that I recorded a few weeks ago, where basically I spoke about the Exposure Triangle. It seemed that episode really helped a lot of people judging by the emails that came in, as well as the sheer numbers of views that episode had as well as shares. I want to record another “Back to Basics” episode, and this one would be one of the last ones; but I want to cover that I have talked about recently, which is about lenses. Once again, this episode is meant for all the beginners out there that are just getting into photography and just learning about cameras, about the lenses, potentially the lenses they want to purchase.

So, I’m going to cover some of the basic lenses and the basics when it comes to lenses. We’re going to talk about that, and do a great overview of when it comes to the different lenses that are out there.

In this episode, I’m going to cover four different types of lenses: a kit lens, which is sometimes called a standard lens, a wide-angle lens, a telephoto lens, and also a prime lens. Let’s talk about the physical stuff before we talk about the actual lens and what do they mean.

Numbers and other important data we can find

The first thing we are going to talk about is the numbers that are written on the lens itself. So if you go and pick up any lens what you can see is that the front element, the main glass that’s in front of the lens, you are going to see numbers that are written in the inside bezel of that lens. And one of the things that you are going to see is a ratio number, which is kinda like 1:2.8 or 1:3.5-5.6; you are going to see some number like that which is the ratio. What that number means is that the maximum aperture that’s found on the lens. This relates to the last “Back to Basics” episode where we talked about the Aperture – the widest opening, the open


ing and closing of the blades that are in the camera lens to allow more or less light. This is basically going to give you the maximum aperture of the lens. So, if you have a ratio in front of your camera or your lens that says 1/2.8, then the lowest your camera lens can go in what relates to aperture is f2.8. You may see a couple of numbers like that. You can see 2.8-4 or 3.5-5.6, something like that. If you see a number, then a dash, and another number, that’s basically giving you a value, so that’s still going to be the maximum aperture value, but you are going to have what’s called a ‘variable aperture lens’, which means that number can change and we will talk about that later. Essentially, what it means is that as you open, zoom into subjects or something like that, your aperture has to change as your lens only can go so far open basically. We will go in-depth about that later but I wanted to give you a basic insight of the numbers that show up in the camera lens.

Other than that, you are going to see some numbers that are linked to the zoom range. Any kind of lens that zooms-in is considered a ‘zoom lens’; but we are going to see, obviously, the focal length, which would be the actual lens that you bought. Say you have an 18-55, 18mm is the widest you can go, whereas 55mm is the most ‘telephoto’ value you can get out of this lens.

There’s also one other number that a lot of people actually miss, and this is basically for those who want to put filters in front of your lens. So if you look in front of your lens you are going to see the ‘phi’ symbol and a number next to it. That number basically means the diameter of the front of your lens, which is the diameter you need to buy if you are aiming to get a lens filter screwed on the front of your lens. So you may see values like 49, 52, 58 or something like that. So, with that value, you can go to Amazon and search for filters that have the diameter of your lens. It can obviously be any number, but once again what that number defines is the front diameter of your camera lens.

Some lenses have letters like VR or VS, which stand for ‘Vibration Reduction’ and ‘Vibration Stabilization’ respectively. That’s going to be next to what looks like a little switch that’s on the side of your camera lens, and that can help with camera shake, especially if you are doing longer shutter speeds, longer hand-held shutter speeds. If you are working with a tripod it’s probably beneficial to turn that off, but if you are doing a lot of handheld photography that can help you with vibration reduction, to minimize it. Then you are also going to see the Manual Focus or Auto Focus switch; so it’s kinda good to know all the basics around your camera lens.

The Different Types of Lenses


lens-basics


Kit Lenses

Now let’s roll into the different types of lenses that we can go over. And that’s going to be by first checking the ‘Kit Lens’ or ‘Standard Lens’. So, when I’m talking about a kit lens I’m referring to a lens that comes with your camera, in a bundle. If you buy your camera as body-only you obviously won’t get that lens, but if you buy your camera as a bundle you will get a Kit Lens. These lenses can come very differently depending on the camera maker, model, what type of camera you are buying – if it is crop factor or full-frame – but in general if you buy a crop sensor camera you are probably going to get a kit lens that’s most likely an 18-55mm – which is the standard. Obviously, it can vary depending on which bundle you get, but for most is an 18-55mm. For full-frame cameras it’s going to be a 24-105mm, that’s because a full-frame camera has a different aspect-ratio when it comes to lenses, but that’s really not what I’m going to talk about in this episode.

Also with kit lenses, you are going to find that the built-quality is probably not the best. That doesn’t mean that you cannot take good photos out of a kit lens, but what I mean is that I wouldn’t take it to a rainstorm or something similar as it’s not going to be weather-sealed or whatsoever. The glass is not going to be the best, probably not going to give you the sharpest image but again, you can still get away with it. A lot of kit lenses have a good number of photos that are proof of their quality. You can work without problem with a kit lens, especially if you are just starting out; the kit lens is going to give you what you need to really understand your camera.

You are also going to find that with a kit lens most of them are variable aperture lens, so let’s talk about the variable aspect. Basically what it means is that your aperture is going to change depending on whether you zoom-in or zoom-out on the lens that you have. So, let’s take the 18-55 for example. If you have an 18-55 and you zoom out to 18mm that little number that’s in front of your camera lens that we talked about, let’s say it was 3.5, you have a 3.5-5.6. If you zoom out all the way you will see that your aperture will be 3.5, that’s the lowest it can go.

If you slowly zoom-in to 55mm, you are going to see that your aperture is going to change. It’s going to change without you changing it as your camera is going to change it because when you zoom in, the lowest aperture you can have is 5.6. That doesn’t sound like a big deal but especially if you are shooting in low-light situations, and you really need some light to come in, going from 3.5 to 5.6 is a major jump, and can really cut out a lot of your light. So you have to bounce it out to shutter speed, change ISO values or something like that. It can be really beneficial if you have a lens that’s not a variable aperture one, but again, starting out you probably won’t notice a whole lot, but it is something to keep in mind.

Telephoto Lenses

So now let’s talk about the telephoto lenses or the zoom-lenses. These lenses have typically a high focal length, they typically zoom-in to ranges like 100mm to 800mm, and you can even go beyond! (laughs). And these are lenses typically used for wildlife, sports, portraits. Portrait photographers actually use lenses like 70-100, you can really get amazing portraits with a 200 lens if you zoom in all the way to 200mm and the background will have this beautiful bokeh effect, even if it is a variable aperture lens, the focal length is so long that you are basically going to get a really blurred up background.

Documentary photography and street photography are also good topics for these lenses, especially street photography – though the lenses can be somewhat bulky – you can actually get a lot out of it as you can zoom pretty far away and it will compress the background and all that kind of stuff. You will be able to get people’s faces a bit more than if you work with a wide-angle lens.

So one more thing about telephoto lenses that I mentioned before is don’t be fooled by something that says it’s a telephoto lens then it’s going to do a fantastic job for topics like sports photography. Just because it’s a telephoto lens you really have to look at the focal length and, again, any lens can be categorized as a zoom-lens as there is a zoom feature in the lens. An 18-55 can be considered a zoom lens, but when you talk about a telephoto lens you need to think of those lenses that work with values over 100mm, with long focal lengths that really allow you to get close to the subject.

Wide Angle Lenses

So now let’s talk about wide angle lenses. Wide angle lenses can vary on what focal lengths go, and I think I have a wide angle lens glued on the front of my camera the majority of the time. Wide angle lenses are really good for those who shoot landscape, real estate, etc. They allow you to get a ‘wide open’ view of something. So some different ranges for wide angle lenses would be for crop sensor camera is 10-20mm or 10-18mm, something around those ranges. For a full-frame camera you will get something like 16-25mm or 17-40mm, maybe even below that, but usually, that’s the kind of range you stick around.

Again, those are zoom lenses as they technically zoom but not a lot of people consider them as a zoom lens. You can zoom in to get some details but if you aim for larger zoom values what you need is a telephoto lens.

Real Estate is one popular reason to get a wide angle lens. One thing you need to consider when you get a wide angle lens is the corners of your photos. When you have a wide angle lens it’s so wide open that the corners can be very blurry, not sharp or distorted in some ways – that depends on what lens you have. You need to check out the quality of the glass, so don’t think that just because you can find a wide angle lens on Amazon for just $50 you can get a great wide angle lens. Most likely it’s not.

It’s a kind of lens worth to have in your lens kit.

Prime Lenses

The last thing we are going to talk about is a prime lens. A prime lens is probably one of my favorite lens to use, even though I don’t use it as often. Nowadays the reason why I would use a prime lens is if I am doing a portrait of somebody and I really want a blurry, blurry background or if I am shooting video, as it makes your videos look amazing.

So basically a prime lens is a lens that has one focal length. You are not going to see something like 18-55 or similar, but you are going to see a number, let’s say like 50. That means it has no zoom capability, the way you get closer to your subject is by moving your feet towards your subject.

One benefit of a prime lens that not a lot of people think about is that typically prime lenses are super super sharp. The main reason for that is the amount of glass your image basically has to pass through. So if you have a telephoto lens or a kit lens, the amount of glass the image has to pass through can really soften your image. The 50mm prime lens can do a great job by capturing a really sharp image, but obviously, you have to be on focus as well. If you have everything perfectly on focus, then your lenses are going to be super super sharp, which is really great.

Usually prime lenses are found with very wide apertures so one of the most popular ones for beginners that don’t want to spend a lot of money on a prime lens is the 50mm f/1.8, that means the widest you can go in your aperture value is 1.8, and that’s a super shallow depth of field. So if you focus on your subject your background is going to be really milky, significantly blurred out, and that’s going to look really great. It’s a popular option for photographers, Canon has it, Nikon has it, Sony has something similar to that, I’m not sure if it’s exactly a 1.8.

Prime lenses are really great for those who want to get on a different type of lens but don’t want to spend a lot of money, don’t care much about the built quality. For the Canon version, to which I can talk about, it’s one of those lenses that you don’t send for repair. If the glass breaks, if the lens doesn’t focus properly you basically ditch it and get a new one as they are pretty cheap. They make really great great photos if you take care of the lens.

So, that’s a quick round of the kit lenses, the telephoto lenses, the wide angle lenses, and the prime lenses, and what you can use them for. Mainly the prime lenses will be used for portraits, but they can be used to walk around – that depends on what you like to shoot.

So if you guys enjoyed that and you are getting in your camera but not sure exactly what to do again make sure you head up to Sleeklens.com and go to the courses section. You will see a course that is the Complete Course to Beginner Photography and that’s got about 30 videos showing you the basics of all you need to know about lenses, camera basics that we have talked about, photography accessories, a little bit of flash, editing, real-world examples for: real estate, landscape, portrait, food, travel… all kind of stuff in that course. If you want to check it don’t forget to use the coupon SLEEKLENSPODCAST, and that will get you a 10% off anything on your cart.

Thank you guys for joining me on this weekly podcast! It’s really fun to help you all with the photography struggles you may have, and I hope this episode can help you to understand what camera lenses are about. See you next week!

August 2018 Photo Contest Announcement!

The Winner for August 2018 is…

Dean Vinson - Sleeklens
Dean Vinson

2nd Place Winner…

Matt Xeniox - Sleeklens
Matt Xeniox

3rd Place Winner…

Luis Maia - Sleeklens
Luis Maia

Honorable Mentions…

Akash Mazumdar - Sleeklens
Akash Mazumdar
Pat Cortez - Sleeklens
Pat Cortez
Jessica Lerche - Sleeklens
Jessica Lerche
Duncan Wildman - Sleeklens
Duncan Wildman
Bridgett Magee - Sleeklens
Bridgett Magee


Photography Questions Part 3

Hey ev


eryone! This is Jordan from Sleeklens.com, welcome to this week’s episode of the Sleeklens Photography Podcast. This one is going to be all about you guys. So I have five questions that came in over the past couple weeks that are pretty important questions. I feel there’s a lot more that I’ll eventually get to, but I wanted to go and get one of these photography questions podcasts out there because I haven’t done one of these in a while.

So, let’s start helping you guys out, these are interesting questions that you guys have submitted. Before answering any of these questions: If you have any questions that you might have that you want featured on the podcasts going to email them to [email protected], and I’ll get your email and I’ll make sure that it hits the podcast whenever we record. Alright, without any further delay I’m going to into the first question!

Question #1 – Do you have any tips when it comes to Milky Way Photography?

The first question is from Tom Dalton. Tom wrote “I have been wanting to start taking Milky Way photography. Do you have any tips?” Yeah when it comes to Milky Way photography there’s one misconception out there that a lot of people seem to have, and that is a lot of these Milky Way photos that have these really beautiful Milky Way in the background, and these really awesomely lit foreground of foreign elements – a lot of those are actually composites. A lot of those are not all in one image.

Surely you might have some folks that are better prepared to go out there and have these really high-power flashlights, LED flashlights to paint the foreground and spend hours doing that. Obviously, a good technique to use, but whenever you see these really cool Milky Way images, they seem to have these really bright foregrounds, and usually those are composited. And so, you may take a composite; you might take a photo of the foreground there, and you might go ahead and light up the foreground with the flash light, which is you know, what you want to do to make sure your images completely expose properly, but then also refocus your camera without moving it and focus it basically to infinity. The lens to infinity, if you’re not sure about what I’m talking about, I’ll try to talk about that in just second. When you focus into infinity, basically you’re focusing on the Milky Way and then take another shot of those two, and you kinda put them together in Photoshop.

The reason you kind of want to do that is because, let’s say for a lot of these Milky Way shots you really want a very wide open aperture – a very, very low aperture number, we talked about last podcasts around 2.8 or so – and you really need a wide-angle lens for those to try to capture as much light as possible. So, if you were to focus on something in your foreground it at an aperture of 2.8 you are going to have a very, very, very sharp foreground, but whatever’s in the background is going be fairly blown out and out of focus. That’s when a lot of this focus stacking comes into play. That’s why you would need to refocus your image when you want to focus on the Milky Way.

So, some really quick tips would be to make sure you have some sort of lighting source that you can kind of light up the foreground; and also, if you’re not familiar with Photoshop, definitely start playing with the compositing. The compositing tools in Photoshop – layer mask, stuff like that – painting in different aspects of a photo that’s one definite thing that I would definitely start playing with. If you’re experienced in Photoshop this should be fairly easy, but the spores like settings don’t really just going out there and playing with the settings, playing with your shutter speed, making sure your ISO was fairly low, you probably can have somewhere upwards of 1600 or something around there which will might give you a little bit of noise but, you know playing with the settings there; stripping with the longer shutter speeds that may be up to 30 seconds or so, and maybe play with a minute – and if you get to a minute you might see that you catch the Earth spinning, and you start seeing your stars have little trails on, so you might need to lower your shutter speeds and get tack-sharp star.

Start playing with the settings. I would suggest starting playing but basically have some form of lighting source. A sturdy tripod and definitely start learning Photoshop.

Thank you, Tom, for that question, I hope the answers give some starting place when it comes to getting Milky Way photos.


July 2018 Photo Contest Announcement!


The Winner for July 2018 is…


July photography contest
Akash Mazumdar

2nd Place Winner…

July photography contest
Drew Bryden

3rd Place Winner…

July photography contest
Duncan Wildman

Honorable Mentions…

July photography contest
Pat Cortez


July photography contest
Ertan Zeki


July photography contest
Melia Milhorat


July photography contest
Jessica Lerche

Making Time For Your Photography


Hey eve


ryone! This is Jordan from Sleeklens.com and welcome to this week’s episode of the Sleeklens Photography Podcast. This one is going to be in response to about three or four emails t


hat I rec


eived o


ver the


past we


ek, all a


bout one specific topic, and that is really been talking about how to get more time out of your photography. How to make more time to get out there and take photos; how to make more time to actually develop your photography. So, these are to be tips a little simple, simple tips in order to get the most out of your photography, and really make the most of it when you do have a chance to actually go and take photos.

So, for those of you who have you know that the normal full-time job, a 9 to 5 Monday through Friday grind that everybody has, you know exactly when talking about and what these emails are really about is, basically, just talking about how someone can work a full-time job and – you know sitting at a desk all day or something like that – and still have time to go out and grab cool photos. Whether it’s after work, whether before work, whether it’s at the lunch break or on the weekends, and still make time for family, all that kind of fun stuff. You gotta have some things put in perspective when trying to make time for your photography. So, I got about seven tips. Here are some things that I kinda thought about when I’m trying to make time for my photography, in between the jobs that I have, still try to do my own personal photography stuff.

#1 – Define Your Vision

I was conservative number one, it’s a very simple one, and this is kind of a very simple one when it comes to just goals in general; and that is actually write down your goals for your photography and display them. So, what was going trying to accomplish here with this particular step is, look at what kind of style photography. What kind of things that you want to accomplish in your photography, and actually write them down so that you know that you know, if you have a free couple of hours, these are the things that you need to work on.

It is really important to display them, because if you don’t display them and you can keep them tucked in the notepad that’s in your desk or something other not easily accessible, and you might find yourself doing something else when you could be working on those specific goals that you really want to take care of; and so I actually do this. I have like a little shot list or concept list that I actually have on my iPad, so I’m actually kinda breaking my own rules: I should be displaying this somewhere, somewhere where it’s easily accessible, but I do write down the kind of goals that I have when I want to photograph something. Whether it’s just places I want to fix photos of, certain styles of shoots that I want to do, genres of photography, something I want to try out new… All this kind of fun stuff I have that actually written down, and so I know that if I have you know couple hours or a free day, or something like that, I can run out and try to start working on this.

I’m not going to say I’m going to complete it in that particular day, or the timeframe that I have, but I know them and work towards completing that because at some point I wrote this down. I really, really wanted to do something along those lines. So, for example, I really want to, I would. I would love really, as a Real Estate photographer, I would really love to find a really nice Airbnb, or a nice rental home that I can rent for maybe two nights, or two days and nights, and really going to the get the home and spend a whole bunch of time in that home photographing light painting – doing all this kind of stuff – and use that for portfolio. So, that would be kind of something that I really want to accomplish. Obviously you can’t do that in a couple of hours, but in the free time period that ever comes up, that would be something that I want to look at to look to see if I do have the timeframe to do that.

#2 – Take your camera with you everywhere you go

Now, this applies to a lot of people. Actually, I did this when I had one of my full-time jobs, where I would take my camera and actually leave it in one of those small shoulder bags in my trunk. And I did that for a week, and then I kinda got freaked out I didn’t want to leave in my car all the time so I took it out; but basically what I’m trying to accomplish here is you know if you’re driving down the road and, and maybe you’re driving back home and some beautiful sunset outside… you don’t have your camera with you. So, you would love just to pull over, get a couple of quick snaps of that sunrise or sunset, but you don’t have a camera with you. So you’re kinda kicking yourself saying: “oh gosh, I wish I had my camera to take this photo”.

So, everywhere you go everywhere, every place you go for going out for the weekend with family or something, take your camera with you. Depending on what kind of style photography you do, maybe you are going to a nice restaurant and you can do food photography. Maybe you could take your camera in there and grab a couple of snaps, and try to get some really cool photos. Stuff like that; stuff that you know you would miss out on it if you didn’t have your camera. So stuff like that.

Also, if you do have the ability to shoot really steady shots on like a smartphone or something, obviously you could do that, but it won’t be the same quality as your regular camera but, you can actually use that as a way of getting different shots; maybe kinda documenting “hey I got this shot here my phone”. I have it there, I know I can go back get with my regular camera so, it could be kind of like a documentary thing, a bookmark and a way just saying “I want to go back and get that”, and this is what it might look like. So always take your camera with you everywhere.

#3 – Start any type of photography project

The next tip here is actually starting any type of photography project; any type of personal photography project that deals with nothing with work, nothing with the photography job that you might have, nothing with people asking you to do “hey, can you take photos” of their family or something like that. Just something that is all your own, that you called the decisions, you call the shots, and you do it exactly the way that you want to.

Starting any type of photography project like that is so beneficial for almost every photographer out there; there’s actually a photographer that I can’t remember the name of right hand, I think it’s something Hernandez, but he has a YouTube channel and what he does is making these really cool scenes, with using like a miniature model.

So, he might put together a car, like a regular model car, might put a car together; paint really nice, rusted up a little bit. Develop a scene with like sand, and different kinds of stuff until you smoking. You know, these are not things that he can do in, you know it, one-hour period. These take weeks and months to develop and sketch, and get the shots right, and that’s just shooting it; not to mention actually compiling all those together in Photoshop and putting everything together and stylize it. It takes a very, very long time.

So, that is, that would be considered a personal photography project where he can do anything that he wants to do, and you know, he knows exactly how it’s well to be he has no time limit of what he wants to finish this. He just knows that he wants to get this done, and it’s just something that he can work on in pieces. If he needs to, take a free day, as he has been all day doing all this stuff; and it’s just one of those cool projects that you know you’re not getting complete in a week. You actually have to keep developing and working on it, and that just make those photos that more meaningful and that more special. So, I really think starting any type of photography project, no matter what it is – whether the short-term or a long term one – doesn’t matter. Just start any type of photography project, and that’ll come get your mind always thinking about that project, about what you can do to develop it or try to finish it up as quickly as you want to – it just doesn’t matter. You’ll always gonna be thinking about that project, you’ll always have something to work on when you do have a free moment.

#4 – Combine your photography with your daily life

Alright, so the next tip is going to be to combine your photography with your daily life. Now, this it will be easier for some people, but for example – I worked as a graphic designer for an apartment complex for a few years and I really wanted to kinda to bring my photography into that job; so, I would ask you ask my supervisor: “Hey, I know you guys want shots of the apartments that are local to us. I am really good at photography. I can go and take those photos for you, and we can use them, that way we won’t have to hire somebody else – the department doesn’t have to hire somebody else to come in and do it. Obviously, a work for you guys, so you guys can have the photos for free.” But that gave me the opportunity to use my photography to go out there and take photos of something that I really, really wanted to take photos of. It kinda gave me a dual purpose. I was able to use those for the job, but also use those for my portfolio. And so, it was kind of win-win there, so that’s kind of a small way of working it in.

You can also do, again is this is kind of like combining the start any type of photography project and putting in your daily life, is kinda combining those two tips, but you can actually start a project like a 365-project work: every day you’re taking a photo, so you’re kind of always carrying your camera with you anyway, and you are working in your daily life. You can actually make a series of your day – like a photo series of your day – and working it into your regular job, your daily life, your weekends – all that kind of stuff – to just, working it in. See a spot; fill that spot with your photography. See if you can develop that into something that could be a career later on.

#5 – Appreciate time management

This one, this next tip is going to be one that I found myself doing a lot way back when. And I can still do it now, but it’s getting rid of all the time-sucks that you have. Anything that just sucks up all of your time.

So, for example, I like to watch YouTube videos that are, you know, photography based, not to mention that they’re entertaining, but they also kind of put little thoughts in my mind; so, if going out to do something I had, I have seen it somewhere. I can probably start developing it, and I found that I will watch all these videos and just get these subliminal thoughts in my head, and I will get to the job and kinda remember what it was but I won’t remember what it was. And I did. I was basically watching how to do the specific technique, but I wasn’t actually putting it into practice. It was like I was just watching it and saying ‘oh yeah, that’s easy. I can do that’ and never actually practising it. So, it’s kind of a two-part tip it’s getting rid of all the time-sucks that you have, but also kind of make sure you practice and not just think you can absorb it all by watching videos or something like that.

So, I’m not talking about the time-sucks like social media or anything like that because that’s kind of a given, but you know, kind of, kind of getting rid of all the things that you might catch yourself doing, that where you could be doing your photography. You could be doing something else; you could be doing something productive, but you’re just sitting there for me. In my case, staring at a screen thinking ‘yeah that’s cool, I can do that’ but then I get to the job, and I’m like ‘I have no idea what I watched, drawing a blank here’. It’s kind of more, more practising, less watching.

#6 – Start saying ‘NO’

So, the next tip is going to be ‘start saying no’. If you’re, maybe you’re a single guy out there, and you really want to go take photos over the weekend after you get off work; you want to go out and kinda go to the mountains and take some cool photos but your friends really want to go out to the bars or something like that, start saying no. Start making sure that you keep track of the time that you actually have to be productive with your photography, and not just again that kind of a time-suck to kinda get sucked back into doing things that, are fun obviously, but you kinda don’t want to do them. You actually had other plans. So, it’s just a quick one. Start saying no, start prioritizing what’s more important.

Do you want to actually develop your photography? Do you want to continue to work on that, stuff something that really brings you joy or just kinda just do the norm and all that stuff? Obviously, you can hang out with friends. Perfect, everything everybody does that, but getting rid of the time-sucks is the big, big deal when it comes to that.

#7 – Remember the process

This last tip is going to be kinda one we gotta think about it a little bit, and that is thinking about where you are now in your photography and compare to where you started. So, for those of you who maybe you are just starting out, this can be a little bit difficult for you, but for those of you actually been doing photography for a little bit and, and learned to develop your style. Develop your skills. Obviously, everybody still is slowly learning. We’re all learning off each other, we’re all in developing new strategies and, it’s just, it’s a really good community. But thinking about where you are now compared to where you were.

This could be kinda pulling out some of your old photos and seeing how crappy they were, how horrible they are compared to the photos that you have now. It could be something where you liked a style of photography a long time ago, and now you’re doing something completely different – that you enjoy even more.

So, it could be just something like that. Think about where you are now compared to where you started, and that kinda gives you that small, small spark. Small inspirational spark that just blows up in your brain and you’re like ‘yeah, I want to keep growing, keep going and just making the most of what I can do with my photography because I know if I keep going at this rate I’m going to get way, way better in the next couple years’. It’s just something simple like that. Something easy like that; it’s just a great way to get that inspiration back.

Drone Video Tips

Hey everyone! Welcome to the Sleeklens Podcast. Welcome back to the show, this week is going to be fun because this episode is going to be for all of those drone pilots out there. Whether you are having fun for a while, doing a lot of commercial work, or if you just got a drone and you started playing with it, I wanna cover some basic drone video tips that will really do wonders for making better video with your drone.

Now, as I start going with some of these tips you are going to realize that none of this is crazy – you know, hidden secrets of Hollywood – about getting video. These are basic movements when it comes to drones, or basic tips when it comes to your drone. And you’re going to find out that doing basic stuff with your drone – whether you have a small DJI Mavic Air or something like that, or the big boy, the Inspire – you’re going to find that a lot of these tips, these different kind of manoeuvres or settings that you can put on your drone are very simple but they can make some of the best movements, some of the best quality videos when it comes to drones. So, let’s get over the first tip!

Tip #1 – Going Slow

The first one is very, very simple but it’s something that a lot of people don’t do because it’s not fun. The first tip is ‘Going Slow’. If you’re getting very cool video of out of your drone and you feel like you wanna fly faster just because you can – you know, photography in the air, you’re not going to hit anything – and it’s just fun to fly fast; which is great, if you are not recording any video that’s totally fun, you can do that.

If you want to get really quality video, going slow is your friend. So, let’s say you’re flying over a lake or something like that and you wanna go slow, you really wanna get a shot of this lake. Going slow over that lake is going to give you more control, obviously – that’s a big factor – but going slow is going to help with that cinematic movement. Now, a lot of people have seen the movements of really fast-moving objects over water, to really kinda represent the speed of something. Well, technically you can still do this while still flying slow, that’s just speeding off the clip in post-production. That’s something you shouldn’t worry about; if you want to speed a clip that you took in post – maybe flying half-speed or something like that – you need to make sure there are no other moving objects around you. So, there’s people walking nearby – maybe at the side of the lake and there’s people walking up and down, or cars passing or similar – obviously those are going to look sped up too, and you will be able to tell it’s sped up.

Um… but actually going slow, tweaking up your clip in post is the safer route for you until you get more familiar with your drone, ‘cause one of my favorite shots, especially if you’re visiting a lake or an ocean, it’s getting fairly low to the water – around 10-15 feet or so – and then flying pretty fast above the water. That’s a really cool movement to show speed, to show action, stuff like that, but I’d rather speed it up in post than worrying my drone may be dipping down or smashing into the water – nobody wants that to happen, obviously!

Another benefit of actually going slow is that you get the best of both worlds a little bit. When you’re moving slow you get slow, nice movements. You can actually have more leeway when slowing down your clips, and getting more cinematic slow-motion shots rather than trying to fill something in a really fast speed and then try to slow it down. You can only go down so much depending on your shutter speed – which we will talk about in one of the later tips – but you’re going to get that really cool, nice, smooth movement, and that’s also going to help with maybe smoothing a bit the bouncing that may happen when drones swing action, or also when doing an orbit – which I’ll talk about here in a little bit – you see the drone bouncing up and down or swing a little bit, that slowing down of the clips will help to get that movement out a little bit. Going slow is probably one of my most used things when flying my drone. Go slow, don’t do those jerky movements when your drone is focusing on something and go someplace else – you’ll never see those movements in cinematic footages.

Tip #2 – Doing Basic Movements

Doing basic movements can do wonders for your videos. Just because you can do certain movements, one of them is what I call the ‘Ice cream cone’, and that’s when you’re starting at either a high, very high angle – or very low angle – and you’re kinda circling an object while going up or down (depending from where you started). It’s a cool movement, but it’s very, very difficult to accomplish, especially if you’re the sole pilot, because you have to keep control of smacking into something… you’re supposed to have a visual observer there… the speed of the drone, and also trying to make sure that it actually looks good.

So, there’s a lot of cool movements that you can do but doing basic movements, basic like flyovers is great, flybys are great. Movements like an approach, where you kinda flying up to an object while the camera is moving up. Basic movements like that do wonders for your drone video.

Tip #3 – Strafing

This tip is actually a kind of basic movement, which is called Strafing. It means going sideways, either left or right. That’s a basic movement that I really don’t see a lot but when you actually incorporate it to video; if you’re editing a video for something like showcasing maybe a commercial property, or you’re showcasing a runner or something like that, going sideways it’s a really awesome movement.

Let’s use the runner example. Anybody can follow a runner when, you know, the drone is high up and behind the runner. Looking down at the scene is actually a cool shot, and you can do that, but an absolutely cool shot is when you follow the runner but going sideways. Looking at them and flying your drone sideways. It’s an absolutely killer movement and a perfect way to show not just the scene but the fast-moving pace, the action that’s going on. Really cool shot.

Say you’re doing Real Estate Photography, or Commercial Photography, and you want to showcase how long a property is. Maybe how long a building is. Doing that sideways movement is a really, really cool way of doing that. You can actually incorporate the camera, move the camera up or down. Maybe pointing it down and moving up as you’re going sideways.

Killer, killer moves, and it’s just a basic movement – you don’t need a lot of people there, you know, kinda judge where everything is going to be; you don’t need a separate camera operator. It’s a really cool movement. I don’t see it a lot, but when I see it is probably one of my favorite scenes.

Tip #4 – Orbit

So now that we’ve covered a little bit of the basic movements, let’s talk about one advanced movement that, again, these are my favorite movements to do, and this one is called Orbit

Now, a lot of people know that orbit is kinda going around a subject but technically it doesn’t have to go all the way around a certain scene to get the full aspect of the orbit.

Basically, an Orbit is flying your drone sideways, going straight sideways, but as you are going sideways you are turning your drone in kinda the opposite direction. So, you have to match your speed with both axis, and it’s difficult to do unless you practice a lot.

What you’re basically doing is pointing the sticks opposite to each other, so the left joystick is – may


be – pointing left and the right joystick is pointing right, and that will allow you to strife right. But if you do it in the opposite way and the joysticks are pointing to each other, you’re going left that way. Either way you’re accomplishing the same goal, but some people can actually do orbits in one direction better than the other. I can personally go left better than I go right.

So, it’s really a cool move; a way of highlighting the subject, highlighting a certain aspect of the scene, but then showcasing what’s around it – it’s a really great way of doing that. If you’re going to incorporate an orbit, if you’re going to practice an orbit and you have the right subject to do it, it’s a really, really killer move – a lot of people love it. Again, you don’t need to go all the way around a subject ‘cause it’s going to be a super long clip if you do that anyway. Maybe going around 25 percent, maybe going halfway around it is good, but definitely you don’t need to go all the way around though you can tell you’re getting that nice circular movement.

Really awesome movement, so definitely practice it if you want to accomplish that cool, cool job when you’re shooting a certain subject.

Tip #5 – Avoid Cloudless or Super-bright Days

This is kind of an obvious thing, because, you know, you have a camera strapped to your drone so basically everything that works in a regular camera is the same thing when you’re doing drone photography. Avoid cloudless or super-bright days.

Cloudless days are going to be super difficult to reproduce great video – you can still get good video obviously – you’re going to have high, high, high amounts of contrast. And it’s really tough to get rid of all that contrast ‘cause the shadows are nearly almost gone. The highlights are super bright, and you’re going to get a lot of midtone area – which is good – but maybe you want to get a bit more of detail in some of the highlights or shadows and you can’t; the contrast is so high.

If you have a partly cloudy day – that’s what I personally like to shoot on because the clouds are going to help to break up that high dynamic range, and you get more control over your main subject that you’re photographing – or videographing. You also can see more of the cloud details as well, but essentially, you don’t have to worry about that whole dynamic range there… um… but I even personally like to shoot on cloudy days, because just like a regular landscape example, having a cloudy day will act like a giant softbox in there. So, you have even lighting all the way around.

Now, if you want to create a dramatic scene, you’ll want to add some contrast or something like that but for most photographers out there it grants even lighting for the scene. I just get sure to not to capture much of the sky because it may not seem a great day for filming, but for the subjects on the ground it’s great in what comes to lighting. Avoid cloudless and super-bright days.

Tip #6 – Shutter Speed

Alright so my last major tip is Shutter Speed. Now again, just with every kind of camera out there – DSLR that shoots video, a lot of them do – you want to make sure you have the right shutter speed. So, a lot of people think the best time to shoot video – again – is super-bright days, and you really don’t want that to happen because when you go out, when you take your drone out there, what you’re going to do is, your drone is going to automatically apply an exposure setting. Your drone is going to automatically drop the ISO value to 100 because it’s super bright – assuming your drone goes down to ISO 100 obviously. And maybe your aperture is going to close down as much as it can, and your shutter speed will probably still be relatively high because it’s so bright outside.

Such conditions are great for taking photos, but for video you’re not going to get that nice cinematic-looking video because your shutter speed is too high. When it comes to getting really nice, smooth drone footage, having a lower shutter speed is actually more beneficial than having a high shutter speed when it comes to video. So, one way if you do this – this is obviously filmed on different days – if you can’t get the shutter speed down to 1/60s you may want to re-schedule, or you can get Neutral Density Filters, just like you see in a DSLR camera, ND filters will cut the amount of light that gets into the camera, and will allow you to get slower shutter speeds.

I like for my shutter speed to be, just like with every other camera out there, to be double of what my framerate is. So, in the drone if I set my framerate to 60fps to get really cool slow-motion effects then I want my shutter speed to be 1/120s. I want it to be double of whatever my framerate is. That will also allow you to get a little bit of motion blur in video, which is actually ideal for getting that cinematic looking video.

Special Mention – Sleeklens Drone Photography Course

drone-video-course-sleeklens-aerial-photos-videos-photography-tutorial

Owning a drone can be one of the best tools a photographer can use to progress and further their business. Even if you don’t have your own photography business and you just want to take better aerial photos and videos, it may be difficult to find the best information to do so. This is one of the reasons why we have created the Mastering Your Drone Beginners Video Course.

Throughout this course, we cover all of the aspects that a beginner drone pilot might need to know to make the most of there aerial video and photos. We will cover everything from popular accessories to make getting the best images and videos easier, safety tips, and useful drone pilot apps. We will also cover the settings to use for getting the best photos possible as well as take you on a real-world commercial drone shoot complete with a “how to” editing guide. Next, we will concentrate on getting the best cinematic video. We will cover the most popular basic and advanced cinematic drone movements as well as how to compile an entire video project together from start to finish. This course will not give you enough information to pass the US Part 107 sUAS exam. It is meant to give beginning drone pilots the skills to get better photos and video.

SaveSave

Social Media for Photographers


Hey eve


ryone! This is Jordan from Sleeklens.com, welcome to this week’s episode of the Sleeklens Photography Podcast. This episode is not going to be about photography tips, or anything


like that, I’m actually going to talk a little bit on Social Media, and what it means in social media for photography.

Now there are tons of social media platforms out there, and just to name a few there’s Facebook, Instagram, Twitter. There’s Behance, there’s Flickr, there’s Pinterest. All kinds of social media networks and that’s great for reaching out, for people who want to get noticed, to get their stuff seen – even their blog saw – to get their photos seen, stuff like that. But it can be a little bit of a time-waster if you concentrate on the wrong one. It all depends on the needs you have for your photography business/career. So, in this episode, I’ll try to clear a little bit of that up and talk about photography and social media put together. Know which ones, and depending on which you want to accomplish, which ones you should concentrate and get your eyes on.

Facebook

Alright, let’s talk about the biggest social media network by far, and that would be Facebook. Almost everybody, and their old, old grandmother, has a Facebook account, and it just becomes a big social network to pass everything you can dream about back and forth. It’s doing videos now, it’s doing hashtag searches. It’s doing business profiles, personal groups. It’s doing all of these things and, overall, it’s a great place to advertise your business when you’re starting out.

You constantly get bombarded with details about your business, which can be a bit overwhelming, but’s what happens when you set up a business profile.

Now, if you are a Portrait Photographer, and you posted clips and photos that you took from previous sessions, people will then see these cool photos and they can share them to their friends saying: ‘hey! This person is great, if you need any family photos then contact him/her’. Given the latest updates Facebook still has this, but from what I’ve seen Facebook has grown more into community building rather than self-promotion for businesses these days.

There are people that use their personal profiles, or even those who built their business profiles so top-level that almost resembles a website. They treat it as a portfolio to showcase their skills, and that’s why they use it for. That’s so devastating for a business, to put so much faith in a social media network that people can only see what you put out there. There are even those who share their URLs in other social media networks or forums to link to their FB pages. That’s so much hurtful for a business in many, many ways, but especially for those who want to take a closer look in what you do, as Facebook is starting to die out a little bit. I’m not saying that it’s going to go away completely, but I think it’s going to die out as far as for the uses people are giving it these days.

Facebook is really good for community building. If you have a group, it’s really good for groups. It’s great for people who want to share content in groups but, as far as for promotions? It’s not as great, it’s not as good as it used to be some time ago for business promotion.

So, when it comes to photography… yeah, you can put photographs to share and get some likes on and on. It’s good if you want to build a community around you, to get a like cult-promotion, but if your aim is to truly expose your work to the world and grow your business, I’d rather choose another platform.

Instagram

Obviously, a big player of the social media networks. Facebook owns Instagram as well. It’s kinda weird to say ‘don’t concentrate on Facebook but concentrate on Instagram’, but when you’re looking at Instagram, it’s obvious what the main goal is as far as Instagram goes.

Instagram, the original Instagram (not talking about Instagram TV which released a couple of weeks ago) is all about photo sharing. So, if you are a photographer, if you are someone who takes pictures and that’s what you want people to see – and you don’t want to worry about the huge description of where the photo is taken, and camera settings and all stuff – you want people to see a photo, and analyse your photos right at the spot, Instagram is your number 1 social media for photographers.

It’s great for engagement because it mainly has one method for searching, and that’s using hashtags. The more hashtags you put in your photos when posting, the better results you’re going to get. Obviously, if you post a photo and you use a hashtag that’s kinda in the middle of being super popular and your photos are somewhat associated with the hashtag you’re obviously going to get better results. For example: #portraitphotographer tends to work better than just #photography if you’re a portrait photographer sharing a sample of your work. You can also use #peoplephotographer #childrenphotographer #petphotographer. You’re adding a description to the hashtag that you’re using; thus, you’re making it more unique than just getting lost in the feed that’s the hashtag of #photography.

I’ve done a little bit of experimenting with Instagram and I noticed that there are three main things that you should follow when it comes to using Instagram to get the most out of it.

  • You have to use hashtags. Use the maximum amount of hashtags – which is 30 per post – and keep them relevant to your photo.
  • Tagging people. Don’t be afraid to tag people – especially if you’re a portrait photographer – or even tag the city.
  • Post consistently. I try to post 1 photo a day, and that’s easy to do as every photographer has a good backlog. Do a nice edit for the photo and upload it.

As a photographer, I’d say concentrate 80% of your presence on Instagram as it does help a lot to promote your business.

Pinterest

A lot of people don’t actually think that Pinterest as being an important aspect when posting on social media. It’s a big player in social media, and as most people know, it’s mostly meant for building board of stuff we fancy – like recipes or home décor – but what a lot of people don’t know is if you’re a photographer who likes to do blogposts (which is great as you have fresh content on your website all the time) it’s really helpful. When you publish these blogposts you want a lot of people to see it, and for that Pinterest becomes an immense resource.

One thing that I would recommend for those of you who want to start posting more to Pinterest and linking back to your site is that when you post a photo, don’t just grab any random photo that’s maybe associated with your article. Take the photo into Photoshop and do a long vertical crop. Make it more vertical than horizontal. And if you’re tech-savvy then throw some text in with a cool layout on what the photo is about or what the blogpost is about. The vertical aspect, the reason why I want you to do a vertical photo is because, think about when you do research via Pinterest. What’s the thing that sticks more in your feed? It’s those vertical posts. It basically takes more screen space. So, when people are browsing through Pinterest, as they take more of the screen it’s more likely that they will click on the photo, hence visit the website you linked to.

Also, Pinterest has one kind of a leg up when it comes to compare it to Facebook. The Pinterest photos that you create, that you put on your Pinterest profile are actually seen by search engines. So, when you Google-search for something, for a keyword or keyphrase, the search engines can see those photos and see the post that you did.

Google Business

Don’t laugh at this. Google+ came as an experiment to create a Google-version of Facebook. But if you’re a businessperson and you want people to see your photos, to work with search optimization really hard, what you need to do is to create a business page and manage it, it will do wonders for your business.

I’ve said this multiple time when I talked about Google+, I try to treat my Google listings for my personal business almost as a secondary website. So, if I post a photo on my website, I’ll also post it to my Google Business page. Now, I’m not going to have a lot of engagement there, a lot of people liking my photos (though most people would leave reviews about my services) but one thing that I noticed is that I get more clients. For as I want to grab as many clients as possible, having that Google page is doing wonders for business.

June 2018 Photo Contest Announcement!


The Winner for June 2018 is…


Irene Krajewska - Photo Contest
Photo by Irene Krajewska

2nd Place Winner…

Ertsn Zeki Contest
Photo By Ertan Zeki

3rd Place Winner…

Drew Bryden Contest Sleeklens
Photo by Drew Bryden

Honorable Mentions…

Marco Di Bianca Contest
Photo by Marco Di Bianca
Roberto Miranda Contest
Photo By Roberto Miranda
Harneet Singh Arora Contest
Photo by Harneet Singh Arora
Jessica Lerche Contest
Photo by Jessica Lerche

SaveSave

SaveSave

SaveSave

SaveSave

SaveSave

SaveSave

SaveSave

SaveSave

SaveSave

SaveSave

Must-Have Photography Accessories

Hey eve


ryone! This is Jordan from Sleeklens.com and welcome to this episode of the Sleeklens Photography Podcast. For this episode, I wanted to cover something, something I wanted to talk about for a while, and what I’m talking about is really important must-have accessories for your camera bag.

The reason I came to this topic for this week’s episode is because I was actually cleaning out my camera bag, cleaning out my camera chest – as you said like a big tub that has all my camera stuff in its, it makes it easy to carry around if you ever need to go to a different location – take all of your stuff. Is, basically, just a large trunk. And self-cleaning them out, trying to get so messed up a little organized, and I noticed that I have some of these accessories in this separate bag, and I keep them with me all the time! I keep them in my car, I keep them some of my camera maxima take out my camera bag, but I find myself using them more and more nowadays, and I wanted to cover some of those accessories – at least six of them – in this week’s episode.

So, some of these are going to be smaller accessories. So many are actually to be pricey ones – as a matter of fact, the first one I’m going to talk about is actually a pricey one – but I’m going to give reasons why I really, really think it’s important to keep these accessories in your camera bag at all times.

Kenko Extension Tubes


? Check it out: Kenko Extension Tubes Set

Let’s talk about the first one. This is the Kenko Extension Tubes, and for those who not sure what exactly extension tubes are, what you can see is a kind of a hollow piece of plastic or metal, depending on what kind you buy, and what it does is attach to your camera before you put the lens on. So, you do you have your camera you put these extension tubes where your camera lens goes, and then you put your camera lens on the other side of these extension tubes. And what this does is can make a fake, or not really fake actually, it’s actually a pretty good solution. It turns your camera lens into a macro lens.

And so, if you are wanting to get into that macro world, but you don’t really want to shell out the money to buy a traditional macro lens, getting some of these extension tubes will come to get you started in the right place.

Now, the reason I have is my camera bag – and the reason I was glad I had these in my camera bag actually – is because I was going to a job, and I didn’t know exactly what I was going to be shooting up. If it was gonna be a lot of wide-angle shots, or be a lot of just, you know, interior shots as mainly what I do is Real Estate stuff; but this was for business so I was kinda thrown for a loop when I got in there, and one of the things they want me to do is get a really nice close-up shot of the of Canada’s printing plate. The camera lens that I had was a wide-angle lens, and the only other I believe I had was little nifty fifty to 50 mm lens – and that doesn’t really take that close up of shot… So, I really had two options: I could take as close a shot as I get to this little printing plate, and then just crop in what I want to get when back to the computer and post. Or I can try these extension tubes, and I had these extension tubes in my bag – and really glad I did because I put them on my camera, and I put my lens on there, and I was able to get a really, really awesome killer shot! A really awesome macro shot of this printing plate, and really just say the whole shoot for me having those extension tubes.

So, I haven’t used them since, but I always keep in my camera bag because you never know when I want to be able to… when you need them – any of you remember walking around; going for walk with my camera with me, I can always take as extension tubes out and do some macro photography.

Then again, if you’re really wanting to get into the macro photography world, getting these extension tubes is way cheaper than getting a macro lens; and you might find when you get them and start playing with them that you really think macro photography is really cool but you don’t really want to go into it as much you thought you were. So, you can save the little bit of money and set up a macro lens by using macro extension tubes.

Honsky Aluminum Water Resistant Memory Card Carrying Case

honsky memory card case

? Check it out: Honsky Aluminum Water Resistant Memory Card Carrying Case

Alright, so next thing I want to talk about is actually fairly cheap and inexpensive accessories, but they are very important. I have them in my camera bag all the time, and I carry them around all the time. The first one is the Honsky Aluminum Water Resistant Memory Card Carrying Case. Now, a lot of people don’t have memory card carrying cases… they might actually throw them into the bag if they have multiple memory cards, and I found myself kinda doing the same thing when I first started buying a bunch more memory cards, just keeping them in the plastic cases they come with… but then I lose the plastic cases… you get the idea.

I bought this aluminium water-resistant memory card carrying case, and it has really helped out because it’s a bright red colour, you’re not going to misplace that! (especially with all those black accessories and cameras/lenses you may have). It holds standard SD cards as well as microSD ones underneath it, so if do happen to you have an SD setup in your camera and a drone or GoPro camera that uses microSD cards, again, these are cheap accessories you can get.

If you have more than one SD card, which if you are a photographer is more than certain to happen, you should check this product. It’s red, it’s aluminium… it’s not like a foldable folder with plastic sleeves, it’s an actual quality carrying case and I really enjoyed it.

Giottos AA1900 Rocket Air Blaster

Giottos Rocket Air Blaster

? Check it out: Giottos AA1903 Rocket Air Blaster

So the next accessory I’m going to talk about it’s actually what’s called a rocket air blaster. Now, a lot of people may have seen this, a little rocket blower. It’s a hand-pressed blower and works for blowing off dust and debris from your camera equipment. Again, this is one of the accessories that I keep in my bag all the time because I find myself being very, very careless with some of my gear, and I find that dust will fly upon the camera lens – and it’s really hard to get those dust particles off there!

If I’m scrubbing my lens I may hear that grinding sound – like sand or similar that’s grinding on the metal strip where I put my lens on. So I took my air blaster and tried to get rid of that debris that was there.

It’s one of those small accessories that you can throw at the outside pouch of your camera bag, and if you ever need to get rid of some dust or something like that it might be on your lens, even inside your camera where you set your lens, the mirror… you get the point.

Camera Hot Shoe Mount

camera hot shoe

Alright, next is one of my favourites accessories; and I have like 6 lying around my desk, in my camera bag, in my camera tote as well, and it’s a Camera Hot Shoe Mount. What these do is, actually, if you have your hot shoe… you don’t really use your hot shoe if you use your flash a lot, this mount is a great way to attach your phone to the top of your camera. This way you can get videos at the same time you take photos, or you can take a timelapse… you can do two things at once.

Now, this is just the mount piece, so this is – technically – one of those one-in-a-half screw sizes where sustain a tripod mount. Pretty much anything you can put on a tripod. This is just the first part of a setup, to fully complete it you will need the next accessory we’re going to review.

? Check it out: https://amzn.to/2twUVUQ

Puroma Universal Cell Phone Tripod Mount Adapter

 Puroma Universal Cell Phone Tripod Mount Adapter

There’s a bunch of tripod mounts around there, this is the one that I have, and basically, you just screw your tripod mount on top of the Camera Hot Shoe Mount that you just bought. And now you have your phone up there!

There was a product some time ago that, unfortunately, didn’t go out in the business, and it was called “Trigger Trap”, and what you would do is that you would use your phone for a lot of advanced features, for your DSLR camera. I could just use my phone as a controller, so I’d put my phone on top of my camera, like a little setup up there. Unfortunately, that camera company went out of business or also I’d be talking about them. But again, you can see that kind of practicality of putting your phone or something on top of your hot shoe.

? Check it out: https://amzn.to/2MSyr9x

Selens 168 LED Dimmable Ultra High Power Panel

Selens 168 LED Dimmable

Alright so, the final product I’m going to talk about, and this is for all of those who do a lot of videos mainly (you can do this with photography as well). If you do video mainly with your DSLR you probably want to get some light source. So, if you really want to make it very portable, here comes the Selens 168 LED Dimmable Ultra High Power Panel, which is basically a light panel that can attach to your hot shoe.

This is a great panel, its got little LEDs in there, and it will light you up. You can put it in the hot shoe and record videos, or put it someplace else and record people. You can attach it to an Osmo if you have one, you can attach it to a tripod and have a little light setup. There’s a lot of different ways in which this little LED panel can help, and it’s cool if you can actually get 4-5 of these actually because they’re fairly cheap. But if you’re mainly doing a portable video setup, this is probably one of the ways to go.

? Check it out: https://amzn.to/2tpG1Aj

Alright so these are some of the accessories I’ve got; I’ll probably find more and do another podcast on this topic if you guys enjoy that as well.

GAS vs SAS

Hey eve


ryone! This is Jordan from Sleeklens.com and welcome to this episode of the Sleeklens Photography Podcast, which is going to be like the last one – a little bit different – and the reason why I say that is because I have an email that I just received (about 30-40 minutes ago) that inspired this particular podcast. So, this particular podcast it’s going to be about GAS or SAS, and I’m going to go exactly on what that means in just a second. First, let me read this email really quick:

“Hi Jordan,

I just purchased a Canon Rebel T5i, which is a used camera for me, and I’m brand new in photography. I’ve only taken a few photos with it but I also had the opportunity to purchase a newer camera from a friend who was selling their old gear.

It’s a used Canon 5D Mark III, and I had the opportunity to buy that with a bunch of lenses, but it will cost a lot of money I wasn’t planning on spending.

What are your thoughts on both of these cameras for a new beginner photographer? And would you go along with these purchases?

Alan”

So Alan, this podcast is going to be directly devoted just to that question! Let me go first on what are my thoughts about these two pieces of gear.

GAS – Gear Acquisition Syndrome

Right now, I’m gonna say it doesn’t matter about any of that. The gear doesn’t matter at all. And this is where the GAS comes in, to which I was talking about earlier. So, what exactly is GAS? It stands for ‘Gear Acquisition Syndrome’ – and what GAS usually means, in photography terms – is the passion or the always wanting to get new gear. New gear all the time, gotta have the newest lens, gotta have the newest camera, the fastest memory card… all of that stuff. That’s what basically GAS is all about.

And so, there’s a lot of people that have GAS – I know it sounds so weird to say in a podcast! – there’s a lot of people that have Gear Acquisition Syndrome. When Canon, Nikon, Sony, whoever, releases a new piece of gear, they always want to get that new piece of gear.

Alan’s question got me thinking about: is the gear actually what makes a particular photo? And I’m going to spoil this for you and say no. The gear that you shoot with certainly does not make your photo. The source I want to back this up with is actually an article on the ‘100 Most Influential Photos of All Time’. I’m going to talk about the first 10: the first 10 photos on this list, I’m going to quickly talk about them, and give the dates about them.

The #1 photo is ‘The Terror Of War’, Nick Ut, 1972. It’s obviously a black and white photo, a film photo. It was taken in 1972, and it has to deal with the South Vietnamese Air Force dropping a load of Napalm on a village; and it’s a picture of the villagers getting out of there, walking down the road, and you can see the black smoke in the background, and it’s a very terrifying photo. But, that photo actually conveys a lot of emotion, it’s considered one of the greatest photos of all time.

Next is the ‘The Burning Monk’, Malcolm Browne, 1963. That one is a picture of a monk that’s burning himself alive as a form of a protest. That one was taken in 1963.

The third photo is ‘Starving Child And Vulture’, Kevin Carter, 1993. It’s a picture of a starving child and a vulture that’s looming behind him. Very powerful photo; I’m not saying that these are the best photos in the world as far as in the picture quality or anything like that, but these are the most impactful photos of all time.

We have the #4 the ‘Lunch Atop A Skyscraper’, 1932. That’s a group of men working on a very tall building and having lunch on a skyscraper beam.

We have the #5, ‘Tank Man’, Jeff Widener, 1989. Number 6 is ‘The Falling Man’, which was taken in 2001; number 7 is ‘Alan Kurdi’. Number 8 is ‘Earthrise’, and that was taken in 1968. Number 9 is the ‘Mushroom Cloud Over Nagasaki’ – and that was taken in 1945, obviously during the WWII; number 10 is ‘V-J Day In Times Square’, taken in 1945 as well.

So, those are the top 10 photos on this list that are considered the most influential photos of all time. Now, the reason I bring this up is because gear had no part in any of these photos. And the reason I say that is almost all the photos were taken with very old film cameras that we would probably never use today; and the photo is the concept, the subject, the timing, all that stuff is what makes that photo.

If you think about the most powerful photos, the best photos of all time, obviously everybody has their personal favorite, their favorite photographer, etc. But again: the gear doesn’t really matter. The timing, the skills needed to take these photos are all things that you already have in your mind – all of that matter, not what kind of camera you have or the camera you have the opportunity of buying.

SAS – Skill Acquisition Syndrome

SAS to me it’s like the opposite of GAS, and stands for ‘Skill Acquisition Syndrome’. So, if you have the opportunity of getting new gear or getting a new skill, I’d certainly go to getting a new skill.

The gear is gonna fail you at some point; the gear is going to be obsolete at some point, but the skills that you retain, the learning that you keep, is going to be the main thing that keeps you coming back and learning and developing your photos, not just buying a new camera that can take 20% better photos. Yes, some may have better low-light quality or similar features, and obviously that matters depending on what kind of photography you are doing, but at some point, the gear goes away. At some point the lens that you are using – even though it’s important – at some point it just goes away.

What I would rather learn is how to take a photo and edit it in a certain way, how to develop a scene, how to think about a scene more clearly and turn it into a different type of photo that you didn’t start out with – maybe like compositing or something like that. That’s why on Sleeklens we have a lot of courses in which we cover developing more and more because the skills are actually what’s more important, not the gear.

Conclusion

So, that’s all for today’s podcast. Alan, I wouldn’t go for new gear, I’d start slowly learning your skills as a photographer. Attending a course, learning more skills instead of getting new gear that – probably – you may never use to the full extent of the features it has.

I know that everybody has their opinion, that’s what I would recommend when it comes to starting out in photography.

“Pixel-Peeping”

Hey everyone and welcome to the next episode of the Sleeklens Photography Podcast! This is Jordan from Sleeklens and in this particular episode, I’m going to go over something that’s a little bit different. It’s linked to one particular email that I’ve got from one of you listeners out there. So, this particular email – which I’m not going to read the whole email because it’s a very, very long one – the basic overview of what this person was trying to say was that is currently experiencing too much pixel-peeping in its images. Thus, not liking how the photos turn out. The outcome looks too noisy, or it’s not as sharp as possible, and I just to cover a little bit at this whole pixel-peeping thing, and also not try to compare yourself with other photographers.

So first, let’s go over this whole pixel-peeping thing. This particular email I’ve got is from Jessica Wilson, and she was talking about how each time she takes a photo, no matter what it is, it can be a photo of her kids, it can be a photo of a landscape she’s taking, it can be a professional photo she’s trying to make money on, she always finds herself pixel-peeping. She always, you know, bring the photo into Lightroom and does the 1:1 look on the image to look at the image, then zoom to even 3:1, try to compare the image and see which places are sharp, which places are in focus, which places might be out of focus, and it’s one of those things she finds herself spending like 5 minutes pixel-peeping per photo – it’s a time-waster as well.

This kinda comes from a personal experience. I used to pixel-peep as well; I’d zoom into a photo and, bring a photo into Photoshop for example, and zoom in as far as I could to actually


see the individual pixels of the image and I’d see which ones… which ones made the edges look fuzzy, and I’d try to selectively sharpen those particular areas. I thought I had my exposure right, my sharpening right, I thought I had every aspect covered but when I zoomed in things look fuzzy. That could be a combination of things as camera settings not being okay, not having the sharpest lens possible, but again, it was one of those moments where I found myself doing the same thing.

Now, Jessica didn’t say whether she was a new photographer or not, she didn’t say that particularly but usually, the pixel-peepers are the new photographers. The ones that would look at an image online at, let’s say a National Geographic image, and see how sharp it is, how crystal clear it is, how awesome the lighting is, how all the coolness that goes into this photo, and they look at their images and they might not look the same. Whether it’s a subject matter, lighting or whatever, it doesn’t look the same, and this is when they start to feel discouraged as well. They look at their images and it’s just they “know” they are never going to be as good as that person.

Well, this goes for Jessica but also goes for all those out there that might be doing the same thing, and that’s… let’s take a picture from your favorite photographer – you may have a particular photographer that you always follow, you’ve always loved their images – and try to visit their website. So, go to their website and pick any image from their website. So, after you download it to your computer – it’s not going to be the full high-res image – and I really want you to examine that image. Just look at it, because a lot of times we would “look at an image” but in fact just glance at it, and get an overview of how awesome it is. And once you start looking at it, studying the image, you will see small little things that would be considered imperfections.

A really good example of this is there’s a night image that I really, really love. It’s an unknown photographer, I don’t know who it is but when I saw the image, I saved it to my desktop, and kept it in a folder for inspirational purposes. And so, there’s a fairly high-res download which you can find in Flickr, so I downloaded the high-res version of it and I really, really loved the image. When you just look at it on Flickr it just looks amazing, like it’s the most perfect image ever but when you download it and start looking at it, really examining it, you’re going to see some different things. For example, when you just quickly look at it, it’s a night photo of the Milky Way, it got a lot of silhouettes going on, you’re going to quickly see it’s “oh cool, it’s a nice Milky Way photo”, but, when you actually look at the image you’re going to see a lot of noise in the photo. You’re going to see a lot of different noise, some blurring from the stars in the sky. You’re going to see all that stuff, but when you quickly look at it you won’t see any of that. And so, this goes – for example – when I was trying to take night photos, when I first started to try taking really awesome night photos, no matter what I always saw a bunch of noise. I wanted to try to get as less noise as possible, I wanted to get my image a little bit overexposed to get as little noise as possible in the shadows, and I realized that it doesn’t make a difference. Nobody’s going to look in your image and just look at it like I was doing and say “oh, it’s a bad image” or “it’s a horrible image, it has a lot of noise”, “it’s not even worth posting” or anything like that, and that’s what we all feel sometimes. That some images are not worth posting because we see imperfections, but I guarantee you that if you post that image out there, there are a lot of people that’s going to love it. They don’t care about the noise, they don’t care about – maybe – a slight blur, a slight movement in the stars. Or maybe you take a photo of a portrait and you are supposed to get the eyes really tack-sharp ‘cause that’s the main focus of the image, but maybe you focused on the nose, and it’s a tiny bit blurry where the eyes are.

No one is really going to notice, and especially if you take your photos and post them on social media networks like Facebook. Instagram does a better job on this regard but Facebook it’s really going to compress your photos like crazy, quality is going to drop like 50% when you post it on Facebook. No matter what setting you change there’s always going to be some compression going on, and that’s going to change a lot of the quality of your image. So, especially if you post on there, the quality is always going to be bad. Don’t worry about getting everything tack-sharp – the degradation of the quality is not going to be suitable for your photos. But, if you want to print your images you want to be a little more selective – depending on which printer you use it can have a little bit of hard quality process going on.

So that’s what I have to say to Jessica and whoever is experiencing the same issue out there. Pixel-Peeping it’s not something we should really be doing, because once you start pixel-peeping you’re going to start looking at your images in a totally different way; you’re going to start examining all your images, and you’re going to worry a lot about the technical aspects that are going on in your photos – which is great, but once you start that process it’s going to hinder your creativity. So, I really, really hope you guys don’t go pixel-peeping, don’t zoom all the way into your images, don’t look at all those individual branches that might have a little bit of chromatic aberration on them in Photoshop. It’s not going to really matter. Really just concentrate on the basics of photography, in composition, in getting the best lighting you can. Learn different editing techniques, and just really get creative with your photos and don’t try to be perfect, because nobody’s images are perfect.

All right guys, I know it was a little bit different of a podcast. I imagine it’s a thing a lot of people deal with – try to compare your photos to other photographers and see that their photos look perfect, and in your eyes, you’re never going to get there. It’s a really important message to get across. Thank you for joining me in this podcast, hope you guys enjoy everything that’s going on with the Sleeklens website with all the courses, all the products, all the new things that are going on there. And don’t forget to join the Sleeklens Members Club via Facebook!

RAW Edit Contest Winners


The Winner for May 2018 is…

Photo by Sharon Spears


2nd Place Winner…

Photo by Jessica Lerche


3rd Place Winner…

Photo by Marlis Breitkreutz


Honorable Mentions…

Photo by Dean Vinson


Photo by Griselda Contreras

8 Personal Photography Projects

In this episode of the Sleeklens Photography Podcast, we will talk about 8 different and uniques photography projects you can start that will help jumpstart the creative process. This projects will help if you are stuck in a creative rut or if you just want to start something new in the photography field!

  1. Shoot something new

This might sound to be basically obvious but if you’re a portrait photographer, for example, you might want to pick just any other style of photography that’s accessible to you and start shooting that way. Even if you find that you hate it, at least you know that you don’t like that style of photography. So, let’s say you’re a portrait photographer and you want to try your hands on food photography, that’s pretty easy to get into because you can grab some food or make it yourself and kind of stage plating and getting the lighting and everything right and everything like that. This is a very easy one to get into. Another one would be if you’re a food photographer and you want to go out and try your hands on really intense landscapes, that’s pretty accessible since you only need to go outside and find some really cool spots in your area to take photos of. While on this, don’t just go out and start taking photos of your backyard but try and research areas in your location and try to make the most of that particular project. That’s pretty easy to do but trying to shoot something new will definitely help awaken your photography skills.

  1. Thinking outside the box

The reason I came up with this is because there’s a lot of different ways of doing photography but a lot of people think that they can only go to a certain extent. For example, those who take landscape photographs think that they can only go out and take a couple of landscape photos and that’s really the extent they can go. However, there are those photographers out there who inspire you to really think outside the box. One of them who I’ll in particular link to this post is Hernandez Dreamphography in YouTube whose channel basically takes staging and product side of photography to a whole new level. Basically as a real quick example of it is a photo that he created called “Love Beatles”. What he did is to create a space out of pretty much nothing and you really have to see the video in order to understand the whole theory. He would take a paint brush and cut the bristles out of the paint brush to make what would look like grass or dead grass in a field and he would create a structure to put a sign on. He basically created a world to put his photos together and he then put a Volkswagen Beatle, a model that he put together and he put the car in the photo and then did some photoshop work but basically, that is thinking outside the box, making your own world in your photo. Doing something like this is extremely time-consuming and requires much attentiveness than you can imagine but you can watch the video to see how long it took him to build the set, take all the photos, do some photoshop and put the work together. But this is one of those projects that you do not want to complete in a day because it might end up looking bad, if you even end up completing it.

It is one of those projects that you have to go through over and over for days, weeks or months to try and get the perfect photo. It is not one of those projects you fill up over time and you’re done in a month. It’s a really cool video and I would encourage you to check out for Love Beatles to see exactly what I’m talking about as far as thinking outside the box is concerned in regards to your style of photography.

  1. Picking a theme

This is the next kind of project you can pick a theme. For a lot of people, picking a theme means picking maybe cars to shoot or something like that but you could actually it in a totally different way and this is probably the more attractive way to look at it. It means picking a theme but what you pick be based on a technique. For example, you can talk about lighting. All the photos in a particular project that you are putting together were taken with an off-camera lighting and so you can put together off camera lighting in your photos. You can do compositing, macro shots, slow shutter speed kind of photos and stuff like that. There is a lot you can do and if you put them together like in a photo album you’ll probably not get the same kind of reaction as you would if you picked a certain subject but you’re going to see that you actually put a technique on the photos and you can see all the variety of things you can do with certain techniques. That’s picking a technical theme and it’s actually a fun thing to go.

  1. Finding your ABCs

This is kind of a fun and popular one when you go to like a novelty shop. What I mean by that is going out to the world and taking your camera with you and what you do is maybe look at a street sign or sort of custom-made sign and you see the letters in the sign. They could look like cool signs but you take pictures of each individual letter on that sign. Over time, you find that these different types of signs, posters and wordarts and you put all of them together to make your own photography alphabet. You’ll put these together and see an “A”, a “B” and all other letters from the sign and it kind of creates a cool collage of photos. You might have seen that in novelty shops where a lot of people have their names spelt in different letters that are photographed and that’s a cool way to do it. But there is also another way of finding your ABC project and that’s basically finding stuff in the world that will resemble some letters. What I mean by that is maybe you take a pair of sunglasses and turn them upside down and that represents the letter ‘B” or you’ll see an inflatable doughnut and or something like that and it creates an ‘O’ and you just take pictures of all these objects that actually look like letters.

It might sound stupid but it’s actually a really tough project especially when you get to more difficult letters such as Z, Q, Y and the likes. You can see there’s a lot of different things you can do with that and its kind of a little cool project. Again, this is not something you can put on your website to promote your photography but it’s a small personal project you can have going on outside your main style.

  1. Day in the life of…

This is kind of a fun one and might require you to carry your camera all day with you. Basically, what you do is to try and pick a nice day when you’re going out on a trip or something like that and then take your camera with you and do a photo documentary of your day. So, you can one of your waking up, take a picture of your alarm clock, a picture of yourself getting dressed, the clothes you are wearing. It’s going to be an event, all day long and basically documenting your life for that day. This is a quick one that you can do in one day but it can make you think about the things you see around you on your normal day to day life. That’s a really pretty one but can create a lot of fun to do.

  1. Self-portrait Sundays

What this means is that every Sunday of the week for a month you will be taking a self-portrait of yourself. You have a whole week to figure out what kind of portrait you will take of yourself and you can be as creative with it as you can and this is going to be one of those projects where you have to time to get prepared, see whether you can have props or something like that and take that portrait on that Sunday, edit it and share with people maybe on your social media or something like that.

It’s just a self-portrait Sunday and is a way of thinking about a process of creating a photo but also getting yourself in front of a camera because a lot of photographers don’t like getting in front of a camera but like hiding behind it a lot. This is another great way of getting out in front of a camera and developing a scene in a photo from start to finish.

  1. Picking a subject

This one goes along the same line as number 3 but this one is on a subject. Picking a subject is also a great way of doing this and it maybe you’re going on a vacation and it could be a place that’s not super photogenic but you pick a subject in that scene and just kind of like concentrate looking for specific things. A really good example of this is me and my family went to visit a place last year and it was a blurry sunny day outside and there were a lot of people and it was just not a photogenic place. But I saw all these really cool doors that are on this old building and I thought of going ahead and creating a small project of 5 to 7 photos and photograph these specific types of doors. They are not the normal doors you’d see anywhere else but are these old-styled wooden doors with different handles and hinges and I did that and I also did the windows as well and it was a really great way to not only concentrate on things that you don’t normally look at but also create a little cool project out of that as well. Again, it was a small project involving a few photos and it was a really cool thing to put together and really spend time looking at the doors and getting them angled just right and really looking at the composition as well. You can go with all kinds of things including doors, colors, lines etc. Picking one subject is a cool way to do a really simple photography project.

  1. 3 simple projects

These are three projects looped into one. These are 365-project, project 52 and 30 for 30-project. Almost everybody has heard about the 365-project and this basically means taking a photo everyday throughout the year and putting them together as a way of documenting the year in a way but a lot of people kind of get lazy and only take a picture of a window or something like that. There are other lazy photos that you can take but it’s a great way of making you take photos. Project 52 is kind of the same thing but instead of taking a photo daily you will be taking one per week. This gives you a little more time to think since you have a whole week to consider the kind of photo you would want to shoot, the places you want to travel to once you are off work and you have a weekend available and that’s basically the same way of doing this. 30 for 30 is basically taking one photo per day throughout the month.


Just as tip number 5 was to kind of document the day in your life, this allows you to document the month but taking things that happen each day even when things seem boring. However, it is your work to make things a little more interesting. You can run to the local park during your lunch break and photograph anything including birds but this is something you can do and get off your normal routine and do some creative thinking and put your mind on a different spot.

These are 8 photo projects that can really further your photography and get you thinking on different ways of thinking outside the box.

Building Your Portfolio


So for t


his week


‘s episo


de of th


e podca


st really talk about building your portfolio, your online portfolio, and making it is as good as it can be, as best as you can, to hopefully try to get some clients to develop your business and hopefully grow to maybe a part-time thing – if you want that – or maybe even a full-time venture for getting photography clients, and that’s kind of what a lot of people are wanting do.

I’m going to go over about eight tips that will come to get you in the right direction and think about different things when it comes to your online photography portfolio.

#1 – Make it accessible

The first tip I’m going to talk about is making an accessible and easily accessible gallery of your photos. There’s a lot of websites out there, a lot of different designs for website; but one of the best ones that I’ve seen – depending on the type of photographer you are – is the kind of thumbnail view or the Pinterest like view of your website, and with it basically means is when someone visits your website that’s got a lot of photos all over the place and they can scroll up and down and see a lot of photos. Click on one to see a high-resolution version of it and get details about it, and that’s kind of the homepage.

It’s very, very easily accessible gallery so they can immediately see your work as soon as they get to the website, which actually can really get a lot of clients engaged and make them stay on your website to look at your galleries. So, you could do it that way; that’s really great way of doing it but another way of doing it is kind of having a header image – maybe a static header image – word doesn’t change, but then below that you can write a little description about your photography in your services and everything and then below that are next that you can actually put a link to say: ‘Check out my gallery’ or something like that. Some something that will have prompt them to click on your gallery. Obviously will still be in the main navigation bar – that’s a very important thing – but having it back linked everywhere on your website is actually a pretty good thing is easily getting them to your main gallery, where you want to definitely showcase your photos.

There are a couple of really easy ways of trying to make it a very accessible gallery so the not always hunting around your website to see what kind of photos you take; see your full gallery of images so they can deftly see what type of work that you do.

#2 – It’s all about your website’s theme

The next tip is picking a consistent theme for your website. So, there are all those photographers out there that I know that are special in my area. After doing a lot of research about photographers in my area, there’s a lot of photographers who are kind of a jack-of-all-trades. They can do weddings, they can do portraits, they can do food, they can do pets, they can do cars, they can do all kinds of things. But what that says to some clients that go to the website looking to see if they can do something is they’re kind of the master of none. They do a lot of stuff but they don’t really specialize in something.

I personally believe in, and this is kind of a belief when it comes to running a business, is that you should really specialize in one particular area of photography and promote that as your business; and your always going to get clients that, you know, let’s say are you specializes a portrait photographer, you’re probably wasn’t inclined to say ‘hey I also do weddings’. You may not advertise that you do weddings, may just say I do portraits, but you can get those people to say that you do weddings. My friend in two months is getting married, and I’m trying to help them find of the wedding photographer.

So, it’s not like you’re not going to get jobs if you don’t advertise; you’re always going to do get jobs like that. Another use case for that is, you know, I primarily do real estate photography. But even if I’m going to somebody’s house, and this happens more often not. If I go to somebody’s house they always ask me: ‘do you shoot people too?’ or ‘do you photograph families?’ and stuff like that and I have to tell them no because I personally don’t like to do that but I like to specialize in just real estate.

So not saying because you don’t have it on your website is not gonna be an amortizable thing, but you’re really saying that ‘hey I do portraits’, I’m a portrait photographer. I do portraits. This is where I’m fantastic at, check out my work; and then you’ll probably get hit up for a lot of other different services after that. So, build that consistent theme of your style of photography and try to be that person. That guy or girl in your area that is awesome at this one particular style of photography.

#3 – Build a solid portfolio

Alright, the next tip is building your solid portfolio; and what I mean by that is building up your images. Now I’ve done a lot of podcasts, and this is a kind of thing that I talk about doing often, and it’s something that a lot of people should be doing, especially if they are working at any easily accessible style of photography. And what I mean by this is, we’ve all seen those photography portfolios where you go to the portfolio and you see the same model in about 15 to 20 different photos, just in different poses, and you always see that he or she is wearing the same clothes, so it looks like they were taken on the same day, the same time, the same model. That could actually give off a negative impression saying that you’re not really, not really bringing in those clients. You’re just taking photos of friends or something like that, and you’re not really bringing in those clients because you have the same person all over your website.

I’m just using portrait photography as an example, but you really want to use all of your resources when it comes to building up your actual images. Obviously, if you been doing photography for a very long time you probably have a good catalogue of images, so this is not meant for everyone. But again, going back to the portrait photographer example: if you are a portrait photographer and you have a very limited number of photos, hit up all the people that you know. Friends, family members, neighbours, all kinds of people to say ‘hey!’. You know, there might be a family next door that has some kids, say ‘hey, I’ll give you the portraits for free for you to hang on your wall or do whatever, but just let me shoot your family’, and you can have all the photos for free. That gives them the incentive to let you do that; that gives you the ability to put those photos on your website, say that you don’t have that occasion of taking the same photos of the same somebody that your viewers get all over, and over, and over again, and having that person on your website kind of almost as a spokesperson for your website.

So, use of your resources and, you know, when it comes to… maybe are doing commercial stuff, maybe you haven’t done a lot of commercial jobs like product photography, for example. Maybe you’ve done a couple but you don’t have enough to put on your portfolio. Find a product; find anything – gaming; go to a hardware store, go to the grocery store – anything – and grab something off the shelf and act like it’s a real shoot. A lot of these styles of photography are very accessible. What you just got a kind of think outside the box about trying to grow those images.

#4 – The ‘About’ page

Now, let’s talk about the about page. The about pages is, and I suffer from this, for my regular portfolio. The about page is a page that people are kind of thinking when building the site is a kind of throwaway page issue. It is supposed to be a picture of you and a paragraph and that’s it. Just saying who you are, but those really, really successful photographers build out a really awesome about page talking about them, talking about their gear, talking about their family. Giving kind of likes and dislikes when it comes to certain things; maybe talk about the favored image. The image that they’ve ever produced. Talking about the kind of where they’ve come from, how they got started and it becomes almost like an online bio, which is kind of what it should be, not just the ‘Hi! I’m so-and-so I live here, and I would love to take photos of you. I have a cat and a dog in the wife and son’ or something like that‘Hi! I’m so-and-so I live here, and I would love to take photos of you. I have a cat and a dog in the wife and son’ or something like that. It’s gotta be a very intuitive thing so treated, almost like an online bio, an online blog post all about you.

Don’t be afraid to write about yourself and just make it very, very robust when it comes to talking about yourself because I noticed that a lot of people actually go to the about pages before leaving go to the contact page and contact you about it because they want to know a little bit about you. So that’s, that’s a really great way of doing that. Just think of it is like an online version of your bio.

#5 – SEO

Alright, let’s talk about some SEO tips. SEO, which stands for Search Engine Optimization, is actually a really important thing, obviously, when it comes to getting your work out there; but there are a couple of small things that you can do that will really help, kind of really, help get people to your website. I’m going to talk about a couple those I’ve seen them be successful, and so of these might be helpful for you guys as well.

So, the first one and I talked about this one a lot when it comes to podcasts tips for your website is keywords for your images. I talk about this all the time but it really, really does help to keyword your images. So, when you take a photo – let’s say you go to a sunset beach scene, and you want to put that on your website… you know it comes off the camera, as you know, IMG_004 or something like that or as a file name. Before you upload that, rename it to something that involves a lot of keywords; so, it could be a beach-sunset-photography – maybe tag the location so you can just say the same. Miami – you know, you tag all these keywords in your images and what that actually does is give Google a little bit of help if someone is doing a search for that seen in your area – it gives them a little bit help and actually shows up very prominently on Google images, which is actually a nice little thing for that. So that helps a lot.

A lot of people leave their images as the file name of whatever came off the camera, and that’s great for just getting the photo up there quick, but it tells Google or any search engine, about the image, it tells them nothing. So, keywording images really, really helps with that.

Another SEO tip, and this is kind of going to go into the next tip, is having your online blog. You know, where I talked about kind of picking that consistent theme. Let’s say you do portraits but also you like to shoot food photography. Go ahead and market yourself as the portrait photographer; but on your blog, you can talk about anything that you want to, you can put images of the food that you’ve taken photos of professionally, a wedding that you went to and maybe shot a couple of photos. You can do all of the stuff on your blog as your blog is your state; a kinda documentary place for you as a photographer. Obviously still put your portraits or whatever your style for your business, and obviously still put those on there as well. But that gives you a whole another avenue to put all these cool things that you can still do as it is a general photographer even if you just market yourself as a certain style.

#6 – Build your own blog

So again, the next tip after the SEO tip would be to, again, build your blog. Building your blog, again, is one of the most important things you can add your website as it gets a lot of people in the door; and what I mean by this is, this kind of analogy that I’ve heard when it comes to all the business websites that are out there. I’ve done a lot of research on this, and think of your website as if it’s town hall in your city, or think of it as this one building in your city, being the city being the Internet basically. Think of these and think of your website as a building and you want people to come to your building. They need to have an avenue to get there. They need to have a road to get there. Every time you put a piece of content out on the website, every time you put a blog post, every time you put a photo, every time you link back to your website from social media Facebook or something like that, you’re creating a brand-new road that leads there – obviously some roads are nicer than others, so maybe a blog post that’s a really nice lengthy blog post is really, really good one so you know some roads are better than others, but you always want to keep all those roads going your website. The more of those roads, the more people have the opportunity to come to your website. If you just put your website out, and you’re hoping clients would just stumble upon you when you first get launch, you’ll be waiting for a very, very long time. You have to give people the opportunity to come into your website, and that’s why the blog is a fantastic way to do that because you can put anything out there that you want to.

So, I would definitely recommend doing a blog even if you don’t like writing. I don’t like writing. You can definitely just put a couple of paragraphs and put a couple of images, then share and that’ll do; but if you do like writing, sit down to write a really nice lengthy blog post and talk about the experience. Talk about the photos; go in-depth, and go in-depth on editing – all that kind of stuff and it will give you the potential client more avenues to come to your city.

#7 – Keeping a copy

Right so the next is actually one that not a lot of people actually do nowadays, and that’s what I call ‘keeping a copy’. So, what I mean by that is that you know, back in the golden days before the website, you actually had a copy of your portfolio. Yeah, a book, a bound book or something like that, where you had all your images printed and it was a pain. The always needed to be updated to get cooler images; you had to reprint it into another book – or you have those cheap slides in folders, plastic sleeves and stuff like that. But nowadays, we have all smartphones, tablets, etc.

Keeping a copy basically means keeping a copy of the images that are on your portfolio, so that maybe if you want to show people in – people asked me ‘what you do for living’ or something like that. You can see I do photography in here. Some of my images; you don’t have to wait for the website to pull up or anything like that.

Especially whip out your phone and have a copy of your images on your phone is just a great way of keeping your images close to you, so that we can easily show them to potential clients. You can even get as crazy as making a PDF that is almost like a book. Anyway, and you can put the images that you can talk about the description. So, if the client does want to see your work with the don’t have enough time, you could actually just email that PDF to them and they can look at it from there. So, keeping a copy is a really great way to make sure that your images are really, really close to you.

#8 – Keep it simple

Alright, the last tip I’m going to talk about is keeping it simple. That’s is something that a lot of people don’t do; keep it simple, and what I mean by that is just because you can do it, that doesn’t mean you should do it. For example, you can put music on your website, you can put on this disc fun music that plays every time someone goes your website, but that was great for about five minutes back in 1998, but right now it is not a really nice thing to do. You can certainly put music on there if you want to but I would put it is the kind that pauses, you know, when someone is in the website is not playing out loud. Having something that automatically plays is not really that great in my opinion, that you may love it that’s, that’s totally fun. You can do whatever you want to with your website, but they can actually disrupt you, can actually take away from the work that is important and that is the actual photography that you have on your website.

Another way of keeping it simple is not to have so many pages on your website. As you know, the pages that display in the navigation bar, and you know if you are some the type of person who wants to put that they do every type of photography under the sun. You don’t want to have a navigation bar that is chock-full of pets, cars, food, people, planes; you know, you don’t have all the cost of just junking up your navigation bar. So, keeping it simple. Keeping consolidated, keeping organized that’s a good a really helpful tip because, again, you don’t want people to be just gushing over how awesome the website is because the website is not going to sell them what’s going on with you.

Doing the actual work is going to sell to them. So, a lot of people opt for the plain white background with the nice scripts and crisp photos, pairing it with a nice clean text. I personally think that’s the way to go. But again, the rules about design and everything can obviously be broken, but just keeping it simple all around is something that I would definitely recommend when it comes to building your online portfolio.

I guess it was just a couple tips think about when you’re starting your portfolio; or if you already have started your portfolio to maybe look into changing, or adding, or subtracting from things I just something to think about.

Spring Photography Tips

With sp


ring coming into play, a lot of plants are blooming outside and birds are trooping and the cold weather, in general, is going away. It is time to shoot those spring photos and I would like to offer some spring photography tips to make you get the best photos you can with spring season coming in. We have this kind of a season two times a year in many locations where you get fairly cool temperatures and it’s okay to be outside when you are not sweating all over the place or even freezing. That’s basically autumn, fall and spring. With spring coming up now, let’s look into some easy spring photography tips: –

  1. Time for close-ups and super wide angle shoots

If you are like me, you most probably stick to one particular lens. Everybody has their own kind of favorite camera that never leaves the bag and mine is a wide angle lens which hardly leaves my camera. If you have a macro lens, this is the time to get really nice close-up shots of flowers (even though flowers can be cliché when it comes to photography because everybody takes photos of flowers) and insects as they do pollinate. However, don’t forget about the wide angle shots where you can have a really strong foreground. What I mean by that is if you have a really nice flower or patches of flowers that are blooming; you can get your wide angle close-up to those flowers on the foreground and get a lot more depth when it comes to getting something in the background maybe like a cool mountain range or something like that. You have those flowers as a strong foreground option but then have the background and this makes it look really cool.

Don’t forget the wide angle shots and obviously don’t forget the close-up shots as this is probably the best time to take the close-up shoots because a lot of things are coming in the bloom and it just makes for a really overall spring feel.

  1. Forget about the horizon

I don’t mean that you make all your shoots really crooked in a way that they need to be rotated and fixed in post-processing editing. But forget the horizon means for example if you have a flower as an example again (spring is always associated with flowers and stuff like that), don’t photograph them from the top looking down at them. That’s a shoot that everyone does and they start looking more general. It’s a shot that everyone gets. This is the time you can play with your camera and gets really down low and then shoot up into the flowers so that you don’t see anything else besides the flowers and a really nice sky. You can have a bunch of like roses and such but you basically shoot from down-up towards the sky and it just makes for a really nice feel, plays with the perspective and makes the flowers look really large which is kind of cool and that’s something to play with; don’t just take a normal shot like everybody else who is standing over a flower or something else for that matter. Always try to experiment with different levels and perspectives of your subject.

  1. Wildlife

This is the time when wildlife including bears, birds and all kind of animals out there and this is the time if you ever wanted to photograph wildlife and maybe you are not set up for it or you don’t have an exactly long telephoto lens, this is the time to try it and just camp out a little bit and wait for different birds and animals to come along and just enjoy the weather that’s happening right now. But you will concentrate on wildlife as everything comes out after being snowed for months during the winter season. But as you do this, obviously be safe especially if you are in areas inhabited by bears and other animals.

  1. Be prepared for muddy conditions

We all know the slogan, “spring flowers bring May flowers” and so the condition is going to be characterized by heavy rains. That’s what happens when spring rolls and there are a lot of showers, storms and stuff like that and as such you should be prepared for muddy conditions by wearing the appropriate boots and water waders if you can but in general, be prepared since it’ not going to be like summer when the ground is rock solid because it’s so dry outside. You should also make sure that your equipment is prepared as well. Don’t set your camera back down on a muddy surface and such stuff. Be prepared as far as equipment and your dressing are concerned.

  1. Shoot those killer sunrise and sunset photos

This is kind of an easy and general tip and everyone gives it out as far as tips go but this is the time to get those killer sunrise and sunset photos. When taking the sunrise photos, it’s good to note that the sun rises a little bit earlier but you still get very nice warm glow on the sunrise and it also enhances those normal photos that you’d want to take. For example, if you want to take the flower photos that we were talking about and shoot at midday with the sun overhead, no clouds in the sky and with harsh shadows, it’ll not look flattering as when you have that really nice side light coming from the rising or setting sun and it’s going to look totally different photo. That’s what sets a lot of people apart by their willingness to get up early and get those shots or stay out and capture really nice sunset photos.

When it comes to sunset photos, the sun sets a little bit later in the day and it’s a little bit easier to get those photos especially if you have a full-time job out there and you can’t run out there before your workday ends.

  1. Try out using a polarizer

If you haven’t used a polarizer before, it’s good to know that they are very good for darkening the sky when you have those normal days when there is a cloudless sky and you really want to darken that sky just a little bit to kind of enhance the blue color. Also, if you want to do a lot of photos near bodies of water such as rivers and lakes, a polarizer can help cut off the glare off the river or the lake and give you less dramatic water when it comes to the shadows. A polarizer cuts off the glare really nicely and a lot of people who shoot landscapes use polarizer for that particular reason. That’s one way to easily and quickly enhance your photos using a circular or a regular square format polarizer.

  1. Rain isn’t always a bad thing

This goes along if you want to be prepared for the muddy condition. A lot of people don’t even take their cameras in the bag and venture out when it starts raining but spring photos can bring a lot of cool things out. It can enhance those flower photos for example, with a little bit of water on them and make everything look nice and clean and if you have a certain pattern of clouds and they start breaking apart and there’s a little bit of sun, you might catch a really awesome rainbow which will be an awesome addition to your photo. I’ve noticed that I do not have my camera with me every time I see an awesome rainbow and that’s another quick side tip, especially in springtime. Make sure you carry your camera with you as much as possible and make it a part of your baggage when you leave your house in the morning, you never know you might grab a cool photo on your way to or from work.

  1. Just get out there

This is the easiest tip you can follow to get better photos and is for everyone who is doing photography. None of these tips will help you if you remain on the couch and fiddle with the settings of your camera all day long or if you always talk of going out and capturing cool photos. You must get out there and get those photos and even if you get out and come back only to find out that the ones you shot aren’t as great as you’d want, at least you did something and had some fun.

With these tips, you can enjoy a good experience during the spring season and enhance your photography skills. Just follow them and enjoy your moments out there in the field.

Which Camera Lens To Use?

This post will be all about lenses as we have received a lot of emails from people who want to know which kind of lens to get for a particular subject or situation one is shooting in. This will be more of a beginner guide but will cover the many types of lenses out there and give you a scenario of when you can use lenses for a particular situation. I will go over types of lenses and then look at what lens you should use for maybe shooting wildlife or sports or other things. You might also wwant to check out our Short Guide for Camera Lenses post.

Types of camera lenses

Standard lens

This first kind of lens is very much considered as a standard lens. It’s not a particular lens but is a focal length. The focal length is what you normally see in a lens, maybe an 18-55mm, and that’s kind of considered to be the kit lens that you typically get when you buy a camera that includes a lens with it. It’s usually called a kit lens and has 18 to 55mm range to it and that’s kind of a lower end or entry level range and then you have some other ranging from 24 to 105 mm and stuff like that. Any range between the 18-55mm which is a crop sensor and around 24-105 mm or 24-70mm that could be considered a standard lens or some kind of an all-around lens and the reason for this is because you have the wider end down the lower number, the lower focal and gets the lower ends and gives relatively wide shoots but then you have a little zoom in there so you can still capture things that are a little bit far away but you do not get as close as you would if you had a telephoto lens.

Before we get started with all other types of lens, it’s good to point out that a lot of people think that kit lens that you might get for your camera are kind of throwaway lenses, such that you don’t need to worry about keeping those even if you want to buy a camera that doesn’t include a lens. They think that even if you don’t have a lens starting out, you just get a camera body and get a separate camera lens with it but I personally think that if you buy a camera that has a kit lens with it, definitely use that lens especially if you are a beginner. The reason for that is because it gives you the opportunity to capture a little bit of a wide angle but then get those smaller telephoto ranges thus helping you play with the focal lens. Not everybody will have the money to go out there and buy the lenses after buying a new camera but just because it’s called a kit lens and it’s cheaper and is most probably made of plastic doesn’t mean that it’s not a really good lens.

Personally, some of my best photos back when I started doing photography were taken using kit lens that came with the camera and specifically a kit lens that came with the camera and was two or three years older than the actual camera. The reason was that I broke mine after it fell and damaged the front element. I went online and found an 18-55 mm kit lens that was not the same version but still worked with my camera. Technically, my shots were taken with a very cheap and outdated kit lens and it still turned out very great. As we talk about these lenses, don’t worry if you don’t have the best equipment out there because although the lens does matter, what matters more is the actual photo itself and that’s the composition, the color and all that stuff.

Telephoto lenses

These are lenses that you can use to zoom in the subjects that are very far away. Some people don’t know the actual difference between the zoom/telephoto lenses and the super telephoto lenses and also the variance in prices that you might see when looking at particular focal length. So, let’s say you are looking at a lens that’s 17-200mm, you might see this and wonder why it is selling at $800 and wonder why a lens of the same focal length is going for $2000. Typically, the reason for this is that the one for $800 is probably for f4 lens and what that means is that this is a very focal length lens meaning that if you have it at its widest opening, it’s going to be an f4 or something around that range (I’m trying to be as general as I can be and different lenses have different characteristics and it is hard to pinpoint each individual characteristic of a lens).

However, let’s say it’s an f4 when you zoom to around 70 and when you zoom into around 200 it moves from an f4 to an f5.6. That means the lowest aperture you are going to get is an f5.6 which actually cuts out a lot of light. This means you can’t use this kind of lens in a remotely dark situation because your shutter speed is going to be cranked up to a high ml so you don’t introduce that shake. The pricing of that lens will be around $100 or thereabouts and that’s because it’s a varied aperture lens and typically those aren’t as high quality or constructed the same and are probably cheap as well. This does not mean they are bad but they are cheaply made compared to those going for $200 and at exactly the same focal length. Let’s say the aperture is f2.8 and the lowest aperture you get is f2.8 and no matter how many times you zoom in even to 300, you will have the ability to shoot at 2.8 which allows more light to come into your camera and gives you fast shutter speeds in different low light situations. That’s the different pricing that you will see with these types of lens

On the other hand, I mentioned the super telephoto lenses and these are lenses that go to crazy higher amounts when it comes to focal ranges. Typically, they range from 200mm to 400mm but you still can get one that goes to 1000mm but the higher the focal range the more expensive they become. Depending on what kind of camera you have, crop sensor or full frame, you probably have to figure out what kind of lens suits you best. Crop sensor camera can get you really close to a subject that’s far away especially if it’s around 400. A full frame camera does not bring you as close but it’s still a good focal range and that’s something you need to think about. When do you need a super telephoto lens? Depending on the type of photography you, you probably might need it but doesn’t warrant a lot of different situations.

Wide angle lenses

Wide angle lenses give a very wide open view. For a crop sensor camera, you might see a good wide angle lens that’s around 10-18mm or 10-20mm and on a full frame camera you might see 14mm or 15mm to around 17mm and that will be a good wide angle range as well. These lenses give you a good wide range situation and you can shoot in most landscapes, real estate and the more the minimum apertures you have like we talked of the telephoto lenses, you might be having a wide angle lens that shoots at f2.8, obviously you will be able to captu


re a lot of low light situations and get a shallow depth of field but then you can also get away with shooting a wide angle lens at f4 and that’s not a bad deal as you are not losing a lot of light there but that can definitely go for different price ranges. If you are looking at a lens no matter what lens it is, usually if you see a varied aperture lens compared to a standard focal length lens, the standard focal length lens especially if it is a lower range is going to be a lot more expensive.

Prime lenses

These are probably some of my favorite lenses even when one is a cheap but I really like them just because they are super sharp because there’s not a lot of glass to go through but it’s typically one or two pieces of glasses that the light has to go through. As such, it’s a lot sharper than a lot of wide angle lenses and telephoto lenses and that’s a really good thing. They also typically come in a lower aperture thus giving you a warm f1.8, f1.6 or f1.4 and thereabouts and are just but fun to use. One of my favorite and I don’t have it though I wish I did is the Pancake f1.8 which is a very skinny lens and I just love the way it looks on camera. You can get a variation of those but the prime lens don’t have any zoom capability whatsoever and if you see it as 35mm prime, it means you will get that 35mm and you will not zoom since it even doesn’t have zoom ring on it but only a focus ring. Those are just fun to play with.

Macro lenses

A lot of people think that any lens can be macro if they just switch it to the macro mode in any camera, but this is far from the truth. Macro lenses are great especially if you want to shoot up-close photos of a particular subject but they are also very expensive. They are great for insect photos and instances where you need to zoom into the eyes of a bee or any other insect, a flower or other small objects. Macro lens are constructed a little bit different especially because many lenses have a limited focusing distance. This means you can only get so close to a subject before the lens will not focus anymore and it’s just going to look blurry.

If you have a microlens, they normally have a very close focusing distance which means you can get very close to the subject and focusing can be right in focus. You can even zoom out very far from the subject and get really close and this makes the lenses very amazing for use. If you really want to make that your niche in photography, just taking up-close micro shoots, by all means, you should grab the microlens because you will not regret it. But if you want to be an all-around kind of a photographer, you can skip the microlens.

Types of situations you can use the lenses in

Having looked at the different lenses available, let’s look at different situations you can use them in, to kind of get you into the right mindset if you are looking into buying another camera or lens and you want to figure out what kind of a situation you might need them for.

When it comes to general shoots such as flowers, people or pets among other things, you’ll probably be going to be able to get away with the standard telephoto lens which is 18-55mm or 24-70mm or something like that. This is especially so if you are a beginner and you’re not really comfortable with different lenses, the standard lens is going to be able to handle a lot of different situations. You should have the standard lens in your bag all the time as this gives you the ability to still get wide and telephoto stuff relatively close when you want to shoot different photos.

If you’re shooting large groups of people, landscapes, architecture, real estate or stuff like that, you definitely want a wide angle lens. Especially since I’m in this field a lot when it comes to real estate, a lot of people think that you can’t get away with using a standard kit lens because it’s an 18mm, relatively wide but you will see the difference if you switch from 18mm on the crop sensor camera to 10mm on a crop sensor camera. You will see why people always go to really wide angle lenses to capture that type of environment. This is particularly because you see a whole lot more of the situation than you would if you had just a standard kit lens.

On the other hand, if you are shooting sports, a lot of action stuff or wildlife, you can get away with a standard telephoto lens that’s around 70-200mm or around that focal range. However, if you are shooting things such as birds or wildlife, you will need the super telephoto lenses that get really close to the subject. If you are shooting a lot of moon stuff that you want to get really close to, you will need a real super telephoto lens or a telescope to get really closer shoots. However, a lot of people don’t know that just as we said in the beginning that you can use a standard lens, you can actually use a telephoto lens when it comes to portraits. The reason for this is that if you have a cheaper telephoto lens, one that has a varied aperture with aperture that’s as lowest as you can go of f4 or f5 around there, you are not going to get a nice bokeh background as much as you would if you had a low aperture of f2.8. What you can do is zoom all the way into your subject and you do need a lot of room to move back and forth in order to compress the background and make it look like one of those professional photos. Once again, these are beginner tips because a lot of people don’t know that telephoto lens can be used by zooming out the subject, blow out the background and kind of mimic the looks of a low aperture lens.

Obviously, with a prime lens, you can technically use it in a lot of different situations especially people and in particular when it comes to street photography. There are many different lenses available but what you need to is zoom into the subject using your feet and that’s something many people cannot get used to but you must zoom in with your feet, get there and focus while close to the subject.  That’s what many people don’t like but if you can get over that stigma, you will be able to capture really good photos.

That’s all the basics about camera lens that I would like to cover in this post but if you are a photographer that’s just getting started, you should get those different types of lenses for different situations but always have the standard all-around lens for whatever you feel is best for you. If you are going into architecture and landscape photography, you will really need a wide angle lens or a telephoto lens if you want to venture into sporting events and all other like stuff but if you want to get into wildlife and other stuff that’s far away, then you’ll need a super telephoto lens. It’s good to have a variety in your camera bag but don’t go crazy and buy every type of lens out there because most of the time probably you’ll stick to one particular lens. In my case, the wide angle lens never leaves my camera despite the fact that I have all these other types of lenses.

Simple Tips for Reducing Noise

This pos


t is specifically created to help you understand how you can reduce noise in your photos whether you are using high ISO or doing a long exposure. I will give you some simple tips you can use to reduce noise.

Basics of using ISO and what exactly noise is

As an overview, it is good to note that raising the ISO of your camera increases the sensitivity of the camera sensors. Think of it like a microphone, if you are talking normally using a microphone, it would be considered like an ISO 100. It’s a very clean audio with very minimal distortion but if you were to start yelling into the microphone, there will be a lot of distortion, noise and feedback. That will be considered as a higher ISO, maybe something like ISO 6400, 3200 or any other level depending with the kind of camera you have and that will be considered as a higher ISO and it will introduce noise into your images. Some people like kind of a film grain in their photos since it gives them a vintage feel but a lot of people also want clean images as possible and that’s why we try to shoot at a lower ISO as possible because this gives the cleanest images as possible.

If you have enough light in your situation, obviously the lower the ISO you can get will give you the cleanest photos possible. There are times when you have to raise your ISO whether you are trying to shoot something that is moving very fast and you don’t have enough light in your situation. In such a case, you might have to raise the ISO to make sure you have a properly exposed photo or you are in a dark situation and are shooting night photos and want to capture the Milky Way or something like that. You will need to increase the ISO to make your camera more sensitive to the available light.

All that being said, the first and easiest step is to try and find as much light as possible to make sure you do not have to raise your ISO as you normally would if you didn’t really look for the lighting in your scene. You want to make sure that you have enough light as you can to make sure that your ISO doesn’t go high but there are some occasions where you might have to increase it. The first thing you should do to make sure that the ISO noise doesn’t show on your photos is to actually overexpose them a little bit and this will minimize the amount of noise. There’s a popular technique where if you raise your ISO up to around 3200 or 6400, you want to make sure that you are roughly 1/3 of a stop to or 2/3 of stop, over-exposing your images. What this does is blow up that noise and you won’t see it. Typically, noise is seen in darker shadows of a scene and you will see it in more of highlight situations may be in the mid-tones but it does show up more in darker areas of a scene. If you can blow up those out a little bit, not in a way you are losing the actual information, (it’s really important to pay attention to the histogram at the back of your camera) but do it just enough to where you are not under-exposing the image or introducing too much shadow to your image.

That is also another way of introducing noise to your images for those of you who are shooting really long exposures. As you open your exposure to 1, 2, and 3 minutes or something around there, you might see that you have a little bit of noise even if you add ISO 100 or the lowest ISO that goes into your camera. That’s because the sensors are getting too heated and are getting a little bit too overexposed and you will see some noise pop-up more especially in the shadow areas of your scene. Instead of shooting long exposures like that, one thing you can do is shoot a bunch of shorter exposures and try to combine the photos in Photoshop or you can use a popular feature that’s in a lot of cameras and that’s the in-camera noise reduction. If you use in-camera noise reduction, you will need to be on your scene and not moving the camera for a very long time. So, let’s say you’re doing a scene for two minutes and you have in-camera noise reduction enabled; most cameras handle that by taking the two minute exposure and then taking another two minute exposure showing where the dark pixels will be and so it’s like taking a blank photo and in the camera it’s kind of trying to remove those overexposed, overheated pixels to get rid of that noise. As you can imagine, it will take a very long time especially if you are taking 5 minutes of exposure because that will mean staying on the scene for 10 minutes total time just for one shot. It’s a good feature to use if you are doing small exposures such as 30 seconds so use that to reduce as much noise possible. However, it is not probably the best technique and I would rather do post-production noise reduction than use the in-camera noise reduction but it can be useful sometimes.

Post-production noise reduction

Now that we’ve discussed the two things you can do with In-camera, let’s look at the post-production things you can do in Lightroom or Photoshop. Obviously many people have seen photographers out there using the detail section specifically in Lightroom where there is a noise reduction section to remove as much noise as possible. There are several sliders which I will go through and tell you what they do include the following.

Luminance slider

This slider is used for reducing the noise that’s coming from over underexposed pixels and is mainly used for what I’d consider as long exposure. The underexposed pixels are kind of heated over and are more prevalent in long exposures.

Luminance detail

The luminance detail controls the luminance noise threshold. This is a very good slider to use for really noisy photos. The higher the values preserved the more the details that can produce a little bit noisier results.

Luminance contrast sliders

This is also used for really noisy photos as well. Higher values kind of keep the contrast that will produce a little bit noisy and blotchy scenes in your photos and you don’t want to mess with that contrast too much but a little bit can go a long way with that slider.

Color noise reduction slider

This slider is labeled color and is used to reduce color noise. You might see red, green and blue or color pixels in there and that will help reduce color noise and this is also more prevalent when it comes to underexposed, shadowy areas like when you are taking a photo of trees and you have silver wedged tree, you probably will see more color noise there than you would if you were looking for a general film grain. There’s a kind of grain aspect and there’s the color noise and this particular slider takes care of color noise.

There are a lot of external plugins that you can check out to help reduce noise. Most are built for Photoshop and Lightroom but I’ve noticed that when I use those, my photos come out a lot more blotchy, hazy and I have to do a little bit of sharpening and clarity work such as dehaze to try and bring some of that back. It does, however, reduce the amount of noise greatly but it does make my overall image very fuzzy. When you are playing with these noise reduction sliders, just be a little bit gentle with them. A little bit of noise in your photos is not going to hurt at all. If you take a little time to look closely especially at night photos or if you zoom into around 50-75 percent, you will see noise in those photos and yet the photos have been published in magazines or sold out for printing. Noise is okay and the only time you should be concerned is when noise takes away colors, saturation, vibrancy and that’s when you are supposed to do some doctoring to your photos with the noise reduction sliders and other sliders to make a little bit better.

Overexposing your images is a great technique to bring back some of that again. Not to a point where you are losing the scene but just enough where you can pull back some of the scenes using the highlight slider in Lightroom or Photoshop. That will bring back some of those underexposed areas and also remove that noise. One other thing that’s a no-brainer tip is to make sure you are shooting in a raw format. All those sliders and techniques I talked about might probably not do you too much good if you are playing with jpeg in Photoshop and Lightroom. Make sure you are shooting a raw format depending on the camera you have because you’ll need enough information to play with. As I was talking about overexposing the scene and trying to bring it back using the highlight slider, you will not be able to do that as much as you would with raw files if you’re using jpeg. If shooting in jpeg, you will be limited and won’t be able to do all that you would want to do.

As such, shoot raw and learn to post-process your images in Photoshop or Lightroom and if you still want to have a jpeg for the sake of catalogue or something of the sort, you can do convert raw into jpeg but definitely have the raw file especially if you are going to a noisy situation and are sure you want to be able to remove as much noise as possible.

Mirrorless and DSLR Video Tips

This particular post will be all about DSLR videos. There are lots of DSLR and mirrorless videos in the market and these give you the ability to shoot really high-quality videos and as such you can have nice photo taking device to take with you as well as a video recording device thus making it very handy if you want to go out at take some photos and would like to grab a few videos as well. I will go over a couple of video tips for you to try and help your videos look a little bit better. Also, you might want to check out our guide on how to shoot quality videos with DSLR camera.

Setting manual exposure for the camera

This is one thing that many people do not understand when shooting videos. In most of the cameras, you will find both auto and manual settings and so when you are using your DSLR video, you can let your camera go ahead just like the green box or auto mode on your camera when you are taking a photo, you can have the camera do basically the same thing with the videos. It will automatically choose the shutter speed, the aperture, the ISO and everything together to get you a nice looking neutral video. But a lot of people don’t know that you can set this into a more manual setting so you can control everything. When you control everything, you also control the frame rate of the camera. So, basically what you are doing is changing how fast your camera captures an image per second. What I’m saying is that when you switch over video, you basically will be capturing a series of images over a matter of a second and how fast or slow it depends on how your image or video looks.

There are several standard frame rates. Around 24 fps to 30 fps is kind of the standard when it comes to cinematic movies. It’s kind of a slower frame rate and although it’s not a bad frame rate, it’s the kind of frame rate used in movies nowadays. You’ll see a lot of cameras out there or even some cell phones that go higher than that. Basically, when you have a frame rate that’s faster than 24 to 30 fps, you will have the ability to record a slow mode and as such, if you have something that’s moving so fast, you can slow it a little bit and that will be to around 60 fps, 120 fps or even 240 fps and that’s extremely slow mode but around 60 frames per second is kind of the center frame rate for getting really nice slow more looking videos that kind of fits in with 24 and 30 fps. What I mean by that is let’s say you are recording a movie at 30 fps per second and you decide that you want to do a really slow motion of somebody walking just to make it a little bit more dramatic, you can change your settings to capture 60 fps and you’ll capture the scene at 60 fps. It’s pretty the same thing on the device but once you start editing you can at least slow that down to around 30 fps meaning that your movie is going to be half the speed and is going to look really slow mode but the entire project is still going to be 30 fps. This is a lot of numbers but it’ll still come out really nice.

What I mean is that you will have to capture frames per second and so the more frames per second you set your camera to capture between 24 and 60 frames per second, you will need more space on your camera obviously and also when you choose the setting in your camera, you actually have to adjust your shutter speed when you are changing the exposure yourself instead of having the camera do it. For example, if you are recording your video at 24 fps, you have to set your shutter speed at 1/50th of a second and basically, it doubles whatever your frames per second is. If you are shooting 30 fps, you need to change your shutter speed to 1/60th and if you are shooting 60 fps you need to set your shutter speed to 1/25th of a second. If you are shooting 60 fps you need to make sure you have enough light and to accommodate that, make sure your aperture is set at a lower number, a wider aperture and make sure your ISO is up a little bit so you can get more light in there to capture a well-lit scene using those fps numbers.

It’s not just about fps numbers but also about ISO. A lot of people think that ISO is bad when you start raising it up a little bit to 1600 or 3200 because you are inducing a lot of noise into your photo but when it comes to videos, noise is not as bad as you might think compared to photos. As many people do when recording standard videos, you can avoid messing with the ISO but instead set it to auto and let the camera choose the ISO that the scene needs and only worry about the frames per second which should be set at the beginning and only concentrate on the aperture to determine how much of the scene needs to be in focus. If you want to highlight the subject just make sure you have a wider aperture and if you have pretty much of the scene in focus make sure you have a smaller number of aperture. You don’t need to let the higher number of ISO scare you away from getting a good scene. Obviously, if you can get more light into your camera you’ll still have a good image but it’s not going to be as noticeable as it would if you were getting a still image.

Focusing

When videos started to be introduced, a lot of cameras didn’t have the ability to autofocus your images. So, if you were to follow a person or have somebody talking in the camera, you had to manually focus on that person and it couldn’t continually focus. This means that if the person had to move back and forth, the scene wouldn’t track their face to keep them in focus. Nowadays it has become common in the DSRLs we have as they come with active autofocus and it will continually focus on a moving subject but that brings a debate on whether you should continue using autofocus or you should do manual focus.

I am of the mindset that you should continually do a manual focus as it will get a little bit better working with the camera and get you to focus on what exactly you want. There are a lot of people however who want to still use autofocus but those are probably conservative blogging type who have a camera pointed at them and don’t want to worry about focusing but let the camera focus in. One thing that does, however, is that if you’re not using an external microphone, you probably will hear the camera start focusing and the ratcheting of the gear and that noise can really disrupt your film and this is what I will handle in the next tip as far as using an external mic is concerned. However, you need to worry about whether you want to use a manual or autofocus but I truly believe that using a manual focus is a better way to go but if you’re in a pinch you can probably always switch it to autofocus and you’ll be fine most of the time.

But if you could work in trying to track a subject using manual focus while you are recording video you’ll just get more and more familiar with your camera.

Sound

Sound is probably one of the most important things when it comes to having the best video possible. A lot of people think that they should spend a lot of time editing and be getting the pictures to look extremely right but if you’d try to record a subject but if you will have to record a subject in an interview or any other forum and you are using the on-camera microphone, you will not be picking the best sound possible even if you have a really quiet room and everything is perfect there, you’re not going to have the best possible sound. You really need to use an external source for your audio.

There are a couple of audio options for this. You can get a directional or a shotgun microphone that will plug directly into your camera and you can put that on a harsh on your camera


and point it at your subject and that will allow you to capture audio coming from one point directly from where the microphone is pointing. That will do a better job and there are a lot of companies that do a better job including Rode which is the most popular company that makes microphones like those. You can also use wireless systems as well but that gets a little bit more complicated. If you want something easy, picking up some shotgun microphone to use like a harsh mic that plugs into it, is probably the easiest way to do it.

Picture style and white balance

These two are very important especially when you want to edit your final film recording. When it comes to picture style, there are numerous options you can use just as you would when taking a photo. You can choose a landscape version, a black & white monochrome version or something like that. I really suggest you choose some sort of neutral or flat picture style. The reason for this is that you want to have as much room as possible when you start editing your film. Whether it’s doing it on your smartphone using a free iPhone or Android editing app or doing it on a desktop using a personal editor, you’re going to have more flexibility and control with the exposure, the saturation, the colors and everything else if you have a flat picture style.

If you have a picture style that has a lot of contrast in it or a really saturated with colors out of the camera, you can bring some of it back but you probably won’t be able to bring back as much as you would think. Editing videos is a little bit trickier when it comes to bringing out contrast, colors and everything since you are not editing in raw file as you would in a photo but you are editing a movie file and there is a little less data to play with. So, if you have a neutral or flat picture style, it gives you most able to drag out as much exposure as you can.

White balance is yet another tricky part and a lot of people think they can just sample something from the film and movie and automatically correct the colors and although you can do that in some cases, in most cases you’ll be out of lack especially if you are recording indoors where you have bad lighting and want to get rid of the color cast. It’s going to be very hard to get rid of that if you don’t take proper precaution before you start recording. You can easily do that by changing the white balance depending on the situation. Don’t always rely on auto white balance when it comes to filming your video on DSLRs because it’ll probably get it wrong than it gets it right.

Don’t automatically rely on the auto balance but if you are in a daylight situation, switch it to a daylight version and that will get you into kind of a ballpark and if you are indoors, switch it to fluorescent or tungsten depending on what kind of light you are around. Just be more cognizant of the white balance and don’t think of it as a photographer where you edit a photo by clicking one button and it’s almost corrected. One thing you can do is get a white balance or grey card to carry with you if you really want to get some accurate colors but if you don’t want to spend money on something like that, even though they are inexpensive, just finding some sort of white paper is going to get you started in the right direction. You can actually sample that piece of white paper in your movie or film editor and sample the white color and it’s going to turn into pure white and that will get you into a ballpark. Just simple things like that before you start recording your film.

Think like a photographer

This is not a technical version of recording your videos in DSRL or mirrorless camera but think like a photographer when doing these types of things. It kind of helps you to make it more fun and also help you stand out a little bit more. If you this kind of a photographer who likes getting crazy angles such as a low angle, a high angle or vantage point, simply because you are recording a video doesn’t mean that you have to be straight and can’t explore that as well. Get low or high just as you would when shooting a photograph and all other cool things such as depth of field. Thinking like a photographer when doing your video and it will help you stand out and make your videos pop off the screen.

Those are just a few tips some of which are technical and others theoretical but to help you get the best mirrorless and DSRL camera possible when starting to learn how to record videos.

8 Photography Projects To Start Now

This post will be great especially for those of you who need a little bit of “pick me up” when it comes to photography. I did another post similar to this that is called ‘stuck in a creative rut’ and this will be kind of along the same line. We’ll cover 8 personal projects that you can take on to kind of invent your photography or just get back into photography. Here are the 8 photography projects you can start now: –

1. Shoot something new

This might sound to be basically obvious but if you’re a portrait photographer, for example, you might want to pick just any other style of photography that’s accessible to you and start shooting that way. Even if you find that you hate it, at least you know that you don’t like that style of photography. So, let’s say you’re a portrait photographer and you want to try your hands on food photography, that’s pretty easy to get into because you can grab some food or make it yourself and kind of stage plating and getting the lighting and everything right and everything like that. This is a very easy one to get into. Another one would be if you’re a food photographer and you want to go out and try your hands on really intense landscapes, that’s pretty accessible since you only need to go outside and find some really cool spots in your area to take photos of. While on this, don’t just go out and start taking photos of your backyard but try and research areas in your location and try to make the most of that particular project. That’s pretty easy to do but trying to shoot something new will definitely help awaken your photography skills.

2. Thinking outside the box

The reason I came up with this is because there are a lot of different ways of doing photography but a lot of people think that they can only go to a certain extent. For example, those who take landscape photographs think that they can only go out and take a couple of landscape photos and that’s really the extent they can go. However, there are those photographers out there who inspire you to really think outside the box. One of them who I’ll in particular link to this post is Hernandez Dreamphography in YouTube whose channel basically takes staging and product side of photography to a whole new level. Basically as a real quick example of it is a photo that he created called “Love Beatles”. What he did is to create a space out of pretty much nothing and you really have to see the video in order to understand the whole theory. He would take a paint brush and cut the bristles out of the paint brush to make what would look like grass or dead grass in a field and he would create a structure to put a sign on. He basically created a world to put his photos together and he then put a Volkswagen Beatle, a model that he put together and he put the car in the photo and then did some photoshop work but basically, that is thinking outside the box, making your own world in your photo. Doing something like this is extremely time-consuming and requires much attentiveness than you can imagine but you can watch the video to see how long it took him to build the set, take all the photos, do some photoshop and put the work together. But this is one of those projects that you do not want to complete in a day because it might end up looking bad if you even end up completing it.

It is one of those projects that you have to go through over and over for days, weeks or months to try and get the perfect photo. It is not one of those projects you fill up over time and you’re done in a month. It’s a really cool video and I would encourage you to check out for Love Beatles to see exactly what I’m talking about as far as thinking outside the box is concerned in regards to your style of photography.

3. Picking a theme

This is the next kind of project you can pick a theme. For a lot of people, picking a theme means picking maybe cars to shoot or something like that but you could actually it in a totally different way and this is probably the more attractive way to look at it. It means picking a theme but what you pick be based on a technique. For example, you can talk about lighting. All the photos in a particular project that you are putting together were taken with an off-camera lighting and so you can put together off camera lighting in your photos. You can do compositing, macro shots, slow shutter speed kind of photos and stuff like that. There is a lot you can do and if you put them together like in a photo album you’ll probably not get the same kind of reaction as you would if you picked a certain subject but you’re going to see that you actually put a technique on the photos and you can see all the variety of things you can do with certain techniques. That’s picking a technical theme and it’s actually a fun thing to go.

4. Finding your ABCs

This is kind of a fun and popular one when you go to like novelty shop. What I mean by that is going out to the world and taking your camera with you and what you do is maybe look at a street sign or sort of custom-made sign and you see the letters in the sign. They could look like cool signs but you take pictures of each individual letter on that sign. Over time, you find that these different types of signs, posters and word arts and you put all of them together to make your own photography alphabet. You’ll put these together and see an “A”, a “B” and all other letters from the sign and it kind of creates a cool collage of photos. You might have seen that in novelty shops where a lot of people have their names spelt in different letters that are photographed and that’s a cool way to do it. But there is also another way of finding your ABC project and that’s basically finding stuff in the world that will resemble some letters. What I mean by that is maybe you take a pair of sunglasses and turn them upside down and that represents the letter ‘B” or you’ll see an inflatable doughnut and or something like that and it creates an ‘O’ and you just take pictures of all these objects that actually look like letters.

It might sound stupid but it’s actually a really tough project especially when you get to more difficult letters such as Z, Q, Y and the likes. You can see there’s a lot of different things you can do with that and its kind of a little cool project. Again, this is not something you can put on your website to promote your photography but it’s a small personal project you can have going on outside your main style.

5. Day in the life of

This is kind of a fun one and might require you to carry your camera all day with you. Basically, what you do is to try and pick a nice day when you’re going out on a trip or something like that and then take your camera with you and do a photo documentary of your day. So, you can one of your waking up, take a picture of your alarm clock, a picture of yourself getting dressed, the clothes you are wearing. It’s going to be an event, all day long and basically documenting your life for that day. This is a quick one that you can do in one day but it can make you think about the things you see around you on your normal day to day life. That’s a really pretty one but can create a lot of fun to do.

6. Self-portrait Sundays

What this means is that every Sunday of the week for a month you will be taking a self-portrait of yourself. You have a whole week to figure out what kind of portrait you will take of yourself and you can be as creative with it as you can and this is going to be one of those projects where you have to time to get prepared, see whether you can have props or something like that and take that portrait on that Sunday, edit it and share with people maybe on your social media or something like that.

It’s just a self-portrait Sunday and is a way of thinking about a process of creating a photo but also getting yourself in front of a camera because a lot of photographers don’t like getting in front of a camera but like hiding behind it a lot. This is another great way of getting out in front of a camera and developing a scene in a photo from start to finish.

7. Picking a subject

This one goes along the same line as number 3 but this one is on a subject. Picking a subject is also a great way of doing this and it maybe you’re going on a vacation and it could be a place that’s not super photogenic but you pick a subject in that scene and just kind of like concentrate looking for specific things. A really good example of this is me and my family went to visit a place last year and it was a blurry sunny day outside and there were a lot of people and it was just not a photogenic place. But I saw all these really cool doors that are in this old building and I thought of going ahead and creating a small project of 5 to 7 photos and photograph these specific types of doors. They are not the normal doors you’d see anywhere else but are these old-style wooden doors with different handles and hinges and I did that and I also did the windows as well and it was a really great way to not only concentrate on things that you don’t normally look at but also create a little cool project out of that as well. Again, it was a small project involving a few photos and it was a really cool thing to put together and really spend time looking at the doors and getting them angled just right and really looking at the composition as well. You can go with all kinds of things including doors, colors, lines etc. Picking one subject is a cool way to do a really simple photography project.

8. 365 Project  |  Project 52  |  30 for 30

These are three projects looped into one. These are 365-project, project 52 and 30 for 30-project. Almost everybody has heard about the 365-project and this basically means taking a photo every day throughout the year and putting them together as a way of documenting the year in a way but a lot of people kind of get lazy and only take a picture of a window or something like that. There are other lazy photos that you can take but it’s a great way of making you take photos. Project 52 is kind of the same thing but instead of taking a photo daily you will be taking one per week. This gives you a little more time to think since you have a whole week to consider the kind of photo you would want to shoot, the places you want to travel to once you are off work and you have a weekend available and that’s basically the same way of doing this. 30 for 30 is basically taking one photo per day throughout the month.


Just as tip number 5 was to kind of document the day in your life, this allows you to document the month but taking things that happen each day even when things seem boring. However, it is your work to make things a little more interesting. You can run to the local park during your lunch break and photograph anything including birds but this is something you can do and get off your normal routine and do some creative thinking and put your mind on a different spot.

These are 8 photo projects that can really further your photography and get you thinking about different ways of thinking outside the box.

Photography Q & A Part 2

This po


st is all about photography questions that have been submitted to us via email or posted on Facebook page. If you have any questions on subjects we might not have covered yet, you still can send them to us and we shall consider them as part of our next episode. This post will cover 5 questions that have come in.

  1. What’s the difference between DSRL and mirrorless cameras?

This first question is from Jeffrey Tomlin. There are a lot of differences as far as how they are built and type of features you can have in there but we shall only tackle some of the bigger or the main differences that would actually be beneficial to a lot of people.

Noise: – The first one is that the mirrorless camera is quieter when you are taking photos and this is due to the fact that it does not have a mirror. In all DSRL, there are mirrors that flip up and flip down and that mirror is there to kind of allow you to see through the viewfinder lens. When you are looking through the viewfinder, you are actually looking at a mirror that’s on top of the viewfinder and then it bounces off a reflex mirror and then you can look through the lens.

This mirror will be gone when you have a mirrorless camera and the reason why it’s quieter is that when you take a picture using a DSRL, that mirror flips up and exposes the scene to the sensors and then flips back down. In essence, when you take a photo with a mirrorless camera, you are basically eliminating that. You are only seeing what the center sees and are not using that mirror and so, when you take a photo with mirrorless camera, you almost hear nothing in a way. Of course, you can hear some sort of sound but with the DSRL you are hearing that shutter or mirror go up and that’s what the click is when you take a photo. That’s one main difference that people talk about when they talk about mirrorless cameras.

Size: – Size is yet another major difference when it comes to these two cameras. A mirrorless camera is a little bit over half the size of the DSRL when everything including the lens is attached to it and weighs a lot less as well. Depending on what kind of version you get, a lot of mirrorless cameras a very compact and this makes it very easy for you to travel with one. The lenses are also a little bit shorter especially if you get a telephoto lens that does not have too much distance extended and you can still zoom into specific length and they have specific lengths but for the most part they are very portable and there are many beneficial things when it comes to mirrorless cameras.

Those are the main differences between the two. Most people go for the size just because if you want a backup camera, a mirrorless camera is probably the best because it’s small, compact especially if you have the brand that your main camera has, you can probably do a little bit of interchangeable lenses and stuff like that. That is the main difference.

  1. How do you shoot and put together a time lapse?

This next question is from Michael.

There are many different ways of doing a time lapse and a lot of people choose to do it traditionally which is like an individual photo. You take a photo after every 2-5 seconds or something like that and then put them together in a movie format. However, nowadays a lot of people have found a shortcut for that and just do one long recording of something. Just take a DSRL and put it on tripod in a movie mode and speed it up. But if you are going for the traditional route of taking photos and putting them together, basically what you are doing is that you want your camera to take a photo again every so often and a normal time lapse being around 5 seconds or thereabout. Every 5 seconds it will take a photo and what you will do to put it together as you take all those photos, you probably don’t want to shoot raw but maybe jpeg to make it easier for yourself and save some space. You take those jpegs and put them together in some sort of a compiler that will put them in a movie format.

There are many different apps you can use to do this but unfortunately, Lightroom doesn’t do this. There is an extension you can get for Lightroom but I haven’t found it to be the best as far as putting images together to make a time-lapse is concerned. But there are other apps you can look at and one of those I particularly use as a Mac or Apple person is called interval and what you do is just import all your jpegs and it knows which ones were taken based on the file names and the count of them. You can make some adjustments as far as basic stuff like exposure, saturation and other stuff is concerned and then click export and it’ll put all those together into a movie file and there you’ll have your time lapse. Windows users have other apps you can find but I can only speak of what I have used an interval is probably the best one and you can find it in Mac APP store.

  1. How do you remove some extreme distortion from your shirt in either PS or LR?

This question is from Matt Harrison

First, when talking about extreme distortion, there’s probably nothing much that you can do. If it’s very bad, you’re probably going to lose much of your image because basically you are turning a wide angle shot that you have with extreme distortions into a normal shot and you are losing a lot of the scene. But there are several ways that you can do this especially in Photoshop where you can use the adaptive wide angle filter. This is a filter built-in Photoshop and it allows you to follow the contour of your photo so you basically draw from one point to another and command that point to be straight and it’ll straighten than point. The more lines you draw, the straighter your image becomes and the more distortion is removed. That’s a good filter to use in Photoshop.

Another thing you can do manually into photoshop is to draw a ruler guide on your photos. If you have the Command+R key, it will bring the rulers and this will allow you to draw straight lines and then you can bring your image into a free transform mode, choose distortion and start warping your image to line up with those rulers. Again, the more rulers you draw the straighter the image will be. Lightroom does not have a lot of tools you can use to remove extreme distortions but you can try the transform develop module and you can choose auto to see what it will do. If that doesn’t work, then you will only be left with the main option which is to use the guided transform that allows you to draw a maximum of 4 straight lines and then it’ll start doing the same thing that adaptive wide angle does. This does a lot of good work as well but depending with the extent of the distortion, you will probably lose a lot of the image.

If you are only using Lightroom, then you are limited to auto transform and guided transform but if you bring it to Photoshop then you might have more luck.

  1. How to you develop your own style as a photographer?

This question is from Dennis Brown

This question is not a “right and wrong question” but a factual question. A lot of people think that developing your own style is developing the kind of photos you actually shoot and that can be a way of developing your style. However, developing your style can be way more than that. It can be the way you process your files, the mood that you shoot, the type of journey that you shoot specifically if let’s say you do portraits and do a lot of very moody portraits for extreme lighting and that’s typically what you like to do, that can be your style.

A lot of people think that when you have a particular style, that’s really all you should shoot. One of the tips I always give people when it comes to building a portfolio is if you are trying to do portraits, you don’t have to do an entire website full of portraits and also if you are throwing a gallery of pet photography or food photography or something like that. You want your portfolio to showcase a specific type of photography, much like if you have an Instagram account and you want to showcase your photos therein, you don’t want to throw in your portrait photos or what you had for dinner that night.

Keeping your style on your website is very important. You want to make sure that your style is showcased to the fullest extent it can be but you also want to make sure that if you are photographing certain things, there are a lot of ways and styles that people use to edit files and if you bring them into Lightroom and typically do certain type of things to the photographs, you are certainly developing your own type of style, method and eventually as you are doing this, you’re going to realize that your photos start to stand out more than others and that can be a good or a bad thing.

You can look at files and wish that yours looked like that but you’ve already started to develop your style. It is a good thing to learn obviously but when you are developing your style you want to keep learning and stay true to what you really like. You don’t want to start editing for other people and hear them saying things like, “that is too saturated’ and then you start de-saturating your photos just because they said so. That’s the way you like to edit your files. There is really no true right or wrong when it comes to photography and creative world in general. If there was true right and wrong, it wouldn’t be a creative field but another factual thing. We are all creative, we all like doing our own things and see things in different ways. Know how to develop your style, know when to come up with the rules and when to break them and that’s really a good thing.

  1. What is the best way to organize your Lightroom catalogue?

This question is from Douglas Daniels

I don’t know whether this is the best way but this is the way I have personally found that it makes it very easy for me to find my files. It also makes it easy to just know that my catalogue is organized. Typically, I create a new folder at the beginning of every year which I’ll give a title of that year. For example this being 2018, I will name the folder “2018.” If I go out and take some photos in a nearby city, I normally come back and create a folder within the new folder which I’ll call ‘cityscape’ and in that folder I’ll call the name of the city and I’ll pit all my photos inside there. If the next day I take some portraits of some friends, I’ll create another folder within the 2018 folder which I’ll call portrait and label it something like “Becky and John.”

I won’t put everything within the 2018 folder but will always create the specific folders within the journal list. This means I’m for example not putting Beck and John in 2018 folder but in the portrait folder which I create inside the 2018 folder. I always create a journal for that particular range of photos. If I go to the beach I’ll do seascapes, if I do regular landscapes I’ll create a landscape and so on and so forth but I keep creating a hierarchy of those particular files in their particular folders as far as the journal goes.

One thing I do but not enough of it and which can consume a lot of time is keywording the images so that when I’m importing them I do it based on their category. It can be time consuming but also makes it easy for you to search your catalogue if you start creating a huge one. If you keyword the images, it will be easy to quickly pull them out especially if you want to look back at the end of the year and see the good shoots that you had.

Those are the 5 questions from our audience and if you have some photography questions of your own that you need answered, make sure you email them to [email protected] and I will make sure they feature in our next post.

10 Useful Lightroom Tips and Tricks

Like it or not, but editing still remains a crucial part of photography. There are multiple editing tools that are widely used by photographers – Lightroom, & Photoshop are the most popular ones. Plus, this is a great topic, one that many people would like to learn especially due to the vastness of activities you can do using Lightroom. There are a lot of shortcuts in there that will really help your workflow and make it a lot faster. There are also many cool and easy tricks that will come in handy especially when dealing with videos. We’re going to cover 10 tips necessary for photography in this post. They are: –

  1. Solo mode

I have created a video on this tip and you can check it out on our YouTube channel. You can also subscribe to this channel so you can get the new videos that are coming out weekly.  This basically means a mode for Lightroom automatically collapsing all the modules, the sections in the development module that you are not using at that time. A lot of individuals when they go to edit their photos, let’s say in the basic module and you drop down to the tone curve or something like that, the basic develop module will stay open and you will see all the sliders there and you’ll have the tone curve section open as well. Every time you open a new module it opens the area on the right side where the development module is and it will get very long and you have to scroll down. However, this basically means that it collapses all the sections that you are not using so that you can only concentrate on one particular section.

This is really one of the great photography Lightroom tips and a time saver if you don’t want to scroll up and down and there are only specific items that you need to do to your photos without having all those sections open. To get to the solo mode and turn it on, just get to develop module and right-click where the basic section is and then click on the grey area and you’ll get a new menu in there and a little pop-up. At the bottom, it will show this one. Just make sure that’s checked and then you’ll be able to only see the sections that you are working on at any given time. Speaking of only having certain useful items active in your Lightroom, I would like to talk about the removal of some of the modules that you might not actually use. At the top right, you see the normal module reading Library, develop, map, book, slideshow and web. However, many individuals don’t know that you can actually remove the ones that you do not use. For example, if you don’t care about the map or you don’t Geotag your photos or anything like that, you can actually right-click closer to the library module and this Lightroom trick will give you another menu that pops down and you will be able to uncheck the modules you do not need. Same way if you don’t want to create a book or a slideshow among other things, all you need to do is just right click and uncheck those modules and that’s one of the many ways of removing items and streamlining them in your Lightroom.

  1. Editing videos in Lightroom

Here is a quick Lightroom trick for the same. Many individuals know that if you have a DSRL, a mirrorless camera or any other kind of camera that you import into your Lightroom if you have a movie files on your memory card when you import them into Lightroom, you will notice that you always get a message that says, “video editing is not supported.” That means you cannot do much to your images or photographs. However, there is a pro adobe Lightroom tips if you want to work on smaller clips. So, if you want to edit your videos, you should import them into Lightroom and then go to the thumbnail, right-click and create a captured frame. This will pull one individual frame from your file and once you have that captured frame you can make the local adjustments you want to do to your film on that still frame with the help of an adjustment brush. You can up the contrast, adjust the exposure and all other normal things that you would probably do. Once this is done, just add the two files and sink the settings back to the video. This will inherently change it and apply those settings that you did to the video frame to the file. You can then export it and you’ll have your edited video that has the normal adjustments that you’d typically do to your video when you are not really supposed to be able to make changes to your it in Lightroom. That’s a quick Lightroom trick and a lot of individuals don’t know one can make changes to it in photoshop as well or just drag it into Photoshop and do the normal tasks you can do to your images or photographs in Photoshop. However, this is a great way to do it in Lightroom as well. This is a neat way to be able to make a simple adjustment or change in Lightroom.

Love this free trick? Would you try it? Tell us now!

  1. Holding ALT option key on different items in Lightroom

One of the most versatile photography Lightroom tips and tricks you can learn. This will display various different situations in Lightroom. One thing that I use ALT key option for is to sharpen my image. So, if I go to detail slider and you will see the normal sliders such as the amount, the radius, the detail and masking. If you are sharpening the image and you only want to sharpen a selected section of the photo, you can hold the Alt option key on your keyboard and click on the masking slider for example and start sliding that to the right and this will turn your photo or image to some sort of black and white balance threshold view. What that means is that basically everything that is white balance will be sharpened when you move the slider but anything that’s black will not be sharpened. This is a great way to see exactly what’s being sharpened in your image. You can also do it with various other tasks in Lightroom but hold the Alt key when sharpening is probably one of the most useful things you can do.

  1. Dual monitor set up

People don’t know that you can have your Lightroom on two monitors if you have a dual monitor set-up on your computers. What this is really helpful for is that if you have let’s say you want to have your Lightroom catalog pulled up on your second monitor but be editing on your main monitor. You can have all your images show up on your second monitor and still see them all not just in small thumbnail view but as large thumbnails. You can make improvements to particular photos on your main monitor while still keeping the other photos up. The way to set this up is to go to your menu bar > Window > Secondary display and there you have a couple of different options. You can choose let’s say, full-screen view, second monitor preview among various other options you’ll find there and have available to you such as loop view, grey view among others. If you want to take advantage of this, that’s the best way to go about it.

  1. Import preset

This is pretty easy and I do talk about it quite often. Import Lightroom presets are not necessarily a different kind of presets. For example, Sleeklens.com does sell presets but you can use a preset that are made by anyone and use them as import presets. Let’s say like when you import your photos and need to make improvements to them, you typically do the same to every photo or image you retouch. You may apply camera profile, the general amount of sharpening, increase the shadows, saturation or any other changes applied by you to almost every one of your photos and then you fine-tune them from there. What you can do is make a preset for that and when you import your photos to your Lightroom catalogue, you can have that specific preset from the import window and as an import, it will apply those adjustments to each and every photo or image that you import. It’s a very really great timesaver and it doesn’t have to be just a simple effect that you do to every photo or image but it could be a full-fledged effect that is applied by you. Let’s take the Sleeklens preset for example; we have all these all-in-one presets that are like a one-click fix that you can use to apply all these general effects to your photos, you can have it applied all these effects to each and every one of your photos and due to this you don’t have to go to your photos and do that individually. This is something I use all the time just because it’s a timesaver especially if you’re trying to make an adjustment or change a bunch of photos and get them all out and deliver to a client as fast as possible.

To avoid highlights or shadows from getting clipped, the best solution would be to get them correct while taking the photo. However, many times, there is always an option to do it in the Lightroom. In dark areas where shadows are clipped, if you brighten the areas too much, you will be left with excessive noise.

If you like the tutorial provided in this article, share it with your friends.

  1. Lights out mode

This is a cool Lightroom tip for a feature that’s also called Lightbox mode but what it basically means is let’s say you want to have a look your photos with none of the distracting elements around or on your desktops such as other images, icons, folders and stuff like that. You can press the ‘L’ key on your keyboard and when you press it once, it will dim everything in your desktop except your photo or image so that the photo or image can be the main standout on your screen. Due to this, you get a clear idea of how your photo or image looks. If you press it one more time, it’s going to completely blackout everything so that your image is the only thing showing on the screen and again this is a great way to have a look at the photo or image without any kind of color contamination or any distracting elements. If you press it one more time, it will exit the Lightbox and go back to normal. This is a great way to single out your photo or image and help you show your colors all together and ensure that your photo or image looks as good as possible.

  1. Customizing the background during edit

This Lightroom tip works almost the same as the previous one. You know typically how there’s a grey background to the area where your photo or image is when you are in the library module or develop module. You can alter that grey background to a different color. If you are in the develop module or the library module, you can right-click on that grey area that’s in the main central window and a little menu will pop up where it says “background color”. You can change this instead of being a darker grey you can change to white balance, light grey, dark grey, darker grey or even black. To fit your preference, you can customize if you use Lightroom to your liking.

  1. Identity plate

Identity plate is the little Lightroom branding that you might find at the top left of the window where it says Lightroom Classic CC, Lightroom CC or something like that. You can change that to any kind of text that you need or even your logo. To change or make an adjustment to this if you are in Window, just go to file menu and if you are on Mac you use Lightroom menu and click on identity plate setup. In the little box that pops up you have the option to change the identity plate to a personalized identity plate and when you choose personalized you can actually have a PNG file of your logo and it will and it will place that at the top of your corner instead of using the Adobe identity plate. You can also do a text version as well, let’s say you select the standardized text identity plate and that will give you the option to type in any name including your name. You can also customize the font style that’s on the module in Lightroom and you can change the color, the weight and various other things. That’s how you can further customize your Lightroom.

  1. Survey mode

This is a little feature that I don’t use often but when I use it, I get a better idea of how my photos look altogether. This is a great method and one of the best ways for looking at your photos in kind of one big group as you see how well they fit together. If you are going for a particular color scheme or color grading effect to your images, this is a great way to do that. What you basically do is select all the photos you want to have a look at and group together and if you have them in a collection you can click Command +Ctrl+ A to select all of them and then hit the “N-key” on your keyboard and this will bring them up in thumbnail view but you can see almost all of them and see how they look together. You will find how the colors go together and whether white balance might be off in a certain number of the images and you can click on each one of them and improve them from there and it will take you back to the survey. If you need to go back to the original mode, which is the grid mode, you can just press the “G” key on your keyboard.

If you like the tutorial provided in this article, share it with your friends.

Smart Previews Edit

Smart Previews are no less than a magic. You can get smaller versions of photos built out of Lightroom classic in your Lightroom catalog so that even when you disconnect you can keep editing.

For laptop users, this is very helpful as they have big image libraries on the hard drive of their system. All thanks to the smart preview, you can continue editing when it’s time for you to leave the hard drive and go somewhere else.

QUICK TIP – In the post-processing stage, ensure that your photo or image is straight. Use the crop tool if you need to. Once the image is straightened out, always see if you can crop it differently.

These are just a couple of photography Lightroom tips which you might have heard about some of them or not heard but they’re things I use almost daily when I’m editing photos and I find that they really help with my workflow especially some of the ones of the import presets are a major time saver. Just play with that and if there’s an effect that you really like to ensure to apply it in your import so you don’t have to do it later.

Would you like to keep getting such articles that provide easy photography tips and tutorials? Tell us in the comment section.

Natural Light Before Flash

In this post, I will be talking about flash vs natural light. This is a somehow popular topic that’s coming up on whether you should start with flash or concentrate on using the natural lighting in the scene or think about using the pop-up flash from your camera for most beginner photographers. I want to talk about the differences between the two and why you should actually learn flash photography less and concentrate on natural light first before you even jump to the flash. Keep reading and I’ll tell you why I prefer natural lighting starting out before using flash and by the end of the post, you will find it making sense to you more.

Natural light is totally free

Well, this is a simple reason and the truth of the matter is that you do not need to purchase any equipment in order to use natural light. You basically find the light in the scene when you go to take your photos and all you need is position your scene or model so you can cast the shadows or put some highlight on certain places you want to highlight. A good example will be a portrait next to a window. Obviously you don’t want to be shooting into the window because your subject will be backlit and as such, it’ll make more sense to have your subject facing towards the window and have the light coming in and hitting the face, lighting it up and the body area and thus have a nice, evenly lit scene on the main subject and then you can worry about the background area later.

You are basically highlighting on your subject and getting that nice light on the same and that’s one of the standard ways of using the natural light in that kind of scene. You don’t need to set up any gear or deal with any settings on your flash but basically using that light coming into the room through the window and setting your camera’s settings exactly the way they are supposed to be for that light coming in and you are good.

There are a lot of photographers out there who choose to concentrate on natural light. I’ve heard a lot of people say that natural light photographers are those who do not know how to use flash or those unable to set the camera settings correctly to take a really nice photo with the flash unit. However, as someone who does natural light photography over flash, I will say that the effects you get with flash, natural light looks you so much better. Even if you are trying to mimic the natural light with the flash unit, natural light looks so much better and makes it more realistic and you don’t have to deal with weird color cast of maybe a flash unit that’s more of a blue tone and you are shooting in a warmer tone and maybe applying a gel on top of your flash. You don’t have to mess with that but you basically use the warm natural light coming into your scene and maybe make everything more flattering.

It’s much easier for beginners

Every beginner will find that it’s hard to work with a flash unit especially if you have never had an experience with the same. This I know from a personal experience and once I got hold of my first flash unit, I had no idea exactly how to set it but I got one simply because everyone said I should have one. I quickly learnt that I didn’t know what I was doing. If I went to a job I would be filtering with my camera and try to mess with the settings of my camera but also keep in mind to keep checking whether my camera settings are set to make my flash unit look as good. You can’t set your exposure to 500th of a second because your flash can’t sync with the shadows. As such, it’s a lot to think about for a beginner. If you get a flash unit and you want to play with it once in a while, well, that is something you can do in your studio, at home or elsewhere and you can test it that way but for a beginner who wants to use the flash unit for a particular job, this is not something I would recommend for you to concentrate on when going out for a job.

Someone might think that pop-out flash will do the job since all it does is fire the flash when it needs to fire and photo scene to turn up basically fine. However, on-camera flash is something I will only use to trigger other flashes. I will never have an on-camera flash or a pop-up as my main light source to try and light up a subject. It’s so unnatural, it creates red eyes and there’s a lot it does to make it scream being armature photo and you really don’t want that. So, if you are still debating on whether to use a pop-up flash or just natural light, definitely use natural light and you will be able to learn a lot.

Natural light makes you think more about your photo

Natural light allows you to think about your photo such as how to position your model just as mentioned in the first example including what time of the day to shoot, should you move a little bit closer to try and get your model’s face lit up more among many other things. That makes you think more about your photo and become more creative as opposed to just taking a flash, pointing it up to the ceiling (in case you have a rotating flash) and making it bounce all over the place.

With natural lighting, you’re able to think a little me, become more creative and can get more angles. If you are shooting through the window as your source of light, what do you need to do for your model to be more exposed? Obviously, you can’t sync it with the outside because the outside will be too bright and your model will be silvery and you can’t overexpose because then your model will not show up. So, it makes sure you think a little bit more and makes you get comfortable with using all the available light in the scene and you’ll ultimately get more creative and realistic looking photos.

It’s easily modifiable

This might be related to the first reason and that’s to say natural light is free. You don’t need to carry a lot of gear with you and only a camera, lens and maybe your reflector is necessary when you want to use natural light. However, with on-camera flash (if you have a flash unit), you will need to carry to every photo site things such as radio triggers and make sure your batteries and fully charged for it, light stands, modifiers for your lights maybe like a softbox or something like that. Instead of this, you can use natural light which is modifiable meaning that if you need to reflect anything or pop a highlight on a person’s other side of the skin for example if the light is coming from right and you want to do it on the left, it can be as something like a white piece of paper that will light them up or a poster paper. You don’t need all these stands and lights everywhere but a simple reflector which is easily modifiable which helps you travel light and this makes it one of my favorite things among the free versions as it allows you to concentrate less on the gear and more on the action you are taking.

It’s easy to transit to flash

Another reason why it’s good to start with natural light especially as a beginner is that once you master the settings and the situations you might need to shoot in with natural light, once you start implementing flash, you will take it in like a duck in water. You will know the settings for natural lighting and then you will know what you need to enhance it a little bit using a little pop-up flash. Obviously, a flash is mandatory if you are shooting in a lower light situation but you will figure out the settings you need to turn on your flash to make sure your photo is lit up correctly.

If you need to capture something in a really dark scene, you may need the whole power of the flash


to fire once you take your shots and allow it to recycle for a little bit longer. Maybe you need that whole power to light up a specific scene, capture a fast moving object or something like that. Or maybe you need a little pop of light to have a catch light in the eyes, you can set your flash to a 1/64th of a second and it will just pop that little highlight in the eyes and you’ll be good. You will know if you need to zoom in a flash to reach your subject or not, you know if you can back it off, or where to point the flash to bounce off the wall or ceiling. It will be so much easier to use the flash once you have played around with or mastered the natural light. You can get a manual flash which I recommend (I don’t recommend TTL flash) because once you have it is a lot easier to use because you are in control of the settings and your camera is not telling the flash how and when to fire or what settings but instead you are telling flash everything you want it to do. It’s almost like the manual mode in your camera where you telling the flash how to operate and if you are wrong it’s going to be wrong too. This is a great option for you.

These are the 5 reasons as to why I would just concentrate on natural light before even touching a flash. You can train yourself to use natural light and enjoy the learning curve that comes with it.

Getting Started In Real Estate Photography

This will be an ongoing series on how to get started in real estate photography. It’s going to be about the things you need to start thinking about and get a mindset of when starting with different styles of photography. I will start this first episode with a landscape style of photography because that is kind of generic entry point for many people who are starting out in photography. We had someone write an email by the name Alicia and she wanted to know some of the tips for getting started in real estate photography. That’s the business that I work on the side as real estate photographer and I built up my personal business pretty good and I want to give my take when getting started from zero clients to having clients that do marketing for me. If you’re looking for a great place to start, Sleeklens offers a great Real Estate Photography Course. Check it out. Anyway, let’s start.

The required gear

If you have been in real estate photography before, you know that you need a minimal amount of gear. Even if you have done just a couple of homes, you know that the amount of gear you need is not the most expensive type of gear out there. If everybody who started landscape photography or photography, in general, began with landscape photography, most likely you have the gear that you typically need for real estate photography. Most of the gear needed for landscape photography and real estate photography go hand in hand. Typically, you will need things such as a wide-angle lens, a steady tripod, and a decent camera (not something like point and shoot but a good DSRL or mirror-less camera) and you are good to go. Typically the kind of gear you’ll need for traditional real estate photography shoot is a very stable tripod. If you will do a technique such as HDR to capture the images, you probably need to drag your tripod with you even if it’s kind of annoying or cumbersome to walk around the house. But if you want HDR to capture the images, a tripod is very much necessary.

As I mentioned, a wide-angle lens depending on what kind of a camera you have, if you have a full-frame camera, then you are probably looking at something in the range of 16-17mm at the low end and that will give you a very good wide-angle view. I personally use a 17mm and if you can get a good price for this or the 16mm then it will help a lot. You really don’t have to worry about the aperture of the lens because a lot of people concentrate on the f2.8 side of it when they go out to buy a wide-angle lens. However, you really don’t shoot at 2.8 and thus you shouldn’t pay the extra money to get a lens that has a wider aperture. You kind of shoot between f8 and f10 and that is what most of your shots will be. Better get the cheaper lens based on the f4 aperture and that will get you in the right ball pack. Once you get your business growing and you are getting more clients, then you can probably move to tilt-shift


lenses which are great for real estate photography because they allow you to move the camera and that basically moves your viewpoint to get rid of converging lines.

Typically, with the normal wide-angle lens, you probably have a lot of distortion that can be corrected easily in Lightroom or Photoshop. Tilt-shift lens can help get rid of this kind of distortion in camera and that is very helpful but they are very expensive. Don’t think about getting that kind of gear out of hand but it’s something you can build up to. If you already have a good DSRL, you will be able to get rid of those two things. If you have a good crop sensor camera, you might want to get a 10mm lens. Those are cheap although many people do not think they can get good quality photos with a crop sensor camera but the camera is not really the one that’s making all the really nice images but it’s the lens that makes these nice images. Sigma makes a nice one 10-20mm and that’s a really good lens to have which is a good one to have. That’s the basic gear that you need and you don’t really need much to get started if you already have this with you.

Building your portfolio

You probably don’t know how to get images for use in your portfolio especially if you have never done any particular style of photography in the past. When it comes to real estate photography, you need access to homes or nice places to help you build your portfolio. But the best thing with this is that you can get many images from a lot of different places. When I  first I started building my portfolio, I asked people who maybe had nicer homes than the one I was living in whether I could come into their premises and clean up their homes for them and stage it a little bit then I can take some photos of their homes. When people look at your portfolio especially real estate agents or brokers, they are not going to look at the pictures on your website and say it’s your friends home and not a real client. They are basically looking at your work and that is one way to build your portfolio. If you happen to live in a home that has a nice modern kitchen, you spend a week cleaning it up and take some photos of your own home especially the exterior because a lot of people would want to see nicer exterior images of a home.

Another way to build your portfolio would be to look at business in the neighborhood. This is something else I did when I was starting. I identified businesses in my area and not asked them whether I should shoot their buildings or something like that. I would go in after-hours, maybe do a twilight or sunset shoot, and then tag their building for them on the social media saying, “here is an image for free and just wanted to let you know that I photographed your building”.  That gives you the opportunity to take the time with editing the photo to make it look as perfect as possible. That is also another way of doing an outreach to get your name out there.

You can also do it by getting a weekend getaway and book yourself in a nice hotel. While there, photograph the interior of the hotel such as the rooms, the lobby and such stuff. The truth is that although it’s not real estate photography as far as homes are concerned, it is another way of building your portfolio and have your potential clients looking at your site. I have also been thinking of another method that can be helpful when you are building your portfolio and that is Airbnb. A lot of people use Airbnb when out of town and they need a place to spend the night and you can also find nice homes in your area, pay to spend a day and a night there and just take cool photos of the place. That gives you an opportunity to go forth from one room to the other and even stage things a little bit. When building your portfolio, you want to make sure that at least you have 10 good images that you can show off. Obviously, when you start building your business, you can add more images and have galleries of images but as you start, you need to have at least 10 good images. This gives people an idea of what they are looking at. Those are just a few ways of building your portfolio.

Pricing

Pricing is a controversial topic when it comes to photography. Many people do not know how to price their images but it really depends on your location. One can charge a $100 USD for real estate shoot but that same image, the same amount of time and work will go for $400 USD in another high-end city. Therefore, it just depends on where you are. When setting my pricing, I would spend let’s say a weekend and document or be on Google the whole time to check other photography businesses in my area and then make a spreadsheet of what they are charging for certain styles of real estate photography. Many people would break it down to square footage to come up with something like 80 bucks for 1500 square feet home or 150 bucks for 3000sq homes.

Most people would break it down like that when setting the price for their work and I spent a lot of time on Google researching as many real estate photography businesses as possible and came up with a spreadsheet that helped me come up with an average of what I found out. If the lowest was charging $100 USD for a real estate shoot and the highest $300, I settled for $150 since I was still working on building my portfolio. What I would do is charge the middle to low end of the spectrum and what I would do is over deliver and under promise. What that means is that I would promise to do some good shots for someone and then come up with the best images I could possibly do. Since you do not have a lot of clients when starting, you do have a lot of time to play with the images, make them perfect and deliver quality images to the agents. The very first agent I shot for still gives me business today and it’s great that he still comes to me and the reason is that I spent time on his images and made them really perfect.

When it comes to pricing, there is no specific figure that’s cast on stone but you really need to do your research in your area and see what other people are charging. If you want to be on the high-end, changing prices is always possible with time. If you are getting too many jobs with time, it might mean that you are too good at what you are doing but charging less for it. That means you might need to increase your prices because you have too much business that you are unable to concentrate on very well. By increasing your prices, you might lose some agents and gain some more but that should balance out because if you lose some then you are charging more and that makes it up for it. Just because you choose your pricing at the beginning doesn’t mean it has to stick. You can always change your prices and that is a good thing when it comes to inflation and other factors as well. That’s basic when you are trying to figure out pricing in your area. It just takes a lot of research.

Getting your first clients

There is no magic pill for getting your first clients. However, there are a couple of things you can do on this. The first thing I will recommend is setting up a Google business listing for your business. Make sure you have the word real estate photographer or photography in that business name somehow. This works as the keyword to help people searching for a real estate photographer in the city you’re in to find you. Try to be the first one that pops up when people are looking for a real estate photographer in your area. Typically, potential customers won’t be looking at your website at times but will call you directly from the business listing. I have found this to be the case for me where they don’t even look at my images or my site but they just go ahead and call me directly and then have me walk them through the process of what’s going to happen when I get to the house.

If you don’t do anything else when it comes to marketing and getting your name out there, the Google business listing is probably the main thing that you need to do. You should build your listing by putting the working hours of your business, the name of the business, photos and even posts although they expire and link back to your site.

Another way of getting as many clients as possible is by emailing the real estate agents. Once you have your portfolio on your website and you’re ready to go and you want people to start looking at your site, go to the store near you and grab one of those real estate magazines that are usually at the entry or exit of a grocery store that have all the listings of what’s currently available in the market. Almost every real estate agent that I can think of has their email address either on that magazine or website of their brokerage company. The emails are very easy to find and you don’t have to work very hard to find them. Grab as many email addresses as you can and send emails to them. You won’t get as many responses as you would want most probably because they will be considered as spam but you might hear from some and they’ll want to look at your site and if they are not photographing their houses for themselves, they will probably call you when they have a project. A lot of real estate agents just go ahead and photograph their homes with their cellphones and the results are really bad. You must look for the ones who really know the value of professional photography.

You can also go in and talk face to face with the agents if you are really personable with people. Just stop by in the morning and drop a couple of doughnuts or something like that but have your business cards with you and say you’re available for real estate photography. You can take an iPad with samples in case they would like to see them and just introduce yourself. Most real estate agents are personable and will appreciate the personality or meeting with someone new and discussing things face to face. It’s very easy to ignore an email but it’s not easy to ignore somebody standing right in front of you asking for business.

Actual business side of photography

When it comes to starting your own photography business or any other business in general, if you are a one-man show or you’re just doing it by yourself, you are not only a photographer, a marketer, an accountant, a graphic designer and all these things wrapped into one. Many people struggle with this thing simply because you are 30% photographer and 70% business manager in a way because once you get down to a shoot you must invoice them for the cost of the shoot, edit the photos, deliver the photos via an online service, if people don’t pay you to have to follow up with them, you have to keep up with the social media to make sure you are constantly getting your name out there, posting stuff on Instagram and Facebook and almost every other thing when it comes to business.  As such, don’t think it’s going to be as easy as going into a home and shooting a couple of photos and delivering them but you must keep track of your expenses and invoices among other things because this is what will keep your business going. You need to keep your business organized as far as the business goes and make sure you have everything you need when it comes to issues such as taxes among others.

A lot of people struggle with that and that’s why many get out of business just because they can’t handle all this. However, if you’ve done photography in the past including portrait and wedding photography and the like, you probably understand this stuff and this will just be a small piece that you have to add in you’re starting in a new style.

That’s just a quick intro on how to get started in real estate photography. Just as mentioned at the beginning, this will be an ongoing series and there might be a part 2 to this when it comes to getting a little bit more advanced but a lot of people who are just starting out really need some basics on how to get started and few ideas on how to get their name out there. One thing I would recommend if you want to get more business and more people to look at your stuff is to concentrate on social media especially Facebook and Instagram where you can tag your location and also tag a bunch of people. So, if you post a photo of a home you can tag a number of agents in your area and that will get them looking at your stuff. That’s another way of just being a marketing machine and get people looking at your stuff quickly.

The Mode Dial Explained

This post will take you back to the basics and this is to help answer many questions from people who wish to understand where to start their photography, how to learn the basics and the best way to learn those basics. Our site has a guide known as the complete guide for beginner photography and it’s a great guide to learn about gear, shooting different situations and lighting among many other essential basics you should learn as a beginner. The guide is a really great place to learn especially if you are an extreme beginner in photography. But this part of the blog will go over the different modes that are on mode dials. That’s because a lot of people think that if they turn their mode dial to automatic mode, the camera can pretty much take care of everything for them. But I want to show you that there are many different modes on the dial but also the advanced modes are actually what you should be working towards getting into.

Basically, this post will be looking at the beginner modes that are in the mode dial, explain what they do and then talk about the more advanced modes on the dial so you know what to work up to and how to figure out what signs to put in there and so on. Let’s begin with the basic dial modes dial settings:

Automatic mode

This is the first mode which is common to many people. It is also called “Green box mode” and basically what it does when you set your camera mode to auto is that the camera does everything for you. This means that the camera will do the thinking for you and you don’t have to think about any settings or anything like that. It might sound great that all you need is to point your camera in a certain direction but the automatic mode can get it wrong a lot of the time. What I mean by that is that the mode is trying to judge the light which is what you wanted to kind of give the right exposure for it but it also could mess up your photos. Let’s say you’re pointing your camera at the sunset or something like that and you have this nice foreground, sometimes you might set your camera to the automatic mode and it also changes your focus point  and then start focusing on other parts of the camera or in the scene that you don’t want to focus on. So, instead of focusing on this nice foreground object it kind of focus midway through the frame and your focus is off.

Another example will be if you are trying to do a long exposure, you won’t be able to do that with the automatic mode because it’ll try to get the best exposure it can and so if you are trying to do, for example, a long exposure mode of getting nice photos during a low-light situation like at night, the camera will think it’s really dark and pop the flash up and that immediately ruins your photo. It could also think that it needs to increase the ISO and thus you’re not only going to get a high ISO but also have a flash with it which could make it look like a really muddy photo. Obviously, the automatic mode is good for events like family get-together since you only want to just put your camera in the mode and not worry about any settings. But if you are going to be let’s say a wedding photographer, you obviously don’t want to have your camera in the automatic mode coz you would want to make the decisions for yourself.

This does not mean that automatic mode does not have its purpose in the camera mode dial but definitely, you want to get out of that mode and the beginners’ guide I mentioned at the beginning of this post will help you know how you can do that.

Portrait mode

This mode is signified as a little person icon on the mode dial. The mode has one major function and that is to set a very wide aperture to kind of focus your camera on the subject of the photo. Let’s say you’re taking a picture of a person obviously, and you focus on that person. The mode will select a very wide open aperture meaning the f-sum number if going to be very low, maybe around 4 or 5 and what it’ll do is try to blow up the background and make it completely out of focus but your model will be very sharp and in focus and then it’ll also pick the very best shutter speed to go with the wide aperture. As such, its purpose is to focus on the subject, blow out the background and not try to get any detail whatsoever throughout the whole photo. That can actually be accomplished by using one of the more professional modes in your dial and we will talk about that in a second. Portrait mode is a very popular mode especially among those who just got their camera and just want to go out and take pictures of their friends or something like that.

Macro mode

Basicall


y, this mode has one major function and that’s to allow you focus as much as possible on small objects. Just because it’s named “Macro mode” does not mean it’ll be a macro shot because macro shoots can only be done using a macro lens. The macro mode is kind of a fake macro in a way and you can get too many macro shoots using this mode because you really need a lens to go with it. All lenses have a minimum focusing distance and what that means is that if you take your lens and to try to move it in as close as you can to a subject, at some point it’ll not be able to focus because it’ll be too close to the object and that might mean you have to back off your camera a little bit. That’s what macro mode is trying to do but you can play with it and zoom in on something on your desk or something like that and see how far you can get and still have the camera focus on that specific subject. So, what it’s trying to do is get you to focus closely on certain things but it’ll not go to do the best job possible because you really need that macro lens to go with it.

Landscape mode

This mode is sometimes referred to as a scenic mode. This mode is kind of the very opposite of the portrait mode. Usually in landscape photos, you want to have a very great depth of field, meaning from back to the front, your photo is going to be in complete focus and is going to be sharp all the way to the front. This is what you try to accomplish in landscape photos and what your camera will do is try and get the smallest aperture that it can, meaning a very large number, around f18, f22 or something around that range. The landscape mode will try to set your camera to that and try to get the best shutter speed and ISO to go along with that. One thing to kind of note here is that if you use your camera in landscape/scenic mode and you try to go out and get a nice landscape picture, if it’s not a super bright sunny day, you might see that your camera shutter speed will go down very low to a 60th or 80th of a second and you might see that depending on what you’re shooting, the scene you’re shooting might look a bit blurry and that’s because of the camera shake. So, obviously if you want to shoot landscape photos you might want to put it on a tripod as it just could cure that but that’s something to watch out for. A lot of different camera manufacturers actually handle landscape mode a little bit differently and if you’re shooting jpegs, some camera manufacturers depending on the camera model you have, will take also the jpeg generated from the landscape or scenic mode and kind of increase the blues and the greens mainly because most of the landscapes out there have a lot of blue and green in line with the color of the grass/vegetation and the sky.

It increases the saturation of these colors and that’s something you can see a difference in if you only shoot jpegs and not raw. If you shoot raw you’re going to see a lot of difference when you get the files in the computer because you have the raw file with very little, if at all, processing done to the raw image.

Sports/action mode

This is a mode that lets the shutter speed to be as fast as it could while still getting a very good exposure. If you set the sports mode, you might find that your ISO is higher than normal and also your aperture might be wider than normal, meaning a small number and your shutter speed will be incredibly fast as it tries to get as higher as it can, probably around five-hundredth of a second or even a thousandth of a second and up. And what the mode is trying to do is freeze the action. Typically when you have a fast-moving action, a lot of people want to freeze that photo and have maybe a runner that’s not even touching the ground because their foot is frozen in the air or something of the sort. What they’re trying to do is freeze the action and this is where if you know what you are doing when it comes to the more pro modes, you’ll be able to freeze the action and blow it a little bit and make it look like the person is running really fast and other stuff like that.

There are so many things you can do but the sports mode is a really nice mode especially if you want to be involved in fast-paced actions. Maybe you are attending a football game and want to shoot action of your kid running around the field and want to take some quick snapshots; you can set your camera in sports and action mode and get a way to freeze the motion of the players.

Some cameras have a mode that’s called ‘night portrait mode”. This is kind of a cool little mode of blending between the natural lighting in a scene and the flash. Night portrait mode takes a photo with a little bit longer exposure. So you might see the exposure being a little bit longer, maybe around twentieth or thirtieth of a second or somewhere around that range. However, right before the photo ends, it’s going to trigger the flash and this flash will light up the subject. If you’re taking a portrait of somebody, the flash will light up the portrait and act almost like a full flash and that’ll give you a really nice scene in the background using the light in there and you’ll get really nice colors in the background especially because this is a night scene but also you get a flash pop which will light up the subject. This is what is typically called a rear curtain flash or second curtain flash where fire flash right before the shutter speed ends and the actual photo is taken so that it can really light the subject. It also helps with freezing the subject because typically because with slower shutter speed, you might have a little bit of movement but the flash will freeze the persons. You can look for this mode in your camera and play around with it as it is a fun mode to use.

These are basically those most common modes that many people are used to seeing. However, there are other more professional modes found in different camera models. These are sometimes called semi-manual modes or semi-pro modes. They include: –

Aperture priority mode

This mode allows you to set your aperture to the one you want. For example, if you are taking a portrait of somebody, you will definitely want a very wide open aperture, meaning a smaller number because you want the background blown out. You can, therefore, set your aperture to around f4 and this will set the shutter speed to kind of get a neutral exposure. You can also set your ISO to the one that you want and be depending on your scene you can set it to around 100 for the lowest and you’ll have a very crystal image and it will set the shutter speed that matches to get a perfect balance neutral exposure based on the light meter. All this is based on the light meter which is more like a graph going from -ve 3 typically to +ve 3 with a zero in the middle. The light meter measures the amount of light coming into the lens and all the measurements the camera is doing are based on what that light meter is seeing and that’s what is meant by a perfect neutral exposure. It’s going to set your neutral exposure to zero, right in the middle of +3 and -3 graph. The aperture priority mode lets you set the aperture you want and the camera will figure out all the other settings.

Shutter priority mode

This is a mode that’ll kind of do almost the same thing as the aperture priority mode except that it’ll do so with the shutter speed. This is a great mode to use if you know you’d like to capture a fast moving object and you know you’d want to have a pretty high shutter speed. What it’ll do is that you set your shutter speed to whatever level you want, let’s say one-thousandth of a second and then the camera will sort out all the rest of the details including the aperture and ISO for you so that you have a perfectly balanced exposure. If you don’t have your ISO set on auto, you need to make sure you have enough light coming into your scene so that your camera can handle both the ISO and the aperture. This again is a great mode for fast Moving subjects especially if you know need your ISO to be at a certain speed to capture what you need.

P mode or Program mode

You can think of this mode as a professional auto mode. What this means is that the auto mode allows you to set the aperture and the shutter speed for whatever scene you are using but also allow you to control the ISO as well. As such, you will be playing with a lot of different things and the camera will work out the aperture, shutter speed and change everything. If you change one thing, it’ll change the other. It’s kind of like a good way to test and see which settings work well for your camera. If you’ve tried to shoot in manual mode before and maybe you came up with a black or pure white photo, it means you have either less light coming into your camera or too much light. The program mode is a really good mode to test and if you’re not familiar with the settings, to play around with the settings and see what the camera will set. So, if you change your ISO from 100 to 200, maybe you’ll see your aperture number shrink or increase a bit. The same thing with shutter speed, you’ll see it change. The Program mode is kind of a fun mode to play around with and see what kind of settings your camera will come up with for you. You can’t do this with the automatic mode even though this is what it is for and you cannot see most of the time all the settings that it’s giving.

The main mode

This is the mode that almost every photographer wants to shoot in or learn how to shoot in all the time. This is the “M” mode in your mode dial and when using this mode, you have to control everything and your camera will basically do nothing for you. If you’re shooting in a scene where maybe you’re pointing your camera towards a sunset, you have to change your settings a little bit to match that and get a really nice exposure and if you maybe turn your camera like 30 degrees and the sun is not as bright, you need to change your settings again because you need to adjust to that situation of not having too much light coming in as scene it was in the first. This a really great mode if you want to learn the settings to think on your feet because you have to remember that basically every time you turn your camera to a certain scenario, it is always good to check your light meter and see how the light coming in has changed and set your settings accordingly. You have to pay more attention to what your settings are. A lot of photographers after doing a log of running and gunning especially in weddings have like 3 cameras strapped to the body and a lot of time they don’t use the manual mode. That’s too much to think about when you think about the scenes they have to capture of the couple and everybody having fun in addition to everything. Most of the time they’ll set their cameras to kind of an aperture priority mode to select the aperture they know they need to grab and then let the camera do everything else for them. Typically, the only kind of drawback to doing that is that you can’t control too much stuff and so the camera can still get it wrong but most of the time you can collect that in post-processing.

Those are the kind of generic modes you might find in most mode dials and it’s very cool to see the changes each one of them does especially if you are a beginner because let’s say you pop your camera in that portrait mode to see how different your photo will be if you use the mode and then popped it to landscape mode. If you want to learn more on how to do all this stuff, you can check the complete guide to beginners photography which is a really great course that runs for 8 hours and you also get a bunch of downloads and all 30 videos and great scenarios. If you are brand new to photography and would like to capture great photos, this guide will be a great place for you to get started.

Best Settings for Social Media

This post will be all about the social media and especially the quality of your images that you post on different platforms. By this, I’m not talking about whether they are in focus or not even though that’s important. I will be talking about the best settings you need to use to get the best quality possible on three different types of social media platforms. First I’ll go over Instagram because that’s a big one when it comes to photography because that’s how you share your photos and feeds and everything is in photos and obviously that’s a huge one. I will also talk about Facebook although I don’t like sharing a lot of photos there personally because Facebook does really compress and downgrade the photos and no matter what settings you use, they still don’t look as good as they do on your computer but there are some things you can change. I will also talk about Pinterest because this is very special as it doesn’t technically matter about the photo quality as far as whether it’s 100% quality jpeg or something like that. Actually, the resolution does matter when it comes to Pinterest to give more visible eyes on your work.

social-media-settings

Instagram

What are the best image settings can we put to get the best quality? Now, whether you are basically in Lightroom or Photoshop (Lightroom is what I usually use to export all my photos, and the settings will be different compared to Photoshop) most of the time, you can get the same image quality in both using some of these exact settings. For Lightroom in this particular example, we are going to talk about exporting them to Lightroom. What I urge you to do is take these settings, put them in your export dialogue box in Lightroom and save export preset for that setting so that way you can call it Instagram if you want to and that way you’ll always have these exact settings and you can click on the export presets, and it’ll export those same settings every time you want to put a particular photo on Instagram.

First, let’s go over a couple of basics here. To begin with, the image format needs to be jpeg. That’s very standard when it comes to any kind of social media platform. So, make sure you choose jpeg, but I think a couple do accept PNGS and TIFs, but you really aren’t sure what you can get with those. So, just stick to jpeg because that’s a universal format for photos and obviously the color space I always keep it in Adobe RGB as this keeps everything nice and gives a good color game. The resolution is also important, and I normally keep all my resolution at 300 whether the images are going on the web or getting printed. A lot of people don’t prefer that because it obviously does make them load a little bit slower and the image size will be a little bit larger, but you can use 100 or 72 which will be the old norm when it comes to photos being online. I always keep mine at 300 and haven’t had a problem with loading speed but if you are kind of getting these going in and out all the time, then the image size might be a little tough to handle depending on the kind of system you have because you need a lot of storage if you keep exporting tons of images on jpeg all the time. Most of the time people are fine with that since a 5-MB image can’t crash any system.

So, the first thing is to make an export preset and change it to a jpeg format and Adobe RGB for the color space and a resolution of 300 as this works really great. When it comes to quality, you have a little quality slider when you choose jpeg, and this ranges from 0 – 100. I’ve tested a bunch of different values on that slider and found that around 73-75 for the quality does really make a big difference. I usually keep mine at 75 rather than go all the way to 100 because if you were to go that far, you would realize that even though your images look great on the computer, they might compress when you upload them to Instagram and if you have a poor quality, they don’t touch it that much. I don’t know the specifics or back-end of Instagram when it comes to uploading photos but I did do a lot of testing at 75, and it looks like the sweet spot when it comes to the quality of the image. I also don’t do a full resolution image although there is an option to do a full res jpeg but depending on the kind of a photo I have, I either make a long or short edge at 1080 pixels wide depending on whether I’m dealing with a horizontal or vertical image. So, if you are dealing with a vertical image, you want that short edge to be 1080 pixels and if you’re doing a horizontal photo such as a landscape, same thing 1080 pixels and that’s what I keep as Instagram vertical or Instagram horizontal and depending on what photo I’m putting on there, I can choose each preset and it automatically gets the ratio perfectly. This is what I personally do as far as the sizing goes. The last box I do uncheck is the “Sharpen for” checkbox. The “sharpen for” checkbox is usually set to screen, and I go ahead and uncheck that because the difference between a compressed image where it’s sharpened for the screen and where it’s not sharpened at all is most likely, you have done your own sharpening. There is a lot of difference there if you were to sharpen for the screen and not sharpen and then compare the two on Instagram, they both look a little bit muddy.

When it comes to getting your photos on Instagram, the platform does not allow you to add them directly from a computer browser, but it’s always done with the phone or iPad. A lot of people have different ways of doing it. Some might take a photo from their Lightroom catalogue and email it to themselves or airdrop it for themselves using an iOS device or something like that but there is actually a different way of doing it, but I use Dropbox or Google drive as this is the easiest way to do it. I usually set my destination to Dropbox folder on my computer which is automatically synced onto the cloud. So, I export my photo whenever I do my export presets and make sure my destination is set to a particular folder in my Dropbox account, and as soon as I hit the export preset, it syncs to the cloud and all I have to do is download the photo to my phone and upload it to Instagram. This seems to be the easiest way of doing it instead of having a bunch of emails come to you with a bunch of attachments. For those of you having trouble figuring out how to do it, this is one great approach to take, and I prefer it over emails or sharing through some other file drop methods.

Facebook

How do you make your photos look better on Facebook? At the beginning of this post, we mentioned how Facebook does a terrible job when it comes to displaying your photos. You could have a really amazing crisp, sharp photo shot with a gear that cost USD 1000 but as soon as you post it on Facebook it’ll look as if it was taken with a really cheap point and shoot and it can really make your photos look bad. However, there are some things you can do to make them a little bit better although they are not going to look crisp or perfect at all, but they’re going to look a little bit better than they normally would.

The best setting for this is to have your jpeg image, and this should be the case always. Sometimes I feel weird talking about jpeg because it should be understood but you never know, people might change to any other format and wonder why it doesn’t look good on Facebook or why it takes almost 30 minutes to open one particular photo. Jpeg is good, and quality of 85 seems to be fine because if we do a quality of 100, again Facebook will take the jpeg and crunch it to a whole lot more than what I thought. I’ve done a little bit of comparison of back and forth and found that around 85 doesn’t seem to be compressing it that much but as soon as I get above 85, it gets really compresses is but when again I go below 80, the quality becomes softer which leaves 85 to be the ideal quality.

Again, when it comes to the long and short edge, I do not upload the full lens, but at times I will upload a screenshot if it’s taken long to upload but the long and short edge will usually be around 2084 pixels wide if it’s a horizontal or vertical image and color space will still be Adobe RGB, and then I’ll sharpen for the screen. I tested two photos, and when I sharpen for the screen, Facebook actually kept a really nice sharpening, but when I use the same kind of method that I did for Instagram, and didn’t sharpen at all, you can easily tell the difference as the unsharpened one looks a bit muddy. This is weird because you figure out that both platforms will handle the images pretty much the same because Facebook has acquired Instagram a while back but they do it differently. The resolution is 300, and I usually keep it around there for most of my images, and I still don’t have a problem with them loading and if you’re loading many images, let’s say you’re a wedding photographer and would want to put for example, 80 to 100 images for your portfolio, then you can change the resolution to around 240 or a little bit lower than that but personally I don’t go below 240 to avoid making them very pixilated.

That’s basically it for the settings. It’s not too terrible, and I don’t have to talk about getting the photos on Facebook because they do allow you to upload as many images as possible and that’s a pretty easy one.

Pinterest

Pinterest is not one that I have settings for except that I have settings for the resolution and that basically means how your photos should be orientated. When uploading photos on Pinterest, many people will just throw their photos in there and if it’s a landscape orientated photo, it will be more horizontal and will show up and be like a normal photo. Some people will upload more vertical images, and one thing I’ve found is that if you upload more vertical images, even more, vertical that an actual camera would take. Let’s say you had a vertical image and you threw it into Photoshop and maybe made it a little bit longer and added some text at the bottom or just made it a little nicer, you will actually get a lot more view and the reason is that if you add more vertical images your Pinterest account if you have a blog or something, the images take more space on the screen when people are viewing them on their desktop and especially on the phone which means you are basically taking more of the screen. As such, that keeps people’s eyes on a particular image and so, what I recommend for the resolution is to have 1080 pixels wide and 1920 pixels high. This is going to be a very vertical image.

You might be wondering how to show up your image nicely in there but you just need to put your image in a document on Photoshop or any other kind of photo editor and drag it in there and then change the orientation a little bit and then play with it a bit by adding some text or adding a name for it. Just be a little creative because most likely regular photos, that is, landscape orientated ones will actually be a bit lost in the crowd when compared to the more vertical images. You can play around with any kind of the settings you want as far as quality is concerned on a jpeg but the main thing to take away from that is making a more vertical image. That’s what I would recommend for that.

With these settings, you can get a little bit more exposure because you like the way the photos look whenever you upload them. You can try these settings and see how they work for you.

Featured item of the week

The featured item of the week is a brand new video course that we just released known as Photoshop Compositing Essentials. If you’ve ever wanted to make things out of nothing in Photoshop, this course will ideal for you. In this course, we walk you through start to finish on three different types of photos and adding pieces to the photos just using stock images. The reason we chose stock images for the course is that that’s usually the ones which are more accessible to everybody. You can actually shoot your own photos to use in this kind of a composite, but I chose the stock images because they are more accessible. In this video, we go through different types of compositing, and by this, I mean taking images and adding different elements, people, color cracking and the like to make them look more cohesive and natural. We take three different kinds of simple compositing techniques, that’s photo called warplane and put a plane on a different kind of a creative setting, and this is really awesome.

We also take another photo called the “walk”, and in this, we get a little bit more advanced and will put a person in the image, create a different environment around that person, add different effects such as fog. In the last photo, we go probably more advanced than any kind of a person except you are in the industry if compositing. This photo is called “Sail away”, and this is a really nice photo of a guy on a boat with rain coming down, cool little background and everything and we take you from start to finish using all the images from the course. You can download the images to use for yourself, and you can follow along as well. The course has 12 videos in total and 3-and-half hours. Throughout the video, you’ll learn a lot of easy techniques and understand how to use them better when using the course. You will learn how to create different weather elements in Photoshop, how to blend everything in together using a bunch of different layer masks, selection tools, perspective tools and stuff like that. If you’ve ever wanted to do Photoshop compositing, this is going to be a really great experience for you. You can check this out on the site under the course section.

photoshop-compositing-course

SaveSave

SaveSave

SaveSave

SaveSave

SaveSave

Photography Q&A


Subscribe to the Podcast for the latest Episodes   |   iTunes   |   Stitcher   |   Google Play   |   RSS   |

This post will deal with different photography questions. If you follow us on the Sleeklens members’ group page (This is a private group for those who have purchased our products in the past) you can post your photos, questions and even request video guides on how to edit your photos using different presets and brushes within our products. For this section, we asked the group members whether they have any photography questions and a lot of people emailed theirs and I will go ahead and cover 5 of them to avoid making this post too long. More questions are however streaming in even as I do this post. Below are some of the questions and their answers:

Q1 by Kent Harrison – How can I achieve a Bokeh effect in my background photos using a regular lens?

I believe what Kent means by this question is on how to get a blurry background and have the subject stand out as much as possible using a lens that is not as an f-2.8 or f-1.8 or something like that. You actually still can achieve this effect although it won’t be as dramatic as it would if you were to buy an f-2.8 or 1.8, a very large aperture opening.

To achieve a bokeh effect, you will have to zoom in as much as possible. You can back up from your subject to get a better composition but zoom in as much as possible and also lower your aperture as lower as it can go. If you have a blur aperture lens such an f-4 or f-3.5, go down as much as you can and then if you back up from the subject, zoom in and use the lower aperture you still can get a bokeh effect in your background. However, it won’t be as dramatic as it would be in a very nice portrait lens that has a very wide open aperture but it still will get that kind of an effect and you can also play around with it a little bit in post editing to try and get that effect a little bit more but that’s basically how you do it. You just have to zoom in but you probably won’t be able to get that effect if you still using an 18mm or so. The key is to zoom in as much as possible.

Q2 by Laura W. Smith – I just got my very first drone and was wondering if there are any apps to show me where I can legally fly?

For those who don’t know or are not familiar with drones, there are a lot of different laws and these vary from country to country. In this post, I can only talk about the laws in the US because I’m not familiar with any other country’s laws. However, there are a few apps out there which can help you so if you were to go to a location you can open the app and it’ll tell you whether it’s safe to fly in a particular location. I used to use one called Hover and this would show a map and your location on the map as well as a circle that outlines that inside it you can’t fly. That’s either near an airport or restricted area such a military zone and the like.

There is also another app that I’ve started using and I find it way more helpful than Hover. Hover was basically for people who are considered as recreational fliers, people who are not doing it for money or anything like that. But the AirMap is available for Android, iOS and is also a web app and it will show you two different classifications. So, if you are a recreational flier, you can toggle on your recreational flier and it will basically show you where you can and can’t fly in a certain zone just like the Hover app. However, if you are a certified flier, you can actually toggle that one saying you are a legally, contracted flier doing it for money and have passed the required tests to be a commercial flier. If you toggle that on, you can see where you can fly as a commercial flier. This app is very helpful because you do have a lot of different places that certain groups of people can fly. Typically if you are flying for recreational purposes, you cannot fly in as many places as you would be able to if you were a commercial pilot that has taken all the regulations. The AirMap app is a really great app to use and it gives you a couple of different things and you can see if there is a caution zone which means you are probably near a school and other areas. This does not mean you cannot fly there but you need to be cautious of where you are flying because areas such as schools depending with your flying time will be a populated area and would be cautious or stay away as much as possible and stuff like that.

Q3 from Michael Ticks – I have a Canon TFI that I bought used as a backup video camera. I noticed that it usually quits recording after 9 to 10 minutes, do you know why?

This is kind of a typical thing when it comes to most crop sensor cameras. Although not all of them, I have a Canon T3I that I use to record video and it basically does the same time. From what I’ve understood, your camera sensor becomes overheated and will shut down around the 9th to 10th minute of your recording and will shut down between there. Sometimes it’ll go a little bit longer or shorter but pretty much they all shut off automatically when recording between 9 and 10 minutes. It really doesn’t matter whether you have a very high-speed card or a nice class-10 card that’s really fast and has a lot of storage that you’re recording to but it’s an effect in the camera that you can’t really get rid of not unless you have an Atomos which is a separate device that you might have to buy to record. There is a walk around for this and for those of you who decide to do this walk-around, it is good to note that you will be putting your camera at risk but it worked on mine very well. For those who want to install a different firmware other than the canon firmware, it will give you an option to toggle off and on whether you want to automatically start app recording after it quits recording. Basically what it’ll do is that once your camera detects that it has stopped recording, it’ll automatically start recording again and there might be around 3 or 4 seconds in between the two clips but it will continue to record as long as the card doesn’t get full.

For those of you who want to use this in your camera and give a shot, it’s a program or free firmware basically an add-on to certain Canon EOS cameras called Magic Lantern. Again it is good to point out that choosing to do this is at your own risk. You might have heard of Magic Lantern but if you haven’t you can go to https://www.magiclantern.fm/ and this will take you to the site and you can download it for free and it’ll also give you instructions on how to use it to your specific camera. I’ve done it with mine and if I were to start recording, the process would have stopped after a few minutes but this would have automatically picked it up and only have a gap of 3 or 4 seconds but still keep recording as long as my card is not full. There is no real quick way around that but if you’re okay with doing that to your camera, that’s definitely the way to do that without having to buy a separate device to put that effect.

Q-4 by Aggie Cornsworth – I have found that my photos seem to be blurry even if I’m using a small aperture, how do I collect this?

Basically, if you’re saying a small aperture I’m assuming you’re talking around f-18, f-20 or f-22 because when people talk about a small aperture they can mean many different things. It kind of depends on your camera and whether your shutter speed is low. First of all, if your shutter speed is too low for the amount of light coming in obviously your camera will get blurry photos and that’s given no matter what kind of camera you have. If you’re trying to handhold a shoot and your shutter speed is too low (let’s say one-twentieth of a second) and you have an f-22 which is carrying a lot of light, you will have to hold your hands extremely still to get that photo very sharp. If you have all that done correctly, most likely depending on what kind of a camera that you have, maybe you have full-frame sensor, (most full frame sensors even if you go up to f-22 just can’t get the right amount of sharpness all the way from foreground to the background) you might have heard people say that they’re doing forecast stacking which basically means that they are taking different points of an image and combining them in Photoshop to get a typically balanced, focused, sharp image.

One example is if you’re photographing a cave and you have tried to frame a shoot with a cave around it but in the very background there is a lighthouse way up there. If you were to focus on the cave to get its nice texture and details, you probably would get a nice image of the cave but then the background will be kind of blurry whereas if you were to focus on the lighthouse, you’ll probably get a not so sharp cave. In such situations, people would focus on the cave in one photo and then focus on the lighthouse without moving the camera, maybe it’s on a tripod, and take a picture of the lighthouse and balance the exposure depending on what the situation is and then use Photoshop to take away blurry parts and then combine the two photos together. That’s one way of doing focus stacking but there’s a whole ton of ways to do focus stacking but this is one simple example to do it. As such, it really just depends on the kind of camera you’re using and the type of blurriness and stuff like that but that’s just kind of a general example.

Q-5 by Neo S :- What are the best settings to photograph the moon?

First of all, there is a myth when it comes to photographing the moon. People think that when you want to photograph the moon, one must push up the ISO, make sure your aperture is as low as it can go up to around f-3.5/4 and shutter speed should be very long all because it’s night and dark outside. But that is kind of the opposite when photographing the moon. When you want to photograph the moon, let’s say it’s the full moon, you zoom in to the moon with your long telephoto lens, you should put your camera in complete auto mode and what it will do is detect that it’s a very bright source and depending on what kind of a metering mode, you probably take a photo but number one it’s going to be noisy and in the middle of your photo where the moon is supposed to be will be a big white circle. The reason is that the moon is extremely bright and what you will need is to go the opposite of what many people think when photographing the moon. You probably need a lower ISO (you don’t need to go all the way to 1600 but can stick to 200 or 400 thereabout) and then a very decent aperture (maybe f-8) and then do a shutter speed of one-fiftieth of a second or something around that.

One thing you can do to make sure you get a nice, perfect image of the moon is to change your metering mode to a spot metering mode. This will meter the very center focus point (the very center of your camera when you look into the viewfinder). So, if you go to aperture priority and set your camera to f-8, your ISO to 400 (for this example), point to the moon and let it meter in sport metering off that one point you’re looking at the moon, you probably will see that your shutter speed is way higher than you thought it’s going to be.

Just because it’s night outside does not mean you have to compensate like you would for taking a traditional night photo. Basically just check your metering mode, change it to spot metering and point to the moon to see what settings your camera gives you from then on.

Thank you to those who submitted their questions. Those are basically our photography Q & A’s for now and if you would want to hear your questions on our podcast, you can submit them to [email protected] and we’ll respond to them.

Landscape Photography Tips + New Video Course


In this post, we shall be talking about landscape editing tips or tips for editing and taking better landscape photos in general. We’ll look at a big group of tips here and some of these are stuff you might think about when you go out to shoot some landscape photos but others are smaller ones that you might think are time wasters for lack of a better word. However, these are really important tips especially for those of you who don’t do research for their landscape photos, which is our first tip.

  1. Doing your research on landscape photos

By doing your research, I don’t mean going to Google images and possibly typing a place you might be visiting. That’s obviously a good one to incorporate but you need to actually do a detailed research for your landscape photos and that’s a big thing. What I mean by that is actually using a couple of different tools that we have talked about before and these are Google maps and Google earth. Google Maps is a really great web version of Google maps which allows you to get directions and see satellite views and street views among others. So, if you’re going to a location, number one, if you don’t know exactly where it is, Google Maps is a good way for you to get directions. In addition to the directions, you can see street views to get a better idea of your location. I use Google Maps if I am going to a spot that I’m not familiar with or haven’t been to before but the main one is Google Earth.

Google Earth can really not only give you a better idea of what you are going to be shooting but also some really awesome spots around where you’re going to be shooting. For example, if you are going to take some photos of the Eiffel Tower in Paris and you want to get some normal classic shoots that everyone gets but if you fire the Google Earth app and you type in there “Eiffel Tower” and you get a nice street view of that and can shoot the normal shoots that everyone gets. However, there might be some locations around the tower that you might want to take some photos of. This app gives you some great ideas of not only the actual spot that you’re going to be taking photos of but also different places around there. You might see something from the satellite and consider them to be a good spot and as you zoom in, you might decide to get some photos while visiting the tower.

You can also, this is probably the best tool you can use for Google Earth, basically get a calendar view of what you are looking at and actually change the time of the day depending on where you are at, might not work for all spots or locations, but for most locations, you can change the time of day and get really awesome views depending on the overcast skies and you can get some advanced views if you are going some three months out you can probably get some nice idea of the shadows that are going to be cast on a certain direction, where the sun is rising and stuff like that.

These are great tools especially if you’re going to a spot you’ve not been to before or are not really familiar with.

  1. Time of day when to shoot

This is another great tip that many landscape photographers talk about. I have done another post on why you should shoot in the golden hour but basically, when shooting landscape photos, the lighting is key to great photos. Great light is most likely to equal great photos depending on you knowing the basics of photography, all your exposure settings and composition etc. What I would recommend is for you to shoot in the early morning if possible, in the evening and at night. A lot of people don’t like advice because it’s like the easy answer to get out of taking great photos. However, if you do any one of those time frames, you are going to most likely get some great photos. Early morning shoots are really great for having an atmosphere to your photos as it typically adds some haze to your photos depending on where you are and you get some nice side light depending on where the sun is rising. Evening shoots you also get that golden hour, you also get that nice side light as well and it’s a little bit warmer and you can actually go to a location that seems like boring and take a nice photo with the Milky Way and a bunch of stars in the background and this makes it look like a better photo because typically people don’t see those types of photos. A lot of people with cameras these days really like those kinds of photos because they see photos that are typically taken from a small cell phone or Smartphone and those phones can’t typically handle those kinds of photos. Basically I’ve pointed out three times of the day and none of those is midday sun. You aren’t going to get great photos especially if it’s a sunny day with no clouds in the sky but you really are looking for that side, warm and natural light and choosing the main time of day will give you some very nice photos.

  1. Get a good quality tripod

This is a tip I have struggled with a lot because I feel like I’m addicted to tripods. When it comes to tripod, going to your local store and grabbing one that is worth $20 won’t work the magic for you but you will need to get a nice, solid metal tripod that typically would be easy for you to carry easily. If you’re one of those landscape photographers who only take a camera with them but don’t use a tripod, it is good to understand that although free-hand photography is good, using a solid tripod opens up doors to a whole lot of opportunities for your photography. A good example will be compositing. I want to do compositing of different frames (maybe this is not a HDR technique) when you go to a location, it’s going to be hard to do that if you’re free-handing it because typically with that sort of location and idea, especially when you take your photos to Photoshop and try to composite the frames together. Maybe if you’re shooting in the golden hour and you have to wait for 20 to 30 minutes without moving your camera at all and then you see a better sky in the background and you take another photo and then take these two photos to Photoshop and composite them together, you will have a very difficult time doing that if you’re trying to handhold your camera and don’t have a tripod.

It might seem cumbersome and a little bit of pain to carry your tripod around but you are really going to love the type of results you get when you have a solid, quality tripod. Quality is undoubtedly one key feature to look at when getting a tripod and although it might seem like a waste in the beginning once you acquire one, you start playing around with it and see the results, you’ll realize how great a tool it is. If you’re looking for a nice tripod, you can visit Sleeklens.com daily deals section on our website where we have great discounts via Amazon or go to sleeklens.com/photograph-deals and you’ll find it there as well. There are numerous tripods there at varying costs and you can type your price range and see what kind of a deal pops up.

  1. Pay attention to the weather

This is a big one and might fall under the research you’re doing but if you have to take better landscape photos, you must pay attention to the weather. The weather can play a different effect to your photo. If you have an overcast sky, then you will have a lot less contrast in your photo and a little bit better time getting the right exposure. If for example, I’m taking a portrait of somebody, I always try to stay away from harsh shadows and instead opt for an overcast sky or partly cloudy so I can block out the sun from giving the shade or something like that. However, if you want dramatic sky then you’ll need a stormy sky or something like that so depending on the type of mood you want to put forth in your photos, you’ll really need to pay attention to the weather and that’s a big thing.

There are a lot of different weather apps out there and you can put on your Smartphone but the one I like to use is called Storm but unfortunately it’s only for iOS, for iPhones and the like. This is a really great app because my main interest in that app is to track lightning strikes and so if you are one of those lightening hunters or want to try it sometimes and want to get out and want to go out and capture lightning photos, you can see where the lightning strike in your area as it shows a 100 miles radius but it’s a really good app as it shows lightning strike real time. This is a niche topic but this is a really cool app and I like it. You can also toggle along layers for cloud layers and other stuff.

  1. Don’t settle for easy

This tip will definitely call out those who are lazy basically because landscape photography is not just about pulling alongside the road and capturing a photo and getting back in the car and driving off. It’s about being adventurous, going out and taking a great photo that is typically not what people are used to see. An example of this will be let’s say you’re driving on a mountain range and there’s a pull off where you can get out and shoot the sceneries. That’s great and you can see a lot of different photos taken from that overlook because that’s an easy spot to find. However, trying to find different angles, times of day, weather conditions and things you can do with special effects such as compositing using a nice tripod or even going to the site and finding a path you can go down or hike half a mile or so makes for great landscape photography. If you settle for easy you just capture the same kind of photos everybody sees on the internet and it’s just going to get lost in the crowd and you don’t want to do this.

If you want to find some great photos, don’t fall for easy. Depending on the type of day you want to shoot, you may want to shoot in the morning and obviously it may feel great to stay in your bed and not have to go out and take some photos in the morning if you are the kind of people who like staying in bed but again that’s easy. If you really want to get some awesome shots, get out of bed and go get some great photos.

Featured item for the week

Those are just a few simple tips for getting better landscape photos. As usual, we have a featured item for the week and this is going to work well with these tips. The item is the brand new video course that we just released called landscape photography editing essentials course. It’s an essentials course thus a smaller course than usual but its 2 hours long with 8 videos and you get all the photos used so you can follow along with the videos as well. The types of things we cover in this course are first of all basic landscape adjustments (the type of adjustments that typically made to every landscape photo) which might have to do with a refresher, different ways of doing some of the things you’ve done before but it’s a really great way to get over the basic overview of basic adjustments that you need to do to almost any landscape. Next, we go over dodging and burning and that’s a really great technique that a lot of people don’t use in utilizing their photos but it can really be great for bringing out a lot of details in your photos. We are not just going to look at the traditional dodging and burning but we are going to use color with that as well to bring out certain areas of your photo. We’ll then look at creating a mood, not just snapping a photo and doing a quick edit but really thinking about the mood you want to convey. The course covers how you can edit with different difficult lighting situations, as far as how the lighting is being cast and using HDR techniques to bring out as much of the details as possible as well as manual compositing and that’s a really big one.

We will show you how to take photos that are not shot in the same scene and how to composite a brand new sky into a photo and add some different effects like reflections, removing distracting elements and even adding some custom lighting effect as well. The last videos in the course are complete start to finish guides showing you how to edit nightscape photos, seascape photos and sunrise photos as well. You will learn how to make great photos using some simple tools found in Lightroom and Photoshop from start to finish. If you want to see some different methods for editing your landscape photos and maybe some great techniques you haven’t thought about before, check out this landscape editing essentials course.

feature item

SaveSave

SaveSave

SaveSave

SaveSave

SaveSave

SaveSave

SaveSave

SaveSave

SaveSave

SaveSave

SaveSaveSaveSave

3 Big Questions Asked By Beginners

This writes up revisits some basic things as a way to answer some questions many people have been asking, and most of these are beginners. I have composited 3 top questions that are being asked, and these are quite simple especially for people who’ve been in photography for a long time and knew the answers to these questions already. If you are not a super beginner, you probably might find this to be a miniature episode, but there are beginners out there who’re asking the same questions over and over again. As such, this episode will help by answering these quick and easy questions because everybody joining the field of photography has the same kind of questions. Below are the questions and the answers: –

  1. What is exposure triangle?

This is one of the main questions that I get, and beginners would like to know what exactly exposure triangle means. To answer this question, I won’t go into super technical details but instead, make it as easy as possible for beginners to understand. I will go over a basic overview of what exposure triangle is and how each point of exposure triangle affects your photography.

The exposure triangle is basically made of 3 “settings” which you can set in your camera to determine how much light will be coming in. Photography is all about light, and you’re capturing light, and the three branches of exposure triangle will be an aperture, shutter speed and ISO.

Aperture

We shall begin by talking about aperture, and this is normally the hardest for many people to understand when they’re starting in photography. Aperture is basically a setting in your camera that controls your lens. If you a traditional DSLR, and have your camera and lens attached, you will see that when you change the aperture, it is represented by “f” number. You might see an “f” number that says something like f 5.6 or something like that. That is your aperture. The lower the number, the wider the opening of your lens and by this, you are not affecting anything in your camera but in the lens. The lower the number means that you’re le


tting in a lot of light into the camera and this will allow you to capture, for example, something that’s fast moving and since you are letting in enough light, you will have a better exposure. This also affects what is known as “depth of field” which basically is how much of your image is in focus. If you have a lower number in your camera that means that the camera lens will be opening a lot wider and thus letting in a lot of light and also less of your photo is going to be in focus. It, however, does not mean that your photo will be out of focus if you have a low number but it’s going to be harder to get your subject in focus especially if it is moving. It’ll be a lot easier if you are in a studio setting, and you can lock your focus.

But on the other side, you have a higher number in your aperture, and so, if you would set your camera aperture to a higher number like f22, f18 or somewhere around there, it means that the higher the number, the smaller the hole diameter and thus you’re letting in less light. This is really helpful if you want to capture something in a very bright situation and you want to let in less light since your sensors are going to be overexposed and this is one way to kind of back that down and just like the opposite of a lower number will affect your depth of field allowing less of your image to be in focus, a higher number will represent how a lot more of your image will be in focus. So, basically from front to back, from foreground to background will be completely in focus traditionally depending on whether you have a forefront camera or a crop sensor camera, but for the most part, you’ll have more of your image in focus. Once again it is important to note that having a lower number will let in a lot more light into your camera and a higher number will let in less light, but both of these will affect the depth of field of your image.

Shutter speed

Shutter speed is kind of an easier one to understand. In your camera, there’s what’s called a shutter, and this is basically a door that opens and closes thus allowing light or scene to be hitting your camera sensor. So, basically, when we talk of shutter speed, we are talking about how long you want that door in your camera to be opened. So, if you want it to open for 500th of a second, which means you will let that door stay open for 500th of a second and you’re going to let in just a little bit of light into your camera to hit the sensor. This is really great for capturing something that is fast moving such as an athlete running down the field, and you want to freeze that motion. That’s one way of doing it but on the other side, if you set your shutter speed to a very long shutter speed, such as 5 seconds or something like that, what you are doing is letting in a lot more light into your sensors which allows you to capture stuff in low light situations especially if you are doing maybe like a night landscape photo where obviously you can’t set your aperture and shutter speed to allow less light. You need to allow in as much light as possible to capture a really nice scene. As such, you’ll need to set your shutter speed to a long speed to allow it to gather in as much light as possible.

ISO

This is the last branch of the exposure triangle and is probably the easiest one to understand. The ISO basically tells your camera sensor how sensitive it needs to be to the light. So, if you have a scene like a low light indoor scene at night, for example, you may have to bump your camera to a higher ISO meaning your camera will have to be more sensitive to that light allowing you to get a better exposure. This does introduce what’s called noise, and you might see some grains in your photo. That’s one downside of having a higher ISO but the lower the ISO you go, the less sensitive your camera is the light and the lesser noise you will see.

That’s the basic of the exposure triangle, and I’ve tried to simplify it as much as possible just to help you understand. However, once you get your camera and go to the backyard, put the manual mode and play with the settings, you will have the best way to understand it and see how each setting affects your scene.

  1. Should I shoot in raw or jpeg?

Most photographers here the terms raw and jpeg and most of the time they hear the term raw they don’t understand what it means and they think they should shoot in it just because everybody says to. But there are actually times when shooting in raw is beneficial and there are others when shooting in jpeg is beneficial as well.

Shooting in raw format

If you are shooting in raw, what you are basically saying is that you want your camera to do nothing to your image. You want to be able to control everything with your image, not in camera basically but when you get to editing software such as Photoshop or Lightroom you want to control everything such as lighting, color, sharpening and all of that stuff. So, your camera is not going to touch your photo at all, and it’s up to you to edit. A benefit of that is that you can have as much information in your image as possible. So, if you want exactly spot-on on your exposure, you can easily correct that using Photoshop or Lightroom. The downside of using raw images is that they have to be processed. A lot of people think that you can shoot in raw and share your photos immediately on social media platforms but you have to actually process image or rather do something to it to make it an acceptable format to email or share online.

This leads to the question, “when is jpeg acceptable or beneficial to use when shooting?” well, I always think of it this way… if I’m going to a family event such as a family reunion and need to capture the people there and a little bit of the scene, I don’t have to worry about taking all my photos, maybe one hundred and fifty from the night and drag them into Lightroom, change the exposure and all that but I just want to be able to capture the scene, the environment, the people and have those photos for memory purposes. I’m not seeking to win an award or anything, and that’s why I don’t want to spend so much time processing because I don’t need to. So, if I’m going for a personal event or something like that, I will set my camera to jpeg mode just because I don’t want to deal with processing of the images. Then if I’m going for a job or someone hires me, I’ll switch to raw so I can have as much information as possible to play with and deliver the best images as I possibly can.

You can also mitigate this by shooting in both raw and jpeg at the same time. A lot of cameras allow you to do this and so when you take a photo, it will record the raw image and jpeg processed images as well on your memory card so you can have both options. If you are worried about having to switch back and forth, this is also a great option as well.

  1. What lens should I invest in first?

This is the last question that I get and probably the toughest to answer. When I’m thinking about this question, I have a particular camera lens that I recommend all the times just because it’s probably one of the best and cheapest lenses that you can grab. It is very versatile, and you can do a lot with it, but this also depends on the kind or style of photography you shoot. There is no “one size fits all” kind of gear that everyone should use, and it really depends on your style of photography. But one lens that I think everyone should have in their camera bag is the 50mm f/1.8. Whether you shoot with Canon, Nikon or whichever camera brand you shoot with, most of the time you’ll find a 50mm prime 1.8 lens. Obviously, if it’s a 50mm lens, you will not have so much versatility with it because it’s not a wide-angle enough to do landscapes, real estate photography or anything that requires a wide angle view. It’s not telephoto enough to be able to capture wildlife or anything like that. It’s basically just a small lens that has a very fast aperture at f 1.8 for you to get a very blurry background for your images. One advantage with this is that it’s very great for portraits and so if you like shooting people or candid photos or basically want a lens that’s doesn’t look very intrusive, like when you are doing street photography and want to take a 50mm 1.8 it makes your camera shrink down so much because the lens is so small that your camera doesn’t look intrusive at all.

With this, you can typically take many photos than you would if you had a 100mm or 300mm zoom lens because that would be a big lens to carry around and you probably look obnoxious carrying that if you are doing a little bit of running and gunning around on the streets but it is a very good lens if you want to practice with just using one focal lens and so basically you’re zooming with your feet and have to walk to the subject to get closer or back up to get further away and you can also play with the benefits of using a 1.8 f lens which are very bokeh, blurry background and also allow more light to come into your camera because you have an f 1.8 and you can shoot in a little bit lower light situations and still get really good exposure.

I find these lenses to be great if you shoot videos with your DSLR. You have video option on most cameras, and this is a great option. And you can get very good quality videos from this lens, and it actually looks more professional because you have the f1.8 (f1.8 is like the selling point) to really blow up your background so if you’re maybe recording an interview or someone, you can focus on your subject and blow up the rest of the background, and it looks like a really professional look.

Those are the top three questions that I get from beginner photographers all the time. Hope the breakdown does give you a better understanding of these topics.

Photography Projects For The New Year

With the new year starting, there are many photography goals. One of the greatest things you can do for those who are new in photography, want to start a new project of their own or those stuck in a creative rut and don’t really know where to go from here and maybe bored with photography, I will show you that there are a couple of self-initiative projects you can do to really drive your creativity and get more familiar with your photography. If you are new, these two projects can really help you out and you actually have a choice of which project you want to choose.

365-project

What do I mean by a project? There are two things you can do in order to get familiar with all the photography related things, get you thinking about different things and to keep your mind creative and actively working to make better photos. The first thing is kind of obvious. Some people have actually heard about this one but nobody has really thought that this is a good idea. I actually have done this one and it’s called the 365 project. What this means is that for the whole year, you have to try and take one cool, creative photo per day. It means taking a really good photo and editing it really nice and maybe posting it in your portfolio, facebook page, just share with your friends or keep it to yourself. Basically, you try and create a very interesting photo per day.

In case you are listening to this, you might be thinking that this doesn’t sound so hard but it’s actually very difficult. I personally did this when I first got my “real camera” and I tried to take a photo every day and while I managed to take some really cool photos, most of them I had really to stretch in order to find something very creative. There was a lot of time when I knew that I wanted to catch a very cool sunset, sunrise or something like that and I would actually have to get up and shoot that photo early in the morning when I wasn’t really used to getting up that early in order to grab that sunrise photo. You have to try and get out of your comfort zone and create a really interesting photo. There are some days you have to get home from work and grab your camera and figure out something interesting and if you can’t figure out something, you just end up pointing at the sea or something like that.

Despite this, the experience really pushes you into creating a really great photo. That’s what we call 365-project, basically taking one photo per day for the whole year and it’s really cool once you get the year done and you get to see all those photos and how you’ve progressed as far as your creativity and quality of your photo from the first day to the last day. This also helps you get used to your camera and also try new photography techniques that you might not have tried in the past and this is a great way to show those off. You can also post the photos in some sort of public platform such as Facebook, and let people know you are doing this bec


ause that keeps you accountable for doing this and also allows people to see what kind of stuff you are up to. If you are a photography business owner, you can actually make a small low tab on your website and say that this is the kind of photos you are doing all year round and people can check in and see. This also updates your website which also helps the SEO. The 365-project can really benefit you if you want to share publicly.

Project-52

Because project 365 can be a little bit difficult, project-52 becomes another option for you to consider. Project-52 is basically taking one photo per week which gives you a little bit of a leeway if you are not able to take a photo per day. However, it can also be difficult because you might let’s say that you’ll slate your project 52 every Friday and by Monday you are already thinking you have 5 more days to figure things out and you end up waiting until the last minute. Personally, I have done this project as well but it took me a long time to come up with something creative.

To help you along for those who are just starting in photography, you probably don’t want to jump straight to project 365use it can be a little overwhelming at times but project 52 is more manageable and easy to track. If you want to start project 52, I have put together a really nice, simple worksheet that will give you some tips and a guide to follow per week. There are some things you can do to help succeed with this project and we will discuss them here briefly. These do not have to be done in the order they are listed but they are just labelled as 1-52 to give you a jest of what they’d follow into.

  • Rule of thirds photo – This is the first thing you should do and it basically means doing a composition with the rule of thirds. We too can be a self-portrait and by this, I don’t mean taking a selfie with your cellphone, iPhone or something like that but making a really creative self-portrait. As photographers, sometimes we don’t think about taking photos of ourselves and there are times we could use one for ourselves and creating a really nice self-portrait could really help. You get to learn some different ways of taking pictures of yourself and also get some promotional photos for your business.
  • Light painting – This is yet another topic you can do. It means taking long exposure and shining maybe a flashlight somewhere and light painting something.
  • Architecture – If you are a portrait photographer and mainly interested in portraits, this topic could make you interested in different fields of photography. Going out and trying to get a really creative architecture photo could be a good one as well. Some examples of this could be fireworks which can be done very well over the holidays, urban decay photos, long exposure photography or iPhone photography not necessary using an iPhone but a smartphone to shoot and edit on your phone before exporting the jpeg to post anywhere you want to post. These are different ways of learning photography.

The list has 52 topics which you can choose from and figure out exactly how you want the photo to come out. You can follow the 52 topics one by one or re-order them the way you need to. However, this is a simple worksheet that you need to get a little familiar with different things in photography. So, doing a project like 365 or 52 is a really great way to get you thinking about different creative aspects of your photography. You can download the worksheet using the link https://sleeklens.com/wp-content/uploads/2017/12/Sleeklens_Project52.pdf

Featured Item of the Week: Project 52 Topic Worksheet

project-52-topic-list

Subscribe to the Podcast for the latest Episodes   |   iTunes   |   Stitcher   |   RSS   |


SaveSaveSaveSave

SaveSave

Drone Flying and Photo Taking Tips

Drones are becoming very popular especially when it comes to photography despite the fact that they’ve been with us for a very long time. A lot of people it seems are acquiring drones with the hope of furthering their photography experience. I personally, got so excited when I got my drone for use in my real estate photography and as soon as I flew it and could see the photos I could capture. Not only was I impressed by the real estate photos but also the landscapes I could capture. It opened my eyes to different possibilities when it comes to drones. I have a couple of flying and camera tips in case you might be getting your drone for photography. Here are the tips starting with the simple ones when it comes to flying the drone:

  1. Staying in the beginner mode when you start

A lot of most popular drones out there have what is called a beginner mode. This might be different depending on the model that you have but what this basically does is that it limits you from going to certain heights and a certain amount of distance from you. This means you can probably go approximately 50 ft or 100ft above the air and 200ft or 300 ft away from you in any direction. This is a helpful thing when you get started because what this does is that it helps you to know the drone. Obviously, when you fire the first flight you don’t want to be taking off and getting it 1500ft away from you where you can’t even see it, you are not even sure where the buttons are and all that kind of stuff coz you will eventually lose it if you do it that way. So, the beginner’s mode is a really cool feature where you can just practice flying in your small area and get to know the camera control and how fast your drone can go, the speed, the acceleration of going up and down. I stayed in the beginner mode for about 5 flights when I first got my drone and this helped me get used to the control. This helps you a lot because you get comfortable with the controls, which is very important when you’re flying a very expensive piece of machinery because you want to be sure that you can bring it home at the end of the day.

  1. Do it in an open field

Next to the beginner mode is to have you try controlling your drone in an open field or set of some sort. This is a really common sense thing but a lot of people don’t it. They’ll get their drone, run out in the backyard in a residential area and start flying around. This can’t end up well and since they are not used to flying it, they ran into a house or something like that. Not only will you damage your drone but you could also damage a home. Being in an open field or area is a very good thing. A lot of people don’t do it but this is a common sense thing that should happen. When practising in an open field, you are not going to run against anything else apart from the ground and if you do that, it will only be your fault but at least you won’t damage anything else and be liable for any other situation.

  1. Paying attention to the wind

This is another obvious thing but these days a lot of drones can actually handle a fair amount of wind. If you’re flying out there and have a 10m/h wind gas depending on the drone, most likely it won’t be able to handle that. It’s not going to blow it away or anything like that. So, paying attention to the wind is a very important thing but when you’re looking at the wind, don’t just pay attention to the wind speed but also pay attention to the wind gas because you could have 10 miles per hour wind but you could have higher wind gas and that could have potential thing especially if you are flying at a high altitude. As such, you should pay attention to the wind gas and the feature item of the week will be an iPhone app that can help you handle that but I will go through this later.

  1. Mastering the Figure 8

This is a side technique of flying your drone in a shape of an “8”, meaning that you’re flying it in big loops. The mastering of figure 8 is the kind of thing that allows you to get used with the control of your drone because if you are flying it away from you, it’s very easy because ‘left is left and right is right’ but when you’re flying it towards you, ‘left is right and right is left’. The controls have flopped that way in different directions and it can very hard think about that depending on how your drone is flying. So, if you fly your drone in a figure 8 right in front of you, it will help you get used with the controls in a way that if you’re flying it away from you can press right and it’ll go right or left and it will go left but when you are flying it towards you, you reverse the directions and start thing about it. All that this does is that it helps you think how the direction will be different and this is what is called “mastering figure 8” and it helps you understand the control directional.

  1. Landing and take off

Some drones are super easy when it comes to taking off. Some of them have a take-off monitor which allows you to see the take-off button once you plug them into your phone. Clicking the button propels your drone to around 4 or 5 feet and it stays there until you command it to go anywhere else. Take off is super easy even if you don’t do it on the phone or the control of the monitor. Landing, however, can be the hardest part and a lot of people think that this is very easy and only requires dropping down the drone and having it hit the ground. This is specifically difficult depending on the speed and could take you up to 5 minutes to land it safely because it is slow and you do not want to come crashing to the ground. Some people like to stop the propellers or mortar maybe a foot above the ground but this could be damaging especially if you have a camera underneath. So, practising the landing is also very important. I can certainly land my drone but a lot of time I like catching my drone mid-air depending on the situation and then turn off the propellers. The reason why I do that is because I might be in a residential setting where I’m taking photos of a building or something like that and there might be tall grass or cars in the area. Landing your drone is very important but if you are in an open area there is no reason for you to catch it. Instead, you should master the landing technique and do it safely.

  1. GPS

GPS is a very popular thing and is built into a lot of drones these days. Basically it allows you to connect to the satellite centers opening the earth and kind of tells your drone exactly where it is and if you have a hover setting on your drone, what it can do is hover in one particular spot so you can let go of the controls and you don’t have to touch anything and it will stay in one spot. If you don’t have GPS turned on, then that’s when you need to pay attention to the wind and something like that because wind can actually push your drone far away from you if you are not paying attention. As such, when at all possible especially if you are doing something simple like taking a photo of some sort of landscape, you might want to keep your GPS on because you can really dial in the composition when you’re trying to take a photo and it’ll pretty much hover where it is. If you try some other modes such as altitude mode or program mode, it’s going to be a little bit difficult especially in the beginning because it will want to drift but GPS mode keeps it from drifting.

Finally, we will discuss a few basic things when it comes to flying a drone and these are known by many people but they don’t pay attention to them. This is where a lot of people get into trouble with drones. In the US for example, there are at least some regulations that one should stick to. The main three are:-

  • Line of sight – always make sure you can see your drone. This is very hard to do especially because the thing is so small in the sky and if you fly it 800 ft away from you, which is legal, then it’s pretty difficult for you to see it, only seeing a small speck in the sky. But definitely, you will need to get to the line of sight so you can see it when it flies.
  • Do not fly above 400 ft – 400 ft is actually the maximum altitude for a lot of drones’ flight. This is intended to stop it from flying into any other commercial or private airspace. There are a lot of drone software you can use to set the maximum altitude and if you find it flying above 400 ft then it’ll stop and won’t go any higher.
  • Stay 5 miles away from any airport – By this, I don’t mean a huge, international airport, No. There are sometimes when maybe there’s a small municipal airport where only small planes take off and land, you will need to keep off that as well. There might be unpaid airports out there where there are crop planes, it’s really difficult to stay away from those because they can be everywhere but try to look at the map and see where there might be an airport near you and try to stay away from that as much as possible.

Now we get into some camera tips when it comes to using your drone. Obviously, cameras are really awesome to have on your drone because you can get some awesome shots in unique perspectives. The following tips are essential especially in the beginning.

Try the automatic mode

A lot of


drones out there allow you to dial your shutter speed, aperture, ISO and others manually or you can have the camera dial it in for you. In the beginning, I will definitely recommend just paying attention to the automatic mode and let the camera do everything for you. Let the drone dial in all the settings because, in the beginning, you are concentrating on flying the drone and trying to compose a really cool picture. So, if you’re flying the drone and trying to pay attention to this, you don’t wanna have to stop the drone and look down at the screen and start dialling a bunch of settings. Pay attention to the automatic mode until you get really comfortable with it and that’s when you can start dialing the settings especially the ISO (that’s a big one because in most of the drones it tops out to around 30 to 100 or something like that and it can really latch at that really quick). If you are shooting in some cloudy situation, your ISO will probably be very high and being able to control the ISO is a very important thing.

So, on that topic, let’s talk about shooting in different conditions. Probably, the best condition to shoot it according to my experience will be a partly cloudy condition because you don’t have those high contrast areas and those really stand out especially when you’re photographing from above. Sunny is also a perfect condition to shoot in and although it might not be perfect for the actual results for the photo, because of the very high contrast areas. I like to shoot in partly cloudy situations, since overly cloudy situations are a bit difficult to shoot in, not because of the flying conditions but because you will have a little bit less light hitting your sensors on the drone and it might be a little bit noisy in your photos.

Another thing you need to pay attention to is shooting in shooting in DNG if possible. A lot of these drones do shoot in jpeg only but there are some especially the DJI series which will allow you to shoot in DNG. So you have digital negative which gives you a little more flexibility when you’re editing in Lightroom or Photoshop although not a whole lot because the quality of the files is still a bit lackluster depending on the drone that you have but you have a little bit more leeway when you’re editing so if it is possible you should shoot in DNG if your drone allows it.

Before committing to any type of shooting with your drone especially if you’re doing a commercial shoot, make sure to practice and learn the buttons. If you are flying your drone and trying to pay attention to not hitting the trees or buildings, the last thing you want to do is to try and not ram your drone into anything and also try to figure out where the buttons are so as to take a photo or to control the camera. As such, you should really practice with your drone in an open field and make sure you master the controls. This will mean not only practising the flying but also the camera as you’re flying it. It will be good to have the memory of where the buttons are located and how sensitive they are especially the turning and tilting of the drone.

These tips will come in handy if you acquire a drone and want to start off with drone photography. Just make sure you master them and you’ll enjoy the experience.

Feature item of the week | Hover App http://www.hoverapp.io

Our featured item of the week has to do with drones. It is an app which we have talked about in other episodes and it’s called hover. This app is available for iOS and I also believe it’s available Android as well. Hover allows know your location through GPS in your phone and it will automatically look for the weather conditions and also give you notifications for airports in the area, wind gusts, among others in a very easy to view window. At the very top, you don’t have to look for anything in specific but it says “ready to fly”, meaning in your location you’re ready to fly and there is nothing that’s going to impede you. Obviously, if you are within 3 miles of an airport or something like that it’ll say, ‘caution’ and you can click on that and it’ll show you what the caution is. This is built-in in a lot of different apps for DJI and they’ll notify you when there is an airport, high wind or something like that but it is good to have a separate app just to be sure of everything.

5 Photoshop Tips for Photography Editing

Photoshop is often overlooked when it comes to your regular Joe who is editing photos. Typically, everybody throws their photos in Lightroom because it is so easy to catalogue all your photos and you can do a lot of really awesome basic edits to your photos and it handles ninety to ninety percent of the jobs. However, Photoshop is obviously a really powerful and popular tool and a lot of people still use it for much of their photos. As such, I’m going to talk about 5 photography editing tips you can use when you’re using Photoshop. Some of these tips are known while others are little known. Some of them are like workflows you can kind of consider but I’m gonna go over these tips that I typically use when I jump into Photoshop. These tips include: –

  1. Dodging and burning

We’ve all heard about dodging and burning a photo and what this basically means for those who don’t know is to selectively highlight or darken parts of your photos. This used to be a technique used all the way back in the film, where we kind of expose a little bit more of a photo or not expose some of the parts during the film process and it’ll basically create some highlights and shadows in selective parts of the photo. In Photoshop, we have a dodging and burning tool that is built into Photoshop and does exactly what it says it does. A burn basically means that it darkens a part of the photo and a dodge means it lightens part of the photo. These tools are built in Photoshop and you can find them in the Toolbar on the left side of your Photoshop window but there are different ways to achieve this kind of dodging and burning effect.

One of the most popular and that does give you a lot more control is actually using a layer and a brush. What I mean by this is that if you open a photo and create a brand new layer right above your photo, change the blending mode of the blank layer to overlay and then lower the opacity of your brush to approximately 20 and then change the color to black or white, black will darken the photo while white will lighten the photo. You can paint strokes across the photo to gradually darken or brighten the photo. This is a very popular technique and it gives you more control because if you happen to mess up by any chance, all you do is to delete that layer and do the dodging and burning process again. You can also lower the opacity of that particular layer and that will lessen the effects of the dodging and burning. There are multiple dodging and burning techniques you can use but this is by far the one that gives you more creative control over your photos.

  1. Using Layer Mask

At this point, we will talk about using layer masks instead of eraser tools. When you’re trying to get rid of a background, for instance, if we have a model that’s on a white background and we typically want to remove that background, what we might do is to select the model away from the background by using any of the selective tools including a quick mask, magical wand or something like that. Once you select the model, just use the eraser tool to erase the white background. That might seem like a typical common practice. However, instead of using the eraser tool, what you can do is to actually grab the layer mask and apply it the selection. When you do that, you are able to make a layer mask from that selection and you can remove the model from your photo. But let’s say you happen to select too much or you cut off the models hair, what do you do about that? You can take the layer mask and paint back the hair but if you use the eraser tool, you won’t be able to do that and will instead have to make a duplicate layer of your image and try to kind of bring that back or start the process all over again and that might seems like a real time waster. So, using the layer mask option instead of the eraser tool is actually a real time saver and it allows you to fix the little problems you might run into when removing an object from a background.

  1. Dual View Photo Editing

This is a really popular workflow if you’re doing a lot of retouching. If you are a portrait photographer and doing a lot of retouching to your models and maybe you’re removing blemishes from their faces or something like that, there is actually an option in Photoshop which allows you to open up a document in two separate windows. This means you’ll be opening one photo in one window and that same exact photo in another window and no matter what edits you do to one of those documents, it reflects in the other document. For example, if you’re retouching somebody, you can zoom in to a photo to a 100% if you want to see how the photo looks like when zoomed out instead of keeping zooming in and out and flip over the other tab and that’ll show you the model completely zoomed out with all the effects you’re doing to the other window. So, the way to actually do this is to open up your photo in Photoshop and on the top of your Photoshop window go to Window Arrange > New Window of > and then it will say the file name of whatever file you are working on. When you click that, it’s going to open a brand new tab in Photoshop and you could go back to the original photo and maybe zoom in to a 100% thereabout and start removing blemishes from your photos and if you want to see how the photo looks like a 100%, just hoop to the other tab where it’s already zoomed out to a regular fitting window and then go back. It’s a really great workflow option and I recently found out that option while doing a little bit of portrait retouching and it’s a very fantastic way of simplifying your workflow without having to zoom in and out all the time.

  1. Camera Raw Filter

This is a very popular tip but one that a lot of people actually forget. When you open a raw image in Photoshop will automatically open up in a program called camera raw because Photoshop conatively edits raw files.  From there you can make your normal adjustments like you would typically see in Lightroom including exposure contrasts, highlights, shadows and others. You can then open the edited photo directly in Photoshop and do all your advance retouches as you would do to any image. However, if you like the way Camera Raw is laid down, you can open the camera raw filter. Even if you have a Jpeg image, you can actually open the camera raw filter and still get all the advanced options that you’d typically get in a way that they are laid out nice and easy. It doesn’t matter whether you have a tiff file, raw file or PNG file, you can actually open those images in the camera raw filter and just kind of edit like you typically would. Just because you’re editing in camera raw doesn’t mean you can make any major adjustments like you would do when editing a raw file. So, if you have a jpeg and you’re trying to make many adjustments like bringing back a whole bunch of details and the shadows among others, it’s not going to bring back like it would in a natural raw file. You are basically getting an interface, the way it looks and the way it’s laid down and thus you can easily find some really simple adjustment tools. Just think about that and if you want a really easy way to maybe just change the exposure easily, you can just hoop to the camera raw filter and do it that way.

  1. Using actions for very simple tasks

A lot of people might think that you have to do everything manually just because you are dragging a photo into Photoshop and that’s how Photoshop is. But if there are some simple tasks that you typically do to every photo that you drag to Photoshop, why not create some simple actions which can do those tasks for you? for example, every time I drag a photo into Photoshop, I want to change the resolution of that photo to 300ppi or dpi so that when I have the option to print it’s already at 300 and thus I have a very good resolution there. Normally, when I drag my photos into Photoshop they’re at 240 and what I did was to create a simple action to apply the image resolution and change it from 240 to 300 and I also apply a little bit of sharpening as well. That’s the action that I click on every time I drag a photo into Photoshop. It saves me a couple of seconds but if you do it every time to every photo, that’s a great amount of time you’ll typically be saved. You can also create some advanced actions to help do things like changing a photo to black and white (maybe there’s a certain effect that you always like applied to your photos). Also, remember Sleeklens does sell a whole lot of actions which are super advanced and you can check those out as well.

Those are just 5 simple tips for Photoshop editing and although they are really simple things, many people typically forget them because they’re wrapped in their own workflows. However, it is always good to experiment with other different types of workflows and settings in Photoshop to continually improve your workflow.

This episode was dedicated to Photoshop and we have a special announcement for you. We just released our first Photoshop course and this is for Photoshop photographers. This course is dedicated just to photographers showing you different scenarios and tools that a beginner might need in Photoshop when trying to learn how to use the Software. It can be tricky and intimidating when you open up Photoshop and fine all those tools. But when it comes to Photography and Photography editing, Photoshop has some really simple tools in there an


d these will allow you to really enhance your photos. If you want to check out this Photoshop for Photographers’ Beginners Course, just visit Sleeklens and click on the courses’ tab and you’ll see it there. It’s a 5-hour course and you get a lot of downloads of the course. There are about 25 videos in there so you can learn a lot of different things ranging from portrait retouching to using layer masks to using clipping masks, smart objects and all kinds of stuff such as adding special effects to your photos among others. These are typically essential for beginner photographers who might want to learn when they get into Photoshop.

Reasons to Shoot in the Golden Hour

This post will cover the golden hour. I shall seek to answer questions such as, what the golden hour is and why you should be shooting in the golden hour timeframe.  I will also go through a few examples to give you a reason why you should be shooting during the golden hour and not just going out in high noon in some parts of the world and just grabbing some boring shoots. There is a really great benefit for you going to shoot in the golden hour.

What is golden hour?

The golden hour is not technically an hour but a timeframe when the sun is setting and you have some really awesome colors and different tones in the sky than you would in any other time of the day. You may have noticed that when you see many of these professional photos and especially portrait photos that are taken during sunset or around that timeframe, the photos tend to look a little bit different. They look a little bit warmer and have a little bit of mood to them and they just make an all-around better photo. With this in mind, I will go through some examples why you should shoot during the golden hour and I know it can be a bit hard to go out there after you get off work and have a little bit of time to spend with your family and everything but it pays for really awesome photos to get out there and take pictures at sunset or around sunset to make sure that you get some really different and awesome photos. Here are some of the reasons why you should shoot during the golden hour:

  1. Soft light

The first reason why you should shoot during this hour is that you have an opportunity to photography in really soft light when the sky is sort of low. During this hour, the sun is a little bit less harsh and there is a little bit of soft light going on. Because the sun is somehow lower on the sky, the light is kind of somehow diffused and a little bit contrasty in your photos meaning your highlights are not going to be as bright and your shadows are going to be as d


ark as you would be shooting in a perfectly bright sunny day. This allows you to get a little bit more information on your photos so you can have a little bit more leeway in playing with your photo and editing the same. The hour just makes for great diffused light and this is a great kind of photo which you would require a whole lot of different gear to shoot during the daytime including reflectors, block lights, and portable reflectors to bounce light back in but when you start shooting in the golden hour, you kind of get that automatically without having to take a whole bunch of gear with you. This is a really awesome benefit for shooting in golden hour.

  1. Color

Color is the other reason why you should shoot in the golden hour. Color is a very important part when it comes to grabbing some awesome photos because if you have this awesome, warm magenta color in your photo automatically without doing any editing, then you have a fantastic-looking image 99% of the time. Color is a really fantastic way to improve your photos and all you have to do is go out during sunset and get that oranges light where the sun is low on the horizon and just make for a cool, awesome photo and also different looking. Unless you’re a professional photographer who gets out there and makes it a point to shoot portraits during the golden hours, the majority of the time, you probably don’t have a portfolio full of sunset photos and as such it is a really awesome thing to get out there and start shooting those photos. Just by having the color and the nice soft light, you will have a really great beginning of the photos before you even start editing. Side-riding is also another thing that I would like to mention. When you have side riding especially when the sun is pretty low on the horizon, you have a really nice level of the sun to you instead of having it up on the sky and catching sun flares and lens flares, this is a really warm sun hitting the sides of your face and you get side riding. This is such a different way to accent different parts of your photos especially if you have a landscape photo by any chance and you have that nice soft sunlight and are getting that side light hitting parts of the landscape that you’d never really notice, even something as simple as grass or wheat in a field or something like that has a really different looking feel to it because of that really nice, warm soft sunlight.

  1. Silhouette

This is somehow easy because it’s a classic photo. If you want to have a really amazing silhouette, especially if your sky is just killer when you’re going out to take these types of photos, silhouette can make a huge a huge impact on your photos. If you point the camera right at the sunset and maybe the sun has gone down on the horizon and you still have all those warm colors popping up, if you have an option for a nice silhouette you will be able to photograph almost anything out there and it’ll look really amazing. Just because you have that nice silhouette and you have no details but are really concentrating on the figure of the person or whatever object you are shooting in the really awesome sunlight with the sky on the background, it’s going to automatically make for a great and amazing photo.

  1. Glowing, simmering portrait-type of a look

What this means if you’ve ever done photography and have the term ‘hair light’, typically there is a light when you shoot portraits in the studio that can accent the hair in a way that separates the subject from the background using a nice little pop of a light near the top of the head and usually kind of accents part of the hair and so that’s why it is called hair light. But when you have the golden hour sun hitting the portrait and the warm golden sun hits the hair, it automatically makes for a really amazing looking and feeling moody photo. If you’ve ever seen those folks out there who maybe shot directly into the sun and were able to have a flash to pop up a little bit of flash into the subject so you get a perfectly balanced exposure for the subject and the background, you automatically have a nice fill light with the flash but you also have a really nice and warm hairline.

  1. Backlighting

Backlighting is kind of the same way and you can classify it as somehow a hair line but when you’re shooting maybe a portrait and you want to have a backlit subject, you can actually do this with a pop up flash and have the warm, golden hour sun behind your subject and you fill it in a little bit with the flash and automatically have a telephoto lens or some lens that has a really low aperture number, meaning a very wide aperture opening, if you have that type of lens meaning f-2.8 or f-1.8 you can get that really awesome color in your sky and a backlit subject but also have an awesome bokeh and those two combined will pretty kill every photo out there. It will make every photo you shoot with those two color combinations to look automatically awesome.

  1. Getting a cool sun flare in your photo

This is somehow considered a golden hour type of shoot but it doesn’t have to be.  A few hours prior to writing this page, I went out and photographed a home and right behind it was the sun just one hour or so before sunset which gave it a really nice sun flare. Since it is winter here in the US, the sun was right behind the home and I saw a peek through the tree and I wanted to get the sun flare peeking through the trees just to add a little interest to the photo automatically. Just the idea of seeing that sun flare gave the idea of capturing the sun flare to have it in the photo otherwise it I would have photographed a boring straight shoot of a home. But the little sun flare peeking through the tree adds something to the photo. Obviously, if it was noon I wouldn’t be able to get that and if I did, it wouldn’t be that great of a photo because I would have very harsh shadows especially in a clear day. So, seeing that automatically pops up a little bit of warmth, sun flare and visual effect to the photo and that can really go a long way.

These are some of the quick examples as to why you should shoot in the golden hour and although it might be hard as pointed out in the beginning, when you get out you’ll enjoy a great experience and see how nice it is outside. Pretty much any subject you photograph is going to look like an amazing subject because you don’t deal with this kind of lighting most often. Real photography is all about lighting and if you can enhance your lighting by going out at a different time of the day, then it’s well worth it. You can also check out for different Lightroom brushes from Sleeklens to enhance your sun flare effects on your golden hour photos.  There is one brush particularly known as “Golden Hour Golden Sun” and it’s a really awesome brush which I use all the time.

Is HDR Photography Dead?

HDR photography was a much talked about a topic a few years ago. However, it has since died down and this lead me to think about the topic, “Is HDR photography dead?” I will start with a brief introduction on what HDR photography really is and then talk about whether this technique is dead or not.

What is HDR photography?

For those who may not be aware or familiar with the term or the topic, HDR stands for High Dynamic Range and when people talk about it, normally they refer to a technique of blending photos but this is a term that basically talks about how your camera handles extreme light situation and extreme dark situations in the same scene. Basically what I mean by that is if you go out on a bright sunny day and you are to set your camera into a neutral exposure where your light meter is at zero and your camera takes that as the perfect neutral exposure, and you take a photo, depending on the kind of a camera model you have, you are probably going to see that there are some spots that are extremely blown out or extremely bright and then there are other parts which are extremely dark. So, if you have some extremely bright situations and your camera can’t handle that, then your camera might not be good at dynamic range. Same with the darks, if you take a photo and your darks are almost on the black side, then your camera can’t handle the dynamic range very well.

There are some cameras out there which can handle dynamic range way better than other cameras brands and models. What this means is that the camera can handle really dark situations or areas of a photo in lighter areas of that same scene and you still get details in those areas instead of them blowing out or being completely lost and having no data. So, there are some cameras out of the box that can handle dynamic range very well and you really don’t have to use some certain techniques to bring some of that back. Sure, if you bring the photo into Lightroom or Photoshop and bring down the highlights and then increase the shadows, you are going to get a little bit more details out there but some of these camera brands and models typically have a very awesome dynamic range and this is especially helpful for landscape photographers who may be shooting in bright situation and they want to still have details and some sort of foreground elements and other things like that.

It is also good for real estate photographers who want to capture the inside of a home and not blow out the windows because typically the inside of the home is darker than the outside. As such, you can handle that a little bit better with some of these camera models. So, just to give a general idea, the Nikon D810, D8-100/E, D750 and even the Fujifilm XE1 are really good cameras that have very awesome dynamic range. I’m not trying to single out any particular canon but these are some of the cameras which have been rated to have a really good dynamic range and you can see that Nikon typically handles that better than any other camera brand. The new Canon EOS 5D Mark IV also handles dynamic range a little bit better than some of its predecessors but it does a good job. Nikon typically has a really good dynamic range as well as low light noise.

The kind of slogan for most of the camera brands when it comes to Nikon vs. Canon is usually that Nikon can handle the low light situation than Canon but Canon has that really awesome looking color and for some reason Canon is always associated with color and although there might be some argument about that going back and forth but this is an age-old question as to which is better but really there is no better camera but whatever works better for you depending on your type of photography. So, those are some camera brands and models to think about if you are looking for a camera that has some really good dynamic range.

Just because you might have a camera that does not have a good dynamic range and can’t handle that very well doesn’t mean that you can’t capture that. You just need to go through a couple of different steps in order to get a really good dynamic range and that’s where the HDR photography movement kind of came. What basically this means for those who haven’t shot HDR and are not really sure how to do it, you’re basically shooting the same scene with the same settings minus the shutter speed. So what you typically do is set your tripod up with your camera there and you maybe take a scene that’s for example, f8 ISO 100 and then you’ll change your shutter speed accordingly to try and get a darker photo, a neutral exposure and a bright exposure. That’s the basics of HDR and so there’re different ways you can take HDR when it comes to getting maybe 7 images, 10 images or all kind of series of different images but typically the HDR is technically going for 3 different exposures. A lot of cameras have blackening where you can do an automatic blackening where the camera automatically takes the shots that are maybe 2-stops underexposed, a neutral exposure and 2-stops underexposed or you can do it manually by dialing the shutter speed yourself and just looking at maybe the histogram to try and get a better idea of how the photo will turn out. But that is the basic idea for setting up an HDR photograph if you want to do an HDR photograph or run it through software.

One quick thing before I move on to kind of the typical software that’s used for HDR photography is that I notice that a lot of people when they start getting into HDR photography, they’d try and hand-hold it and sure you can try and manipulate the software and do a little bit of de-ghosting but you really might need to try a tripod if you can because that way everything is stable and neutral and you don’t have to increase your ISO. I’ve seen a lot of HDR photos that are very noisy and this is probably one or two things maybe they’re dialing in more of the exposure composition than they should, where they are trying to increase the shadows and decrease the highlights way too much maybe or they have an HDR photograph they’re trying to shoot but they have a relatively high ISO. A lot of people think that just because your camera might handle ISO and noise better than some cameras then you don’t have to worry about the ISO performance for a camera when it comes to HDR photography. But you need to keep your ISO down as real as it can go. This is mainly due to the fact that when you run your photos through an HDR program, whatever program you choose to use, it kind of amplifies the noise a little bit. As such, even if your camera can shoot a low ISO at 100, if you go to 200, you are going to see a little bit of a noisy image. Again, depending on the camera model, you’re going to see a little bit of a noisy image because your camera is kind of amplifying that when you run it through the software.

HDR software

There is a bunch of different HDR software which you can find especially if you do a little search on Google right now. All these will claim to be really good when it comes to HDR photography but some of the top HDR programs that people use are obviously Photoshop, Lightroom, Photomatix Pro and Aurora HDR. If I had to rank all these programs based on the one that is best for doing HDR photography, then I will have to go with Lightroom as the best to do HDR photography with. There are a few reasons why I like having my HDR photos in Lightroom and number one is that you are dealing with raw files and although you can deal with jpegs and TIF files working with raw file gives your program a lot more information to deal with and ultimately you get better results. You also get to do the whole process from start to finish in one program and thus have all the awesome capabilities than you would normally have if editing a single photo and that’s being able to catalogue your images, being able to edit and go back and do non-destructive edits to it. This is not as cumbersome as it would be to do this in Photoshop where you have to import it into Photoshop as a script, open the file, play around with it and try to get the best image and then save the PSD and then you might need to go back to the camera raw filter to make more edits and this becomes some sort of a mess. However, Lightroom really does a fantastic job of making a HDR photo that doesn’t really look like it’s an HDR photo and that’s kind of the whole goal nowadays when taking an HDR photo as you don’t want it to really look like it was taken through a program or like you generated a file and made some adjustment. You want it to look like a very natural photo because that is what it kind of what it’s all about. It’s not applying really nice looking grunge effects to a photo but making a photo that has a very good dynamic range where you can still see a lot of bright areas and bring back a lot of the dark areas.

We mentioned a program called Photomatix and this was the first program I used for HDR Photography and without putting the blame on this software, there are many filters it offers from where I think HDR gets a bad rap. One of the filters in there is called Painterly where you can just click and it makes some real artistic looking effects to your photos and I think people saw that and they were like ‘oh these are some new looking photos that we’ve never seen before. I wanna share this and see how it looks but originally probably it looked really awesome because there was something different or new that we’d never seen before and everybody just kind of ran with it…’ also everybody in HDR photo looked just the same and had this ‘paintry’ feel to the photo and that kind of got a bad rap according to me. I don’t think you can really edit one of those today and people say, ‘wow that looks really crazy’ but instead they say it looks like an HDR photo.

When it comes to HDR photography nowadays, I think people just want it to be an HDR photo and if their camera doesn’t handle the High Range well, they want it to be an HDR photo without looking like an HDR photo. That’s kind of my whole goal when I’m trying to capture a scene with a lot of dynamic range, just to make it not look like an HDR photo at all.

One quick trick when it comes to HDR photography as I mentioned earlier is to take three different photos thus giving you three different files which you run through this kind of software. You can actually do this with one single image but it wouldn’t give you the same best results as you would receive if you were using 3 different raw files to deal with. You can actually work with a single raw file and it just takes a little bit extra work but again the quality is not always the same. I have done this on occasions when I was in a fix and I needed to have a little bit more dynamic range. It definitely helps a little bit but not as much as obviously having three separate files to deal with. So, the way to deal with one image is to actually take the raw file and drag it into camera raw (I like using it because it is a quick in and out program) and then take the neutral exposure and do a little bit of adjustment by maybe doing the highlights and the shadows by either increasing/decrease the highlights and increase the shadows and do a little bit of vibrancy Nothing major really but just slight adjustments before saving the file as a Tif. File. I will keep that file open and then do the same thing with that file except that I’ll leave all the settings that I just made but I’ll take the exposure and maybe knock it down one or two steps depending on how deep I want to go with the shadows. So, I’ll drag it down there and I’ll save another Tif file and then I’ll take the exposure and bump it up one or two steps overexposed and save that as another Tif file. As such, I will technically have 3 files to deal with and the reason why I’m doing Tif files and not jpegs is because I want something that’s totally uncompressed to help the quality of the photo. Jpegs normally give you a compressed version of what you had before and that’s how you start seeing noise, ghosting and defragging and stuff like that.

If you want to do this technique, the best thing is to do a Tif file. I will then take those Tif files and run them through an HDR program like Photoshop or Lightroom or Photomatix among others and then try to adjust them from there. If you do this and you are not getting the same results as you would when editing one file altogether, this could be the way to get some stuff back but again this is what  I will only use in a case of emergency situation and needed something that looks ‘HDR-ish’ or brings back a little bit of details. If I want to get a real HDR photo, I will have to use 3 individual photos.

Now that we know what HDR is, we go back to our original question on whether HDR photography is dead? My short answer to this is “No”. The reason I say this is that it’s not really as it was but is kind of revolving a little bit. What I mean by that what it seems to me is that people are totally ok in doing HDR photography if it is done almost the manual way. What I mean is that maybe you are taking 3 separate photos but you are not running it through a program. You will take the three separate photos, edit them a little bit and drag all of them through Photoshop and manually blend them in with layer masks and all these other stuff. That is what HDR photography seems to be; you are capturing more data for 3, 5 or any number of separate images and then manually blending them in.  I think more people will respect this rather than running them through a program but that is what it tends to be now. So, if you’ve ever heard of manual blending, that’s kind of how it goes. Maybe you are blending a bright sky and the dark foregrounds, what you will do is take the exposure of the sky that is over-exposed and not worry about the foreground at all but worry about it in the next photo and you store those in Photoshop and mask them out and blend them together. That’s kind of what is being considered ok now when it comes to High Dynamic Range photography.

You can share your thoughts on HDR photography by joining the exclusive Facebook members page and also give us your feedback on this podcast.

5 Useful Mobile Photo Apps

This podcast is all about mobile photography and mobile editing, and other related stuff. I will go over 5 popular and main mobile apps that I personally use for my mobile photography on my Smartphone. I will try to break them down as much as possible for everybody to understand and see which app will suit your style of photography. I will also tell you whether it’s available in Android or IOS, whether it costs money or not and I’m gonna go through the five most popular apps out there just to kind of forewarn you a little bit, most of these apps actually do a lot of the same thing. There is rarely a time when you will get an app that has mind-blowing features that another app might not have but most apps will require you to control the exposure adjustments, do contrast and some effects in there but it’s really about finding an app that you like to use, design, the interface, how easy it is to use and I will keep that in mind.

  1. Lightroom CC App

So, let’s start with the list and the first app I will look at is a no-brainer for everyone out there especially now that Adobe has released the new Lightroom CC for the desktop application but the Lightroom CC app is basically meant to be an app that floats between platforms. If you are part of the Adobe Creative Cloud photography subscription, you can download the free Lightroom CC version, the desktop app for your computer. you can play around with it and it’s some kind of slim version of Lightroom but it also works very well with the new Lightroom CC app that is available for IOS and Android. Before this app was released, the mobile photography part of Lightroom was kind of difficult to understand. You had the main Lightroom CC which is now called the Classic Creative Cloud (Classic CC), and that was meant to be able to sync with your phone but sometimes it worked while other times it didn’t. At least in a bunch of occasions, I tried to sync some files and they would never sync but now it’s easier to drag your files into Adobe Lightroom CC and it would sync the files across your devices. So, if you drag it into your desktop’s Lightroom CC, you can then go to your iPhone or iPad and it will automatically be there. It syncs the files very well.

If you have the subscription, make sure to download the Lightroom CC app, it is free especially if you have the subscription model and it works great in syncing between your desktop application and all other applications in your other devices altogether. One of the cool things it allows you to do is that if you shoot something with the Lightroom CC app, you will actually be editing a digital raw file of whatever you photographed. So, you won’t be editing a jpeg file that you might have shot with the native camera app and then pulling it in there but instead editing with a raw file. That’s one really cool thing as you’ll have plenty more information to play with and might be able to get a little bit better exposure. Anybody who has that subscription should have this app even if you do not want to sync between your devices, it is a really cool app to have especially just for simple editing.

  1. SnapSeed App

This is yet another no-brainer app and everybody likely has heard about it. It is a free and amazing app for Android and iOS with tons of features but it is also free. The creators seem to update this app a lot more than any other feature photography apps that I have found, always adding more features, effects, filters and the ability to do different things. Back then when I downloaded the app, it was kind of slim down and I could do some manual exposures, contrast and sharpen details among other things but now you have the ability to do brushes, selective color adjustments, and you have a lot of crazy filters you can do and it’s just a really awesome app. It also has an iPad version if you have an iOS device and this can help you when editing since it gives you a bigger screen to work on. If I was to rank my top 3 best apps, this would definitely make it among them because it is so easy to use.

  1. VSCO

This is also another popular mobile app and is available for free and is compatible with Android and iOS. It’s a really cool app allowing you to create some kind of subtle adjustments that will mimic film effects. If you are really interested in these kinds of film effects, this is one of the mobile photography apps that you should probably download. The one thing that I’m not really particular about when it comes to this app is the workflow. Much like Snapseed you can apply different effects but I like the way Snapseed lays out the effects such that you kind of apply a group of effects and the click “done” when you are through with them and then get another menu. VSCO seems like you have to go backwards a little bit and if you play with the app you will understand what I am talking about. That’s the only thing I don’t like about this app but would use it if I wanted to get that awesome film looks because it is so easy so easy to create those really subtle film looks. One of the cool things it does have and which I haven’t taken a part of because the workflow doesn’t suit me is that it has a community like Instagram around it. It is kind of a photo-sharing platform that is built in and once you take a photo and maybe you want to share it on your social media account, you can also share it in the VSCO portfolio that is kind of built into your account when you signed up for it. That’s a really cool thing to do but obviously, you are going to get more popularity when you upload it to your regular social media like Instagram, Facebook and so on.

That’s pretty much for the free apps that are available and it’s not a huge list and you’ve probably heard of these apps before but the reasons these are ones that everybody talks about is probably that they are the top rated apps out there. They are the best working apps and give you the best experience and quality of your prints. These are really good apps that I have and I keep popping out and especially the Lightroom CC app which is very awesome and the one I’ll probably continue using more.

  1. ProCam

One of the paid apps that is kind of expensive depending on whether you are thinking of an android app or iPhone app pricing is called ProCam. It is a $4 US Dollar mobile photography app and is only available for iOS. But if you have an iOS device ProCam app it’s probably one of those go-to apps you’ll do when you want to have more control over the actual taking of the image. You have really nice control over exposure settings and so you can both the exposure settings manually so shutter speed aperture, ISO and all that stuff for stills and video as well. This is the main reason I particularly downloaded the app because I wanted to change the video settings on it. So, you can actually change to video mode and record videos. You can change the frame rates for both stills and videos so you can kind change the ratios for stills but especially for videos and frame rates you can change 24 fps 60, 30 all in the app without the need to go out to the main settings of the iPhone or Android phone. You can do everything in the app and this is what makes it really great. The other thing is that you get a DNG file from and so if you are not shooting jpeg and you can’t shoot jpeg, you are not getting compressed jpegs but instead, you get full DNG that you can then export to Lightroom, open it up in Lightroom CC and play with it there. That is another really great feature of that mobile photography app.

Another one is that if you have an Apple watch per chance, then you do have a compatible app with it. This means you can take a photo with your Apple watch and have it as a remote shutter in a way. That’s a really good selling feature from it but again, its price tag is $4.99 and so, if you’re not used to spending money on small Smartphone apps this might be a little bit pricey for you.

  1. Enlight

This is also another great photography app for mobile and costs $3.99. It is for iOS and Android. It has tons of creative tools that you will have double exposure effect built into the app, tool shift effect, slight leaks, tons of crone tools that help you remove distracting elements of your phone that you’ll typically have to export that file to some sort of desktop app like Lightroom or Photoshop and remove it that way. For a simple removal of distract


ing objects, there are really cool clone tools that allow you to easily remove stuff. If you just enter that creative photography space and you don’t want your photos to look like just simple edited images, Enlight is one of the best apps you can look into because it allows your photos to look really creative with a lot of tools in there.

Those are the 5 main apps that I wanted to go over but I just want to throw in a quick honorable mention in there which is actually Instagram. You might be thinking, ‘well, of course if you are in photography you do need Instagram as the main way of sharing photos in social media’ but the reason I say Instagram specifically for editing is that a lot of people don’t know that you can actually edit plenty heavily in Instagram with basic adjustments such as contrast, brightness, shadows, tilt-shift, highlight of shadows, sharpening and many other things. One of the recently released versions of Instagram you get a download button in the editing section so that if you want to edit your photo and save that file you are able to do it without even posting it. Previously, if you wanted to have a really cool effect or filter to it you had to edit in Instagram and then post it because it would save the edited version in your phone or you just had to take a screenshot and kind of crop it a little bit. However, Instagram has now given you the opportunity to download the photo without even posting it. So, if you want to do a quick edit and you don’t want to mess with any other apps and you have Instagram on your phone, you can do it and then download the file.

Featured item of the week

The featured item of the week is from Sleeklens and the reason I am talking about it is that it mainly involves autumn. Autumn is in full swing and we have the cool weather coming in and the leaves coming off the tree. I want to go over a really cool collection which I personally like a lot. This is the Autumn Pumpkin Glaze Overlay and Action Collection. It really is crazy how much value you get out of this collection because you will have 78 actions specifically designed help you edit your fall photos. You also get a lot of overlays including 20 color filter overlays that will help you match a little bit of color tones and bring stuff to your photos so they can look really awesome. You will also get 20 light overlays, 15 sky overlays which include storm clouds, sunset clouds, and regular day sky clouds and stuff like that. It also gives you 10 rain overlays and 8 leaf overlays which are really great if you want to enhance those leaves on your photos. In addition, there are 2 customary brushes so you can paint in leaves yourself and place them exactly where you want them to be. You also get 10 bird overlays to easily add birds flying to your photo so as to enhance the images a little bit. All these are imported to Photoshop and are transparent which allows you to add them easily. This is a really cool thing to have and if you want to enhance your fall photos in Photoshop, make sure to check the Autumn Pumpkin Glaze Overlays and Action Collection from Sleeklens and also with every episode we like offering a coupon code which you can use to get 10% off your purchase. You can use coupon code Sleeklenspodcast to get 10% off anything in your cart.

7 Things to Do To Every Photo


In this episode of the photograph podcast, I go over 7 things you should think about doing to every photo

This episode will talk about most of the edits that I do to my photos but it’s actually 7 things you should do to every photo. This doesn’t mean there are individual steps that you have to take per photo. Most of the time, these are done altogether without you even knowing because you’re kind of used to going through your own little workflow. But there might be some things that you can learn from this and that you may kind of overlook or maybe oversee that you kind of mess up on one thing and you realize you should have done it in this particular spot. That is what we’re going to talk about as 7 different things that you should do to every photo. These include: –

  1. Profile corrections

A lot of times when you import a photo into Lightroom or open it up in Camera Raw, a lot of people make the mistake of not applying profile corrections to their photos. Profile corrections are almost needed in a way because they allow for you to correct a little bit of distortion, maybe vignetting in your photos and that you normally have to apply and which would make your photos look bad and you don’t want that to happen. What profile corrections do is kind of take a combination of your camera and your lens and Adobe has built-in a profile for both the camera model and lens model and will apply a correction to that. So, for my particular lens, I have Canon 6D, which is a full-frame camera and I also mainly shoot with a Canon 17-40. What that’ll do is kind of wider angle lens and when I kind of apply profile correction to that it’ll kind of whoop it up a little bit, mainly stretching the center of the photo and remove a heavy distortion or heavy kind of black vignette around the edges of my lens or the edges of my final photo. It will automatically remove that without having to do anything but if I want to keep the vignette for maybe an artistic style, I can definitely do that but profile corrections help by removing distortion and does a really good job in that. Profile correction is like one click and you’re done. There is one small click box in both Lightroom and Camera Raw, and if you do most of your editing in camera raw, there is one little checkbox that says “enable profile correction” and when you do that it kind of automatically detects the camera models, the lens that you used and it will automatically create a profile for you and apply that distortion removal, vignette removal and you are ready to go.

  1. Applying an alignment and straightening your photos

Depending on the style of photography that you use, you can apply an alignment and straighten your photos with ease. Portrait photographers might not have to do this but wedding photographer might have to do this depending with the room they are in or maybe they are photographing a couple in a gazebo and the lines are perfectly straight but it kind of depends on the style of photography that you are into. For example, if you are a landscape photographer if you go out to a landscape and you have a definite horizon line you definitely want to kind of straighten that up. A lot of people might leave it and concentrate on the creative edits to their photo thus straightening things out. There is a tool especially in Lightroom and it’s very easy to find and under the ‘Crop Overlay menu’ you’ll see kind of a little angle that has a little ruler next to it.  What you can actually do is click on that ruler and drop it from one side of the photo to the other and it will kind of drag it along the horizon line and automatically straighten it so that your photo does look perfectly level/straight with ease.

If you need to remove distortion, that’s another separate thing. You can go to the Transform menu and therein find a number of options including off (allows you to keep your photo as it was shot), you also have auto, guided, level, vertical and fore. Auto is the one you should use as it works for almost 99% of the scenarios. Auto alignment does a very good job as it detects all the vertical and horizontal lines and straightens them out especially if you are in a situation like a venue or a room. It straightens the lines and removes distortions from your photos and makes them look really nice. I personally will use auto alignment and also straighten the photo with angle tool in Lightroom.

  1. Sharpening

A lot of people don’t sharpen their images but this is one of the most important steps to take especially for shooting raw. This is because when you are shooting raw, your images are coming right off the sensor, right out of the camera with minimal, if any,  processing is done to them. As such, you always get raw data and therefore your photos are going to be a little bit soft. You might see a little bit of softness in your photo. So, if you are going to ‘Detail menu’ in Lightroom, you are going to get a couple of options for sharpening amount including the amount, radius, the detail and the masking. There are no rules although some people have some mathematical equations to apply to sharpening what I typically do is (sharpening is normally set to around 25 when you import them into Lightroom for example) to bump mine to around 75 to 80 and that typically gives me a good amount of sharpening. If I am making a photo that I definitely know will go to print, I want it to have a good sharpening amount and radius and thus will apply the amount to around 95 to 100 and radius to 1.5 (radius default is normally set to 1.0) and that kind of a number is based on a resolution of 300dpi when you finally get it printed and that kind of mathematical equation normally works out. So, no matter how big a photo I am printing, I normally make it 300dpi and always set the sharpening amount to 100 and the radius to 1.5.

Those values are great for global adjustment and what you are doing is applying a global adjustment throughout the whole photo. But there is also one more slider in there and that is the masking slider. The masking slider helps you refine the edges in your photo and as a default, the slider is set to zero whenever you import a photo and what that means is that zero is implying a global application across the whole photo. Masking applies the sharpening amount to the detected edges to your photo. Let’s say you have a portrait of somebody and you don’t want to sharpen globally because you don’t want to sharpen the texture of the skin, and you may not want to sharpen the details in the eyes, you don’t want the hair to look overly sharp and what you can do is slide that to the right and the further you slide the slider to the right, the more you are going to sharpen the edges to your photo and so, if you want to actually see what it’s doing, you can hold the Alt or Opt key on your keyboard and slide the slider over and its going to change into a black and white view of a photo and so the black images or areas on your photo when you slide the slider over are going to be the parts that are not sharpened and the white areas are going to be those which are sharpened. As such, you can see that it’s only sharpening the edges of your photos. So, if you are working with people, this might be a good reason to use masking but if you want global sharpening effects to your photo, try to keep your masking around 0-5.

  1. Spot and blemish removal

This is kind of an easy one and many people think about it as the first thing when thinking about how creative they want to be with the photo. This is not a technique that you’ll look to but it’s kind of a process you’ll think about when editing your photo. You might have some people in your photo who you’d want to remove or other distractions such as power lines or anything such leaves or whatever that you consciously would want to remove from your photo beyond your subject. You can think of removing it or darken the area a little bit but if you can remove it, then this is something you should consider. Remember that distraction to your photo is not something you want the viewers’ eyes to go to and thus is easily removable especially if you have a model that has some blemishes or something, just get a spot removal tool in your Lightroom or Photoshop and just remove all of that.

  1. Dodging and burning

A lot of people don’t think about doing dodging and burning in their photos. Some of you might not even know what dodging and burning means. Basically, dodging and burning means darkening or highlighting/lighting part of certain areas in your photos. For example, if you have a field that has some flowers in certain parts which you would like to stand out a little bit more than the other parts of the image, what you can do is apply certain exposure amount to that part where the flowers are and it will make them stand out more and what you’ll be doing is brightening the exposure a little bit so that the areas can stand out more and that is called dodging. You can also do burning to the image and this is basically darkening it a little bit more. In dodging, you will be lightening the image while in burning you will be darkening the image. For example, you might be having a sky and would want to bring out a little bit of details out of it, you can do burning on it to make it a little bit darker. A lot of people might say that you can do some dodging and burning if you go to the basics panel in Lightroom for example and you bring down the highlights and increase the shadows but in the traditional dodging and burning you’re actually taking a brush of some sort and painting in a little bit where you want to lighten or darken and this starts with the creative process of how you want the viewers to see your photo and this leads to step number 6.

  1. Your creative edits

This is a weird step to think about but when it comes to creative edits, you want to know what it is that you should do. This is where you start thinking about color differences, color tones, white balance, color balance, split toning, black and white and all other creative edits. One thing I like to do specifically if I have an image and am not sure which direction to go mainly on color adjustment, I will go into my Sleeklens’ presets and hover over them a little bit and then get a preview window on top left side of Lightroom to get a feel of what the image could look like. That gives me an idea that will help things start flowing about how I want the image to eventually look like. That’s one thing you can think about and it’s kind of playing around with your ideas.

  1. Exporting

This is the last step when working on your photos. There is a different workflow that a lot of people have when it comes to pretty much of the workflows that they have and that is, what they do with the photo after it is done. Does it stay on your hard-drive or do you immediately start sharing or something like that?  It depends on the photo obviously but what I like to do after I’ve had the final edit of the photo or what I believe to be the final edit and most likely I’m not going to do anything with it is to export it and this is kind of a backup situation. What I do is that I would export the photo in two different formats. So, I will open up Lightroom and click ‘export’ and then export a high-resolution Jpeg of the image. As such, I will do a 300dpi jpeg as a quality maximum and then save that as a backup. Obviously, the raw file is still in my Lightroom catalogue where I imported it and so everything is great there. But I still want a high-resolution jpeg of it and in case something happens I can still have access to it. As such, I just take the high-resolution jpeg and move it to a service like Dropbox or Google drive among other options available and this happens to be my offside backup. I know this is just a jpeg but that’s the best I can do if something were to happen to my computer. The other format that I would export it in is actually a TIF file. I kind of go-between TIF and PSD file and this is actually in Lightroom if I’m exporting it from there but if I’m doing it from Photoshop, then I would just save it as PSD file or Photoshop file while still keeping the jpeg file. The reason why I do a TIF file in Lightroom is that this format offers a whole lot of data backed into the file so that if I needed to make some further adjustments I will have all the necessary data to work with. There is no much data in raw files but if something happens to my backup situation or computer, then I definitely want what I can get out of it. If I don’t have a solid backup solution, something I believe every photographer should have, some sort of all in one backup solution in my computer, these two kinds of file formats will kind of help me along and would be better than losing everything.

These are the seven things that should be done to every photo but again, a lot of these things are actually thought about without going through step-by-step. You kind of do all together, all at once especially if you have an import preset in Lightroom, you can actually knock a lot of these out as you import your photo. So, you can make a quick import preset and just say “apply auto-correction”, “apply auto alignment” or “apply the sharpening” and you’re completely done since Lightroom will apply all these changes to your photos as you import them. if you don’t want to do all these step-by-step, that’s one of the really quick steps to use.

Featured Item of the Week | The Sleeklens Beginners Photography Course Starting in photography can be a bit overwhelming. Not only do you have to learn the technical details of photography, but you will also need to know all about the gear available. This is why we have created the Complete Beginners Guide to Photography video course. This course covers everything needed for a beginner to start learning the most important aspects of photography without all of the useless, wordy, technical details that can make you quit before you even start. This course will also show you that you can use the most basic of gear and still get fantastic results as long as you know the basics of photography.

Find information at The Complete Course to Beginner Photography

Histogram vs Light Meter


In this episode of the Sleeklens Photography Podcast, we talk about using the Light Meter and the Histogram built into your camera.

This episode will cover the usage of the histogram and light meters in your camera. It is kind of a beginner’s episode and also good even for those who know as it could work as a refresher. There are certain tools that are built in your camera that’ll help you along to get a more balanced exposure when you’re photographing pretty much in a situation and light meter and histogram is part of the main tools you should use and we will be looking at some examples of how to read them, use them and also when to use them.

Using the light meter, what it is and how to use it

What exactly is a light meter? A light meter is pretty easy to understand. It’s a device of some sort that measures the amount of light that’s coming into the camera. Some of the old school cameras have light meter devices that are not to your camera in any way but they kind of allows you to set a certain aperture or some sort of setting on your camera and then you’ll be able to measure the light and will kind of give you a balanced exposure with the different kind of settings you can use. This was kind of a big thing in the film days because when you had films, you didn’t have any way to measure the light but had to use your judgment or expertise to meter the light correctly.

A lot of old-school photographers who used films a lot would probably wear a light meter around their necks and that’s what they would use to measure the light and get some balance, neutral exposure and get a better exposure that they wouldn’t have to guess it. Light meters were that kind of tool you’d typically see but in most modern cameras you actually have a light meter that’s built in. if you are shooting in an automatic mode, the light meter judges the kind of settings it’ll put in this mode and as soon as you press the shutter button it’ll read the light in the scene and suggest the settings it has kind of predetermined depending on the light coming in. But if you are some sort of a manual mode or aperture priority mode or something along those lines, the light meter is going to be a little more useful there because you can see the total amount of light coming in. That’s basically what light meter does. It kind of judges the total amount of light hitting your camera.

You can find the light meter easily by just looking in the viewfinder of your camera and you’ll see something like a little graph at the bottom and it’s gonna be from -3 on the left side to zero which is a balanced neutral exposure based on what the light meter reads and then it’ll go up to +3 on the right side. What that exactly means is that the 0 (zero) is what is considered to be the balanced neutral exposure for a particular scene that you’re photographing. If you might have pushed the shutter button down and you see they have a little indicator showing that you might be at -2, what that means is that you are two stops under-exposed, and so that is the negative portion. If you go to the other side when you click on the shutter button half-way down and you see that the light meter is reading at +2, that means you are two stops over-exposed, meaning your image will be really bright compared to two stops under-exposed meaning that your image will be pretty under-exposed, a little darker than it would be if it was closer to the zero range.

Again, the light meter measures the total light coming into or hitting your camera sensor but can be fooled by little things that might be really bright or really dark on your scene and that’s something we need to pay attention. For example, if you’re shooting in a very backlit situation, meaning that maybe you’re shooting a model and she has a window behind her, it’s going to measure the total light that’s coming in to the camera and it’s going to see that the window is extremely bright and when you take the photo most likely your model will be pretty dark or dimly lit and that’s because of the light coming from the window. As such, that should be something you pay attention to because it can be fooled easily. Just because you get a balance neutral exposure showing in the meter you might not actually have a balanced neutral exposure for what you want to photograph. The same thing happens with people wearing dark clothing. If someone is wearing a dark pant or a dark shirt, that could throw off the exposure because it’s measuring the darkness coming into your camera lens. It might not have a harsh exposure as the bright open window would but again you might have to bump up your aperture, ISO and shutter speed or whatever else you need to in order to compensate for that dark reading. That’s one thing you need to pay attention to in most situations, it can be very helpful in most situations but it can be easily fooled.

As such, if you are running into a situation where you find that your light meter is reading a balanced neutral exposure of around zero or thereabouts, but you still find that you’re still finding that your exposures are a little bit off or maybe you’re losing information in some of the brighter points or darker points of your image, this might probably be the time you might need to look at the histogram.

What is histogram?

The histogram is kind of a separate light tool that’s built-in most cameras. It’s kind of a bar graph that measures the brightness of each individual pixel and displays it in kind of a horizontal line graph. If you want to see what we are talking about as far as what histogram is, make sure to open your camera’s manual to see where you can turn that one on as in most cameras that is like an info button and you can hit that a couple of times when you have a photo pulled up and you’ll be able to see what the histogram will look like for the particular photo that you have. It’s good to pay attention to this and know when you can pull up the histogram, and how you can pull it up so you can see it. What histogram do for example if you’re shooting a model right in front of a bright window, what you are going to see if you have the histogram pulled up will most likely be a graph that looks like a slide going from top left all the way to bottom right. What that is doing is that it’s reading a lot more bright information on the right side of the histogram. So when you look at the histogram, what you see is an area or a little graph that is divided into 5 sections. On the far left, you’ll have your really dark black points in your image and that’s kind of the zone you want to stay away from as much as possible. It’s ok to have a little bit in that area but you want to make sure that you do not have most of your image in that area because it means you’re losing a lot of information.

Right next going to the right you have very dark, shadowy tones, in the middle you have mid tones, next to that you have a very light area that’s kind of the brighter point but not completely white and then on your far right you have your very light pixels and again that’s the kind of point you want to stay away from. You don’t want to be too much in the white or too much in the black because that means you are losing information. If you see a spike in some of the areas all the way to the right maybe you are shooting that model that means you are losing information and even if you pull your photo into Lightroom or Photoshop and try to bring down the highlights or the white sides, you’re not going to get pretty much of anything back because you’ve lost the information. There is no information for that pixel to present you and it’s going to be completely white or completely black.

As such, using the histogram is a really good thing when you’re shooting in a difficult situation because you can actually see where in the image you have your brightest or darkest points and if you want to have perfect exposure with histogram, what you should try and do is have what I call a “little hill”. It starts from the left side, the darker points and then it kind of starts going up and then in the mid-tones you’ll have a little lump before it starts going down towards the white side. That means you’ll have a lot of information in the mid-tones. In such a case, when you bring your photo into Lightroom, Photoshop or whatever editing program you have, and you mess with those sliders; the shadows, the highlights and the exposure, you’ll probably be able to bring back a little bit of information if you got your exposure a little off. The histogram is a really great tool to use especially in those many difficult situations. If you have time to pull out histogram when you’re shooting out there, it is a really important tool to look over. A lot of people have their histogram already on their LCD screens and so if you were to shoot like a light view, you can see the histogram on the light view and as you change the settings, the histogram will change with it. It shows a real-time view of your exposure changing.

I particularly have a histogram on my camera so and it’s a small bar graph that’s on the top left of the light view and it’s kind of cool tool to have. So, if you really want help to balance your exposure, that’s one really nice feature to use.

Special feature announcement

Sleeklens has begun a beginners’ photography video course and if you are really starting in photography and not sure where to go, maybe you have your camera but you want to start taking better photos or learn the ins and outs of photography, this is the kind of course for you. It’s about 30 videos showing you everything from gear to exposure triangle, useful modes and settings you can use, flash photography basics, post-processing in both Lightroom and Photoshop and you have complete photography guides that include portrait photography, landscape photography, food photography, real estate photography and travel photography. These are more like all-in-one guides.

For example, in the landscape photography shooting you will learn how to research your shoot, go on location, grab your photos, the settings to use and even bring the photos back to show you how to edit them in Lightroom and you can see the whole process from start to finish. You will have 5 guides you can go through. Even if you are not interested in one particular photography style such as food photography, the video is still a great one to watch as you’ll learn new things, new tricks and kind of brainstorm your kind of photography. The course has more than 8 hours of content and you also all the downloads that are used in this video series so you can follow step by step. If you are beginning in photography, these courses will definitely come in handy for you and will help you get proper foundation as you kick off.

Find information at The Complete Course to Beginner Photography

Stuck in a Creative Rut?

This post will be all about how you can get out of a creative rut you might be getting in with your photography. Photography just like any other art out there, even if it’s not a technical art, it may be writing a book or even other creative pursuits, there are times when we all seem to fall into a creative rut. At this time, we can’t figure out what we want to do with our photography or any other art. However, this problem is more rampant in photography because it seems like we are doing the same thing over and over again. You could be a portrait photographer and it seems like the only kind of thing we photograph are just the same types of families and although we obviously do get different poses, lightings and stuff like that, we just get to do the same thing time after time. One of the things we can do is to think about how to get out of the rut and start liking your photography again. How can I start thinking of new ideas to further the business that I’m just beginning or get better photos in general with different looks and not just shoot the same thing over and over again? I have about 8 little tips you can use to help you get out of any creative rut that you might be getting in. Hopefully, by sharing these tips you will be able to get out of any rut that you might be stuck in, maybe you don’t feel like you should be doing photography anymore and that’s a pretty sad thing. These tips will help you out because they have personally helped me get out of any rut that I have been in. these tips include: –

  1. Get out of your normal setting

This first tip is kind of counter-intuitive to what you might think will get you out of a creative rut. Normally we think that if you are in some sort of a rut you need to buckle down, sit down at your desk and figure out what you want to do. But what helps me at least is getting out of my normal setting. Maybe you are a portrait photographer, you start your day by getting to your computer and checking your emails and going through some business stuff among other things and you always find that when you get in front of your office it’s just the same routine over and over again. Maybe you are looking for your bookings or something like that. How about you take your laptop and go to a coffee shop or café and do your work there a couple of days and see whether that kind of breaks you out from your normal routine? I’ve actually heard a great quote when it comes to this. It goes something like “old ways won’t open new doors” and what this means is that maybe the old thinking is not going to open up any new situations for you. So, try to break away from any old ways that you are used to doing things and this might actually jog some creativity in your mind and it could start opening new doors as far as different things you might want to shoot or any kind of different projects you might want to start.

  1. Projects

Starting a personal project is very important when you want to get out of a creative rut. You need to have a project that you’re working on and this should be just for you. It doesn’t matter whether you are super-busy or the kind that shoots 35 wedding projects in two months, the truth of the matter is that you need to have personal projects even if it takes you 5 years or 10 years to finish. Having an awesome project that you can call your own is one of the surest ways to break away from any sort of rut that you might be stuck in where you do not really like your photography anymore because it seems really easy. Making a personal project even if it’s something outside your personal style of photography is a really awesome way to get out of a rut. Personally, I’m trying to start a project and I will give you a background of that.

I typically do real estate photography and landscape photography and wanted to get into Photoshop composite. I did one recently and I really like it and that made me start my own project of doing 4 composites making it kind of a small collection. They all have to be the same theme and include the same element and that is kind of my personal project.  It turns out that the Photoshop composites do take a long time to create especially if working on a tone of other stuff at the same time and so this is going to take me a while to complete but I still have this project. What this has done is to advance my style of photography because now I know these new techniques and ideas I can apply to my style of photography and it kind of opens up these new doors. So, it can be a simple thing like starting a small project like that or not shooting wedding photographs for a month if that’s the style you’re accustomed to. So, if you are in wedding photography it could mean breaking away from that in order to do something different. It can be some sort of different projects that you start on your own, just to get your mind thinking in a totally different way.

  1. Taking on a different photography style

To kind of piggyback on that a little bit when it comes to doing a different style of photography that could actually be something that helps you break out of a rut as well. Maybe you’re a wedding photographer and you kind of want to break away from that for a little bit, obviously don’t quit completely and refuse to do wedding photographs anymore because you still want to make money for your business. Maybe you can do sport photography and if there is a sporting event in your neighborhood such as a high school activity


, you can ask whether they could allow you to take photos for free so you can break into a new style of photography. If you’re a portrait photographer, maybe you can go for camping for a few days and do landscape photography without shooting any people whatsoever. You probably will hate it because that’s not what you are used to but that’s the part where you start growing and get your mind thinking a little differently when it comes to breaking into different types of photography. Even if you do it, you hate it and don’t want to promote it on your website as a part of your business at least you know it opens up new ways of doing photography and that can jumpstart your creativity.

  1. Watching movies, playing video games or reading books

Just like the first step sounded a little counter-intuitive to get you started in your photography, this one is going to sound counter-intuitive because it sounds kind of fun. This has helped me very much and it’s like doing a combination of things and if you don’t like doing one of the things you can do other ones. These 3 things can help take your mind out of the norm and allow you to concentrate on something else. Let’s say when it comes to watching movies, there are tons of movies out there with a lot of visual effects and that is what basically photography is all about. It’s kind of creating a visual that you want people to look at over and over again and really love the image. And so, watching different kinds of movies can really jumpstart your creativity. I know one movie that kind of jumpstarted mine, not because of the subject matter but because of the colors. The movie Abattoir is from a while back but it got me thinking about different things. It was an animated movie and this made is so easy to kind of piece those two fields together as far as photography and kind of effects are concerned. That movie really jumpstarted a little bit of photography creativity in my personal field.

Playing video games is another activity where you can really get adventurous with your creativity and you might get some ideas there. Obviously, you shouldn’t allow it to consume a big chunk of your time but if you’re just looking at the aspect of playing video games, everything that went into the making of the games including the visuals, lighting and effects will give you some great ideas. Reading books especially the non-fiction ones can really jumpstart your creativity and get your mind thinking.

  1. Limiting your disrupting inputs

One thing I like to do when it comes to the limiting of disruptions especially if you are used to driving is to not do anything in the car as far as input is concerned. This means not listening to the radio, music podcasts or anything like that because if you have a lot of disruptions especially if you do your own personal photography business you will not be giving your mind space to breath or let loose and develop any creative thoughts that you have going on. Mostly it will mean that you have calls and emails coming in, video comments, Twitter notifications and all kind of stuff coming in which can really be disruptive. If you’re driving, shut off all these disruptions and only hear the hum of the engine and all that going by and this will let your mind to just roam and think on its own in a while without having anything come in as you just concentrate on the road. Once you start doing this over and over again, you get some interesting ideas coming in and you start thinking new things like how to start getting some kind of effects on your photographs or grow your photography business or even new ways or things you can embrace to do editing on your photos. All this stuff comes in when you let your mind breath and this is just a simple one to do but there are many other ways of stepping away and getting away from any kind of input and letting your mind do its things but this is one really easy one that a lot of people are able to do especially because many people do drive.

  1. Step away

To piggyback off that one as well, we also have stepping away and what I mean by this is that maybe take a “vacation from photography”. So, if you don’t have a lot of bookings or you don’t feel like going anywhere and doing photography that day, maybe stepping away and taking a break from it will let you come back to it as if it’s a new thing. Don’t even take your gear and although you can look at some of your photos once in a while, limiting your input as far as photography is concerned. I know when it comes to musicians, there’s a lot of people especially guitar players, who have developed calluses on the fingertips from pressing the strings and what many guitarists say when it comes to reconnecting with music and becoming great musicians again is that they know they’re ready to get back to it when their fingers begin to hurt again while they’re playing. That means they’ve been away for a long time and they start getting a connection with the guitar again when they start playing and it becomes like a new thing. It’s kind of the same thing when it comes to photography, don’t touch your camera for a while, don’t concentrate on photography groups on social media but just get away from it for a while and let it become new again and that’s one easy way of doing that as well.

  1. Limit your gear

What I mean by this is, let’s say you have a new top of the line DSRL and it has all the bells & whistles but maybe leave it at home once in a while. Maybe you can use your Smartphone as your main camera but obviously not when going to do a wedding shoot. However, if you’re going for an outing and you would like to take some photos, leave your gear at home and use your android, iPhone or Smartphone as your main photography device and let your mind roam on how you can achieve an effect without using your fancy gear. When it comes to the use of phones for photography, you’re to kind of zoom with your feet and so you have to learn on how to do that. Simply what we are saying is you try to limit your gear or any type of thing you normally carry with you to see if that breaks into any kind of creativity that you might be thinking.

  1. Change your space

Let’s say you have an office in your house that you use for your editing or maybe you have a small studio in your office, change it up a little bit. This will also help you break away from creativity rut. It could be something like getting a fresh coat paint on the wall to kind of change the look a little bit or maybe rearranging your furniture or desk or it can be something honestly as simple as changing your desktop wallpaper to something different than it has been for many months. Just change what you have been looking at constantly and all that ties back to the very first tip on “getting out of your norm”. Change things a little bit. Your mind is not going to grow if it’s doing the same thing over and over again and that comes to creativity as well. So, change up your space, do something different and if you have a desk you’ve been wanting to have for a long time, maybe it’s time to grab that desk so that it’s different to sit at or look at and you can kind of dress it up a little bit. Maybe you can change your computer or stop working from your main desktop and work from your laptop for a little bit. It can all be about doing very simple things to change up your norm.

Those are the 8 tips that could help you break away from your photography creativity rut and some of these have worked for me as I use them quite often and it kind of gets me new to photography again and that’s the fun part because I start learning new things I never thought of before.

Featured item of the week

This week’s featured item is something you can do right now as you sit in front of your computer and this has to do with creating your own gray card in Photoshop. A gray card is sort of used to help white balance as you have medium gray, a scale from black to white and then a medium gray in-between. What this does is that it helps you with white balancing your photos to kind of get the correct colors and you can go on Amazon and buy all these really expensive color check cards and gray cards but if you want a really simple one right now, you can create it in Photoshop. It is as easy as doing a couple of steps which I’ll outline below:

  1. Open up Photoshop and create a new document the size of a regular paper that is on your plate.
  2. Draw a gradient from pure black to pure white on that document (Black at the bottom and white on top.
  3. Go to the adjustment layer and choose to posterize and this will bring a small dialogue box which allows you to choose “Labels” and this basically means the number of colors that are going to show up. Choose 3. This will give you pure black at the bottom, medium gray at the middle and pure white at the top. If you have a semi-normal printer or laser, you can go and print that off and that will be a very simple color checker card.

This is a good one if you have a pinch but if you already have a professional gray card or color checker you can just stick with it. You can carry this simple card with you to help get balanced colors. I have used this a couple of times while shooting videos and it actually works very well.

5 Useful Lightroom Tips

In this


episode of the Sleeklens Photography Podcast, we talk about 5 real easy Adobe Lightroom Tips and Tricks that can really help improve your workflow. Featured Item of the Week | myTracks iOS App Easily tracks your GPS location on your iPhone with the myTracks app. Find information at http://www.mytracks4mac.info


This episode will cover 5 of my favorite tips and tricks which you can use in Lightroom tips and tricks. These are basically shortcuts that you can type on your keyboard and get different things to pop-up in Lightroom. these are kind of different things around the modules and settings that you can apply to kind of enhance or maybe better your workflow. Below are the 5 favorite tips and tricks that I use in Lightroom:

Smart preview enablement

If you are in a hurry to edit your photos and maybe you notice that Lightroom is running a bit slow than it should be, one thing you can do is to enable what is called smart previews.  A lot of people don’t know about this but it’s a very important feature. What exactly smart previews are is a way for Lightroom to build kind of a lower resolution image that you edit on. This will allow your Lightroom catalogue to respond faster and kind of be speedy. So, if you happen to have an older machine that has Lightroom installed, this might be one of the features you can turn on. As such, when you import a photo into Lightroom, the software will basically be creating a smaller lower resolution version of your image that you can apply the edits to. That way the edits are applied faster, your Lightroom catalogue will be running faster as well but the best thing about it is that Lightroom will still do the final full resolution output of whatever file you choose. Thus, even if it creates a file that you edit on and that has a lower resolution and lower quality, when you do a final export, you still are going to get the full resolution file that you originally imported.  As such, you are not importing a lower resolution file and losing all the capabilities or anything like that. You are basically allowing Lightroom to create a smaller preview of that image that you can apply your edits to and then when it has the edits you can apply those edits to the original file that you imported and then go ahead and export a full resolution version of whatever size you want be it jpeg or photoshop file and it will still do the output. So, if you want to turn that on, just go to Preferences>performance tab> and then click on the checkbox that says “use smart preview instead of the originals for image editing”. That setting will turn this on and every time you import, it will go ahead and create a small preview of the file and offer faster system response as well.

Lights-Out feature

This is another small feature which is a shortcut on your keyboard and not a tip or trick. It allows you to focus only on your image when you are editing. Lights Out will basically turn your Lightroom interface dark but only keep the color of the image that’s in the development module. So, you can hit the “L” key on your keyboard and that will toggle your Lightroom interface to completely go dark. When you have your interface dark like this, it still shows the image in full color, full brightness so you can focus on the edits that are going on, in your image. This is also a great way to make sure that you’re not staring at the screen over and over again where you are getting the “editors’ fog” when applying all these edits. If you have ever had that editors’ fog, where you look and edit an image and things are really great, you walk away and come back after 5 minutes and you find out that you really don’t like something, maybe the exposure was too bright or too dark, this kind of helps a little bit so that it allows you to focus just on the image itself.

Smart Collections

This is another feature in Lightroom. Many people use the collection and it’s a really popular way of organizing multiple files in your Lightroom catalogue so that they are stored in a kind of virtual folder thus making it quick and easy to pull out an image that you want to. However, smart collections kind of taking the regular collection a step further. What it does is that it set parameters that will automatically add to the collection based on whatever parameters you set. One of the most popular ones is actually a parameter that will allow you to choose the best photos from particular years. I truly believe that every photographer out there whether you are brand new or seasoned and have been in the industry for a number of years, you should always have a collection of the best photos in your mind and which you have taken over time. One of the ways to do this without having to wade through your catalogue over and over at the end of the year is to basically create a smart collection that is called the best of the year. What you will do is make a smart collection and you set every image the way you want. Personally, every image that I set for example if it has the year and has a 5-star rating, that means it is one of the best photos I have taken that year and so when I go to the smart collection, it will show all the photos from that particular year with a 5-star rating. This will, therefore, make it a lot easier for you to go through your smart collections and choose the best photos from the year. You can take them down after that and maybe give then 4 stars and that way you will narrow down on your collections and this is one of the best ways to have Lightroom automatically do this for you.

Dual Screen Uses

This feature is for dual screen uses. I have 2 screens attached to my computer and this will be a great help for those people who do have multiple screens attached to their computers. This could even be for people who have a laptop that is pulled to another display because technically you do have 2 screens there. This allows you to have 2 different things on Lightroom showing on 2 different screens. We all know that we pull Lightroom up on the main screen and you have all the information in Lightroom including the development module, the library and everything that you typically see. But you can actually enable what is called ‘Dual Screen Uses’ and this will help you pull up something else on a separate screen. One of my favorite options is to actually pull up a grid view of the images that I am editing. If you’ve ever seen the grid view in the Library catalogue, instead of having a timeline view at the bottom and you kind of scroll from left to right, you can turn on the grid view which basically looks like a thumbnail view of your images. So how you can have this happen on your second screen is pull up a grid view of your images on the second screen. That way you can still have your edits on the main screen and have all your edits (7.46) on the main screen. But you can have a grid view of all the images so you can easily go back and forth, pull up an image on your second screen and it’ll automatically pop up on the main screen and you can kind of go back and forth and that way you can have the full use of your Lightroom on both screens. If you really want to zone in on your editing because maybe you have a project that is due, this is one of the great ways to blackout everything else on your computer so you can completely focus on your editing. Again, if you want to turn that on and have two screens, you can go to windows> secondary display and turn on the grid in there. There is also another couple of options like the loop but I usually use grid display and it works very well.

Snapshots

This is the last small item that I want to touch a little bit on. It is a well-known feature but I like to retaliate it because it is a super popular and useful feature if you haven’t used it yet. We all know presets which are also very popular and Sleeklens sells tons of quality presets and you can check them out. However, snapshots are more like presets but they are for a particular image. What this basically means is that if you were to apply presets to an image, you will have to select the preset from your presets panel and then apply them to an image but if you want to have several edits to that particular photo, you will have to use snapshots. The reasons you will have to use snapshots over making a virtual copy of a photo because what you are trying to do is to actually make a couple of different edits to one photo. Maybe you have one photo and you are not sure whether maybe to go black and white, or color, or really saturated with color, you don’t want to keep creating multiple copies of one particular photo because that will junk up your catalogue, making it hard for you to go through your photos. This is where snapshots come into play as they will allow you to make an edit to one particular photo, save that snapshot in the snapshot panel and then you can kind of reset that photo and make another edit to that same photo, save it and then make another edit to that photo and on and on. You can keep editing that same photo over and over again so that what you are basically doing is that when you go that photo, you can see all the edits you have done under the snapshot panel and this will allow you to kind of wind out the best photo editing styles that you did to this particular photo. It’s a really great way to do that as you definitely want to make virtual copies all over the place as this can mess up your Lightroom catalogue especially if you have a well-organized catalogue and starting to make copies and copy and pasting will mess up your catalogue. So, you need snapshots to create multiple edits for one particular photo and this is really a great way to do that.

Those are the 5 most popular tips and tricks for Lightroom to really help you get a better workflow and speed up your system. These are not just shortcuts but great ways to utilize different features you might not be aware of.

Featured item of the week

The featured item of this week is a new one I came across known as My Tracks app. This is an app for iOS and unfortunately, it’s not available on Android. I searched for it to see whether the makers have it for android but couldn’t find but in case you come across it you can let me know. There are other apps just like this one but this one is a purple icon with a globe in the middle of it. What this basically does is that it allows you to track your GPS location. If you are a photographer and you go on a cool adventure and you want to keep track of where you are going, or you have a photo location where you go all the time, and just want to make sure that you’ve captured all the scenes around there or just show where you’ve been over and over again, My Tracks is a great app to do that. It basically runs in the background and tracks the GPS location without you even noticing that it’s there. It tracks your GPS location, your altitude, and tracks everything on where you’ve been and when you stop it you can actually see your really great visualizations on a map of where you’ve been and you can save those for viewing later. It does not use your battery but basically uses your GPS and that’s it.

If you want to view this app, you can go to mytracks4mac.info. It is a great app and I have used it a couple of times already. It is fun to see the different places where you have been on a map as far as your photo location so you can play around with different locations that you have or haven’t been to.

You can rate and review the podcast and if you have any photography topic you would want to be featured in the show, be sure to write an email to [email protected] and we will try and have those in the show for you.

Starting Your Photography Business

This is the second edition of Sleeklens’ podcast and this particular piece will be addressing how you can start a photography business. This is a really important thing that many people who actually go to photography want to do. They want to start their own photography business and grow it into something that allows them to quit their full-time jobs. There is nothing wrong if you go into photography and you do not want to start your own business. However, a lot of people start out wanting to know the best way to start a photography business.

I will go through a lot of different tips and things to think about as well as the tools you can use. However, make sure to visit Sleeklens website which has a lot of material on how you can start your own photography business. The page has videos and free downloads.

How to start a photography business

The first thing you need to learn or do is to understand photography. You will need to understand the ins and outs of basic photography and exposure. Just because you have a camera that does auto exposure and has green box mode does not mean that we are able to take photos. We actually need to understand how the camera works and how to take photos. There are a lot of beginner photographers out there who think they have the ability to take great portraits or any type of photography for pay just because their friends admire their photos.

portrait

It is very easy to get overwhelmed or nervous and therefore it is really to first understand your craft. You need to understand the exposure triangle, understand how gear works and which gear to use for different situations. There is a lot that goes into photography than just pressing a button. This is a no-brainer but really important to understand the very basics when it comes to settings and exposure before you get started.

Getting a photography mentor

The other thing which is very important but many people do not consider it to be important is to get a mentor. If you are a portrait photographer, for example, you will need to contact a few portrait photographers in your field of photography. You can contact a few photographers near your area. It is advisable not to contact those within your area as you will become a competition to each other and this is not a good environment to be in. You can go to the next city or village and find a photographer who is doing exactly what you are doing and ask them whether you can become a second shooter for free. This is to help you go along and see how the process works, how the posing work and what kind of gear they use for different situations. You can also watch to see how they do their edits and how they get certain effects to their photos. This is something that many people do not think about but is especially prominent in wedding photography. Although most of the second shooters on such occasions could be getting paid, you will understand that most of them are just looking for a mentor to follow along and understand how the process works.

Choosing your fun photography niche

The next step goes hand in hand when it comes to finding a mentor. When looking for a mentor, it is important to look for someone within your specific niche of interest. If you want to be a wedding photographer, you will need to find wedding photographers within your area and go along with and see whether that is something you would want to go into. You may find that wedding photography is too stressful and not your thing and decide to switch to something else such as portrait photography or landscapes. Always go along with those within the niche that is fun for you than you think as a business.

photograhy

Creating a photography business plan

Once you figure out your mentorship and niche, then next step is to create a business plan for yourself. This plan doesn’t have to be extensive but one that gives you the kind of goals you should set. This simple business plan should outline things such as how to re-shoot something like three weddings the whole year. This helps you to fill out things and knowing whether you want to do it and also how your pricing should be. Being the beginning, you aren’t sure what you should be doing exactly but this plan will help you to learn. You can come up with a 5-year plan and maybe decide that you’ll want to be shooting a wedding every month, making it twelve weddings per year. You can also come up with a secondary goal and decide you don’t just want to shoot in weddings along but venture into engagement portraits.

You can also put other small goals you want to include in the plan including things such as the number of social media likes and follows you want to get for your photography. Other things within the plan could be how you intend to stick to your plan all the way until your goals are fully achieved as you go fulltime with your photography.

The right type of photography gear

Next, we have a question which every beginning photographer or even photographers, in general, want to know. This has to do with the right kind of gear to use when shooting a specific type of photography. We will go quickly through a list of options available but you can learn more by checking the full-length article on Sleeklens’ blog page. But mainly what we are talking about has to do with knowing the specific type of gear that you need for your particular niche of photography. If you a portrait photographer and you want to make sure that you have the right camera lens and other accessories. With that, if you are a portrait photographer, you should be thinking of a nice entry level DSLR but if you do not have this already, you can try and see whether you have the right camera combination because you don’t need a wide angle lens as a portrait photographer but you’ll need some sort of nice portrait lens or many be telephoto lens or prime lens. You may also need to think about lighting and if you are doing wedding photography, you might need just what a portrait photographer needs but then add an external flash, a nice replacement for your pop-up flash and stuff like that.

If you are a real estate or landscape photographer most likely you will need a Tripod and a really nice camera which doesn’t have to be super expensive but should at least capture decent quality images. You probably do need a wide-angle lens for these different styles of photography. If you are a sports photographer and want to capture great sporting events, you need a long telephoto to capture good action in your shots and fill the frame a little bit. You can see an example of all the gear we recommend in our full-length article on blog section on Sleeklens’ website.

Starting an online portfolio

Next, we will talk about gathering up your photos and starting your online portfolio. This is a huge step when you want to become a professional photographer. You definitely need an online source for your portfolio. By this, we’re not talking about choosing a social media platform such as Facebook where you put your album therein since this is not really professional. Instead, you should consider your own website which becomes your personal space where people can get all the information about you and understand that you’re somebody they can hire. The website becomes some kind of store where people can go and shop and know you are someone they can hire.  If you are going into a field where you don’t already have photos for, it can become a little bit difficult but there are ways to get around it.

If for example, you are planning on becoming a portrait photographer, the best way to get portfolio photos is to use your family and friends. You can ask them to gather somewhere in a park and have them pose for you. You can take photos that mimic engagement photography where two of those present can act as though they are engaged. While this might look like cheating the system, the truth is that it doesn’t matter who the models are but the quality of photos which you are able to capture. Another example will be, let’s say, sports photography. You can go to local high school games or sporting events for a friend and start shooting the action there just to show that you can get these kinds of photos. If you are going to a basketball game or any other event, you can go early and request to be allowed to take some shots so as to build a portfolio. The organizers might allow you or deny you the opportunity. Whichever the case, you should try and get some simple images on different types of styles of photography and there are a lot of ways to do that and you just need to be creative.

When it comes to the website, it is really important to have a very high-quality host. The days of building a website from scratch are almost over and you can get a lot of hosting options out there. WordPress hosting is highly recommended, very popular and free option it comes to photography websites. You will need to pay for hosting and domain name but the actual software that runs the back-end of your website is free. You can learn more about this option from the article as well. There are also other options if you are not familiar with WordPress including SquareSpace, SmugMug, Zenfolio among others and these are worth looking at depending on the style that you want to get into. For example, if you are a wedding or portrait photographer and you don’t want to worry about printing your own images, you can choose SmugMug or Zenfolio as your website service and couples or people who buy your wedding photos or portraits may be able to order them directly off your website. You don’t have to worry about printing them as they are completely ordered off your website, printed and shipped directly to your customers. This is kind of a passive business that would be really good to have so you can worry about shooting and not printing.

When optimizing your website, it is very important to do a number of key things. First of all, you need to choose the best domain name. Most people go for their name plus the word “photography’ and while there is nothing wrong with that, but if you want to be a little bit creative, you can actually generate a lot of SEO traffic (Search Engine Optimization) from your URL. If you are a photographer in New York, you can choose something like .newyorkphotography.com or something that is closely related to that. You can actually go to photographyinnewyork.com. Of course, you can still stick with your name plus the word “photography.com” as part of it but you can get a little bit creative in this just to help generate traffic to your site based on the domain name.

You can also keyword your images before uploading them to your website. Most of the images come off the camera with a generic name but you can rename them to something with keywords. You can use something with the keyword such as -wedding-New-York or something closely related to that just to help generate traffic as well. Simple things like these can help people who are looking for images in Google to find your site and see your work which can help grow your business.

Spreading a word about your business

Spreading the word about your business is very important since marketing is 95% of the battle when it comes to growing your photography business. When seeking to spread the word about your photography business, there are different methods such as printing flyers, postcards, business cards but the main thing you can do to promote your business is to use word of mouth. This is the answer but many people don’t like it when it comes to spreading the word about photography business. Just think of a friend who says, “I want to go and see a movie or something like that…” The way that movie is spread around is when people say, ‘I have seen that movie and it’s very good” and all who hear about it want to go and see it for themselves. The opposite also brings about negative effects. A word of mouth brings great impact on any business and people who use your services can help spread the word about you and bring customers your way.

The social media

Social media is huge when it comes to promoting and keeping up to date with customers. You need all the popular platforms such as Instagram, Facebook, Twitter and Pinterest and make sure they are updated regularly or at least once a week. This will help you keep up to date with your customers and get a lot of eyes on your business. If you are running something special such as half the price portrait photography sessions, just post it on Facebook and other social media platforms so that most people will come across it without join some different mailing lists. If you are a photographer, Instagram is one of the most powerful platforms especially because it is more image-based and people will, therefore, see your images and that’s what entices them to click on it. Make sure you post a lot on Instagram and do a lot of keywording and hashtagging and this will, in turn, generate a lot of business for you.

This is just a short preview of the big article on Sleeklens blog and there is a lot more not covered here. Make sure to check this article as well as the videos that will guide you on a lot more including how you can build a WordPress website from scratch. There are also many other free downloads for you and you can take advantage of all these.

Featured item of the week

The featured item of the week is very simple. This is actually an iOS and Android app for your Smartphone known as Trover. This is an app that is basically labelled as a discovering and saving ideas for your next trip. This is one important step if you are travelling photographers who maybe want to travel and get some new places that you would want to photograph and get a couple of memorable pictures from. You just open it up after downloading and you’ll be able to see your location and different photos from around your location. This could be anywhere from monuments, foods, sceneries, or overlooks but just anything that people have seen from that area and photographed to just tell others that there are some great spots. The app helps you know these great spots and the distance from where you are located. It also helps you get the direction to the specific monuments or sceneries just in case you are in a new place. You can also find more about this little app by visiting trevor.com and you can see it is available for both iOS and Android.

trover-app

SaveSave

SaveSave

Simple Smartphone Photography Tips

In this episode of the Sleeklens Photography Podcast, we talk about easy smartphone photography tips.

Subscribe to the Podcast for the latest Episodes   |   iTunes   |   Stitcher   |   RSS   |

Smartphone photography is kind of a big deal these days. Many people are quickly ditching their big cameras and carrying their Smartphones around. I actually answered a question by one user who wanted to know which the best Smartphone editing app is so she can leave her camera behind and just take her iPhone with her to help take photos and edit them on the go within the app.  Since this is happening more and more these days, obviously DSLRs and high-quality cameras are much needed but it’s becoming a big thing when people want to travel light, therefore wanting to carry small cameras with them and that’s usually their phone because they have it with them most of the time anyway.

smartphone

As such, these tips are going to be just some simple things that you can do to try and get some different and more creative photos while at the same time making your photos generally better overall. However, these tips are going to concentrate on some basic features which are found in iPhones because that is what I am familiar with. But most of these features can be transitioned over to an Android device or any other kind of Smartphone that you might have. A lot of these features are found in most smartphones as well and you can check your device to see whether they are there even when you hear me talking much about iPhone.  Some of these tips are going to be very simple but others are likely to be some things that you haven’t noted. These features include:

Composition

This a really a simple thing that a lot of people forget but you can easily and almost instantly improve your photography without changing any settings by just working on your composition. One of the main composition rules out there is called the rule of thirds. This rule has to do with spreading your frames into two lines going vertical and two lines going horizontal and this is basically cutting your image into nine squares. This gives you some points of interest to put a subject on. So, when you look at the intersecting lines, maybe you’ll put your subject in the bottom left corner and that will kind of create a rule of a third that’ll give you a lot of negative space on the right side.

iphone

The iPhone has a feature that allows you to put a grid on your phone thus giving you an automatic rule of thirds and you can kind of play with it that way and obviously the lines do not show up in your final image but you will be able to see them when working with your camera just to help you position your image that way. The rule of third is one of the widely known features when it comes to composition but there are also other rules out there including leading lines (that’s maybe having a walking path going up to an object and that can create an instant interest in your photo). You can even use symmetry just to make sure that everything is perfectly symmetrical from left to right, basically looking like a perfect mirror image of each other. If you flipped it into halves, you’ll have a lot of symmetries there. The basic rule of thirds, basic composition strategy will definitely improve your photography without changing your settings whatsoever.

Using angles

This goes along with the composition. The beauty of being able to use a small camera such as an iPhone or any other Smartphone is that you can easily get into different places that you might not be able to if you were using a big DSLR. One of the most popular angles that get this kind of a low angle looking up at a subject and what it creates is some sort of more dominant and impactful image. As such, you are able to bend down low and position the camera very low when using a Smartphone and still see that large screen which is much larger than the LCD screen on the back of the DSLR. So, you’ll still be able to see your image and again just because the phone is so small, you are able to get down low without any kind of trouble positioning it thus being able to go down to many different places.

iphone

If you go to the opposite side of going down low, it means you can hold it up above your head and kind of fire a burst mode of shoots. If you are trying to shoot at a crowd or a concert, you can just hold the shutter button and get a burst mode of shoots and select the best photo from that which will look a little bit less intrusive if you are holding a small iPhone or Smartphone up in the air as opposed to a big DSLR camera.

 Using exposure lock to control lighting

On the iPhone, there is a camera app which is normally known as ‘Camera’ and when you click on it, then that is your native or inbuilt camera app on the phone. What is exposure lock does is when maybe you are shooting into a bright window and so your subject is going to be completely dark because the whole image is exposing that bright window. The way to collect this is to kind of move out of the way and find a different kind of composition that is not directly pointed at the window or you can use the exposure lock. The way to do that is to click and hold on your subject on the screen and the camera will kind of lock itself in that different mode, the focus-exposure lock, meaning it won’t move the exposure not unless you tell it to do so. Once you’re locked in there, you can scroll up or down the screen and as you scroll up, it will kind of lighten the image and as you scroll down, it will somehow darken the image. With this feature, you can easily play with more lighting effect depending with what you want without letting the camera to do any evaluative metering when it comes to finding the right exposure for the photo. This feature also works well when using videos on your phone using any mode. If you find that some of your videos are a little dark, you can use the exposure lock and focus lock as a really great way to haze the exposure a little bit without having the camera do all the work.

Using camera apps with more features

Now that we talked about the native camera app in the phone, let’s just say that you’re fed up with it and don’t want to use it either because there are no many features in there and you want to use something different, what could you do about it? Well, I will encourage you to look at different apps that I’m going to discuss but some of the best apps that I like to use


are those which allow you to control almost all the image settings as you would in a DSRL camera.

apps

One of my best apps that I like is called ProCam. This is a great app that does both videos and regular stills and you are allowed to change the ISO, the aperture, the exposure and even the ratio of the image among other dozen things. You can even out this app as a shortcut widget on your phone so that you do not have to go to your native app intuitively but instead use this one for your photography. The app also allows you to edit the DNG files right inside it which means you will be editing the raw files that you just took. This feature makes it a great app to use. You can also export it and eventually update it in another program such as Lightroom or even export it to your desktop and edit the photos in Lightroom just to give you better results as you would just using the JPEGS.

Using Polarizing sunglasses

The next tip is kind of a fun one. Let’s say you are out in some bright, sunny situation such a beach and you’re trying to take photos of a family but realize that the sky is really blown-out and doesn’t look like you’ll get an appealing photo. What you can do is take your sunglasses and put them over the camera lens and this will help darken the exposure, trying to make it a little bit more balanced. This works best when you have polarizing sunglasses. We all know what polarized filters do to a regular DSLR and polarizing lens in the sunglasses work exactly like that. It darkens up part of the image while leaving the bottom part of the image a little bit brighter and allows for more neutral exposure. It also cuts down the reflection as well. As such, polarizing glasses can actually help while taking pictures like those. That’s a really easy way to get great shots with your sunglasses when exposed to excessively bright light.

Using natural light

Natural light is a big key when it comes to getting really great, well exposed and creative images. A lot of people stick to using the camera flash but this is not really powerful no matter the technology or colour tones in the flash feature and thus does not match up to what you would get when using the natural light for your photography. One thing that is really interesting especially in a sporting event is that you’ll see multiple flashlights pop-up and that can be a lot of different things and also some people might have DSRLs which have flashes, most of the little popup flashes you see are from Smartphones or iPhones.

landscape

What people don’t understand is that although they think they need those flashes, the fact of the matter is that they are damaging their photos. These flashes normally ruin the exposure since they can only travel so far. The little, tiny dot can’t transfer as far as to where the object or action is and if it were to go far, the truth of the matter is that it can go beyond two feet. The best thing will be to put the flash off and try to get the best natural exposure and this way you will get better-looking photos. The truth is that you might see a little more noise and movement in the photos but at the end of it all, you’ll have better-looking results that when you use the little tiny flash.

Using panorama mode in the Smartphone

Using a panorama mode helps to mimic the wide angle lens. This is kind of good when taking a group photo but can’t get back far enough to capture everybody in the frame. Normally what happens in such a situation is that you try to squeeze people together or try to shrink the frame. However, you can use the panorama feature on your phone to do a makeshift widening effect. Using the panorama, you have to go from 180 degrees from left to right although it’s not a must that you get the 180 degrees. You can move slowly from far left and pan over the group and get the whole group in the shot and then kind of pan away from the right and then we can crop in later on in the editing and get kind of a makeshift wide angle lens and also get everybody into the photo. This is a really quick thing which I use a lot, especially when shooting real estate photos using my phone.

Using headphones as a shutter release cable

To do this, you just need to plug your earphones into your phone and then set your camera very far away from you. On the headphones, you have a little ‘volume up/down’ locker which you can use as a shutter release when maybe you want to take a photo and you don’t have anyone to help you, you can plug your headphones and do a little bit of selfie action. Some wireless headphones also allow you to use them a shutter release locker but it depends on the maker and the model. However, most of them work just the same since they have the volume up/down locker. You can also do that with a small headphone since they all act like a wireless shutter release.

headphones

Editing in Smartphone photography

I personally don’t like editing on the Smartphone especially if I don’t have to. If I can save the photos and transfer to my laptop or PC later for editing, I would prefer this to editing on my phone. However, there are a couple of great photography apps which allow you to edit your photos on your phone. The first one is known as Snapseed by Google and its updated regularly, something that is really great. It offers a number of pro-level features including transform, blurring, colour adjustment, and blemish removal among many other cools features and functions that allow you to take control of your photo. Many people normally do take photos using their phones and then transfer them to their iPad as their main editing source using Snapseed. This is a really good app if you are the kind of people that like sitting down in front of their computer to edit photos.

VSCL is also another great app that you can use for editing on your Smartphone. If offers some great filters and other features, some of which are free and others premium. The app also allows you to transfer your photos directly to social media thus making it a great and convenient option if you want to edit your photos using your phone. The other option is the Instagram. Many people think that when you edit your photo on Instagram you have to post it. However, you really don’t have to. When you open a photo on Instagram and start editing and then push the next button after you are done editing, it is saved on your phone before you post it on the social media. As such, you can cancel the whole process after pushing the next button which allows you to have the photos on your phone but not posted on to your Instagram account. Instagram has some great features although they don’t have a lot of filters such as VSCO dust you can do the usual fine-tune edits using the well-known features as you would find in Lightroom.

Next, you can use Lightroom but use what is known as Lightroom mobile. This is a mobile version of Lightroom which allows you to edit your photos which are taken using your phone. The great thing about Lightroom Mobile is that it has almost the same features as the main Lightroom software but these are layered differently to suit the smaller screen of the phone. Once you edit your photo, your files can instantly be transferred back and forth if the Lightroom in your computer is synced up with your phone. This allows you to edit your photos on your phone and if you can get back to it, then you can access it through your computer. That’s a great feature if you have your phone and computer synced together.

Lastly, we will touch on one of the most interesting and better options when you are trying to get the best photos using your phone. This involves exporting your photos as a Digital Negative file (DNG) and editing it in Lightroom on your desktop. You will be able to see more of the image and also have more features as you are used to and also enjoy better-known adjustments and also use the presets that you’ve downloaded or bought. It is a really well-known place to edit your photos and actually if you have the time you can export your photos as DNG files for editing.

Featured item of the week

The featured item of the week is not an actual item but a really cool technique for getting really fast edited photos if you are in a hurry. There is a feature found in Adobe Lightroom known as import preset. This feature is found in the Import module and is a section on the right-hand side known as ‘Apply during import’. There is a little box under that called “develop settings”. In that ‘develop settings pull-down menu, you will see all your well known presets that you’ve installed on your Lightroom catalogue. Any preset you have installed in your preset module will be seen in that develop setting panel. Whether it’s a popular setting that you’ve applied to your preset module, Lightroom will apply it to you while importing back to your computer. As you import your photo, just change the ‘develop setting’ to the preset that you regularly apply to your photos and allow Lightroom to apply that and when you get back to your computer, you can see that all the presets were applied on all your images and you can only do some fine-tuning adjustments. This makes for quick photo editing session and is a really cool feature that many people do not know about.

SaveSave

Photoshop Vs Lightroom: The New Debate to Acknowledge

Welcome to the very first episode of Sleeklens’ digital photography podcast. This is a weekly podcast where we will be talking about everything photography including Photoshop, Lightroom or anything you can think of. Overall, this lightroom vs photoshop debate will help you upgrade your knowledge same as that of professional photographers. It does not matter what style you shoot; we will talk about it in this podcast.

So, if you are in the Photoshop camp of the digital photography world, or if you are a Lightroom user and not that good at Photoshop then you better listen up. It’s time to realize that it does not matter if you are using Photoshop or Lightroom; they both do the same job. The only thing that matters is your need.

We will go with the flow of the podcast, and you can see what to expect to move forward and what we will be talking about in the next few podcasts.

Remember you can stream our podcasts simply by clicking here 🙂 Also, you should check detailed tutorials on our website.

I will go through a popular topic about Photoshop vs Lightroom, which is a very popular topic when it comes to a lot of beginner photographers out there. Also, we will discuss a few version of photoshop. Basically, we will look at the flow of the podcast going forward. But before then, just a little bit about me as a person. My name is Jordan Younce, a real estate professional photographer from the United States where I do more real estate stuff. I’ve done a lot of other styles of digital photography, but I’m kind of concentrating on real estate now. This is a really cool topic and journal to concentrate on now. We will also be talking about lightroom and photoshop elements. That just shows you that you can start with one style of digital photography and then move on to a different one, and in the process, you might find one that you love better than the one you originally planned on starting out with. That’s something you might need to keep in mind. I also do different content on Sleeklens YouTube channel. You can go to YouTube and search for Sleeklens and you will find a lot of videos to help you with photo or image editing tools, shooting or anything you can think about including all about the Sleeklens’ workflows, Photoshop actions, Photoshop elements, Lightroom and all other stuff and I can help out with that if you need help as well. Further, to all the photographers out there, every idea or suggestion is welcome. So be sure to send me anything you need to see in this podcast, any ideas, and I will be happy to help you with that. You can send those to [email protected]. Anything you would need help with or any questions, just send them my way, and I will be glad to help.

photography

With that out of the way, we will talk about the podcast moving forward. This will be a weekly podcast and is eventually going to be moved to a weekly live show on YouTube. If you don’t want to be in a live show or don’t have the time, don’t worry. We are still going to get the audio from there and release it as a podcast. So, even if you subscribe here, you still will receive notifications about all the episodes so you can follow along with us.

In this weekly podcast, we will talk about news, lightroom and photoshop, general topics for the episodes, and recent articles which are posted on Sleeklens.com website, and there will also be a featured item of the week. This is going to be some fun little things such as Photoshop actions, photoshop elements, photographers who use Lightroom, gear or any kind of a thing you can think of that is digital photography related.

To show you our appreciation for listening to the podcast, we will also offer a coupon code which you can use at the Sleeklens cart. If you add something that you need to pick and then enter the coupon code “sleeklenspodcast”, it will get 10% off anything on the store. So, make sure to check that out if you’ve been looking forward to buy anything from the site. That is the basic flow of how this podcast will get laid out; it’s a really fun podcast and cool environment to have all professional photographers out there listen to. I did mention that I’ll be talking about a topic on this episode, but this is an introductory topic that is very popular when it comes to beginner photographers out there. This has to do with the program one should use to edit my photos? Should I use Lightroom or should I use Photoshop?

So, Photoshop or Lightroom?

The answer to Lightroom vs photoshop

The quick answer to this question is that there is no magic answer, but it depends on the kind of style of photography that photographers are shooting and what they need to do with their photos. Both programs, lightroom and photoshop, have their pros and cons. I will look into that in in-depth. So, let’s go over Photoshop first and start with the pros or advantages of using this program.

lightroom

What one of the main things that Photoshop does but Lightroom cannot do is to use Layers. A layer allows you to put an edit on top of an edit that you can do in Photoshop. This does non-destructive editing of your files. It also allows you to do tons of stuff more than I can cover in this podcast. Being able to do different stuff on your photo non-destructively is important because you don’t want to mess up with your original file but want to keep it intact and in its original form. Photoshop also has what we call ‘Actions’ and Sleeklens sells a bunch of actions out there to do certain changes to your photos, and these are same as presets (if you are familiar with the process to use Lightroom). You can have one effect and apply it to your photos with one click and it automatically does all these types of changes to your photo. This allows you to do all kinds of image editing with editing tools. You can do colour adjustments, and other fun stuff with a single click using the actions.

Blending and compositing is another really important feature that you can do to your photos when you use Photoshop. Many photographers have agreed to it. What I mean by this is that, let’s say you’ve gone out for landscape shooting and you have this really amazing scene and you take a picture but realize that the sky may be just a little boring and you don’t like the how it looks. But earlier on you had taken a really nice sunrise or something similar to that but with a very impactful sky. What you can do is take that sky out of one photo and put it in the other photo and blend them together thus giving you a very to scene by replacing the blurry sky with the better one. Photoshop can do that, but Adobe Lightroom or creative cloud cannot get any closer to something like that. That’s kind of an advanced image editing tools technique that Adobe Lightroom can’t do. So, editing Photoshop is another reason for you to use layers as you can do that as well but Lightroom cannot get any closer.

Photoshop also has a ton of tools that you can use. Adobe Lightroom or adobe photoshop lightroom or adobe bridge or adobe creative cloud has a little bit of what Photoshop has, but the latter can do almost everything. One of the tools that many people use and they think they can do the same is to use Lightroom but they cannot is actually the Liquify tool. Many people are familiar with that tool and what that tool does is that it allows you to whoop your photo to make it better looking. What I mean by that is that, let’s say you took a photo of somebody, but they are concerned with the weight or something like that. You can actually slim them down using the Liquify tool. You can take a really cool facial portrait of somebody and enlarge their eyes a little bit to make them appealing. You can do stuff similar to that. You can make them smile if they weren’t smiling when you took the photo. Photoshop has some really awesome tools and a large variety of things you can do to your photo. So, basically, anything you can imagine is possible to do to multiple images or photos using Photoshop. It might take a little bit of time, but you can actually do it in Photoshop.

Even though when you use Photoshop, there are many high points when it comes to editing photos, there are also many low points or negative aspects that some people cannot get around. One of the major ones is that it has no image manipulation and image management. Once you drag a photo into Photoshop for image editing, you have to save it just as you would a doc file. You have to figure out where you want that image manipulation to be saved while in Lightroom, you can put them in a catalogue, you can organize them and open them in Lightroom, and your file management or image management is basically Lightroom. But in Photoshop, you have to save multiple images or photos in your hard-drive or file structure that you specify, and you can lose files just because you do not know where you are saving them. Thankfully, while using Lightroom/ creative cloud, you get a better file organization, and that one is a major con when it comes to Photoshop.

photographer

The next one is that it has no built-in raw support. You might be asking yourself, why you have been able to edit raw images in Photoshop before. Well, technically you haven’t but what you have edited your photos in is what we call ‘camera raw files’ which is a small separate photo editing software from Photoshop. This is not really a big deal because camera raw is updated to edit raw files from almost any camera. However, you are not editing your RAW photos in Photoshop but doing it in adobe camera RAW. So, when editing your RAW photos in adobe camera RAW, you basically need to have all your main adjustments done before you bring them into Photoshop because you are not going to have that leeway to edit your photos later on. You will lose some of the information when they go into Photoshop, and that is kind of a negative thing but again you can edit your RAW photos in Camera RAW but can’t do it in Photoshop.

One of the last negative points with Photoshop is that it’s hard to learn and we all are aware of this when we get to that learning curve. It is a little hard to get accustomed to the Photoshop or creative cloud interface, and if you are not familiar with it and you happen to open a file, it will be overwhelming when you do it in Photoshop. It takes a lot of time to learn to use Photoshop while in Lightroom, another photo editing software, you can almost jump in there and start editing your photos right away. That is one major con of Photoshop.

Are you aware of the pros and cons of adobe bridge? List them out in the comment section!

Next, we move to Lightroom….

One of the main pros or advantages Lightroom also has is that it does have Built-in RAW support. So, when you import your photos into Lightroom and you keep making adjustments to your files, you are constantly making your edits on that raw file rather than a compressed file format of that raw file or any other type of file and all the edits are non-destructive. Anything you do to your files can automatically be reset and you get back to the way it was when it came off that camera. That’s really important if you are someone who goes back and edits photos regularly because you have that raw file to fall back on.

Like I mentioned in Photoshop, Lightroom has a major file feature and optimization. You can organize your files greatly. I know in my case when I go shooting in a home, I always put them in an individual folder in Lightroom and that way if someone wants to see the files for any particular house I can pull out the specific file where I put the files and export them and send them their way. This is very easy and it is very easy to organize your files in Lightroom.

Again, as I mentioned, using Lightroom is very easy. You have your modules on the top-right hand side of the Lightroom window and these are self-explanatory. Your library is where you keep all your files, your develop module is where you edit the files, map shows exactly where your photos were taken at if you have GPS location just among many others. It is a very easy file structure or file management window to allow you to edit your files in. the develop module is also very straightforward with the correct labels such as basic adjustments, tone curves, Split toning details and all that stuff. It is very easy to understand and all of them are in one place.

photographer

Another major pro when it comes to using Lightroom is preset. They are fantastic and you can use them in almost every photo because not only do they allow you to do your edits quickly, which is a major thing when it comes to photographers who put out a lot of work all at once, but you can also apply almost any effect that you can ever think of. For example, if your photo is very much underexposed, you can apply a certain effect to bump up the exposure but it doesn’t mess up with certain highlights of your exposure. It only brightens up certain spots on one image via image editor. Sleeklens has not just one preset but many which you can use in almost any situation from landscapes to real estate to drone photography, to visual effects and if you want to see them you can visit the site and check the collections available. You can also create your own preset if you know there are certain changes you apply in almost every photo thus making it a really awesome feature to have in Lightroom.

Let’s now check the cons when it comes to Lightroom…

First, Lightroom has no advanced image editing tool. What I mean by this is that as we were talking about Photoshop when it comes to compositing and replacing the sky and stuff like that, you can’t do that at all. Basically, you have to go into Photoshop to do that. Say you have a portrait of someone who may have some blemishes or something like that, you have the spot removal tool and you can take those out, you can have the healing tool to help you take that stuff out that way. You can remove some simple stuff from your photo but as far as doing any major adjustments that you may need to do, you must do it in Photoshop.

Again, as mentioned under Photoshop, no “layerability”, meaning you can’t do stackable presets which is mainly what the Sleeklens’ presets are which allows you to stack on top of each other until you have the desired changes. You do not have the ability to do layers in Lightroom and that can be a drawback for some if you really concentrate layer editing.

Need more tutorials on Lightroom, keep reading articles on our website.

One of the last cons with Lightroom is that it’s only for photos. You might be asking, ‘isn’t Photoshop also just for photos?” But actually, this is not the thing. Many people don’t know that you can actually edit videos in Photoshop. You can edit your videos as you would one image by opening it in a Camera RAW filter once you import it to Photoshop and edit all the same features, all the same sliders that you are used to in Photoshop. It’s probably not the best video program out there but if you are doing simple adjustments and are not used to any other video editing tool or software, Photoshop will definitely enhance the quality. It also does have a timeline and so you can make that as your video editing suite. However, I would recommend looking for some other type of video editing program. Although you can edit your videos in Photoshop, importing the same into Lightroom doesn’t allow you to do much but you can catalogue it in order to save it but you can’t really view it or edit it. That’s one real drawback for someone who wants to edit or catalogue video because you will have to come up with your own file or structure for that as well.

That is the main topic of this episode and hope you enjoyed it. Just some quick information for beginners out there who are trying to find what editing program is best for them, I personally use Lightroom 99% of the time but there is something we have to dive into Photoshop to kind of fix or correct but for the main part, Lightroom is the main go-to tool when it comes to editing.

Hey, what about adobe bridge? Do you need us to talk about it too?

Featured item of the week

The featured item for this week is a brand new collection when it comes to Sleeklens’ Lightroom workflows and that is the Visual Noir Collection. This collection is really great and focuses on cinematic film presets effect. If you’ve ever wondered how to get that cinematic effect look on your photos, this collection is probably the one you want to look out for.  You can actually go to Sleeklens YouTube channel to see some great videos showing you some really awesome effects that you can apply to your photos using the Visual Noir Collection. To see these, just go to Sleeklens.com and check out the Visual Noir Collection. Just look at the before and after photos for how great results you can get. Remember to use your coupon code ‘Sleeklenspodcast’ to get 10% off that collection.

I hope you now know that your lightroom vs photoshop dilemma is clear! For more tutorials, don’t forget to check more articles.

Here’s how you can learn to take advantage of selection tools in Photoshop.