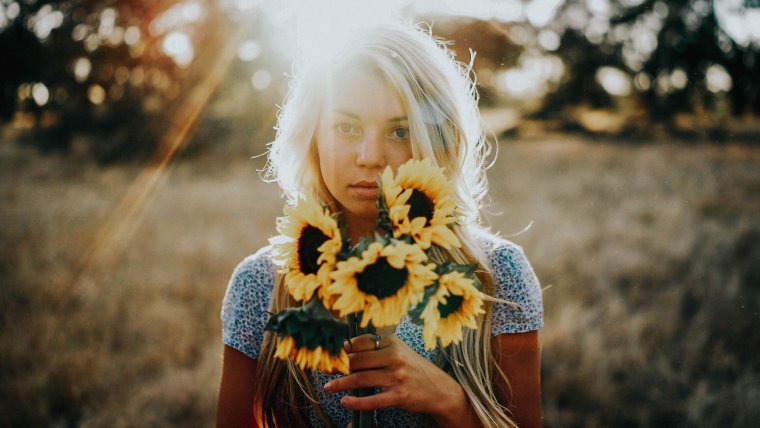
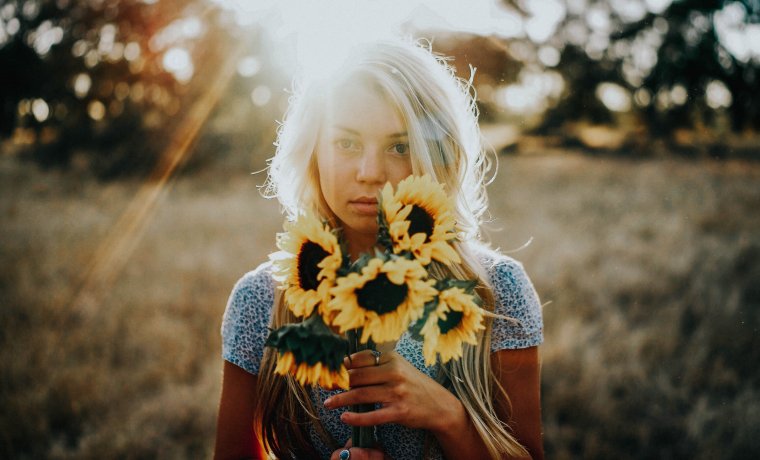
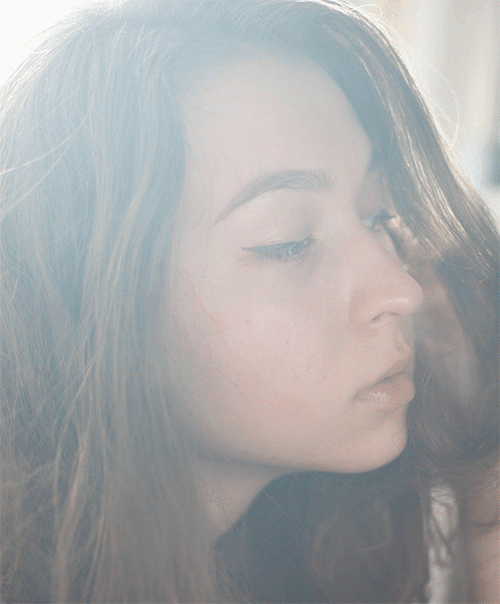
We’ve all been there: attempting to capture the heart of a photo shoot in a limited amount of time, coming home with a heart full of wild excitement, and being disappointed with the results. Maybe you shot on a sunny day, creating bright photographs that somehow managed to conceal your subject completely. Perhaps you shot during the golden hour, resulting in beautifully warm – yet unbearably bright – images.
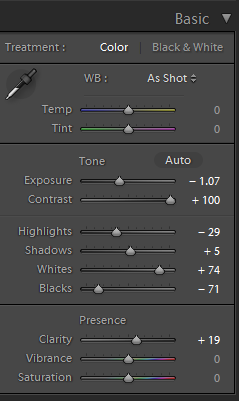
Photographer friend, I have some good news for you: fixing these lighting errors is possible using a number of editing programs. The program we’ll be focusing on today is Lightroom. After installing the Lightroom presets, you will see that Lightroom presets is filled with a plethora of handy little tools like exposure, highlights, shadows, clarity, and more. These tools – which can be altered by using sliders – can fix both dramatic and minor issues. If you’re refusing to share one of your favorite shots due to overexposure, the tutorial below will help you fix your dilemma. In no time, you’ll be able to find potential in photographs that, at first glance, seem impossible to fix. This will give you more opportunities to add great photos to your portfolio and make your shots less stressful.
Before you begin, it’s very important to remember the power of shooting in RAW mode. The value of RAW lies in the amount of image data it collects; JPEG stores less image data, resulting in photographs whose quality isn’t the best it can be. Thus, editing RAW files enables the photographer to alter things dramatically without instantly ruining the overall quality. When it comes to images that are too bright or too dark, this is especially valuable.
Preset-loving folks, please keep this in mind: In Photoshop, it’s possible to use an action after editing your image and not lose any of the minor details you fixed. In Lightroom, however, this is possible but not easy to achieve. When presets are applied, any changes you made before the application are completely altered to fit the preset’s inbuilt adjustments. To avoid losing precious work, apply your desired preset first and then work with the sliders. This will save you a lot of time and frustration.
Now that you’re aware of these points, let’s begin!
The Basic panel contains the most important sliders – if you were to use only those during the editing process, you’d get an abundance of great images. Imagine how wonderful your work can be if you master the basics, apply stunning presets, and understand how to use Lightroom’s other panels (such as Tone Curve and Split Toning). It would be great also if you could master how to remove blue cast photos in Lightroom.
Once you’re done with the basics, feel free to experiment with other panels. Now you’re ready to make the most of any shoot, no matter how bright it may be outdoors. Be proud of yourself for learning something new!
Happy shooting, and don’t forget to never stop learning.


Please verify your software version before proceeding.
 I’ve verified my software version


 Facebook
 Google +
Comments (0)
There are no comments yet.