In this episode of the photograph podcast, I go over 7 things you should think about doing to every photo
This episode will talk about most of the edits that I do to my photos but it’s actually 7 things you should do to every photo. This doesn’t mean there are individual steps that you have to take per photo. Most of the time, these are done altogether without you even knowing because you’re kind of used to going through your own little workflow. But there might be some things that you can learn from this and that you may kind of overlook or maybe oversee that you kind of mess up on one thing and you realize you should have done it in this particular spot. That is what we’re going to talk about as 7 different things that you should do to every photo. These include: –
-
Profile corrections
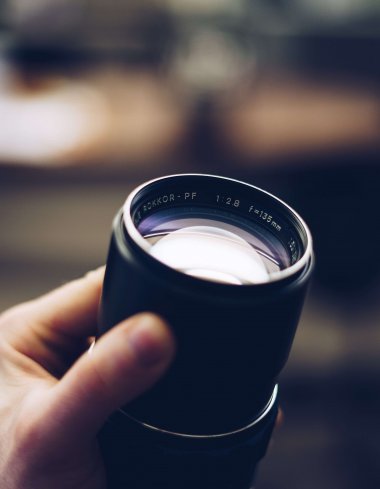
A lot of times when you import a photo into Lightroom or open it up in Camera Raw, a lot of people make the mistake of not applying profile corrections to their photos. Profile corrections are almost needed in a way because they allow for you to correct a little bit of distortion, maybe vignetting in your photos and that you normally have to apply and which would make your photos look bad and you don’t want that to happen. What profile corrections do is kind of take a combination of your camera and your lens and Adobe has built-in a profile for both the camera model and lens model and will apply a correction to that. So, for my particular lens, I have Canon 6D, which is a full-frame camera and I also mainly shoot with a Canon 17-40. What that’ll do is kind of wider angle lens and when I kind of apply profile correction to that it’ll kind of whoop it up a little bit, mainly stretching the center of the photo and remove a heavy distortion or heavy kind of black vignette around the edges of my lens or the edges of my final photo. It will automatically remove that without having to do anything but if I want to keep the vignette for maybe an artistic style, I can definitely do that but profile corrections help by removing distortion and does a really good job in that. Profile correction is like one click and you’re done. There is one small click box in both Lightroom and Camera Raw, and if you do most of your editing in camera raw, there is one little checkbox that says “enable profile correction” and when you do that it kind of automatically detects the camera models, the lens that you used and it will automatically create a profile for you and apply that distortion removal, vignette removal and you are ready to go.
-
Applying an alignment and straightening your photos
Depending on the style of photography that you use, you can apply an alignment and straighten your photos with ease. Portrait photographers might not have to do this but wedding photographer might have to do this depending with the room they are in or maybe they are photographing a couple in a gazebo and the lines are perfectly straight but it kind of depends on the style of photography that you are into. For example, if you are a landscape photographer if you go out to a landscape and you have a definite horizon line you definitely want to kind of straighten that up. A lot of people might leave it and concentrate on the creative edits to their photo thus straightening things out. There is a tool especially in Lightroom and it’s very easy to find and under the ‘Crop Overlay menu’ you’ll see kind of a little angle that has a little ruler next to it. What you can actually do is click on that ruler and drop it from one side of the photo to the other and it will kind of drag it along the horizon line and automatically straighten it so that your photo does look perfectly level/straight with ease.
If you need to remove distortion, that’s another separate thing. You can go to the Transform menu and therein find a number of options including off (allows you to keep your photo as it was shot), you also have auto, guided, level, vertical and fore. Auto is the one you should use as it works for almost 99% of the scenarios. Auto alignment does a very good job as it detects all the vertical and horizontal lines and straightens them out especially if you are in a situation like a venue or a room. It straightens the lines and removes distortions from your photos and makes them look really nice. I personally will use auto alignment and also straighten the photo with angle tool in Lightroom.
-
Sharpening
A lot of people don’t sharpen their images but this is one of the most important steps to take especially for shooting raw. This is because when you are shooting raw, your images are coming right off the sensor, right out of the camera with minimal, if any, processing is done to them. As such, you always get raw data and therefore your photos are going to be a little bit soft. You might see a little bit of softness in your photo. So, if you are going to ‘Detail menu’ in Lightroom, you are going to get a couple of options for sharpening amount including the amount, radius, the detail and the masking. There are no rules although some people have some mathematical equations to apply to sharpening what I typically do is (sharpening is normally set to around 25 when you import them into Lightroom for example) to bump mine to around 75 to 80 and that typically gives me a good amount of sharpening. If I am making a photo that I definitely know will go to print, I want it to have a good sharpening amount and radius and thus will apply the amount to around 95 to 100 and radius to 1.5 (radius default is normally set to 1.0) and that kind of a number is based on a resolution of 300dpi when you finally get it printed and that kind of mathematical equation normally works out. So, no matter how big a photo I am printing, I normally make it 300dpi and always set the sharpening amount to 100 and the radius to 1.5.
Those values are great for global adjustment and what you are doing is applying a global adjustment throughout the whole photo. But there is also one more slider in there and that is the masking slider. The masking slider helps you refine the edges in your photo and as a default, the slider is set to zero whenever you import a photo and what that means is that zero is implying a global application across the whole photo. Masking applies the sharpening amount to the detected edges to your photo. Let’s say you have a portrait of somebody and you don’t want to sharpen globally because you don’t want to sharpen the texture of the skin, and you may not want to sharpen the details in the eyes, you don’t want the hair to look overly sharp and what you can do is slide that to the right and the further you slide the slider to the right, the more you are going to sharpen the edges to your photo and so, if you want to actually see what it’s doing, you can hold the Alt or Opt key on your keyboard and slide the slider over and its going to change into a black and white view of a photo and so the black images or areas on your photo when you slide the slider over are going to be the parts that are not sharpened and the white areas are going to be those which are sharpened. As such, you can see that it’s only sharpening the edges of your photos. So, if you are working with people, this might be a good reason to use masking but if you want global sharpening effects to your photo, try to keep your masking around 0-5.
-
Spot and blemish removal
This is kind of an easy one and many people think about it as the first thing when thinking about how creative they want to be with the photo. This is not a technique that you’ll look to but it’s kind of a process you’ll think about when editing your photo. You might have some people in your photo who you’d want to remove or other distractions such as power lines or anything such leaves or whatever that you consciously would want to remove from your photo beyond your subject. You can think of removing it or darken the area a little bit but if you can remove it, then this is something you should consider. Remember that distraction to your photo is not something you want the viewers’ eyes to go to and thus is easily removable especially if you have a model that has some blemishes or something, just get a spot removal tool in your Lightroom or Photoshop and just remove all of that.
-
Dodging and burning
A lot of people don’t think about doing dodging and burning in their photos. Some of you might not even know what dodging and burning means. Basically, dodging and burning means darkening or highlighting/lighting part of certain areas in your photos. For example, if you have a field that has some flowers in certain parts which you would like to stand out a little bit more than the other parts of the image, what you can do is apply certain exposure amount to that part where the flowers are and it will make them stand out more and what you’ll be doing is brightening the exposure a little bit so that the areas can stand out more and that is called dodging. You can also do burning to the image and this is basically darkening it a little bit more. In dodging, you will be lightening the image while in burning you will be darkening the image. For example, you might be having a sky and would want to bring out a little bit of details out of it, you can do burning on it to make it a little bit darker. A lot of people might say that you can do some dodging and burning if you go to the basics panel in Lightroom for example and you bring down the highlights and increase the shadows but in the traditional dodging and burning you’re actually taking a brush of some sort and painting in a little bit where you want to lighten or darken and this starts with the creative process of how you want the viewers to see your photo and this leads to step number 6.
-
Your creative edits
This is a weird step to think about but when it comes to creative edits, you want to know what it is that you should do. This is where you start thinking about color differences, color tones, white balance, color balance, split toning, black and white and all other creative edits. One thing I like to do specifically if I have an image and am not sure which direction to go mainly on color adjustment, I will go into my Sleeklens’ presets and hover over them a little bit and then get a preview window on top left side of Lightroom to get a feel of what the image could look like. That gives me an idea that will help things start flowing about how I want the image to eventually look like. That’s one thing you can think about and it’s kind of playing around with your ideas.
-
Exporting
This is the last step when working on your photos. There is a different workflow that a lot of people have when it comes to pretty much of the workflows that they have and that is, what they do with the photo after it is done. Does it stay on your hard-drive or do you immediately start sharing or something like that? It depends on the photo obviously but what I like to do after I’ve had the final edit of the photo or what I believe to be the final edit and most likely I’m not going to do anything with it is to export it and this is kind of a backup situation. What I do is that I would export the photo in two different formats. So, I will open up Lightroom and click ‘export’ and then export a high-resolution Jpeg of the image. As such, I will do a 300dpi jpeg as a quality maximum and then save that as a backup. Obviously, the raw file is still in my Lightroom catalogue where I imported it and so everything is great there. But I still want a high-resolution jpeg of it and in case something happens I can still have access to it. As such, I just take the high-resolution jpeg and move it to a service like Dropbox or Google drive among other options available and this happens to be my offside backup. I know this is just a jpeg but that’s the best I can do if something were to happen to my computer. The other format that I would export it in is actually a TIF file. I kind of go-between TIF and PSD file and this is actually in Lightroom if I’m exporting it from there but if I’m doing it from Photoshop, then I would just save it as PSD file or Photoshop file while still keeping the jpeg file. The reason why I do a TIF file in Lightroom is that this format offers a whole lot of data backed into the file so that if I needed to make some further adjustments I will have all the necessary data to work with. There is no much data in raw files but if something happens to my backup situation or computer, then I definitely want what I can get out of it. If I don’t have a solid backup solution, something I believe every photographer should have, some sort of all in one backup solution in my computer, these two kinds of file formats will kind of help me along and would be better than losing everything.
These are the seven things that should be done to every photo but again, a lot of these things are actually thought about without going through step-by-step. You kind of do all together, all at once especially if you have an import preset in Lightroom, you can actually knock a lot of these out as you import your photo. So, you can make a quick import preset and just say “apply auto-correction”, “apply auto alignment” or “apply the sharpening” and you’re completely done since Lightroom will apply all these changes to your photos as you import them. if you don’t want to do all these step-by-step, that’s one of the really quick steps to use.
Featured Item of the Week | The Sleeklens Beginners Photography Course Starting in photography can be a bit overwhelming. Not only do you have to learn the technical details of photography, but you will also need to know all about the gear available. This is why we have created the Complete Beginners Guide to Photography video course. This course covers everything needed for a beginner to start learning the most important aspects of photography without all of the useless, wordy, technical details that can make you quit before you even start. This course will also show you that you can use the most basic of gear and still get fantastic results as long as you know the basics of photography.
Find information at The Complete Course to Beginner Photography


 Facebook
 Google +