This pos
t is specifically created to help you understand how you can reduce noise in your photos whether you are using high ISO or doing a long exposure. I will give you some simple tips you can use to reduce noise.
Basics of using ISO and what exactly noise is
As an overview, it is good to note that raising the ISO of your camera increases the sensitivity of the camera sensors. Think of it like a microphone, if you are talking normally using a microphone, it would be considered like an ISO 100. It’s a very clean audio with very minimal distortion but if you were to start yelling into the microphone, there will be a lot of distortion, noise and feedback. That will be considered as a higher ISO, maybe something like ISO 6400, 3200 or any other level depending with the kind of camera you have and that will be considered as a higher ISO and it will introduce noise into your images. Some people like kind of a film grain in their photos since it gives them a vintage feel but a lot of people also want clean images as possible and that’s why we try to shoot at a lower ISO as possible because this gives the cleanest images as possible.
If you have enough light in your situation, obviously the lower the ISO you can get will give you the cleanest photos possible. There are times when you have to raise your ISO whether you are trying to shoot something that is moving very fast and you don’t have enough light in your situation. In such a case, you might have to raise the ISO to make sure you have a properly exposed photo or you are in a dark situation and are shooting night photos and want to capture the Milky Way or something like that. You will need to increase the ISO to make your camera more sensitive to the available light.
All that being said, the first and easiest step is to try and find as much light as possible to make sure you do not have to raise your ISO as you normally would if you didn’t really look for the lighting in your scene. You want to make sure that you have enough light as you can to make sure that your ISO doesn’t go high but there are some occasions where you might have to increase it. The first thing you should do to make sure that the ISO noise doesn’t show on your photos is to actually overexpose them a little bit and this will minimize the amount of noise. There’s a popular technique where if you raise your ISO up to around 3200 or 6400, you want to make sure that you are roughly 1/3 of a stop to or 2/3 of stop, over-exposing your images. What this does is blow up that noise and you won’t see it. Typically, noise is seen in darker shadows of a scene and you will see it in more of highlight situations may be in the mid-tones but it does show up more in darker areas of a scene. If you can blow up those out a little bit, not in a way you are losing the actual information, (it’s really important to pay attention to the histogram at the back of your camera) but do it just enough to where you are not under-exposing the image or introducing too much shadow to your image.
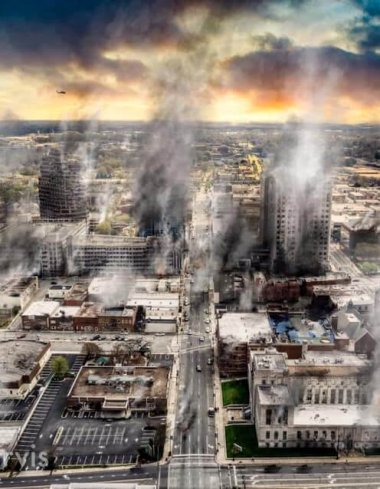
That is also another way of introducing noise to your images for those of you who are shooting really long exposures. As you open your exposure to 1, 2, and 3 minutes or something around there, you might see that you have a little bit of noise even if you add ISO 100 or the lowest ISO that goes into your camera. That’s because the sensors are getting too heated and are getting a little bit too overexposed and you will see some noise pop-up more especially in the shadow areas of your scene. Instead of shooting long exposures like that, one thing you can do is shoot a bunch of shorter exposures and try to combine the photos in Photoshop or you can use a popular feature that’s in a lot of cameras and that’s the in-camera noise reduction. If you use in-camera noise reduction, you will need to be on your scene and not moving the camera for a very long time. So, let’s say you’re doing a scene for two minutes and you have in-camera noise reduction enabled; most cameras handle that by taking the two minute exposure and then taking another two minute exposure showing where the dark pixels will be and so it’s like taking a blank photo and in the camera it’s kind of trying to remove those overexposed, overheated pixels to get rid of that noise. As you can imagine, it will take a very long time especially if you are taking 5 minutes of exposure because that will mean staying on the scene for 10 minutes total time just for one shot. It’s a good feature to use if you are doing small exposures such as 30 seconds so use that to reduce as much noise possible. However, it is not probably the best technique and I would rather do post-production noise reduction than use the in-camera noise reduction but it can be useful sometimes.
Post-production noise reduction
Now that we’ve discussed the two things you can do with In-camera, let’s look at the post-production things you can do in Lightroom or Photoshop. Obviously many people have seen photographers out there using the detail section specifically in Lightroom where there is a noise reduction section to remove as much noise as possible. There are several sliders which I will go through and tell you what they do include the following.
Luminance slider
This slider is used for reducing the noise that’s coming from over underexposed pixels and is mainly used for what I’d consider as long exposure. The underexposed pixels are kind of heated over and are more prevalent in long exposures.
Luminance detail
The luminance detail controls the luminance noise threshold. This is a very good slider to use for really noisy photos. The higher the values preserved the more the details that can produce a little bit noisier results.
Luminance contrast sliders
This is also used for really noisy photos as well. Higher values kind of keep the contrast that will produce a little bit noisy and blotchy scenes in your photos and you don’t want to mess with that contrast too much but a little bit can go a long way with that slider.
Color noise reduction slider
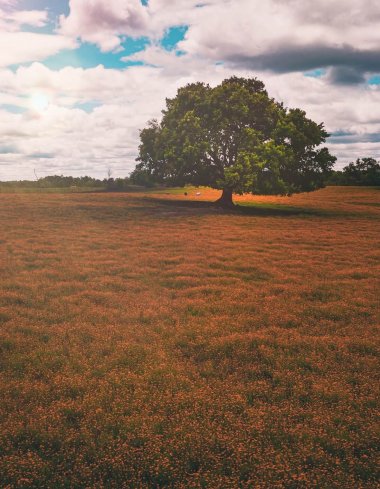
This slider is labeled color and is used to reduce color noise. You might see red, green and blue or color pixels in there and that will help reduce color noise and this is also more prevalent when it comes to underexposed, shadowy areas like when you are taking a photo of trees and you have silver wedged tree, you probably will see more color noise there than you would if you were looking for a general film grain. There’s a kind of grain aspect and there’s the color noise and this particular slider takes care of color noise.
There are a lot of external plugins that you can check out to help reduce noise. Most are built for Photoshop and Lightroom but I’ve noticed that when I use those, my photos come out a lot more blotchy, hazy and I have to do a little bit of sharpening and clarity work such as dehaze to try and bring some of that back. It does, however, reduce the amount of noise greatly but it does make my overall image very fuzzy. When you are playing with these noise reduction sliders, just be a little bit gentle with them. A little bit of noise in your photos is not going to hurt at all. If you take a little time to look closely especially at night photos or if you zoom into around 50-75 percent, you will see noise in those photos and yet the photos have been published in magazines or sold out for printing. Noise is okay and the only time you should be concerned is when noise takes away colors, saturation, vibrancy and that’s when you are supposed to do some doctoring to your photos with the noise reduction sliders and other sliders to make a little bit better.
Overexposing your images is a great technique to bring back some of that again. Not to a point where you are losing the scene but just enough where you can pull back some of the scenes using the highlight slider in Lightroom or Photoshop. That will bring back some of those underexposed areas and also remove that noise. One other thing that’s a no-brainer tip is to make sure you are shooting in a raw format. All those sliders and techniques I talked about might probably not do you too much good if you are playing with jpeg in Photoshop and Lightroom. Make sure you are shooting a raw format depending on the camera you have because you’ll need enough information to play with. As I was talking about overexposing the scene and trying to bring it back using the highlight slider, you will not be able to do that as much as you would with raw files if you’re using jpeg. If shooting in jpeg, you will be limited and won’t be able to do all that you would want to do.
As such, shoot raw and learn to post-process your images in Photoshop or Lightroom and if you still want to have a jpeg for the sake of catalogue or something of the sort, you can do convert raw into jpeg but definitely have the raw file especially if you are going to a noisy situation and are sure you want to be able to remove as much noise as possible.


 Facebook
 Google +