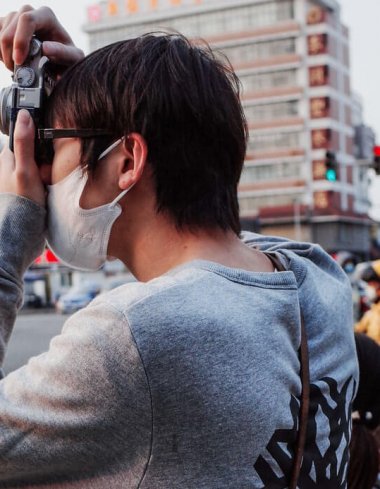
This particular post will be all about DSLR videos. There are lots of DSLR and mirrorless videos in the market and these give you the ability to shoot really high-quality videos and as such you can have nice photo taking device to take with you as well as a video recording device thus making it very handy if you want to go out at take some photos and would like to grab a few videos as well. I will go over a couple of video tips for you to try and help your videos look a little bit better. Also, you might want to check out our guide on how to shoot quality videos with DSLR camera.
Setting manual exposure for the camera
This is one thing that many people do not understand when shooting videos. In most of the cameras, you will find both auto and manual settings and so when you are using your DSLR video, you can let your camera go ahead just like the green box or auto mode on your camera when you are taking a photo, you can have the camera do basically the same thing with the videos. It will automatically choose the shutter speed, the aperture, the ISO and everything together to get you a nice looking neutral video. But a lot of people don’t know that you can set this into a more manual setting so you can control everything. When you control everything, you also control the frame rate of the camera. So, basically what you are doing is changing how fast your camera captures an image per second. What I’m saying is that when you switch over video, you basically will be capturing a series of images over a matter of a second and how fast or slow it depends on how your image or video looks.
There are several standard frame rates. Around 24 fps to 30 fps is kind of the standard when it comes to cinematic movies. It’s kind of a slower frame rate and although it’s not a bad frame rate, it’s the kind of frame rate used in movies nowadays. You’ll see a lot of cameras out there or even some cell phones that go higher than that. Basically, when you have a frame rate that’s faster than 24 to 30 fps, you will have the ability to record a slow mode and as such, if you have something that’s moving so fast, you can slow it a little bit and that will be to around 60 fps, 120 fps or even 240 fps and that’s extremely slow mode but around 60 frames per second is kind of the center frame rate for getting really nice slow more looking videos that kind of fits in with 24 and 30 fps. What I mean by that is let’s say you are recording a movie at 30 fps per second and you decide that you want to do a really slow motion of somebody walking just to make it a little bit more dramatic, you can change your settings to capture 60 fps and you’ll capture the scene at 60 fps. It’s pretty the same thing on the device but once you start editing you can at least slow that down to around 30 fps meaning that your movie is going to be half the speed and is going to look really slow mode but the entire project is still going to be 30 fps. This is a lot of numbers but it’ll still come out really nice.
What I mean is that you will have to capture frames per second and so the more frames per second you set your camera to capture between 24 and 60 frames per second, you will need more space on your camera obviously and also when you choose the setting in your camera, you actually have to adjust your shutter speed when you are changing the exposure yourself instead of having the camera do it. For example, if you are recording your video at 24 fps, you have to set your shutter speed at 1/50th of a second and basically, it doubles whatever your frames per second is. If you are shooting 30 fps, you need to change your shutter speed to 1/60th and if you are shooting 60 fps you need to set your shutter speed to 1/25th of a second. If you are shooting 60 fps you need to make sure you have enough light and to accommodate that, make sure your aperture is set at a lower number, a wider aperture and make sure your ISO is up a little bit so you can get more light in there to capture a well-lit scene using those fps numbers.
It’s not just about fps numbers but also about ISO. A lot of people think that ISO is bad when you start raising it up a little bit to 1600 or 3200 because you are inducing a lot of noise into your photo but when it comes to videos, noise is not as bad as you might think compared to photos. As many people do when recording standard videos, you can avoid messing with the ISO but instead set it to auto and let the camera choose the ISO that the scene needs and only worry about the frames per second which should be set at the beginning and only concentrate on the aperture to determine how much of the scene needs to be in focus. If you want to highlight the subject just make sure you have a wider aperture and if you have pretty much of the scene in focus make sure you have a smaller number of aperture. You don’t need to let the higher number of ISO scare you away from getting a good scene. Obviously, if you can get more light into your camera you’ll still have a good image but it’s not going to be as noticeable as it would if you were getting a still image.
Focusing
When videos started to be introduced, a lot of cameras didn’t have the ability to autofocus your images. So, if you were to follow a person or have somebody talking in the camera, you had to manually focus on that person and it couldn’t continually focus. This means that if the person had to move back and forth, the scene wouldn’t track their face to keep them in focus. Nowadays it has become common in the DSRLs we have as they come with active autofocus and it will continually focus on a moving subject but that brings a debate on whether you should continue using autofocus or you should do manual focus.
I am of the mindset that you should continually do a manual focus as it will get a little bit better working with the camera and get you to focus on what exactly you want. There are a lot of people however who want to still use autofocus but those are probably conservative blogging type who have a camera pointed at them and don’t want to worry about focusing but let the camera focus in. One thing that does, however, is that if you’re not using an external microphone, you probably will hear the camera start focusing and the ratcheting of the gear and that noise can really disrupt your film and this is what I will handle in the next tip as far as using an external mic is concerned. However, you need to worry about whether you want to use a manual or autofocus but I truly believe that using a manual focus is a better way to go but if you’re in a pinch you can probably always switch it to autofocus and you’ll be fine most of the time.
But if you could work in trying to track a subject using manual focus while you are recording video you’ll just get more and more familiar with your camera.
Sound
Sound is probably one of the most important things when it comes to having the best video possible. A lot of people think that they should spend a lot of time editing and be getting the pictures to look extremely right but if you’d try to record a subject but if you will have to record a subject in an interview or any other forum and you are using the on-camera microphone, you will not be picking the best sound possible even if you have a really quiet room and everything is perfect there, you’re not going to have the best possible sound. You really need to use an external source for your audio.
There are a couple of audio options for this. You can get a directional or a shotgun microphone that will plug directly into your camera and you can put that on a harsh on your camera
and point it at your subject and that will allow you to capture audio coming from one point directly from where the microphone is pointing. That will do a better job and there are a lot of companies that do a better job including Rode which is the most popular company that makes microphones like those. You can also use wireless systems as well but that gets a little bit more complicated. If you want something easy, picking up some shotgun microphone to use like a harsh mic that plugs into it, is probably the easiest way to do it.
Picture style and white balance
These two are very important especially when you want to edit your final film recording. When it comes to picture style, there are numerous options you can use just as you would when taking a photo. You can choose a landscape version, a black & white monochrome version or something like that. I really suggest you choose some sort of neutral or flat picture style. The reason for this is that you want to have as much room as possible when you start editing your film. Whether it’s doing it on your smartphone using a free iPhone or Android editing app or doing it on a desktop using a personal editor, you’re going to have more flexibility and control with the exposure, the saturation, the colors and everything else if you have a flat picture style.
If you have a picture style that has a lot of contrast in it or a really saturated with colors out of the camera, you can bring some of it back but you probably won’t be able to bring back as much as you would think. Editing videos is a little bit trickier when it comes to bringing out contrast, colors and everything since you are not editing in raw file as you would in a photo but you are editing a movie file and there is a little less data to play with. So, if you have a neutral or flat picture style, it gives you most able to drag out as much exposure as you can.
White balance is yet another tricky part and a lot of people think they can just sample something from the film and movie and automatically correct the colors and although you can do that in some cases, in most cases you’ll be out of lack especially if you are recording indoors where you have bad lighting and want to get rid of the color cast. It’s going to be very hard to get rid of that if you don’t take proper precaution before you start recording. You can easily do that by changing the white balance depending on the situation. Don’t always rely on auto white balance when it comes to filming your video on DSLRs because it’ll probably get it wrong than it gets it right.
Don’t automatically rely on the auto balance but if you are in a daylight situation, switch it to a daylight version and that will get you into kind of a ballpark and if you are indoors, switch it to fluorescent or tungsten depending on what kind of light you are around. Just be more cognizant of the white balance and don’t think of it as a photographer where you edit a photo by clicking one button and it’s almost corrected. One thing you can do is get a white balance or grey card to carry with you if you really want to get some accurate colors but if you don’t want to spend money on something like that, even though they are inexpensive, just finding some sort of white paper is going to get you started in the right direction. You can actually sample that piece of white paper in your movie or film editor and sample the white color and it’s going to turn into pure white and that will get you into a ballpark. Just simple things like that before you start recording your film.
Think like a photographer
This is not a technical version of recording your videos in DSRL or mirrorless camera but think like a photographer when doing these types of things. It kind of helps you to make it more fun and also help you stand out a little bit more. If you this kind of a photographer who likes getting crazy angles such as a low angle, a high angle or vantage point, simply because you are recording a video doesn’t mean that you have to be straight and can’t explore that as well. Get low or high just as you would when shooting a photograph and all other cool things such as depth of field. Thinking like a photographer when doing your video and it will help you stand out and make your videos pop off the screen.
Those are just a few tips some of which are technical and others theoretical but to help you get the best mirrorless and DSRL camera possible when starting to learn how to record videos.


 Facebook
 Google +