This post will take you back to the basics and this is to help answer many questions from people who wish to understand where to start their photography, how to learn the basics and the best way to learn those basics. Our site has a guide known as the complete guide for beginner photography and it’s a great guide to learn about gear, shooting different situations and lighting among many other essential basics you should learn as a beginner. The guide is a really great place to learn especially if you are an extreme beginner in photography. But this part of the blog will go over the different modes that are on mode dials. That’s because a lot of people think that if they turn their mode dial to automatic mode, the camera can pretty much take care of everything for them. But I want to show you that there are many different modes on the dial but also the advanced modes are actually what you should be working towards getting into.
Basically, this post will be looking at the beginner modes that are in the mode dial, explain what they do and then talk about the more advanced modes on the dial so you know what to work up to and how to figure out what signs to put in there and so on. Let’s begin with the basic dial modes dial settings:
Automatic mode
This is the first mode which is common to many people. It is also called “Green box mode” and basically what it does when you set your camera mode to auto is that the camera does everything for you. This means that the camera will do the thinking for you and you don’t have to think about any settings or anything like that. It might sound great that all you need is to point your camera in a certain direction but the automatic mode can get it wrong a lot of the time. What I mean by that is that the mode is trying to judge the light which is what you wanted to kind of give the right exposure for it but it also could mess up your photos. Let’s say you’re pointing your camera at the sunset or something like that and you have this nice foreground, sometimes you might set your camera to the automatic mode and it also changes your focus point and then start focusing on other parts of the camera or in the scene that you don’t want to focus on. So, instead of focusing on this nice foreground object it kind of focus midway through the frame and your focus is off.
Another example will be if you are trying to do a long exposure, you won’t be able to do that with the automatic mode because it’ll try to get the best exposure it can and so if you are trying to do, for example, a long exposure mode of getting nice photos during a low-light situation like at night, the camera will think it’s really dark and pop the flash up and that immediately ruins your photo. It could also think that it needs to increase the ISO and thus you’re not only going to get a high ISO but also have a flash with it which could make it look like a really muddy photo. Obviously, the automatic mode is good for events like family get-together since you only want to just put your camera in the mode and not worry about any settings. But if you are going to be let’s say a wedding photographer, you obviously don’t want to have your camera in the automatic mode coz you would want to make the decisions for yourself.
This does not mean that automatic mode does not have its purpose in the camera mode dial but definitely, you want to get out of that mode and the beginners’ guide I mentioned at the beginning of this post will help you know how you can do that.
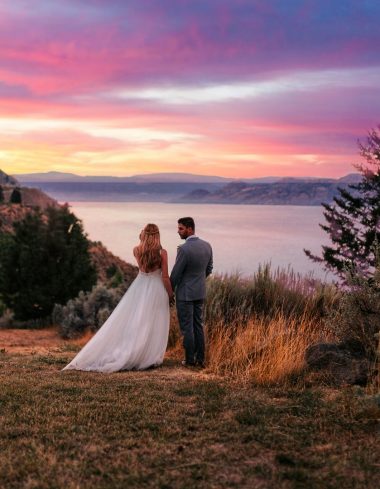
Portrait mode
This mode is signified as a little person icon on the mode dial. The mode has one major function and that is to set a very wide aperture to kind of focus your camera on the subject of the photo. Let’s say you’re taking a picture of a person obviously, and you focus on that person. The mode will select a very wide open aperture meaning the f-sum number if going to be very low, maybe around 4 or 5 and what it’ll do is try to blow up the background and make it completely out of focus but your model will be very sharp and in focus and then it’ll also pick the very best shutter speed to go with the wide aperture. As such, its purpose is to focus on the subject, blow out the background and not try to get any detail whatsoever throughout the whole photo. That can actually be accomplished by using one of the more professional modes in your dial and we will talk about that in a second. Portrait mode is a very popular mode especially among those who just got their camera and just want to go out and take pictures of their friends or something like that.
Macro mode
Basicall
y, this mode has one major function and that’s to allow you focus as much as possible on small objects. Just because it’s named “Macro mode” does not mean it’ll be a macro shot because macro shoots can only be done using a macro lens. The macro mode is kind of a fake macro in a way and you can get too many macro shoots using this mode because you really need a lens to go with it. All lenses have a minimum focusing distance and what that means is that if you take your lens and to try to move it in as close as you can to a subject, at some point it’ll not be able to focus because it’ll be too close to the object and that might mean you have to back off your camera a little bit. That’s what macro mode is trying to do but you can play with it and zoom in on something on your desk or something like that and see how far you can get and still have the camera focus on that specific subject. So, what it’s trying to do is get you to focus closely on certain things but it’ll not go to do the best job possible because you really need that macro lens to go with it.
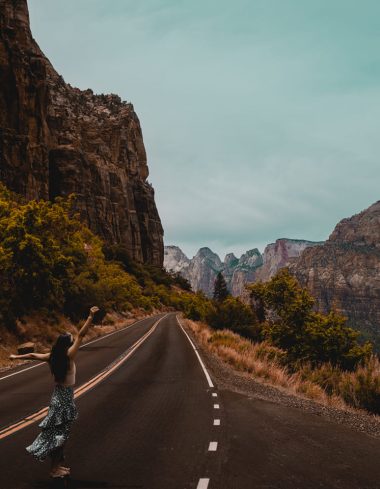
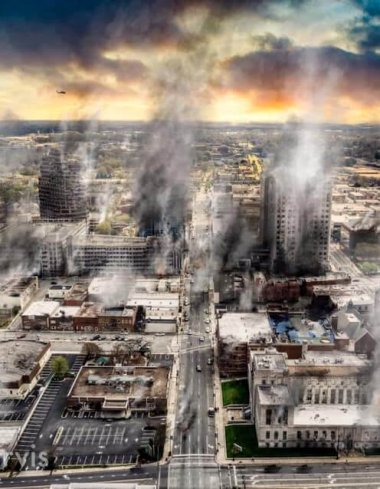
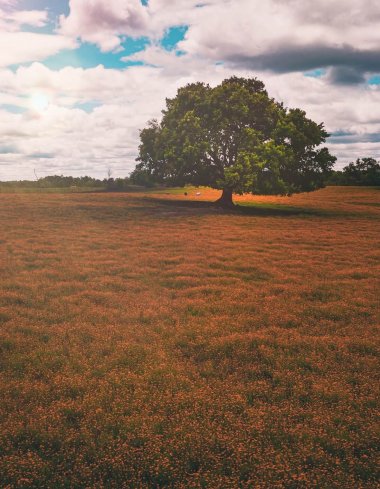
Landscape mode
This mode is sometimes referred to as a scenic mode. This mode is kind of the very opposite of the portrait mode. Usually in landscape photos, you want to have a very great depth of field, meaning from back to the front, your photo is going to be in complete focus and is going to be sharp all the way to the front. This is what you try to accomplish in landscape photos and what your camera will do is try and get the smallest aperture that it can, meaning a very large number, around f18, f22 or something around that range. The landscape mode will try to set your camera to that and try to get the best shutter speed and ISO to go along with that. One thing to kind of note here is that if you use your camera in landscape/scenic mode and you try to go out and get a nice landscape picture, if it’s not a super bright sunny day, you might see that your camera shutter speed will go down very low to a 60th or 80th of a second and you might see that depending on what you’re shooting, the scene you’re shooting might look a bit blurry and that’s because of the camera shake. So, obviously if you want to shoot landscape photos you might want to put it on a tripod as it just could cure that but that’s something to watch out for. A lot of different camera manufacturers actually handle landscape mode a little bit differently and if you’re shooting jpegs, some camera manufacturers depending on the camera model you have, will take also the jpeg generated from the landscape or scenic mode and kind of increase the blues and the greens mainly because most of the landscapes out there have a lot of blue and green in line with the color of the grass/vegetation and the sky.
It increases the saturation of these colors and that’s something you can see a difference in if you only shoot jpegs and not raw. If you shoot raw you’re going to see a lot of difference when you get the files in the computer because you have the raw file with very little, if at all, processing done to the raw image.
Sports/action mode
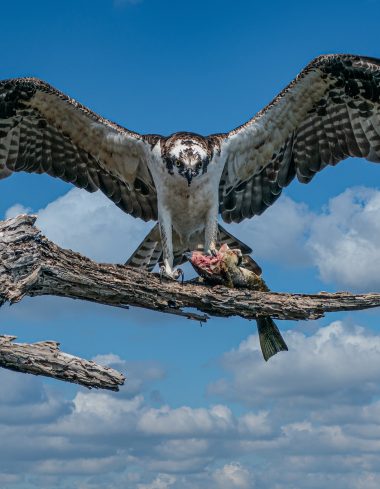
This is a mode that lets the shutter speed to be as fast as it could while still getting a very good exposure. If you set the sports mode, you might find that your ISO is higher than normal and also your aperture might be wider than normal, meaning a small number and your shutter speed will be incredibly fast as it tries to get as higher as it can, probably around five-hundredth of a second or even a thousandth of a second and up. And what the mode is trying to do is freeze the action. Typically when you have a fast-moving action, a lot of people want to freeze that photo and have maybe a runner that’s not even touching the ground because their foot is frozen in the air or something of the sort. What they’re trying to do is freeze the action and this is where if you know what you are doing when it comes to the more pro modes, you’ll be able to freeze the action and blow it a little bit and make it look like the person is running really fast and other stuff like that.
There are so many things you can do but the sports mode is a really nice mode especially if you want to be involved in fast-paced actions. Maybe you are attending a football game and want to shoot action of your kid running around the field and want to take some quick snapshots; you can set your camera in sports and action mode and get a way to freeze the motion of the players.
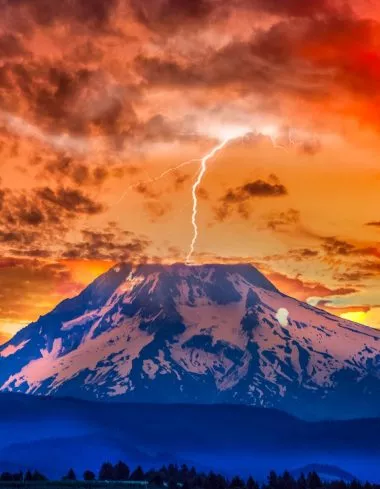
Some cameras have a mode that’s called ‘night portrait mode”. This is kind of a cool little mode of blending between the natural lighting in a scene and the flash. Night portrait mode takes a photo with a little bit longer exposure. So you might see the exposure being a little bit longer, maybe around twentieth or thirtieth of a second or somewhere around that range. However, right before the photo ends, it’s going to trigger the flash and this flash will light up the subject. If you’re taking a portrait of somebody, the flash will light up the portrait and act almost like a full flash and that’ll give you a really nice scene in the background using the light in there and you’ll get really nice colors in the background especially because this is a night scene but also you get a flash pop which will light up the subject. This is what is typically called a rear curtain flash or second curtain flash where fire flash right before the shutter speed ends and the actual photo is taken so that it can really light the subject. It also helps with freezing the subject because typically because with slower shutter speed, you might have a little bit of movement but the flash will freeze the persons. You can look for this mode in your camera and play around with it as it is a fun mode to use.
These are basically those most common modes that many people are used to seeing. However, there are other more professional modes found in different camera models. These are sometimes called semi-manual modes or semi-pro modes. They include: –
Aperture priority mode
This mode allows you to set your aperture to the one you want. For example, if you are taking a portrait of somebody, you will definitely want a very wide open aperture, meaning a smaller number because you want the background blown out. You can, therefore, set your aperture to around f4 and this will set the shutter speed to kind of get a neutral exposure. You can also set your ISO to the one that you want and be depending on your scene you can set it to around 100 for the lowest and you’ll have a very crystal image and it will set the shutter speed that matches to get a perfect balance neutral exposure based on the light meter. All this is based on the light meter which is more like a graph going from -ve 3 typically to +ve 3 with a zero in the middle. The light meter measures the amount of light coming into the lens and all the measurements the camera is doing are based on what that light meter is seeing and that’s what is meant by a perfect neutral exposure. It’s going to set your neutral exposure to zero, right in the middle of +3 and -3 graph. The aperture priority mode lets you set the aperture you want and the camera will figure out all the other settings.
Shutter priority mode
This is a mode that’ll kind of do almost the same thing as the aperture priority mode except that it’ll do so with the shutter speed. This is a great mode to use if you know you’d like to capture a fast moving object and you know you’d want to have a pretty high shutter speed. What it’ll do is that you set your shutter speed to whatever level you want, let’s say one-thousandth of a second and then the camera will sort out all the rest of the details including the aperture and ISO for you so that you have a perfectly balanced exposure. If you don’t have your ISO set on auto, you need to make sure you have enough light coming into your scene so that your camera can handle both the ISO and the aperture. This again is a great mode for fast Moving subjects especially if you know need your ISO to be at a certain speed to capture what you need.
P mode or Program mode
You can think of this mode as a professional auto mode. What this means is that the auto mode allows you to set the aperture and the shutter speed for whatever scene you are using but also allow you to control the ISO as well. As such, you will be playing with a lot of different things and the camera will work out the aperture, shutter speed and change everything. If you change one thing, it’ll change the other. It’s kind of like a good way to test and see which settings work well for your camera. If you’ve tried to shoot in manual mode before and maybe you came up with a black or pure white photo, it means you have either less light coming into your camera or too much light. The program mode is a really good mode to test and if you’re not familiar with the settings, to play around with the settings and see what the camera will set. So, if you change your ISO from 100 to 200, maybe you’ll see your aperture number shrink or increase a bit. The same thing with shutter speed, you’ll see it change. The Program mode is kind of a fun mode to play around with and see what kind of settings your camera will come up with for you. You can’t do this with the automatic mode even though this is what it is for and you cannot see most of the time all the settings that it’s giving.
The main mode
This is the mode that almost every photographer wants to shoot in or learn how to shoot in all the time. This is the “M” mode in your mode dial and when using this mode, you have to control everything and your camera will basically do nothing for you. If you’re shooting in a scene where maybe you’re pointing your camera towards a sunset, you have to change your settings a little bit to match that and get a really nice exposure and if you maybe turn your camera like 30 degrees and the sun is not as bright, you need to change your settings again because you need to adjust to that situation of not having too much light coming in as scene it was in the first. This a really great mode if you want to learn the settings to think on your feet because you have to remember that basically every time you turn your camera to a certain scenario, it is always good to check your light meter and see how the light coming in has changed and set your settings accordingly. You have to pay more attention to what your settings are. A lot of photographers after doing a log of running and gunning especially in weddings have like 3 cameras strapped to the body and a lot of time they don’t use the manual mode. That’s too much to think about when you think about the scenes they have to capture of the couple and everybody having fun in addition to everything. Most of the time they’ll set their cameras to kind of an aperture priority mode to select the aperture they know they need to grab and then let the camera do everything else for them. Typically, the only kind of drawback to doing that is that you can’t control too much stuff and so the camera can still get it wrong but most of the time you can collect that in post-processing.
Those are the kind of generic modes you might find in most mode dials and it’s very cool to see the changes each one of them does especially if you are a beginner because let’s say you pop your camera in that portrait mode to see how different your photo will be if you use the mode and then popped it to landscape mode. If you want to learn more on how to do all this stuff, you can check the complete guide to beginners photography which is a really great course that runs for 8 hours and you also get a bunch of downloads and all 30 videos and great scenarios. If you are brand new to photography and would like to capture great photos, this guide will be a great place for you to get started.


 Facebook
 Google +