Subscribe to the Podcast for the latest Episodes | iTunes | Stitcher | Google Play | RSS |
This post will deal with different photography questions. If you follow us on the Sleeklens members’ group page (This is a private group for those who have purchased our products in the past) you can post your photos, questions and even request video guides on how to edit your photos using different presets and brushes within our products. For this section, we asked the group members whether they have any photography questions and a lot of people emailed theirs and I will go ahead and cover 5 of them to avoid making this post too long. More questions are however streaming in even as I do this post. Below are some of the questions and their answers:
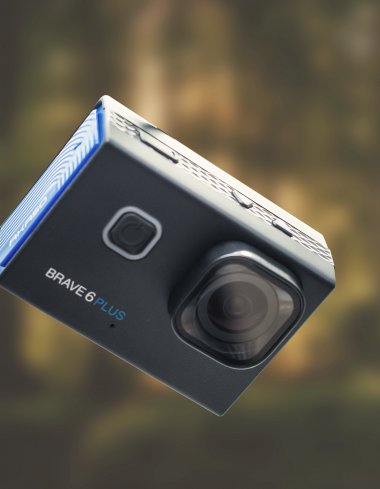
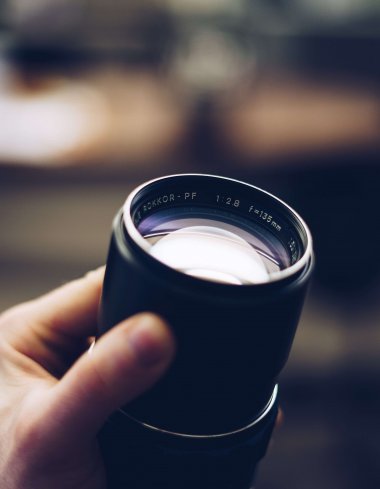
Q1 by Kent Harrison – How can I achieve a Bokeh effect in my background photos using a regular lens?
I believe what Kent means by this question is on how to get a blurry background and have the subject stand out as much as possible using a lens that is not as an f-2.8 or f-1.8 or something like that. You actually still can achieve this effect although it won’t be as dramatic as it would if you were to buy an f-2.8 or 1.8, a very large aperture opening.
To achieve a bokeh effect, you will have to zoom in as much as possible. You can back up from your subject to get a better composition but zoom in as much as possible and also lower your aperture as lower as it can go. If you have a blur aperture lens such an f-4 or f-3.5, go down as much as you can and then if you back up from the subject, zoom in and use the lower aperture you still can get a bokeh effect in your background. However, it won’t be as dramatic as it would be in a very nice portrait lens that has a very wide open aperture but it still will get that kind of an effect and you can also play around with it a little bit in post editing to try and get that effect a little bit more but that’s basically how you do it. You just have to zoom in but you probably won’t be able to get that effect if you still using an 18mm or so. The key is to zoom in as much as possible.
Q2 by Laura W. Smith – I just got my very first drone and was wondering if there are any apps to show me where I can legally fly?
For those who don’t know or are not familiar with drones, there are a lot of different laws and these vary from country to country. In this post, I can only talk about the laws in the US because I’m not familiar with any other country’s laws. However, there are a few apps out there which can help you so if you were to go to a location you can open the app and it’ll tell you whether it’s safe to fly in a particular location. I used to use one called Hover and this would show a map and your location on the map as well as a circle that outlines that inside it you can’t fly. That’s either near an airport or restricted area such a military zone and the like.
There is also another app that I’ve started using and I find it way more helpful than Hover. Hover was basically for people who are considered as recreational fliers, people who are not doing it for money or anything like that. But the AirMap is available for Android, iOS and is also a web app and it will show you two different classifications. So, if you are a recreational flier, you can toggle on your recreational flier and it will basically show you where you can and can’t fly in a certain zone just like the Hover app. However, if you are a certified flier, you can actually toggle that one saying you are a legally, contracted flier doing it for money and have passed the required tests to be a commercial flier. If you toggle that on, you can see where you can fly as a commercial flier. This app is very helpful because you do have a lot of different places that certain groups of people can fly. Typically if you are flying for recreational purposes, you cannot fly in as many places as you would be able to if you were a commercial pilot that has taken all the regulations. The AirMap app is a really great app to use and it gives you a couple of different things and you can see if there is a caution zone which means you are probably near a school and other areas. This does not mean you cannot fly there but you need to be cautious of where you are flying because areas such as schools depending with your flying time will be a populated area and would be cautious or stay away as much as possible and stuff like that.
Q3 from Michael Ticks – I have a Canon TFI that I bought used as a backup video camera. I noticed that it usually quits recording after 9 to 10 minutes, do you know why?
This is kind of a typical thing when it comes to most crop sensor cameras. Although not all of them, I have a Canon T3I that I use to record video and it basically does the same time. From what I’ve understood, your camera sensor becomes overheated and will shut down around the 9th to 10th minute of your recording and will shut down between there. Sometimes it’ll go a little bit longer or shorter but pretty much they all shut off automatically when recording between 9 and 10 minutes. It really doesn’t matter whether you have a very high-speed card or a nice class-10 card that’s really fast and has a lot of storage that you’re recording to but it’s an effect in the camera that you can’t really get rid of not unless you have an Atomos which is a separate device that you might have to buy to record. There is a walk around for this and for those of you who decide to do this walk-around, it is good to note that you will be putting your camera at risk but it worked on mine very well. For those who want to install a different firmware other than the canon firmware, it will give you an option to toggle off and on whether you want to automatically start app recording after it quits recording. Basically what it’ll do is that once your camera detects that it has stopped recording, it’ll automatically start recording again and there might be around 3 or 4 seconds in between the two clips but it will continue to record as long as the card doesn’t get full.
For those of you who want to use this in your camera and give a shot, it’s a program or free firmware basically an add-on to certain Canon EOS cameras called Magic Lantern. Again it is good to point out that choosing to do this is at your own risk. You might have heard of Magic Lantern but if you haven’t you can go to https://www.magiclantern.fm/ and this will take you to the site and you can download it for free and it’ll also give you instructions on how to use it to your specific camera. I’ve done it with mine and if I were to start recording, the process would have stopped after a few minutes but this would have automatically picked it up and only have a gap of 3 or 4 seconds but still keep recording as long as my card is not full. There is no real quick way around that but if you’re okay with doing that to your camera, that’s definitely the way to do that without having to buy a separate device to put that effect.
Q-4 by Aggie Cornsworth – I have found that my photos seem to be blurry even if I’m using a small aperture, how do I collect this?
Basically, if you’re saying a small aperture I’m assuming you’re talking around f-18, f-20 or f-22 because when people talk about a small aperture they can mean many different things. It kind of depends on your camera and whether your shutter speed is low. First of all, if your shutter speed is too low for the amount of light coming in obviously your camera will get blurry photos and that’s given no matter what kind of camera you have. If you’re trying to handhold a shoot and your shutter speed is too low (let’s say one-twentieth of a second) and you have an f-22 which is carrying a lot of light, you will have to hold your hands extremely still to get that photo very sharp. If you have all that done correctly, most likely depending on what kind of a camera that you have, maybe you have full-frame sensor, (most full frame sensors even if you go up to f-22 just can’t get the right amount of sharpness all the way from foreground to the background) you might have heard people say that they’re doing forecast stacking which basically means that they are taking different points of an image and combining them in Photoshop to get a typically balanced, focused, sharp image.
One example is if you’re photographing a cave and you have tried to frame a shoot with a cave around it but in the very background there is a lighthouse way up there. If you were to focus on the cave to get its nice texture and details, you probably would get a nice image of the cave but then the background will be kind of blurry whereas if you were to focus on the lighthouse, you’ll probably get a not so sharp cave. In such situations, people would focus on the cave in one photo and then focus on the lighthouse without moving the camera, maybe it’s on a tripod, and take a picture of the lighthouse and balance the exposure depending on what the situation is and then use Photoshop to take away blurry parts and then combine the two photos together. That’s one way of doing focus stacking but there’s a whole ton of ways to do focus stacking but this is one simple example to do it. As such, it really just depends on the kind of camera you’re using and the type of blurriness and stuff like that but that’s just kind of a general example.
Q-5 by Neo S :- What are the best settings to photograph the moon?
First of all, there is a myth when it comes to photographing the moon. People think that when you want to photograph the moon, one must push up the ISO, make sure your aperture is as low as it can go up to around f-3.5/4 and shutter speed should be very long all because it’s night and dark outside. But that is kind of the opposite when photographing the moon. When you want to photograph the moon, let’s say it’s the full moon, you zoom in to the moon with your long telephoto lens, you should put your camera in complete auto mode and what it will do is detect that it’s a very bright source and depending on what kind of a metering mode, you probably take a photo but number one it’s going to be noisy and in the middle of your photo where the moon is supposed to be will be a big white circle. The reason is that the moon is extremely bright and what you will need is to go the opposite of what many people think when photographing the moon. You probably need a lower ISO (you don’t need to go all the way to 1600 but can stick to 200 or 400 thereabout) and then a very decent aperture (maybe f-8) and then do a shutter speed of one-fiftieth of a second or something around that.
One thing you can do to make sure you get a nice, perfect image of the moon is to change your metering mode to a spot metering mode. This will meter the very center focus point (the very center of your camera when you look into the viewfinder). So, if you go to aperture priority and set your camera to f-8, your ISO to 400 (for this example), point to the moon and let it meter in sport metering off that one point you’re looking at the moon, you probably will see that your shutter speed is way higher than you thought it’s going to be.
Just because it’s night outside does not mean you have to compensate like you would for taking a traditional night photo. Basically just check your metering mode, change it to spot metering and point to the moon to see what settings your camera gives you from then on.
Thank you to those who submitted their questions. Those are basically our photography Q & A’s for now and if you would want to hear your questions on our podcast, you can submit them to [email protected] and we’ll respond to them.


 Facebook
 Google +