Hey everyone! Welcome to the Sleeklens Podcast. Welcome back to the show, this week is going to be fun because this episode is going to be for all of those drone pilots out there. Whether you are having fun for a while, doing a lot of commercial work, or if you just got a drone and you started playing with it, I wanna cover some basic drone video tips that will really do wonders for making better video with your drone.
Now, as I start going with some of these tips you are going to realize that none of this is crazy – you know, hidden secrets of Hollywood – about getting video. These are basic movements when it comes to drones, or basic tips when it comes to your drone. And you’re going to find out that doing basic stuff with your drone – whether you have a small DJI Mavic Air or something like that, or the big boy, the Inspire – you’re going to find that a lot of these tips, these different kind of manoeuvres or settings that you can put on your drone are very simple but they can make some of the best movements, some of the best quality videos when it comes to drones. So, let’s get over the first tip!
Table of Contents
The first one is very, very simple but it’s something that a lot of people don’t do because it’s not fun. The first tip is ‘Going Slow’. If you’re getting very cool video of out of your drone and you feel like you wanna fly faster just because you can – you know, photography in the air, you’re not going to hit anything – and it’s just fun to fly fast; which is great, if you are not recording any video that’s totally fun, you can do that.
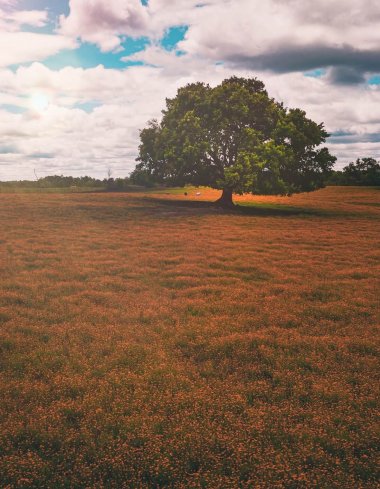
If you want to get really quality video, going slow is your friend. So, let’s say you’re flying over a lake or something like that and you wanna go slow, you really wanna get a shot of this lake. Going slow over that lake is going to give you more control, obviously – that’s a big factor – but going slow is going to help with that cinematic movement. Now, a lot of people have seen the movements of really fast-moving objects over water, to really kinda represent the speed of something. Well, technically you can still do this while still flying slow, that’s just speeding off the clip in post-production. That’s something you shouldn’t worry about; if you want to speed a clip that you took in post – maybe flying half-speed or something like that – you need to make sure there are no other moving objects around you. So, there’s people walking nearby – maybe at the side of the lake and there’s people walking up and down, or cars passing or similar – obviously those are going to look sped up too, and you will be able to tell it’s sped up.
Um… but actually going slow, tweaking up your clip in post is the safer route for you until you get more familiar with your drone, ‘cause one of my favorite shots, especially if you’re visiting a lake or an ocean, it’s getting fairly low to the water – around 10-15 feet or so – and then flying pretty fast above the water. That’s a really cool movement to show speed, to show action, stuff like that, but I’d rather speed it up in post than worrying my drone may be dipping down or smashing into the water – nobody wants that to happen, obviously!
Another benefit of actually going slow is that you get the best of both worlds a little bit. When you’re moving slow you get slow, nice movements. You can actually have more leeway when slowing down your clips, and getting more cinematic slow-motion shots rather than trying to fill something in a really fast speed and then try to slow it down. You can only go down so much depending on your shutter speed – which we will talk about in one of the later tips – but you’re going to get that really cool, nice, smooth movement, and that’s also going to help with maybe smoothing a bit the bouncing that may happen when drones swing action, or also when doing an orbit – which I’ll talk about here in a little bit – you see the drone bouncing up and down or swing a little bit, that slowing down of the clips will help to get that movement out a little bit. Going slow is probably one of my most used things when flying my drone. Go slow, don’t do those jerky movements when your drone is focusing on something and go someplace else – you’ll never see those movements in cinematic footages.
Doing basic movements can do wonders for your videos. Just because you can do certain movements, one of them is what I call the ‘Ice cream cone’, and that’s when you’re starting at either a high, very high angle – or very low angle – and you’re kinda circling an object while going up or down (depending from where you started). It’s a cool movement, but it’s very, very difficult to accomplish, especially if you’re the sole pilot, because you have to keep control of smacking into something… you’re supposed to have a visual observer there… the speed of the drone, and also trying to make sure that it actually looks good.
So, there’s a lot of cool movements that you can do but doing basic movements, basic like flyovers is great, flybys are great. Movements like an approach, where you kinda flying up to an object while the camera is moving up. Basic movements like that do wonders for your drone video.
This tip is actually a kind of basic movement, which is called Strafing. It means going sideways, either left or right. That’s a basic movement that I really don’t see a lot but when you actually incorporate it to video; if you’re editing a video for something like showcasing maybe a commercial property, or you’re showcasing a runner or something like that, going sideways it’s a really awesome movement.
Let’s use the runner example. Anybody can follow a runner when, you know, the drone is high up and behind the runner. Looking down at the scene is actually a cool shot, and you can do that, but an absolutely cool shot is when you follow the runner but going sideways. Looking at them and flying your drone sideways. It’s an absolutely killer movement and a perfect way to show not just the scene but the fast-moving pace, the action that’s going on. Really cool shot.
Say you’re doing Real Estate Photography, or Commercial Photography, and you want to showcase how long a property is. Maybe how long a building is. Doing that sideways movement is a really, really cool way of doing that. You can actually incorporate the camera, move the camera up or down. Maybe pointing it down and moving up as you’re going sideways.
Killer, killer moves, and it’s just a basic movement – you don’t need a lot of people there, you know, kinda judge where everything is going to be; you don’t need a separate camera operator. It’s a really cool movement. I don’t see it a lot, but when I see it is probably one of my favorite scenes.
So now that we’ve covered a little bit of the basic movements, let’s talk about one advanced movement that, again, these are my favorite movements to do, and this one is called Orbit
Now, a lot of people know that orbit is kinda going around a subject but technically it doesn’t have to go all the way around a certain scene to get the full aspect of the orbit.
Basically, an Orbit is flying your drone sideways, going straight sideways, but as you are going sideways you are turning your drone in kinda the opposite direction. So, you have to match your speed with both axis, and it’s difficult to do unless you practice a lot.
What you’re basically doing is pointing the sticks opposite to each other, so the left joystick is – may
be – pointing left and the right joystick is pointing right, and that will allow you to strife right. But if you do it in the opposite way and the joysticks are pointing to each other, you’re going left that way. Either way you’re accomplishing the same goal, but some people can actually do orbits in one direction better than the other. I can personally go left better than I go right.
So, it’s really a cool move; a way of highlighting the subject, highlighting a certain aspect of the scene, but then showcasing what’s around it – it’s a really great way of doing that. If you’re going to incorporate an orbit, if you’re going to practice an orbit and you have the right subject to do it, it’s a really, really killer move – a lot of people love it. Again, you don’t need to go all the way around a subject ‘cause it’s going to be a super long clip if you do that anyway. Maybe going around 25 percent, maybe going halfway around it is good, but definitely you don’t need to go all the way around though you can tell you’re getting that nice circular movement.
Really awesome movement, so definitely practice it if you want to accomplish that cool, cool job when you’re shooting a certain subject.
This is kind of an obvious thing, because, you know, you have a camera strapped to your drone so basically everything that works in a regular camera is the same thing when you’re doing drone photography. Avoid cloudless or super-bright days.
Cloudless days are going to be super difficult to reproduce great video – you can still get good video obviously – you’re going to have high, high, high amounts of contrast. And it’s really tough to get rid of all that contrast ‘cause the shadows are nearly almost gone. The highlights are super bright, and you’re going to get a lot of midtone area – which is good – but maybe you want to get a bit more of detail in some of the highlights or shadows and you can’t; the contrast is so high.
If you have a partly cloudy day – that’s what I personally like to shoot on because the clouds are going to help to break up that high dynamic range, and you get more control over your main subject that you’re photographing – or videographing. You also can see more of the cloud details as well, but essentially, you don’t have to worry about that whole dynamic range there… um… but I even personally like to shoot on cloudy days, because just like a regular landscape example, having a cloudy day will act like a giant softbox in there. So, you have even lighting all the way around.
Now, if you want to create a dramatic scene, you’ll want to add some contrast or something like that but for most photographers out there it grants even lighting for the scene. I just get sure to not to capture much of the sky because it may not seem a great day for filming, but for the subjects on the ground it’s great in what comes to lighting. Avoid cloudless and super-bright days.
Alright so my last major tip is Shutter Speed. Now again, just with every kind of camera out there – DSLR that shoots video, a lot of them do – you want to make sure you have the right shutter speed. So, a lot of people think the best time to shoot video – again – is super-bright days, and you really don’t want that to happen because when you go out, when you take your drone out there, what you’re going to do is, your drone is going to automatically apply an exposure setting. Your drone is going to automatically drop the ISO value to 100 because it’s super bright – assuming your drone goes down to ISO 100 obviously. And maybe your aperture is going to close down as much as it can, and your shutter speed will probably still be relatively high because it’s so bright outside.
Such conditions are great for taking photos, but for video you’re not going to get that nice cinematic-looking video because your shutter speed is too high. When it comes to getting really nice, smooth drone footage, having a lower shutter speed is actually more beneficial than having a high shutter speed when it comes to video. So, one way if you do this – this is obviously filmed on different days – if you can’t get the shutter speed down to 1/60s you may want to re-schedule, or you can get Neutral Density Filters, just like you see in a DSLR camera, ND filters will cut the amount of light that gets into the camera, and will allow you to get slower shutter speeds.
I like for my shutter speed to be, just like with every other camera out there, to be double of what my framerate is. So, in the drone if I set my framerate to 60fps to get really cool slow-motion effects then I want my shutter speed to be 1/120s. I want it to be double of whatever my framerate is. That will also allow you to get a little bit of motion blur in video, which is actually ideal for getting that cinematic looking video.
Owning a drone can be one of the best tools a photographer can use to progress and further their business. Even if you don’t have your own photography business and you just want to take better aerial photos and videos, it may be difficult to find the best information to do so. This is one of the reasons why we have created the Mastering Your Drone Beginners Video Course.
Throughout this course, we cover all of the aspects that a beginner drone pilot might need to know to make the most of there aerial video and photos. We will cover everything from popular accessories to make getting the best images and videos easier, safety tips, and useful drone pilot apps. We will also cover the settings to use for getting the best photos possible as well as take you on a real-world commercial drone shoot complete with a “how to” editing guide. Next, we will concentrate on getting the best cinematic video. We will cover the most popular basic and advanced cinematic drone movements as well as how to compile an entire video project together from start to finish. This course will not give you enough information to pass the US Part 107 sUAS exam. It is meant to give beginning drone pilots the skills to get better photos and video.

Please verify your software version before proceeding.
 I’ve verified my software version

 Facebook
 Google +