
Night photography has always been fascinating to me. It so amazing how everything changes just a little bit when the sun goes down and the street lights or neon lights come on. Night photography is almost like a whole new world. Having recently moved to a bit city, I’ve gradually grown to appreciate and practice it more over the past couple months. Practicing it here and there has motivated me to share a few night photography tips as it relates to gear, camera settings, and techniques.
Table of Contents
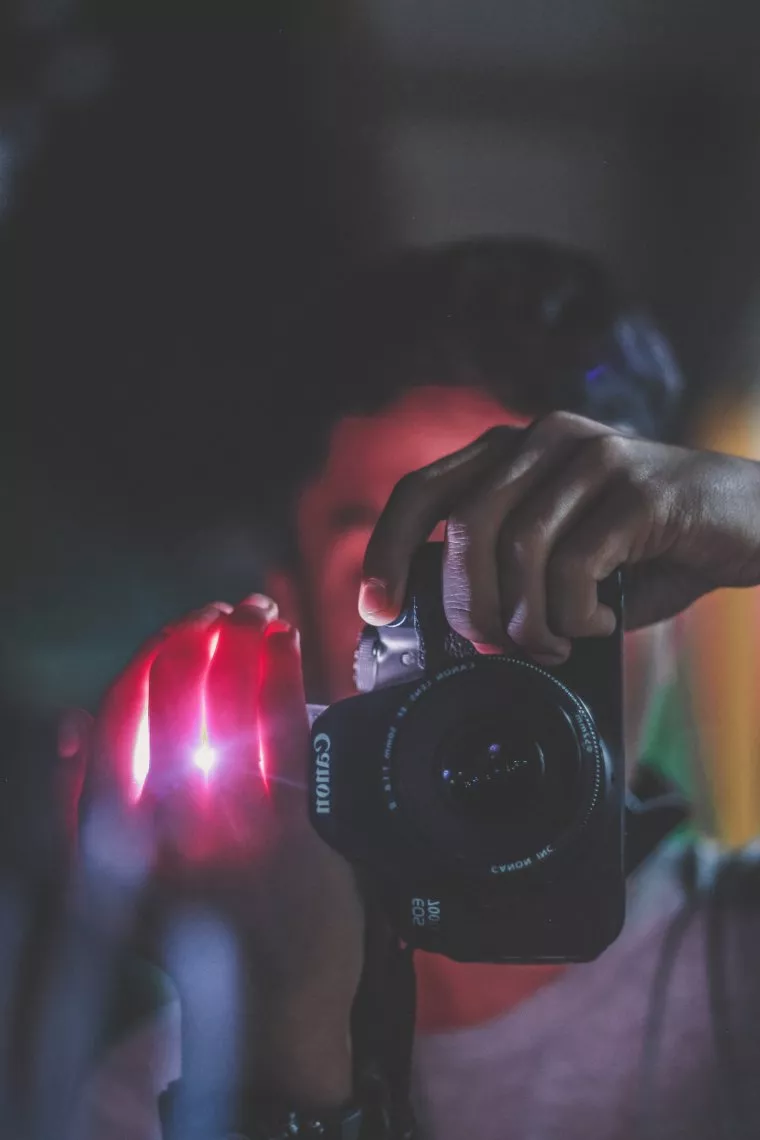
The first thing you need for night photography is obviously a camera. Not having this would defeat the purpose of going out at all. I’m not talking about the camera itself, but rather the capabilities of the camera you pack.
Upgrading your camera these days can be a hassle (not mention expensive), but there are a few key things to take into consideration before diving into night photography. One of the key things to consider is your camera’s maximum ISO value. You will be outside working in low light conditions, which mean you will have to bump up the ISO on your camera to capture texture and detail in your shot.
If you are using an entry-level camera, you will run into issues. Most entry-level cameras tend to introduce noise into the image once you’ve set it to ISO 800 or more. This will result in a lot of noise in the image, and while it can be fixed post production, you don’t want to give yourself extra work. Check the capabilities of your camera before heading out to make sure you will be getting the best image quality possible.
In terms of DSLR camera bodies that handles high ISO levels, you could look at something like Nikon D5, Sony a7S II, Canon 5D Mark IV, Nikon D5600 and many others. Generally, noise performance is very good in newer cameras so you shouldn’t worry too much about.
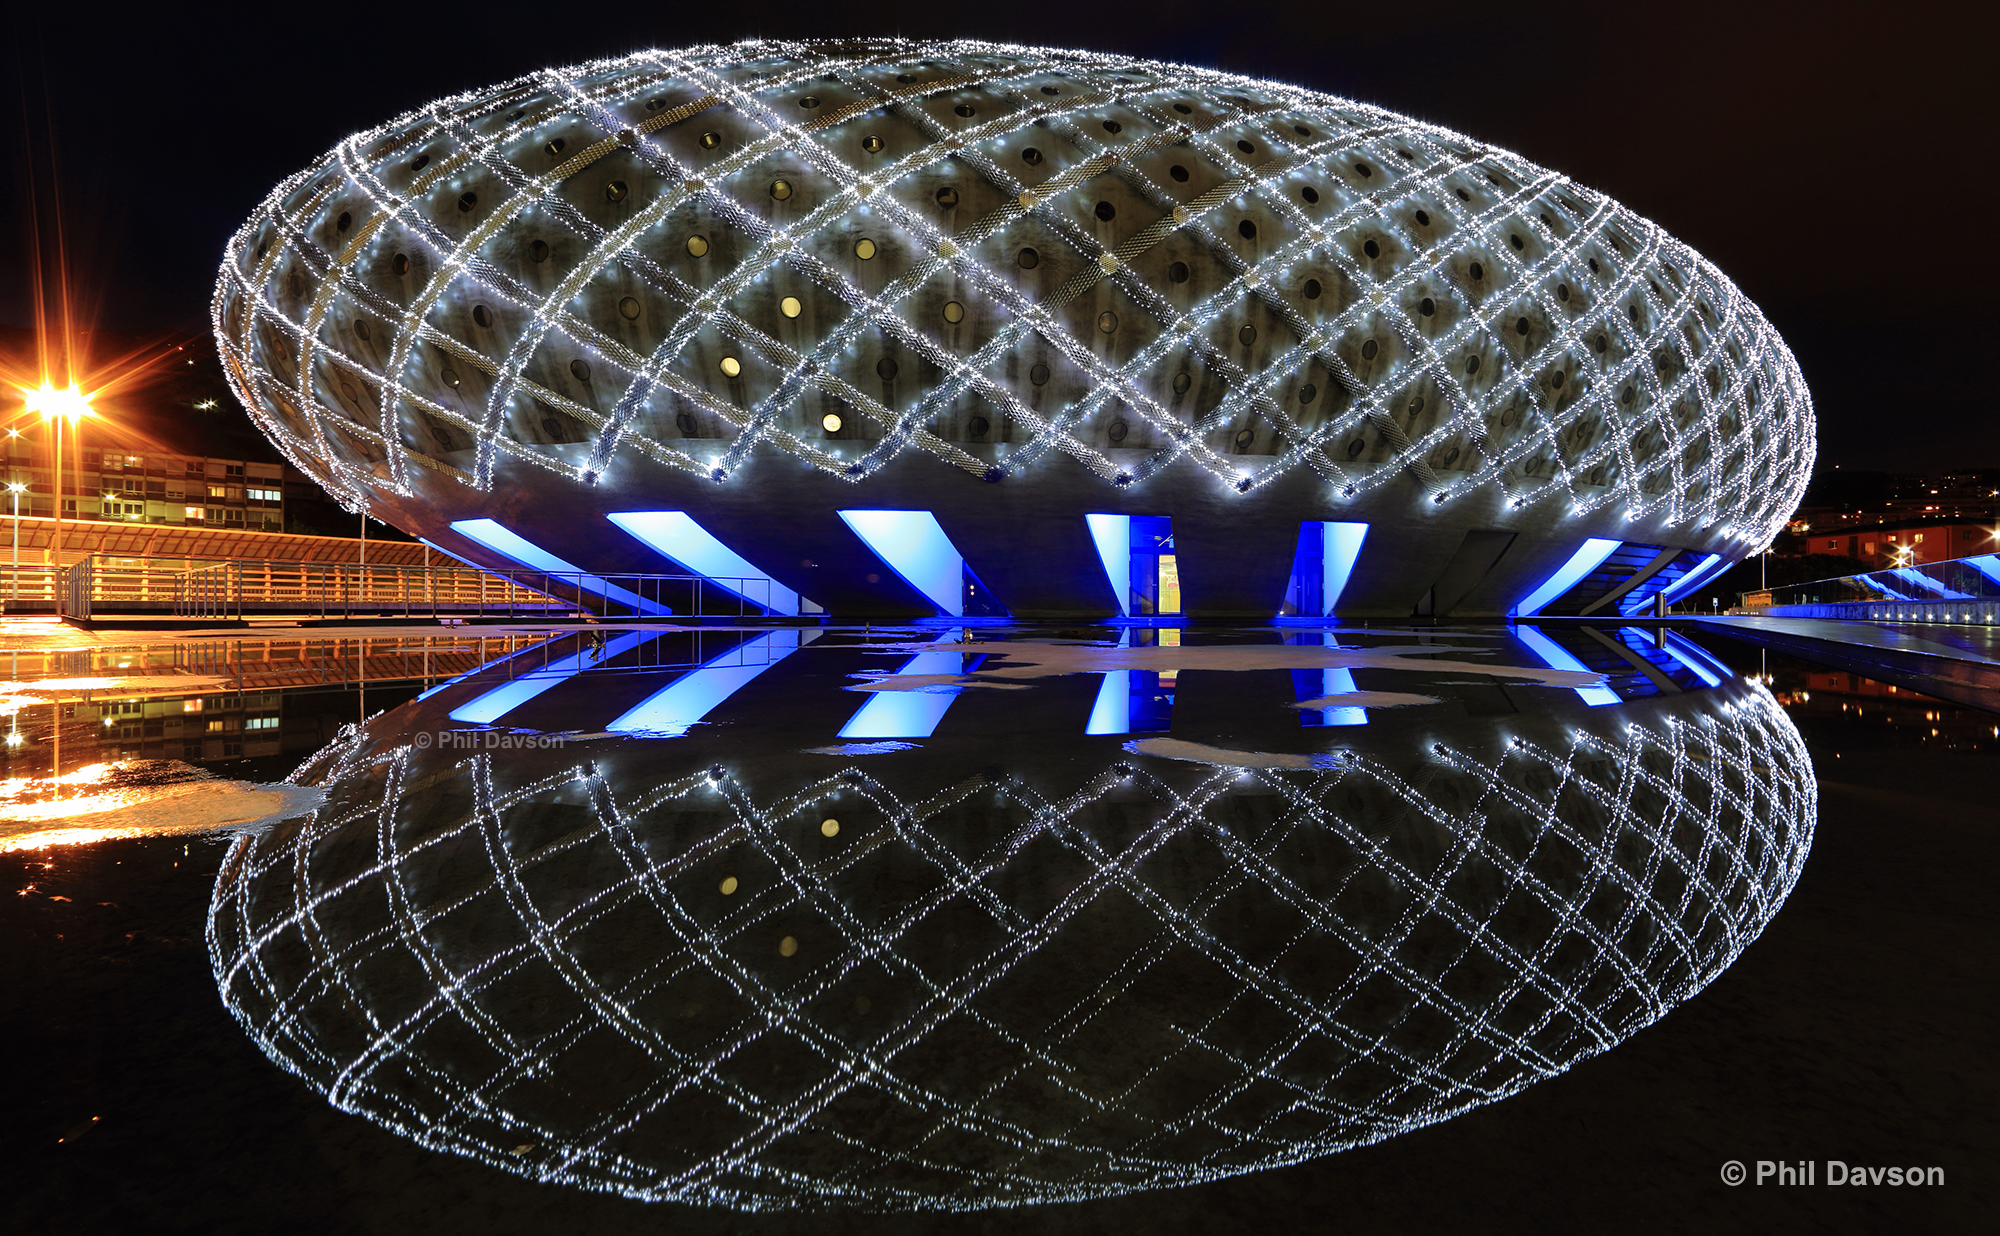
The single most important feature you want to look for when buying gear for night photography is image stabilization. It may be called vibration control or some other variant depending on the manufacturer, but the concept is the same.
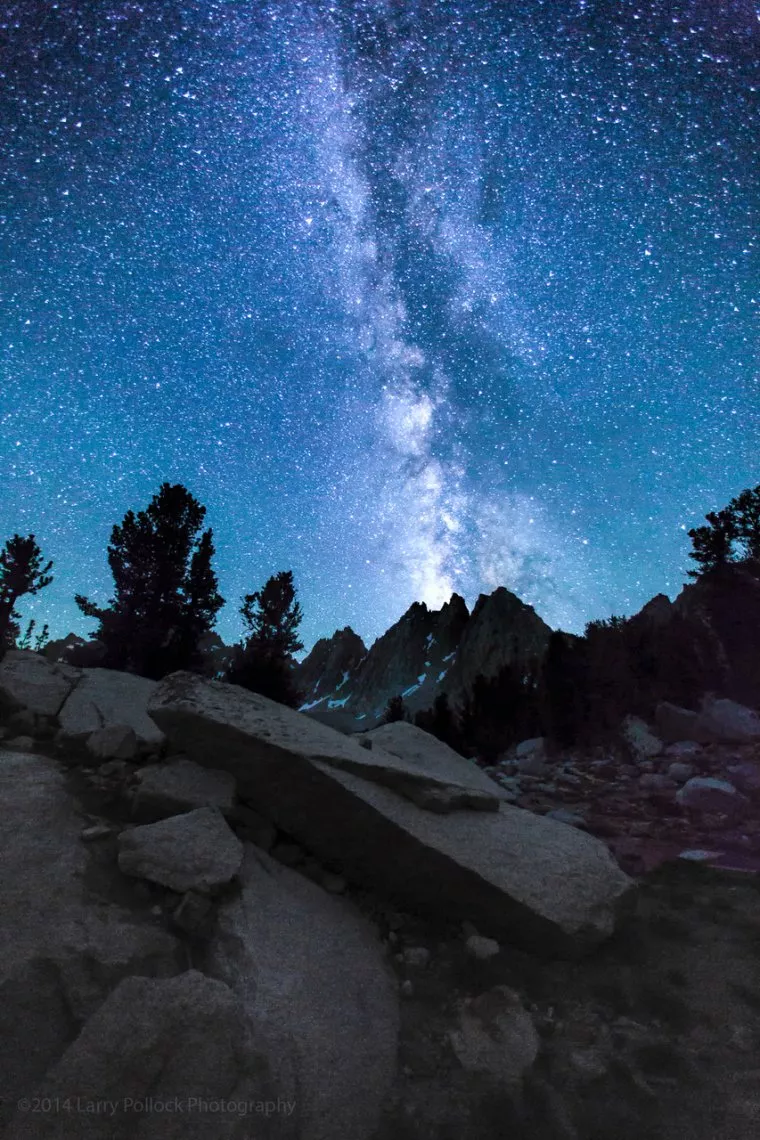
Image by Larry Pollock: Facebook Website
This second piece of equipment that is crucial to night photography is a trusty tripod. You may find yourself shooting at a relatively low shutter speed, which will introduce the possibility of motion blur or camera shake. Some of us are not blessed with steady hands, so this will eventually be a problem. A tripod will help you achieve much sharper shots and reduce the chance of blurry photos.
If it is not necessary, don’t raise the center column of the tripod upwards – it is better to fully extend the legs first, and afterward, if necessary, the center column. It shifts the center of gravity and it becomes less stable when the camera is hanging higher than the meeting point of the legs. Additionally, the last parts of the legs, the thinnest ones, should be used only if it is a make or break moment. They are thin, thus they will shake more. That is why more advanced tripods either have two poles per leg or are quite thick even at the thinnest points.
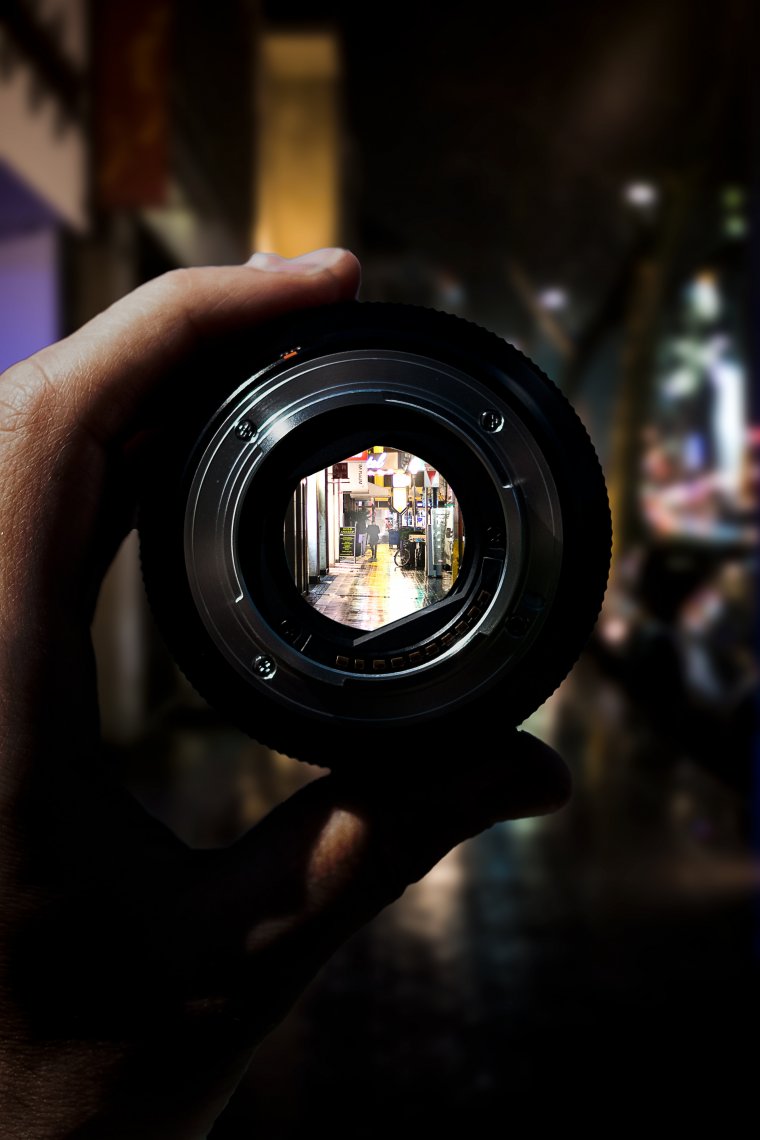
Choosing the right lens or lenses is also very important—almost as important as the camera itself. Packing the right lens can often be subjective to what it is you’re looking to capture. However, I generally recommend picking a wide angle lens with an aperture large enough to let in more light when shooting.
My go-to lens when doing this kind of photography is usually my 24-70mm f/2.8. This lens offers me a wide enough angle with the freedom to zoom in and out if I want while still having a great maximum aperture of f/2.8.
Wide angle lenses are great for night photography, and choosing a zoom lens can help you get better results because it’s more flexible—you can easily zoom in and out depending on the focal length you need. A great wide angle zoom lens for beginners would be the Tamron 15-30mm f/2.8, it has a wide aperture (2.8), has an image stabilizer, a good sharpness, the 15mm focal length is very wide and overall range available in this lens is quite useful.

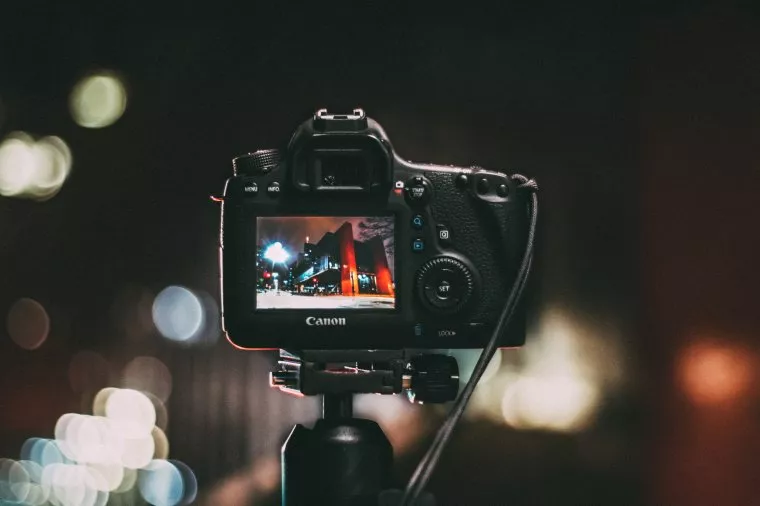
This piece of equipment is optional, depending on your method when doing night photography. Most, if not all, DSLR or mirrorless cameras are equipped with a timer for the shutter. This comes in handy in situations where you want to capture a family photo while still being in the photo yourself as the photographer or if you’re trying to reduce camera shake as much as possible, in addition to what your tripod is already doing.
However, you also have the option of using a shutter remote which basically gives you the same freedom as a timer would but it is considered a more convenient alternative to the timer on your camera. When working in situations where your shutter will be open for less than 30 seconds, there is practically no need to have a remote shutter, but if you plan on going beyond that, then it would be a good idea to invest in one.
Remote shutters these days are not very expensive. If you don’t already have one, they’re pretty easy to find on Amazon or at your nearest camera store.
Feel free to pack a natural light filter as well, because they do come in handy. A natural light filter helps in cases where there is a lot of light pollution. It gives you a relatively crisp, contrast image.
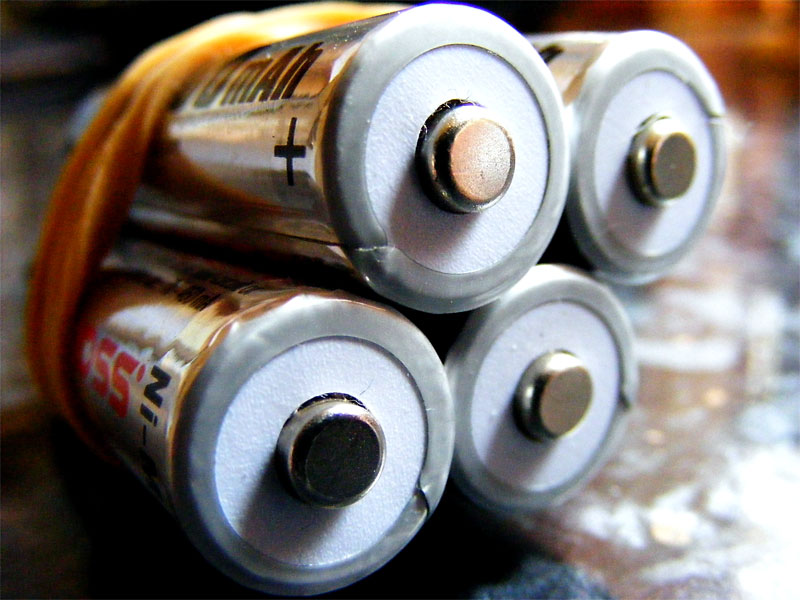
Longer exposures eat up bigger chunks of your battery life, so you’ll find yourself running out of power faster compared to regular shooting. Therefore, it’s a good ideas to have a spare battery or two with you at any time. And have them charged, of course.
Since you will be shooting in the dark, you’ll need to see where you are going and make sense of the camera controls and buttons (if you don’t know them by muscle memory). You don’t necessarily need to have a dedicated flashlight—more often than not the flash on your smartphone will do the job just fine.
Photography as an artistic form is mainly limited by light. The light that is captured by the sensor of the camera produces the picture, and of course, the more light there is, the easier the job for the camera.
This can pose a big problem a night since light is scarce, so the sensor struggles to obtain enough light to generate a a good image.
There are three ways we can solve the light problem: by increasing the duration of the exposure (shutter speed), increasing the width of the aperture (f stop), or increasing the sensitivity of the sensor (ISO).
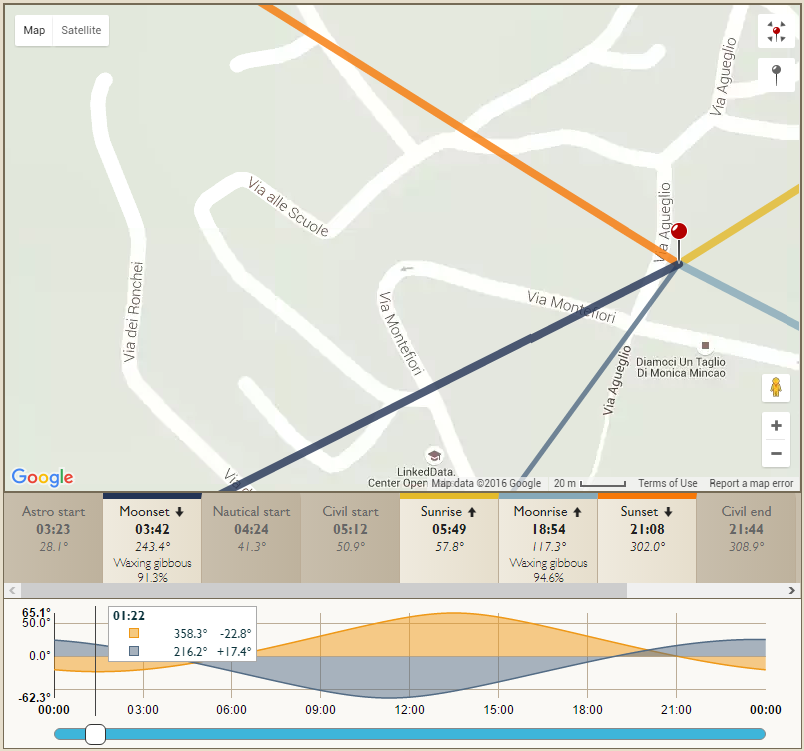
In order to be able to make great photographs at night, you need to be quite handy with a DSLR camera and you’ll need to be familiar the phases of the day.
After the sun sets, there are several night phases. The phases are seen from both a scientific and a photographer’s point of view, and the difference between both is generally in the naming.
From a scientific standpoint, the phases of the night are: sunset, civil twilight, nautical twilight, astronomical twilight, night, astronomical twilight, nautical twilight, civil twilight, sunrise. Each twilight lasts for about half an hour in most countries. As long as the day is in the “twilight” phase, there is some remnant of the sun in the atmosphere. You can see that in the orange cast on longer exposure shots (even when the human eye won’t pick it up).
From a photographer’s standpoint, the phases of the night are: golden hour, blue hour, astro, blue hour, golden hour.
Basically half of the civil twilight, nautical twilight, and part of the astronomical twilight are the “blue hour”. The “golden hour” is during sunset and half the civil twilight; same goes for sunrise just in the opposite direction—half of the civil twilight and the sunrise. These are just rough measures—there isn’t an exact time span per se, and it doesn’t mean that they last for an hour. Depending on where you live and the length of the day in your timezone, they can last from anywhere from 30 minutes to three hours. Most countries they are usually an hour or so, hence the name.
So what does all this information mean? Knowing the phases of the night and practicing during the optimal times leads to better photography. For example, during sunset, civil, and nautical, you can basically shoot handheld. However, handheld falls out of the equation in astronomical twilight and night.
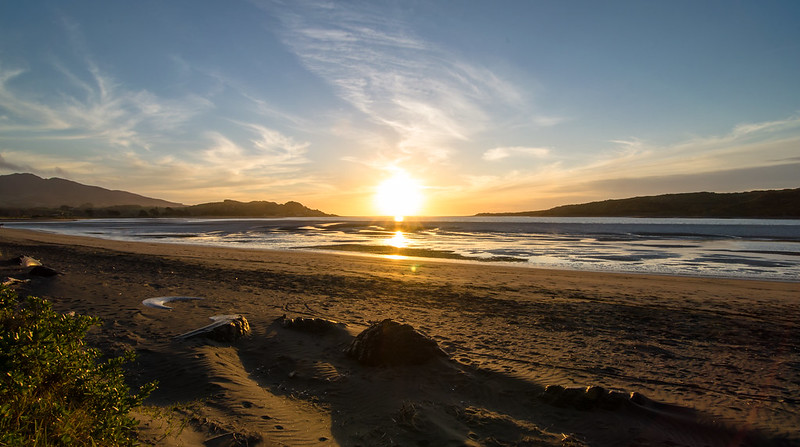
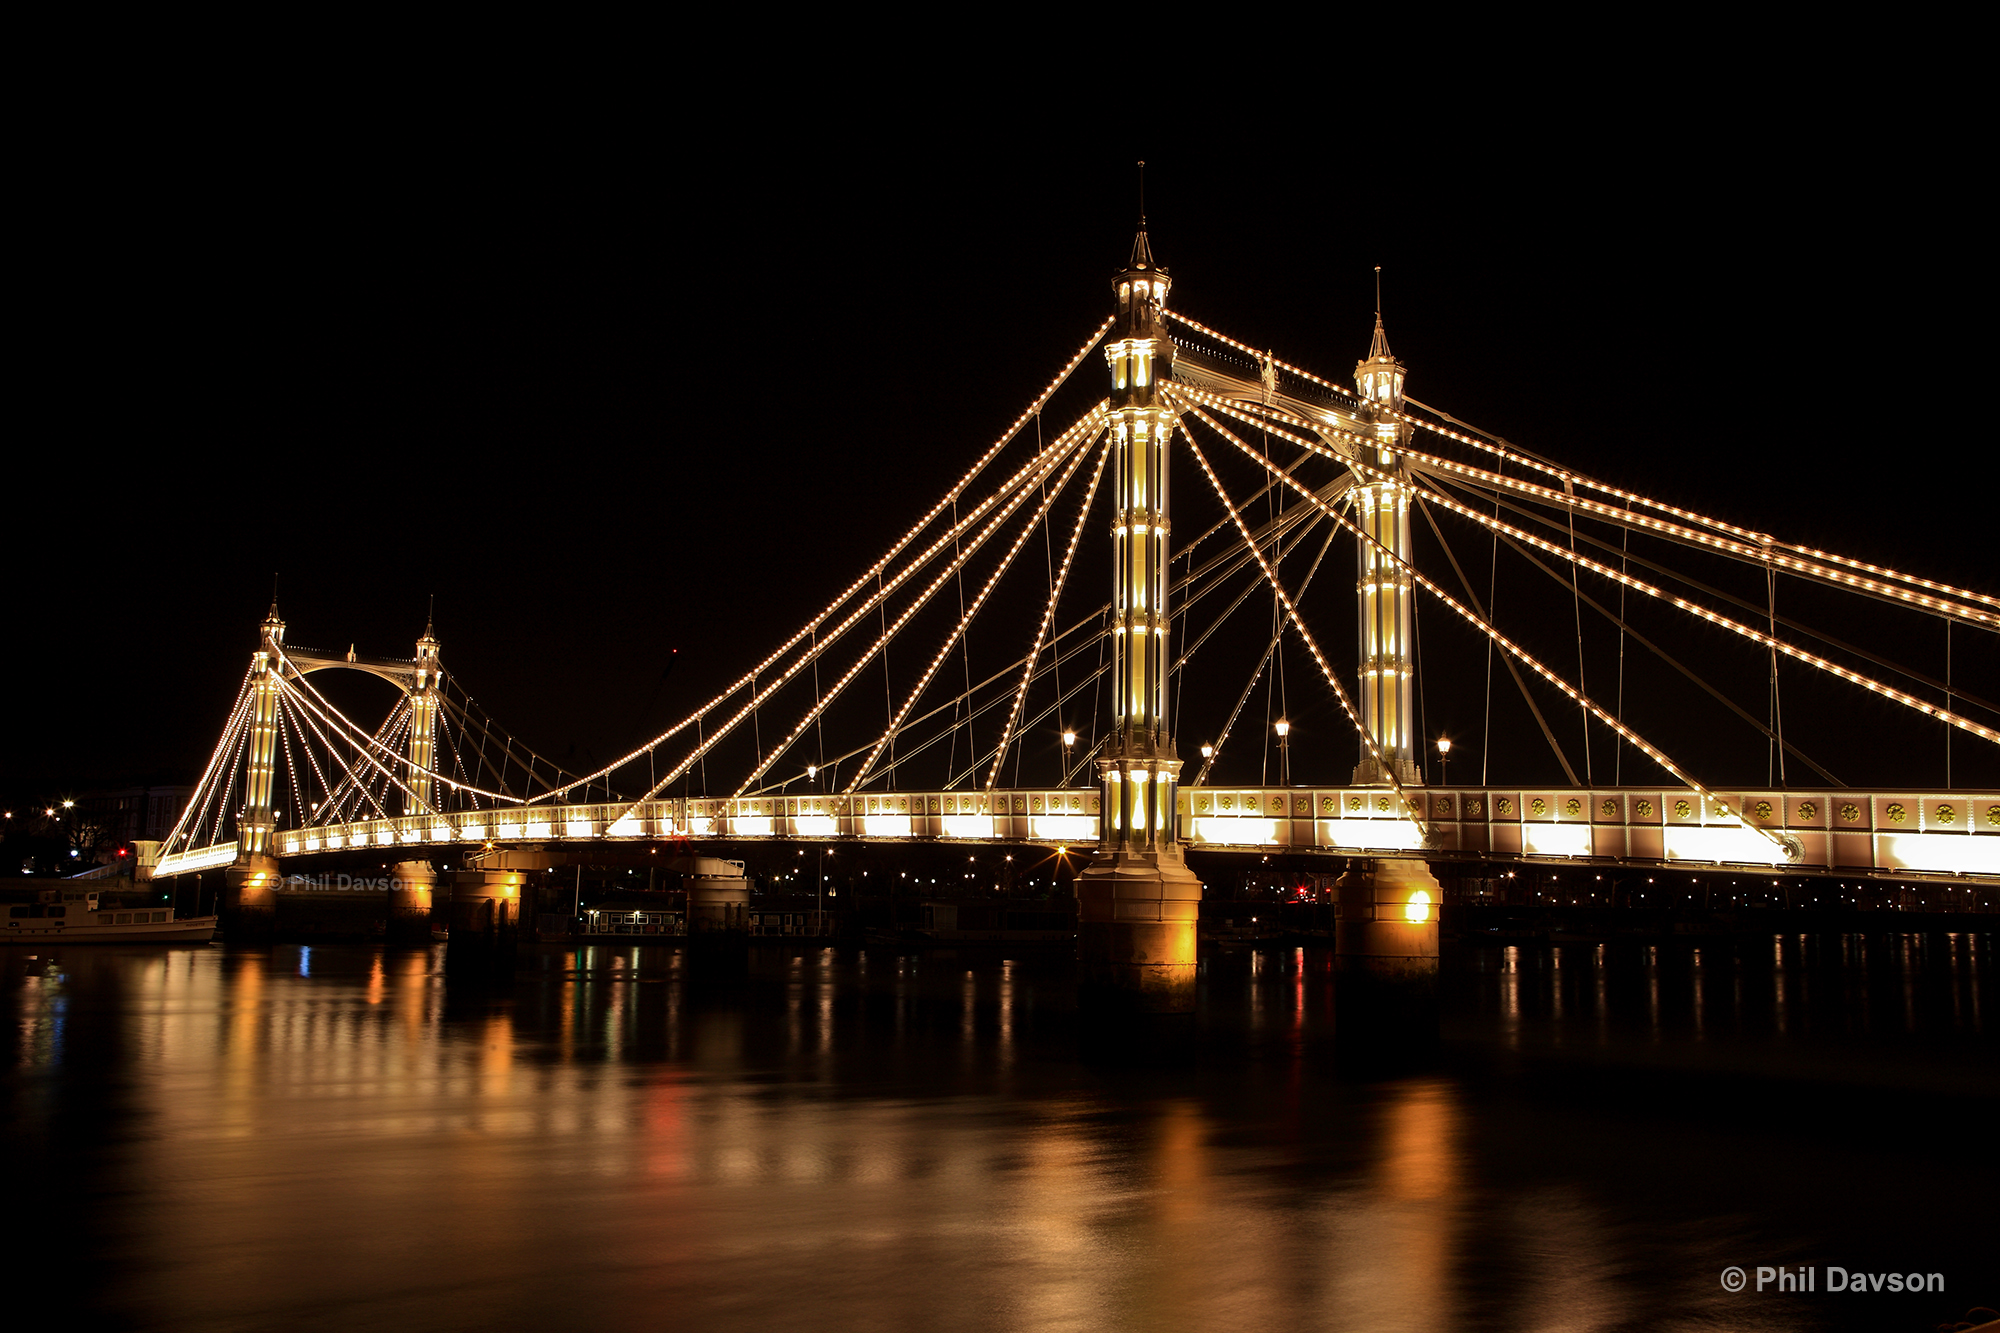
The aesthetics of the pictures are dependent on the night phases. If you are going to shoot stars, astro (or pitch black night) is the time of day for you, otherwise, stick to the blue and golden hours. Golden hours are good for both portraiture and landscape, while blue hours are more convenient for landscape, especially cityscape shots.
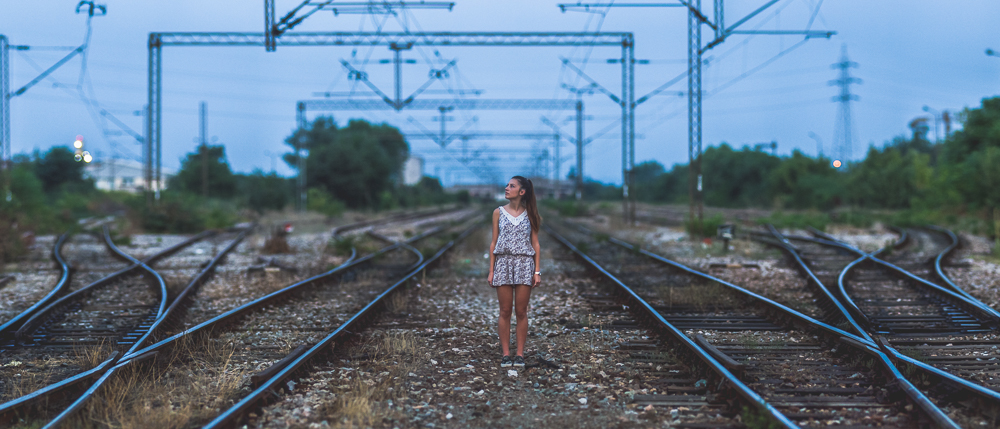
There is no “best” time to shoot. It all depends on what you want to shoot. For example, if I were to shoot light trails made by cars on a busy street, I’d probably pick the blue hour to do so. If I were to do it during Golden Hour, the light from the sun would be significantly brighter than the light from the cars, and I wouldn’t be able to do longer exposures. Astro wouldn’t work as well since the sky will either be pitch black or it would receive faint color from the street lights. Therefore, blue hour is the best time for light trails.
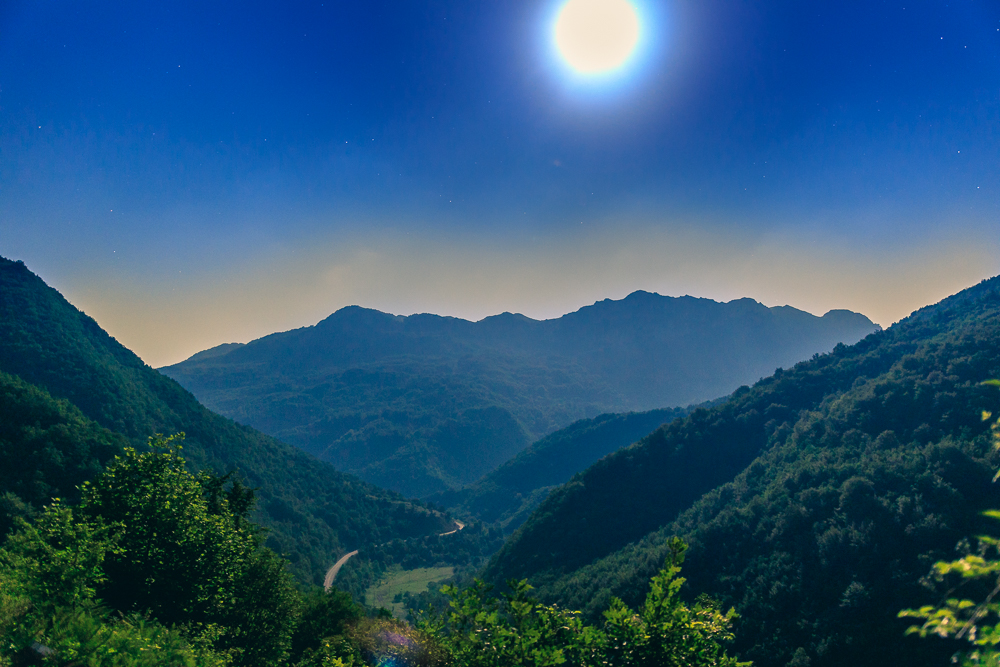
If I were to shoot stars, I would get away from any artificial light source—usually by heading to mountains away from the city, and I would shoot during the astro part of the day (it is called astro for a reason). But I would have to make sure that the moon is away as well, since light from the moon could obscure the stars.
Say I want to shoot a portrait in the moonlight (with slight artificial light, of course). I’d do it during blue hour with a full moon. The blue hour will give enough color so the background isn’t boring, but the flash would also serve me well too.
Golden hour is great for sunsets, sunrises, and portraiture because the light is angled and diffused. That is the time of day most photographers shoot at.
The moral of the story is to go out and test each phase of the night so that you’ll know which phase is the right one for your next project. The examples above should as rough guides though.
Knowing how to control the manual camera settings is quite crucial because the metering isn’t as accurate in low light as it is in the normal light. Therefore, you’ll need to control every aspect of the camera yourself. This will also work to your advantage because different settings will produce different results for the same exposure.

Let’s start with the most important camera setting when it comes to night photography: ISO.
You should have the ISO at the lowest value possible, especially if you are shooting landscape/cityscape shots where you can have longer exposures without any issues. Normally, keeping your ISO low increases the clarity and sharpness of your image because the higher the ISO, the more grain and noise you will have in your picture, but if you have really bad lighting conditions and you are not able to use a fast shutter speed, try to set your cameras ISO higher than you normally would.
If you use a higher ISO setting you should be able to increase your shutter speed, therefore your shot will gain more sharpness. If you shoot in automatic mode I would suggest setting the maximum ISO sensitivity to 1600. Nowadays most DSLRs are able to provide good quality images at ISOs up to 1600. It’s kind of a balancing act photographers are doing nowadays, because on the one hand they want to keep their ISO as low as possible to reduce digital noise, but on the other hand, they also need a fast shutter speed to achieve sharp images.
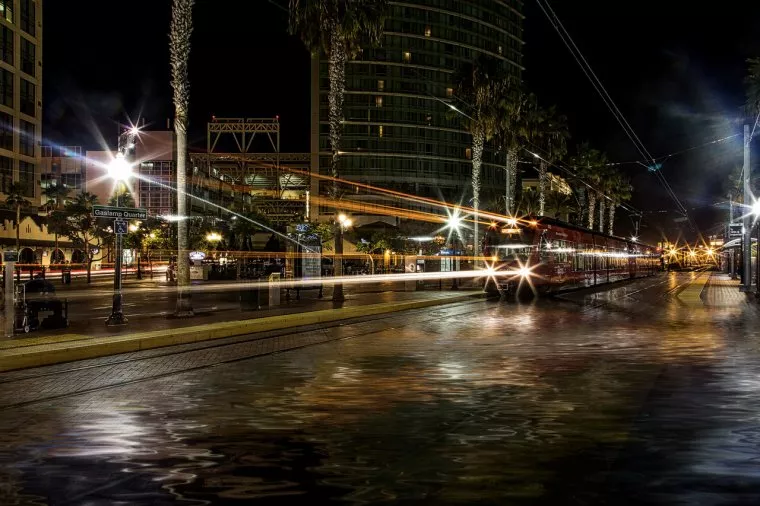 Image by Larry Pollock: Facebook Website
Every camera’s sensor has its own dynamic range, which is about the range of the exposure (measured by Exposure Stops) that your camera sensor able to cope with. If your camera sensor has a 12 stop dynamic range, that means that it is able to capture the darkest exposure value from 1 stop up to the highest exposure value at 12 stops. However, if you try to capture a scene beyond than that, your photo will experience details lost in either the shadow or the highlight—or both, depending on your exposure setting.
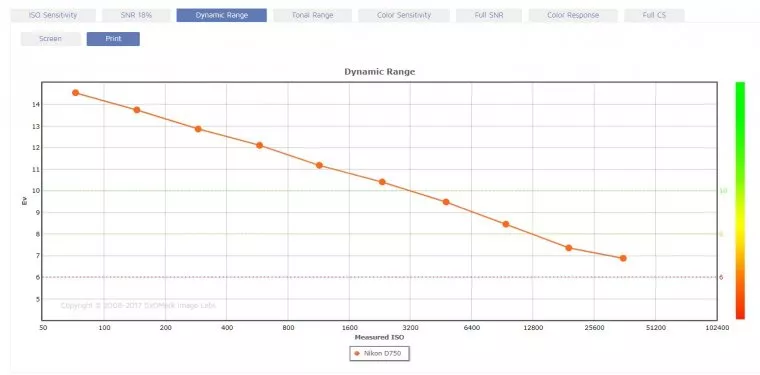
Here is a photo screenshot from Dx0Mark website, the graph shows how the dynamic range drop following the increase of the ISO setting. At ISO 75, the Dynamic Range is 14.5, but when the ISO goes up to 25,600, the Dynamic Range is plummeted to around 7. That means around 7.5 exposures that are lost. Overall, a higher ISO will have a poorer dynamic range.
While it is true that using a lower ISO helps preserve the best image quality that your camera can offer, there are several reasons that you should make a good use of high ISO settings, or at least not being afraid in using them.
Technology is always improving, and these days, a DLSR camera can provide a far better image quality and improved noise control if compare them to the DSLR cameras of the past. At the same ISO settings, you would be able to get a photo with much less noise now, and that allows you to easily push the ISO up to 800, 1,000 or even 6,400, depending on your shooting environment. Instead of avoiding high ISOs altogether, you should give it a try to understand your camera capability.
Landscape photographers often have to shoot in the dark, whether is to photograph the Milky Way or sunrise (because you need to be at the shooting spot before the dawn). So, finding the best composition can sometimes be tricky and time-consuming.
Imagine you have to use camera setting at ISO 400, aperture f5.6 and a 30 second shutter speed to do a test shoot between each adjustment of your composition—that would be a total of 5 minutes for 10 photos, and that doesn’t include the time that you spent moving around trying to get different angles. In this case, I would suggest you boost the ISO to 6,400, 12,500 or higher, which would reduce the shutter speed to only one or two seconds and speed up your overall composition process.
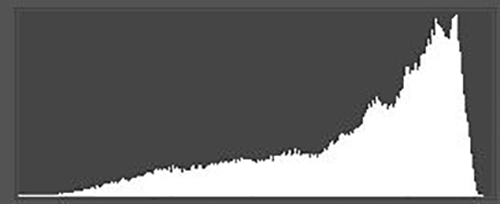
Usually, noises tend to be more in the shadow area than in the highlight area, which is why the ETTR technique comes to mind. Instead of having an underexposed photo, it would be better to use a higher ISO. In other words, you’ll want to look at the photo’s histogram to ensure that most of the tone (or “peak”) is as far to the right side without touching the edge. If it touches the edge, that means that your photo is losing detail in the highlight area.
Let’s get into more detail on the ETTR technique. Here is the comparison of two photos, with and without applying the ETTR technique.
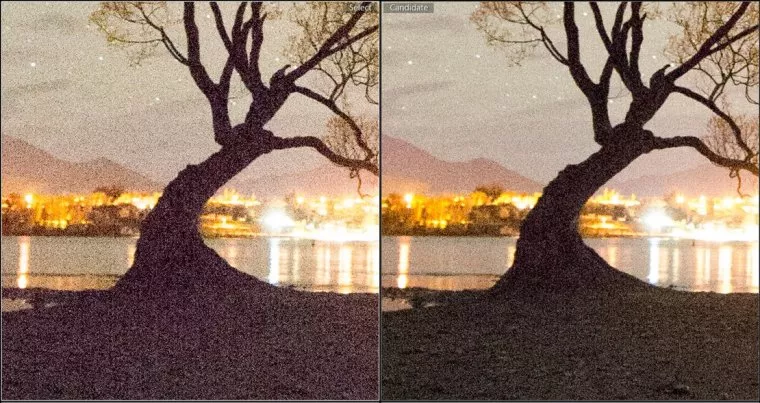
Photo A was taken using ISO 6,400 and Photo B with ISO 25,600. Both are using the same shutter speed, but the original result of Photo A is much darker and underexposed. Obviously, you can see the noises appeared to be much more than Photo B, even while using a lower ISO.
There can be a huge difference between a photo with noise reduction applied and without. There are many noise reduction techniques available, and most of them can easily be found and learned on the web.
Overall, the more time consuming the technique is, the better the noise reduction result. One of my favorites is doing an image stacking noise reduction. It is a technique that requires you to take multiple photos without changing your camera settings and composition. All these photos will then import into Photoshop and merged into a Smart Object. After that, you need to apply the Median Stack Mode (Layer > Smart Objects > Stack Mode > Median), then wait for the process to finish.
The result will be dramatic once it is completed and the more photos that are used, the better the result. I would advise you to start with at least five photos (I personally prefer going up to 20 photos, but that depends on the how high of an ISO I’m using).
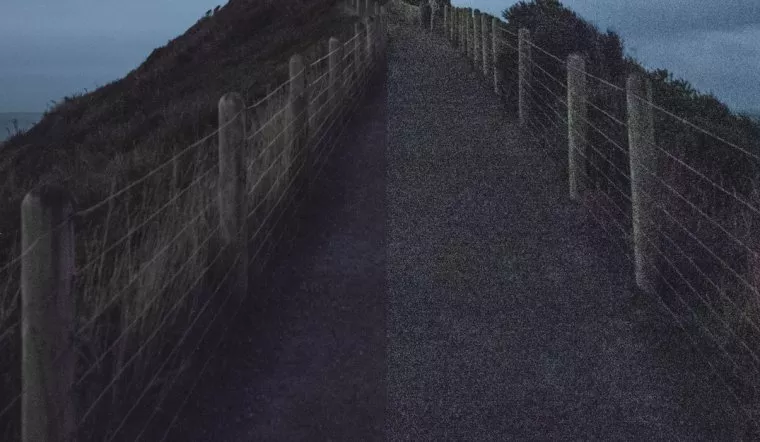
Above photo is the before and after comparison and the result is evident.
The only drawback of this technique is that it will blur out the sky due to the clouds and stars moving constantly throughout the series of the photos that are taken. Thankfully, the solution is simple—just use the sky from any one of the photos that are taken and blend it back into the processed photo.
If you want the light sources in your pictures to have light streaks (looking like stars and such), you should close down the aperture. The more aperture blades the lens has, the more streaks the light sources will have. This phenomenon usually appears after f5.6, or even more with some lenses. However, since you’ll be shooting on a tripod, drop the lens down a stop or two to avoid the vignetting and softness from a wide open aperture. Somewhere in the range of f/5.6 to f/11 should be the sharpest (also called the sweet spot), but you should test this out for every lens.
Having a fast shutter speed in low light is basically science fiction, except if you push the ISO to ridiculous levels—but, as mentioned, then the images will look rubbish. If you need to photograph people in low light, you’ll need a flash or another solution to illuminate the people enough so they won’t be dark or blurry. Otherwise, don’t be scared to use long exposures. Even if bulb mode is necessary for exposures longer than 30 seconds.
If your lens or camera has image stabilization and it is set on a tripod, it is wise to turn it off. The tripod is stable, and having the lens elements magnetized into a float position can induce motion where there isn’t any.
Once you have the camera settings down, it’s time to start shooting. Here are a few night photography tips for shooting the best shots:
This is a pretty simple one, especially if you are familiar with night photography and are used to getting out there and trying to get a good balanced exposure when it comes to really dark situations. The reason for working in manual mode is that your camera will be fooled a little bit. If you have any kind of automatic mode, your camera is going to be confused because if it sees something that is a little bit brighter or very dark, especially night scenes, it will automatically try to increase the ISO to try and get a good exposure. It will also probably try to do a longer shutter speed, and you don’t want that combined with a high ISO.
It take a bit of trial and error when it comes to mastering the exposure triangle in manual mode. And when it comes to night photography, you want to have a nice, sturdy tripod so that you can allow the most light into the camera on the lowest settings possible. This is very important for night photography because you want to have as of clear scene as possible because if you have underexposed pixels, there’s a high risk that somewhere in the photo there is an overexposed pixel and it can get all crazy and wacky. As such, you will definitely want to have a very low ISO to try and get an image that is as clean as possible. Working in manual mode and using a tripod allows you to dial into the best exposure settings to get the best night shot possible.
Using your histogram is going to give you a more accurate representation of what the scene is actually going to look like.
Let’s say you go somewhere and take a photo using manual mode, but set the camera on live-view. You think it looks great—it’s bright and you can see some foreground elements. However, when you get to your computer and pull that image into Adobe Lightroom or Photoshop, you realize that it’s still a little bit dark and wonder why it was looking brighter on your camera screen. Typically, the reason for this is that your screen is lying to you a bit. If you were to go to your camera settings and look at your screen brightness, you might find that it is lit up all the way, making your image brighter look than it really is. That’s why you need to pay attention to the histogram, as it will show you if you have more shadows, blacks, balanced exposure and mid-tones, and whether it is overexposed, among other things.
Most of the time when you look at an image at the back of the camera screen and think that it looks very good, if you pull up your histogram, you’ll probably see that you might need to give it a few seconds to gather more light for that night photo.
For those who don’t know, bulb mode is found on most DSLR cameras and is marked by a “B” sign. Sometimes you will need to go into your camera settings to change it for the shutter speed.
Bulb mode is set in such a way that as long as you hold the shutter button down on your camera, the shutter inside stays open, thus exposing the scene to your sensor. This is a really important mode when it comes to nighttime photography because you can control how long your shutter stays open.
Let’s say you are in a really dark scene and have an aperture of 16 and an ISO of 100. You will need to have a very long shutter speed to make sure you expose the scene correctly. If you were to do that and put it to a regular manual mode, most of the time the shutter speed will only go to 30 seconds, but in that particular example, you are going to need longer than 30 seconds to get a well exposed photo. That’s when you need to switch to bulb mode and hold the shutter button down on the camera to expose it for more than 30 seconds.
You can go for as long as the shutter button can hold or as long as your camera battery can last to get a well-exposed scene. You may be wondering how you are going to hold the shutter button down on your camera for that long, but you will probably need a shutter release because even if you have a steady hand and hold the shutter button for around 45 seconds, you are likely to introduce a little bit of camera shake. A shutter release is very cheap, and there is a plug in on your camera and that will act as a shutter button and then you are able to hold it down, lock it in place and walk away—letting your camera shutter stay open, recording the scene for you, so you don’t have to hold it down manually.
This is an easy tip, and will actually work great for any style of photography no matter what situation you are in. This night photography tip is very important, because you have more information to balance the exposure if you get something that’s a little too dark or too bright. If you only shoot in JPEG, it will compress things in the photo, and you won’t be able to restore it as well. You’d be surprised how much information you can bring back to your night phtos when shooting in RAW.
A lot of people would think of blackening their HDR process as being only a daytime thing to try and calm down bright highlights and minimize shadows so that the images are a little bit more balanced. However, you can actually do the same thing when it comes to night photography. Do some blackening to try and get more details in the shadows. You don’t have to bring all of it back since you still want it to look like a night photo, but it gives you some leeway.
Stay away from auto blackening settings on your camera, where it changes the blackening to go to -2 stops under in neutral exposure and 2-stops over. Instead, I recommend using the histogram to do it manually. Get your settings in manual mode and have them dialed into the proper ISO, aperture, shutter speed, and make sure you add some neutral exposure so that the histogram has a spike in the middle. You can then take your photo and shorten the shutter speed to where you get the darker image, then increase the shutter speed to get the lighter of the image. Then you can do some blackening or HDR blending back in Adobe Lightroom so you have more information to play with. Blackened night shoots come out very cool, so give it a try the next time you go out shooting at night.
If your camera supports the live view function, you should turn it on. It will help you to get more control over focus because you can easily zoom in to test your image sharpness and to see where your focus point is. In the live view mode, you can adjust your focus point precisely while using the manual focus ring of the lens.
If you shoot RAW, white balance actually is not as much of an issue since you can adjust the white balance in Adoble Lightroom or Adobe Camera Raw. Simply use the auto white balance setting if you are unsure about which white balance mode you should choose.
I recommend studying the scene you want to photograph before it starts getting dark, so you have enough time to decide on an image composition, because as we know image composition is one of the most important elements of photography.
To start off I want to mention that night photography either requires a tripod or at least would it be smart to bring one. Meaning, if you are doing a shoot for a client, trying to produce top quality photos for your portfolio or similar, you would want to bring a tripod in most cases.With that said, many times you may not have the time or opportunity to bring a tripod, or maybe you are on a more casual shoot, but still want to get the best possible results. In these cases, here are a few tips to get the sharpest image possible.
If you are a Canon or Nikon user, then you want to look for lenses with image stabilization. Canon lenses are marked with “IS”, Nikon with “VR”, and Sony usually refers to it as “SS”.
Image stabilization tries to cancel out the shakiness of your hands, which allows you to use slower shutter speed without getting blurry photos. It is important to keep in mind that image stabilization can’t freeze subject movement, so if you are photographing moving subjects, you might need to increase your shutter speed anyway.
If you want to use extremely slow shutter speeds, try looking for a wide angle lens with image stabilization. As you might know, you are able to use slower shutter speeds on shorter lenses without getting noticeable handshake. This way you might get sharp images even at something like a quarter or half a second with practice and multiple shots.
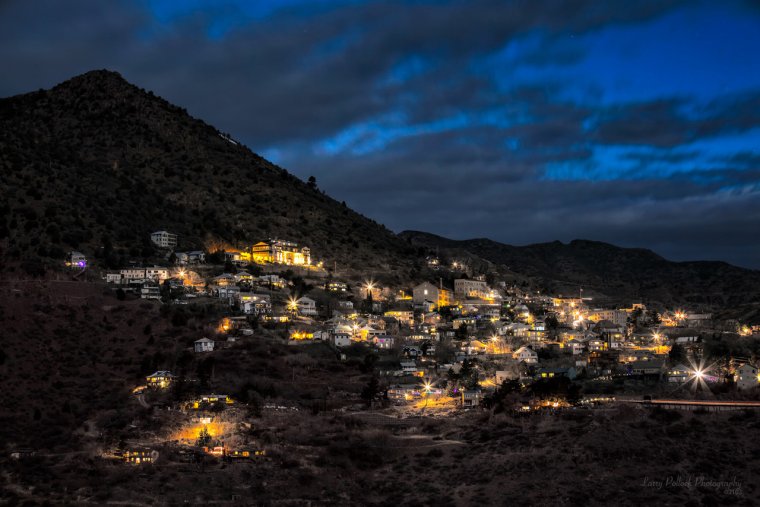 Image by Larry Pollock: Facebook Website
Landscape photographers usually use a small aperture such as f/16 to get everything sharp and clear, but in terms of low light conditions using a small aperture won’t work, because of the smaller the aperture, the more light you will lose. So, the idea behind using a wider aperture at night is that more light will fall on the camera’s sensor, which means that you will be able to select a low ISO number and to use a faster shutter-speed.
Making sure that you stand in a stable way and use your arms to support the camera can mean big differences when the light is sparse. In short, what you want to do is spread your legs a little further apart than you normally would.
If you want to take it a step further, try to look for something stable to lean against, like a tree or a wall to increase your stability even more. If you aren’t too concerned with your clothes or how you look, you can also try lying on the ground, which helps tremendously, but obviously changes your composition too.
When doing so I would recommend experimenting with different very slow shutter speeds, since you often get surprised with how slow they can get without introducing shake into the final image. Remember to zoom in on the back of the camera to make sure there is no shake since it often is hard to see on the small screen on the camera, but very visible on a bigger screen.
Another tip is to set the camera to continually shoot and take a series of images, which increases the chance of getting one completely sharp image.
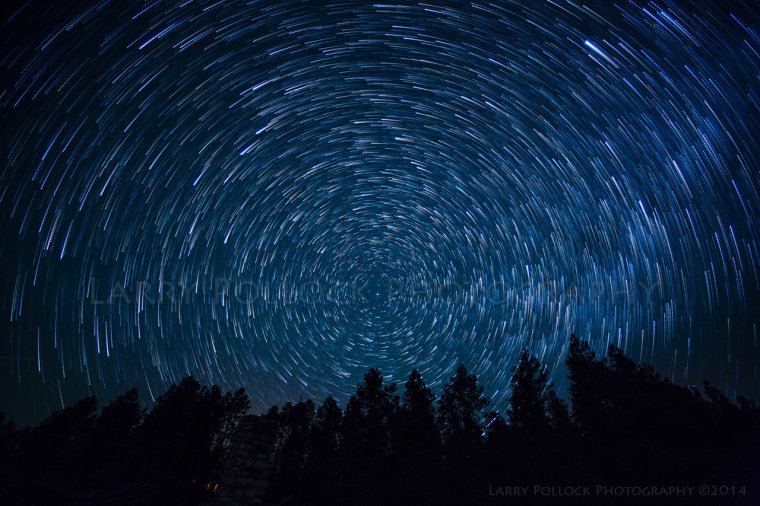 Image by Larry Pollock: Facebook Website
Often times, especially if you are in a city, there is a lot of opportunities to lay your camera on a flat and stable surface. It could be a bench, a wall, or just whatever is available to you. You can then position your jacket, bag, cleaning cloth or something similar to the camera to be able to point it in the direction you want. This might compromise your composition slightly, but in turn, you are now able to use a slow shutter speed as if your camera was on a tripod. Furthermore, if your camera supports the live view function, you should turn it on. It will help you to get more control over focus because you can easily zoom in to test your image sharpness.
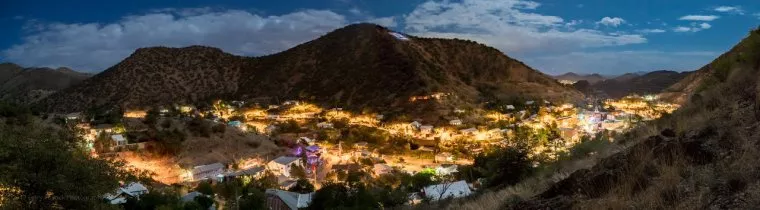 Image by Larry Pollock: Facebook Website
You can create a makeshift tripod with your body if you position your elbow on your knee while you are kneeling. Another option would be to lie on your stomach, just position your elbows on the ground and use your arms as a tripod to avoid any movement.
Previously, we discussed what is the right time of night for photography, and how to do it generally (from a technical aspect). Now we will focus on some of the most used scenarios and how to tackle them directly. Of course, you can mix and match the following techniques. After a couple attempts, you’ll surely create some modifications that work best for you. Don’t be afraid to experiment, and don’t be afraid to fail—that is how one learns. At the end of the day, you’ll need to find your own flow.
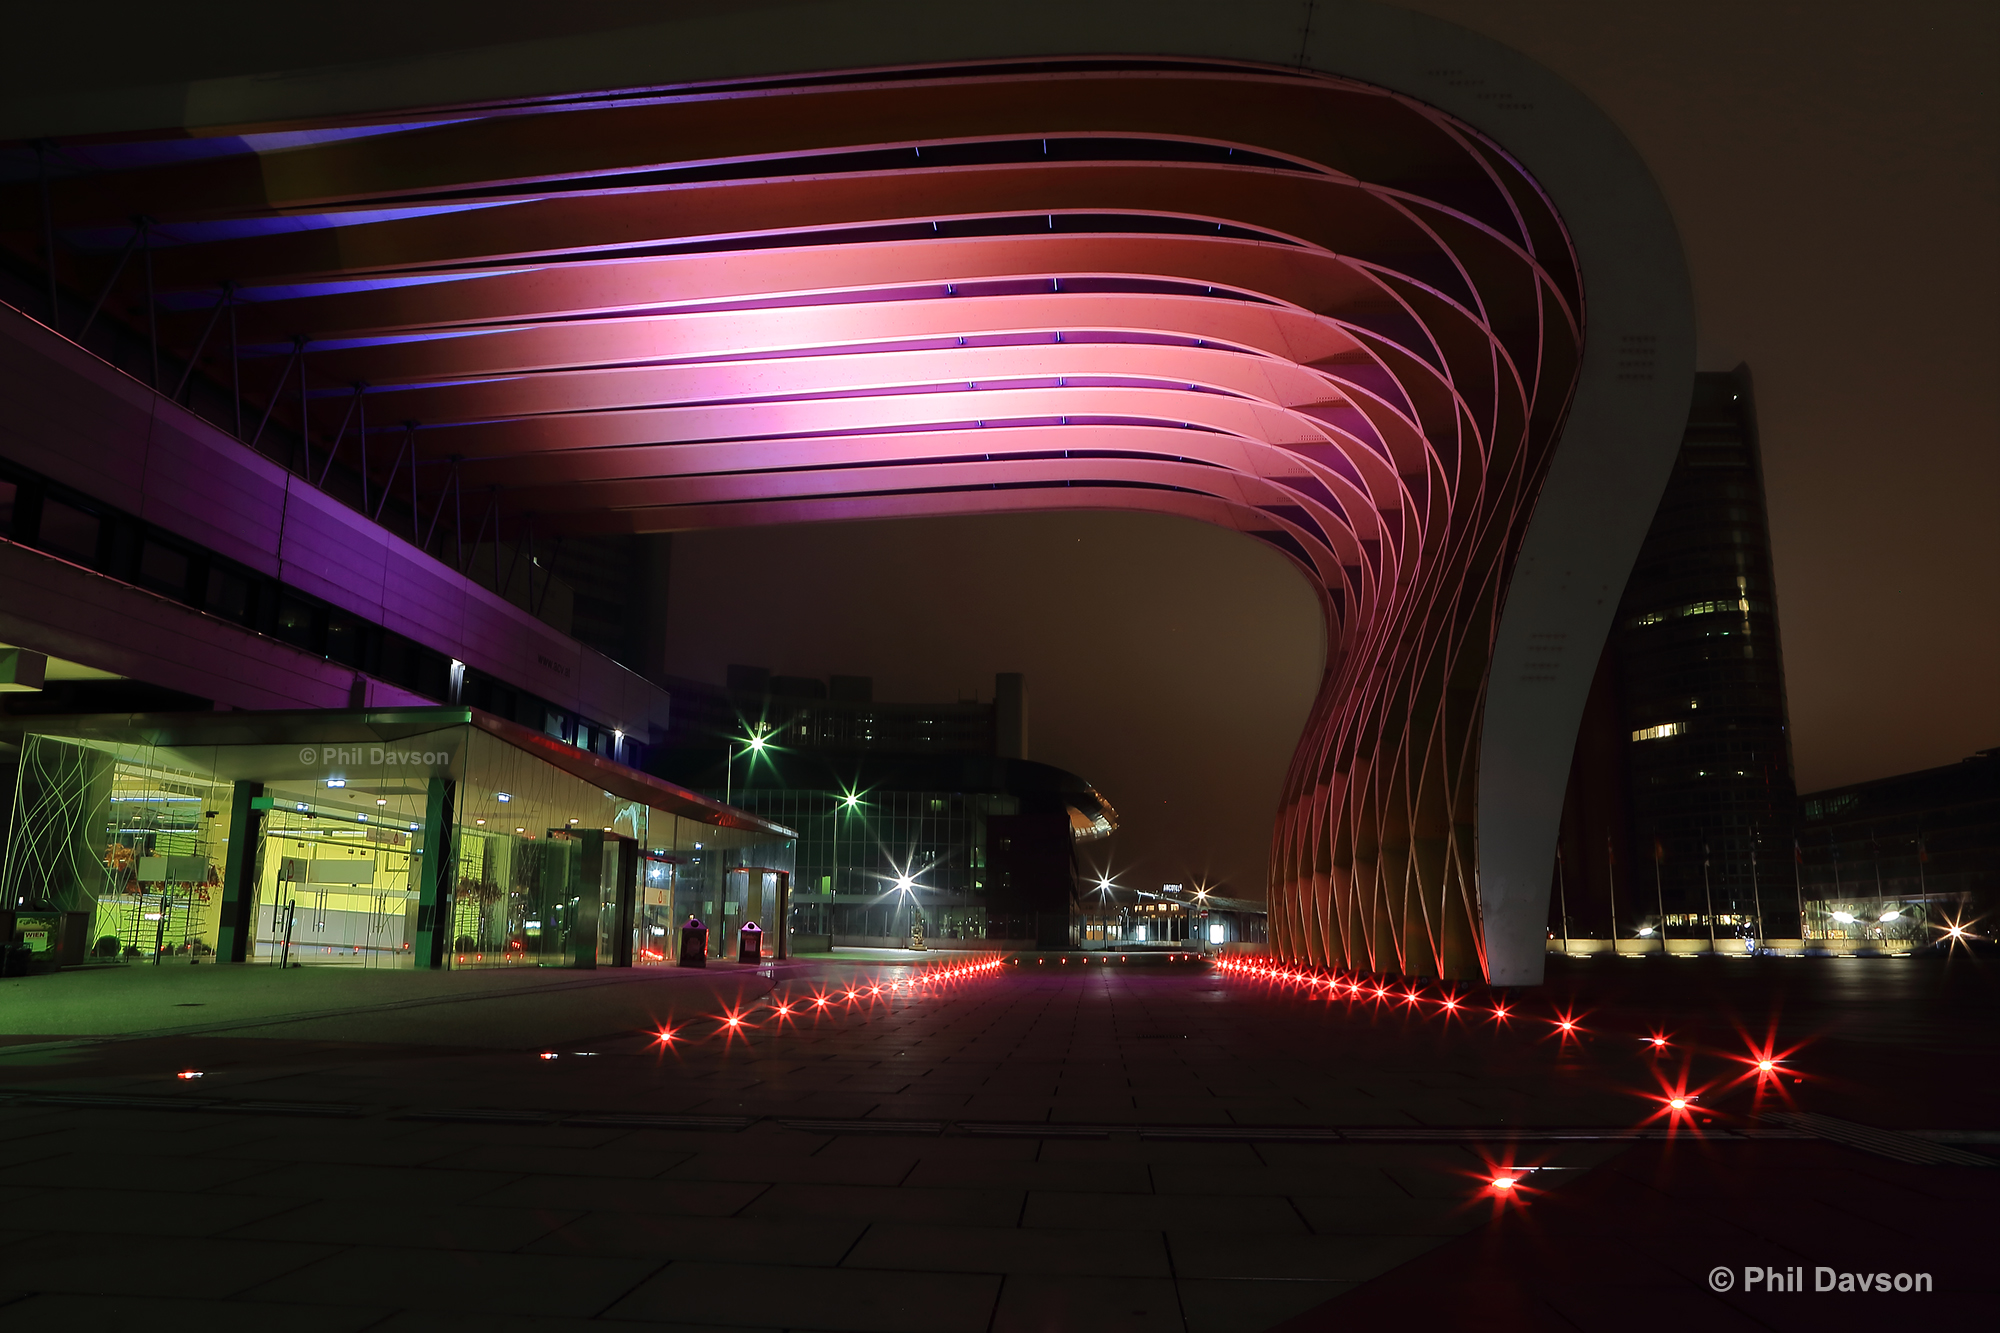
You can achieve the starburst effect by using a narrow aperture. Set the aperture at f16, and all the city lights in your image will become nice shiny stars. Keep in mind that you will lose a lot of light while using a narrow aperture, so you will have to use a slow shutter speed in order to get enough light.
This is kind of a fun effect, and really works well with bright lights, especially when you are shooting in cities at night. So, if you have a really cool light situation, using the starburst effect is a nice little way to spice up your nighttime photography.
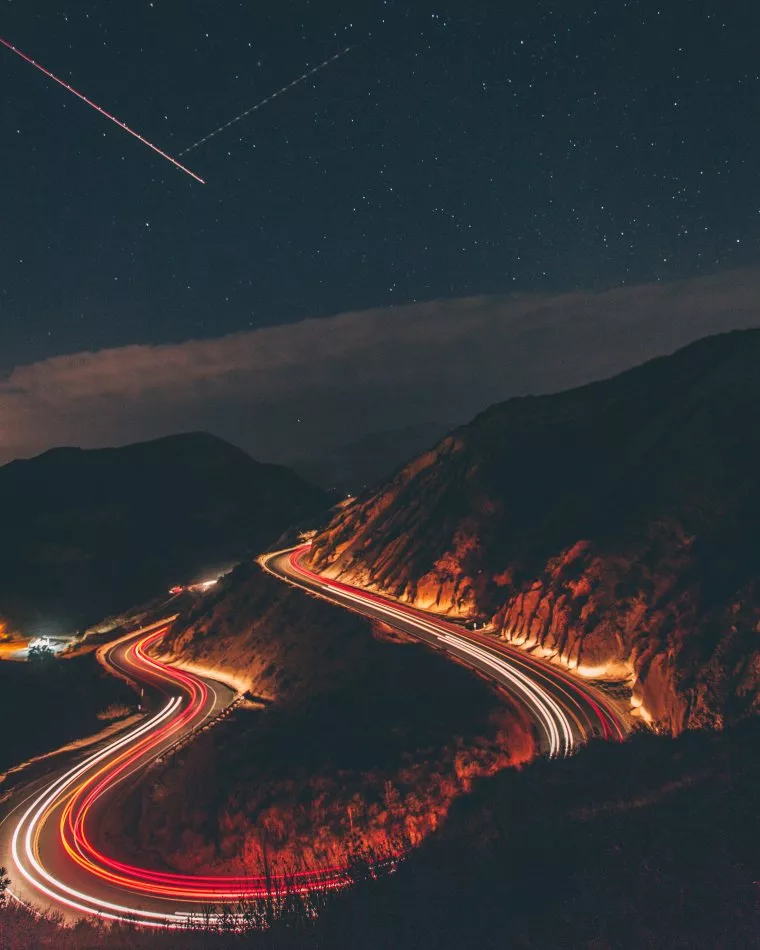
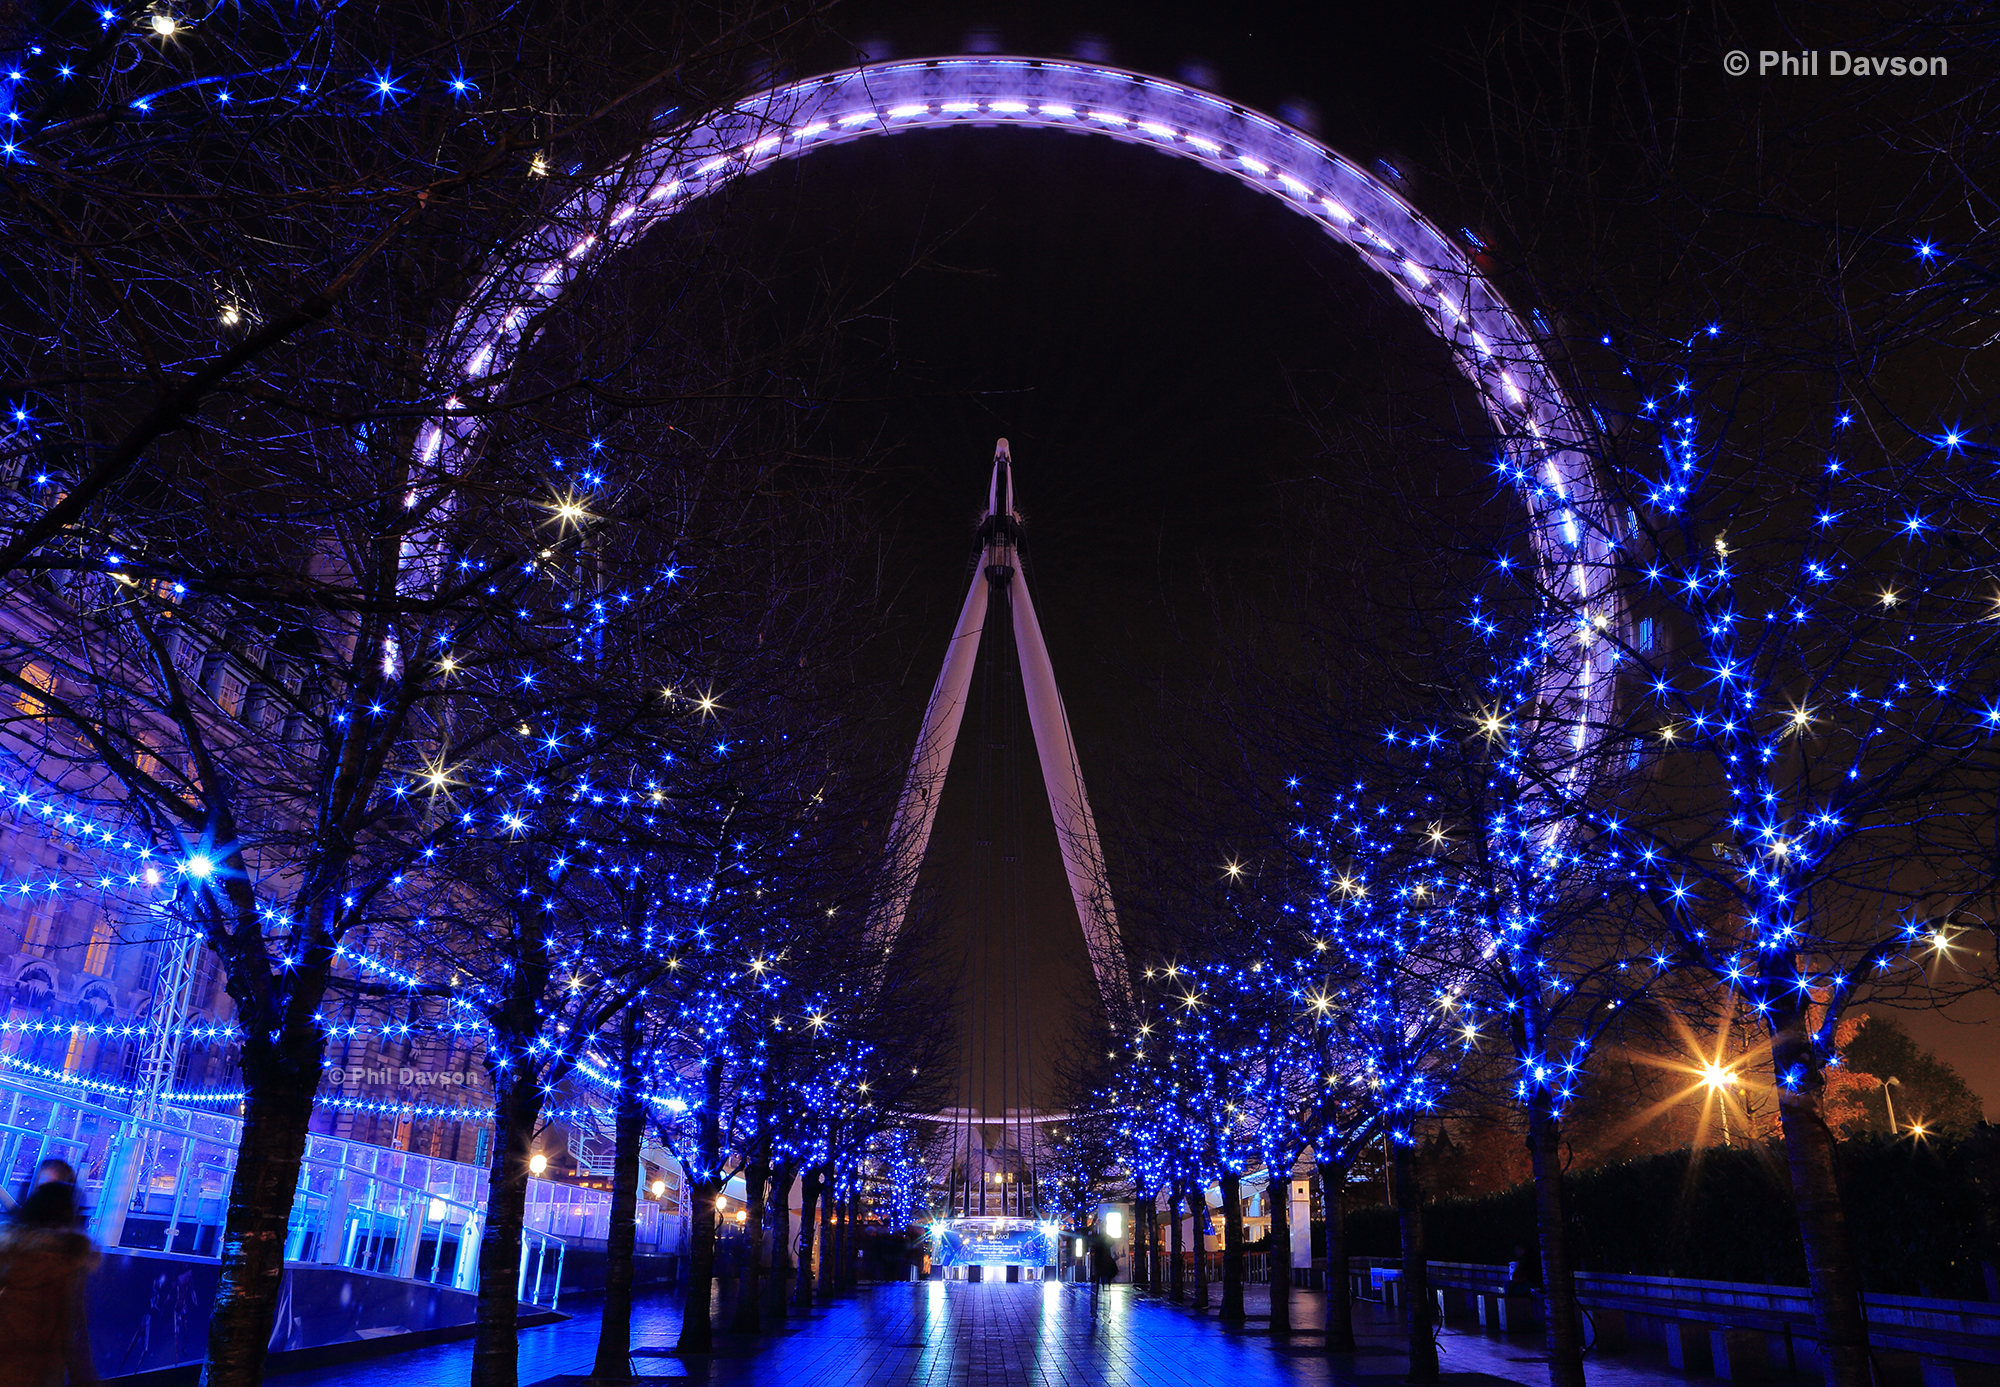
Long exposures at night will bring stunning results. For example, if you photograph a street that has a lot of traffic at night, a Ferris wheel, or simply stars (which can produce beautiful light trails in combination with a slow shutter speed and the rotation of the earth). Don’t forget to bring your tripod, as it is impossible to get a sharp image when you take an image at a slow shutter speed.
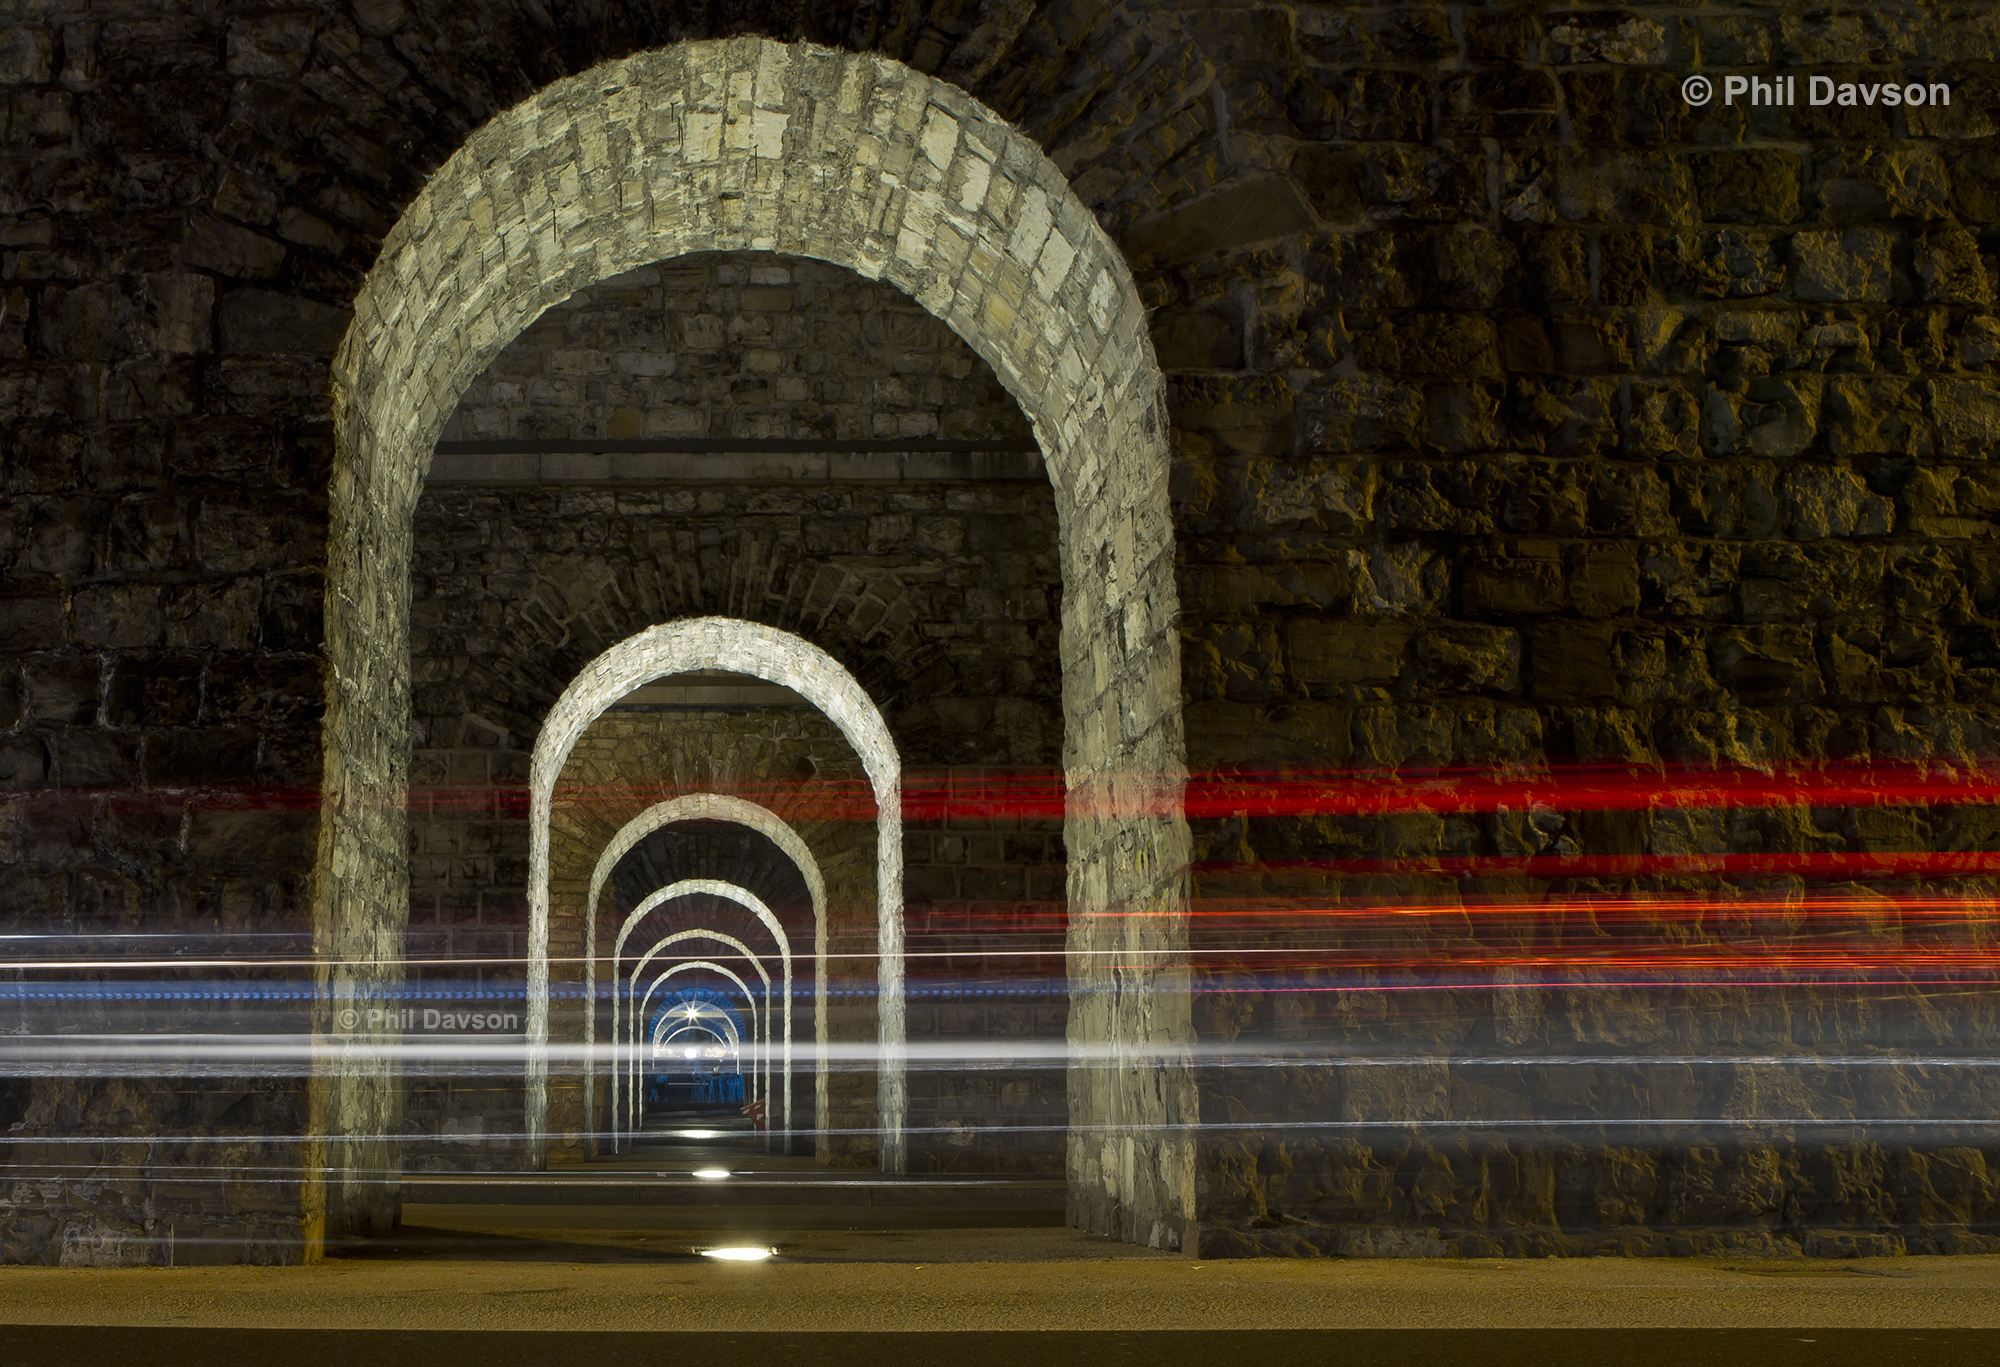
In order to capture light trails (this works for star trails as well, but longer exposures are necessary) you’ll need to use long shutter speeds. In order to guesstimate how long the shutter speeds need to be, you can take a few measurements.
Using the stopwatch and live view, measure the time a car takes to pass through your frame. Add around 5 to 10 seconds to that value and you are set. Those 5-10 seconds are the buffer you’ll need to activate the camera before the car enters the frame and to have time to exit the frame if the car drives slightly slower.
If you want more light trails on a street that isn’t that busy, photograph several separate cars, one where the surrounding area isn’t well exposed, and one base image where the surrounding area is exposed half a stop under. Then merge them all in Photoshop using “lighten” blending mode.
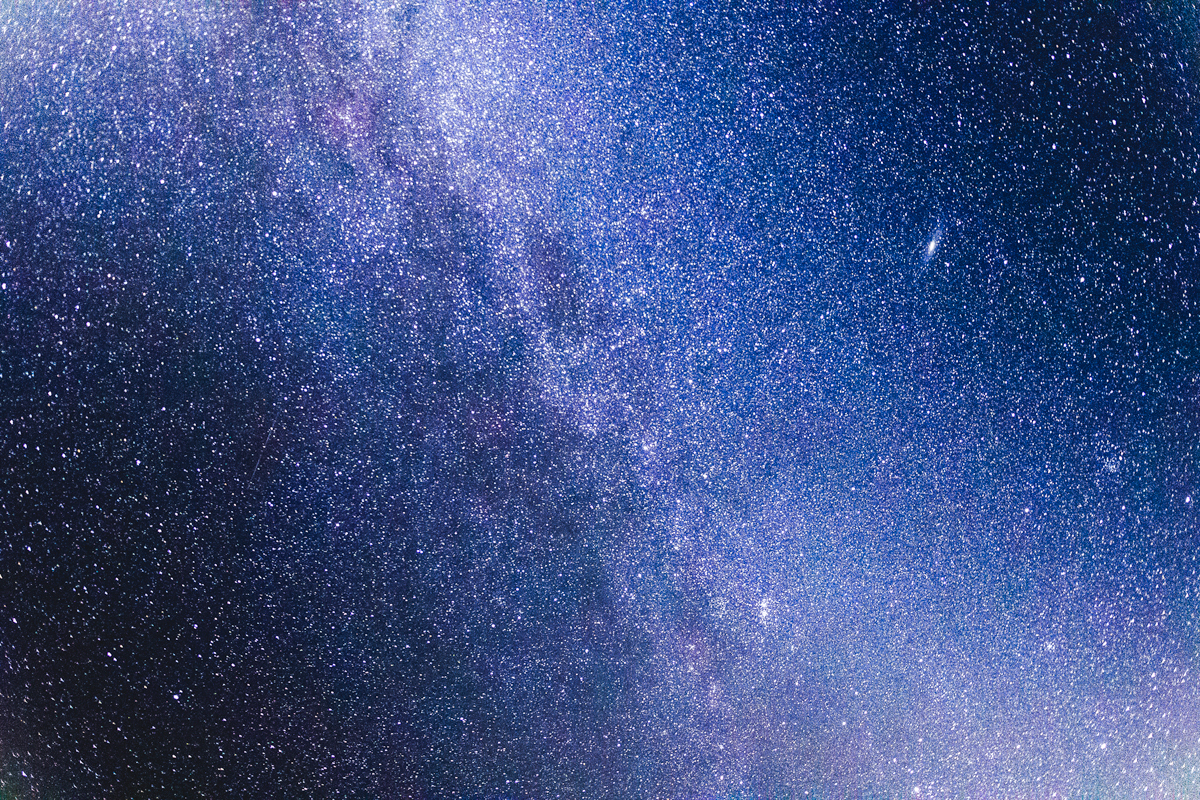
To photograph stars, you’ll need to be outside of any area that has lights. That means, get out of the city. Avoid light pollution since it will mask the stars. Also, you’ll need to pick a clear day (overcast means no stars) that has no moon. Other than that, you’ll need a fast wide angle lens—usually, f/2.8 does the job.
Following the “500 rule,” the shutter speed needs to be 500/lens focal length = seconds of exposure. Bear in mind that if you are using a crop sensor camera, you’ll need to multiply the focal length by 1.6 for Canon, 1.5 for Nikon, and 2.0 for micro four thirds cameras.
So if you are using an 18mm lens on a crop sensor camera the equation would be 500/(18*1.6)= 17.3 seconds, and you round that up to the shorter value that the camera goes to (in this case 15 seconds). The aperture is wide open, and you compensate the rest with ISO.
Usually, when I photograph stars with my Canon EOS 7D Mark II Digital SLR Camera 7D Mark II, the settings are something like this: 18mm at f/1.8 and ISO 6400. The 500 rule is there to avoid star trails, since stars move relative to the Earth.
There is no science fiction here, you can use the moonlight to capture landscapes similarly as you would use the sunlight. The only difference is that the moon produces a mere fraction of the light that the sun does.
Given the fact that it is actually sunlight being reflected off of the surface of the moon, there are wavelengths of the light lost or subdued in the process. You’ll notice that there won’t be much red and yellow; rather it will shift highly towards the blue tones. Trying to correct that in post processing will result in weird looking colors. Embrace the type of light and use it to your advantage. The moon is white, so calibrate the white balance accordingly and go for it.
In order to capture the city lit up with all the lights, you have to shoot while there is still some remnant of the sunset. First, take the shot without the city lights (a tripod is necessary here), as if you would shoot it normally. Then, wait for the lights to turn on, and photograph it again. Merge the two shots in Photoshop afterward using the “Lighten” blending mode and some selective blending done via masking.

You’ll need to be quite smart about this scenario. You’ll either need to use a high ISO to have fast enough shutter speed, or you’ll have to use artificial light to compensate. You can do so by using flashes, or you can use lights available around the city. The trick is to find a middle ground between the slowest shutter speed you can use without any issues, and the lowest ISO you can use to have enough light to do so. Make sure the aperture is wide open in this scenario since you need the maximum amount of light passing through the lens.
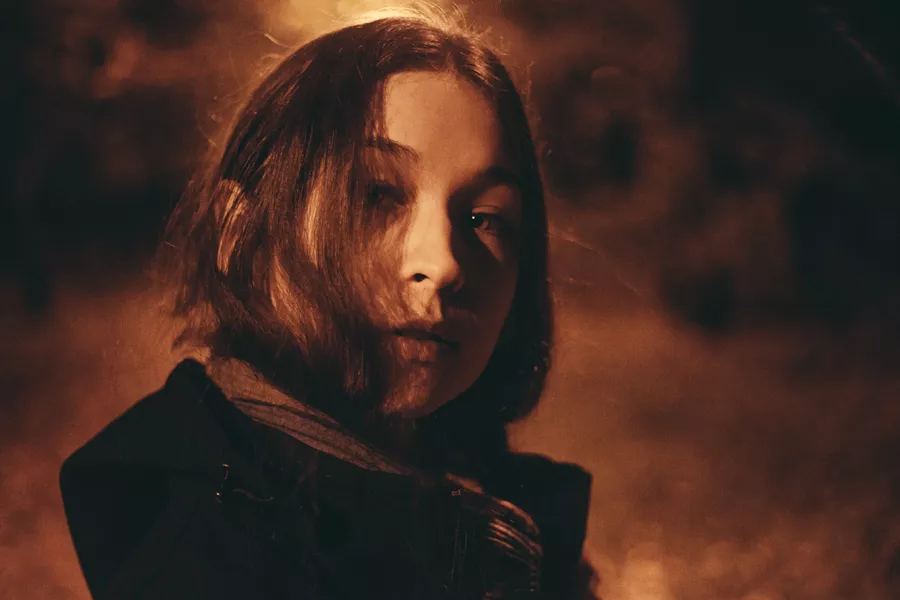
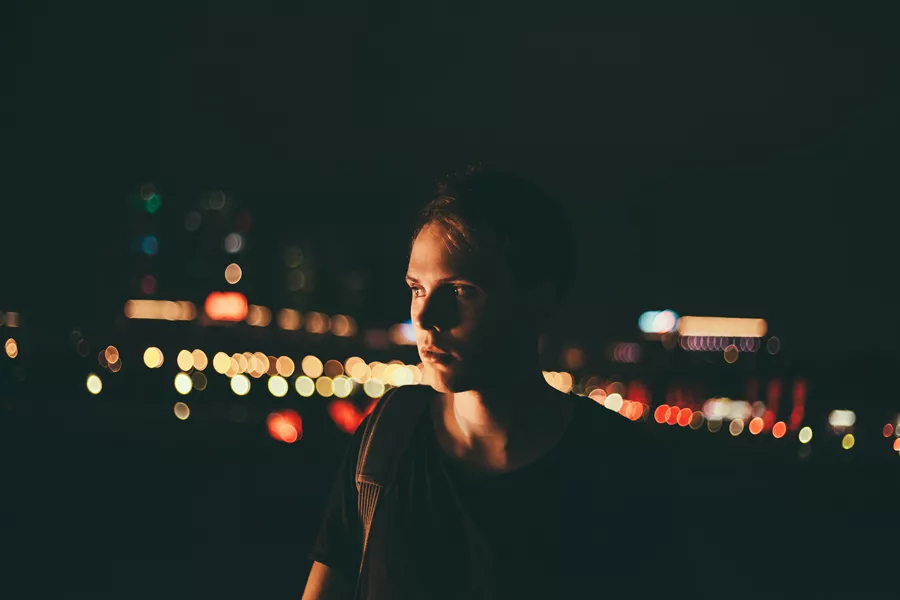
For many of portrait photographers, shooting in excellent lighting conditions is an absolute joy. An abundance of light prevents us from worrying about ISO, flash, and the plethora of technical issues most nighttime photographers have to consider. When the sun sets or when the weather worsens, we might be tempted to put down our cameras and wait for better shooting days. However, much beauty can be found in darkness. The artificial light coming from streetlights, torches, and windows is as valuable as sunlight. In addition to being a useful source of light, it adds a touch of mystery to photos, allowing photographers to pour great imagination and originality into their portfolios.
If you’re not sure where to begin, then consider some, if not all, of the tips below. They cover important topics like ISO, focus, the desire to experiment, and more. Using these tips, you’ll be able to conquer your artistic fear of the dark and create eye-catching photos in the process.
Artificial light is useful for a variety of reasons:
As you take all of these points into consideration, embrace the concept of experimentation. If you don’t own expensive lighting equipment, use your phone, torch, or street lights instead. The less equipment you have, the more healthy challenges you’ll have to face.
For example, if you have to shoot in complete darkness with only a single torch, you’ll be faced with questions about the light’s position and distance from your subject. Experimenting with this might lead to unexpected shooting opportunities, as well as a brighter imagination. Once you do obtain better lighting equipment, you’ll be all the more prepared to tackle those creative ideas to create striking portraits.

Oftentimes, a high ISO is associated with unpleasantly grainy photographs. While this is true if your ISO is at its highest, a lower amount will create a balanced and sharp portrait. An ISO of 1,600 is often more than enough to take a clear portrait without accumulating an unnecessary amount of grain.
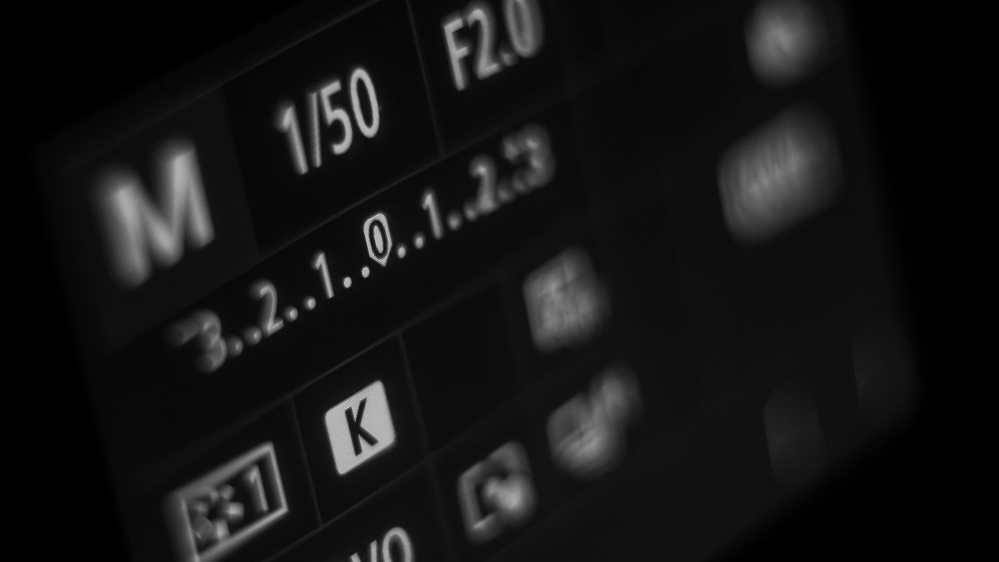
In photography, Kelvin is a unit used to measure color temperature. In situations where artificial light is too yellow or too blue, Kelvin can save the resulting photos from looking unnatural.
The Kelvin scale typically ranges from 2,000K to 9,000K. If the artificial light you’re working with is very warm, set your white balance to 3,500K or lower. If the opposite is true, the color temperature should be anywhere from 5,500K to 8,500K. Though making these changes takes time, mastering them will give you more control over your photographs and save you lots of time during the editing process. With time, worrying about fixing strange colors in a portrait will cease to be an issue.
There are times when the camera cannot focus, even though some light is present. For example, if you want to photograph a silhouette set against a bright city, the camera may get confused and focus on the wrong thing. Even if you focus manually, it may be too dark for you to find your subject’s face.
Fixing this is very simple: make your subject hold a small source of light, be it their phone or a torch, close to their face. Once your focus is ready, hold it until your subject removes the light and poses again. This will guarantee sharp results.
Shooting in continuous (or burst) mode will allow you to take a bunch of photographs in a matter of seconds. This will guarantee at least one sharp shot. If you’re new to nighttime photography, make sure you experiment a little with this.
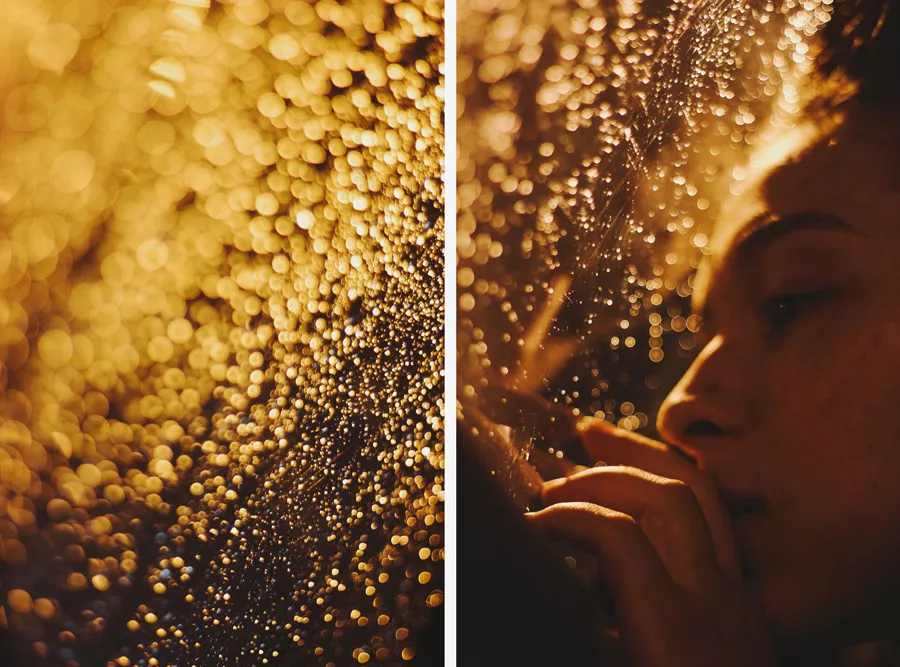
Standing directly under or too close to artificial light will create harsh portraits. Unless you’re experimenting with moody portraits, take a few steps away from direct sources of light. This, combined with the appropriate color temperature, will add softness to your portraits.
Using some, if not all, of the aforementioned tips, will help you become a better portrait photographer in general, even if nighttime shoots aren’t something you’re interested in. However, allow yourself to experiment with every photography genre – everything you learn will affect your main interests, forming you into a better and more open-minded artist.
Night photography can be a challenge, but it can also produce some of the most beautiful and unique images. We hope our tips and tricks have helped you to get started with this exciting genre of photography. And don’t forget, if you want even more effects and presets for night photography, we have just what you need. Download the Sleeklens Dramatic Nights Lightroom Collection for stunning presets that will take your photos to the next level.


Please verify your software version before proceeding.
 I’ve verified my software version


 Facebook
 Google +