Anyone involved in ecommerce will testify that presentation is important for selling products online. The best way to boost product presentation is through high-quality product photography. Taking beautiful product photos that highlight the best features of what you’re selling can go a long way toward helping your listings stand out.
Table of Contents
How to Shoot Product Photography
Invest in the Proper Gear
Set Optimal Camera Settings
Use Proper Lighting
Style the Scene with Props
Vary the Angles
Product photography is not as easy as simply pointing and shooting. However, as long as you have the proper tools and techniques, anyone can take captivating, high-quality product photos. You can even take your skills to the next level with our Product Photography Lightroom presets.
How To Shoot Product Photography
Whether you’re a business owner who wants to take a DIY product photography approach, or an aspiring professional photographer looking to expand into the product photography niche, the following product photography guide will take your product photography skills to the next level:
1. Invest in the Proper Gear
Cameras
If you’re just starting out as a photographer, investing in photography equipment can seem like an expensive, daunting task. The truth is that while having the right gear makes a significant difference in the quality of your photos, you don’t have to spend a fortune to get decent equipment. Although it doesn’t hurt to have a top-of-the-line $2,000 DSLR camera, it is also completely unnecessary.
In fact, many smartphones today are more than capable of taking high-end photos. If you have a newer iPhone or smartphone with a powerful camera and flexible settings, then you do necessarily not need to purchase a separate camera. If you want to go the traditional camera route, just make sure it has at least 24 MP. The best camera for product photography is really about personal choice, so long as it can produce a high-resolution image.
Lenses
Similarly, you may be wondering which lens is best for product photography. The best product photography lens has a focal length between 50mm-120mm for a full-frame camera or 35-60mm for a cropped sensor camera. This focal length range is best for portraying the product as it appears to the human eye.
Tripod
One essential piece of product photography equipment is a tripod to keep the camera stable while shooting photos. This will ensure you don’t wind up with blurry images, and keeps your photos consistent when shooting different products. A good tripod doesn’t have to be expensive. You can get tripods for as little as $20 online.
There are two types of tripods: traditional, which can be adjusted up and down, and flexible, which can be manipulated by bending the legs in different ways to get the angle you want. Both types of tripods come with a camera mount, but if you want to use your phone, you may need to purchase a mobile grip adapter, which you can screw into the tripod to use with a smartphone.
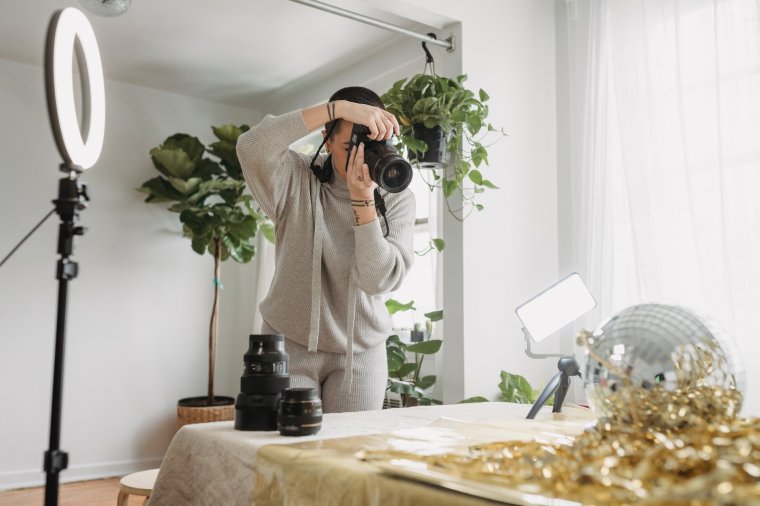
External Lighting
Another piece of product photography equipment you should definitely invest in is a lighting prop. Lighting is key to getting a professional, high-quality product photo. A beginner-friendly, versatile option is a ring light, which is a donut-shaped light designed to fit around your camera’s lens or clip onto your smartphone.
Ring lights are popular for product photography because they are very affordable and offer a lot of flexibility when it comes manipulating lighting to create different effects. You can shoot with a ring light from farther away to get a softer, diffused lighting effect or position a ring light at a different angle to highlight specific details of your product.
One other lighting item you may want to consider is a product photography lightbox. A light box is a box that you fill with light and place your product inside of to avoid shadows when taking a product photograph.
Another way to control shadows is by positioning a less intense, secondary light opposite the main light. This “fill light” softens the shadows produced by the main light source. You can also purchase a flashbulb bounce card. Also called a reflector card, this small card “bounces” or “reflects” the light from your main light source back onto the surface underneath your product in order to minimize shadows. If you’re on a tight budget, foam boards are a great alternative to bounce cards.
Backgrounds
You also want to consider backgrounds for product photography. A common product background choice for product images is a white background. To achieve a pure white, perfect background look with no lines or blemishes, many professional product photographers use a sweep at their photo studio. A sweep is simply a large, bendable sheet, usually made of paper (though vinyl backgrounds can also be purchased)/ The bottom of the sweep acts as the surface underneath your product, then the sheet curves up behind your product to create the illusion of a white wall. The curve is invisible on camera, putting all the focus on your product. A cheaper alternative to a sweep is a poster board.
2. Set Optimal Camera Settings
Once you have your camera equipment, you want to get familiar with your camera’s manual settings to make full use of its capabilities. While cameras usually have an auto setting, adjusting the settings manually will give you more control over how the photo turns out.
It may be tempting to save time by snapping quick photos without adjusting the camera’s settings. In reality, however, this just creates more work for you in post-production. A good product photography tip is to always shoot for the edit. Putting the initial effort into your product photography setup by styling the scene, adjusting lighting, and setting optimal camera settings is always worth it, and will prevent time-consuming editing work later on.
The three main settings you need to learn to use are ISO, aperture, and shutter speed.
ISO
ISO settings adjust how sensitive the camera sensor is to light. The lower the ISO setting, the less sensitive the sensor is, and the longer the photo will take to shoot. ISO measurements range from 100-3200, with ISO 100 meaning a full second to take a photo and ISO 3200 meaning 1/32 a second. For product photography, it is best to keep the ISO low. A low ISO setting will help you avoid noise in the photograph. Set your ISO to 100 and see how the photo turns out. If it is too dark, you can gradually increase ISO until the photo is properly lit.
Aperture
Aperture controls how much light passes through the camera lens, and determines the photo’s depth of field. Aperture is measured using F-stop, and most cameras have a range between F1-F22. An F1 setting means that more light can pass through the lens to the camera. Lower aperture settings create shallow depths of field, giving you a narrow range of focus. This is great for focusing on a specific detail, but more commonly in product photography, you need to set the aperture high, between F16 and F22. This will ensure that the whole product is in focus and will give you the biggest depth of field.
Shutter Speed
Shutter speed is how fast the shutter of the camera opens and closes. Lower shutter speeds let more light into the camera. Look at your image through the camera’s live view and adjust the shutter speed until it has the optimal exposure. Normally, product photos benefit from a lower shutter speed—around 1/13. However, low shutter speeds can also result in motion blur if you are not shooting with a tripod. If you will be holding the camera in your hands or shooting a lifestyle photo with a model, you may need to adjust the shutter speed higher to prevent blurriness.
RAW Format Setting
Some cameras have a RAW file setting, which gives you the highest resolution image file possible. If your camera has this, you should definitely use it, but keep in mind you will need to use special photo editing software, like Adobe Photoshop, to edit the final product image.
White Balance
Another camera setting you should get comfortable with is white balance. White balance adjusts the colors of your image so that they appear naturally. If the white balance of your photo is off, then the colors can appear different than they are in reality by taking on warm or cool tones that aren’t actually there (a phenomenon known as color cast.)
White balance is measured in Kelvins (K.) With product photography, you can usually set white balance to auto, but there will also be times where you may want to manually adjust the white balance setting. For instance, if you are shooting outdoors, you may want to adjust the white balance to between 5,000-6,500K.
Portrait Mode
Your camera also has different modes you can take advantage of to get unique effects. If you will be shooting product photos in a real-world setting, then you should consider putting your camera into portrait mode. Dynamic, lifestyle shots are wonderful for putting your product into context, and can be very appealing. It is easy for your product to get lost in its surroundings, and make it unclear on what you are selling. Portrait mode blurs the background slightly, bringing the focus back to your product. This photography technique shows the context of your product, while giving the product itself emphasis and depth.
3. Use Proper Lighting
Never underestimate the power of lighting when it comes to taking product photographs. Using proper lighting is key to taking a picture that looks professional and puts your product in the best light possible (literally.) The best product photos give the customer a true-to-life image that reveals everything they need to see before purchasing. If the lighting is poor, then your product is not going to look as good as it does in real life.
So, what is the best lighting for product photography?
When it comes to how to product photography lighting, you have two: natural lighting or artificial lighting. Every product photo shoot is different. What works for one type of product may hinder another product’s appearance. The product itself and purpose of the product photo will help you decide which way you want to go.
Natural Light
Natural light is sunlight. It is also called soft light because the sun’s rays cast wider, softer beams of light compared to artificial lights, like a lamp beaming down directly on an object.
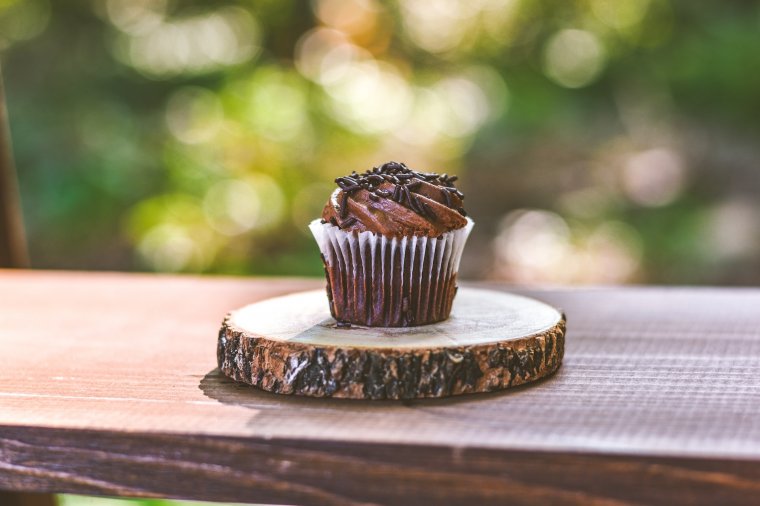
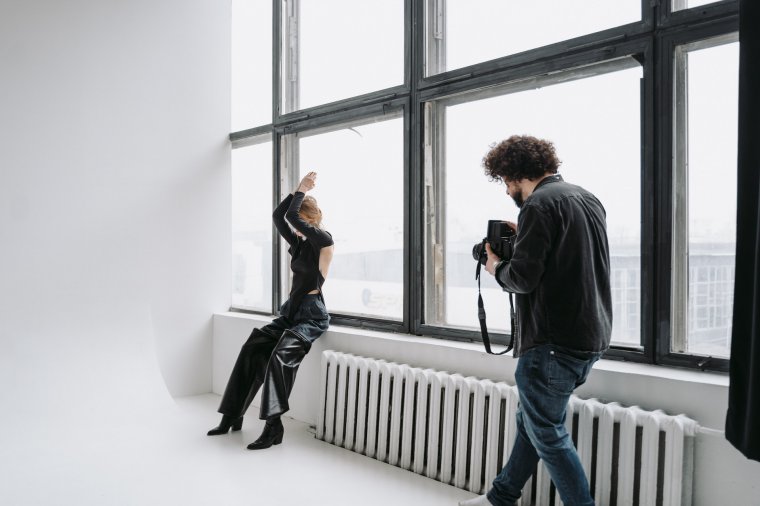
People flourish in natural light, so if you are taking product photos with a model wearing or using the product, then you may want to opt for natural lighting. Food photography and outdoor product photography with a natural background are additional examples of where natural lighting can help enhance the subject. Natural light also works wonders for lifestyle images that take the focus off the product’s details to emphasize its context in its surroundings.
If you want to take advantage of the sun’s rays for your product photograph, you can either shoot indoors with your product facing a window, or take your setup outside. The best times of day to shoot photos with natural lighting are early morning and late afternoon. Overcast days are also great for taking photos. You want to take pictures when the sun is shining, but not too harshly. If you take pictures at noon on a bright, sunny day, you will get too much glare and shadows in your photographs.
Studio Lighting
On the other hand, artificial light, also known as studio lighting, works well for products like artwork or fine glassware that have a lot of small details you want to showcase. It also works well for products that are normally used indoors, like furniture or cookware.
Artificial lighting is called hard light because it gives off a more focused beam of light. With studio light, you have more control over how light causes certain features of your product to “pop.”
In general, you should not combine an artificial lighting setup with natural lighting. As a rule of thumb, you want to use artificial lighting when you want a sharper look and natural lighting when you want a softer look.
4. Style the Scene with Props
When shooting product shots, you’ll need to decide which type of background you want to use. You can pick a no-frills white background or go with something more dynamic.
You may be wondering, “what is the best backdrop for product photography?” The truth is it depends on the photo shoot. You should not base the decision of which background to use for product photography on whatever is easier to create; rather, your product photography background should align with how you want customers to perceive the product.
Do you need to style the photoshoot? The answer to that question depends on the effect you want your photo to have.
White Backgrounds
When you’re first getting started with product photography, it’s a good idea to master the classic, pure white background. A white background for product photography looks professional and keeps the focus entirely on your product. As previously mention, you can also use a sweep to get a pure, blemish-free look.
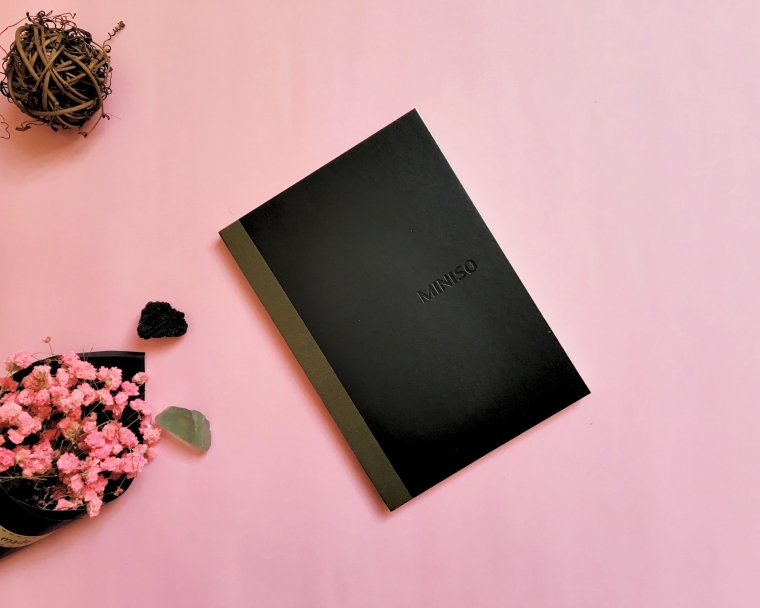
Black and Solid Color Backgrounds
Another product photography background idea is using a black background or solid color. A colored backdrop can create a stunning visual effect and spice things up. Just be sure the color you choose complements the color of your product. Similarly to a pure white background, you can also purchase a colored background or black background sweep to ensure that the background is free of imperfections and harsh lines.
Product Photography Props
Once you’ve got the basics of shooting product photography down, props can help make it more interesting. A more complex product photography background can be trickier to get a grip on, but when done right, contextual backgrounds can enhance the beauty of your product. Never forget that photography is an art form. So, when shooting product photography, feel free to get your creative juices flowing and bring in props to style the scene!
Using product photography props can showcase how your product is used in a lifestyle setting. and make your brand stand out. While you can style your product photography setup however you wish, there are a few tips to keep in mind.
First, don’t go overboard. To avoid a busy background that detracts from your product image, keep props minimal and simple. This will ensure that the focus of your photographs remains on the product itself. Your product photography props should complement, rather than compete with, the product—both in quantity and in quality.
Second, make sure the props for product photography align with a color scheme. If you choose to use a colored background, then pick a background color that complements the color of your product. Don’t use props that clash with the color of your product or background. You want all the colors in your product photography scene to create an appealing aesthetic. One way to achieve this is by sticking to neutral colors with a single prop added to give a pop of color.
Finally, keep props in context. Only include props that help bring out the best features of your product, and give context to how your product is used. When shooting a lifestyle shot, it helps to add props that give the potential customer a sense of how your product can assist them with daily life. You can get product photography ideas from looking at brands similar to yours to see what types of props they are using for their own product photography.
5. Vary the Angles
As with any type of photography, it is important to take multiple shots so that you can choose the best pictures from a bunch of photos. You don’t want to only take a few photos, only to not have any of them turn out quite right. With product photography, not only do you want to take several product shots, but you also want to capture various angles to show every aspect and detail of the item.
For example, if you are shooting pictures of clothing, take a photo of the front, back, and each side of the clothing article. If a model is wearing the clothing, have them stand at different angles to get a snapshot of each one.
Or, if you are shooting a food photography setup, take some pictures from above and a couple different side angles.
Including multiple angles of a product will simulate the real-world buying experience, and help the customer examine every aspect of the product. This will not only show your customers exactly what your product looks like, but will also help make your product pages more interesting with a variety of unique shots that give your products a competitive edge.
If you have a whole line-up of products to take pictures of at one time, it may seem like a time waster to take several photos of multiple angles of every product. However, the initial effort pays off in the end. Not only will shooting different angles show off all the product’s details, but it will also give you options when it comes to selecting which photos to use.
Sometimes, the angles you think would look best don’t turn out as well, while a different angle you were skeptical of turns out beautifully. So, don’t be afraid to experiment. The good thing about product photography is that you have the ability to snap a whole bunch of different product shots and strategically pick the best ones.
Product Photography is an Important Component of the Customer Experience
Showcasing your products with high-end, compelling product photography can be the difference between converting a potential customer and losing a sale. Even if you have a killer product description and wonderful product, you can lose out on customers by neglecting product imagery. Beautiful pictures are well within anyone’s reach, as long as you follow the product photography tips listed above.
After you gather your product photography gear, adjust the camera settings and lighting, set up the perfect backdrop, style your shot with product photography props, and take several snapshots from different angles, it’s time to hop on a computer to edit your product images.
If you’ve done everything right, then it shouldn’t be too difficult to put the finishing touches on your product pictures.
Thankfully, SleekLens makes it easy. All it takes is a few simple clicks with our Chasing Light Workflow for Adobe Lightroom to get the perfect, cohesive look across all your product photos. Download it today to streamline your photo editing workflow and ensure your online shop looks as professional as possible!


 Facebook
 Google +