Architectural photography, at the first glance, might seem or look like a rather boring genre of photography to be interested in. I myself once thought this as well until I started to look beyond the idea of these buildings just being what they are–buildings. I slowly started to see the creative value in these structures and began to appreciate them by telling a story through my images.
Architectural photography has so much more to offer than what meets the eye. In this article, we will be going over everything you need to know about shooting architecture–from telling a story to gear to composition and editing.
Table of Contents
The best architectural photography tip we can offer is to approach the photograph with the goal of telling a story. The best way to accomplish this is by:
Architecture is a very interesting and vast field that encompasses many important things. A lot these buildings were built with careful thought and design into every square foot. Some of these buildings were built way before we were even born, but still manage to keep their integrity and beauty throughout the decades. Before we get excited and decide to grab our camera and other gear, it’s important to first get an understanding of your subject.
Getting an understanding of your subject will innately add more meaning to your photographs and allow you, as the photographer, to appreciate your subject more as well. A lot of these buildings hold historical meanings within their walls and have made their fair contribution to history. Your research will help you to share this historical contribution through the shots that you take, and by extension, help give a deeper meaning to your shots.
Creating or looking for more contrast when composing architectural shots can help to enhance the image and also add to your story. Every building is different in its own right, and will evoke its own style and look through the materials used to build it.
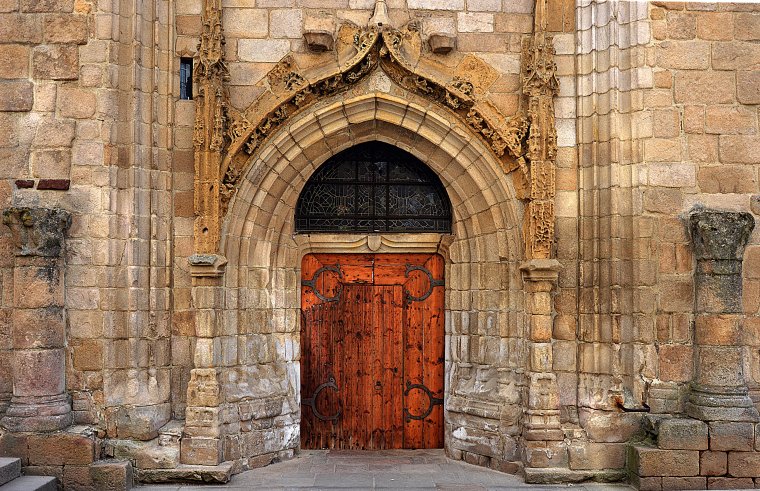
For example, you will receive a different feel or mood from an image of a modern-day building made with ridiculous amounts of glass and concrete than a building that was made out of stone in the 1800s. The contrast in your shots will show the differences in these two architectures and evoke a different feel in regards to the story told by each building.
Contrast helps to make every crack, crevis, window, and stone on a building look a lot richer, and you can almost see the history seeping through the image as well.
To create a good story you need to have a series of different scenes. To do this, you want to create a series of images when photographing a specific building. You will more than likely have to keep moving and shooting at the same time to capture different angles and perspectives of your subject, as you would when photograph a model. The only difference here is that this model is not able to change poses and look at the camera, so you will have to do most of the work.
Giving different perspectives will assist in giving the viewer a better understanding of what your subject has to offer, and create an imaginary timeline for your story.
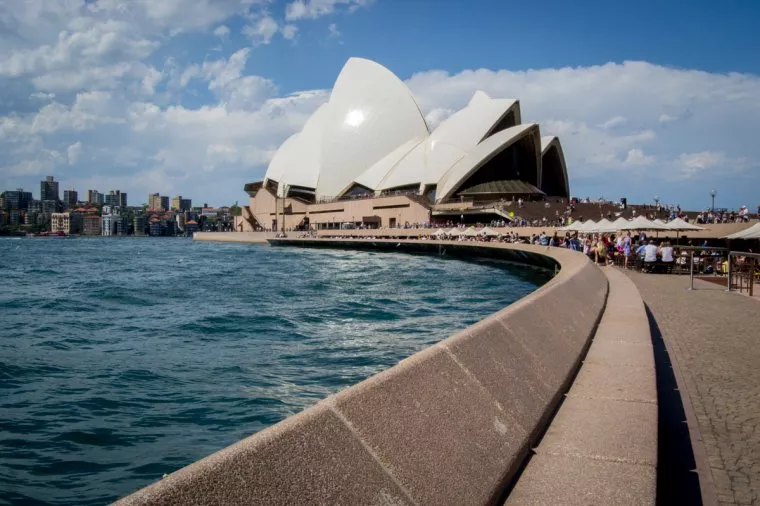
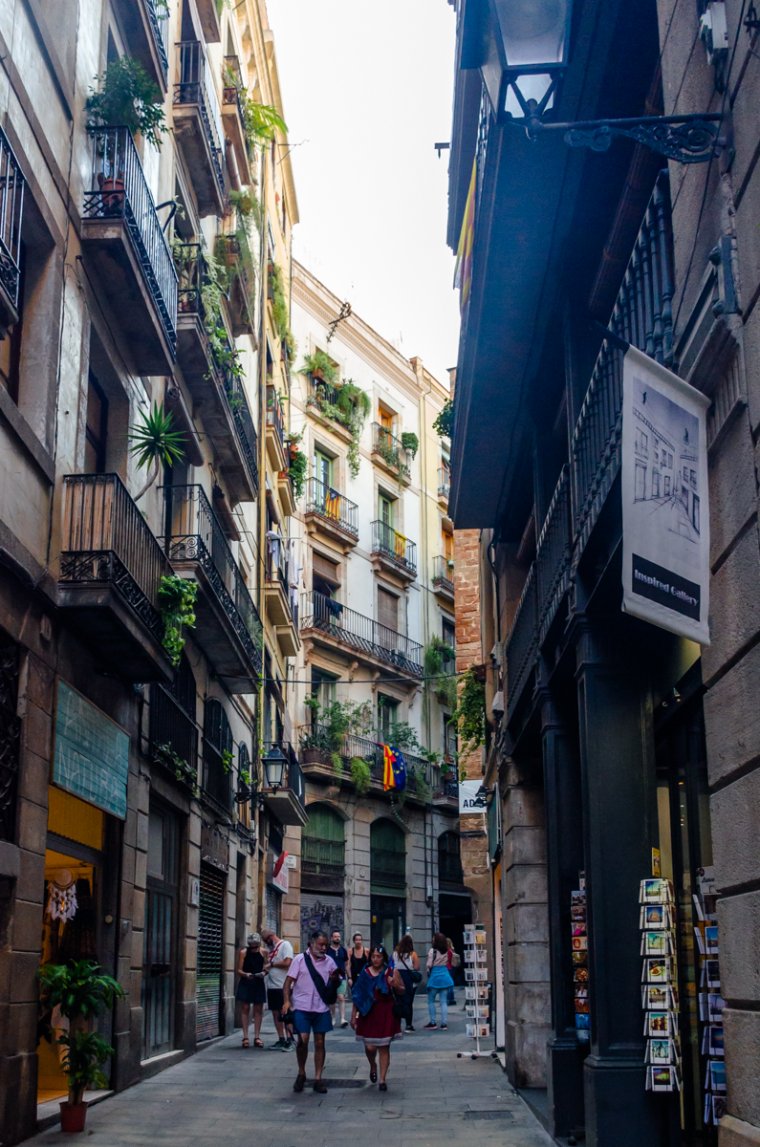
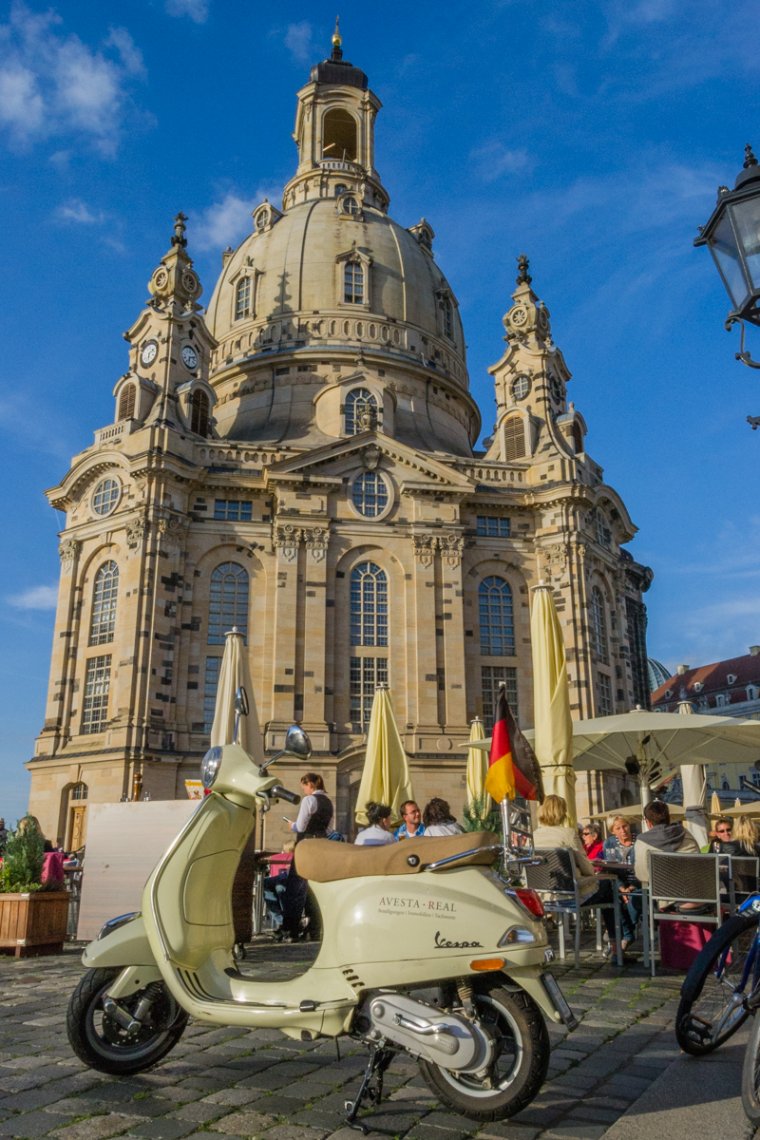
These stunning architectures themselves might be very impressive and captivating, but don’t forget that it’s often where the building is that adds to its character. Try to include some of these surroundings within your shot to add more character and give a sense of what the ambiance or atmosphere is like around the building.
For example, if there is a bike just casually leaning on the side of the building, composing that shot properly can add character and improve the story. Telling a story through photography is all about taking the little things that are often deemed insignificant and giving them significance in your frame.
There is a saying that “It’s all in the details,” which is important as details themselves can help to tell a story. If you were to capture the details in the architecture of a building, then you could easily show the age or historical importance of the building. These small details will add diversity to your series, as well as introduce a new perspective.
Now that we’ve talked about the importance of telling a story with architectural photography, let’s talk about the gear you’ll need to do so–particularly when it comes to a good architecture photography lens.
I would strongly recommend ultra wide-angle lenses for architectural photography.Ultra wide angle lens can be defined as any lens with a focal length shorter than 24mm. It is worth investing in ultra wide angle lenses due to their versatility. They are the must-have lenses in your camera bag, as they are usable in various fields such as landscape photography, street photography and, of course, architectural photography (especially exterior photography)
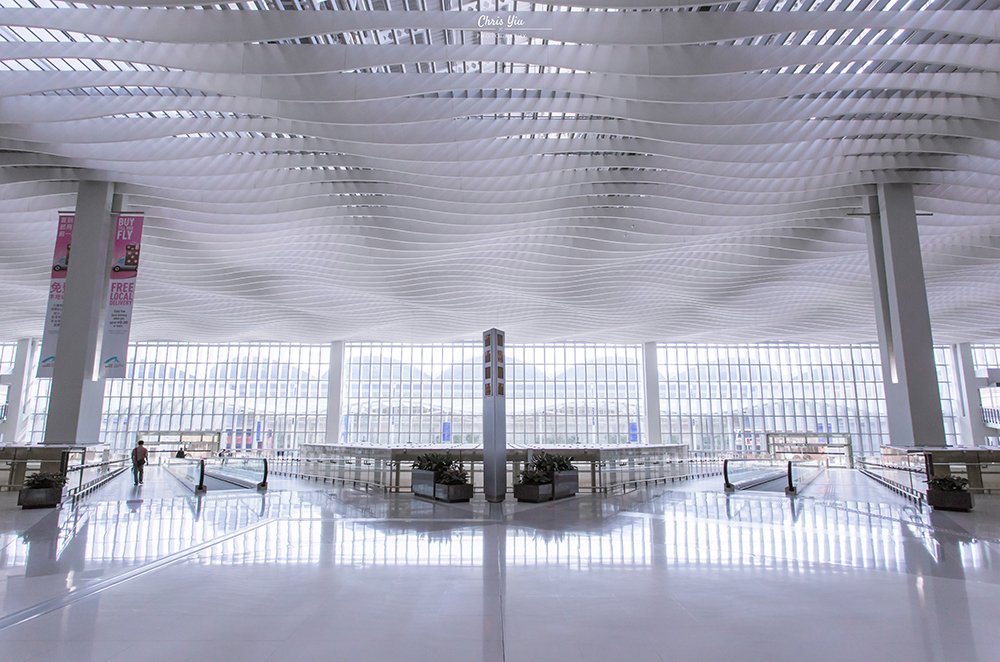
Wide angle lenses are capable of creating exaggerated perspective and capturing the most out of the scenes due to their field of view (FOV). It is useful for both large and small interior photography. No matter whether you are taking interior shots of an international airport, or shooting in a small room in a house, an ultra wide angle lenses will always get the job done.
However, you will need to pay attention to the perspective while shooting. Always remember that with short focal length comes strong distortion. If you are not handling the distortion properly, the photos will turn out weird.
Telephoto lenses are not in the must-have category because they are not as versatile as ultra wide angle lenses. It is still worth to consider buying one though if you haven’t yet. It is especially useful when you want to capture the details of a building.
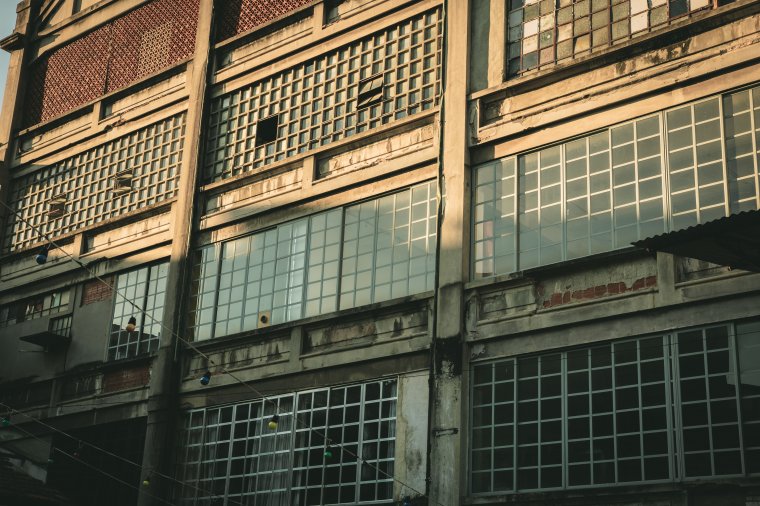
Unlike ultra wide angle lenses, telephoto lenses are capable of creating a sense of compactness in photos. The distance between subjects will be compressed. Therefore, they are extremely useful while shooting repetitive patterns. In most cases, distorted perspective, like the one seen in wide angle lenses, is not preferred. That is why I would recommend telephoto lenses if you are capturing repetitive patterns.
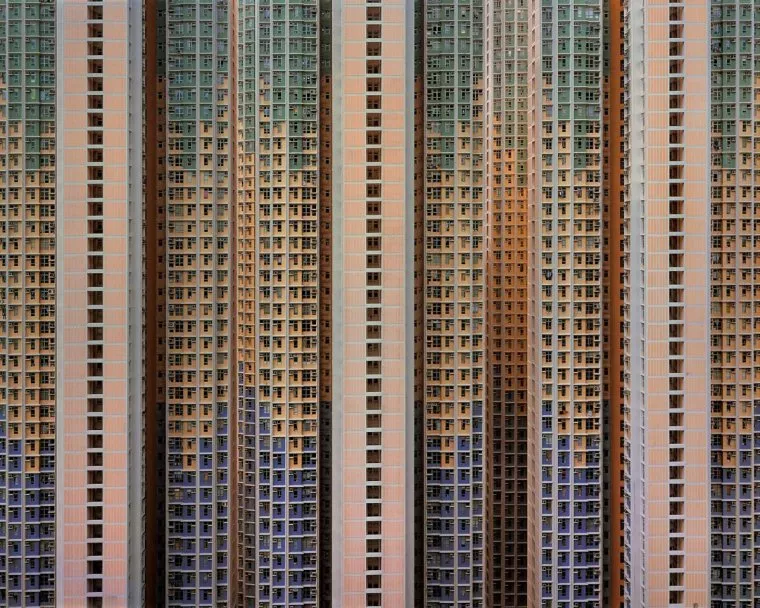
A photo from Michael Wolf which demonstrates compressed perspective. (Courtesy: Michael Wolf)
Michael Wolf is one of the famous photographers who is proficient in capturing stunning photos with the use of telephoto lenses. Some of the most famous masterpieces from him are doubtlessly the shots he has captured of closely packed buildings in Hong Kong. Distance seems to disappear in his works. Every subject lies on a flat surface.
It would be icing on the cake if you have a tilt shift lens in your camera bag. A tilt shift lens is relatively expensive. It has the lowest c/p among the three types of lens in this article. Despite the relatively low c/p ratio of tilt shift lenses, they have the most promising optics quality compared to most of the expensive lenses.
Before and after perspective correction. (Courtesy: Luminous Landscape)
Apart from the capability of producing exceptional images, a tilt shift lens is designed for perspective correction. You could rotate and move the lens to control the depth of field and perspective. It is specifically useful when you are shooting high-rise buildings, since perspective distortion is nearly inevitable if you were shooting with ordinary wide angle lenses. If you are pursuing the ultimate sharpness and exceptional image quality, a tilt-shift lens is your best option.
One of the best things about architectural photography is that it is available to everybody. Even if we live in a small place, we can easily find several types of buildings or man-made structures that can be an interesting subject for our images. However, architectural photography is not just “point and shoot”–you have to put a lot of thought into the photo’s composition.
It is a natural tendency of the human brain/eye to look for and follow lines. By paying attention to the placement of lines and angles of the building, we can exploit this to improve the composition of our photos and guide the viewers to focus on what we want them to.
Buildings are rich with lines and geometric shape and you really should use that to your advantage. For example, if you take a photo in a church that has a beautiful stained glass window you want the viewer to focus on, you could align the aisle and the window so that it will look like the passage is leading to the window
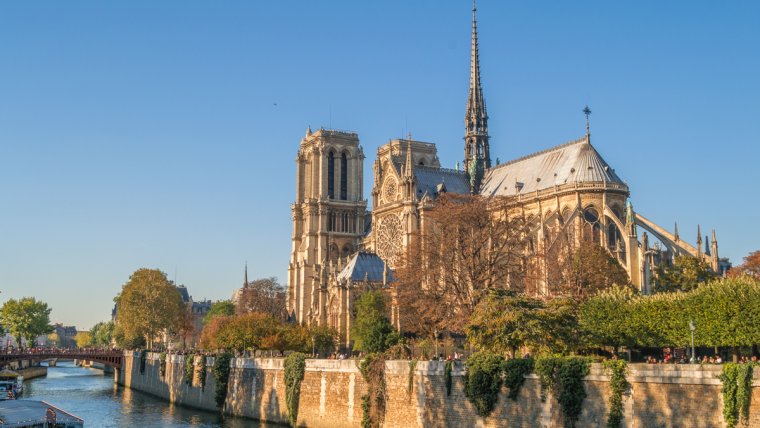
If the surrounding adds to the building, include it in the composition: It is a good habit to analyze the background/foreground of the building you are shooting at. It is true that sometimes the background might look messy, boring, or ugly. However, many times the background adds something to the story of the building. “Contextual background” is called so because this is what its role is, to give a bit of context to the building. This context might tell the viewer that the building is in the forest, next to the sea, or that the photo was taken at a special event (for example a photo of the Bastille in Paris on Bastille Day which includes the celebrations as well).

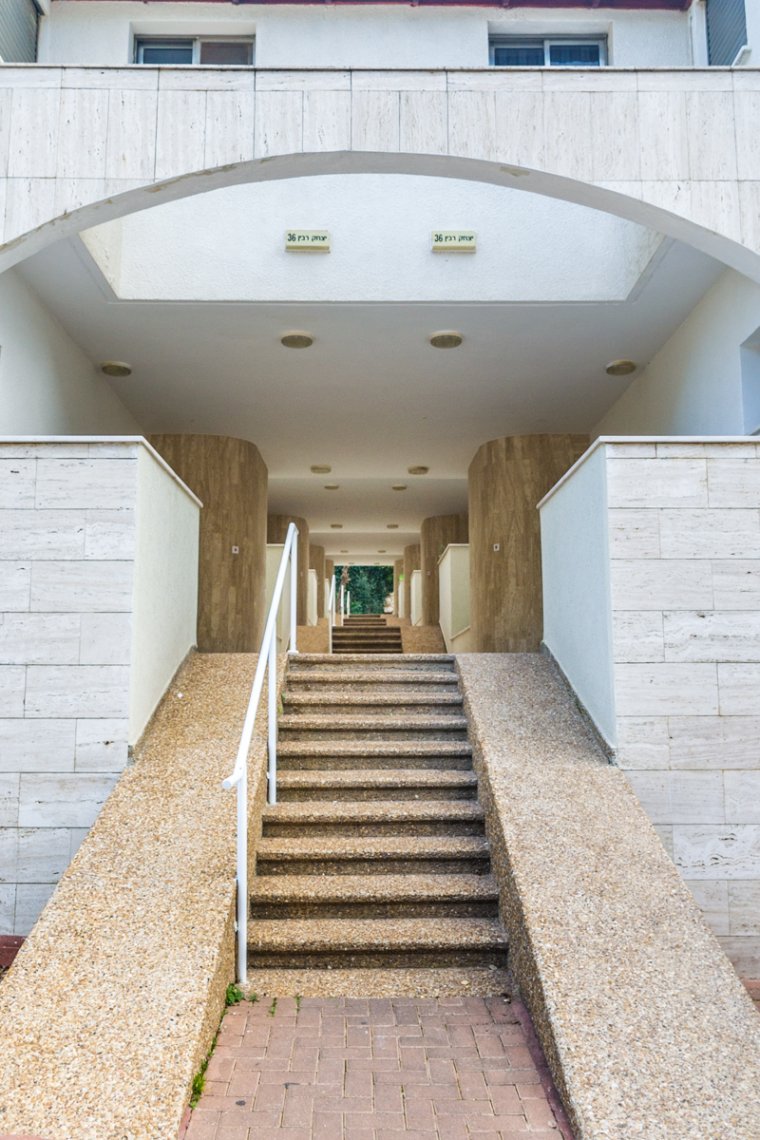
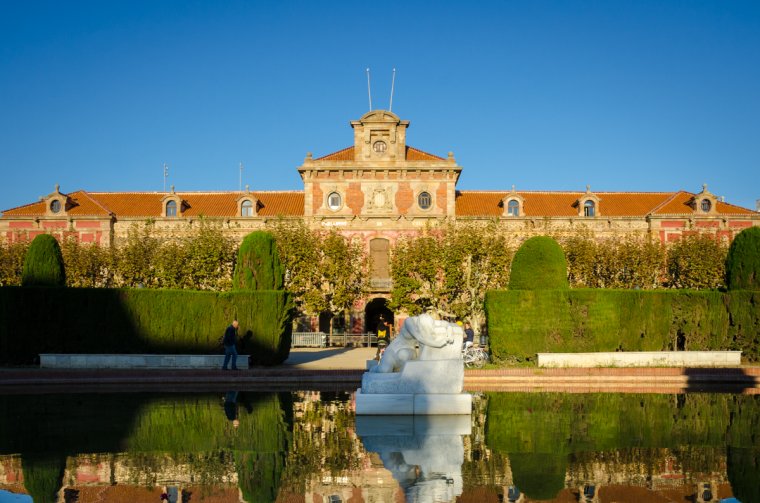
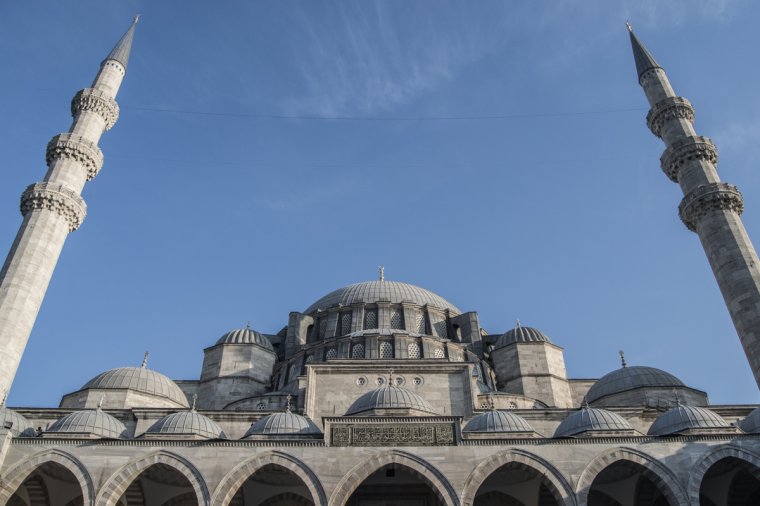
Symmetry will give a sense of balance to your images: man-made structures are usually full of lines and geometrical shapes. If you can show the symmetry of this shape, it will look balanced and pleasant to the eye.
Symmetrical images might look a bit too static sometimes (too perfect as well), but this is an effect that can work really nicely in architectural photography. If you are aiming for a symmetrical image, try to make it as symmetrical as you can, otherwise, it won’t have the same impact. You can also get symmetry by playing with reflections (windows, lakes, pools…)
The quality of light has a strong effect on how a building looks and it changes throughout the day. At sunrise and sunset, we usually have a soft light that comes with an angle. Shadows are usually long and soft. At midday, on the other hand, the light is hard, falling directly from above us and casting sharp shadows. The different types of light will make the same building look different. Shadows will look more interesting during the sunset and sunrise; on the other hand, colors will be brighter during the midday.
You can also include sunburst in your architecture photography to make the building look a bit different. You should consider what you want to capture in your image and adjust your time accordingly. I highly recommend experimenting with it to find the style you like.
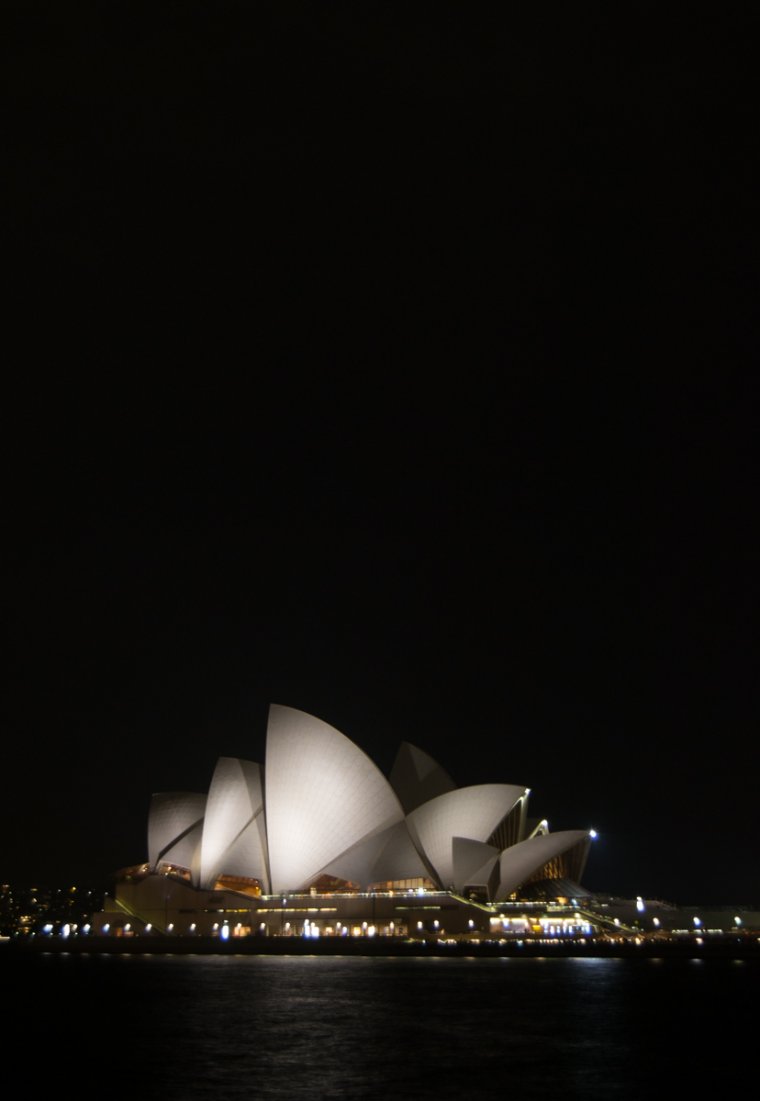
Ah! And don´t forget night photography! Some buildings have lights that make them look better at night. For night photography, I strongly recommend you use a tripod and play with long exposure.
It can be quite a challenge to fit a whole building in a frame. For this, maybe you need to go far in order to “make” the building small. But this approach is not always possible due to lack of time, or just because the building is surrounded by others that will block its view even from afar.
Something that might help fit the whole building in a frame is to have a wide angle lens. However, if you don’t have it, there is still a chance you can take a photo of a big building: shoot in panorama. I have to admit that a panorama takes more work than just shoot and go, but on the other side, it is totally worth it.
I usually like architectural photos that just include my main subject. If there is a human figure in the image, we instinctively give it a lot of importance, so I am always scared that the people become the main subject of the photo and the building would pass to a second place.
However, lately, I have learned that including human figures can give a sense of scale to the image. We are familiar with the height of a person, so when we place somebody close to a building, our brain compares its size with the one of the people. The trick is to keep the people small in a way that we still can see it is a human being, but that the important thing in the photo is the architecture.
We had gone through some of the important gears, especially lenses, that we will need while shooting architectural photography last time, no we are going to cover some of the essential shooting techniques . These techniques include observation of lights and compositions.
Architectural photography is similar to mathematical problems. There are numerous curves and polygons in a meticulously designed building. We will have to figure out the visual relationships between elements of the building. In order to get started, you will need to familiarize yourself with the following skills. The following tips could help you get better results in architectural photography.
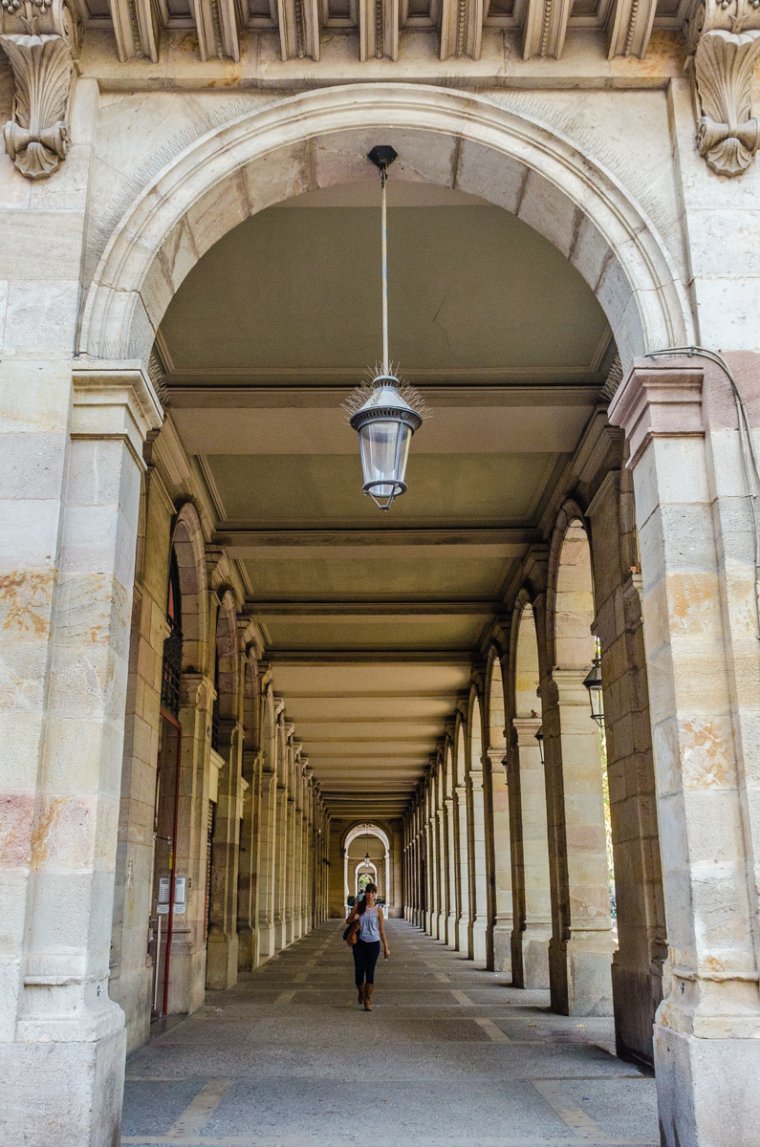
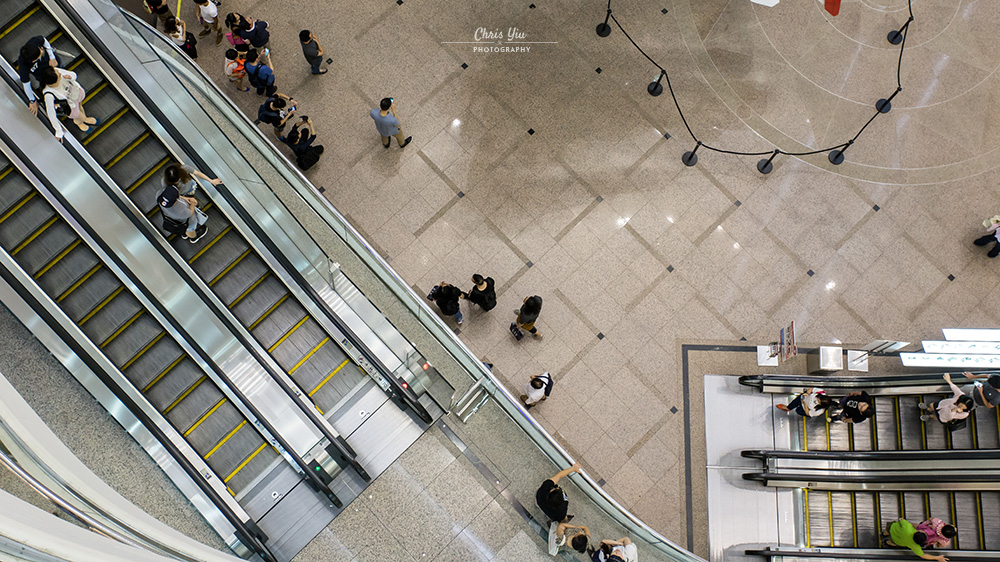
Everything we see in our daily life is formed by dot, line, and plane. To put it in a more unambiguous way, I would say the view we are seeing can be analyzed with the “dot, line, plane” approach. The dot represents objects that take up comparatively small area in the viewfinder. They are usually the focus of a photo. The line often refers to the objects that are usually, but not necessarily, capable of guiding the attention of audiences. The line could be a column, an escalator or even a corridor in a building. Plane refers to the objects that occupy a relatively large area in the viewfinder.
By understanding the characteristics of the above three elements, we could arrange them in the appropriate positions within the frame. For instance, it is always a good idea to put the dot, which is usually the focus of attention in a photo, on the intersections of the guidelines of the one-third rule. Then, it is a good option to put include a line element that guides the attention of audiences towards the dot element. There are unlimited possibilities and combinations while playing around with this approach. The aforementioned example is only one of the possibilities.
Perspective distortion is one of the most important considerations in architectural photography. We are seeking perfection while shooting a masterpiece made by talented architects. Therefore, perspective distortion must be avoided in most circumstances. Perspective distortions are commonly found in photos shot with ultra wide angle lenses.
There are two ways to minimize perspective distortion while shooting with wide angle lenses. Put the subject at the center of the frame since the subject will be less affected by distortion in that way. Furthermore, we could also correct perspective distortion in Adobe Photoshop and Lightroom. Despite the powerful post-editing functions of Adobe Photoshop, it still has some limits. Therefore, it is a must to predict how will you do the correction in post-editing before shooting.
Light is one of the most important elements in photography. We can capture nothing if there is no light. Therefore, photographers must be able to observe and analyze the lighting conditions at the scene. Weather plays an important role in architectural photography. The contrast becomes more apparent during sunny days. On the other hand, light is much more diffused during overcast days. As a result, the contrast will be less apparent. Direct sunlight is usually a preferable light source for architectural photography. Therefore, shooting during clear days is a better option in most circumstances.
Playing around with light and shadows is always an outstanding idea when direct sunlight is available. You may also capture light and shadows with the approach of minimalism. Minimalistic style usually gives decent results in architectural photography. Furthermore, you will have to ensure the scene is well lit.
If sunlight is insufficient to light up the scene while you are shooting indoor, you may consider using flash for auxiliary illumination. Softboxes usually give better results as they diffuse the flashes inside them. However, you will need to match them with the natural light sources, if any.
After familiarizing yourself with the essential skills of architectural photography, it’s time for us to move on and discover the possibilities in architectural photography. You may find yourself running out of ideas or inspirations sometimes. If that’s the case, this section will give you some decent ideas for your upcoming architectural photo shoot sessions.
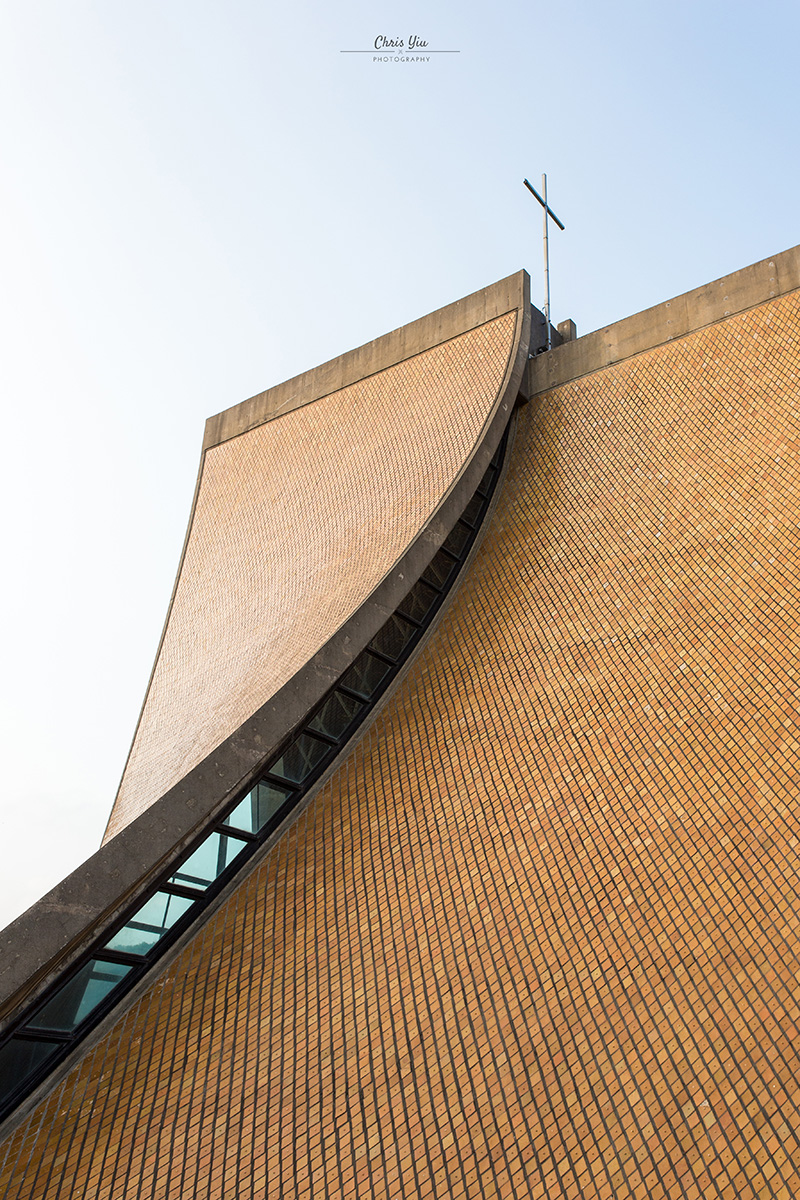
Minimalism has always been one of my favorite styles of photography. It is usually a good idea to take away all the unnecessary elements from your photos. Photos that are crammed with numerous subjects are unappealing to audiences. They will only distract audiences’ attention from the main subject. In most cases, only the building itself matters.
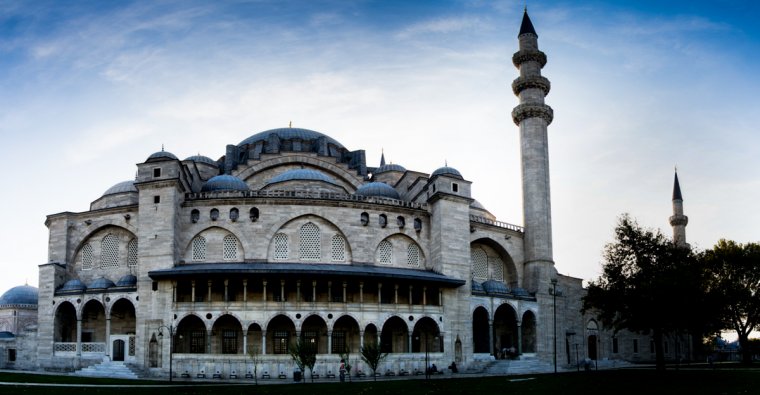
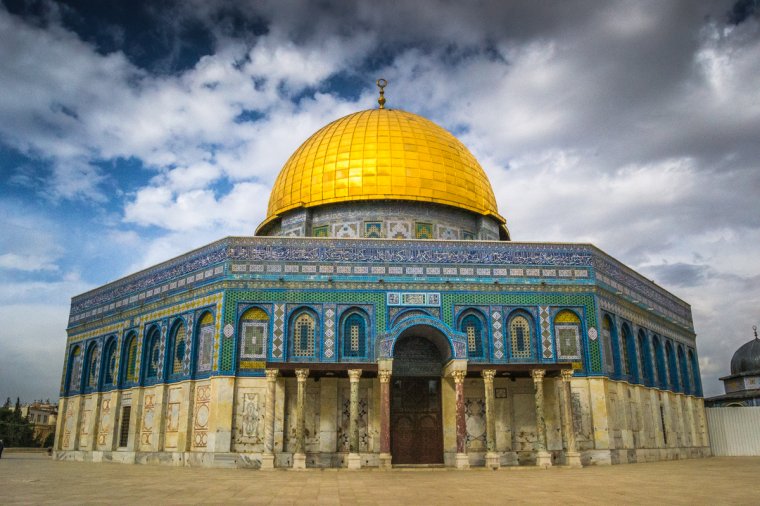
I would recommend you start with shooting only the building itself when you are not sure about where to start. The photo above is an example. The structure itself is already an architectural masterpiece. Therefore, other objects can be excluded from the shot. You may attempt composing your shots with centered composition, which is a superb combination of minimalism.
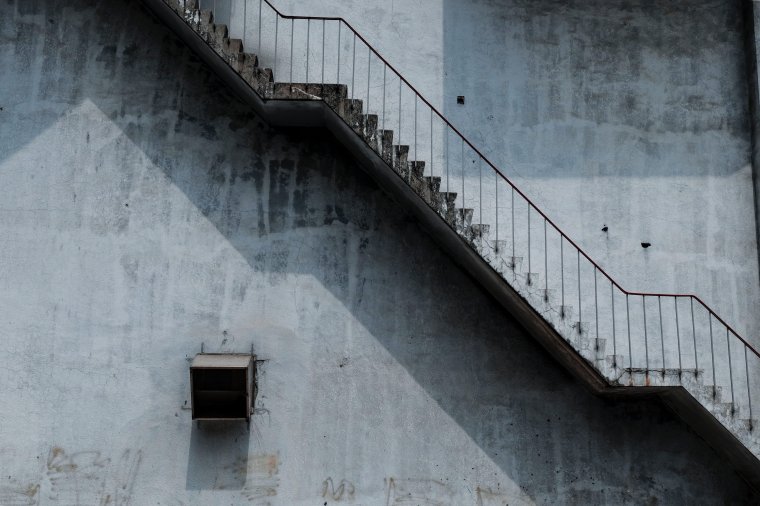
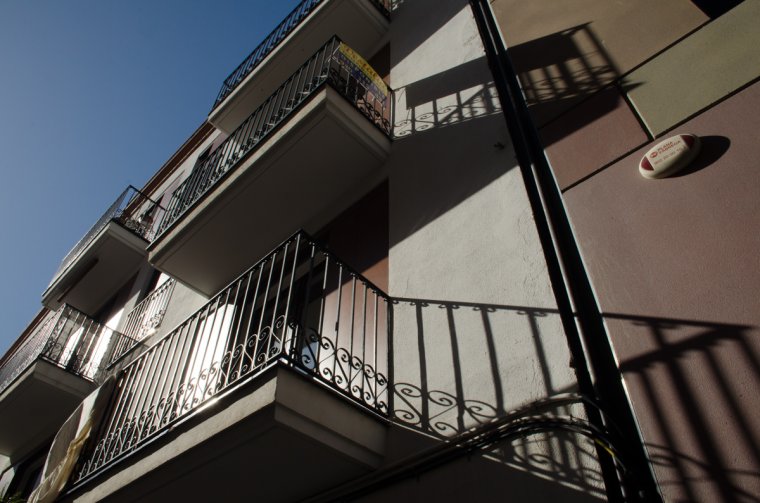
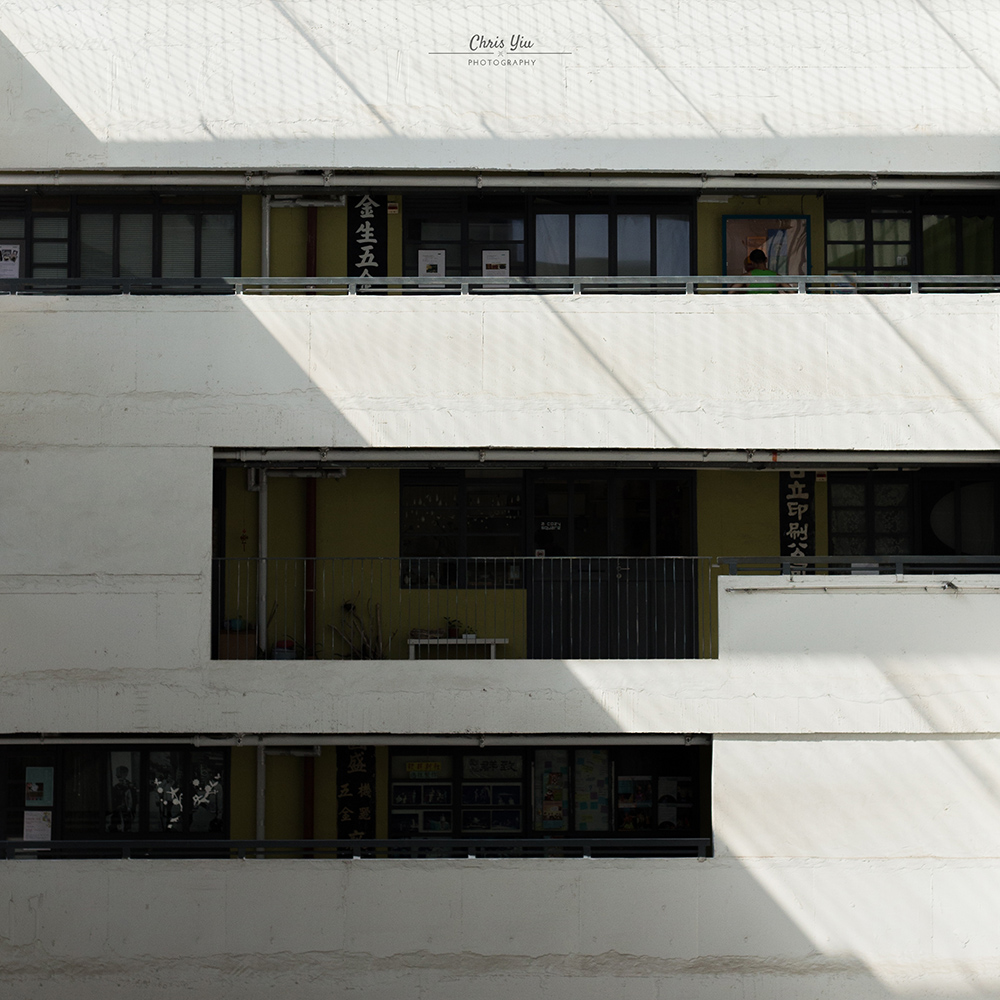
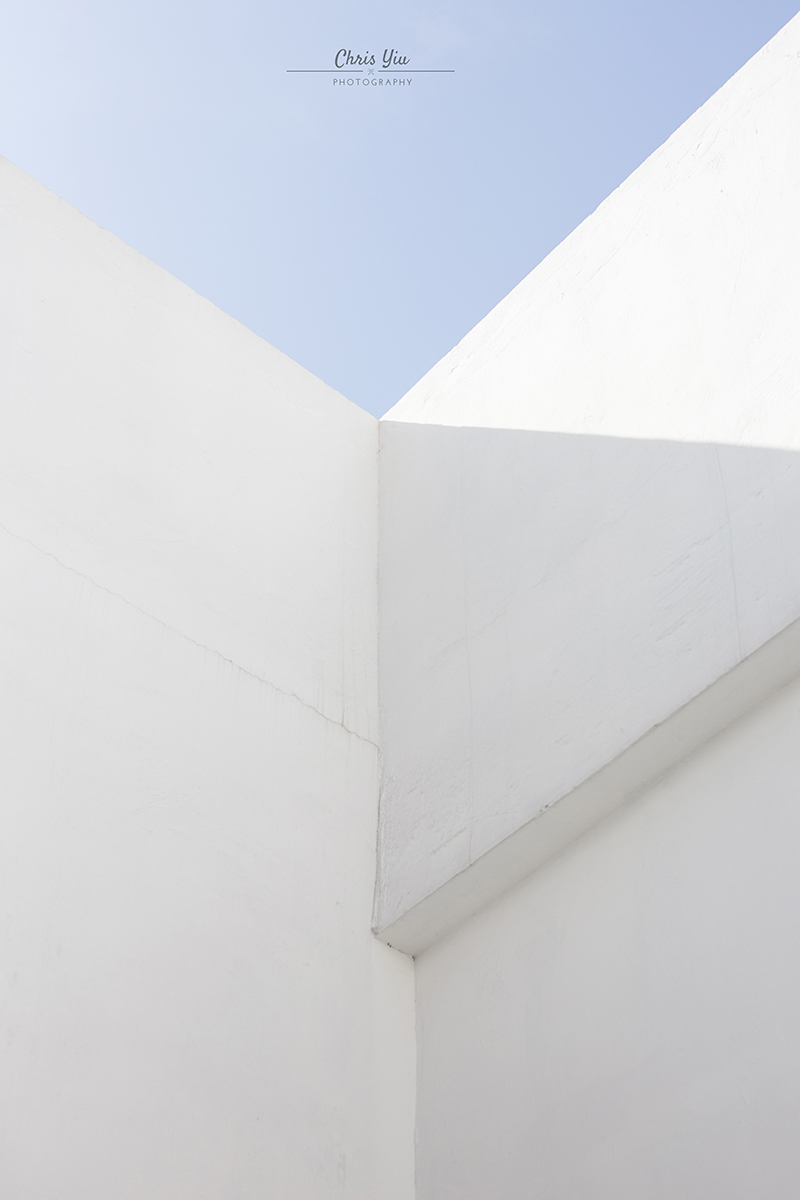
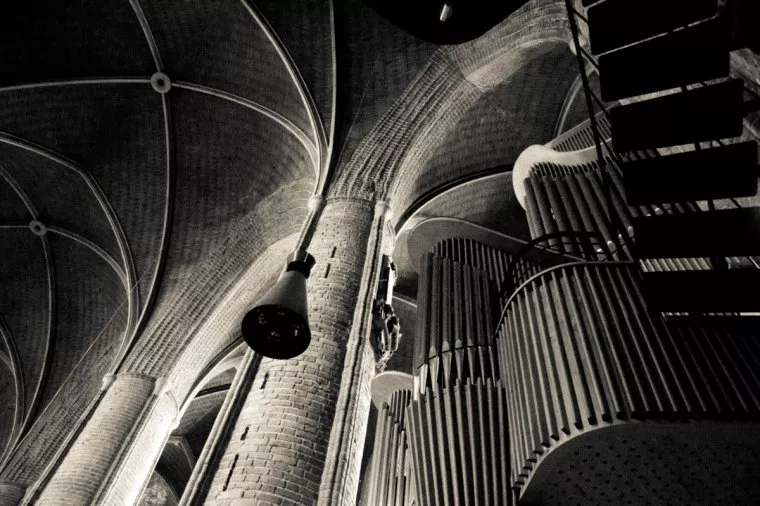
I always believe that architects are great artists that are good at playing with shadows. It is never difficult to find fascinating shadows inside a meticulously designed building. The structures inside buildings cast various patterns of shadows. Some of the shadows may form attractive geometric shapes.

Before getting down to business, you should always consider whether it will be shot in high-key or low-key. High-key and low-key lighting refer to different lighting ratios in a scene. In simple words, high-key photography produces brighter images whereas vice versa for low-key lighting.
In architectural photography, high-key images often deliver a sense of modernism while low-key images highlight the contour of subjects better. You will see the differences between high-key and low-key photography from the two images above.
Have you ever felt bored about the ordinary perspective you have been seeing the world from? Or have you been visiting the same building so many times that you find it difficult to shoot something new? Shooting from a brand-new perspective will do the trick.
I like to shoot from upper floors and lower floors. Overlooking from a higher place is an interesting experience. You will see the view that you haven’t seen before. Every three-dimensional subject in the scene looks two-dimensional when you see them from upper floors. Look into the geometry that you see from this perspective carefully. You will discover countless possibilities when viewing from the top.
This idea may sound a little cliche, but it has been around for decades and is commonly seen in fine art photography and architectural photography. I deeply believe you should give it a shot if you have never tried it with architectural photography before.
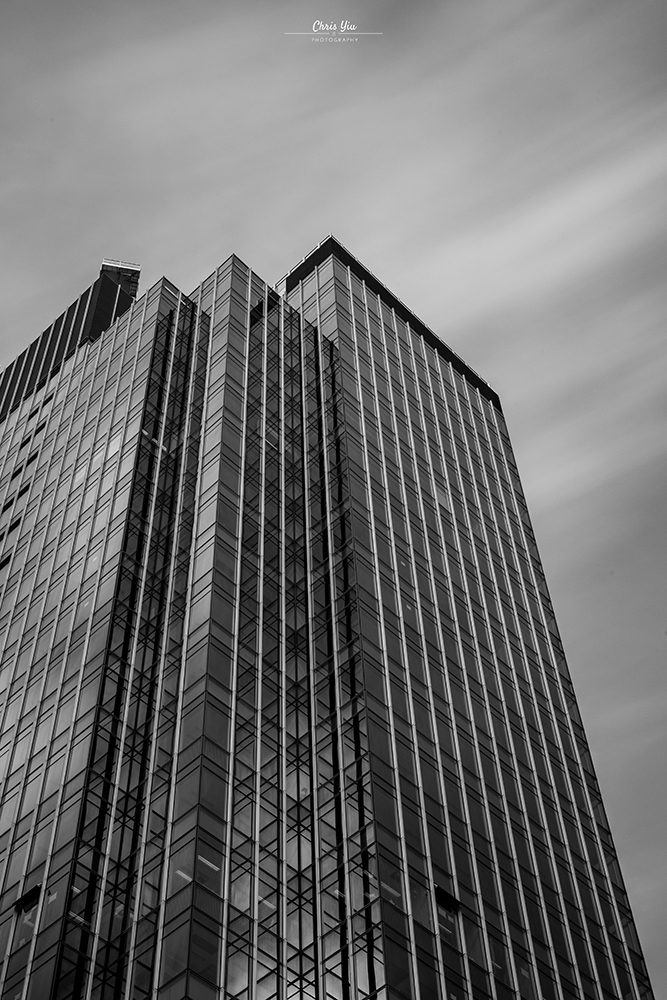
Needless to say, you will need some moving elements in your shots. Clouds are a decent option while you are shooting from the outside. Long exposure photography works well with black and white in most circumstances. Doubtlessly, you should never shoot in black and white blindly. You should pay attention to the lighting conditions, gradients, and other factors before you shoot in black and white.
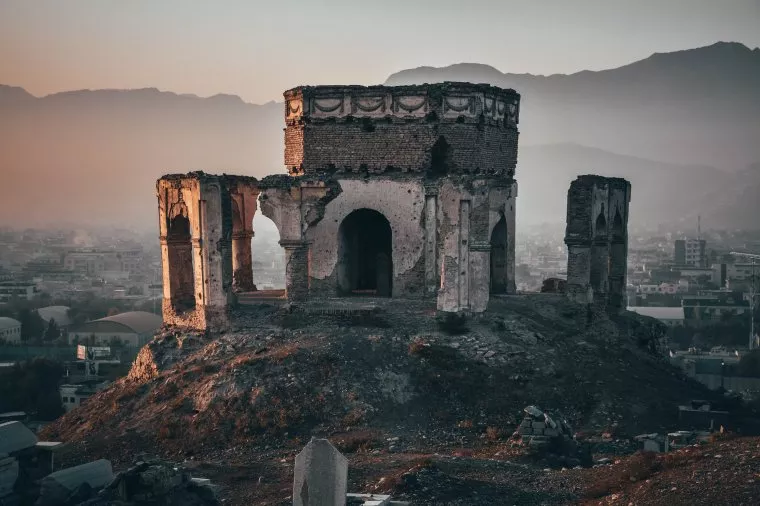
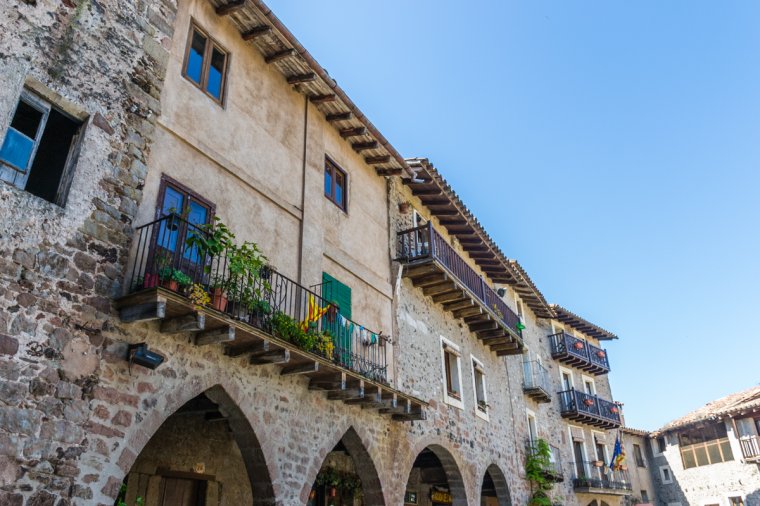
Historical buildings are a very popular aspect of architectural photography, especially when traveling. If you find yourself planning an historical building photo shoot, you’ll want to keep these tips in mind:
A lot of historical buildings are well taken care of, and some are open to visit, so it is easy to find information about them either online or at the site itself in tourist information centers. Once you choose a building, you should spend some time checking the activities/events that the building holds, opening hours…etc. Knowing these details will help you to decide the best moment for you to go.
Using the tripod is always a good thing when you are taking photos of architecture. Some of these buildings can be quite dark, so if you want to take a photo during sunset, for example (usually the golden light in this time creates a beautiful effect on this type of buildings), you might find it necessary to use low shutter speed, for which a tripod will be handy.
In addition, some of these buildings are illuminated at night. If you want to capture them at night, you will need to use long exposure photography. Having a tripod grants you more stability and lessens camera shaking and blur.
Keep in mind, using a tripod is not always possible. If the building is open to the public and there is a respectable amount of people visiting, setting a tripod might obstruct the passage for other visitors and cause an inconvenience. For that reason, tripods are not allowed in some historical buildings (this is another good reason to get information about the building in advance).
If you can’t use a tripod, look for an alternative approach in order to avoid blurry photos! You can increase the ISO to keep the shutter speed higher (remember that increasing ISO means adding noise to the image). Or you can look for tripod alternatives like monopods, a wall or even setting the camera on the floor (or any other stable surface).
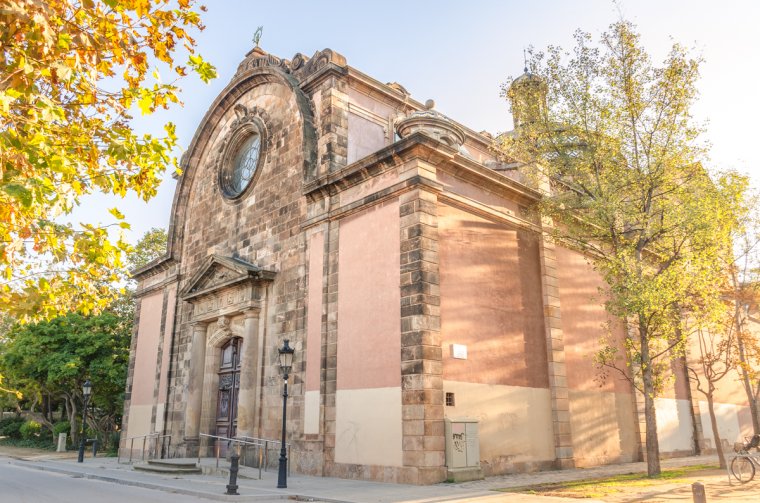
Historical buildings look great when shot from conservative perspectives because they are usually quite balanced and symmetric. Leading lines and symmetry will work really well with this type of buildings:
I know I just said how well the conventional/classical perspectives fit historical buildings, but that doesn’t mean you should not explore a little (or a lot)–otherwise you can end up with a complete collection of photos that look all the same.
I usually take photos in more than one style. It helps me feel less restricted and also makes my collections interesting to more people. In the case of a historical building, having both classical and unorthodox perspectives can be a great option.
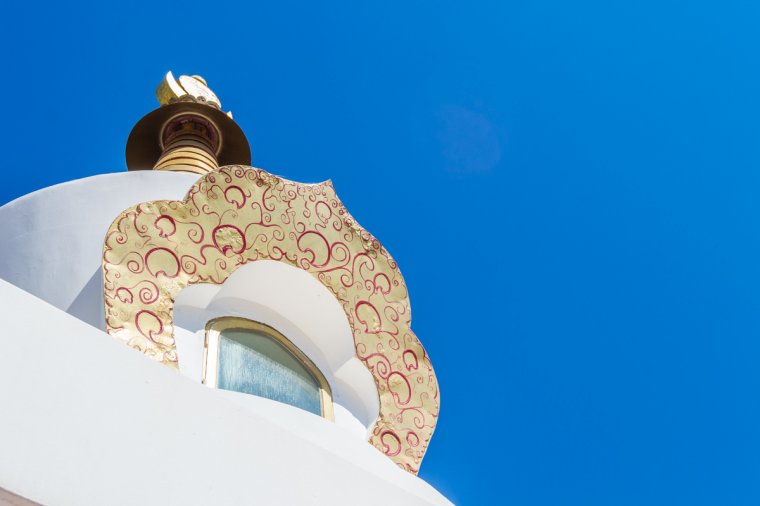
Maybe you are in the same situation as I am and you don´t own a wide angle lens and/or a full sensor camera that allows you to fit big buildings in a single frame. When I find myself in this situation, my go-to solution is to make panoramas. The downside of it is that taking a panorama is not always possible (you are in a hurry for some reason, or you needed a tripod and you don´t have it with you for example). In these situations, I change my mindset. I let go of the idea of capturing the entire building and I focus on getting a photo (or photos) of that building that will convey the feeling that the building has more to it than seen in the photo.
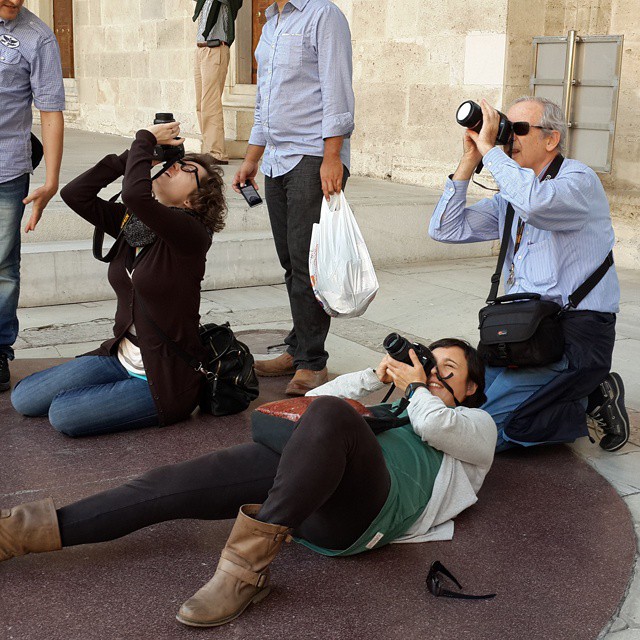
So, I choose a part of the building, usually the top part, and I try to emphasize the distortion to make it look huge and important. You can do this by lowering the shooting point (kneeling down or even lying on the floor if you don’t mind getting dirty). This increases the tension of the photo, adding some interest on it.
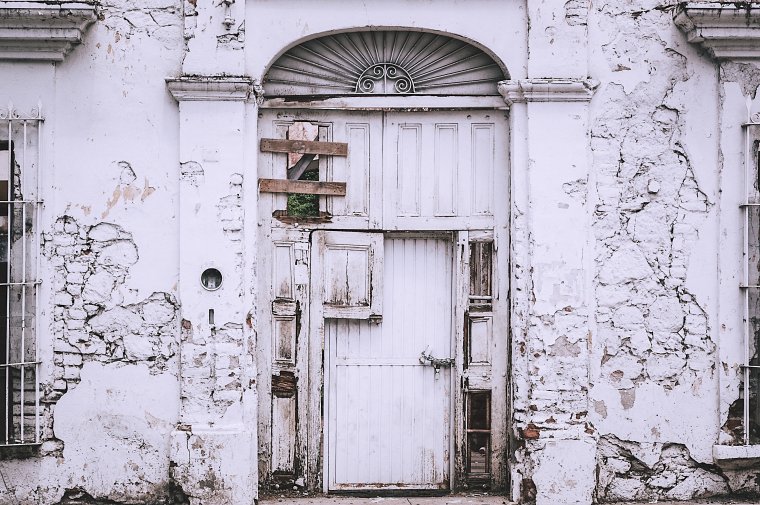
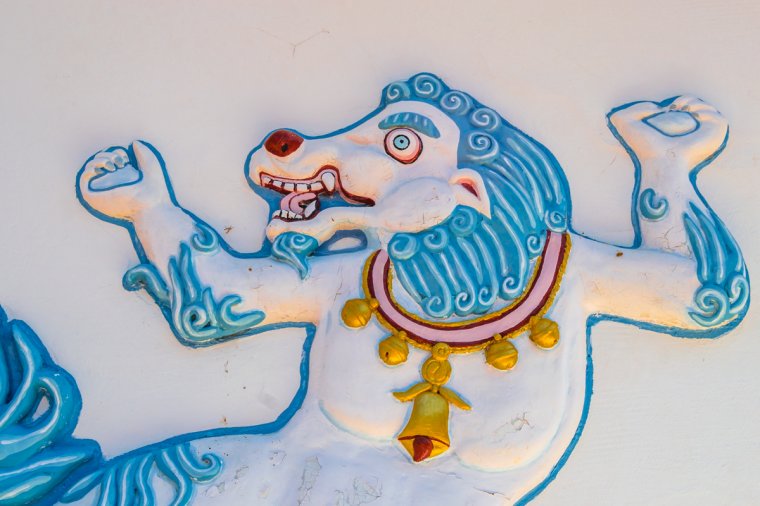
Many times historical buildings are full of architectural detail that adds to their story and atmosphere. Take advantage of that and include them in your photos. Take some close ups of the decorations or statues. This will add diversity to your shots and tell a bit more about the building. Having a small collection of photos from the whole building and some details will be a great way to show the building to anybody that has not been there.
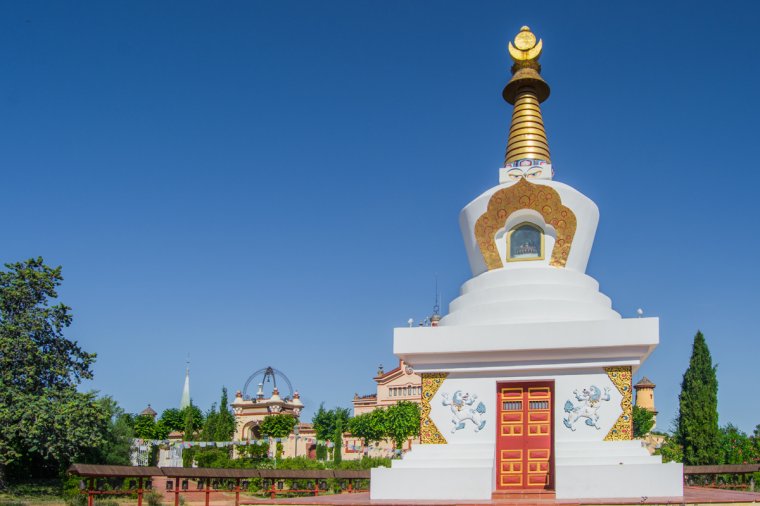
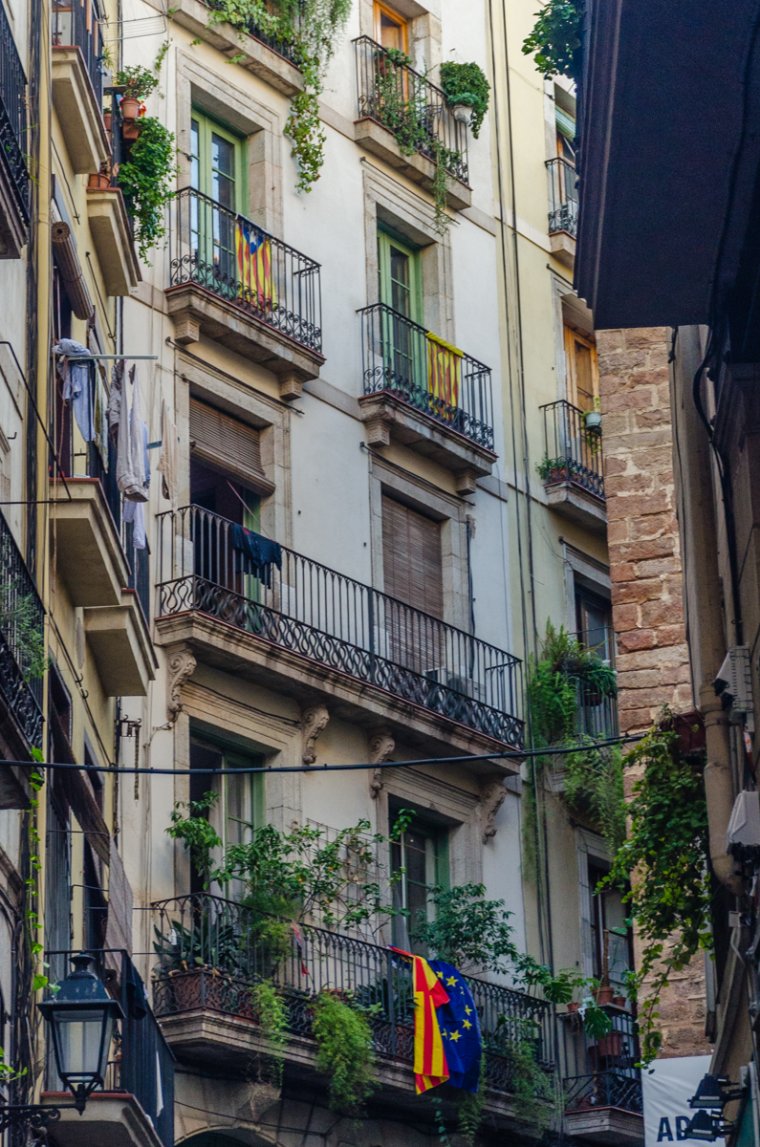
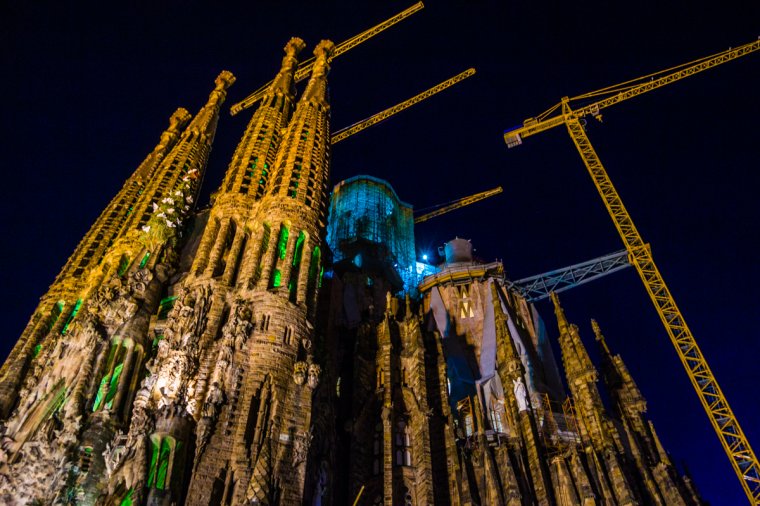
Some historic buildings are not widely known, so adding some hints of where they are located might add to the story. A flag, letters, people dressed in popular clothes, and so on. These are examples of details that can be easily related to a country or region
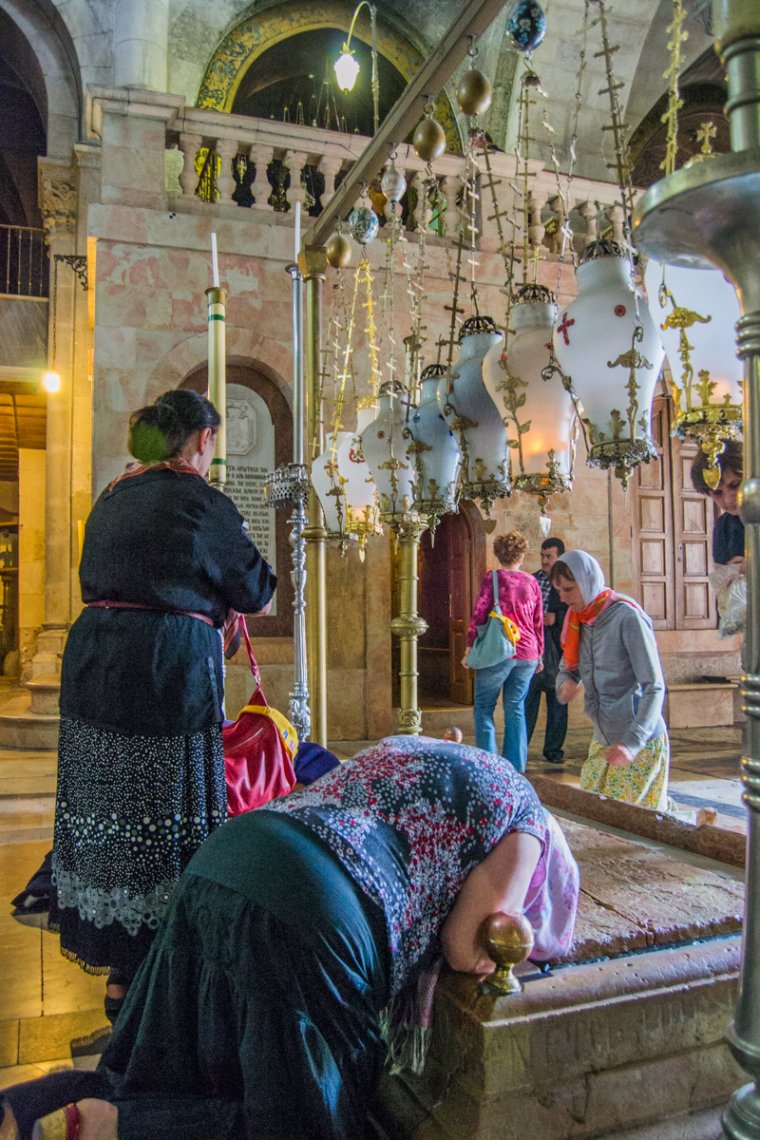
Some buildings have strong emotional baggage associated with them. A good example is religious buildings. If you want to take photos there, be especially respectful of the people around you. They might be praying or in any other type of intimate spiritual moment, so don’t make them feel uncomfortable with your camera.
Read the rules of the place or ask, if you don´t see them written anywhere, make sure you can take photos. Follow all the other rules, such as dressing code and times.
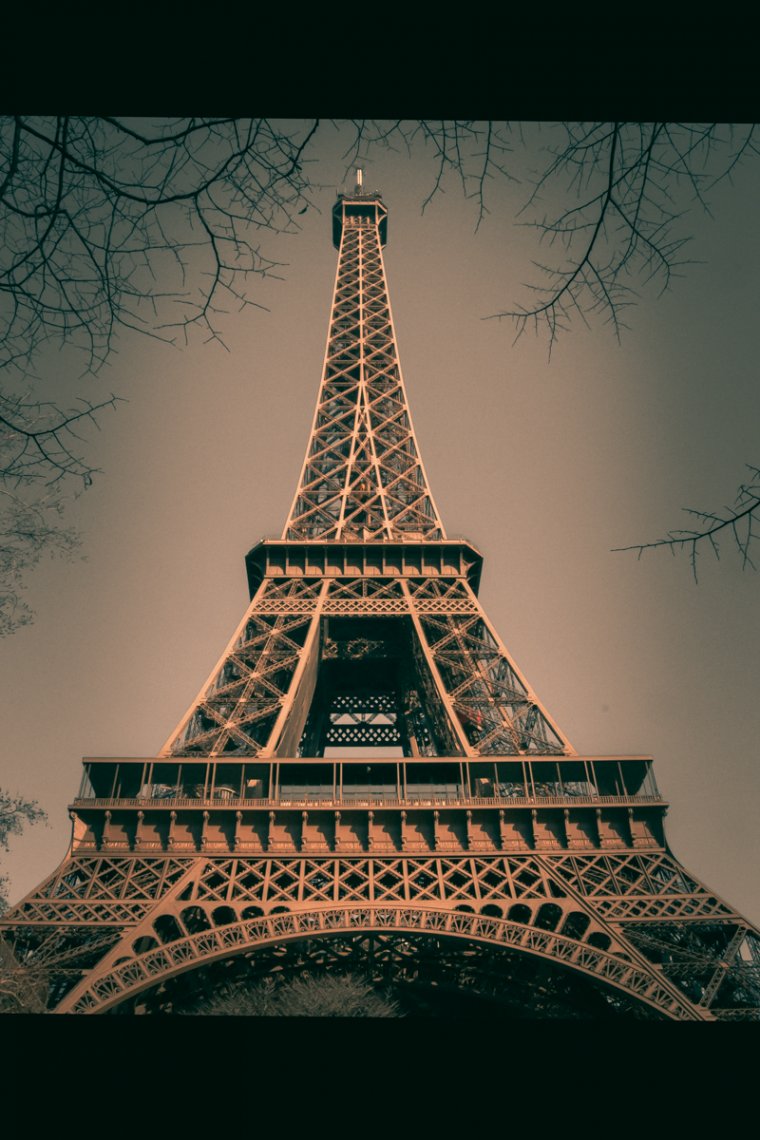
Some historic buildings look really nice if you edit them to look film. Photos of really well known monumental structures can sometimes look too touristic to my taste. In these cases I like to edit them to look like old style photos. It’s a way to give them a nostalgic look.
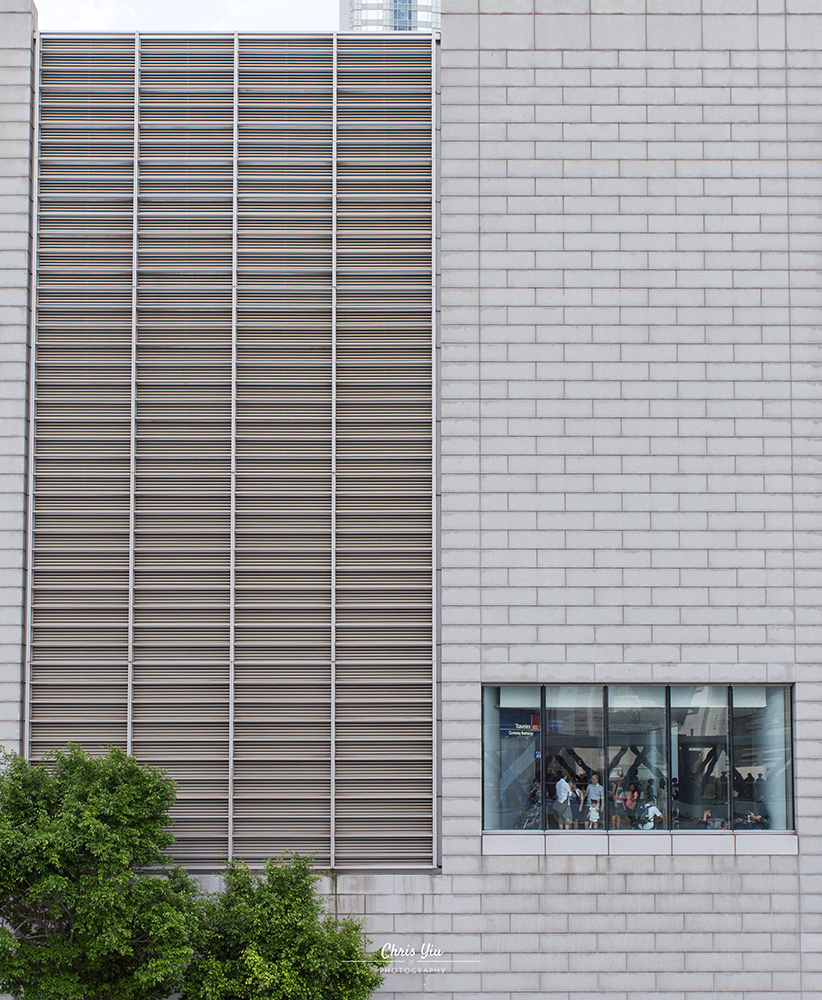
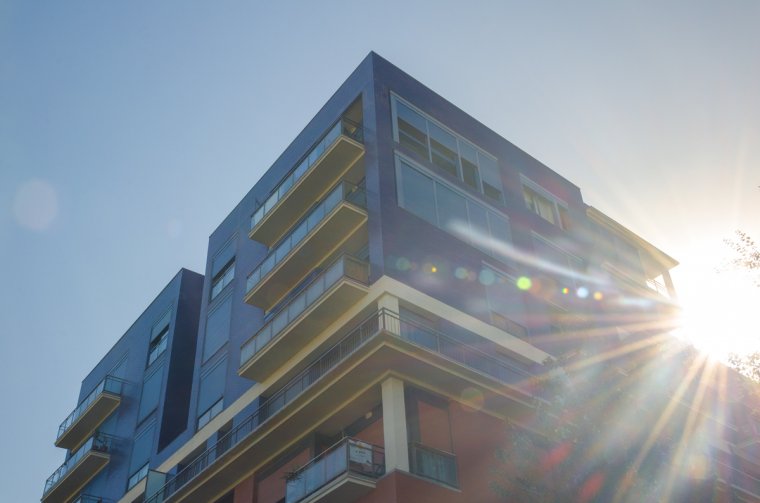
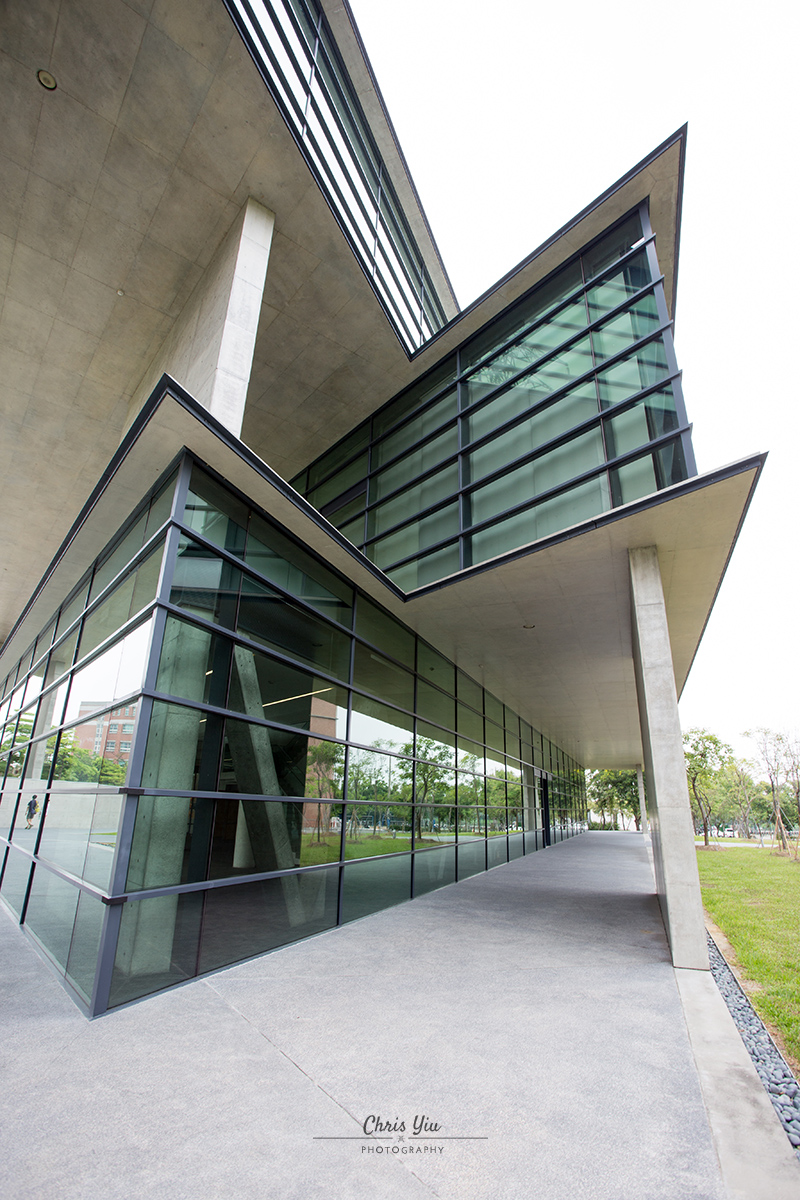
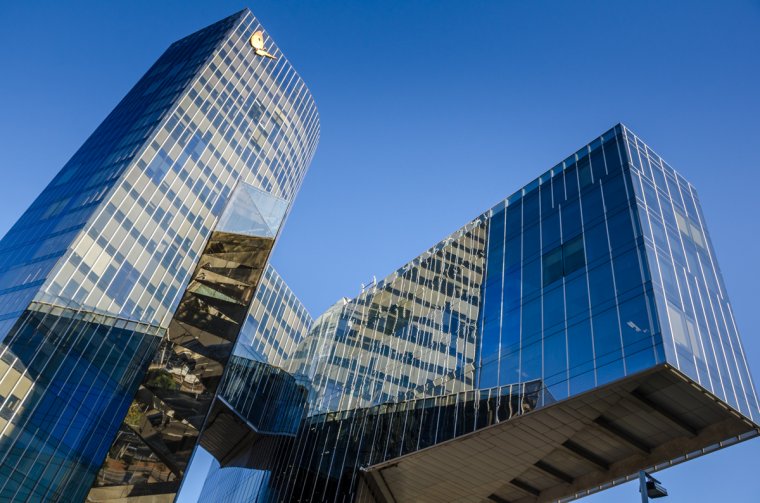
Now let’s talk about a totally different architectural element: modern buildings. Modern architecture buildings feature different styles than historical buildings because their construction is based on new technologies and the construction materials are typically glass, steel, and concrete.
Modern buildings look totally different than the classic ones, and for that reason, the tips for working with them are different too. Let’s dig into it!
With modern buildings, you can keep all the classical recommendations about composition, or you can go wild and try new perspectives or a different angle. The innovative nature of these buildings makes them more suitable for nonconventional compositions.
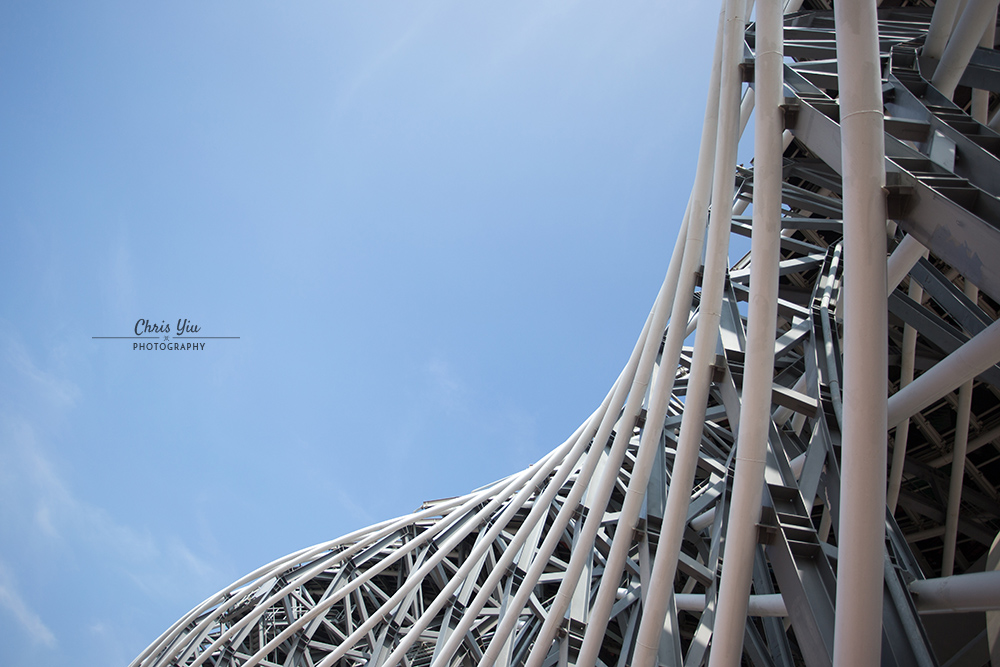
The shapes and materials of a modern architectural structure are really well suited for abstract photography. Here you can be as creative as you want. Look at parts of the building and try to isolate them from the whole picture. Play with textures, lines, and colors. Abstract photography can complement a more conventional photo and it adds to the feeling of modernity.

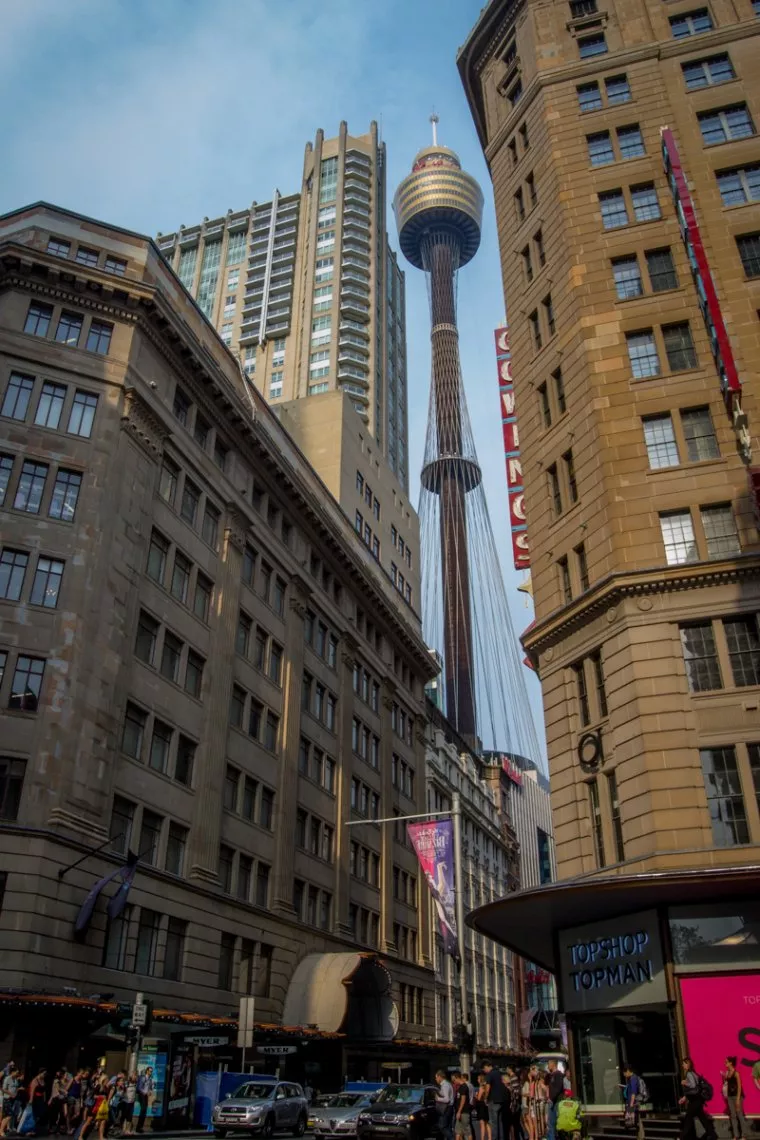
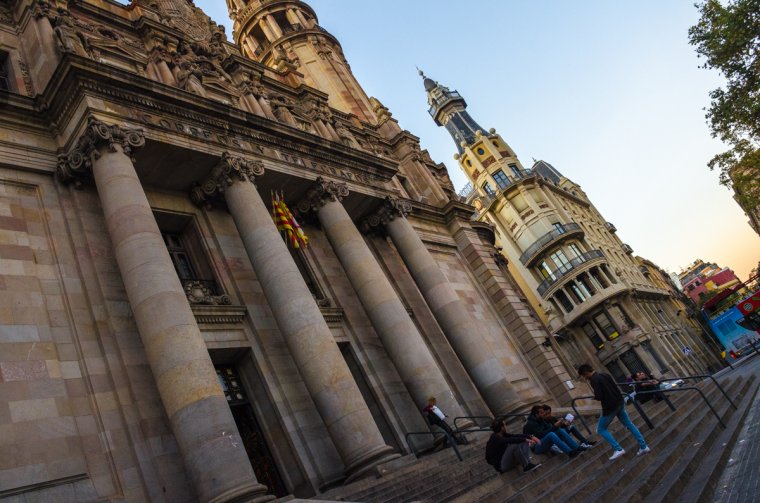
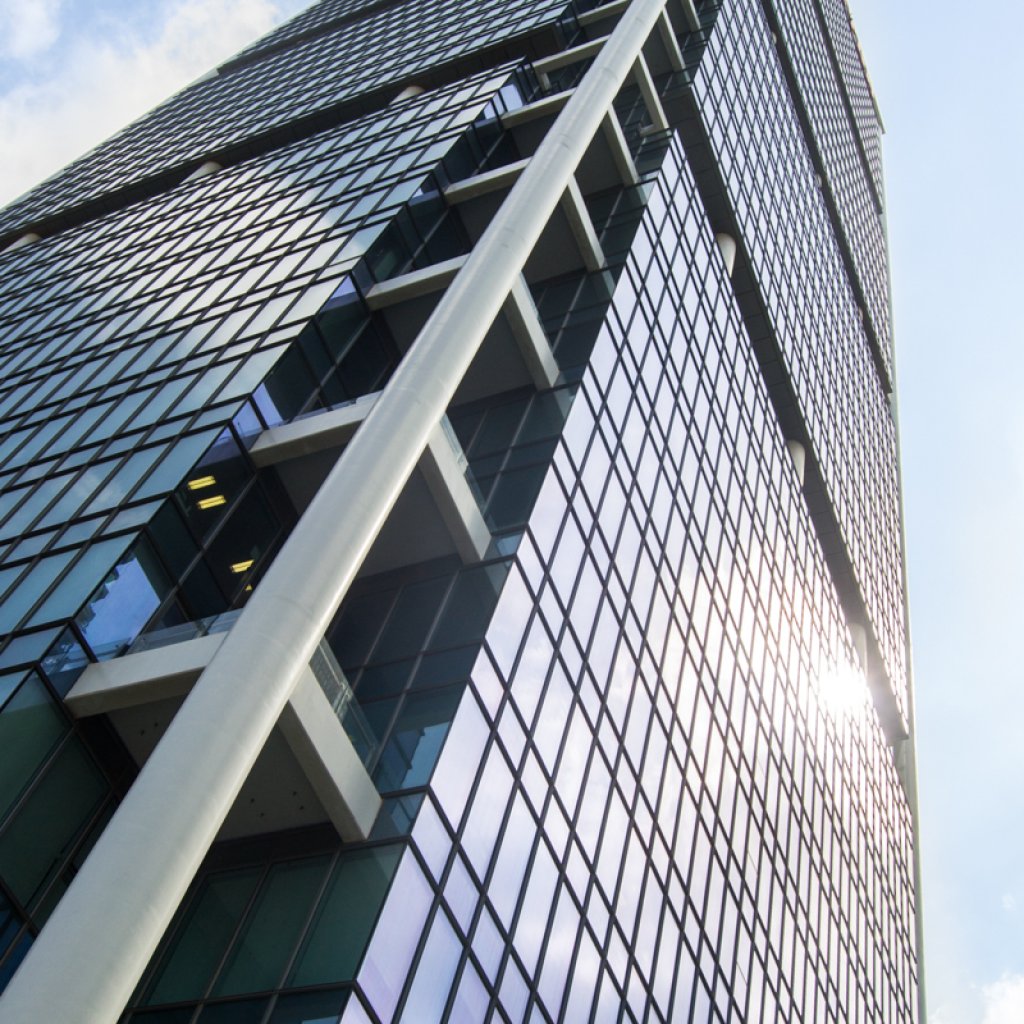
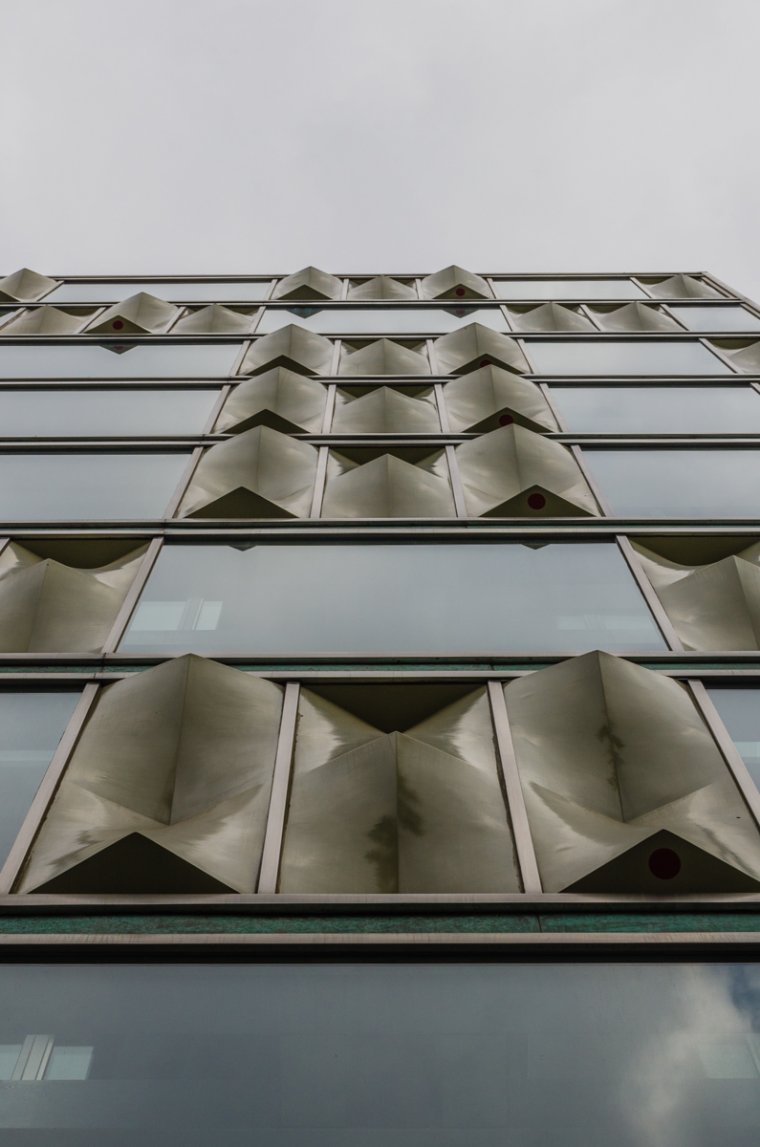
Modern buildings are usually quite big. If you want to emphasize this feature, you can do it by using vertical distortion to your advantage. Get close to the building and just point up. You will get this convergent vertical lines that make the building look taller.
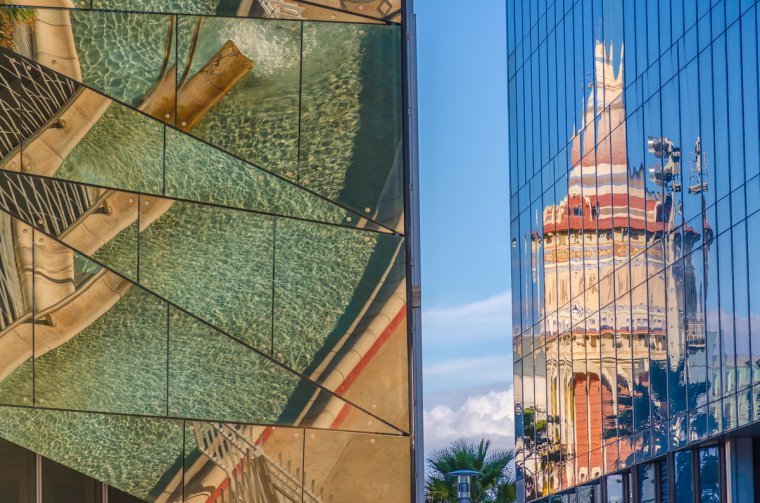
The nature of the building materials of modern buildings might be a perfect subject to play with. Glass windows will allow you to capture nice reflections: from the sky, the floor, closer buildings–experiment with reflections and you will for sure get interesting results.
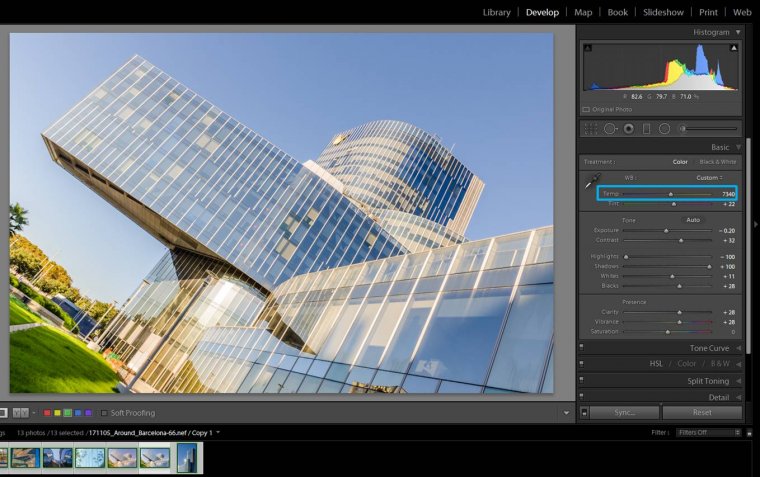
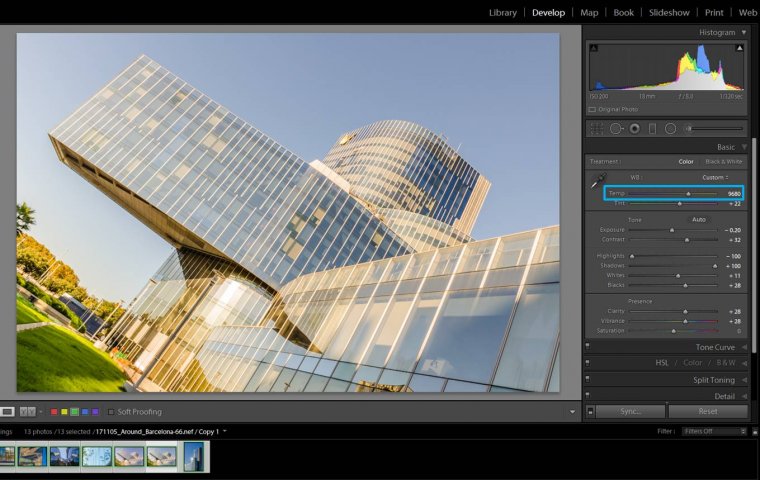
You can also warm a bit the colors to soften the metal- looking colors (A bit more of earthy feeling). You can do it using Adobe Lightroom by moving the temperature slide towards the warm colors:
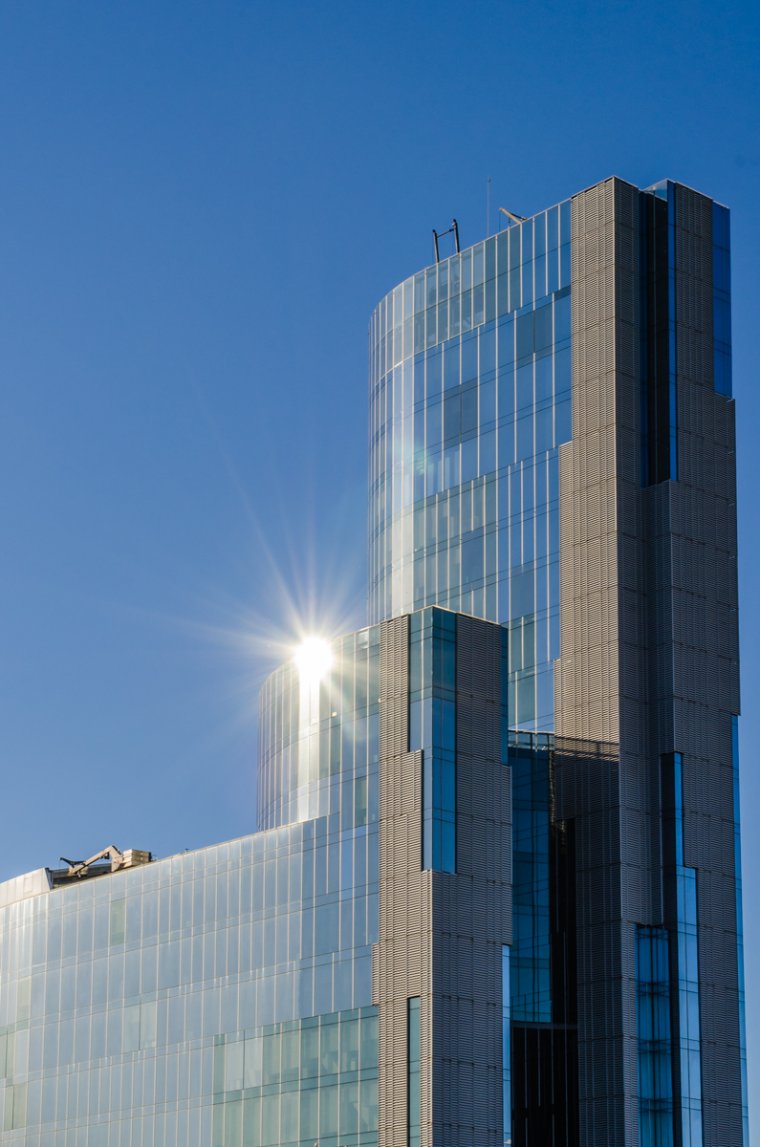
Sunbursts can give you a new element to the image that breaks the symmetry and artificiality of a big building and puts it a bit closer to a natural element: the sun.
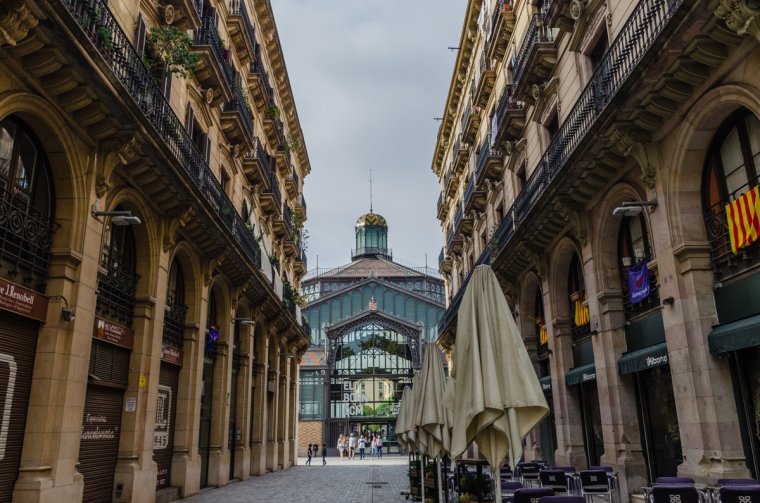
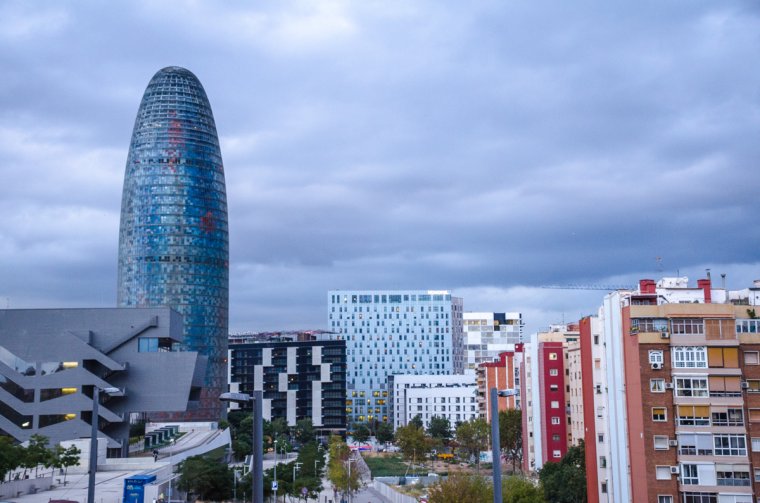
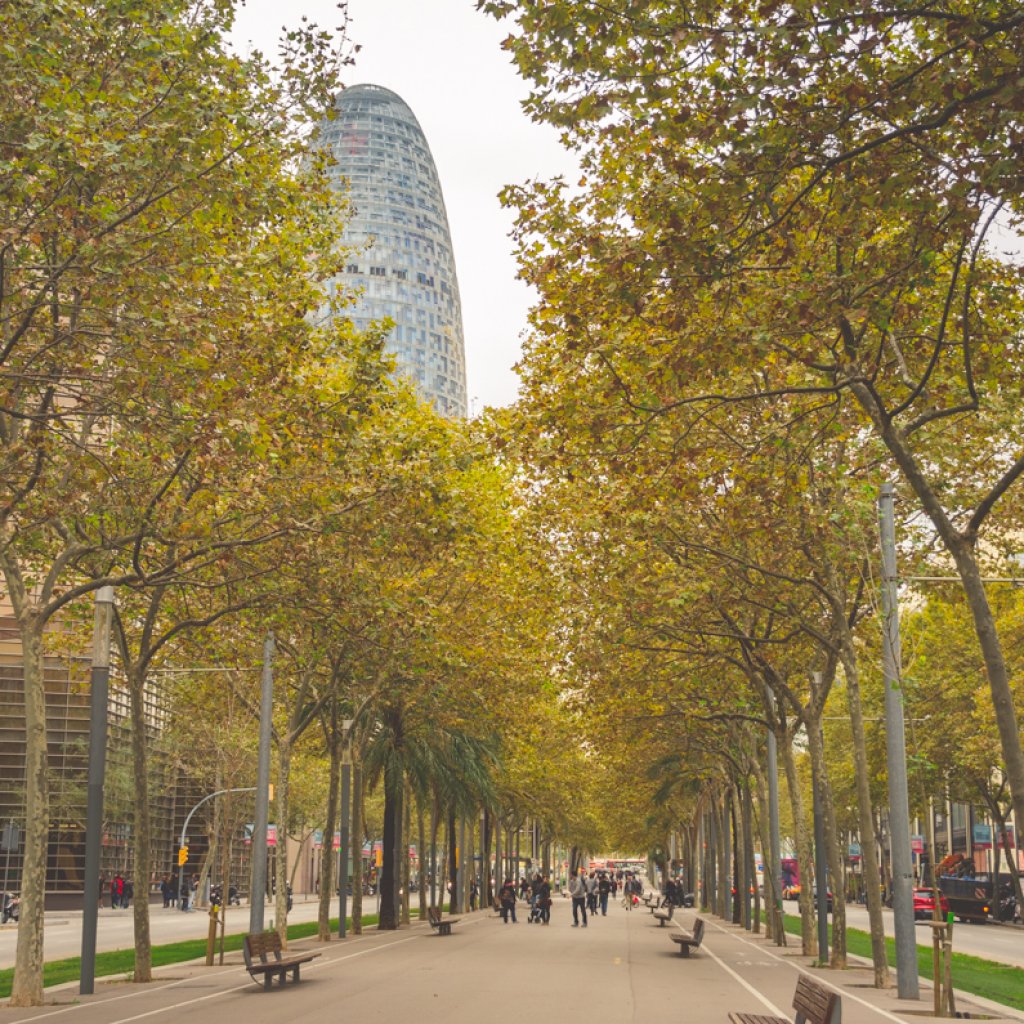
Taking a photo of the building from far will allow you to include the surroundings in the frame and add a bit of context to the image. The building will appear as belonging to somewhere instead of looking isolated.
Although some conservative photographers might find post-editing unacceptable, it is, in my opinion, necessary for nearly all kinds of photography. Architectural photography is no exception. Here are a few elements you’ll want to adjust when editing architectural photos.
There are various styles of architectural photography such as surreal, fine art and much more. The method of retouch varies according to the styles of your shots. We are going to discuss the most common approach of retouch in this article, which mainly aims at recovering the exposure of a photo.
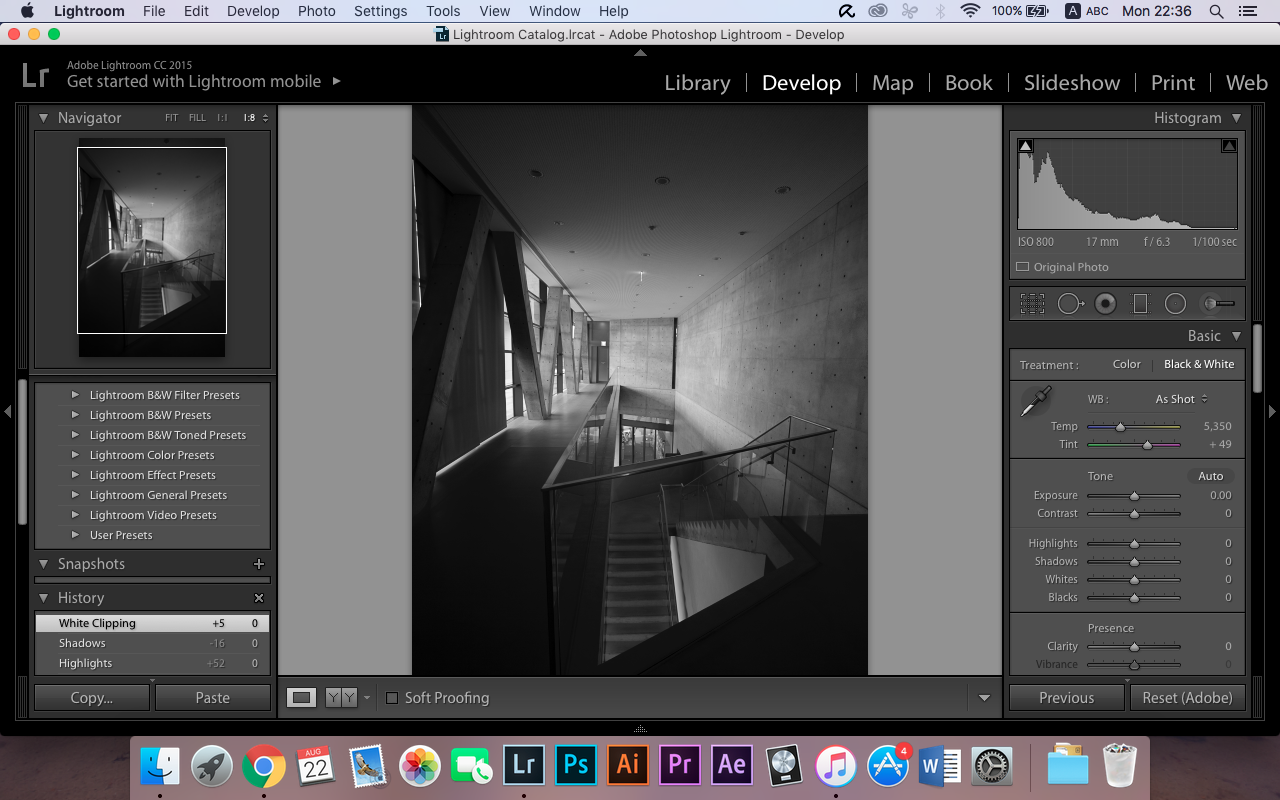
This photo is obviously underexposed. Exposing to the right (ETTR) has always been a controversial topic. The reason for ETTR is that appropriate overexposure could eliminate excessive noise from an image. It is because luminance noise is formed when a photo is underexposed. On the other hand, there are some reasons against the idea of ETTR. First and foremost, it is a relatively painstaking process to figure out the appropriate exposure when you are sticking to the ETTR approach. It would be inapplicable for the occasions where time is limited or shots are taken within seconds. Wildlife and sports photography are some of the typical examples.
Secondly, exposing to the left (ETTL) would always be a safer option whenever the shots could only be taken once. It is also a wise option when there are extreme brightness differences. The approach of ETTL prevents the occurrence of white clipping. In most cases, recovering the exposure of an overexposed photo is far more challenging than an underexposed photo. It is more likely for the former to lose the details in the highlights rather than vice versa. As you see from the photo above, it is underexposed and the luminance differences are also a bit extreme. Therefore, it is almost impossible to get a decent exposure without retouches.
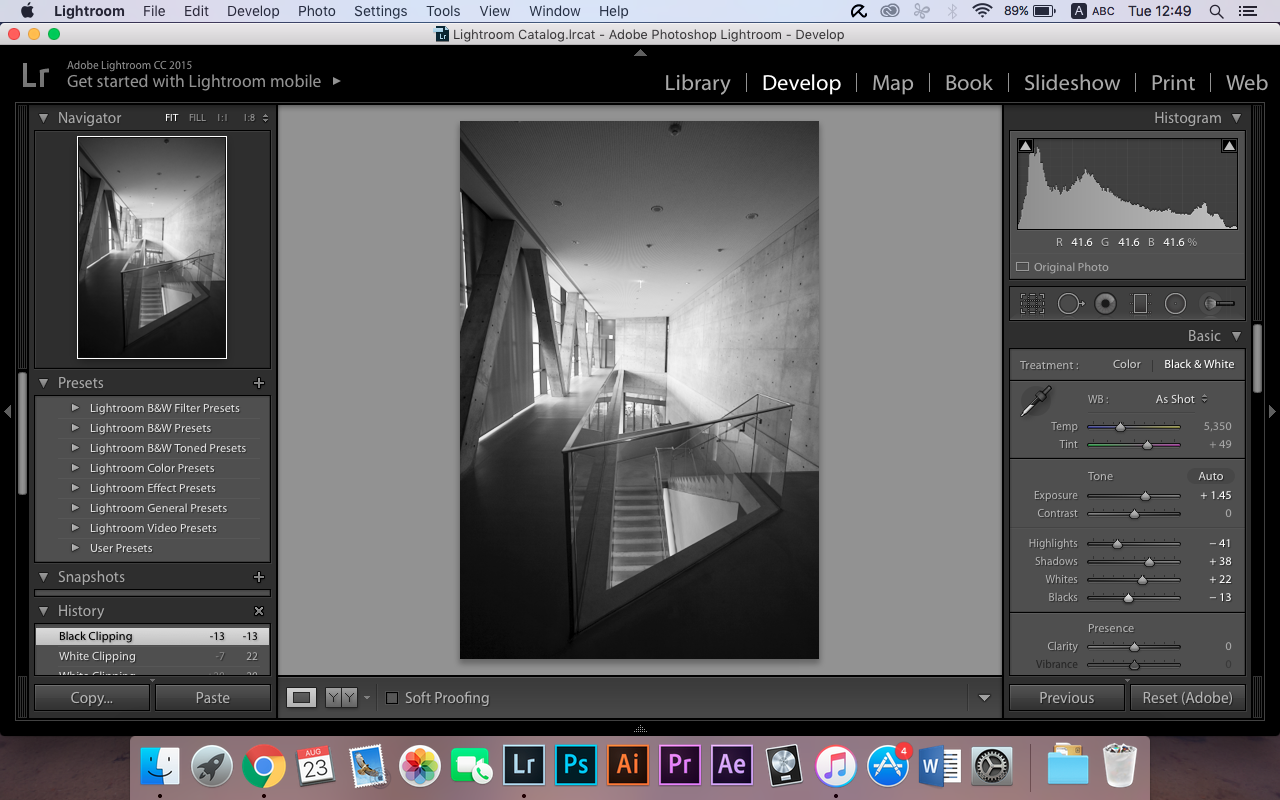
The workflow of exposure recovery goes like this. I usually start with the attribute exposure, which determines the overall brightness of the photo. It is an equivalent of the brightness attribute in Adobe Photoshop. Then, I will go ahead and play around with highlights and shadows. Under most circumstances, we will suppress the former while boosting the latter. It reveals the details in the darker and brighter part of the photo.
Then, I will move on to adjust the attributes whites and blacks. This step saves your photos from white and black clipping effectively, unless your photos were underexposed or overexposed severely. I am attempting to have all the details revealed in most architectural photos of mine. Therefore, I will always avoid white and black clipping. But, you will need a certain degree of contrast so that the exposure will look natural.
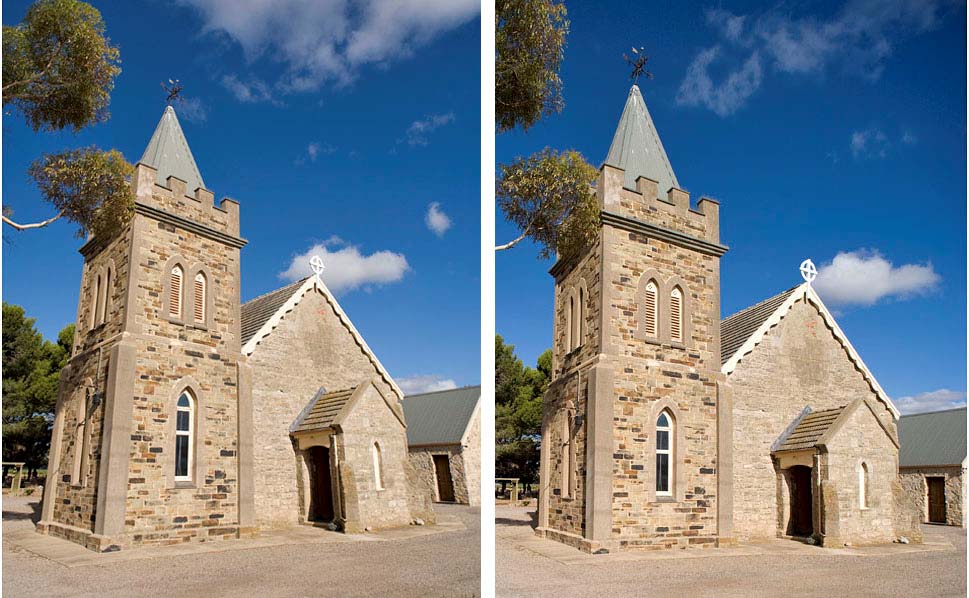
Vertical distortion can completely ruin your photos. It is specifically true for architectural photography. A professional architectural photographer would always pay attention to perspective distortion. Even the slightest perspective distortion, especially vertical distortion, is not tolerated.
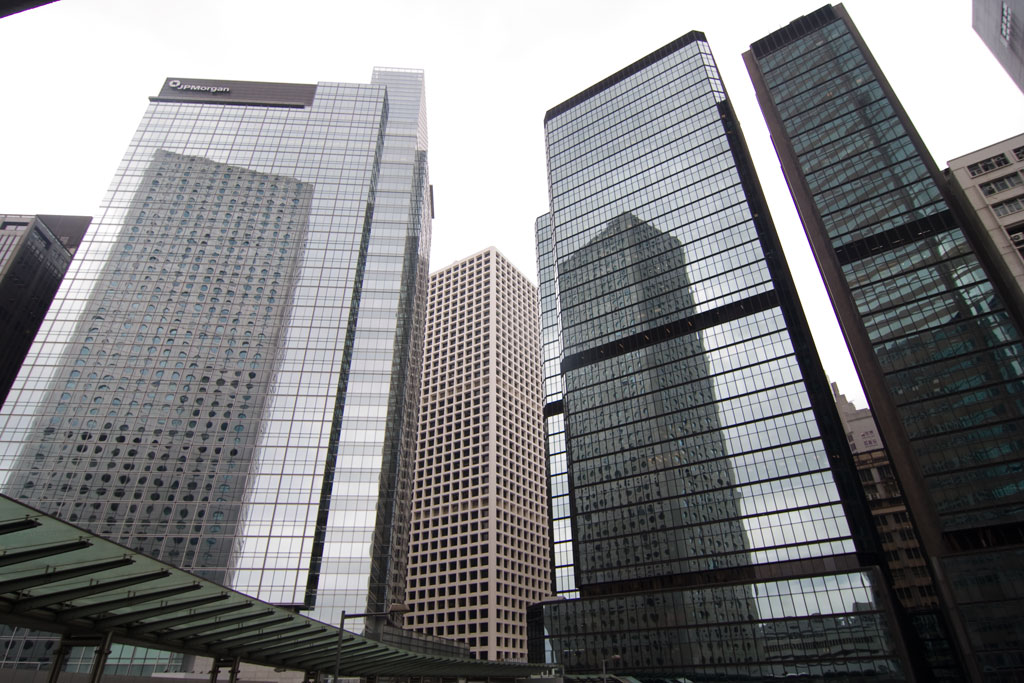
Buildings appear to be collapsing as the vertical lines bend towards the center when there is vertical distortion. (Courtesy: uofgts.com)
In order to fix vertical distortion effectively, you will have to take the distortion correction into account while shooting since cropping is inevitable during the process of distortion correction. I will go through the steps of distortion correction in the following part.
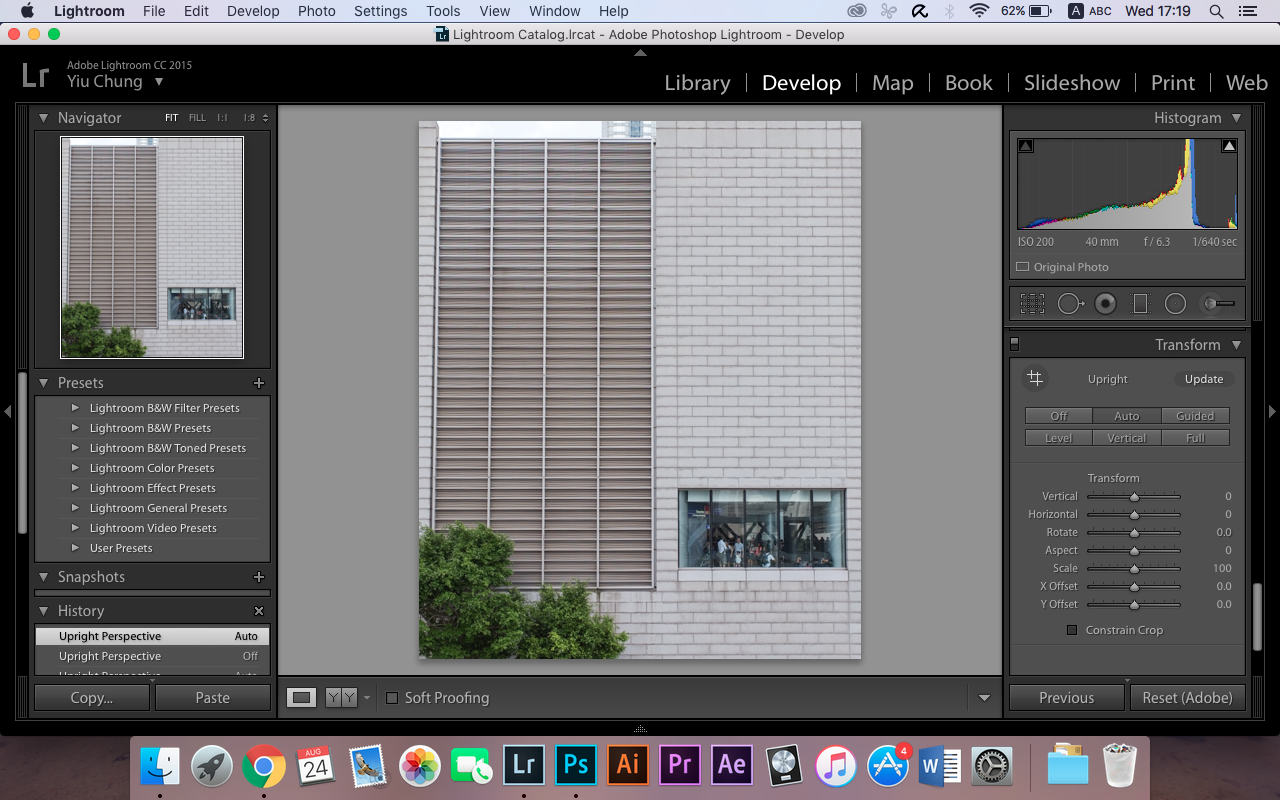
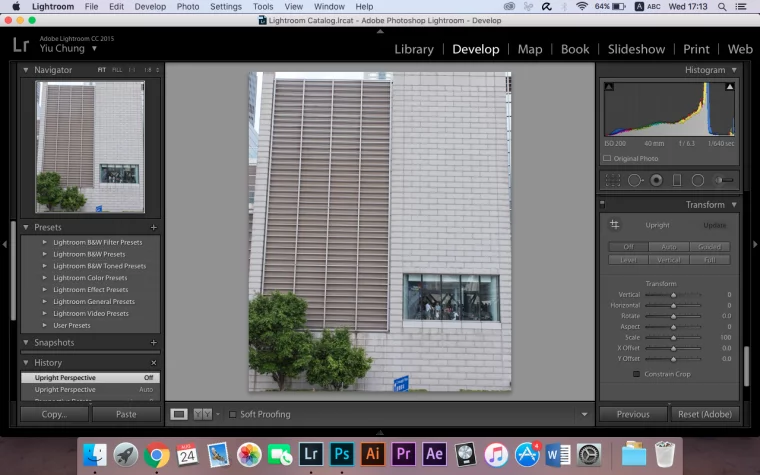
In order to fix perspective distortion, you will have to navigate to the Transform panel on the right side of Lightroom. You can simply press Auto for automatic correction. It will do the work in most cases. However, the corrected result might not turn out as expected on rare occasions. If that’s the case, you may want to do it in a manual way.
Remember to have the checkbox of Constrain Crop checked before you start editing. Otherwise, blanks will be found along the boundaries of the photo. In addition, you should always do the lens correction, if necessary, beforehand. The most commonly used adjustments include Vertical and Horizontal. They fix vertical and horizontal distortion respectively.
At first glance, architectural photography appears to be just a few pictures of building and structures, but it’s so much more than that. It’s about telling a story and creating a work of art through angles, composition, and lighting.
There are so many possibilities to showcase a building in a hundred different ways. It just takes a little creativity and experimenting. We hope this guide has inspired you to get out and get creative when it comes to showcasing the structures and buildings you come across.


Please verify your software version before proceeding.
 I’ve verified my software version


 Facebook
 Google +
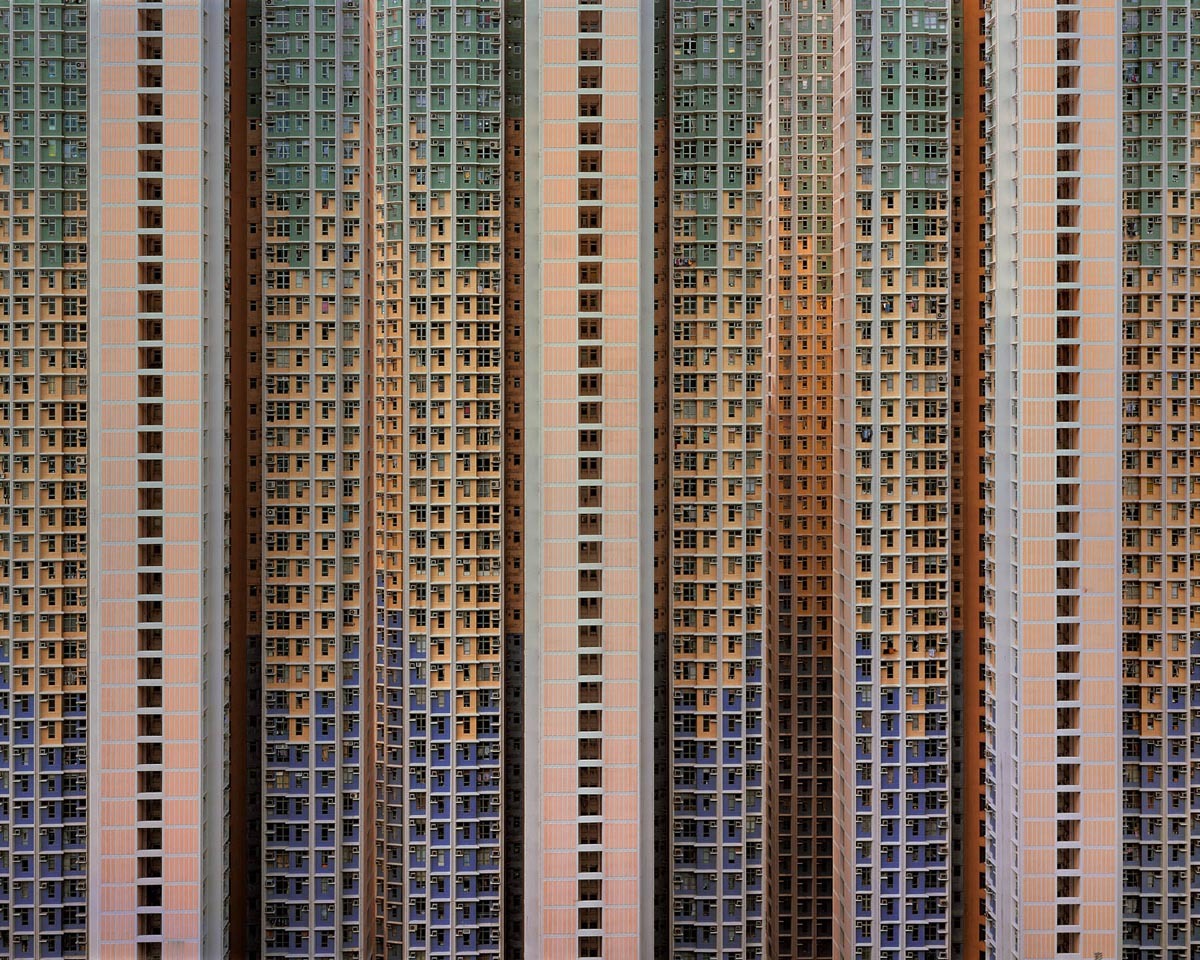