I’ve been recently going through Instagram quite a bit trying to build on my list of Photographers.
If this is your thing and you want to start getting really into to Fine Art Photography then I would suggest getting an Instagram account, there’s so many great Photographers and Photoshoppers on there.
Literally thousands, I find a new one everyday when I check and I can’t help but be inspired by some of the absolutely awesome images they create.
So to start with if you are not totally active in Photography yet then you can use stock images for this Tutorial.
If you are active in Photography then take a look through what you got and pick out what you think you can use as we go along.
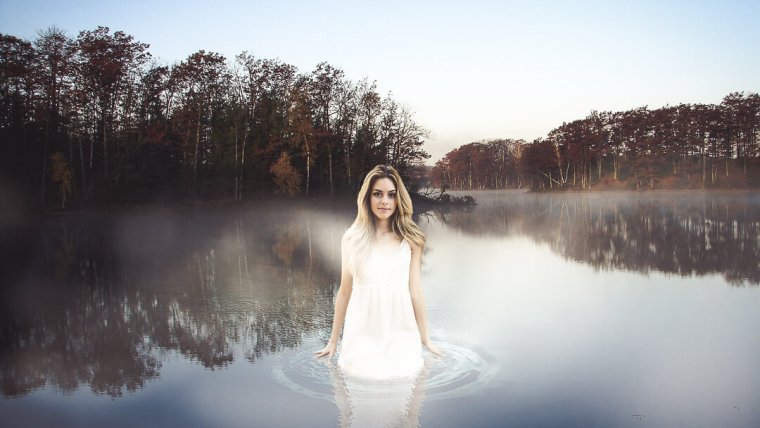
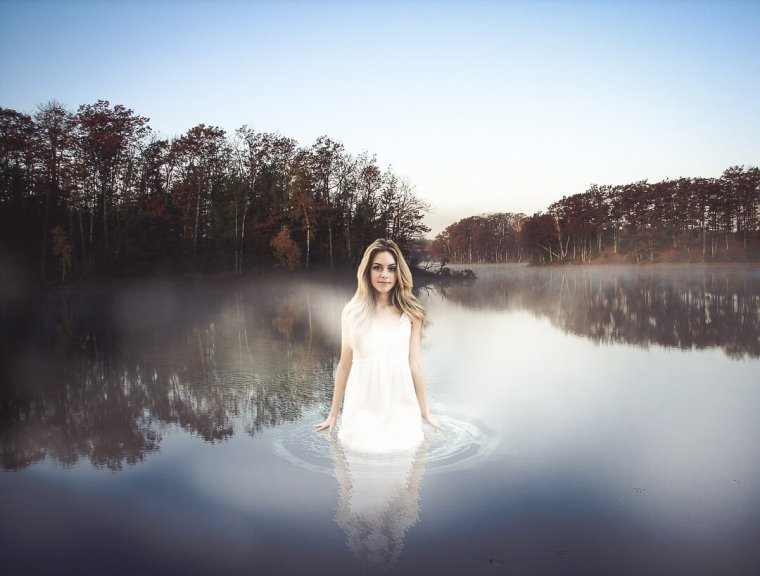
The idea in my head at the minute is I’m going to create an image of a young lady raising out of a lake or some sort of body of water.
I want to be able to create this and make it look real, as if I had taken the Photo myself, this is my goal.
I’m going to be combining 3 images possibly more as I continue through this, It just depends on mood at the time if I add more to my Composite or not.
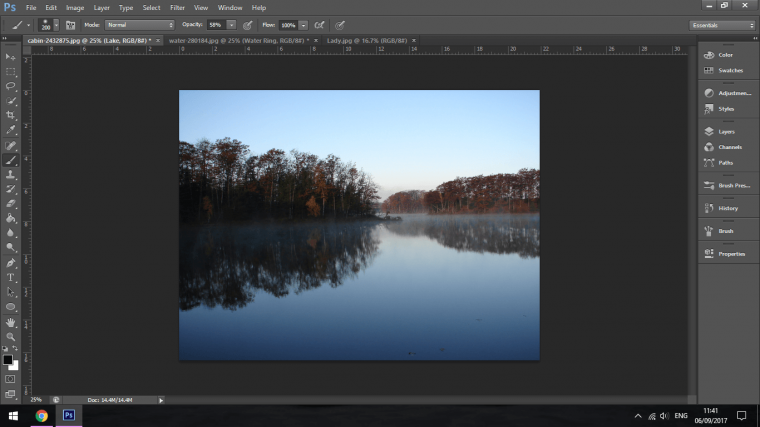
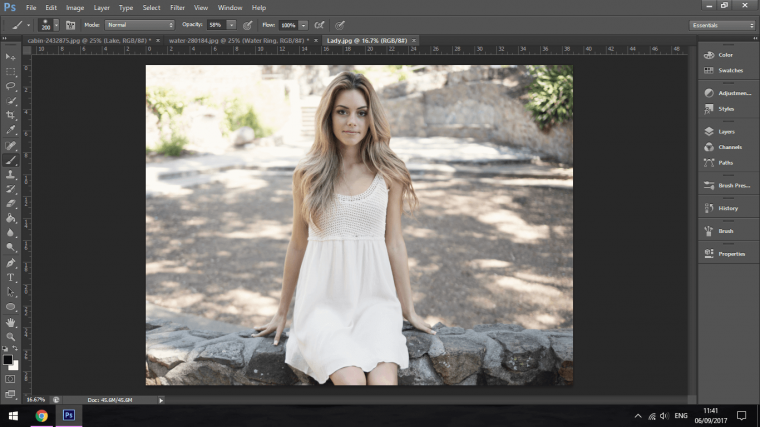
So the three image that I have chosen to create my Composite with are as follows.
I chose this lake as it gave me plenty of room to play with.
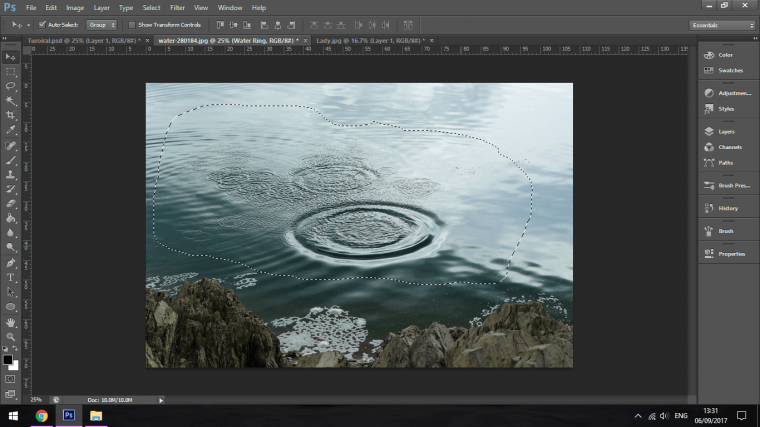
I gathered up this Photo of water rings, it was hard enough found, if you took your own picture then great, in this case it will be far easier.
As long as the image is not for commercial use though you should be able to get one on google easy enough.
With Free Stock sites like Pixabay, which is what I use for all my images was limited to a point for this Tutorial even though there was a lot of options, so don’t be disheartened, it may take a little bit of time to get something that suits.
The image of the Lady works we due to Her pose, I wanted an image that looked like someone was coming out of the water gliding their hands and thanks to this I believe I got a pretty good image for the job.
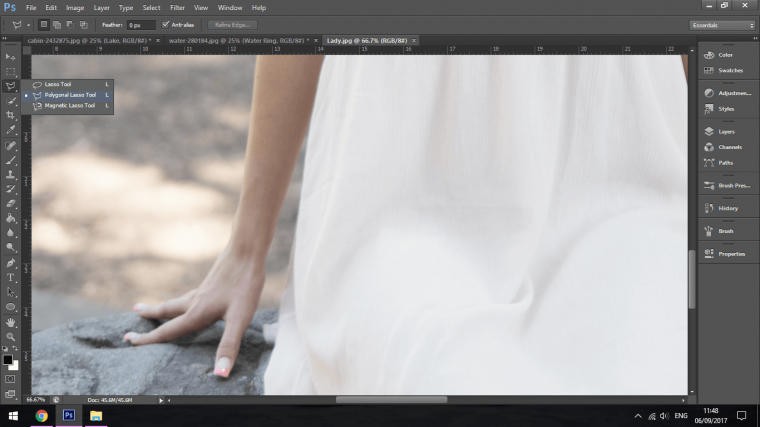
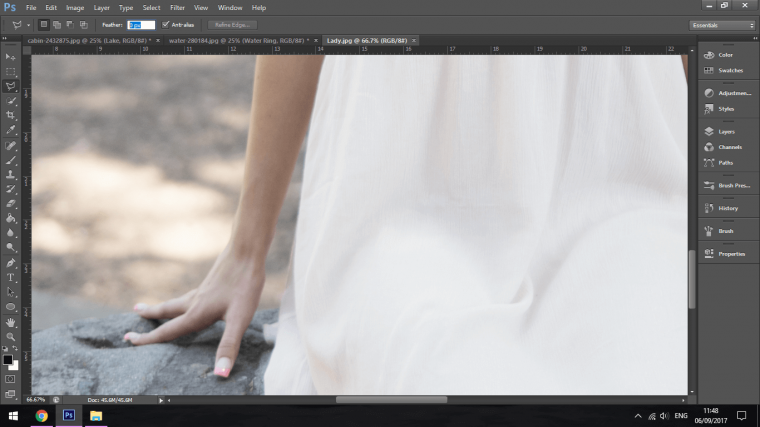
The first thing I sis here was I needed to cut the image of the model out so I could add it to my main Lake Image.
As seen below I chose the Polygonal Tool for this task.
You can use the Pen Tool if you wish to do so or any other method, just as long as it works.
But I would recommend either the Pen Tool or the Polygonal Tool unless you model is in front of a full colour background such as one shade of grey so there’s a strong contrast between the two.
Then Tools such as the Magic Wand Tool and Quick Selection Tool comes in very very handy due to the quickness of the selections made.
But for now if you have never used any other the other Tools, just for complete simplicity of the Tool use the Polygonal Tool.
In the image below you will see under the top menu I have a little area selected.
This is the Feather, I want to set this to 0.5
I do this because I don’t want an insanely sharp edge to my selection, I want it to blend in with my background a little.
But I’ll go one better once we have everything else sorted so sit tight for that.
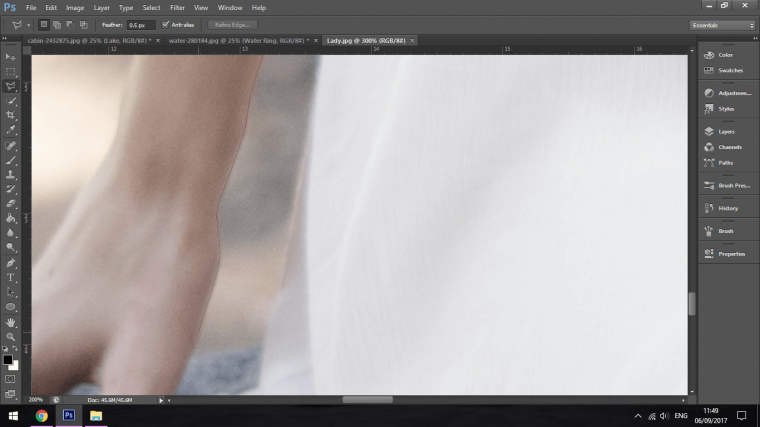
I just want to note here that I didn’t go super detailed with the hair, I just made a basic selection around the hair not worrying about all the areas that are frayed out.
I know there is plenty of tutorials out there that shows you how to do this but for the size we’re good just creating a normal clean selection and cut out.
I can zoom in and out by holding Ctrl and using the + and – keys on my keyboard.
So as you’re making your selection if you want to then move around your Image as you create your selection then hold down on the space bar on your keyboard, then that will free up your mouse to then click and drag around your image so you can shift to different positions to carry on with your selection.
Now I just click along the edge to create my selection.
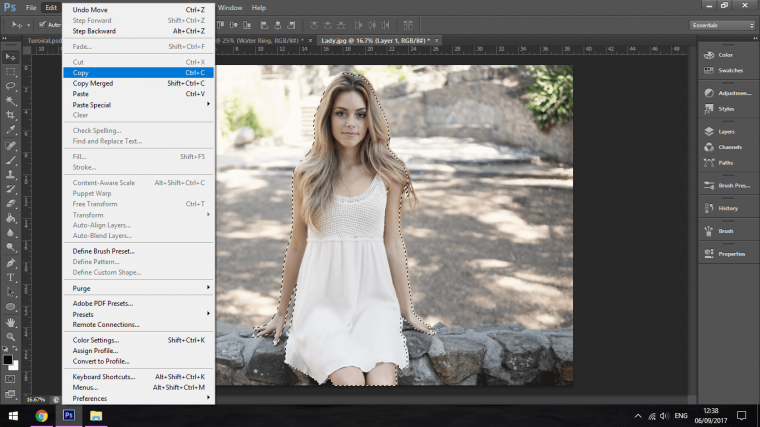
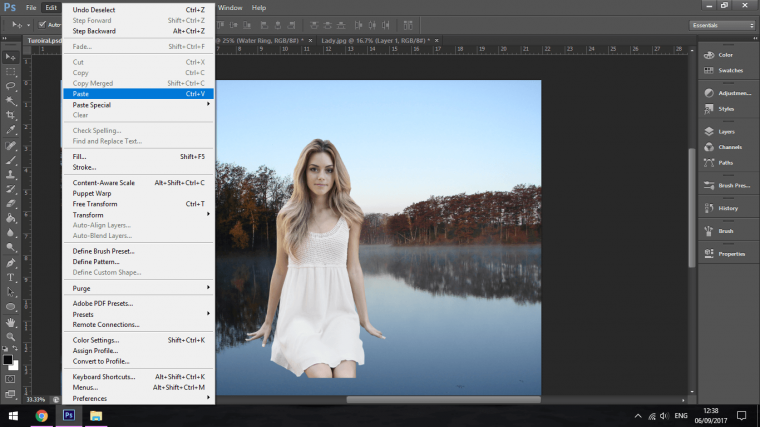
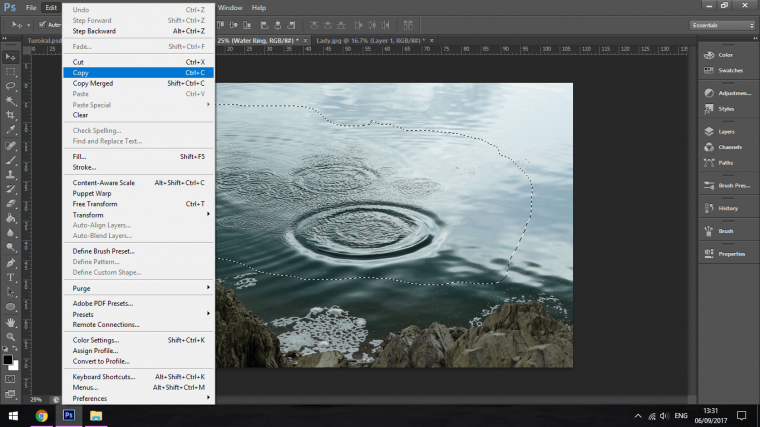
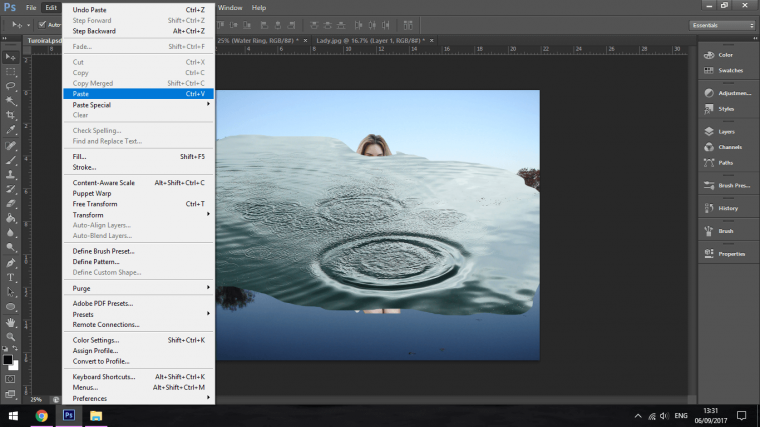
Now copy and paste, you find this is Edit on the main menu bar.
I have now created my selection that I can Copy and Paste into my main image.
Now I’ll cut out the Water ring, I can be a lot more loose with this, I just want a basic shape around it as I will be using my Masking options to deal with it.
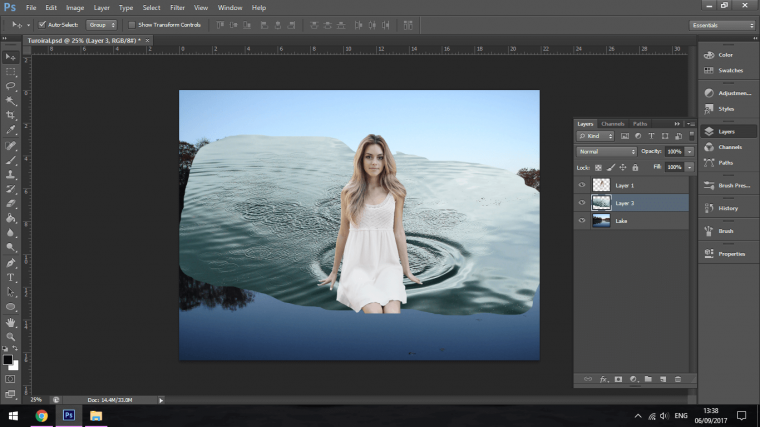
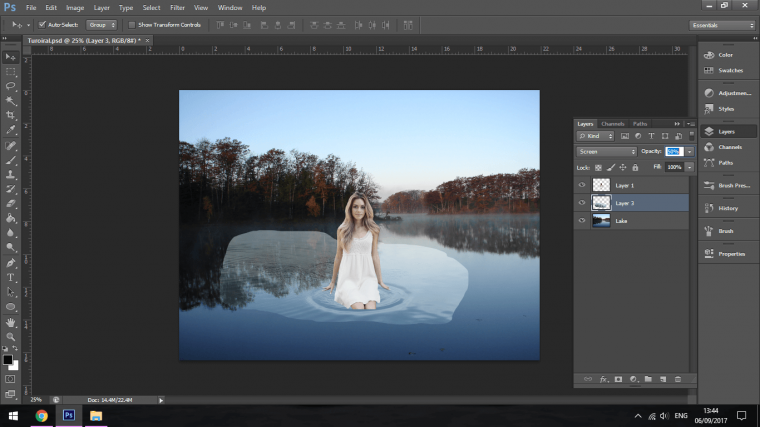
Cool so now we have everything into our main image file we can close up the other two to save on RAM and clutter.
I’m just going to rearrange my stacking order in the layers panel so that the water ring is underneath my model as that’s the order it will be in the end.
You just go to your layers panel, click and drag.
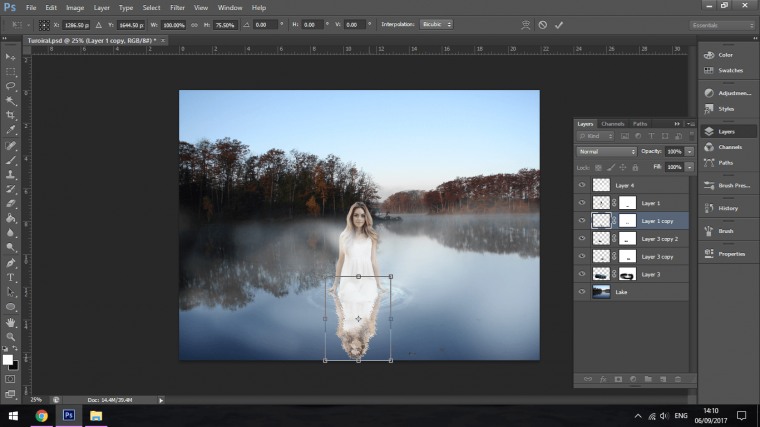
Next I’m going to resize and position everything to where I think it will be in the end.
I click on the layer in question and by keying in Ctrl T I can now use Free Transform to re-arrange everything to how I like it.
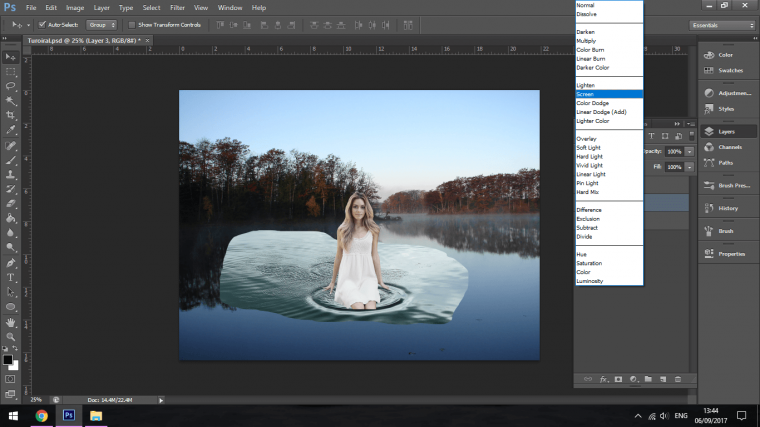
Now I’m going to change the Blending mode to Screen, you’ll find this in the layers panel were you have been shifting about your layers, it is in the panel beside Opacity, it should say ‘Normal’ unless you have been playing around with it in the past, then you probably know what Blend Modes are.
Then change the opacity to 50%
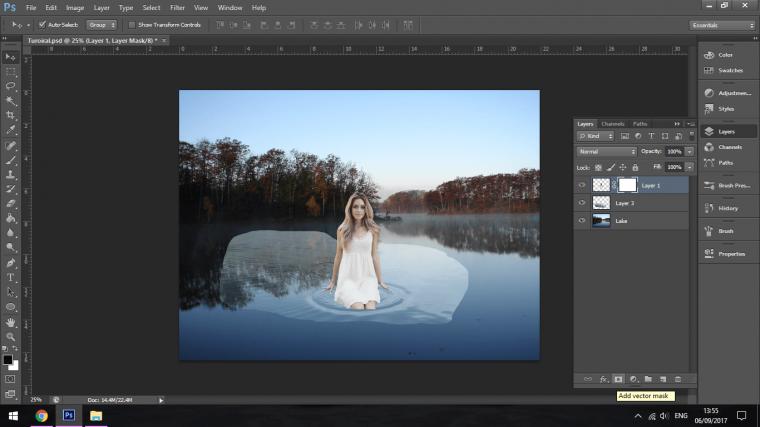
Now I’m going to create a Mask on my Model selection.
Click on the Model Layer to activate it.
Then at the bottom of the layers panel where we changed the Blend mode you will see seven icons, the easiest one to pick out is the FX.
Click the one beside that to the right hand side (The Circle in the Rectangle)
You will now have a Mask attached to your image.
Do the same to your Water Rings Layer.
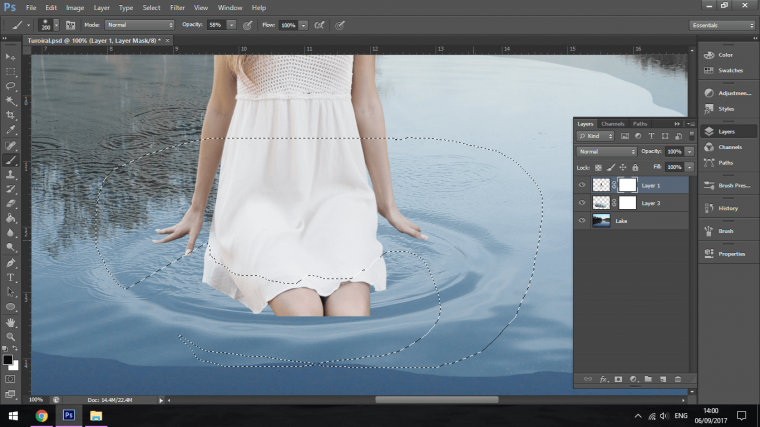
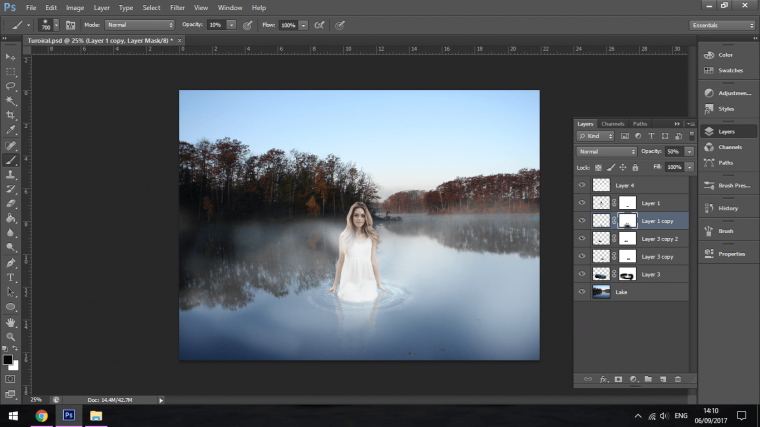
This now means that when you click on the little white box that appeared to the right of your layers thumbnail, with a Black brush you can now paint over and hide whatever parts you paint over on the image that, that Mask is attached too.
If you make a mistake you can simply change your Brush to White to paint on your image and make it appear again.
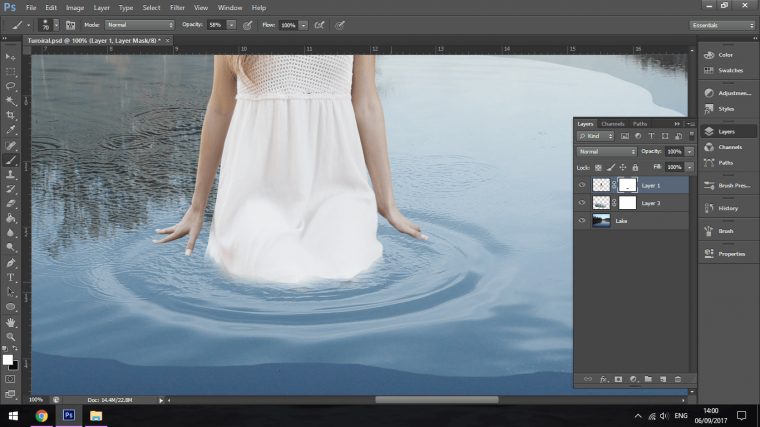
Now make a quick selection around the models legs where you think She would enter the water.
Using a Black Brush now paint out the area that would be under water, I dropped the opacity of my brush down to 50% for this.
If you find yourself painting out the wrong area paint it back in with white and key in Ctrl Shift + I to invert your selection.
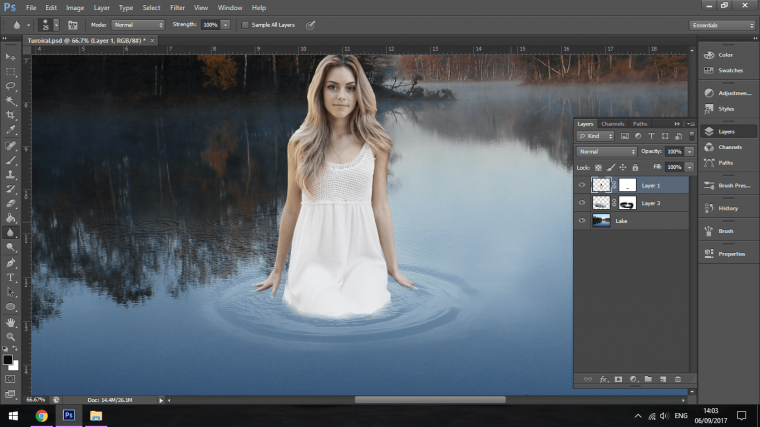
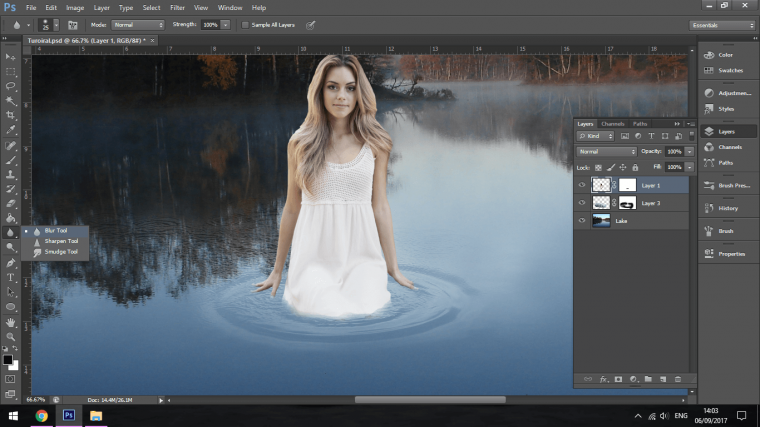
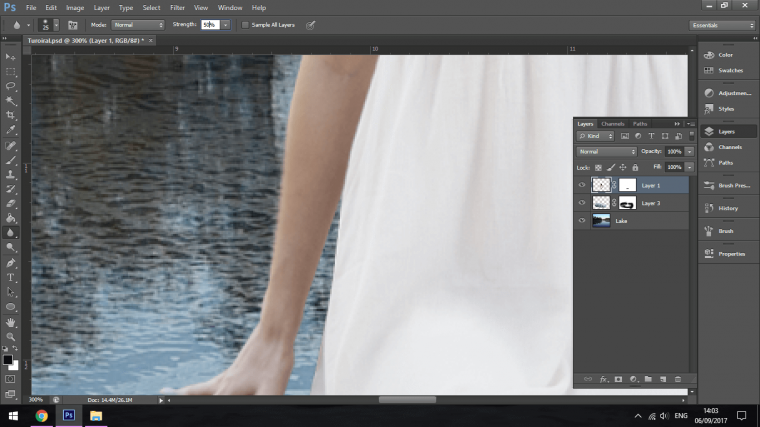
Now I want to blur the edges of my model to blend Her in more.
I grab my Blur Tool.
Change the opacity to 50%.
Then paint around the edges of the model.
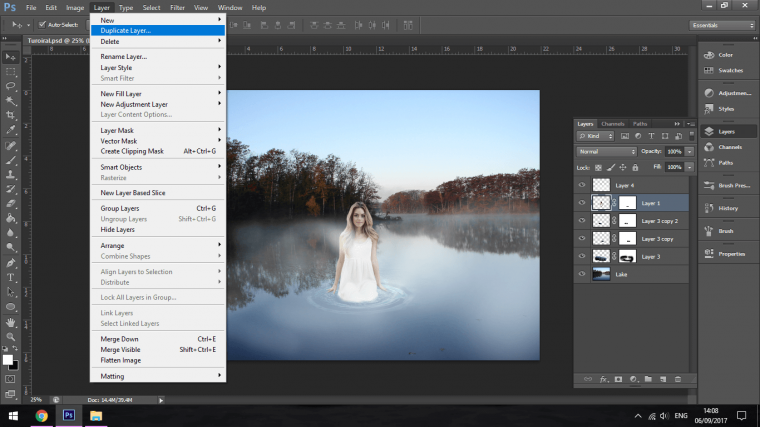
I now go to Layer – Duplicate Layer
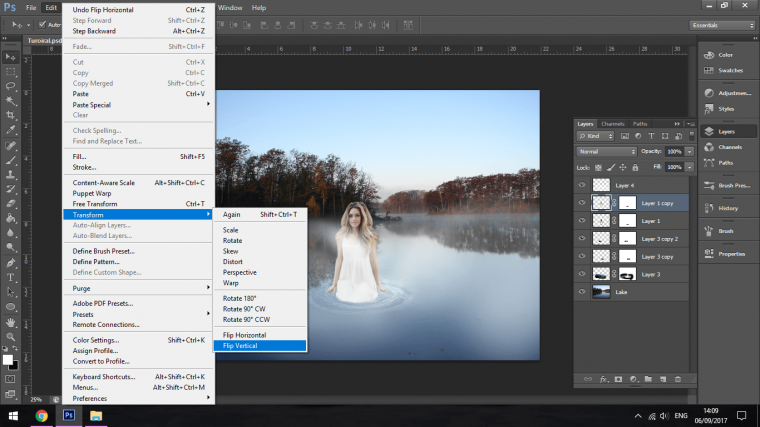
And using the Transform options I Flip Horizontal and Vertical.
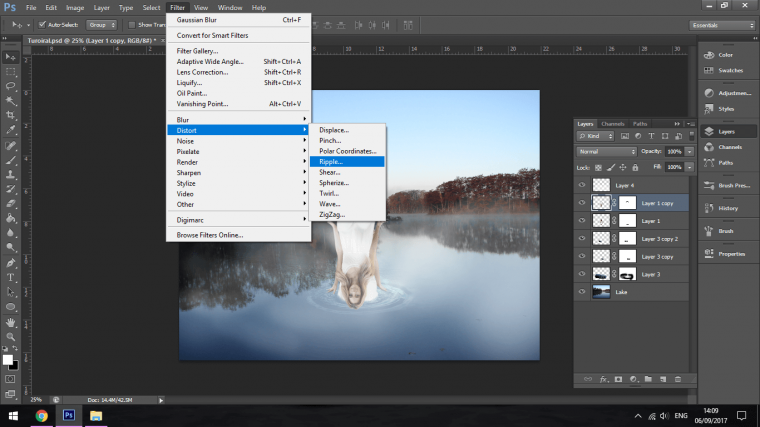
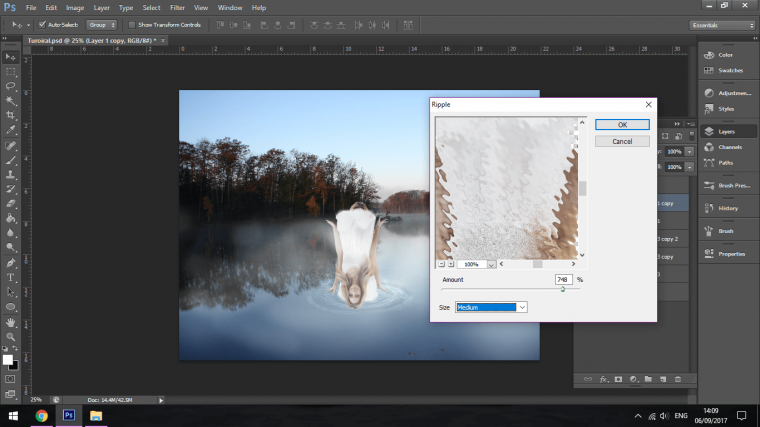
Now I add a little bit of ripple to the model so make Her reflection look like it’s under water.
Keep the size Medium if you want, but you have a few more options there you can check out, so see what works for you.
Add the Reflection layer under our models layers and position accordingly.
Key in Ctrl T for this.
I then drop that layers opacity to about 50% and using our masking technique I genitally brush out the areas that would be less seen, as in the head because it is further away.
The last little touches I made to my image was I created a new layer and using the standard Brush Tool set to 50% I just painted on what looks like a little mist, the I add a Gaussian Blur set at around 4.
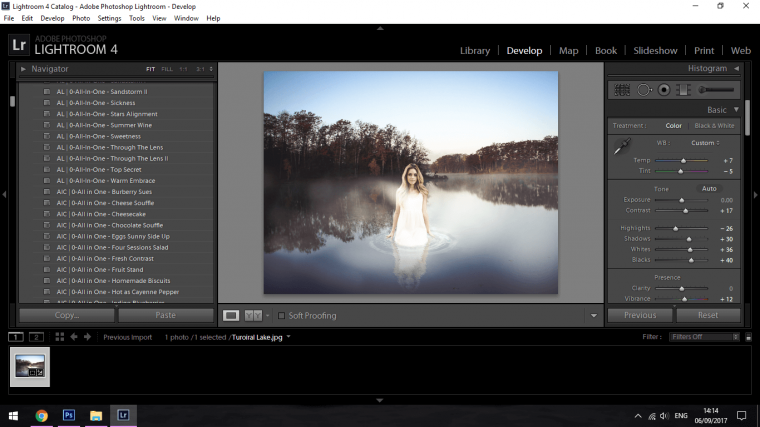
And if you want you can transfer your image when saved to Lightroom and use one of our Presets if you have them.
Graduated from college in 2002 with a degree in Art & Design, I started exploring my way in Graphic Design and Professional Post Production. Full-time freelancer since 2011.


 Facebook
 Google +
Comments (0)
There are no comments yet.