Selective colour is where you take a coloured image and remove most of the colour from that image, leaving just one colour behind that you want to focus on.
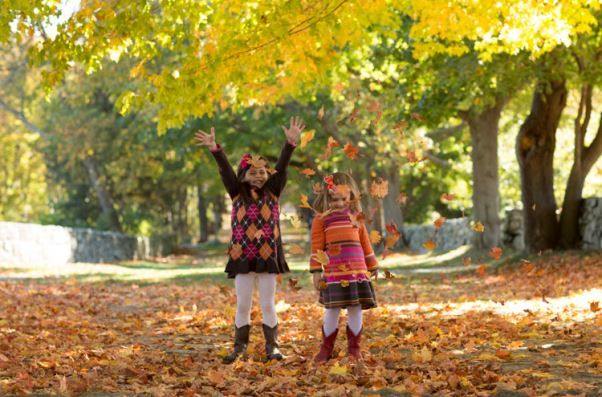
The photo we will be using today, provided by sleeklens.com, is a lovely shot of two little kids playing in some Autumn leaves.
For this, I’m going to have everything in the background black white, while focusing in on the leaves, the children and their colourful outfits.
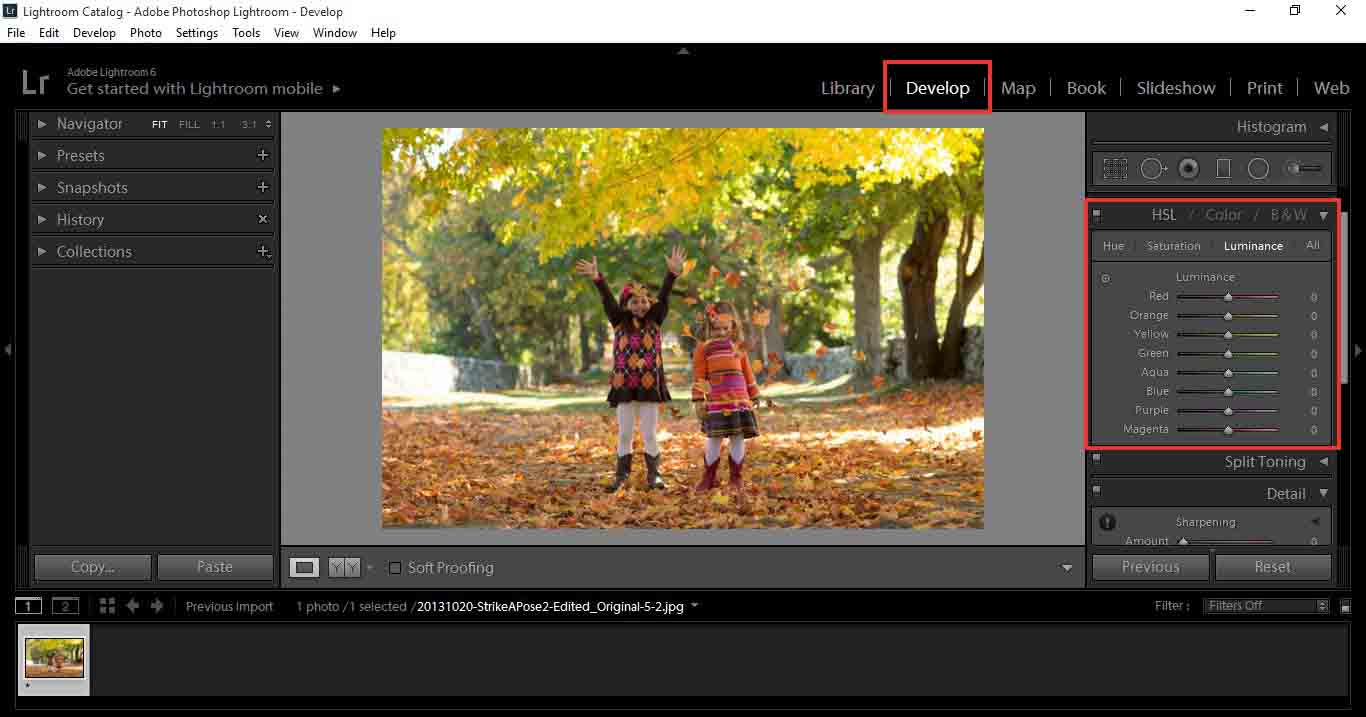
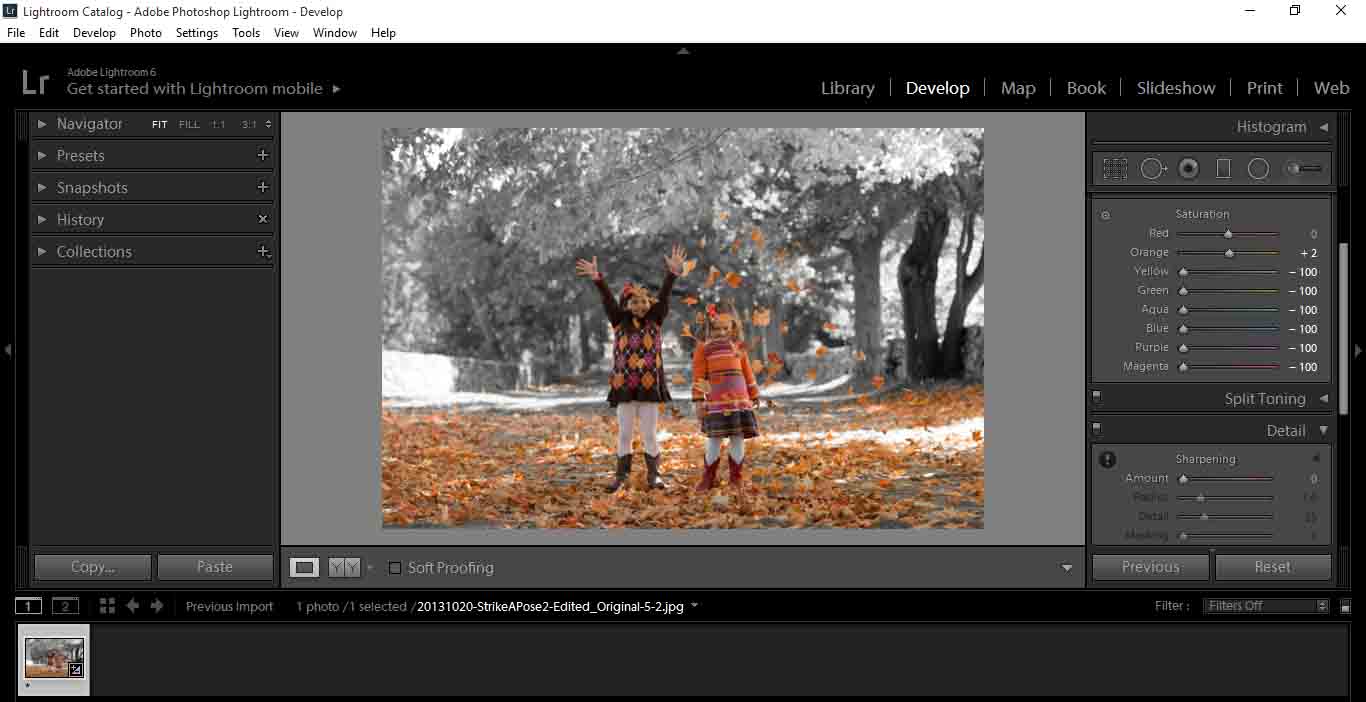
First up, go to your HSL/B&W/Color panel, which is situated in the Develop module.
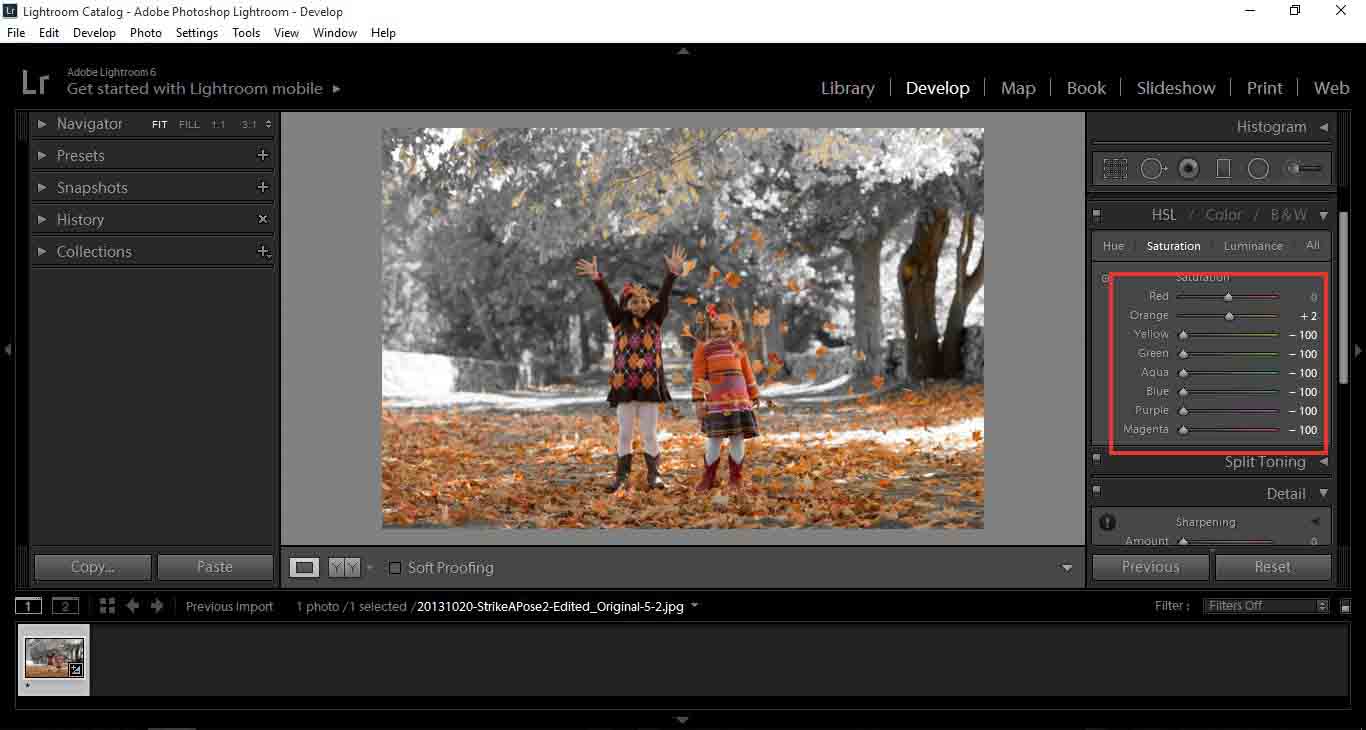
Click on the Saturation tab, and we are going to turn all the colours down, that we don’t need.
Ok, so you will notice that there are 8 colours. You will want to desaturate the colours that you think will not effect the targeted area too much.
So, I will turn down everything else, minus the Red’s and Oranges to start with. As we go through, we may return and re-edit as we see fit.
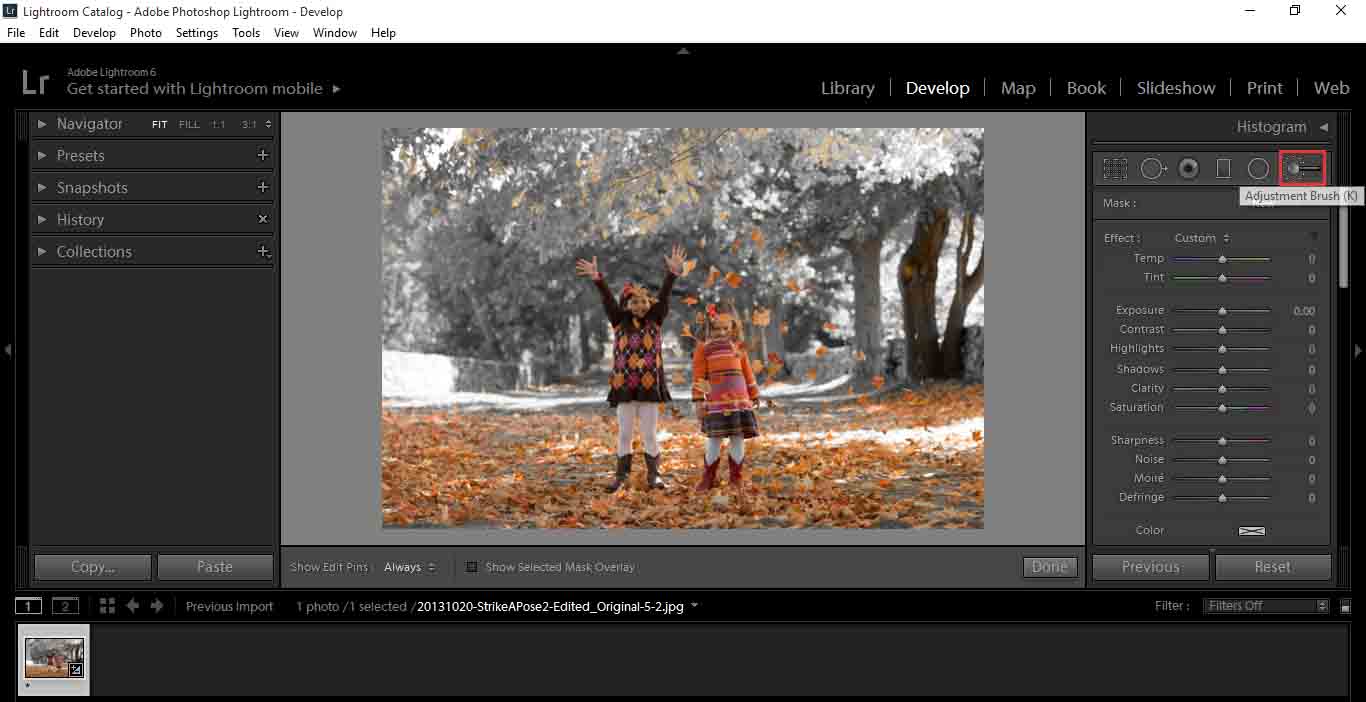
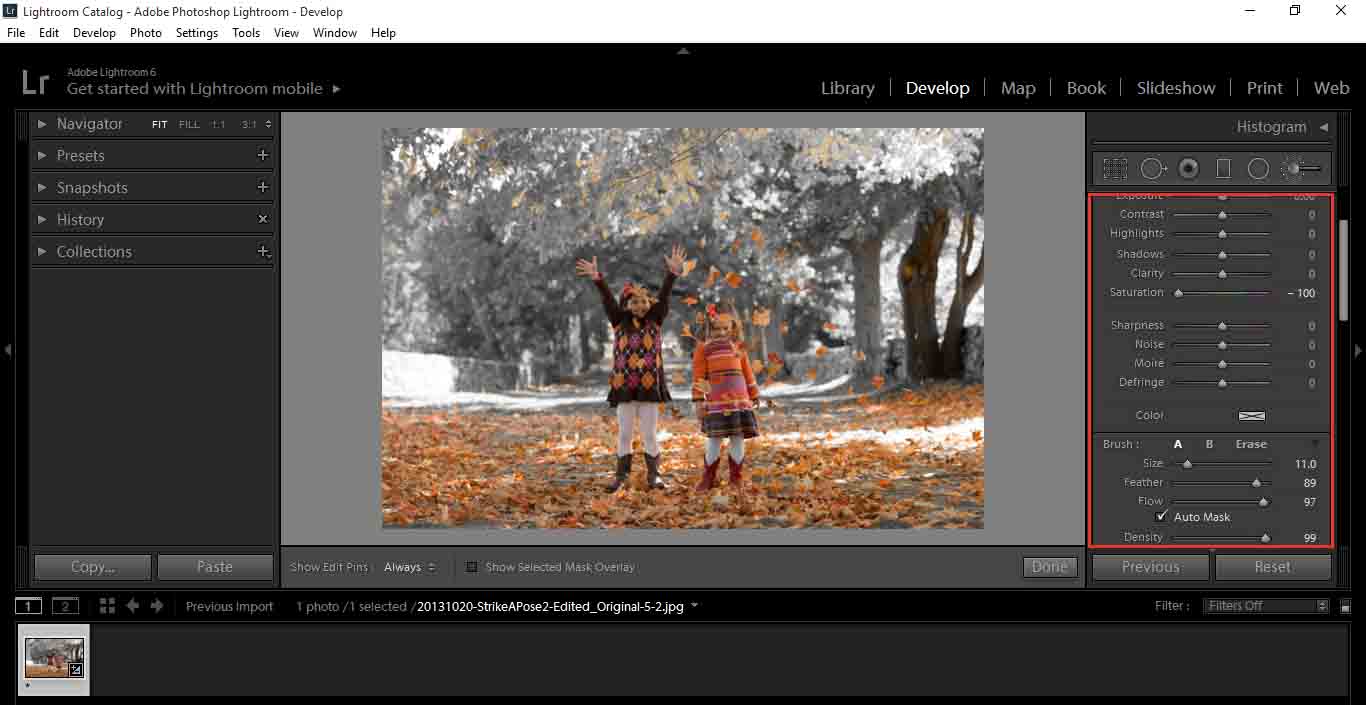
As you can see from the picture we have some other colours in the background, such as the leaves in the trees and the trunk of the tree that make it look a little messy and unfinished, so to get rid of those you want to click on the Brush Tool.
Click on the Brush or press (K) for the Shortcut.
Note: if your Brush has other previous settings, Press Alt, and where you see Effect written beside Custom, it will change to Reset. click on that and you will be in your default brush mode.
Click on the Custom Field and open up the dropdown box, click on Saturation.
The setting you will want for this is as follows.
Saturation at -100, Feather your brush a little and have Auto Mask Checked.
So, now we’re going to paint over the areas we want to Saturate, as you do this you can use the Bracket keys ([ ]) to resize your brush.
You should end up with something that looks like this.
While painting over you will come across areas that have fine detail, in those situations reduce the Feather on your Brush so you have a hard edge. That way, there won’t be much of a bleed over into the parts you want colourised.
Just a short one today, but straight to the point. If you play with this technique you can create some wonderful images. I find this technique is best used in this type of lifestyle shot, and also good for Weddings etc when you might want to focus in on flowers or something like that.
Well anyway, those are some ideas you may want to consider, so I hope you got something out of my tutorial. You may also consider looking at my tutorial about white balance in Lightroom.
Check out some of our Lightroom collections, where you will have exclusive access to our private Lightroom Help and Tutorial Facebook Group and get more great Tips and Tricks.
Graduated from college in 2002 with a degree in Art & Design, I started exploring my way in Graphic Design and Professional Post Production. Full-time freelancer since 2011.


 Facebook
 Google +
Comments (0)
There are no comments yet.