Working with Colour Selection and Changing Colours in Photoshopwww.sleeklens.com
Hello everyone, today we’ll be taking a look at how to select and isolate colours and then change them to a different colour of your choosing.
This is a great technique so I hope you find it useful in your editing, which I am 100% sure will, you can use this in just about any photo so it will give you a wide range to work with.
There will be instances where you will have to look for other techniques but this should cover quite a lot.
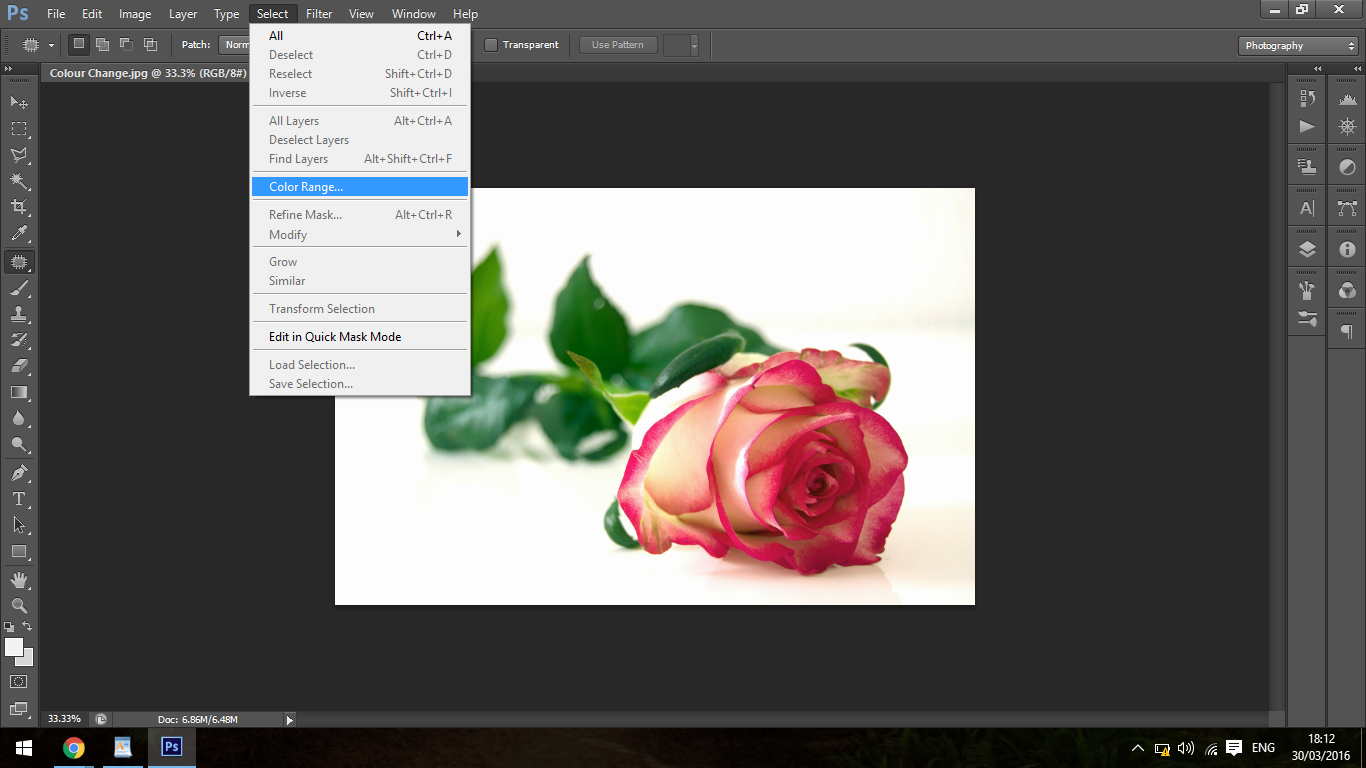
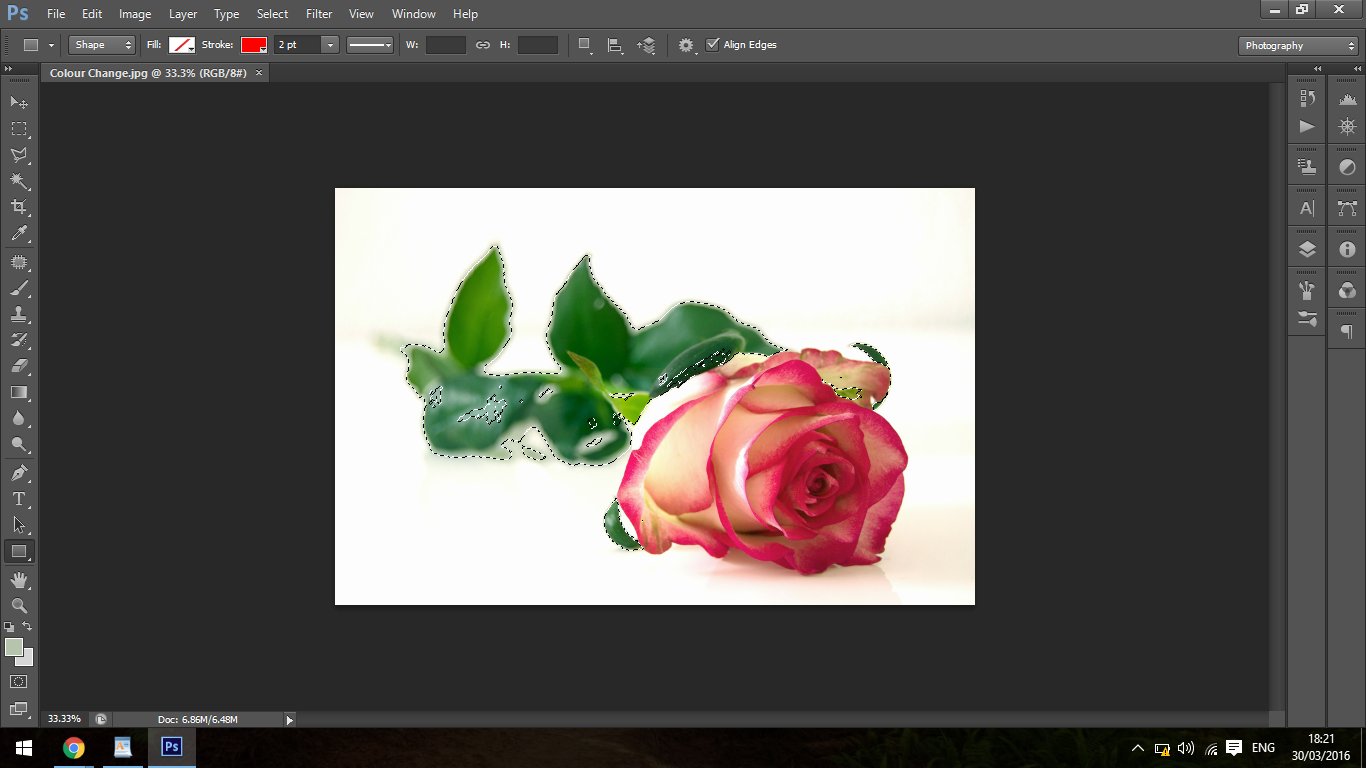
How we do this is you have to go to Select in the top bar and then down to Colour Range.
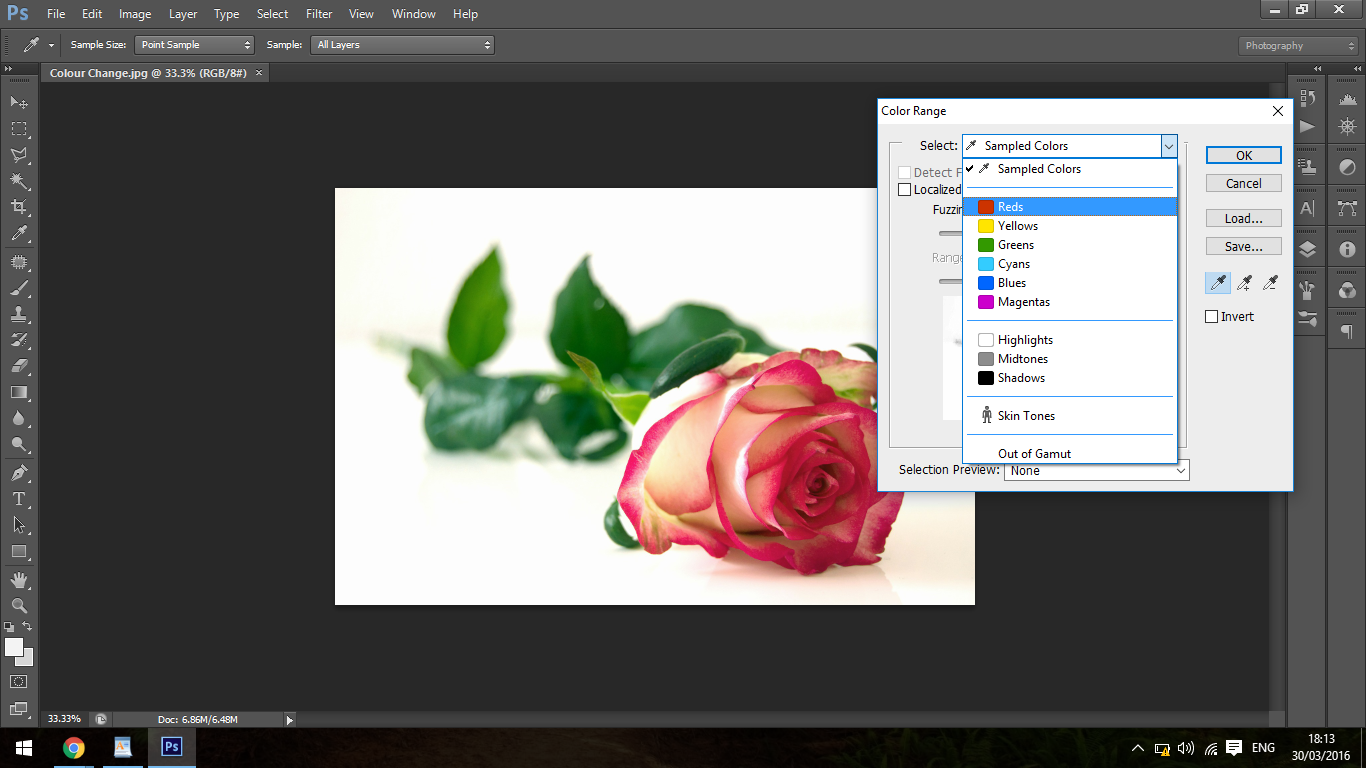
At the top as indicated you will see a section marked Sampled Colours, this will take you through the range of colours individually, so you’ll see Reds, Yellows down to Magenta’s, Highlights Mid tones and so on.
At the bottom you’ll see Skin Tones which can be really helpful if the situation arrives where you could use such a Tool.
If you select sampled colours then this will allow you to use the eye droppers on the right hand side to click on the areas that you want to change.
So if you have a large background of one particular colour then you would use the eye dropper by clicking on the back ground and that will then select that colour.
The eye dropper in the middle with the plus sign will let you add further colours and the eye dropper with the minus of course does the opposite.
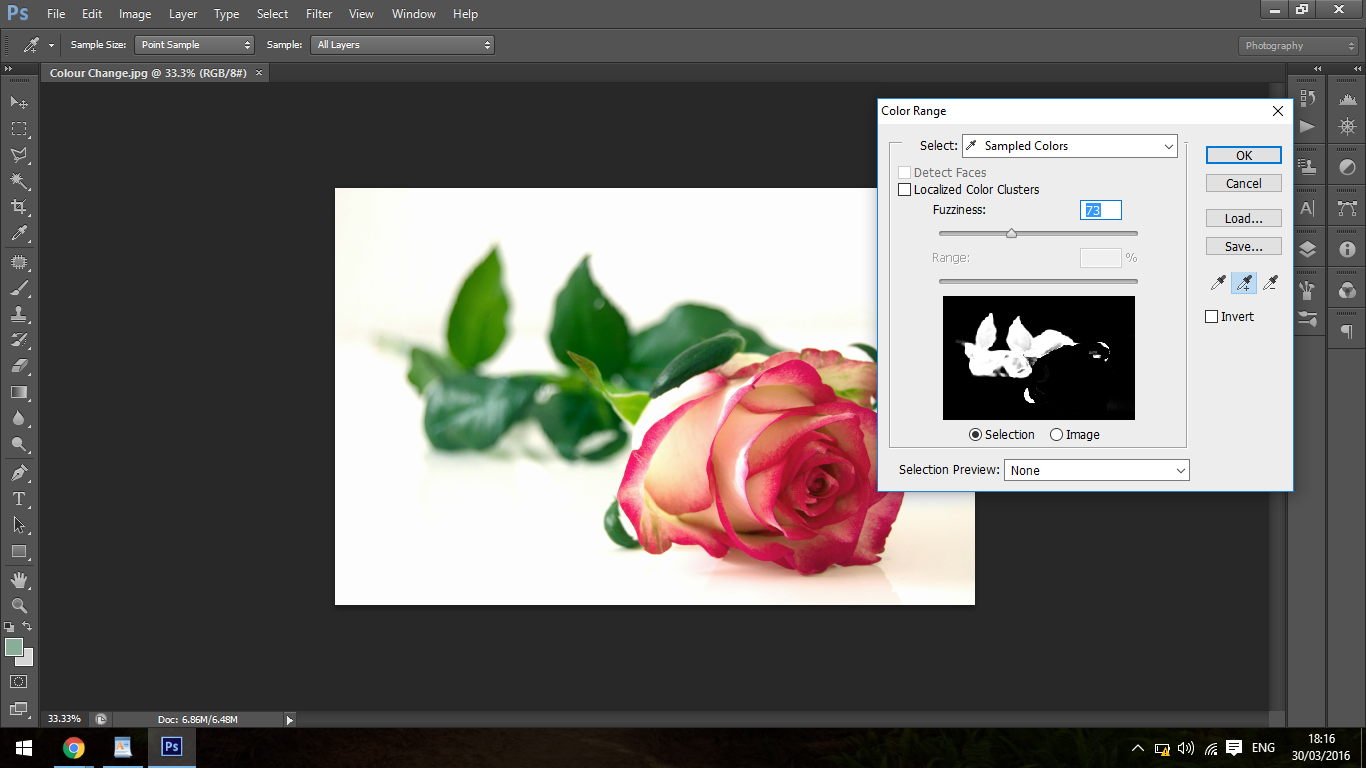
So you click on your areas and it will select, what next? because you may be seeing most of the image still instead of it being in a crisp Black and White format.
Well this is where you use the Fuzziness slider, so slide it up and down for a second to familiarize yourself with that.
Then you can follow up with the Plus eyedropper and do what we just discussed by further clicking on the areas you need selected to increase the selection range.
Click ok and you will see that there is now a selection that has appeared covering the colour range that you have chosen.
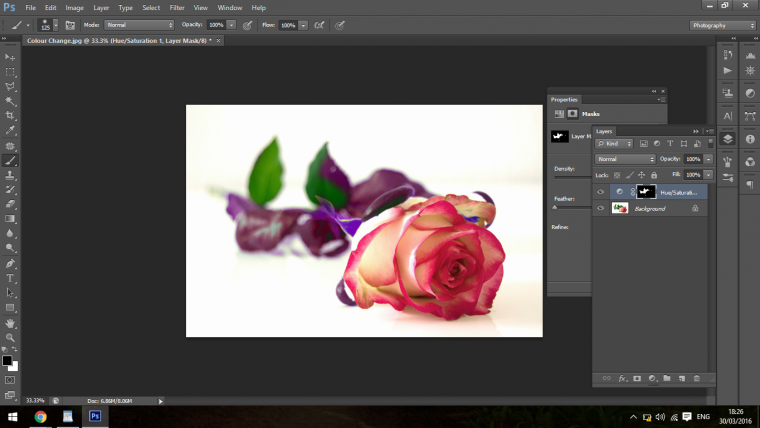
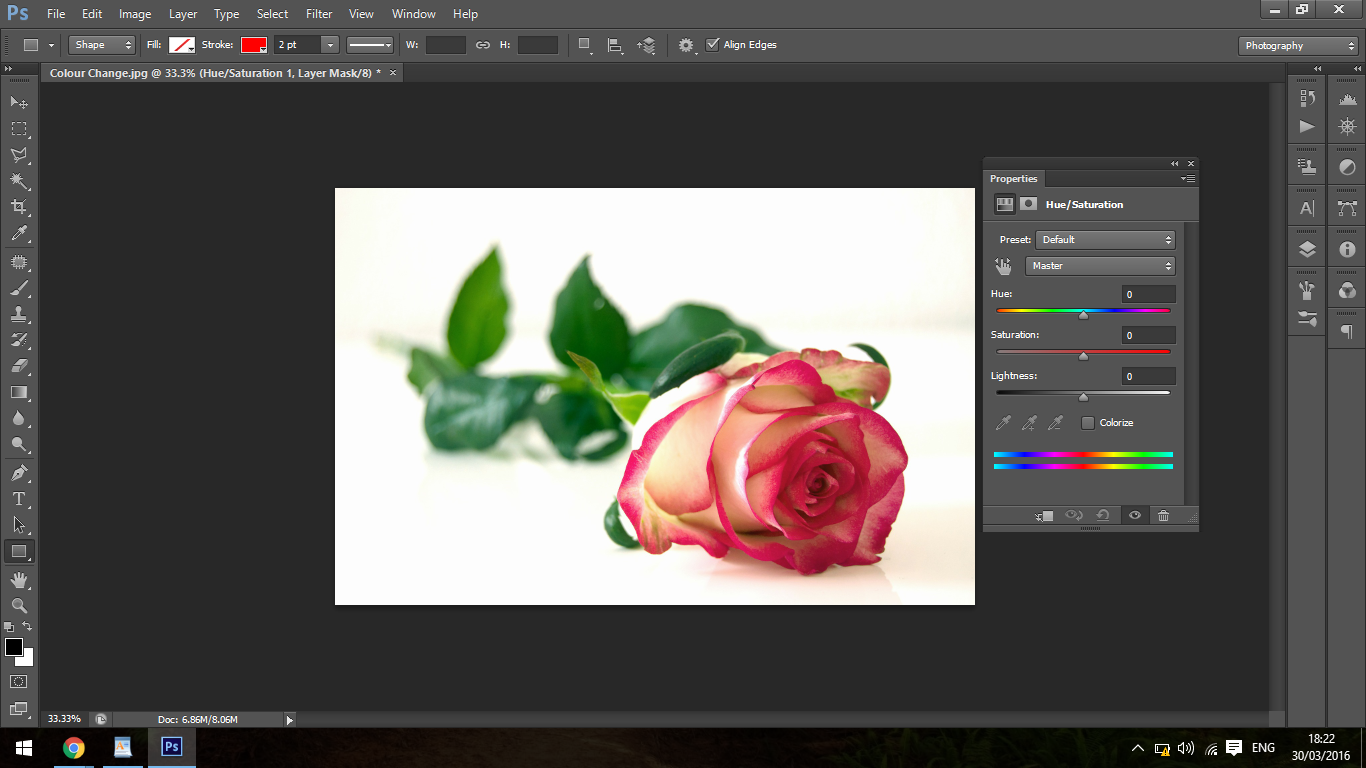
Next step is to create a Hue and Saturation adjustment layer, you can do this simply by clicking on Layer – New Adjustment Layer then chose Hue and Saturation.
It’s called Hue and Saturation but in practice right now we’re only using the Hue slider because the saturation slider drains colour out of the image and we don’t need this, but just take a note if you don’t know what saturation is, so in short, saturation makes your colour more grey.
Now you will be able to use the top slider (The hue slider) and you will now see that the colours will change as you slide back and forth.
Then you click ok, so now if you want to change one of the other colours you will be able to do the exact same thing and add a new adjustment layer.
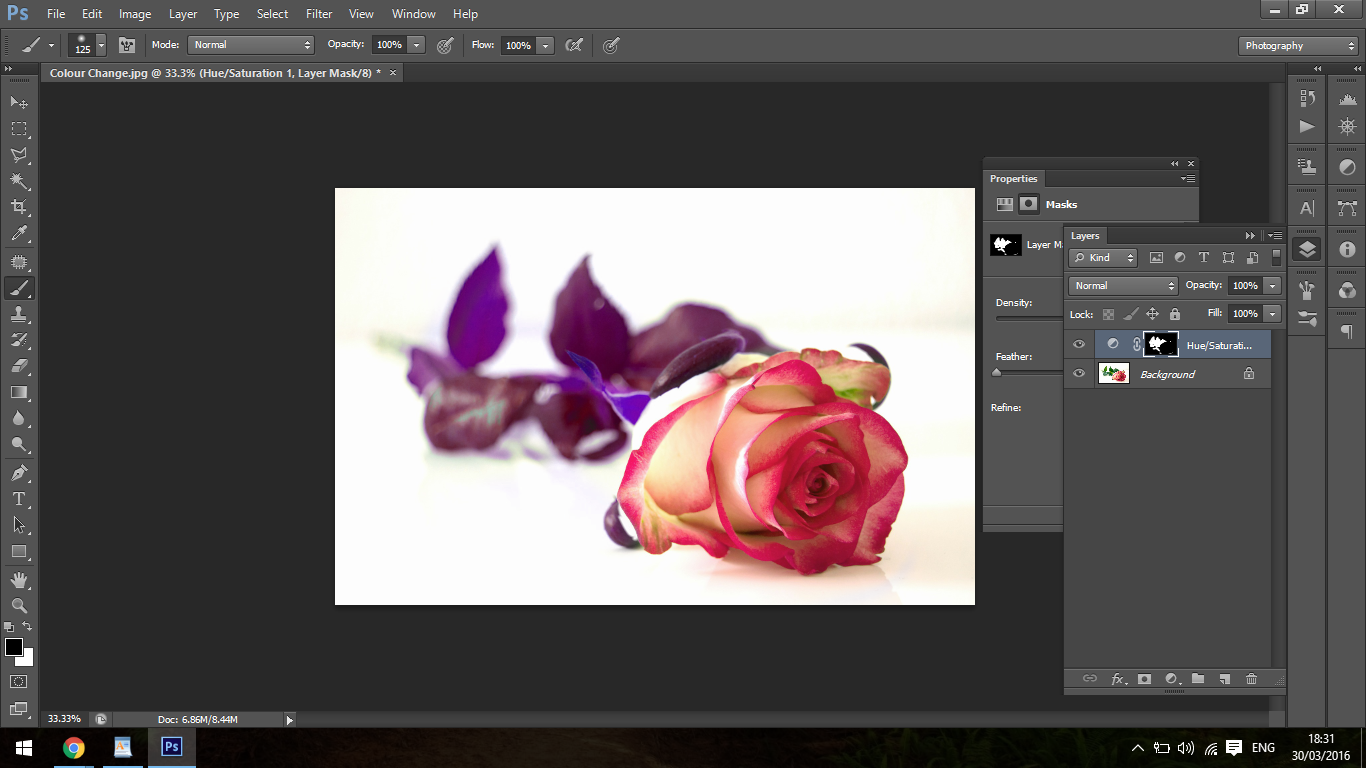
To refine these adjustment layers, you must use the layer mask technique just like you would with a normal layer mask, reason for doing this is that the selection sometimes depending on how complicated it is may not be perfect, like when you are dealing with Hair or Trees and stuff like that, so you will want to use the layer masking technique to improve the image as best as you can.
To do this technique, click on your brush Tool, then click where I have highlighted below, this is your mask.
So while using masking remember that Black means the image you are masking is invisible and the white means that it is visible.
That means when you use a paintbrush with Black you will be temporarily erasing the image and when you paint using white you’ll bring it back.
So don’t worry what ever you do can be fixed as this is whats known as non destructive editing.
Hold Alt and click on your layer mask and this will turn your image black and white if you wish to do so, I prefer to work with the colour version but I will from time to time use this black and white option.
So take this technique and make a success of it, good luck.
Graduated from college in 2002 with a degree in Art & Design, I started exploring my way in Graphic Design and Professional Post Production. Full-time freelancer since 2011.


 Facebook
 Google +
Comments (0)
There are no comments yet.