Hello all, I have a great Photoshop Tutorial for you today. This one’s for all you budding wild life photographers out there.
What we’ll be discussing today is how to add Dust to create drama to a wildlife shot.
Why would you do this you may ask? Well, by adding dust to your image it will give your image a sense of action and movement.
If you take a look at all the best wildlife photographers you will see this in their images.
All their final images have a sense of drama to them the way they play with the lighting and effects, so we’re going to try to recreate that on Photoshop so we don’t have to travel to these wild parts of the world we can do it from our desk with our coffees…
But some of us can’t afford the luxury of crazy world wide adventure so we’ll have to put up with being Photoshop masters for now 🙂
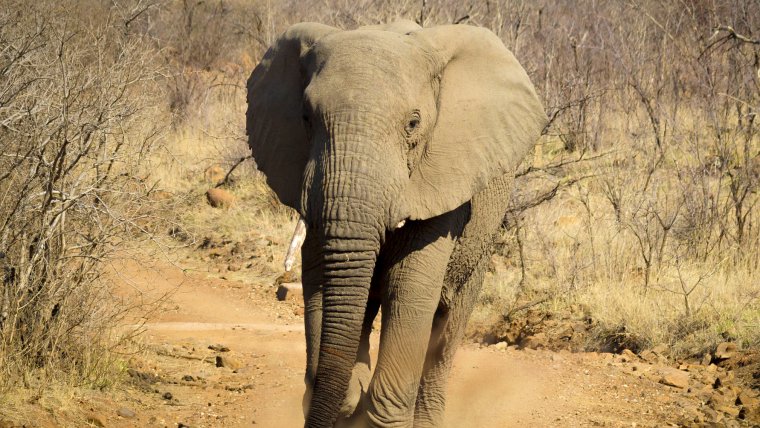
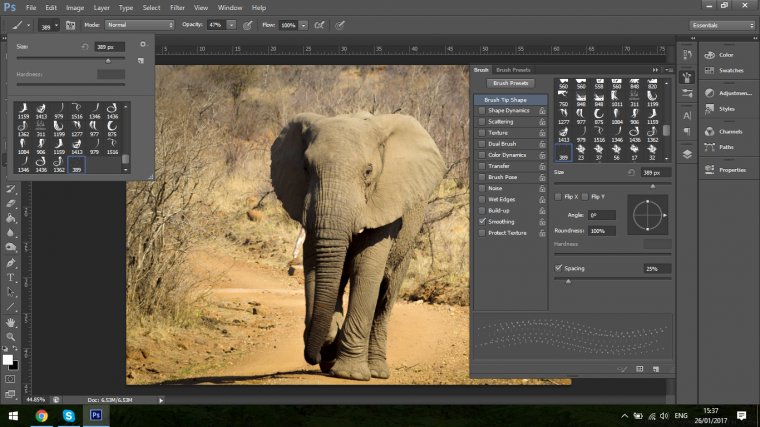
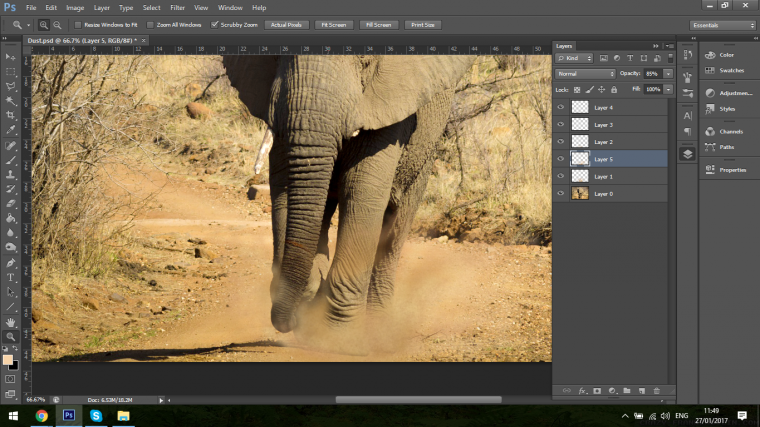
Ok so let’s take a look at the image I want to use for today.
So I used this image because it already has a sense of movement, you can see that the Elephant isn’t really moving at a seriously high speed compared to what it probably could do so it in my humble opinion takes away from the image a little.
When we add the dust it will give this image more speed and intensity like it’s moving at your fast and coming after you with all it’s might.
The dust will also add weight.
So you can see from an Artistic point of view what the small changes will do for the images, subtle but very very effective.
Ok so let’s get to it now you know the background.
I’d also like to add at this point, if you are making Photo Composites sometimes you will notice that the image you have added so, for example, a person running along a desert or something along those lines you will notice that the person will look like they are floating, this is a very common problem, I call it not being grounded.
Even after adding the shadows etc sometimes the image still won’t look like it has any weight to it, so you can use the dust effect to ground the image and bring out the mass to it.
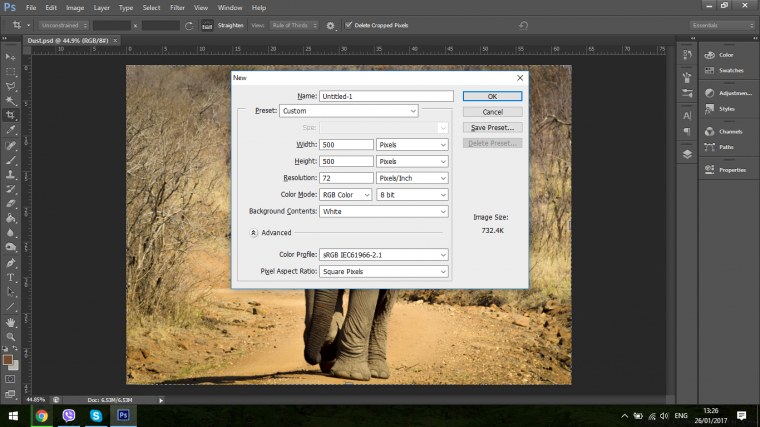
How we are going to create this is by creating a custom brush.
Type on your keyboard Ctrl-N to create a new document and make it 500 pixels by 500 pixels.
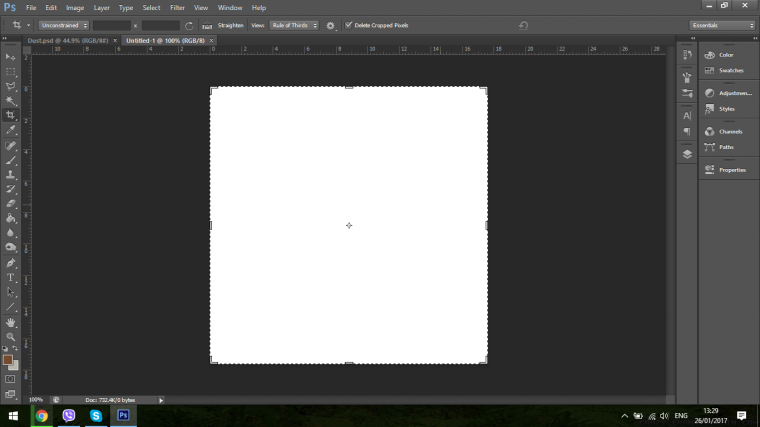
The next step we want to take now is to choose your Brush Tool, with Black as it’s color and start to paint little Brush marks onto your canvas as in the example image below.
Do this with a soft brush, so the first one in your Brush options and they do not have to be uniformed so don’t worry about that.

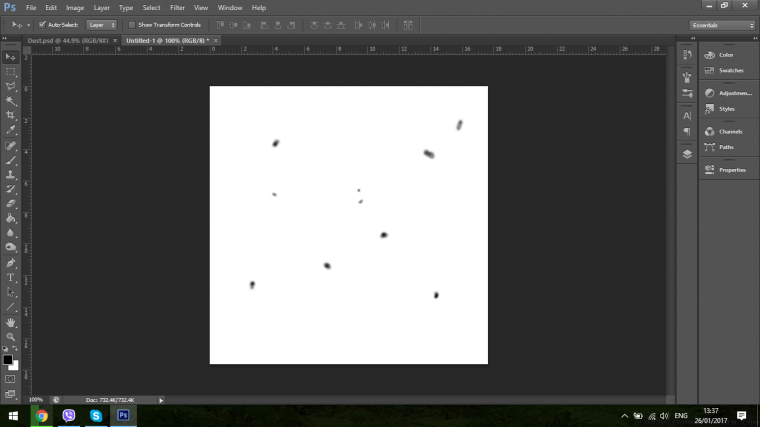
My objective is to make it look like there is particles in the air within the dust.
Now you have that completed we have to make a temple from it so we can start to use it like a real brush in our other image.
You do this by going to Edit – Define Brush Preset.

Once you have done this name the Brush something that you can easily identify it, the reason you do this is because over time in Photoshop we tend to collect a lot of Brushes as we go along and sometimes it can be a total nightmare trying to find the one that you are after, so save yourself some headache.
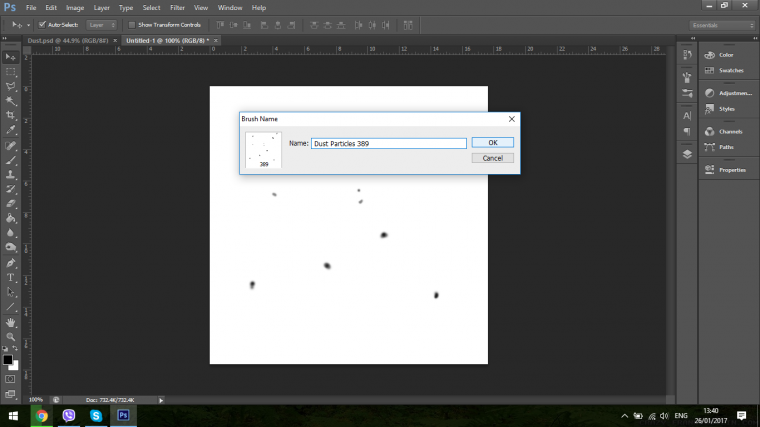
Click OK and we will now have our Brush preset almost ready for use.
We can’t use it right away because it still has to be randomized.
Then we will start to add in a few other simple effects to complete our masterpiece, so stay tuned we still have a lot more to do on this image but what we have learned so far in terms of creating mass and weight will carry you far when it comes to creating your own Photo composites because you are now aware of the issue that many Photoshop users over look when it comes to creating life like images that fool the normal eye.
On your Photoshop window, you will see in the menu bar ‘Window’
Click on that or you can use the shortcut of F5 and your brush option will then appear on the right-hand side.
You will then see within the option panel the option ‘Shape Dynamics’
Click on that to open up your options and at the top, the first one is Size Jitter.
Click on the slider and move it to the right-hand side all the way over.
What this does is makes the Brush pattern completely random so it won’t the same.
Next is turn you Minimum Diameter down which is right under your Size Jitter slider.
Now you can turn the Angle Jitter all the way up as well, what this does is it rotates you Brush Pattern so again further randomizing the final look of the pattern.
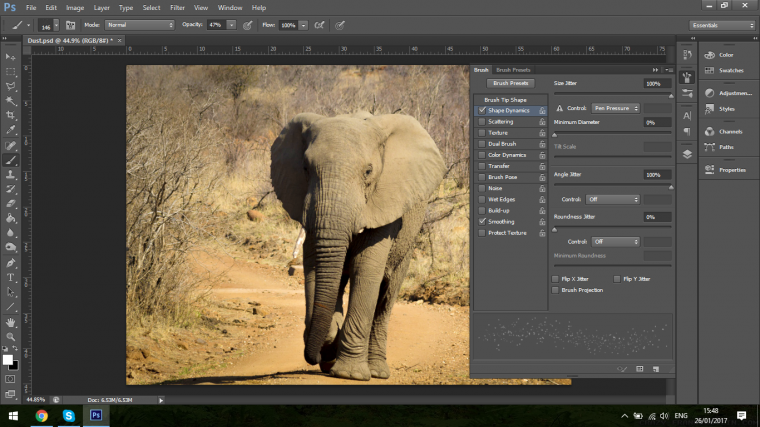
Ok, so we’re now done with Shape Dynamics.
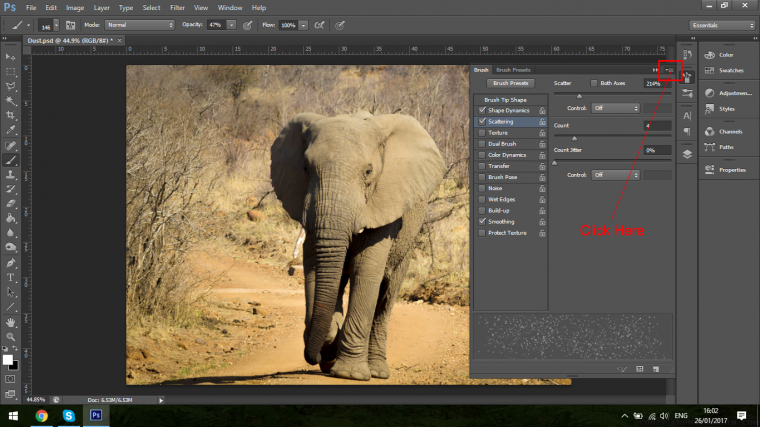
Next up is Scattering, just below Shape Dynamics.
As the name suggests that will now create and Scattering effect, furthering randomizing the dust.
Right now I want you to test the Brush out on a new layer that you can delete, what I want you to do is to play with the Scatter Slider, Count, Count Jitter and Click on Click on Both Axes.
Take a few minutes to play around with those options and get used to the in’s and outs of it.

Ok so that’s our Brush ready to use, now let’s go create some magic.
So the color that we will be looking to use is the same color as the surrounding earth.
With your Brush Tool selected hold Alt and then click on the area, you wish to sample the color from.
Side Note: If you want to save your Brush for the future you can do so by clicking where I have indicated below.
Then click on New Brush Preset.
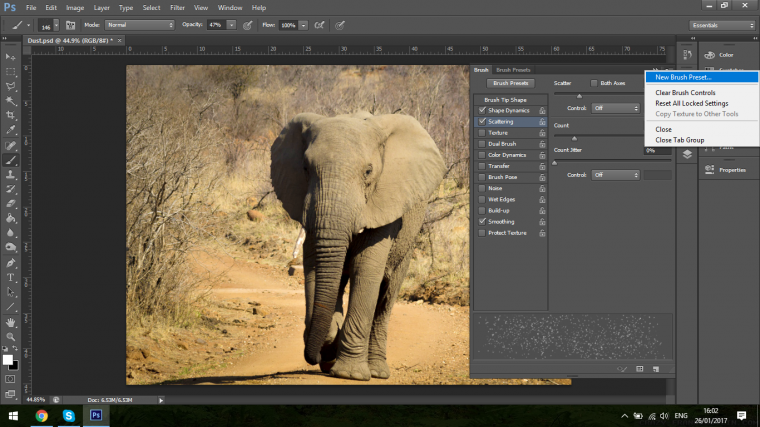
Then you name and click Ok if you haven’t done so already from our Previous Tutorial.
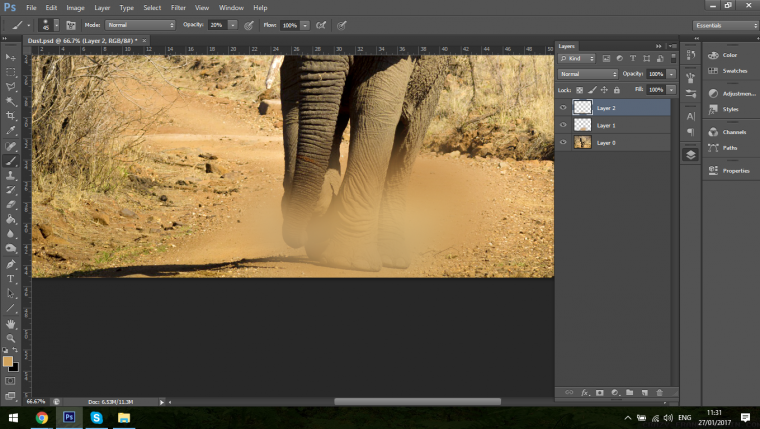
Right so what we have to do now is to start to lay down the dust, we are going to do this in two ways, the first well be laying down with a normal soft brush an Artistic impression or what you think the dust would look like using a low opacity of around 20/25% and with a sampled colour of the surrounding dirt, also note that take several samples as you go along to add a bit of variation.
With the opacity low, you will be able to build up the layers.
For this, I would suggest you google wildlife images and focus in on the ones with movement and dust so you can get an idea of what you have to do.
Like I said this is the Artistic part of the tutorial so go with what you think is correct and build the layers up bit by bit.
So zoom in and lets get to work.
Below you will see what I have created.
Once you are happy with what you have created you can then start to add in a Gaussian Blur.
You find this in Filter – Blur – Gaussian Blur
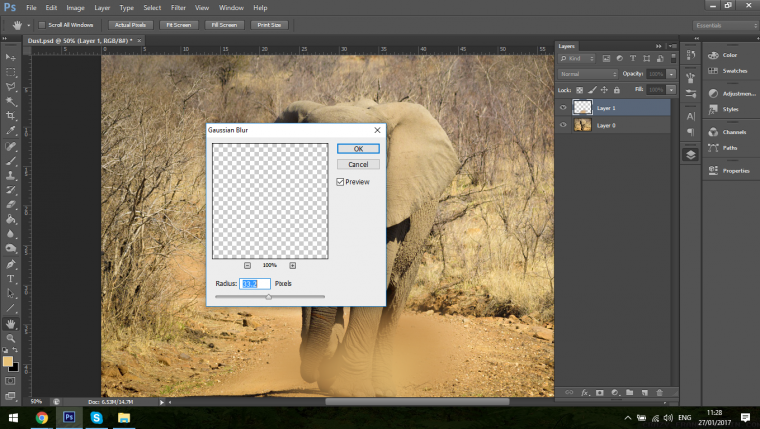
You can always reduce the opacity of the layers as well.
Once you are happy with your base Dust Effect then we will start to add in the Dust Particles, this is where it will start to come to life.
Again a certain amount of Artistic Licence will have to be applied here.
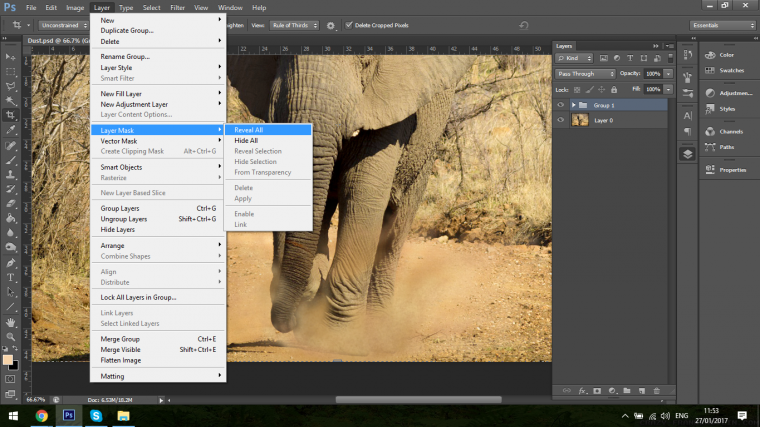
The last part of the Tutorial now is to Group all the Dust Layers together.
You do this by clicking on the bottom layer, holding shift and then clicking on the top layer.
Once they are all selected hold Ctrl-G and they layer should be grouped together.
Next go to Layer – Layer Mask – Reveal All
Now with a Brush using Black, you will be able to start to edit all the dust in that layer, what I do is I zoom in, and work back and forth with opacity.
I try to reveal areas I think the dust would miss etc.
If you make any mistake you can bring back switching Black for White.
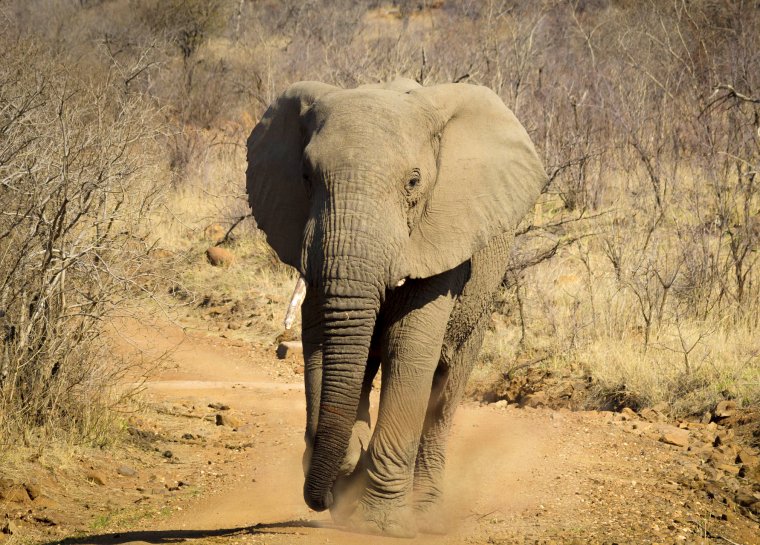
In the end, your image should look like the image below.
Learn to vignette in Adobe Photoshop using actions


Please verify your software version before proceeding.
 I’ve verified my software version


 Facebook
 Google +
Comments (0)
There are no comments yet.