Hey everyone for today we’re going to be checking out a really awesome feature that Photoshop has and review over what all it can do.
This is a really cool 3 part Tutorial so get buckled in and get ready because we have a good amount to go through over the next few Tutorials on the Photoshop Filter Gallery.
So to start with I get all my images free from Pixabay.com
This site is a great resource that I have been using for all my Tutorials so far over the past year, so I’m giving you that tip as a present.
You’re welcome 🙂
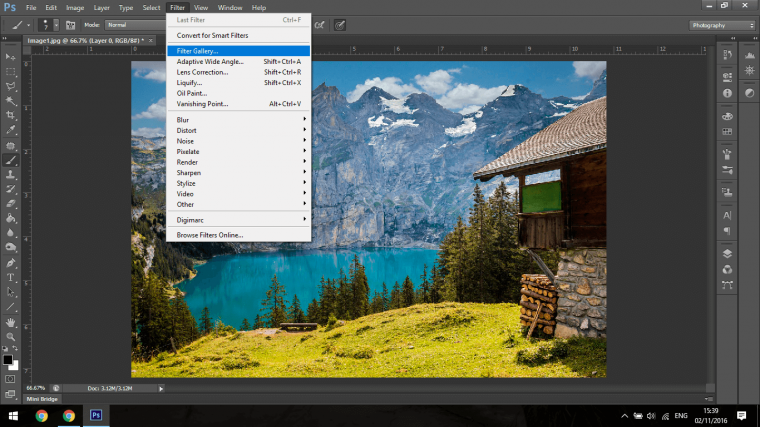
So this is the image that I’ll be starting off with.

Nice isn’t it, so nice in fact that I am now using it as my wallpaper.
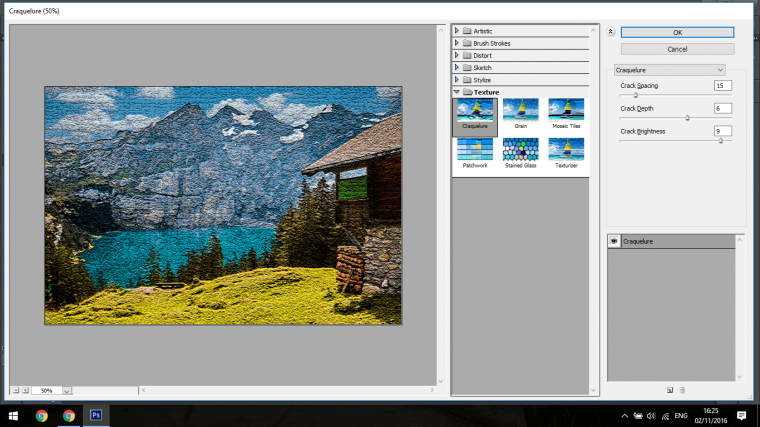
As nice as it is, I’m going to now open it up in Photoshop and go to Filter – Filter Gallery.
Let’s see what else we can do with this.
First up I’d just like to say that Filters may seem harsh at the start but you can fully customize them to your needs, they are a really great way to add some cool effects to your images without having to know an awful lot of Photoshop Knowledge, just the basics are enough to pass.
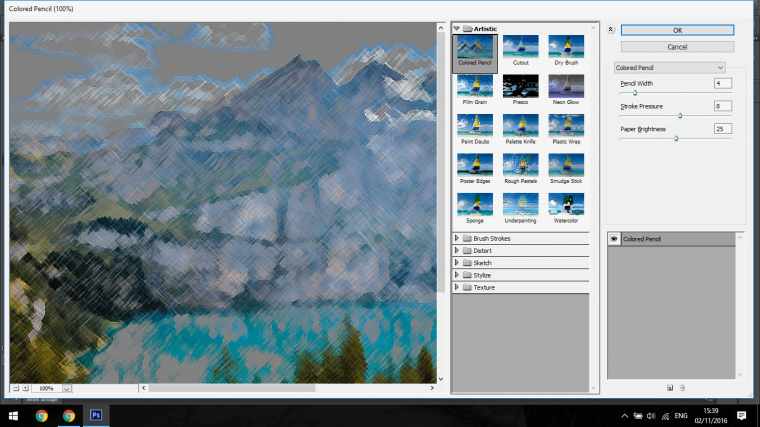
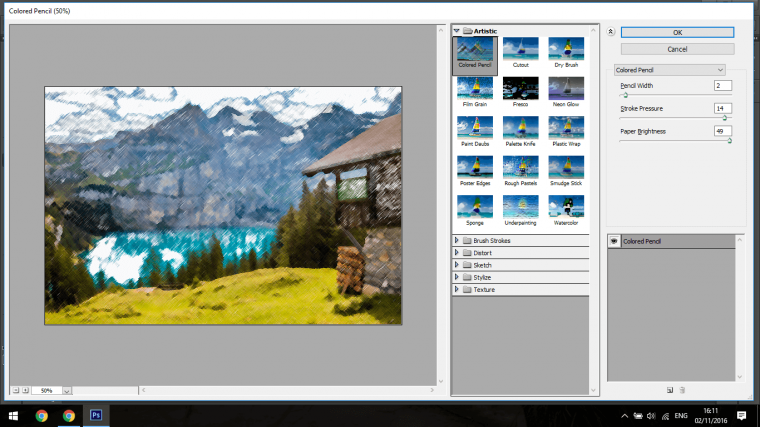
Ok, now you have gotten this far if you look at the bottom left-hand side of the pop-up panel you will see the magnification buttons, just zoom that out a little so you will be able to see the effect on your image a little better.
I went to 50% but whatever works for you is all good.

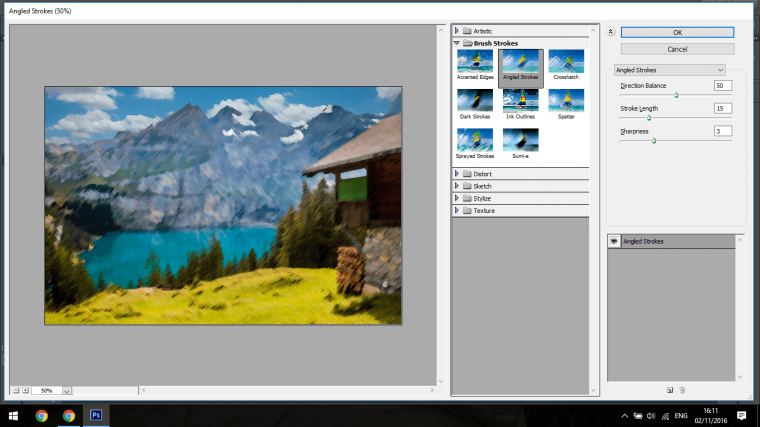
As you can see from the image above, in the center right we have a whole lot of drop down boxes, Artistic, Brush Strokes, Distort, Sketch, Stylize, and Photoshop Textures.
So I’ll go through these then I’ll take each individual effect and talk you through it and how to use it.
The first we are looking at here is the Artistic, so as the name states they have tried to make these very Artistic and out there a little, so you can image these as being in Art class and your teacher saying create what feels good for you.
The next if Brush Strokes, this Filter will replicate the look that a real Paint Brush would give, well at least to a point, but I’ll discuss ways to make these more realistic also later in these Tutorials if that’s your thing.
Next is Distort, this option can give you some very weird psychedelic effects, personally I love this one and wish they had a lot more in the Distort section, three is just not enough in my opinion.
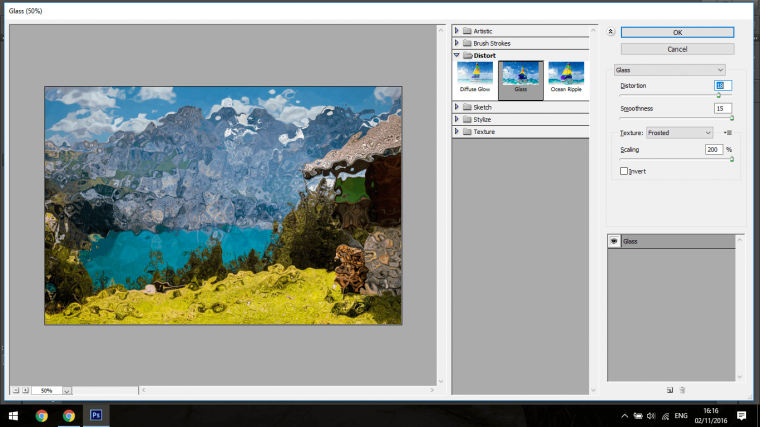
As you can see from the image above how wild this feature can get, but we’ll return to this to check out what all we can do, but for now if just a brief on the different sections, of which Sketch is next.
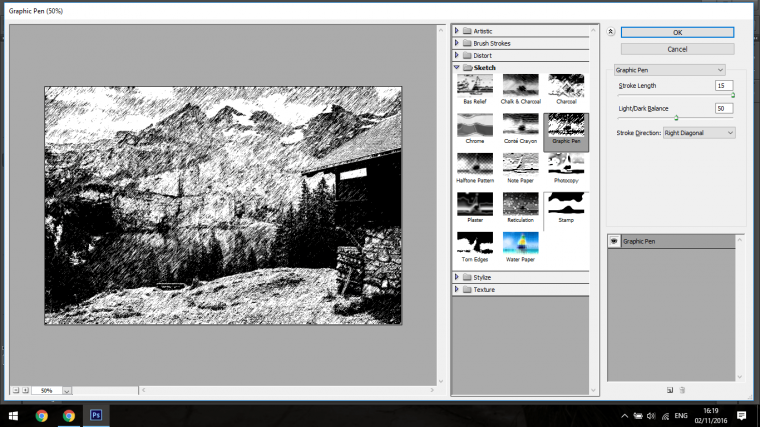
So Sketch is simulating all the different effect that you would get if you were to use a pencil or charcoal in real life, I think there is a good range in the Sketch section and it can be put to very good use when you put your imagination to it.
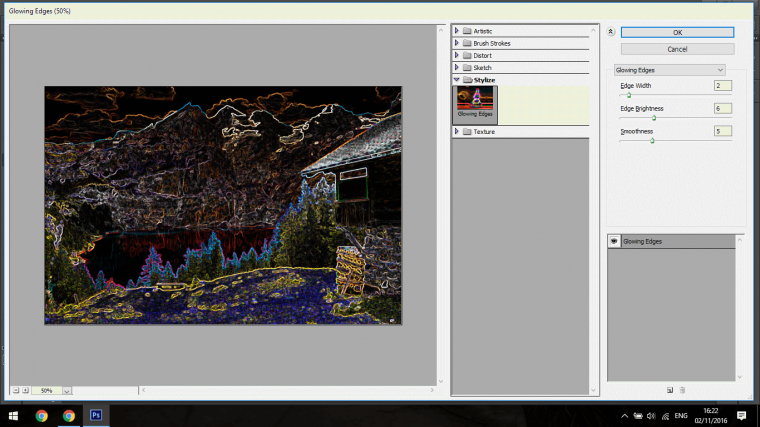
The next is Stylize, unfortunately, this section only has one, I’ve never used it and I doubt I will, the way I think of Stylize is that they have tried to change the image to make it look like it’s made of light or something like that, when we take a better look we’ll try to figure out what use we could have for it, even though I’ve never used it I have a few ideas in my head already.
Final on the list is Texture, Texture is hit and miss, there is deafeningly a few good effects in there like grain and a few that you wouldn’t use or you would be hard pressed to figure out how you would use them.
So for an exercise take a few mins and juts look over all that the Photoshop Filter gallery has to offer you and familiarize yourself, while you do this try to think “what could I use these for? how could I apply them?” and in the next few Tutorials we will look at how we can customize and what each offer.
Last tip before you go – How to create a fractured mirror effect in photoshop


Please verify your software version before proceeding.
 I’ve verified my software version


 Facebook
 Google +
Comments (0)
There are no comments yet.