Hi all!
Thank you for joining us today for another great Sleeklens tutorial, that will help you climb those steps to success. Whether it’s just working with Photoshop and Photography as a hobby, or if in the future, you’d like to take it serious and perhaps become a productive Freelancer. That’s what all these tutorials are for, so I hope you are enjoying them as much as you are learning.
Today we’re going to be taking a look at how to reduce harsh, overly dark shadows that can sometimes seriously plague our images.
The disadvantages to having these overly dark shadows, as cool and dramatic as they can be, is that they can obscure a lot of the other details in the image.
So I’ll be showing you a way to lift up the Shadows with out damaging the rest of the picture, keeping those Highlights in good order.
Normally when it comes to this sort of thing, people run straight for Levels and Curves. I know this to be true because I’ve done it and still do it, and there is nothing wrong with that as it’s not a mistake, but in this case, the Shadows and Highlights tool will do a better job.
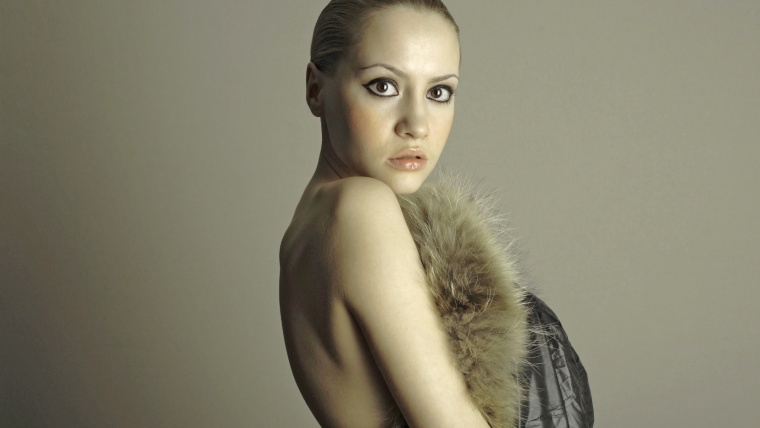
Looking at our image today that I picked up searching through Google images, which can be found here (Mayer George Vladimirovich), it looks great, but it looses areas around the ear, hair as well as definition around the back. This is not a fault of the photographer and I’m sure this is the exact image they were after, but for this tutorial we can use this to demonstrate how to tame those shadowed areas a bit.
Now, I briefly touched on Curves and Levels, but you may be asking why I am not going to use them for this image.
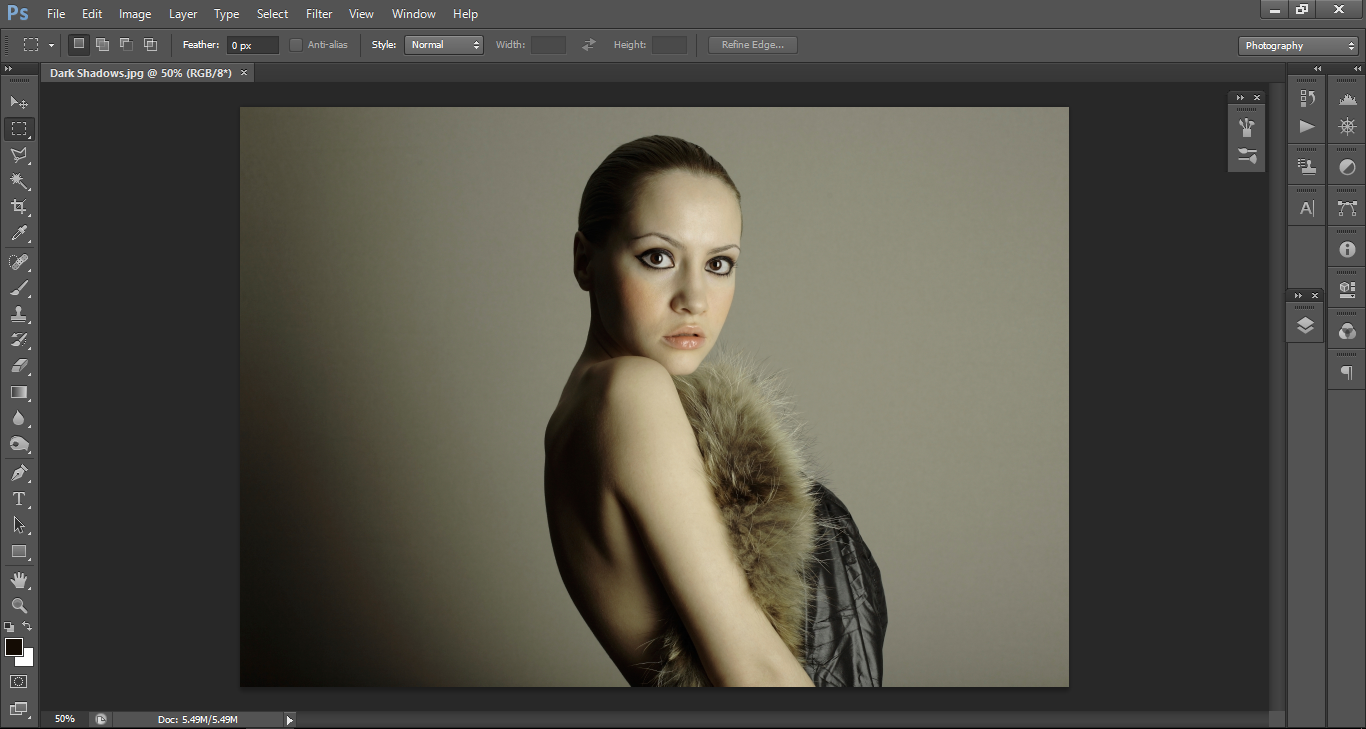
Well, if you look below you can see two examples.
I will admit that in these examples I did over do it a little on purpose, so you can see exactly what I’m talking about.
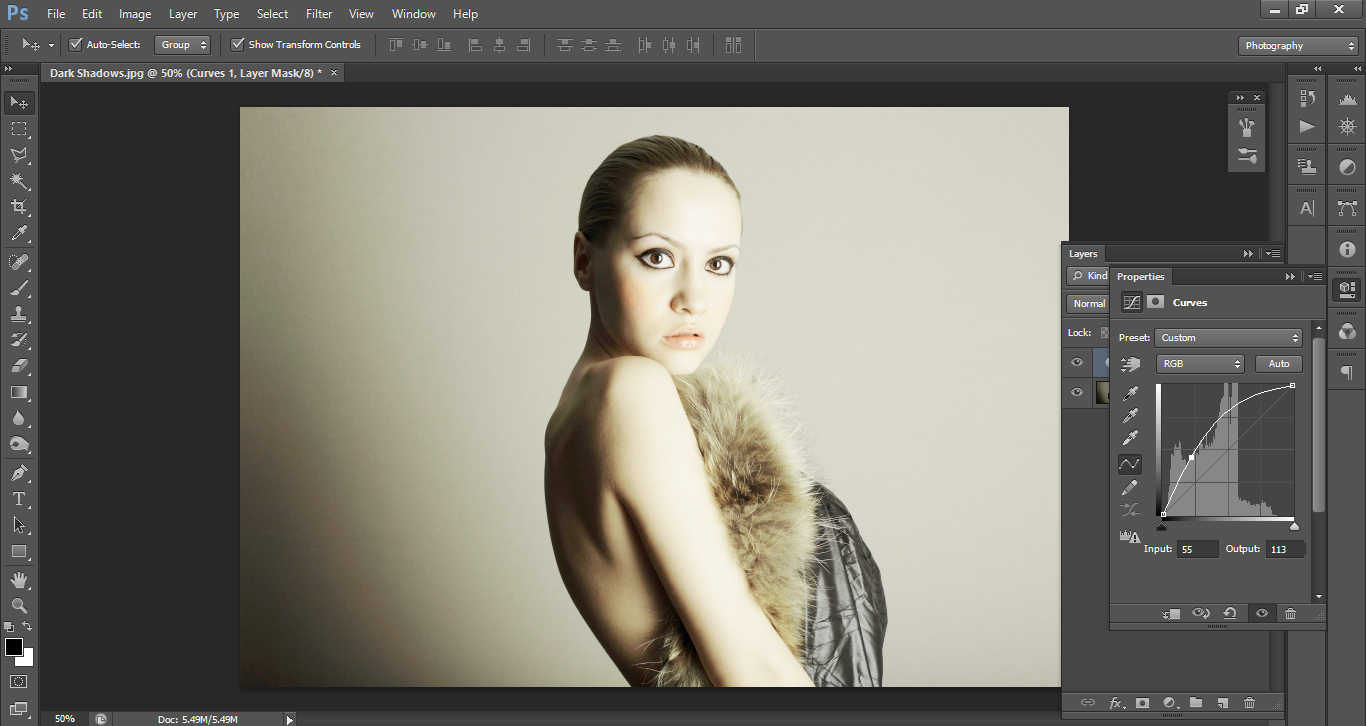
As you can see from the two examples above that the highlights are looking very blown out. Yes, We’ve got the hair and ear detail back which is great, but we’ve wrecked the highlights and it looks awful 🙁
Lets take a look at what the Shadows and Highlights tool can do for us.
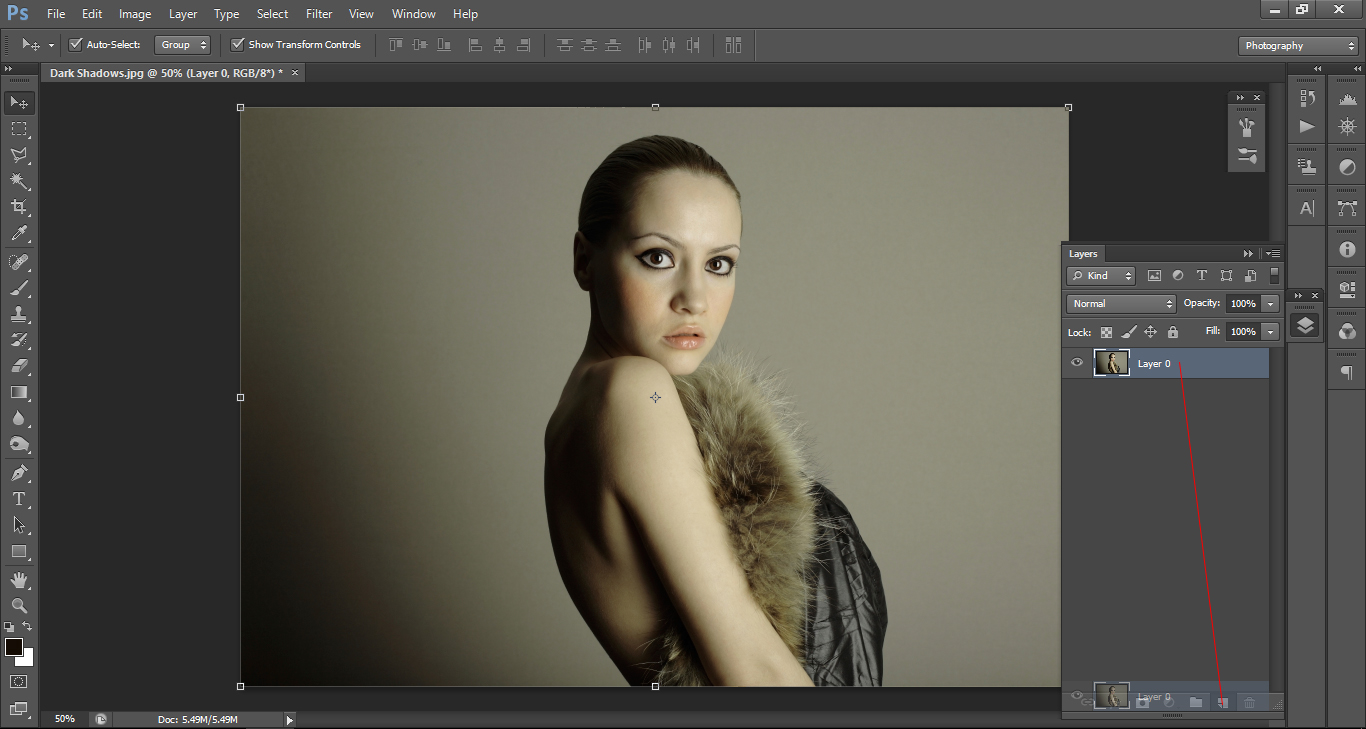
First, Duplicate your layer.
You can do this simply by clicking and dragging your layer to the sixth icon across as shown below.
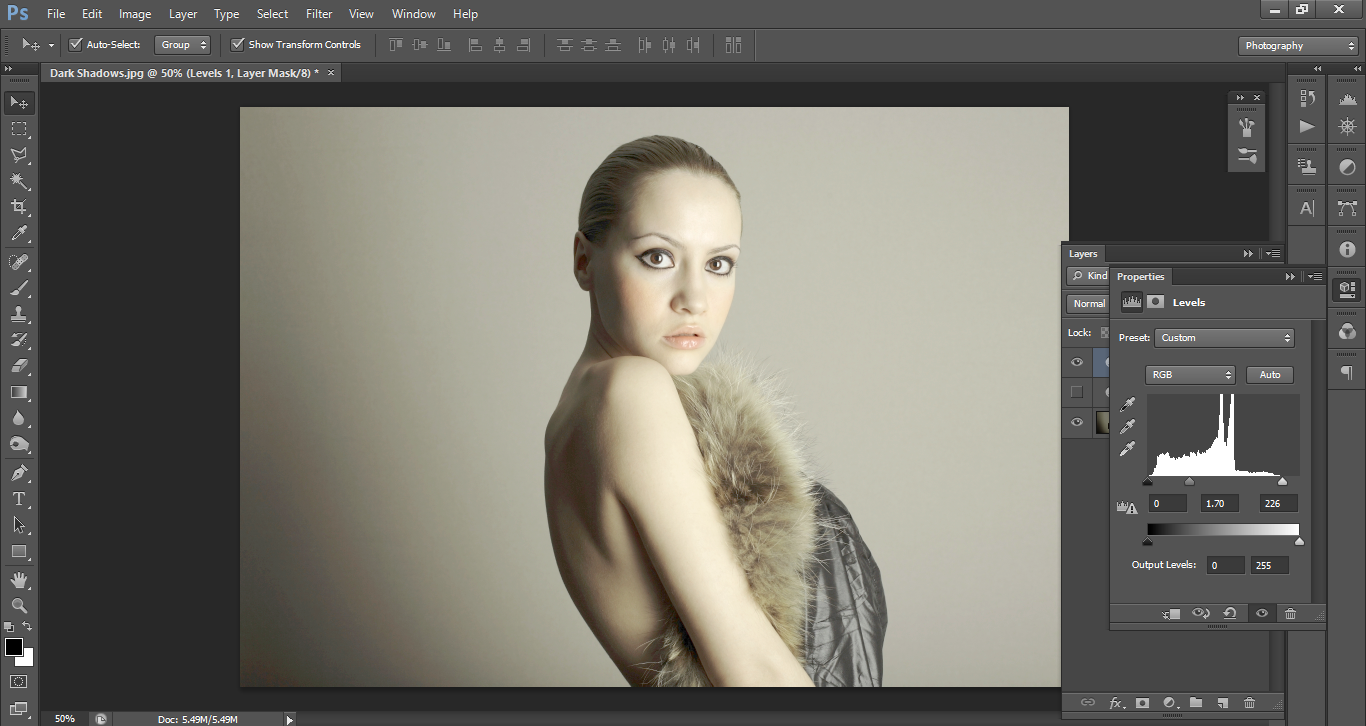
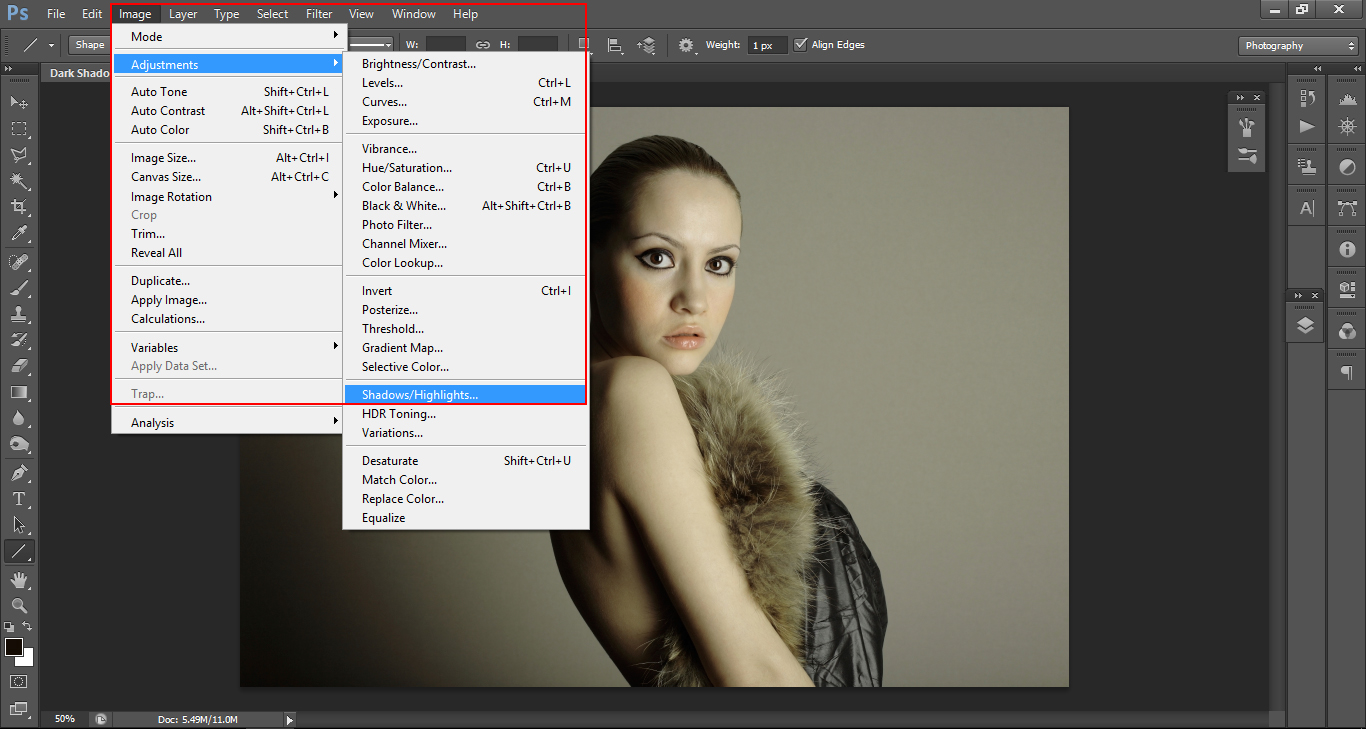
Now click on Image, then Adjustments and about two thirds the way down click on Shadows/Highlights
If your panel appears smaller than mine you can click on Show More Options at the bottom and it will expand.
It’s also a good idea to click on Preview just below where you can see OK, Cancel Load… & Save…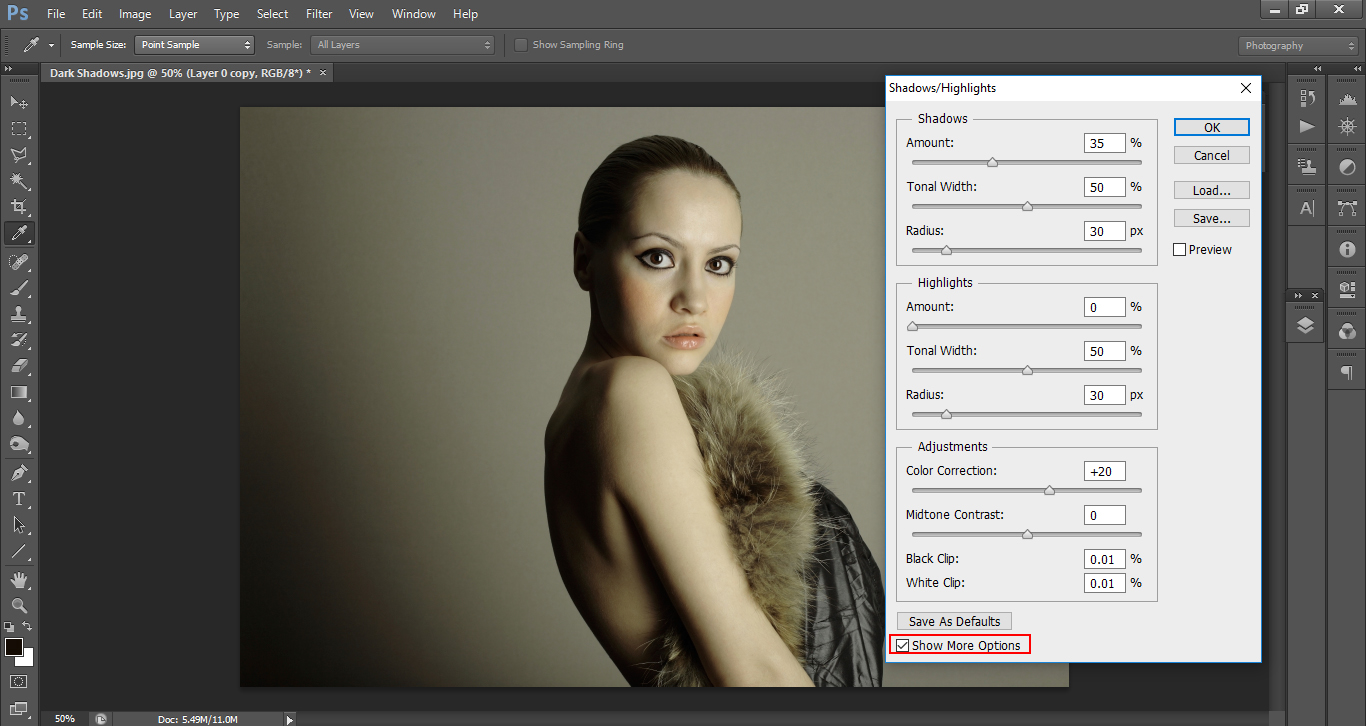
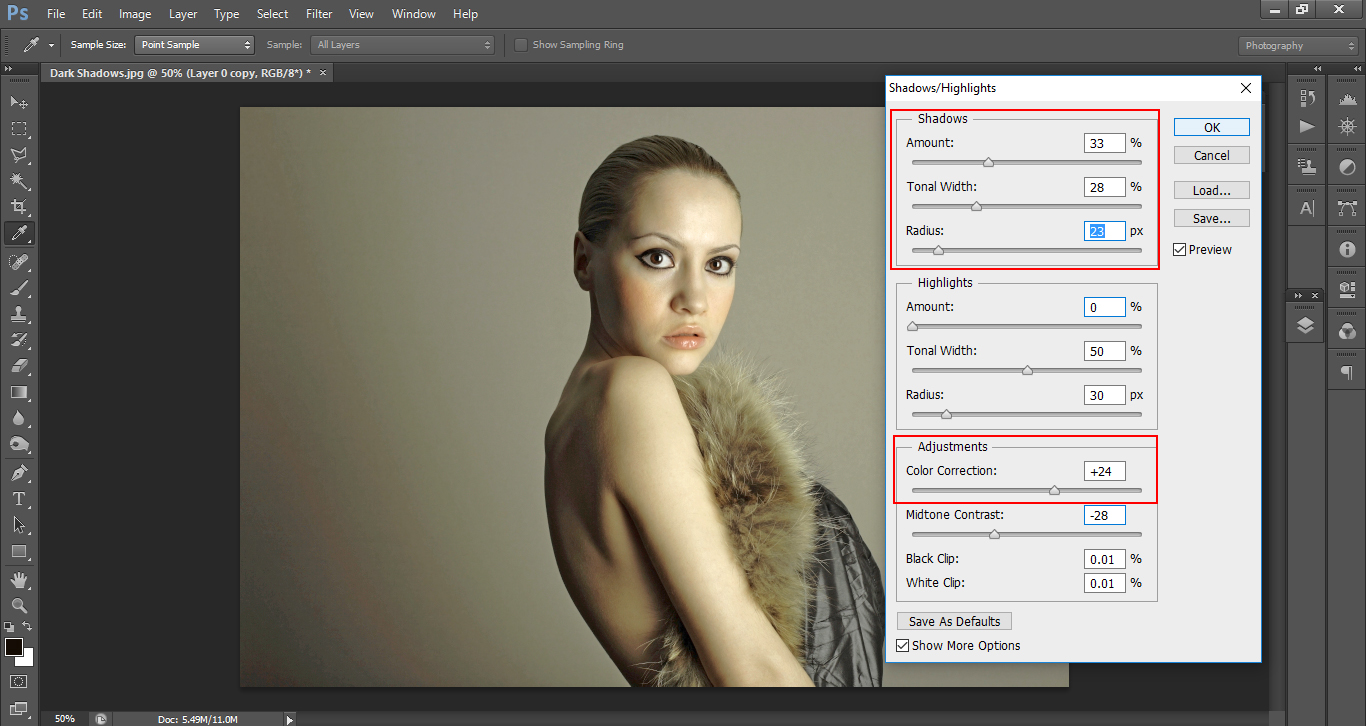
Take a minute to play around a little and familiarize yourself with the Shadows, then move everything down to 0% as shown below (Just in the Shadows area)
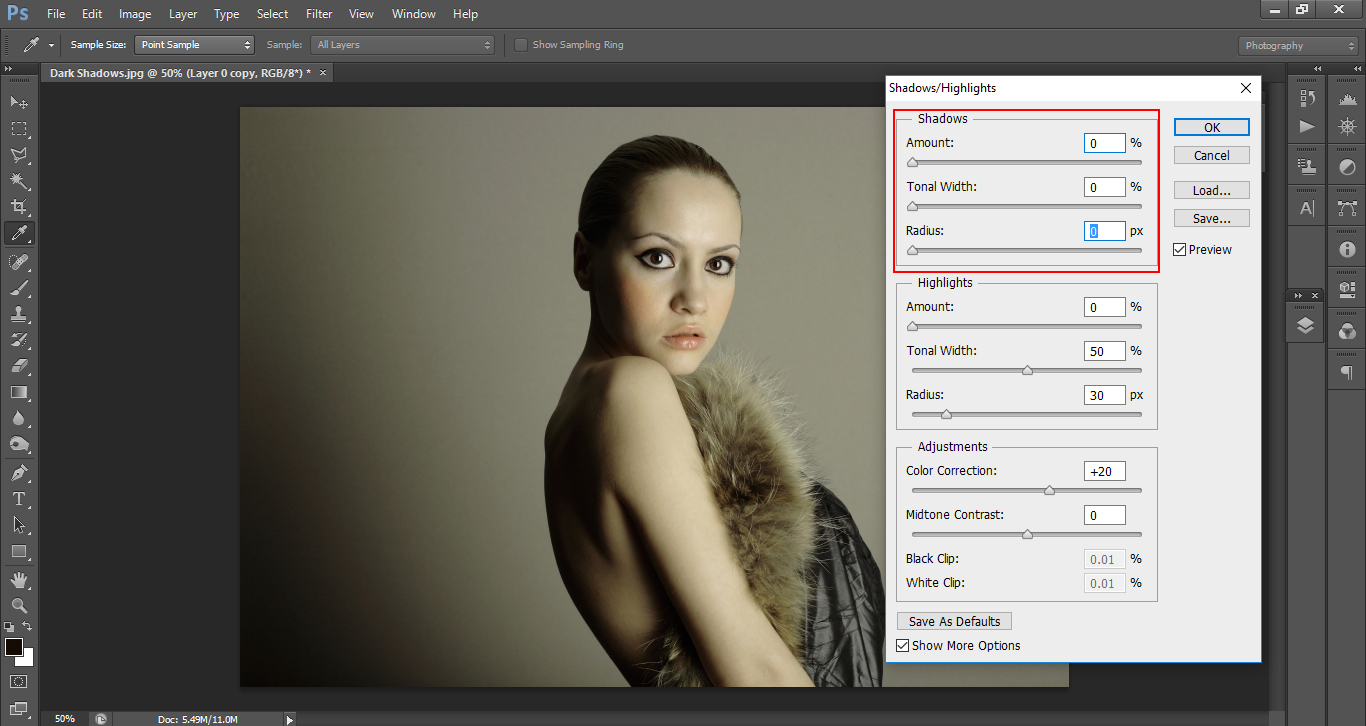
Start by adjusting the ‘Amount’ first then Move on to your ‘Tonal Width’
This is going to take some trial and error, so defiantly work with it and see what results you get, because every photo will be different.
You will need to develop an eye for this.
With the Radius, keep it low. I usually don’t mess with it too much and always keep it very low, if you increase it you will see why it should be kept low.
At the bottom you will see Adjustments, inside you will find Color Correction. You will sometimes need to use this to bring back some of the color that has been washed out during the correction process.
Slide it to the right a little till you see some of the original color coming back.
Remember not to go too far with it, try to find a good balance between them all.
You don’t usually need to do very much with the Highlights, if at all, but it does depend on the image, so use your creative judgement.
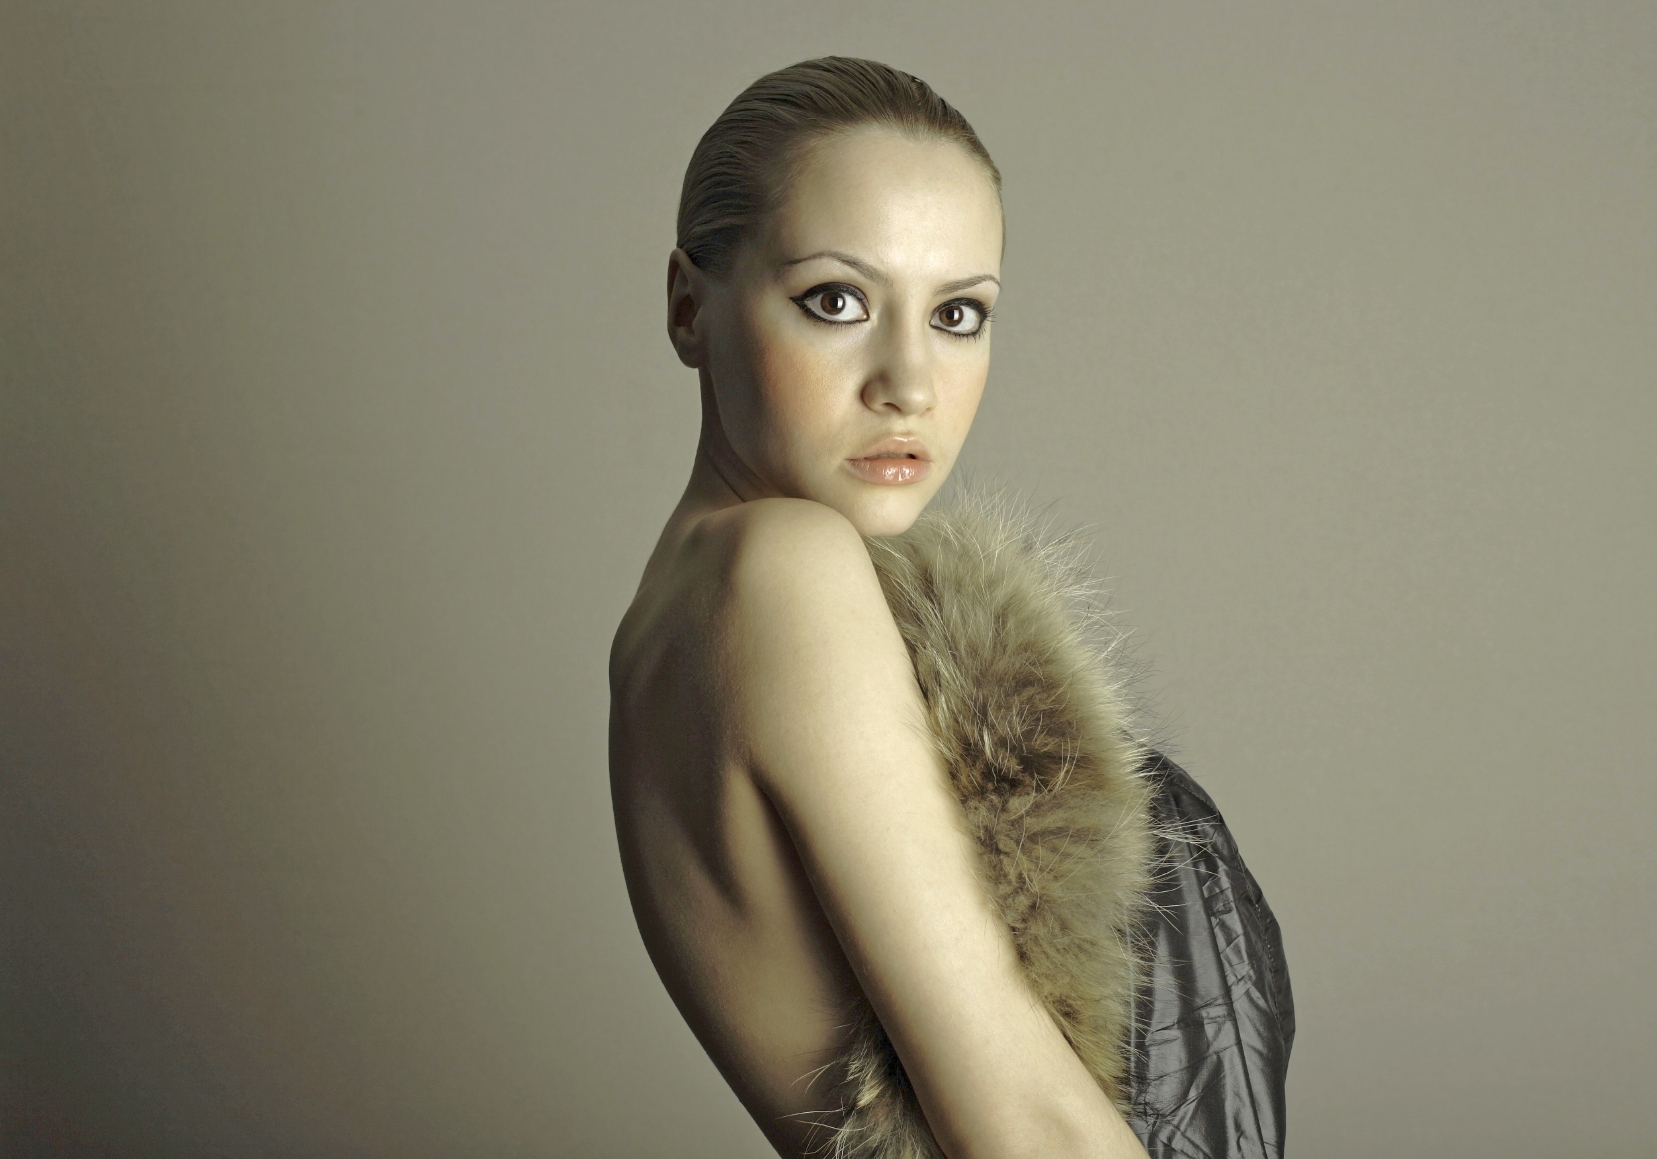
This is my final image. As you can you can see a great amount of detail has been brought back into the image, compared to the original which was very dark.
Hope this helps you with your workflow 🙂


Please verify your software version before proceeding.
 I’ve verified my software version


 Facebook
 Google +
Comments (0)
There are no comments yet.