We wanted to share with you one of our favorite creative editing processes using Adobe Photoshop, which is creating a double exposure effect (also known as multiple exposure photography). The best thing about double exposure photography is how dreamy and unique they are This is a popular technique when shooting with a film camera, but it is also an easy post-process technique for digital photography, too.
The first thing you will want to do is pick two images. My suggestion is to think of contrasting between an image with little detail and a focus in your images such as a portrait or flower. Your second image should have some more detail to it such as a landscape, a bunch of flowers, or a detailed texture. This way your images will complement each other rather than clash. Also, think about the colors you are using and how they will complement one another.
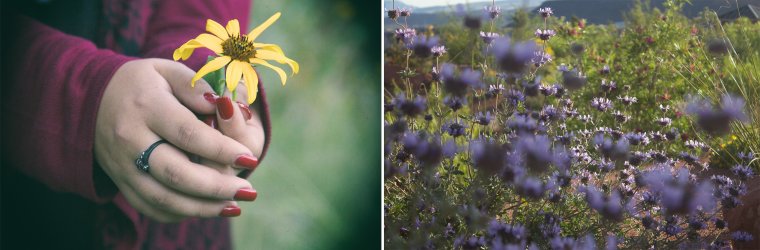
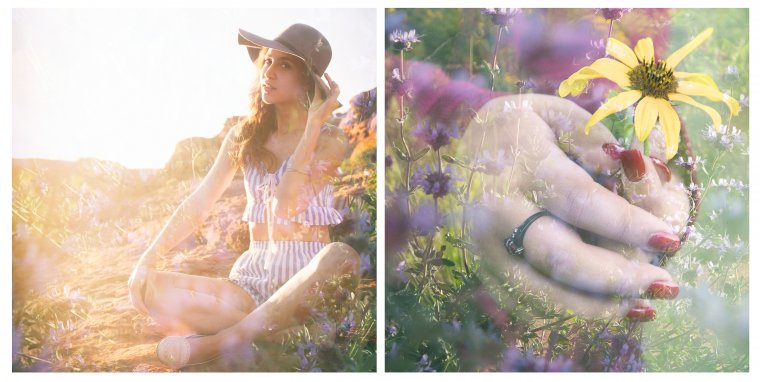
The background image I have chosen is a detail shot of hands holding a single flower and for my foreground image, I have used a bunch of purple desert flowers. I thought the contrast between the bunch of purple flowers and the single yellow flower would complement each other well.
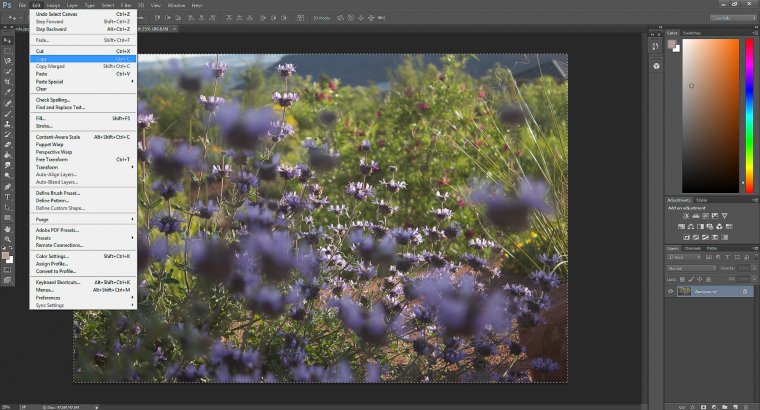
The first step is to pull up both of your images into Adobe Photoshop. First, you will want to duplicate your background layer of your first (background) image and rename it. When you are finished prepping your background image you go over to your second image, select, and copy it. (Select > All….Edit > Copy)
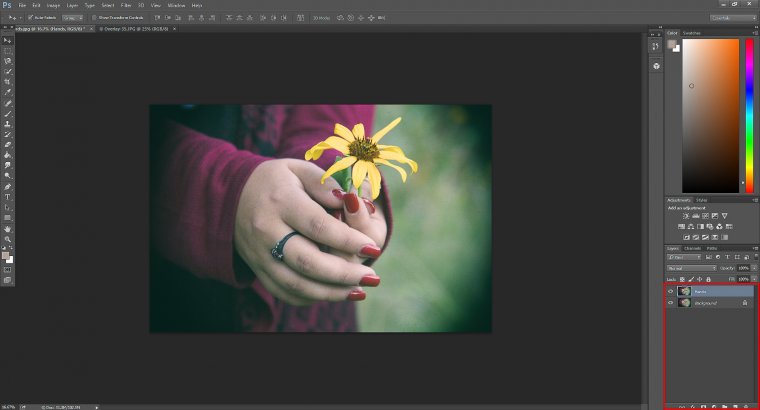
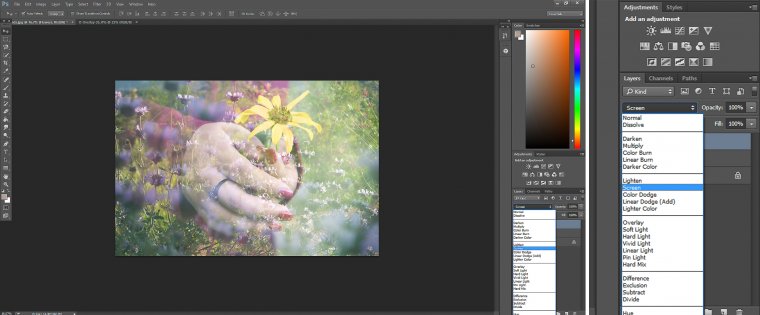
Once you have copied your second image you will paste it on top of your background image. (Edit > Paste) After pasting, your images rename your foreground layer. While your top layer is selected you will then change the blending mode to “Screen.” The screen blending mode will lighten the top image and you will notice a blend of the images. You can also move the image and size it freely until you like where everything is placed. Something to note when using the photo blender for multiple exposure photography is that the background highlights are going to absorb the foreground image. This means that the darker part of the image is going to show more of your second image.
At this point, you can see that it makes a great double exposure image, but there may be some details from your background images that you might want to pop out more in the image.
Select your foreground image and add a layer mask on top. You will find this at the bottom panel of your layers. This layer mask will allow you to control the opacity of selected areas. You will be controlling these areas with your paint brush tool using black and white. Black will reveal more of the background layer and white will conceal it more with the foreground image.
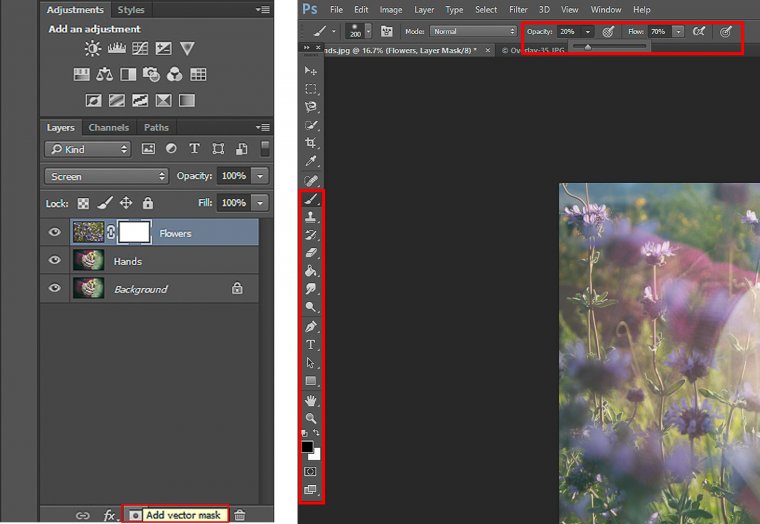
While making sure your layer mask is selected, take your paint brush tool and turn the opacity down to 20% and your flow to 70%. We are going to select black for our color to paint with because we want to reveal more of the background image. I want to reveal more of the flower and red nails in my image so this is the area I’m going to paint on. If you seem to have revealed more than you would have liked then you can just select white to conceal it again with the foreground
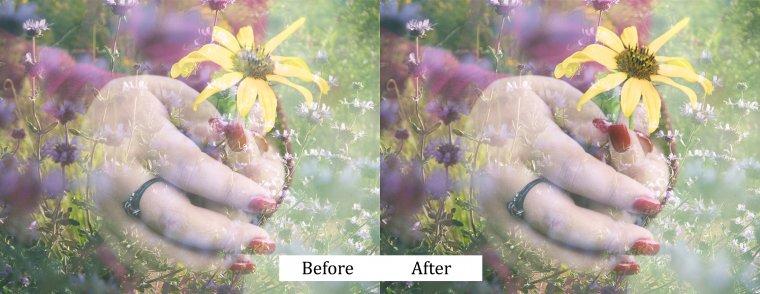
Once you are finished with your creation flatten your final image (Layer>Flatten Image) and save as a jpeg. and/or save as a PSD file so you can go back and make further changes.
The two images that we will be using are as follows:
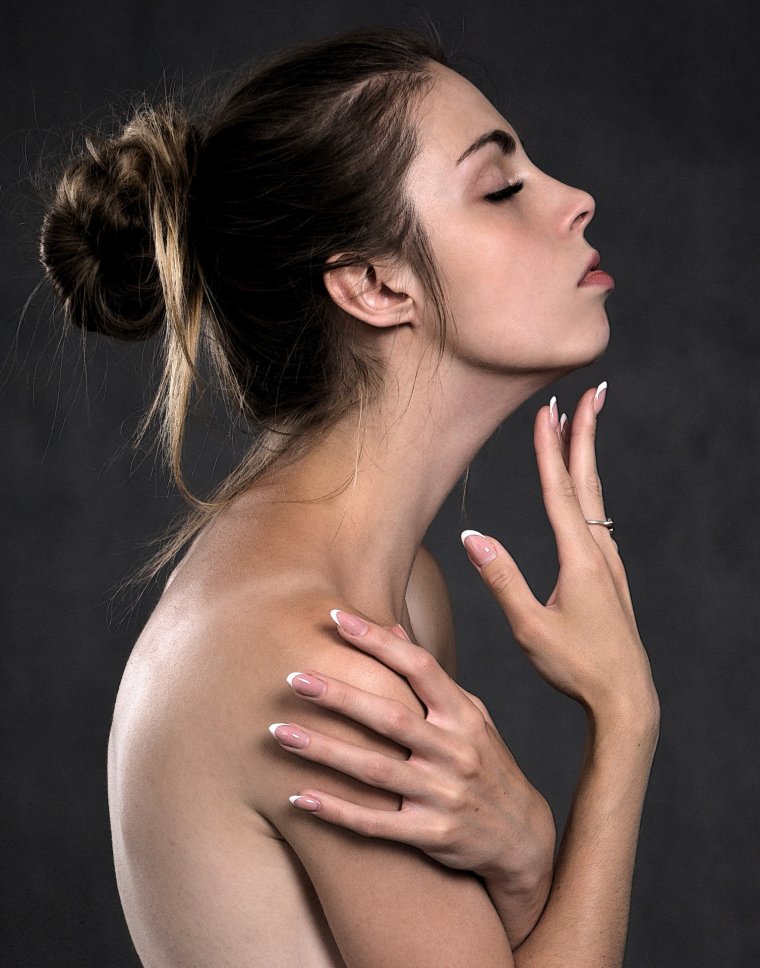
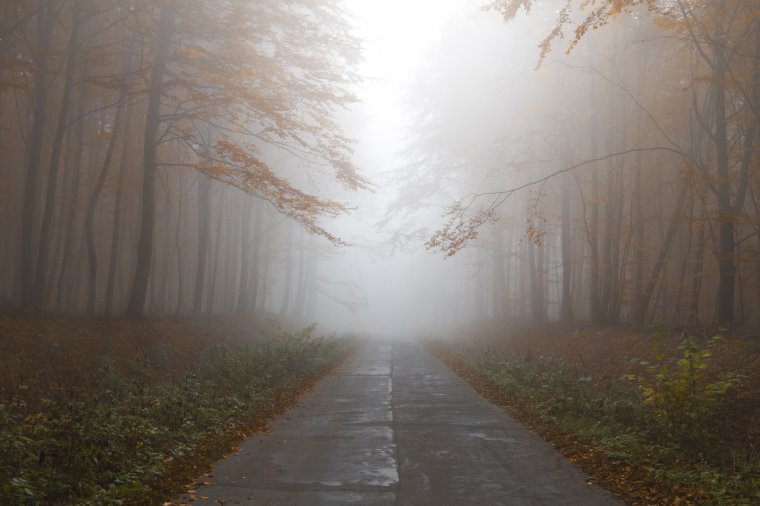
Any variations on these images should do the job very nicely.
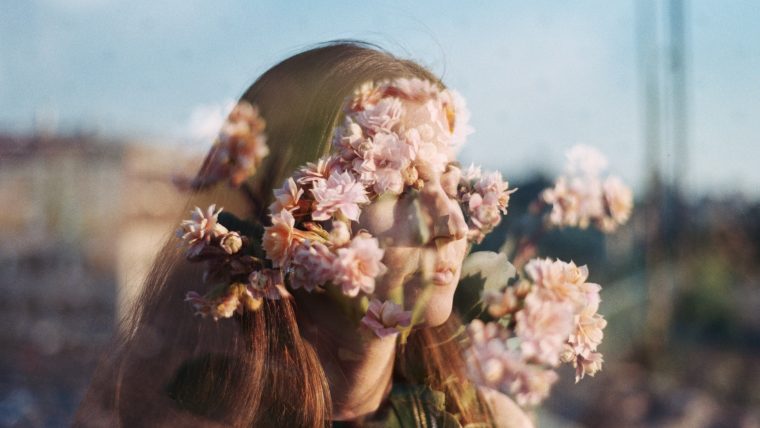
Just to get a little creative and artistic, the look we will be going for is a wintery, cold, and somber look; as if the subject is thinking about where to go in life or something.
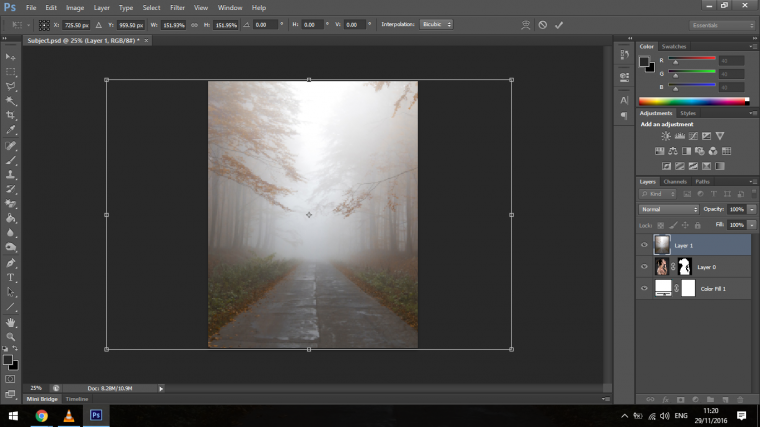
The first thing that you will have to do is to create a selection of the model for the base image.
So to do this I’m going to use the Polygonal Tool, you can use the Pen Tool to or just whatever works for you, in this case, I think the Polygonal Tool will be best for me.
Create a Selection.
Then create a mask by clicking where I’ve shown below.
Just as a quick tip, you can actually get an image like standard stock images, you will find many that have a plain background and if you use these then you can speed up the selection process by using the Magic Wand Tool.
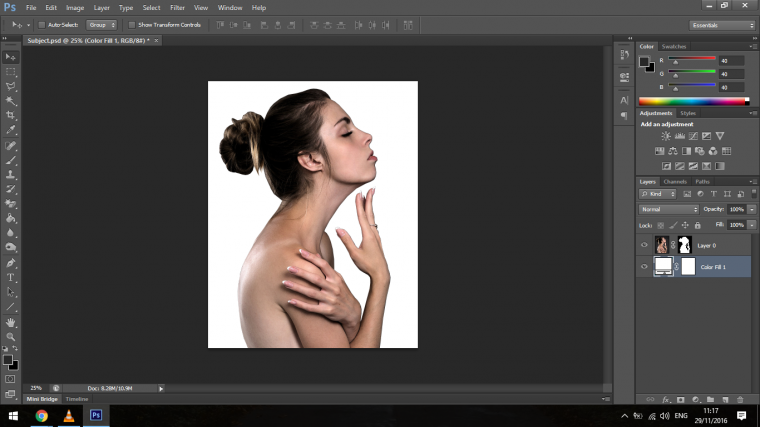
The next step is, you have to create a solid color layer, you do this by clicking the Icon next to the Mack icon on the right-hand side.
Then choose Solid Color which will be the first option there.
Choose a white background and click OK.
Once you have your solid color single image, click and drag it below your current layer.
Next, I want you to add a Black and White Adjust adjustment layer, you will find this in the exact same place as you found the Solid Color Layer only it will be a little further down the list.

Make sure that this layer is positioned above the other layers as shown above.
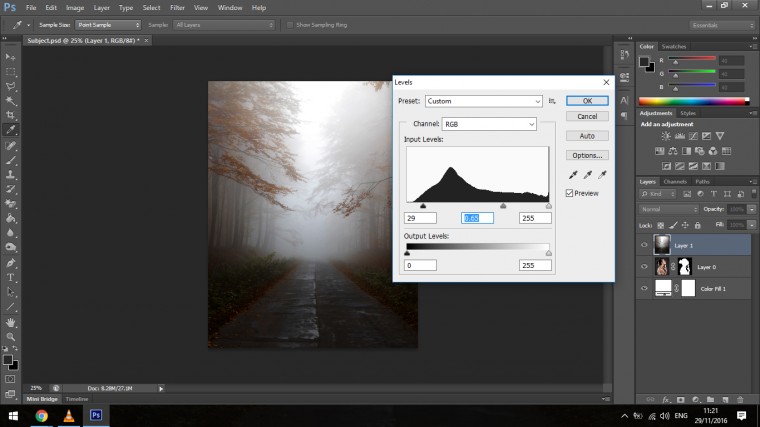
Now it’s time to add your second image to our current work. Select the second photo and copy and paste it onto the base image.
You may have to resize your image and darken it up a little using Levels
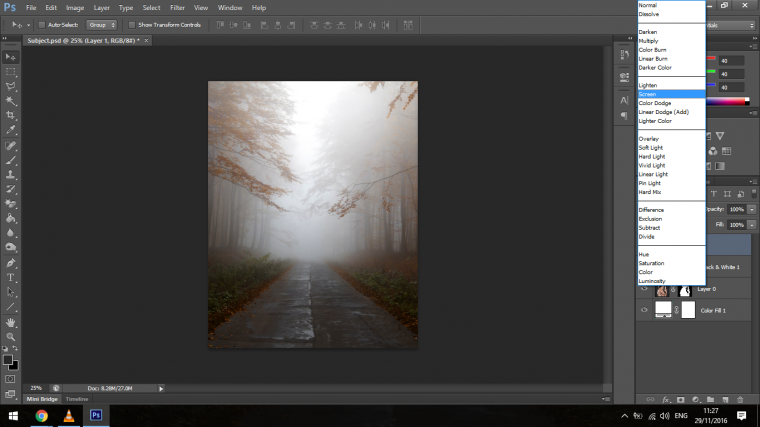
So with this base image, you will want to now change the Blending Mode to Screen.
You do this by clicking on the Dropbox in the Layers Panel, the Dropbox option should say Normal as a default, if it doesn’t then you probably know about Blending modes already if not then you will find it in that Panel and it is right beside Opacity.
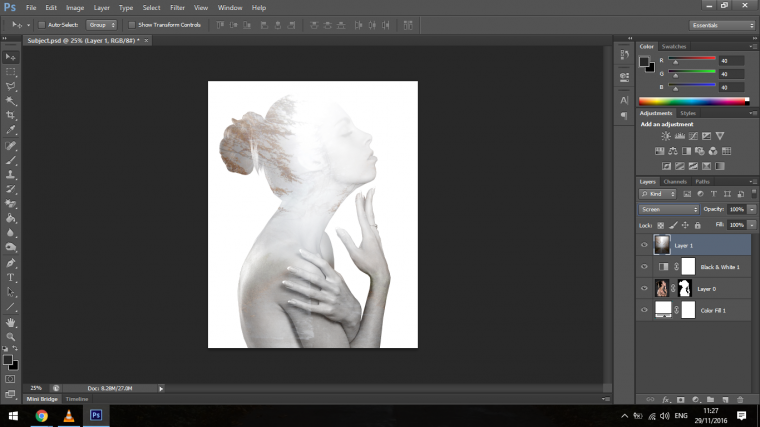
Ok so at this stage you should have an interesting double exposure portrait, looks pretty cool as doesn’t it?
Well, we’re not done yet, let’s look at improvising this just that little bit more 🙂
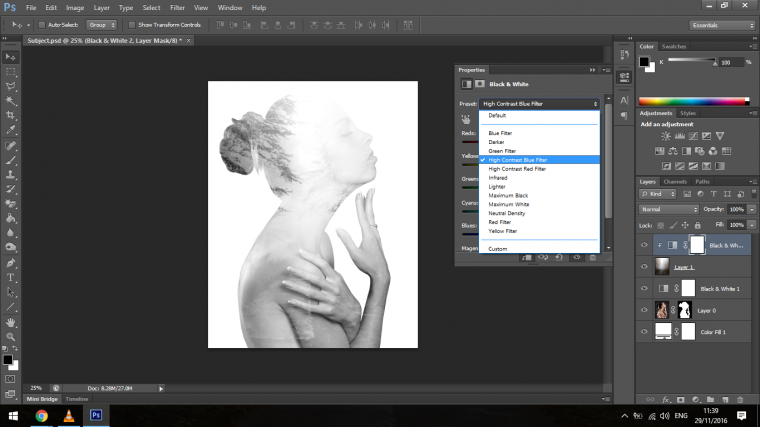
So if you want to go with a color double exposure photo, you can, but I want to create a Black and White image and have a lot of contrast in it so it looks really intense.
What you can do then is create another black and white adjustment overlay just like we did before but this time it will be at the top of the stacking order in the Layers panel, if it’s not the click and drag it there.
To combine the two different images, right-click on it and click on Create Clipping Mask.
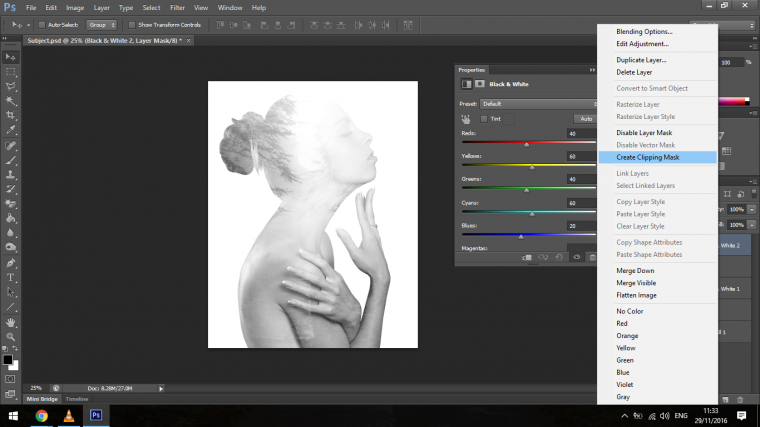
This will then attach that layer to that image and that image only, so it will not tamper with any of the others.
In the Presets you will see a list of options choose High Contrast Blue Filter.
This will now intensify the image.
Ok so we’re nearly done, what I would do now if to create another Levels layer and play with this a little more just to try to create some cool custom contrasts for extra impact, sometimes you may not be successful in increasing impact, the image may not allow it or it’s just at a point where it’s perfectly fine.
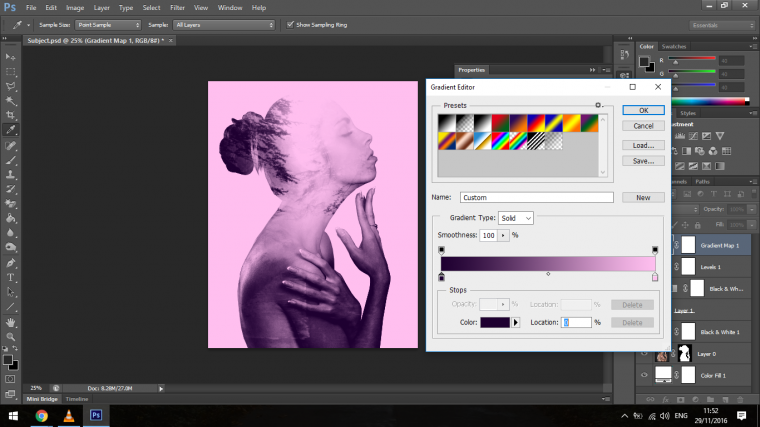
So the last part is to create a Gradient Map, this is also optional, it’s just for a little extra flair.
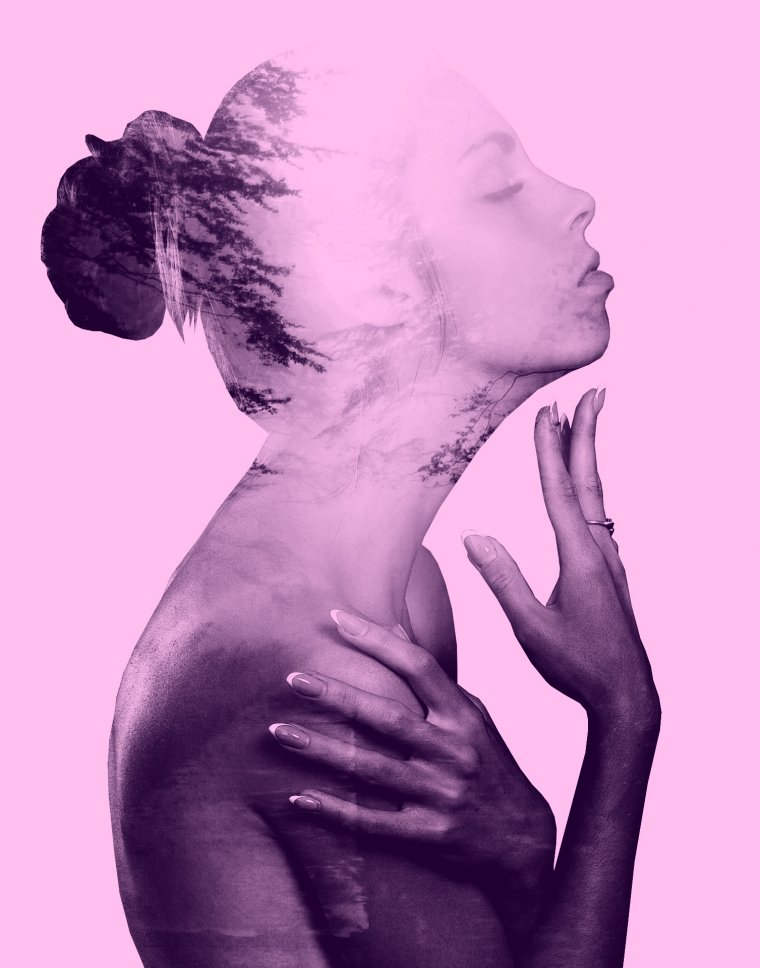
Check it out, this is our final image.
I’m sure you’ll agree, it’s very cool, I can imagine using this multiple exposure photograph on a poster or album cover.
We hope you enjoyed this dreamy and creative double exposure photography image tutorial!


Please verify your software version before proceeding.
 I’ve verified my software version


 Facebook
 Google +