Hi everyone.
As the title of this new Photoshop Tutorial suggests, we’re going to be taking a look at how to use the Pen Tool.
First of all I’m going to explain to you a little about what the Pen Tool is and when I would use it.
Ok so the Pen Tool is a selection Tool, if you have ever used Adobe Illustrator then you will probably be very familiar with the Pen Tool but there is a few slight differences to the Pen Tool in Illustrator compared to using it in Photoshop so this Tutorial may be beneficial to your self as well.
Now I use all the Selection Tools that Photoshop generally provides me to the best of my ability and to fit the specific job that I believe they are required for, with the likes of Polygonal Tool which I used to swear by and still like and use a lot you make selections with small increments of short straight lines to cut images out, I would use this when I’m dealing with cutting images of people out, I’d add a slight blur, possibly a 0.5 to the edges and I’d work my way round.
Now this is good, very good for this specific task and I would say that I have definitely mastered that Tool quite some time ago.
there is other Selections Tools but we will not concern ourselves with those at this present time as the main other option apart from the Pen Tool is generally the Polygonal Selection Tool.
Ok so we’ve learned that the Polygonal Tool is a click and move Tool, crude but it does its job well when you choose it for the correct job you wish to undertake.
Now the major difference between the two Tools is that the Pen Tool gives you a perfect sharp curve whereas with the Polygonal Tool you would have squared of increments as mentioned previous.
Another advantage of the Pen Tool is that is can also be used just as the Polygonal Tool when needs be.
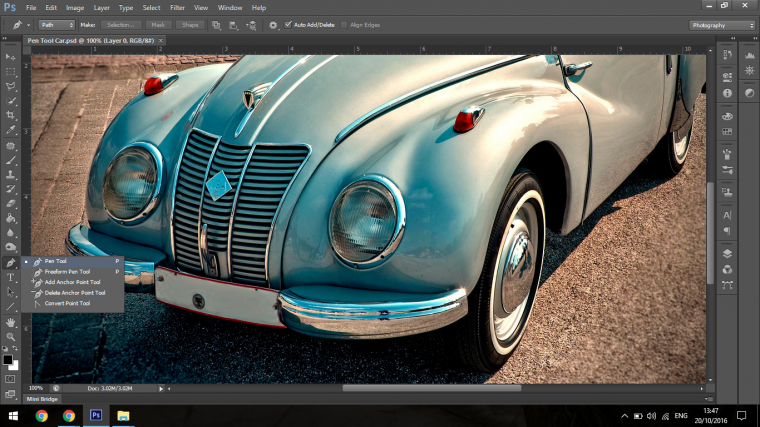
So I’m going to be taking you through step by step on how I use the Pen Tool.
To select the Pen Tool use the keyboard shortcut (P)
Or you can click here I have indicated below.
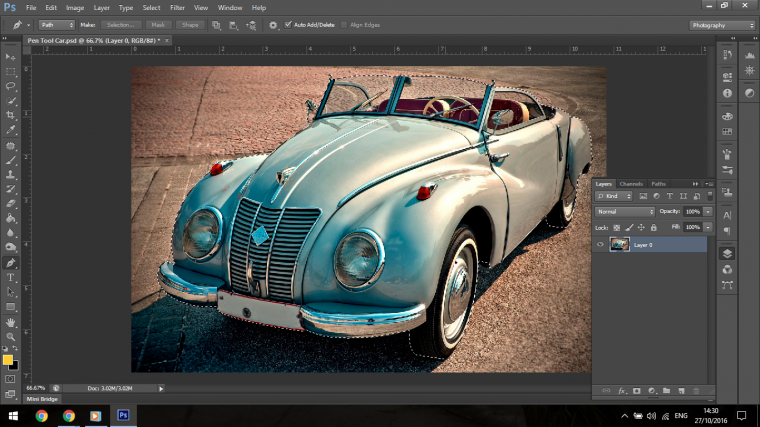
Ok so now all you have to do is pick a spot where you want to begin.

So click on the spot you want to begin, I’m starting where the next step is simple just a straight line so I click on the next spot.

Ok so the next one is going to be slightly different, well I say slightly, it’s actually very different.
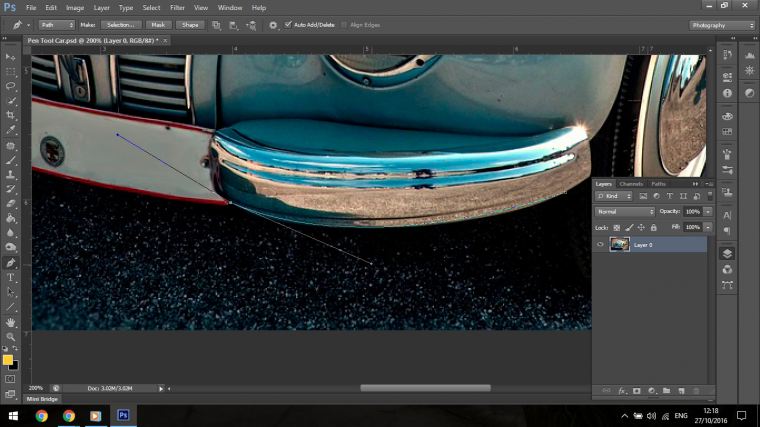
What you do is you click to the next step and hold, while you have held you drag the curve out so that it matches the line you are going to trace over.

You don’t have to match the image perfectly, just enough so that when you finally cut the image out it will look decent enough to pass.
Then you can release the button on your mouse.
So now you are this far you will notice that there is little handle on the curve, what you can do with these after you have made the curve you can then hold Alt and click on the small square indicator on the handle and move the curve around, so if your curve isn’t perfect right away you always edit it after wards.

The handle that moves the curve is the handle on the inside, so remember that.
The Handle on the outside is different, you want that handle to point in the direction your curve will go next, if it doesn’t then you will see something like the crazy curve that’s below.

But don’t worry, if this happens all you have to do is press Delete on your keyboard and you will go back to the previous step.
This is the first part of the Tutorial so in the next Tutorial we are going to be going through Step by step curve by curve exactly how I go about creating my selection as if it was in real time, you will discover my thought process so you know what a professional thinks while they are working through their project.
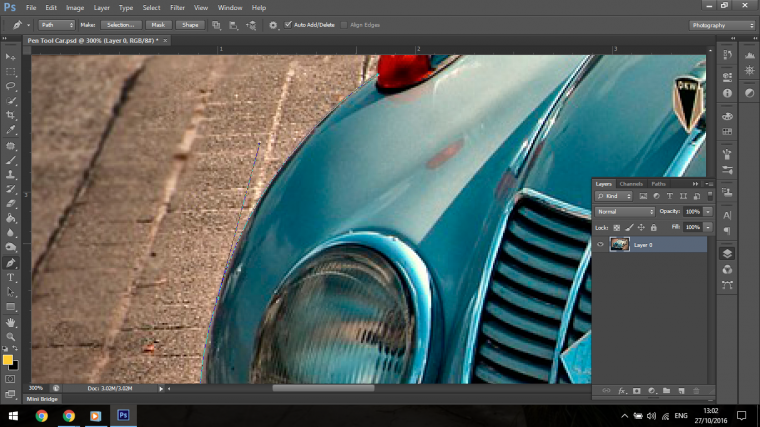
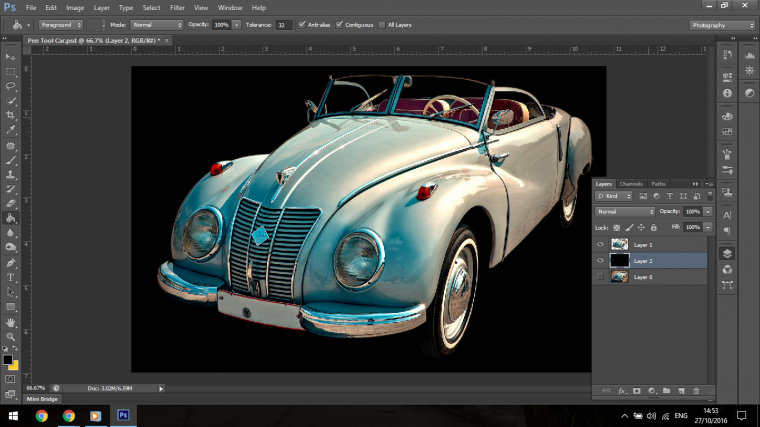
What I noticed first was the nice curves on the bumper, so I figured that would be best as I could probably get those all in one go, so I’ll start at the wheel in the front center and work my way left.
To do this I first zoomed in, now when you zoom in it will give you a better view on your image as to making the curves the only issue is that sometimes while stretching out your curve you’ll end up in a completely different part of your image all of a sudden, well don’t worry, you can release the button on your mouse and then go back and holding Alt you can then click on the end of the curve handle on the inside of your curve and use that to freely move you curve around and adjust it.
With this first part I didn’t quite get all of the image in, but it’s such that it’s not really a huge deal, I got enough to work.
For this next little bit I will zoom in again right up close and instead of dragging a curve you drag it up to the next part that you want to start and use the Pen Tool like I would the Polygonal Tool.
So to do this I will first have to Drag out a line direct to the next point I want to click on then release on my mouse.
Then re-click on the last anchor point to activate the path and then start clicking as normal.
Then continue to click as I would with the Polygonal Tool, once you are happy you can continue with the next selection which I am able to do in one curve.

Then we repeat the process of using the curve like the Polygonal Tool and then complete the next curve after that to complete the bonnet.
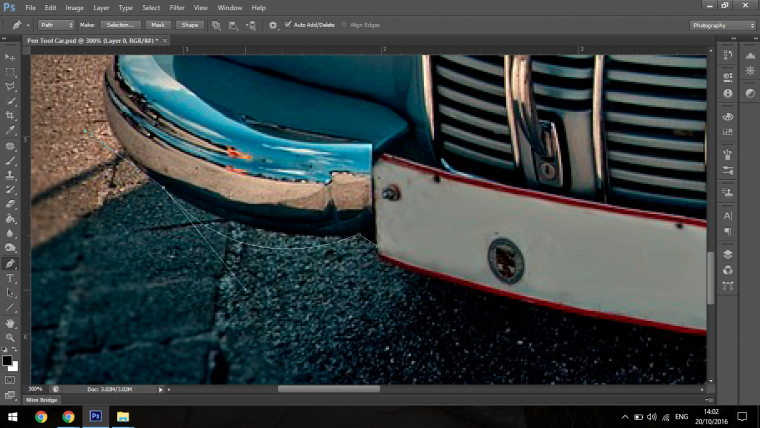
I did have a little issue with the end of the Bumper because the curve of the Bumper was too great to do in one try, so I had to complete this in several little steps mixing and matching using the Curve technique and mimicking the Polygonal Technique.
This does take practice but as a rule of thumb if the image has a mild curve you should be able to do it all in one go, if it’s closer to half a circle you will have to do a few curves to get around it and use the polygonal technique on the more complex areas with a lot of twists and turns were I just zoom in real close and do my best to make it look as good as possible.
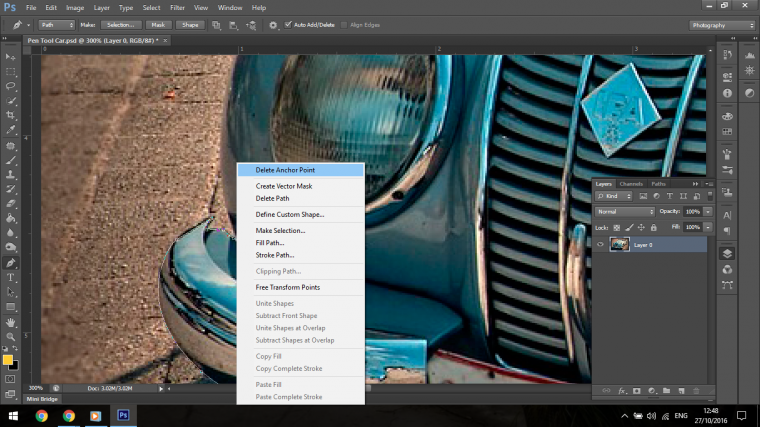
If all fails you can always right click on the last point and choose the Delete Anchor option.
So the next part I definitely will have to do it in two steps.
The way I see it is that the curve you make will only have a range of 1 quarter of a circle so if it gets any larger than that you will have to do that in two stages.
Photoshop is very accommodating here, what will happen after you make your first curve is you can then click on the curves finish point and Photoshop will do it’s best to judge the curve for you, now a lot of times you will get very very close some times not but it will be close enough to do a good bit of work for you than all you have to do it to adjust holding the Alt Key.
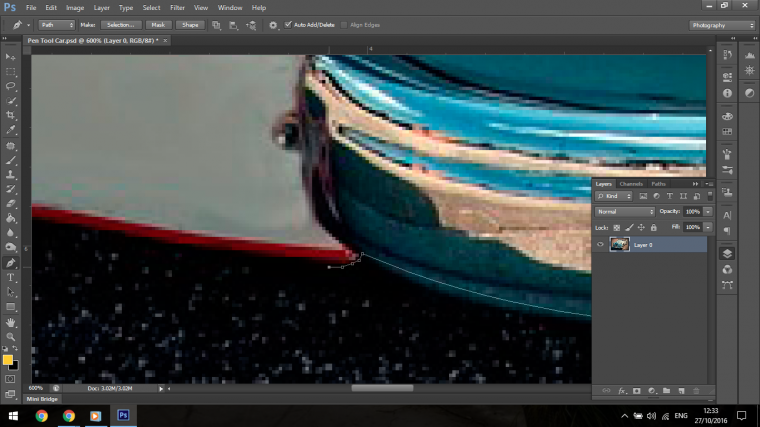
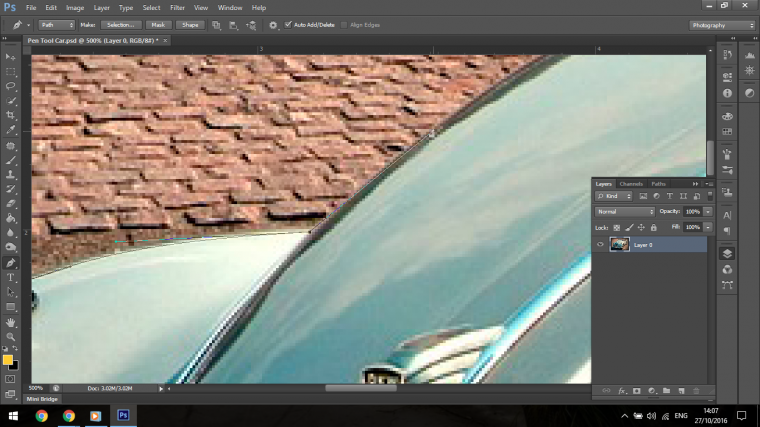
The light I will have to do in two stages as the curve on it is too sharp for the Pen Tool to Handle, for this I will use the Red part as a guide for the first curve then the shiny metal part for the next, after that the Bonnet will be a piece of cake right up to the base of the wing Mirror.
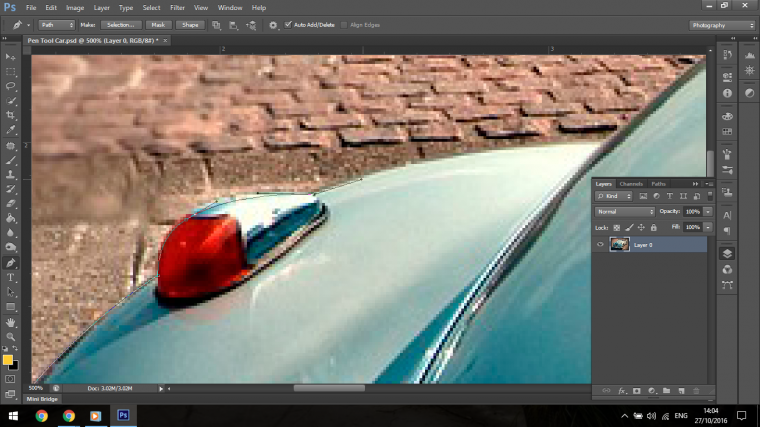
One thing to remember also, is to be aware of the direction the handle at the end of your curve is pointing, you must using Alt on your keyboard point it in the correct direction so when the next curve is created you will be on track with the angle and not have to do too much to adjust it.
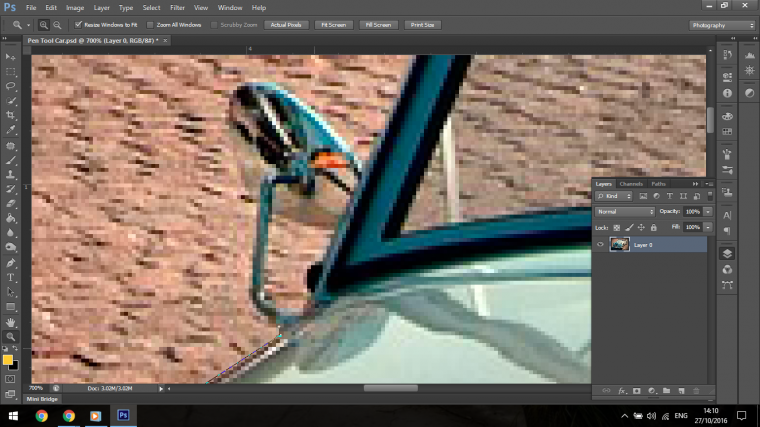
With the light you will have to try a few times perhaps to get the selections correct so don’t worry if it doesn’t work out the first time round just use the Anchor Delete option and try again, eventually you will get it dead on.
With these kind of selections you don’t always have to get it “Perfect” so to speak, you have a little bit of license with it, as long as it looks like how it would look you can get away with a few missing pixels.
But in saying that, that is not a free pass to cut corners, it’s just to let you know that you will not always be able to get it 100% absolutely and completely correct, just get it as close and as passably as you possibly can.
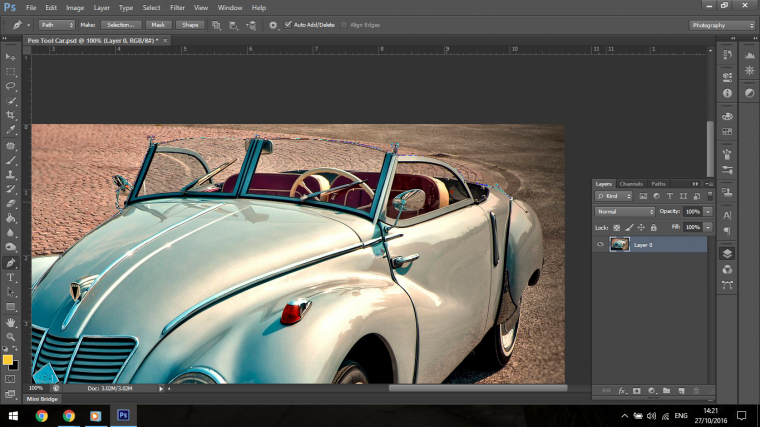
There’s not too much to add for the rest of the outside of the Car, it’s pretty straight forward using the techniques I have included in these tutorials, so with your out judgement see if you can finish the rest of your selection on what ever picture you are using as an exercise, this might take you an hour or maybe 5 minutes, who knows but do your best and do the exercise properly, observe and learn as you go along and I am very sure that you will be mastering this Tool in no time what so ever.
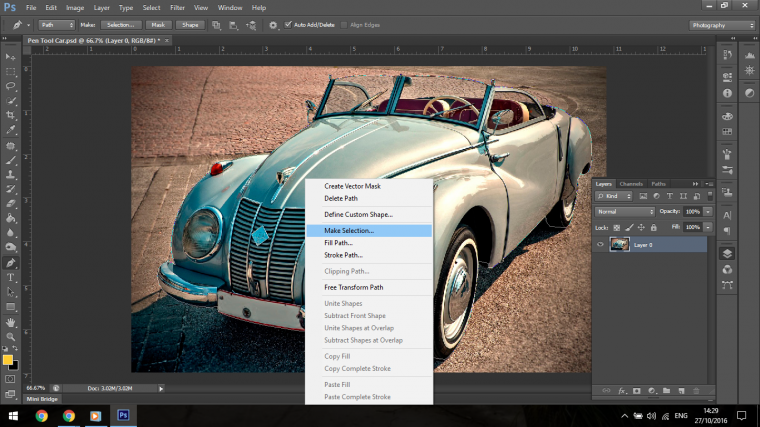
Once you have completed you full selection path you will now have to actually make the selection, this is easy all you have to do is right click within the Path.
(The path is the line around which you created)
When you right click and the pop up appears you will see the option for Make Selection, click on it.
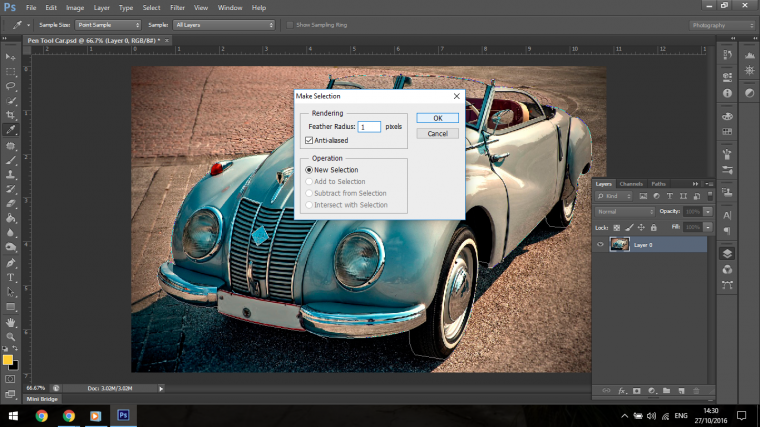
When you do this the next pop up that will appear will as you if you want to make a feather around the object you cut out, if you want things to be super sharp choose zero, but with Photographs I’m editing I usually give it 1 pixel just to add a tiny bit of blur around the edges so it will blend in nicely.
Again with this sort of thing getting it correct all the time it will take plenty of practice so never be disheartened.
Next, then we will go to Edit – Copy – Paste
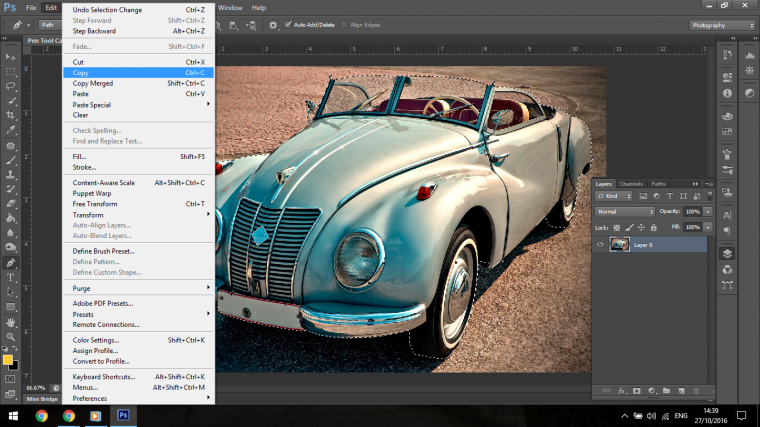
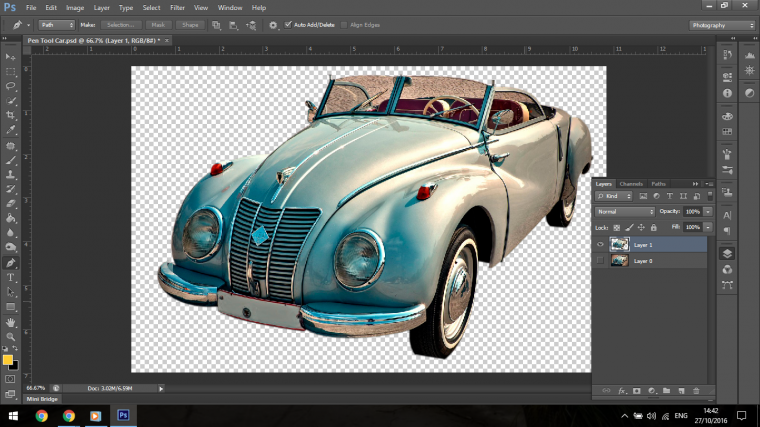
Your image will now be on a separate background away from your original image and you will now be able to move it around freely as you so please.
You will now be able to add it to other picture and so on.
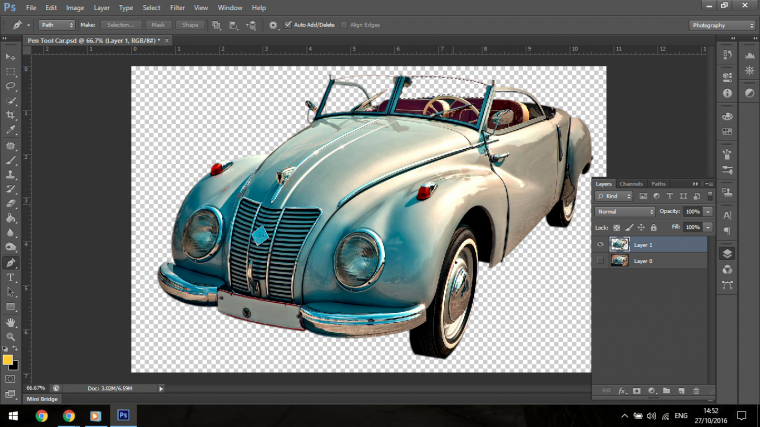
The last part yo

u will have to do is to hollow out the car, that means remove the background image from the windows etc
There’s no change here really except for one thing, if the image has a similar background I will change the Feather in the selection panel to something a little higher, possibly 4 or 5 to blend the glass of the car window a little better, if not then just add the 1 pixel feather and that should be perfectly fine.
Once you create the selection instead of Copy and Paste you just hit Delete and it will erase the background.
So by now you should be well up to power with the Photoshop Pen Tool and have a nicely cropped out image like the one I have below.
Until next time, keep Photoshopping.


Please verify your software version before proceeding.
 I’ve verified my software version


 Facebook
 Google +
Comments (0)
There are no comments yet.