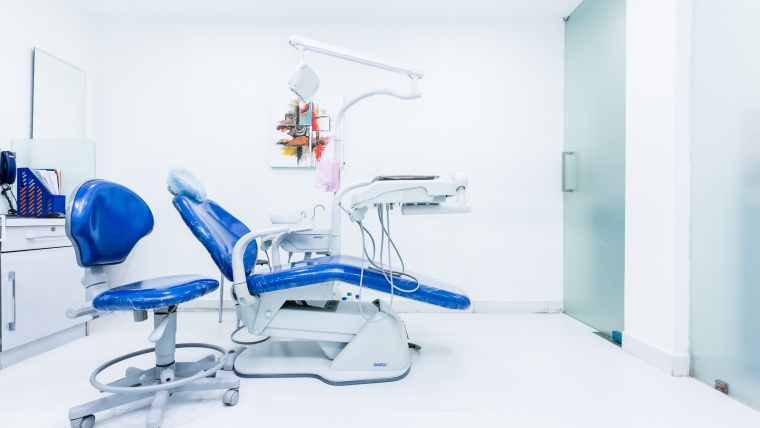
In a lot of cases, photographers face a situation where an interior photograph turns out looking a bit flatter when it is first captured. This post will tell you exactly how to process an interior photograph shot to make it best appearing for its purpose as well as an image in itself.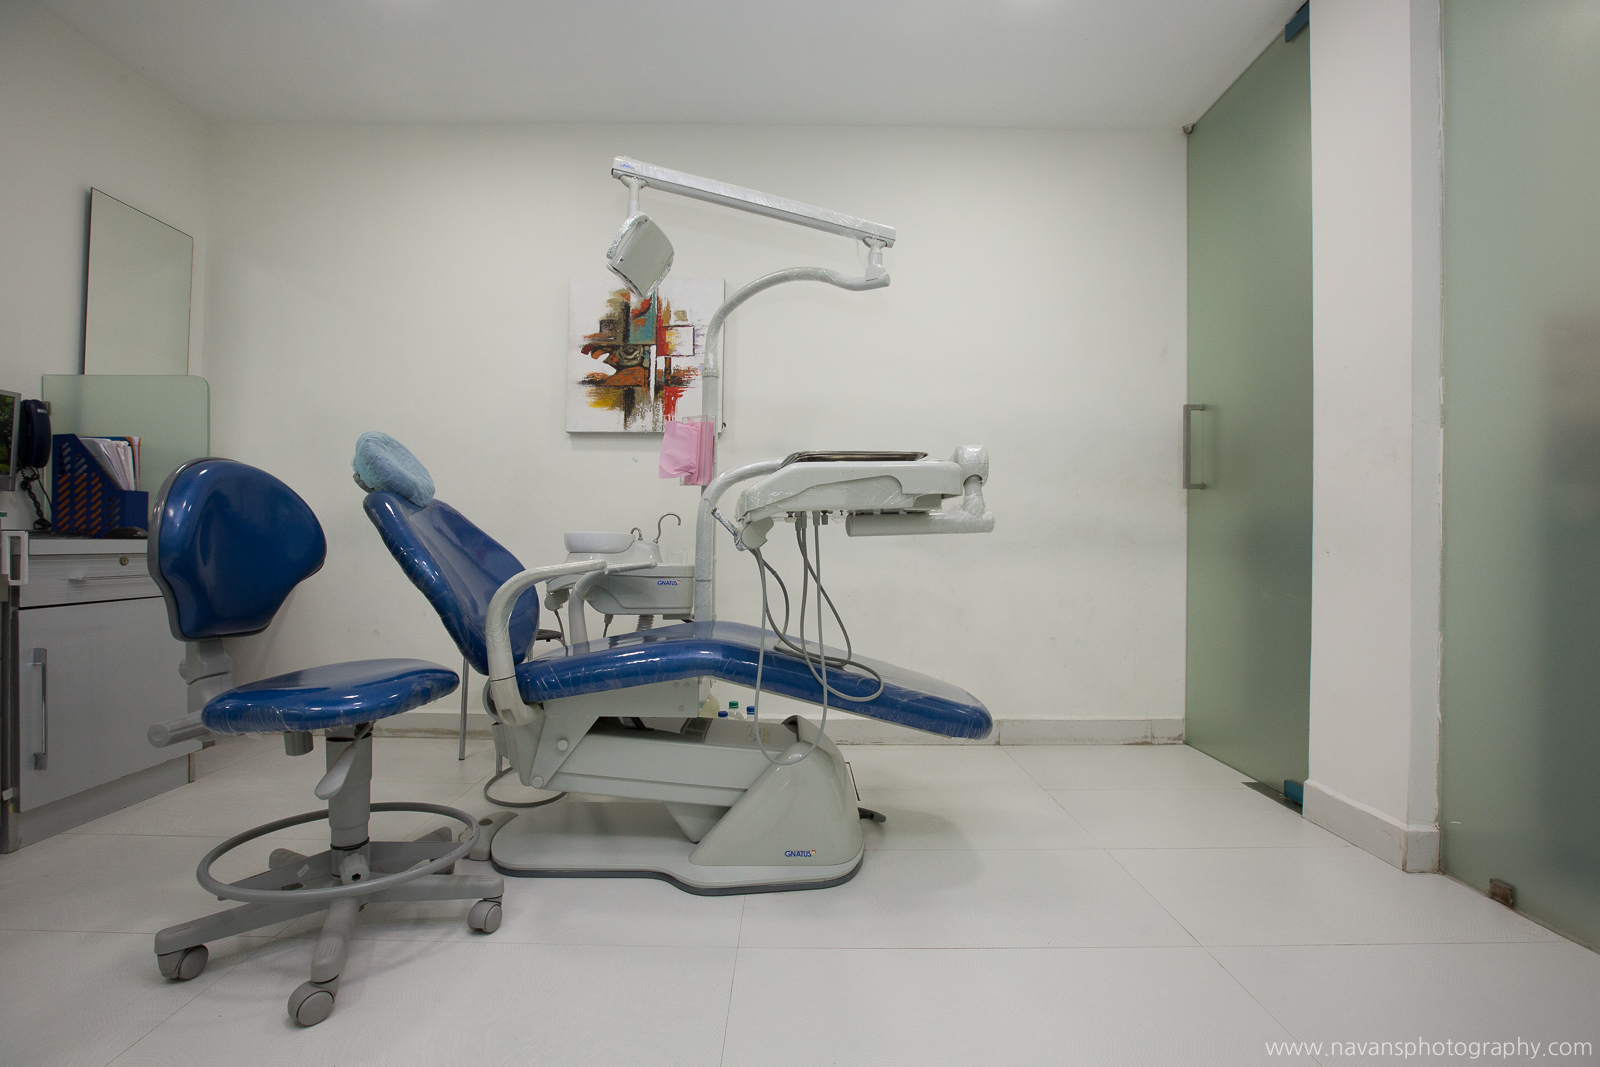 The photograph displayed above was shot for a chain of dentistry. The purpose of this image being taken was for their website and other marketing purposes. In the first look the photograph turns out looking flat, underexposed, and also has a yellow tinge to it which brings down the appearance of the whole image and makes it look heavy. The rich white colour that is present in the actual interior surrounding can be better depicted than it is already captured. Rectifying these setbacks would also make it a photograph that will have better use for the purpose it was taken, that is for any sort of display. Few of these corrections could make the picture turn out to be perfect for its use in a website or as a visual in another marketing method or just as a plain image and all these amendments can be easily met through Lightroom. The following are the steps to quickly fix the drawbacks in the image that is giving it a dull appearance. The following are the settings under which the photograph was captured:The shot was taken with the aperture set at f/8.0, a shutter speed of 1/100 and an ISO of 1600. The lens used were of 16-35mm with an aperture of f/2.8 L II USM. The model of the camera used to take the shot was a Canon 5D MK III.The first thing that has to be fixed in this image is its exposure. With the help of a Histogram which looks like a graphical representation of the exposure, one can easily fix a photo’s exposure in Lightroom. Open the image in Lightroom’s setting called the ‘Develop Module’, and press the ‘J’ key to let Lightroom know you if any clippings are currently happening while you are editing the image. This means that if any area on the image gets any darker than it is supposed to be, Lightroom will immediately let you know by highlighting that particular area that is under exposed by displaying a blue color over the under exposed portion of the picture on the screen. Similarly, if any area on the image gets any lighter than it should be or over exposed, Lightroom will let you know the same by displaying a red color over the over exposed portion of the photograph in an instant.After making the adjustments, the photograph will appear to be something like this:
 The next step would be fixing the White Balance in the photograph. This is to bring in the white color that would be more suitable for a website or marketing purpose and also to remove any dull yellow shade that is bringing in the heavy look and pulling down the entire look of the image.The White Balance of the actual picture taken was 5400 K and the tint was at 46. Even after having changed the White Balance of the picture to a 4400 K, we find that the tint remains unchanged. Although, if we were to shift the tint either way, towards magenta or green we may bring in either of the two shades, magenta or green, which is not what we require. To avoid this, we do not want to tamper with the tint feature.
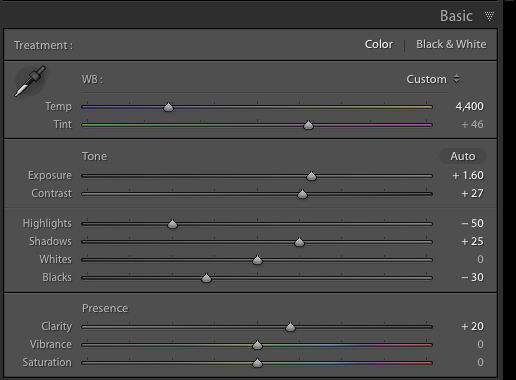
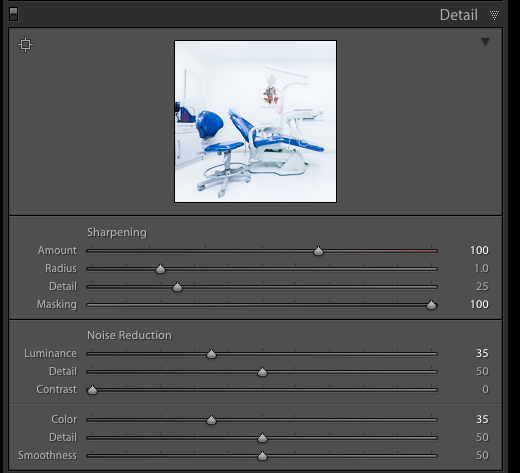
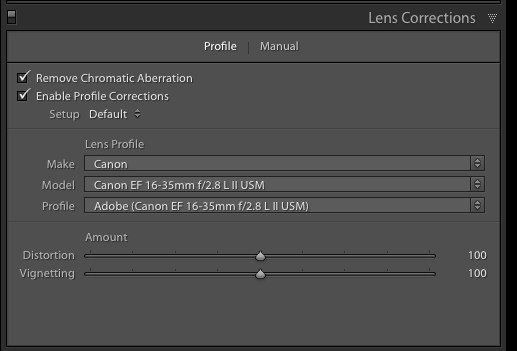
For the final step, the image below contains the basic panel corrections that are the last required touch ups of the image correction process. You will notice that you can see the contrast, the shadows as well as the black settings to bring the image to the necessary contrast. Clarity is also increased by a very small extent to bring in a final touch to the image that we want to acquire in order to obtain the perfect image that can be used for any marketing purpose. Apply the sharpening, lens correction and noise reduction tools accordingly after which your image is ready once you export the same.
The final picture will look something like this after all the processing is done to it: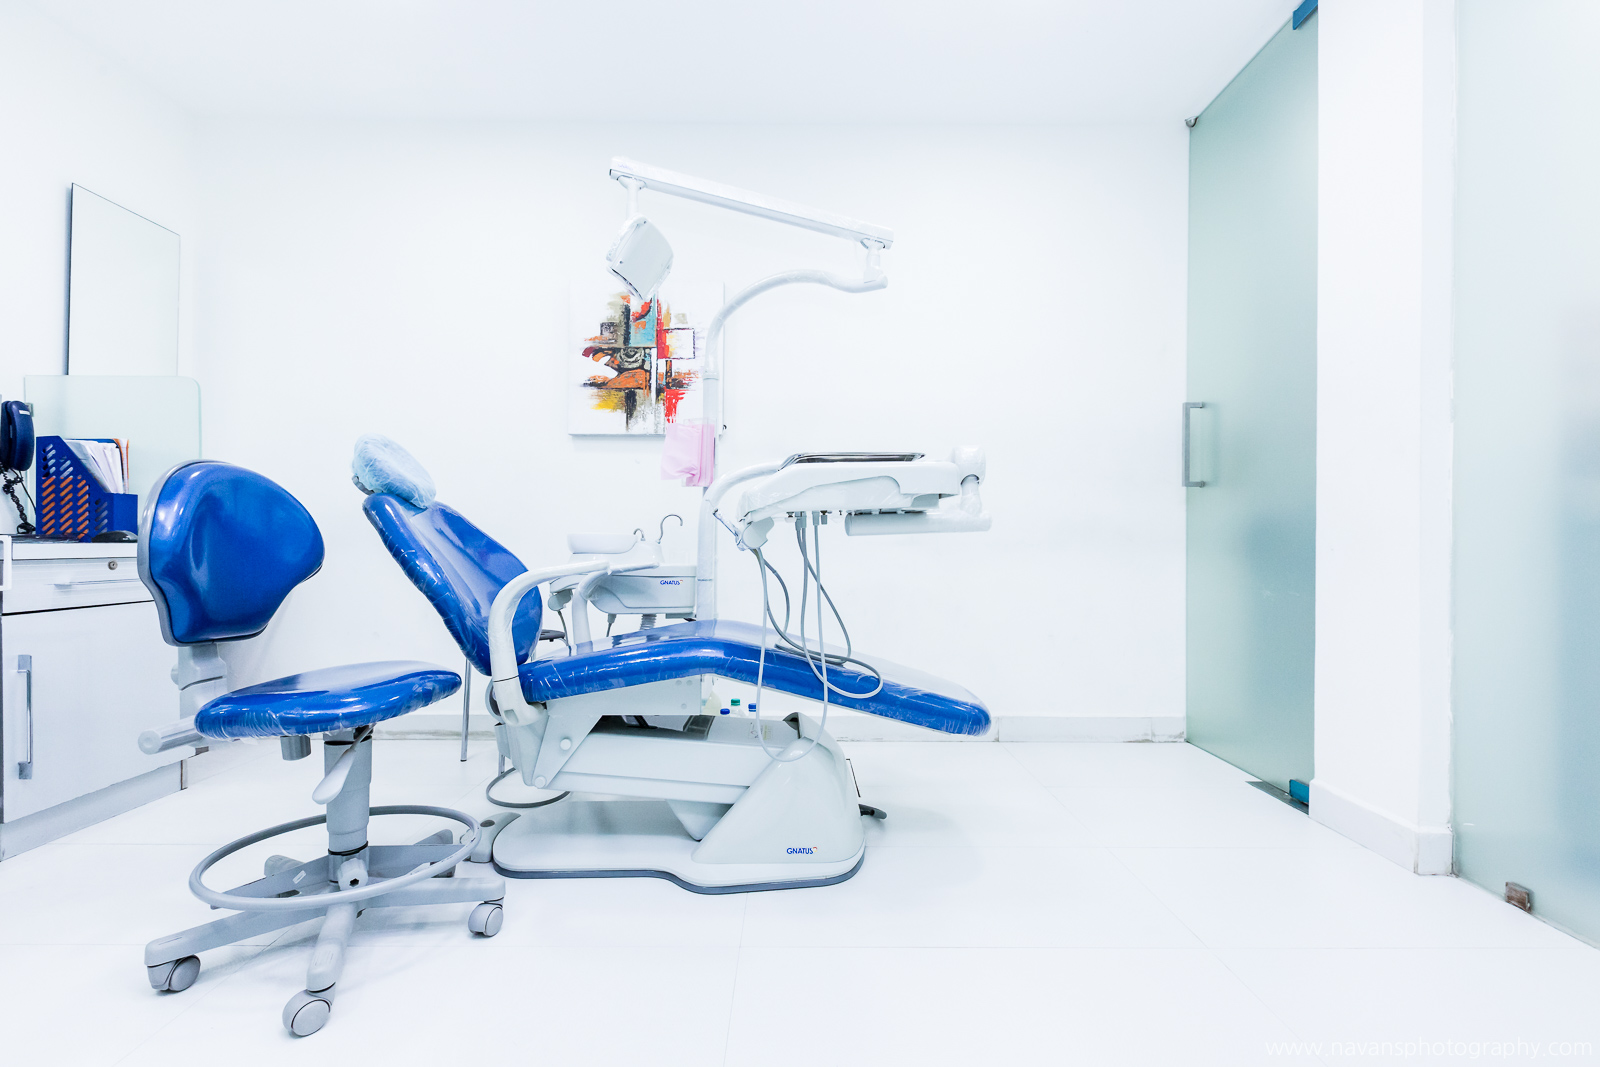


Please verify your software version before proceeding.
 I’ve verified my software version


 Facebook
 Google +
Comments (0)
There are no comments yet.