Hello again everyone.
So, if you know how to use Lightroom Presets properly, all you need to do is go to settings, scan the images and they will all be there.
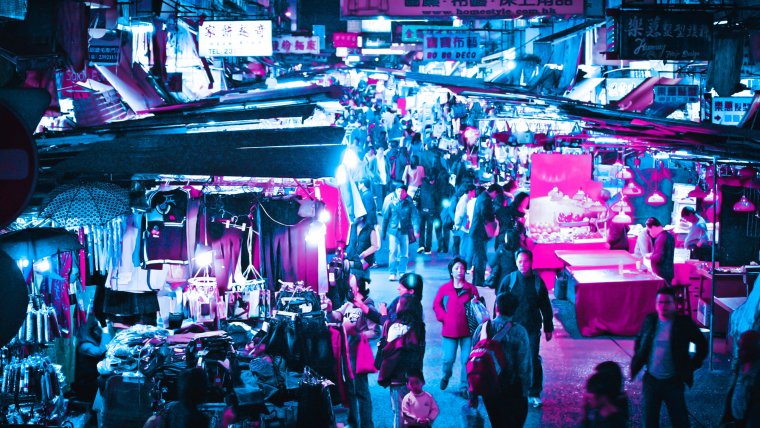
I want to begin by saying….woohoo! I’m starting this Lightroom Tutorial all excited, number one is because I love this type of editing with the use of presets as well as the work of Brandon Woelfel. If you don’t know who he is, then check out his website for some pretty cool images.
Number 2, is because I have finally upgraded my Lightroom from 4 to 6. Thanks to a friend for giving me an old copy, I don’t think I’m ready to move on to the subscription services quite just yet, I like to have my own copy, but who knows, we’ll see in the future what happens.
So let’s get out Image going.
The first thing to do if you are a beginner to this is to right click on your desktop screen and create a new folder, give it a name, whatever suits.
Now, what ever type of Image you’re going to use, just click, drag and drop it into the new folder, like this.
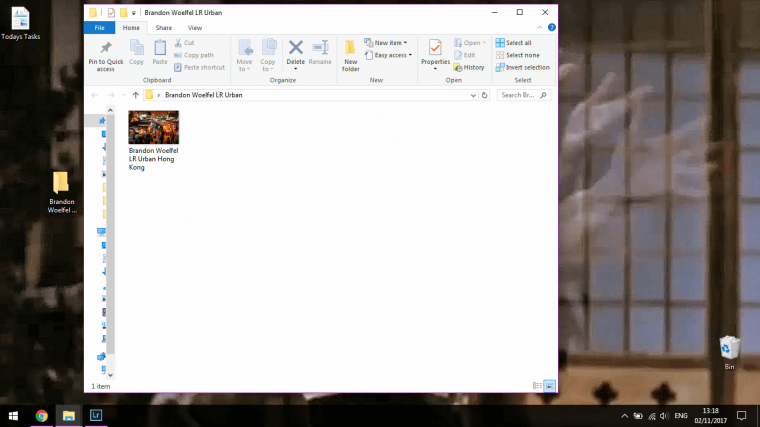
And if you have figured out that’s a Bruce Lee image as my Wallpaper then you get an A+ Immediately even though this isn’t a test.
Anyway, so once you get your folder sorted open up Lightroom.
You will see tabs on the top right-hand side of the program.
They are labeled as
Library
Develop
Etc.
If you are not in Library click on it.
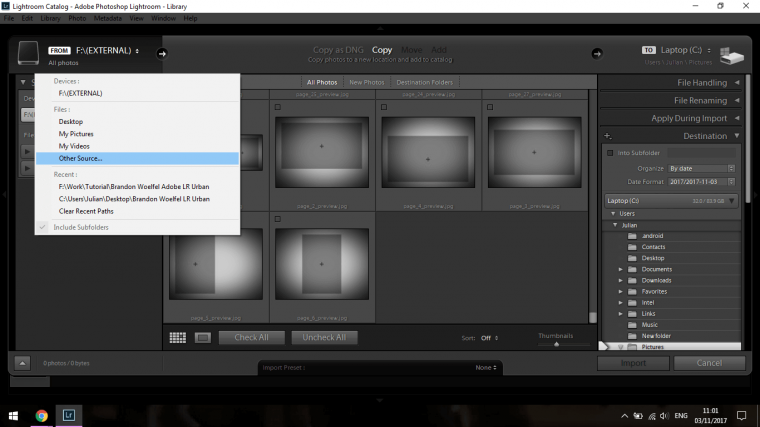
Then you will see at the bottom left-hand side two options, one is Import and the other is Export.
Click Import
A panel will appear and where you see EXTERNAL on the image below you click there (It will probably be labeled different but that’s the tab you have to click)
Once there click on Other Source.
In there you will find Desktop where you image folder is or you can simply locate it just as you would normally.
Then go back into Lightroom and click on the Develop Tab.
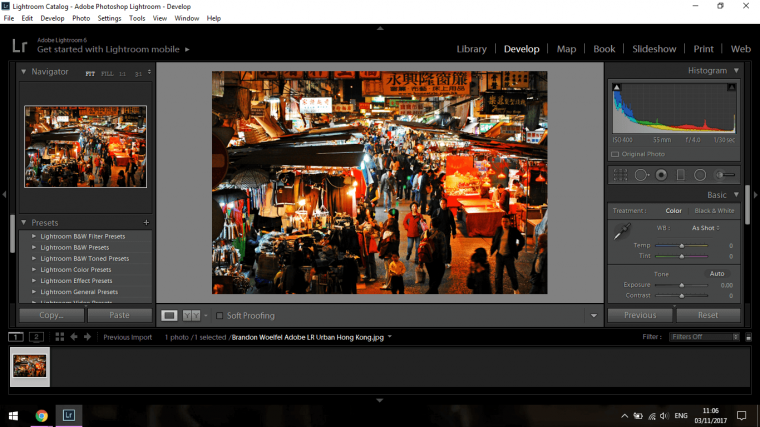
Ok now we’re set up and ready to rock!
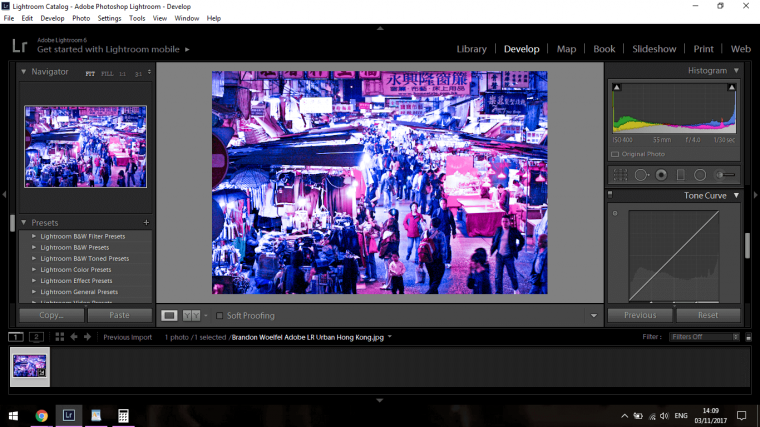
So the first thing we’re going to do to edit is to change the Temp, you will see this in Basics, but if you don’t know check below on the right-hand side, keep looking till you see it, I want you to actively look so you’ll remember better.
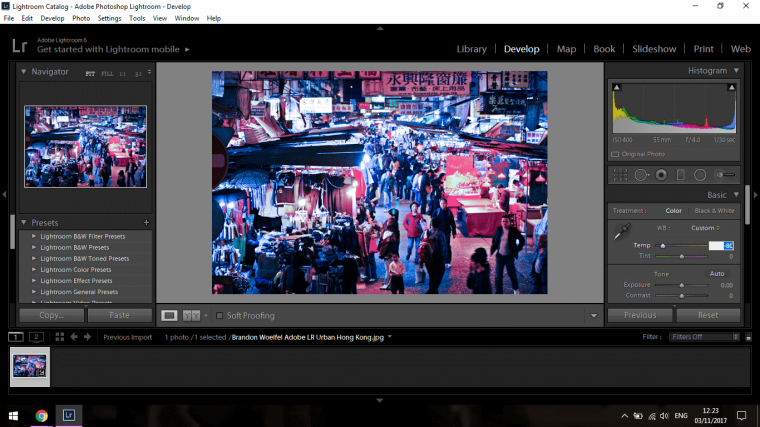
I want my Temperature to lean to the cool side so I’ll change it to -80.
Now minus 80 works for me but it will be relevant to your image and also to what you feel looks similar to Brandon Woelfel.
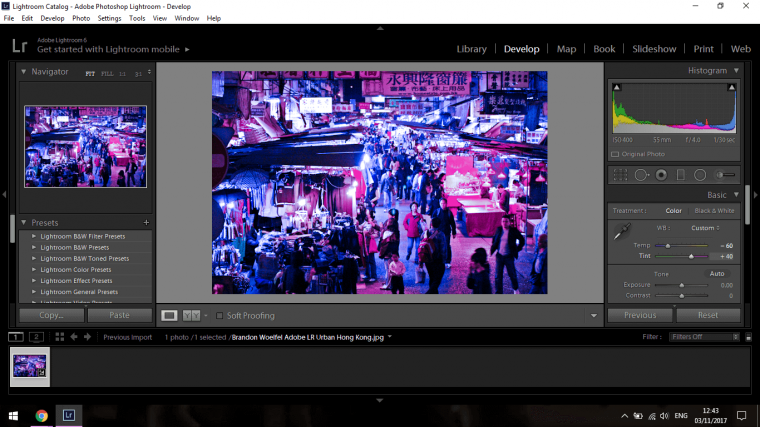
Next, I want to change the Tint a little, now when you start to work with the Tint you may have to alter the Temperature like myself, I changed it to -60 instead of -80.
I made my Tint +40 as I felt it gave me a good balance.
Now we’ll take a look at the Highlights, Shadows, Whites, and Blacks.
Scroll down a little until you see them.
Move your Highlights, Shadows, and Whites to the right-hand side.
Move the Blacks to the left-hand side.
So as you can see from my image below where I have moved the sliders, you can copy that to a point but you don’t have to be exact.
Again it comes down to what works for your image.
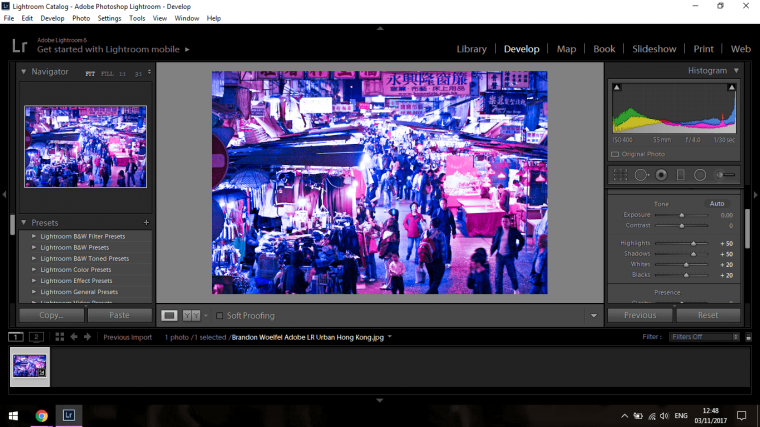
At this point, your image will look a little grainy, but don’t worry we’re not finished yet.
Next, we’ll work with Clarity and Vibrance below where we’re working at, at the minute.
I set Clarity to +15 and the Vibrance to -5
Ok so we’ll leave it here for part one and finish up in part two, in part two we’ll be fixing the noise that you will see in your image when you zoom in, it looks unsightly at the minute but we’ll fix that right up.
To finish off I’m going to add this summary for you as a quick reference.
So far the setting is as follows.
Temp -60
Tint +40
Highlights +50
Shadows +50
Whites +20
Blacks -20
Clarify +15
Vibrance -5
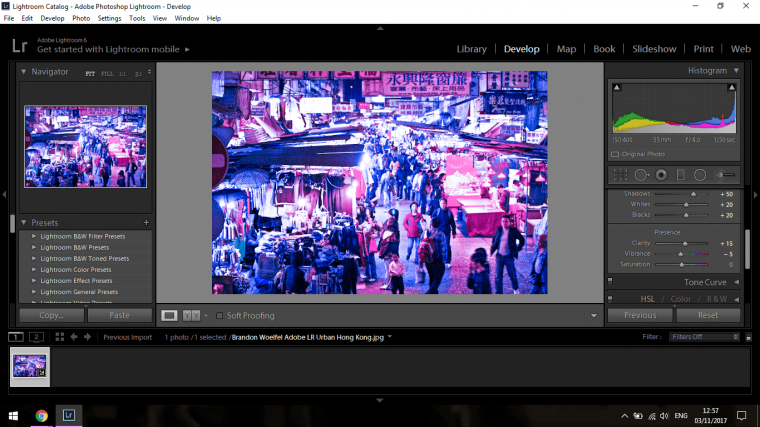
Right so check out below the Vibrance you will see the Tone Curve Histogram.
It may look like it’s a bit intimidating but it really isn’t, so look at the image below.
On the right-hand side of the screen you will see the Tone Curve and the line that runs through it, scroll down a little bit more until you see the box I have clicked at the bottom of the Tone Curve Panel.
It’s a really small histogram and it’s beside where it says custom and just about Reset.
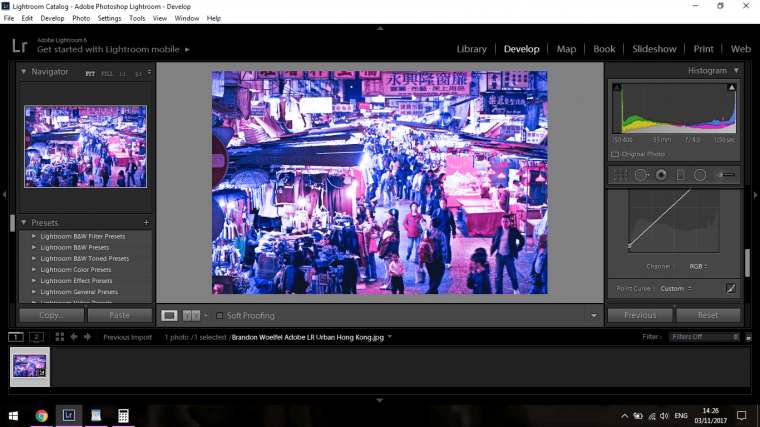
Now what you can do here is you just click on the line at the very bottom left-hand corner and drag it up a little to adjust the blacks slightly.
Next, click on the top of the first box in the grid in the histogram and drag it down just a little bit more.

Now go to the top box and drag it the opposite way, which is up and to the left a little bit.
Now look at the image below of my edits, you will see now that the line has been moved about in certain places.

If you want to play around a little you can just key in on your keyboard Ctrl and Z, and that will undo your last action.
The look that you are looking to go towards is the lights being blown out a little, not to the point where it looks overall blown out but just enough so that the lights enhance a little.
As before your image will/may vary from mine so take a little look at Brandon Woelfel’s images and see if you can match them to a point.
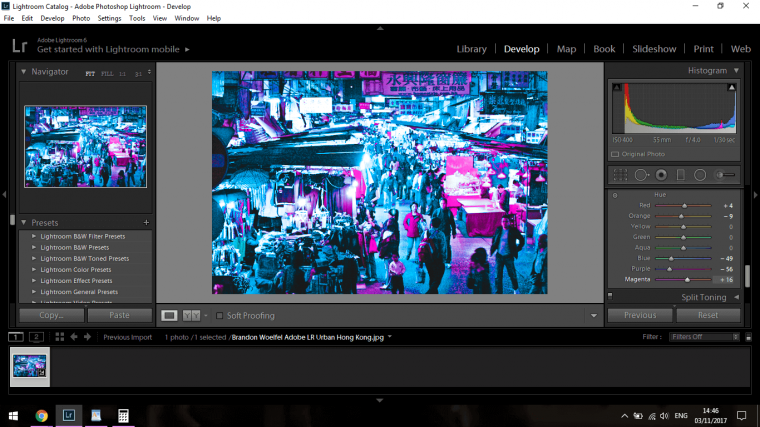
Now scroll down again until you see the letters HSL, it is on the same line as Color and B&W.
It will be a whole lot of color sliders.
The only thing that I can tell you here is to try to match my edits below.
By all means have a mess around with the sliders just to see what they do but ideally, you want to have your sliders something similar to mine.
Now that you have done this, the noise in your image may have gotten a lot worse, so at this point, you can go back to all your settings from the start and brought them all back towards the center a little bit just to tighten them all up.
So go below that again and you will see Split Toning.
I slide both the Hue Sliders closer to the right and I bring the saturation to the right just a slight bit.

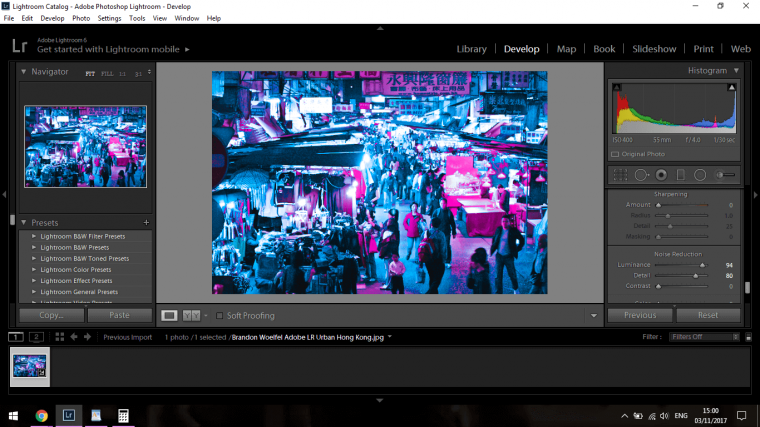
The next section below that will be The Detail Panel.
When you click on that as scroll down you will see Sharpening and Noise Reduction.
For me I had to reduce Sharpening down to 0, you may not.
With Noise, I had to increase the Luminance and Detail.
But my advice here is to try it out for your self and try to get rid and find a good balance between image clarity and pesky noise.
If you are unsure of what noise is, it quite simply put is pixelation.
You will find it in around the shadows and such.
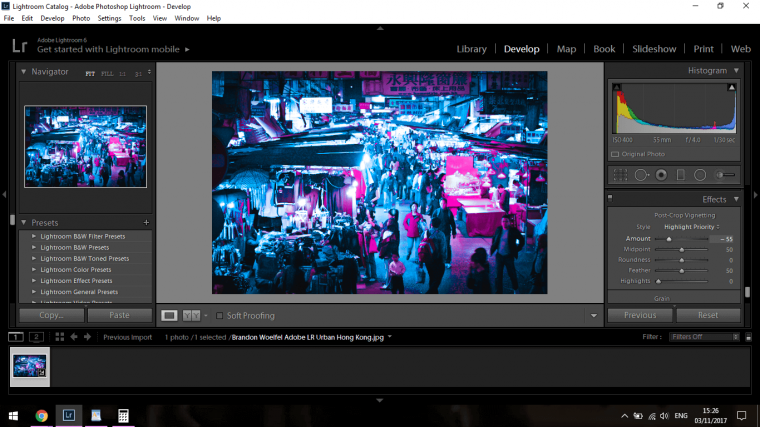
The last little touch I will add is to scroll down to Effects and where it says amount I will drag that slider to the left to add a Vignette.
And we’re done 🙂
Now all you have to do is go to Library and Export your image to your Desktop.
Here is my final image, hope yours looks cool too 🙂 I guess it would be great to discuss next time how to fix over exposed image in Lightroom. So, till then!:)


Please verify your software version before proceeding.
 I’ve verified my software version


 Facebook
 Google +
Comments (0)
There are no comments yet.